There used to be a tiny panaderia tucked behind a laundromat on Olympic Boulevard that made the most unforgettable Pan de Muerto. When they closed—just vanished one November, the windows papered over, the pink sign gone—I actually stood there staring at the empty storefront like I’d lost a friend. After twelve tries—twelve loaves that ranged from “edible but wrong” to “what was I thinking”—I finally got it.
The secret, honestly, wasn’t in some fancy technique I read about online. It was in paying attention to what that little bakery’s bread actually tasted like. The orange blossom aroma that hit you before you even walked in. The way the dough felt almost silky, not dry and dense like some versions I’d tried. The glaze that wasn’t just sweet but had this floral thing happening that made you close your eyes on the first bite.
I remember the Tuesday I finally nailed it. My kitchen looked like a flour bomb had gone off—there was dough on the cabinet handles, which is a thing that happens when you get impatient with kneading. But when that loaf came out of the oven, golden and fragrant, I actually texted my friend Maria a photo with the caption “We’re back, baby.” She knew exactly what I meant.
This Guest-Favorite Pan de Muerto with Orange Blossom Glaze is the one I now bring to every Día de Muertos gathering, the one people ask for by name. Maybe you’ve been there—chasing a flavor from a place that no longer exists, wondering if you imagined how good it was. You didn’t. And now you don’t have to imagine anymore.
Why You’ll Love This Recipe
Let me tell you why this particular Pan de Muerto has become my go-to for hosting. I’ve tested this recipe on friends, neighbors, and my very honest sister-in-law who once told me my first attempt tasted “like a sweet roll that lost its way.” This version? She asked for seconds.
- Showstopper for Gatherings: Nothing says “I put thought into this” like a beautiful, glazed Pan de Muerto on your table. It’s the kind of bread that makes people stop mid-conversation and ask, “Did you make that?”
- Make-Ahead Friendly: The dough actually develops better flavor if you let it rise slowly in the fridge overnight. That means less stress on party day—just shape, bake, and glaze while your guests are arriving.
- Simple Ingredients, Complex Flavor: You don’t need a specialty grocery store for this. Butter, eggs, flour, sugar—plus orange blossom water, which is easy to find online or at any Middle Eastern market.
- Crowd-Pleaser Across Ages: Kids love the sweet, soft bread with that shiny glaze. Adults appreciate the sophisticated orange blossom aroma. Even my uncle who “doesn’t do sweet bread” had two slices.
- Unbelievably Delicious: The texture is this perfect middle ground—soft and pillowy like brioche, but with enough structure to hold up to the glaze without getting soggy. The orange blossom flavor isn’t overpowering; it’s subtle and elegant, like a whisper of spring in every bite.
This isn’t just another Pan de Muerto recipe. The technique of blooming the yeast in warm milk with a touch of sugar, plus the double-rise method, gives you a loaf that’s consistently light and airy. The orange blossom glaze isn’t an afterthought—it’s the star that ties everything together.
Perfect for impressing guests without spending your whole day in the kitchen. Honestly, this bread makes you look like you worked way harder than you actually did.
What Ingredients You Will Need
This recipe uses simple, wholesome ingredients to deliver that signature soft texture and bright floral flavor. Most of these are pantry staples, with one special addition that makes all the difference.
For the Dough
- 4 cups (500g) all-purpose flour – I prefer King Arthur Flour for consistent results, but any good brand works. Spoon and level your flour—don’t scoop directly from the bag or you’ll end up with dense bread.
- 1/2 cup (100g) granulated sugar – Just regular white sugar. It feeds the yeast and adds sweetness without changing the color of the bread.
- 1 packet (2 1/4 teaspoons) active dry yeast – I use Red Star or Fleischmann’s. Check the expiration date! Dead yeast is the number one reason bread fails.
- 1/2 cup (120ml) whole milk, warmed to 110°F – Warm milk wakes up the yeast faster than water. Too hot will kill it, too cold won’t activate it—think bathwater temperature.
- 4 large eggs, room temperature – Cold eggs will shock your dough and make it harder to rise. Leave them on the counter for 30 minutes before starting.
- 1/2 cup (113g) unsalted butter, softened – European-style butter like Plugrà adds extra richness, but regular unsalted butter is perfect. Salted butter will throw off the flavor balance.
- 1 teaspoon salt – Don’t skip this! Salt controls yeast activity and enhances flavor.
- 1 tablespoon orange zest – From about 2 oranges. Zest before juicing, and make sure you only get the orange part—the white pith is bitter.
- 1 teaspoon vanilla extract – Pure vanilla, not imitation. It rounds out the floral notes beautifully.
- 1 teaspoon orange blossom water – This is the magic ingredient. Cortas brand is reliable and affordable. A little goes a long way.
For the Orange Blossom Glaze
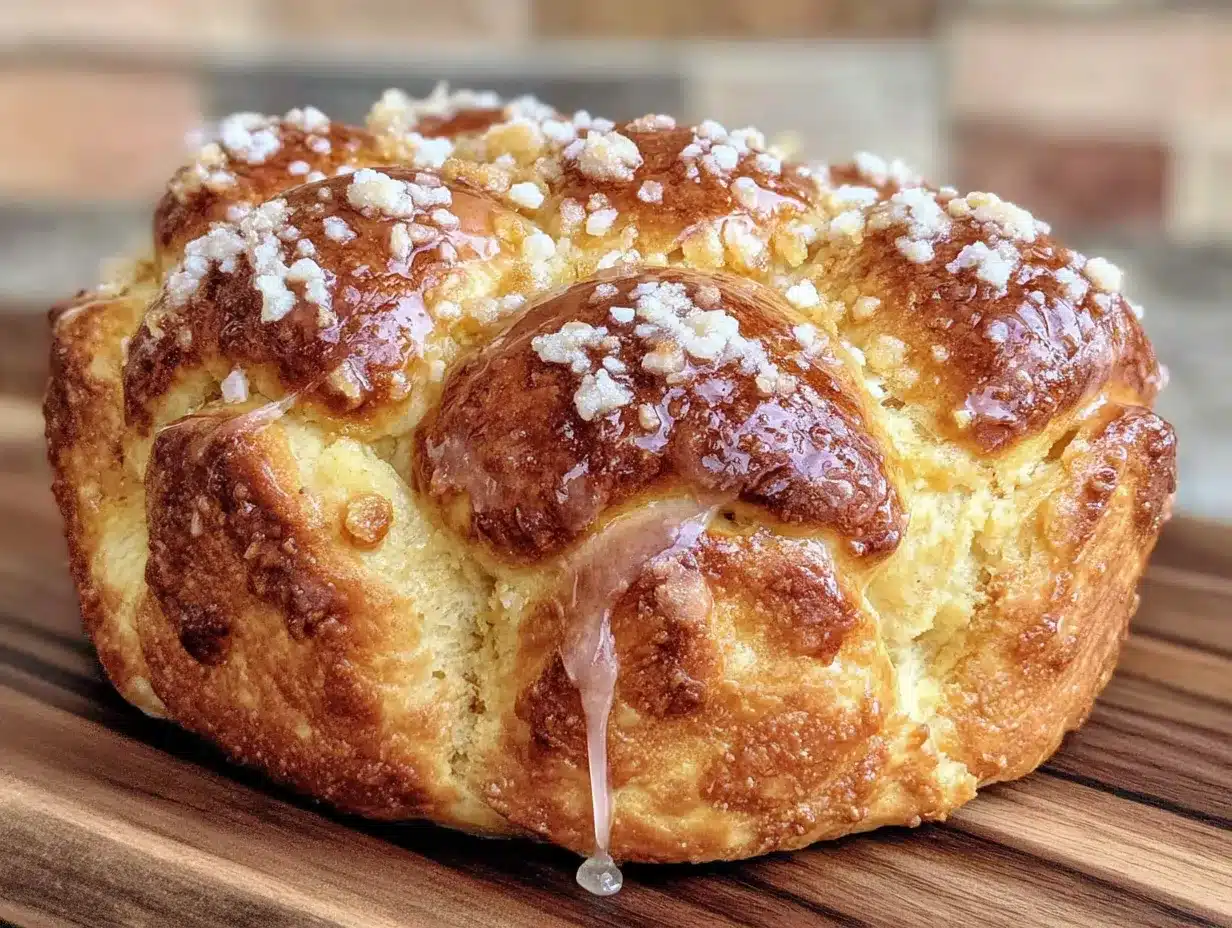
- 1 1/2 cups (180g) powdered sugar – Sift it first to avoid lumps. Trust me on this.
- 2 tablespoons fresh orange juice – From the oranges you zested. Fresh juice has brighter flavor than bottled.
- 1 tablespoon orange blossom water – Yes, more! This is where the floral aroma really shines.
- Pinch of salt – Balances the sweetness and makes the flavors pop.
For Decoration
- Additional orange zest – For sprinkling on top of the glaze while it’s still wet.
- Coarse sugar or sanding sugar (optional) – Adds sparkle and texture. I love the way it catches the light at a dinner party.
Substitution Guidance: If you’re dairy-free, you can use oat milk and vegan butter—the texture will be slightly less rich but still delicious. For a gluten-free version, I haven’t tested this with GF flour blends, but a good 1:1 baking blend might work. No orange blossom water? Increase the orange zest and juice, but honestly, try to find it—it’s what makes this bread special.
Equipment Needed
You don’t need a professional bakery setup for this, but a few key tools make the process smoother.
- Stand mixer with dough hook – This dough is sticky and soft. You can knead by hand (I’ve done it, and my arms let me know about it), but the mixer saves time and effort. A KitchenAid is my go-to, but any stand mixer works.
- Large mixing bowl – For the first rise. Glass or ceramic is ideal because it doesn’t retain heat.
- Baking sheet – A half-sheet pan lined with parchment paper. No need for a special pan—this bread is free-form.
- Instant-read thermometer – For checking milk temperature and internal bread doneness. Not strictly necessary, but it takes the guesswork out.
- Pastry brush – For applying egg wash. A silicone brush is easier to clean than natural bristles.
- Wire cooling rack – Essential for even cooling. Putting hot bread on a plate traps steam and makes the bottom soggy.
- Zester or microplane – For getting those fine orange zest strands without the bitter pith.
Budget-Friendly Alternatives: No stand mixer? Knead by hand for about 12-15 minutes. It’s a great arm workout! No thermometer? Test the milk by dripping a little on your wrist—it should feel comfortably warm, not hot. Use a dinner knife to slice decorative shapes if you don’t have a pastry wheel.
Preparation Method
Let’s make some bread that’ll have your guests talking. Set aside about 3.5 hours total—most of that is rising time where you can relax.
- Activate the yeast. In a small bowl, combine the warmed milk (110°F, remember) with 1 tablespoon of the sugar and the yeast. Stir gently and let it sit for 5-7 minutes until it’s foamy and smells like bread. If nothing happens, your yeast is dead—start over with fresh yeast.
- Mix the dry ingredients. In the bowl of your stand mixer, whisk together the flour, remaining sugar, salt, and orange zest. This distributes the zest evenly so every bite has that citrus pop.
- Combine wet ingredients. In a separate bowl, whisk the eggs, vanilla extract, and orange blossom water together until smooth. The mixture should look pale and slightly frothy.
- Bring it together. With the dough hook attached, add the yeast mixture and the egg mixture to the dry ingredients. Mix on low speed for about 2 minutes until a shaggy dough forms. It’ll look messy—that’s normal.
- Add the butter. With the mixer running on low, add the softened butter one tablespoon at a time. Yes, this takes patience. Each piece needs to incorporate before you add the next. The dough will look like it’s falling apart at first—don’t panic. Keep going and it’ll come together into a smooth, glossy ball after about 8-10 minutes.
- Knead until smooth. Increase speed to medium and knead for 5-7 minutes. The dough should be soft, slightly sticky, and pass the windowpane test—when you stretch a small piece, it should thin out enough to see light through without tearing. If it tears, knead another 2 minutes and test again.
- First rise. Transfer the dough to a lightly oiled bowl, turning once to coat. Cover with plastic wrap or a damp kitchen towel. Let it rise in a warm spot (I use my oven with the light on) for 1.5-2 hours, until doubled in size. It should feel puffy and leave a slight indent when you poke it.
- Shape the dough. Punch down the dough gently to release air. Turn it out onto a lightly floured surface. Divide into two pieces: one large piece (about 2/3 of the dough) for the base, and one smaller piece (1/3) for the bone decorations.
- Form the base. Shape the large piece into a smooth round ball by tucking the edges underneath. Place it on your parchment-lined baking sheet. It should be about 6 inches wide and 2 inches tall.
- Make the bones. Divide the smaller piece into 4 equal parts. Roll each into a rope about 6 inches long. Then roll each rope into a smaller rope, about 3/8 inch thick. Cut each rope into pieces: two long pieces (about 2.5 inches) for the main bones, and two shorter pieces (about 1 inch) for the knobs.
- Assemble the decorations. Place two long ropes across the top of the dough round in a cross pattern, pressing gently to adhere. Place the shorter pieces at the four points where the ropes meet the edge of the bread, like little knobs. Traditionally, these represent the bones of the deceased—it’s symbolic and beautiful.
- Second rise. Cover loosely with plastic wrap and let rise again for 45-60 minutes. The dough should look puffy and almost doubled. It’ll be soft and delicate—handle with care.
- Preheat and egg wash. About 20 minutes before baking, preheat your oven to 350°F (175°C). Whisk one egg with a tablespoon of water and gently brush it over the entire surface of the bread, including the bone decorations. This gives that gorgeous golden-brown crust.
- Bake. Place the baking sheet in the center of the oven. Bake for 25-30 minutes, rotating halfway through. The bread should be deep golden brown and sound hollow when tapped on the bottom. Internal temperature should reach 190°F (88°C).
- Cool completely. Transfer the bread to a wire rack and let it cool for at least 1 hour. Don’t even think about glazing while it’s warm—the glaze will melt right off and make a sticky mess.
- Make the glaze. In a medium bowl, whisk together the powdered sugar, fresh orange juice, orange blossom water, and salt until smooth. It should be thick but pourable—like heavy cream. If it’s too thick, add more orange juice a teaspoon at a time.
- Glaze and decorate. Place the cooled bread on the rack over a baking sheet (to catch drips). Pour the glaze over the top, letting it cascade down the sides naturally. While the glaze is still wet, sprinkle with extra orange zest and coarse sugar if using.
- Let the glaze set. Allow the glaze to firm up for about 30 minutes before serving. The wait is worth it—you’ll get that beautiful, crackly top that shatters slightly when you cut into it.
Cooking Tips & Techniques
After twelve attempts, I learned a few things the hard way so you don’t have to.
Temperature is everything. The first time I made this, I killed my yeast with milk that was too hot. I was impatient, okay? Now I always use my thermometer. Milk at 110°F feels like a warm bath—not hot, not tepid. Your dough will thank you.
Don’t overthink the windowpane test. I used to stress about this, stretching and re-stretching dough until I was sure I’d ruined it. Here’s the truth: if the dough feels smooth, elastic, and doesn’t tear immediately when you pull it gently, you’re good. It doesn’t have to be perfect. Bread is forgiving.
Wet hands are your friend. This dough is sticky, especially when you’re adding the butter. Keep a small bowl of water nearby and dip your fingers in it when handling the dough. It prevents sticking without adding extra flour, which would make the bread dense.
Rise time varies. My kitchen is drafty in winter, so first rise can take up to 2.5 hours. In summer, it might be done in 1.5. Trust the dough, not the clock. It’s ready when it’s doubled and feels pillowy.
Glaze while the bread is completely cool. I learned this one the messy way. Warm bread + thin glaze = puddles on your serving platter and a sad, soggy crust. Give it the full hour on the rack.
Multitask smart. While the dough is doing its first rise, zest your oranges, measure your dry ingredients, and set out your butter to soften. During the second rise, clean up your kitchen and set up your glazing station. Future you will be grateful.
Variations & Adaptations
This recipe is wonderful as written, but don’t be afraid to make it your own. Here are a few ways I’ve adapted it for different occasions and dietary needs.
Classic Cinnamon Version: Add 2 teaspoons of ground cinnamon to the flour mixture and skip the orange blossom water in the dough. Use vanilla extract only. The glaze stays the same but with cinnamon sprinkled on top instead of orange zest. This version reminds me of the pan de muerto my abuela used to make—simple and comforting.
Chocolate Orange Twist: Replace 1/4 cup of the flour with unsweetened cocoa powder. Add 1/2 cup mini chocolate chips after the butter is incorporated. The orange blossom glaze pairs surprisingly well with chocolate—it’s like a fancy chocolate orange candy in bread form.
Vegan Adaptation: Use oat milk instead of whole milk, vegan butter (I like Miyoko’s), and a flax egg (1 tablespoon ground flaxseed + 3 tablespoons water per egg, let sit for 5 minutes). The texture is slightly denser but still delicious. Use maple syrup instead of honey in the glaze if you want it fully plant-based.
Gluten-Free Option: I’ve tested this with Cup4Cup gluten-free flour blend and it worked surprisingly well. Add 1 teaspoon xanthan gum if your blend doesn’t already include it. The dough will be stickier and won’t rise as high, but the flavor is still there.
Individual Buns: Instead of one large loaf, divide the dough into 8 equal pieces and shape into rounds. Skip the bone decorations (or make mini ones!). Bake for 15-18 minutes instead of 25-30. Perfect for parties where everyone wants their own.
Serving & Storage Suggestions
This bread is best served the day it’s made, but it keeps beautifully if stored properly.
Serving Temperature: Room temperature is ideal. The glaze firms up perfectly, and the bread is soft without being cold. If you’ve refrigerated it, let it sit out for 30 minutes before serving.
Presentation Tips for Hosts: Place the glazed loaf on a wooden board or a colorful ceramic platter. Sprinkle extra orange zest and a few dried marigold petals around the base for a nod to Día de Muertos tradition. It’s stunning and your guests will take photos before they even cut into it.
What to Serve Alongside: This bread pairs beautifully with Mexican hot chocolate or café de olla. For a brunch spread, serve it with fresh fruit, whipped cream, and a side of warm honey. It’s also incredible with a scoop of vanilla ice cream for dessert.
Storage: Keep the glazed bread in an airtight container at room temperature for up to 3 days. The glaze may soften slightly, but that’s part of its charm. Do not refrigerate—it dries out the bread.
Freezing: You can freeze the unglazed bread for up to 2 months. Wrap it tightly in plastic wrap, then foil. When ready to serve, thaw at room temperature, warm in a 300°F oven for 5 minutes, then glaze. The glaze doesn’t freeze well, so always add it fresh.
Reheating: For that just-baked texture, pop slices in a 300°F oven for 3-5 minutes. The microwave will make it rubbery—avoid it if you can.
Flavor Development: Honestly, the bread tastes even better on day two. The orange blossom flavor mellows and integrates with the dough. If you can resist eating it all on day one, you’re in for a treat.
Nutritional Information & Benefits
Let’s be real—this is a treat, not a health food. But it’s made with real ingredients, and that counts for something.
Per serving (1/8 of the loaf with glaze): Approximately 380 calories, 12g fat, 58g carbohydrates, 8g protein, 2g fiber, 28g sugar. Values are estimates and will vary based on specific ingredients used.
Health Highlights: Oranges are packed with vitamin C and antioxidants. The orange blossom water adds flavor without extra calories or sugar. Eggs provide high-quality protein and important nutrients like choline and vitamin D. Butter contains fat-soluble vitamins A, D, E, and K.
Dietary Considerations: This recipe contains gluten, dairy, and eggs. For allergen-friendly versions, see the variations section above. It’s not low-carb or keto-friendly due to the flour and sugar content.
My Take: I believe in balance. This bread is meant to be shared during a special occasion, not eaten for breakfast every day (though I won’t judge if you do). The joy it brings to a gathering is a form of nourishment too.
Conclusion
This Guest-Favorite Pan de Muerto with Orange Blossom Glaze is more than just a recipe—it’s the one I spent months chasing, the one that brought back a memory I thought I’d lost when that little panaderia closed its doors. Every time I make it, I think about the smell of that tiny shop and the way the baker would nod at me like we shared a secret.
Now it’s your turn to make it your own. Maybe you’ll add extra orange zest, or skip the bones and shape it into a wreath. Maybe you’ll serve it at your Día de Muertos altar, or just on a random Tuesday because bread this good doesn’t need an excuse. The point is, this recipe works. It’s been tested, tweaked, and loved into existence.
I’d love to hear how yours turns out. Did you try a variation? Did your guests fight over the last slice? Drop a comment below and let me know—I read every single one. And if you share a photo on social media, tag me so I can see your beautiful creation. Happy baking, friend. You’ve got this.
Frequently Asked Questions
Can I make the dough ahead of time?
Absolutely. After the first rise, punch down the dough, wrap it tightly in plastic wrap, and refrigerate for up to 24 hours. When you’re ready to shape, let it sit at room temperature for 30 minutes before proceeding with the shaping and second rise. The cold fermentation actually develops deeper flavor.
My dough isn’t rising. What went wrong?
Most likely, your yeast is dead or your milk was too hot. Check the expiration date on your yeast and make sure your milk was between 105-115°F. If your kitchen is cold, find a warmer spot—on top of the refrigerator, near a sunny window, or in the oven with just the light on works great.
Can I use orange extract instead of orange blossom water?
You can, but the flavor will be different. Orange blossom water has a delicate floral quality that extract doesn’t replicate. If you’re in a pinch, increase the fresh orange zest and juice, and add a teaspoon of vanilla extract. It won’t be the same, but it’ll still be delicious.
How do I know when the bread is fully baked?
Look for a deep golden-brown crust. The bread should sound hollow when you tap the bottom. If you have a thermometer, the internal temperature should read 190°F (88°C). If the top is browning too quickly, tent it loosely with foil for the last 10 minutes of baking.
Why did my glaze turn out runny?
Too much liquid, or the bread was still warm. Make sure your bread is completely cooled—at least an hour on a wire rack. When mixing the glaze, start with 2 tablespoons of orange juice and add more slowly if needed. The consistency should be thick but pourable, like honey.
Pin This Recipe!
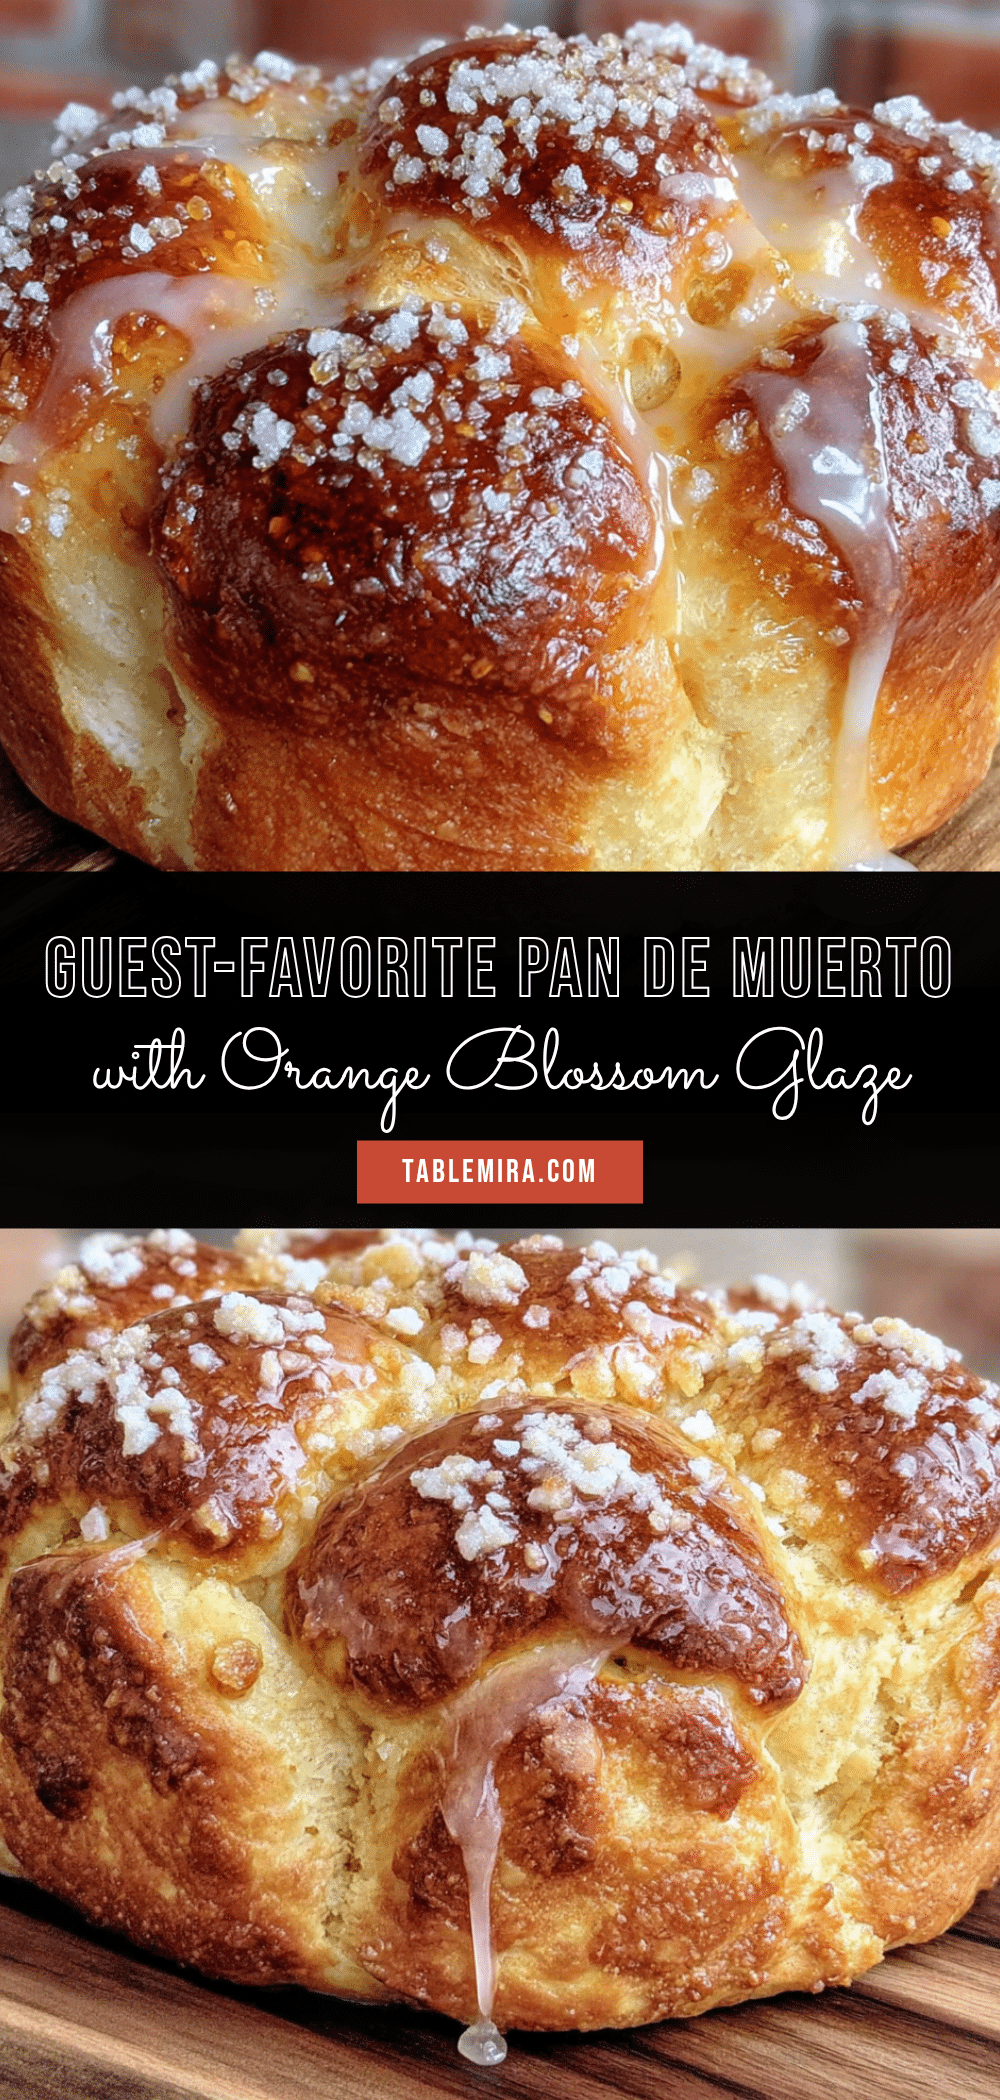
The Best Pan de Muerto with Orange Blossom Glaze
This Guest-Favorite Pan de Muerto with Orange Blossom Glaze is a soft, pillowy bread with a delicate floral aroma and a shiny, crackly glaze. Perfect for Día de Muertos gatherings, it’s a showstopper that tastes even better than it looks.
- Prep Time: 30 minutes
- Cook Time: 30 minutes
- Total Time: 3 hours 30 minutes
- Yield: 8 servings 1x
- Category: Dessert
- Cuisine: Mexican
Ingredients
- 4 cups (500g) all-purpose flour
- 1/2 cup (100g) granulated sugar
- 1 packet (2 1/4 teaspoons) active dry yeast
- 1/2 cup (120ml) whole milk, warmed to 110°F
- 4 large eggs, room temperature
- 1/2 cup (113g) unsalted butter, softened
- 1 teaspoon salt
- 1 tablespoon orange zest
- 1 teaspoon vanilla extract
- 1 teaspoon orange blossom water
- 1 1/2 cups (180g) powdered sugar
- 2 tablespoons fresh orange juice
- 1 tablespoon orange blossom water
- Pinch of salt
- Additional orange zest for decoration
- Coarse sugar or sanding sugar (optional)
Instructions
- Activate the yeast: In a small bowl, combine the warmed milk (110°F) with 1 tablespoon of the sugar and the yeast. Stir gently and let it sit for 5-7 minutes until foamy.
- Mix the dry ingredients: In the bowl of a stand mixer, whisk together the flour, remaining sugar, salt, and orange zest.
- Combine wet ingredients: In a separate bowl, whisk the eggs, vanilla extract, and orange blossom water together until smooth and slightly frothy.
- Bring it together: With the dough hook attached, add the yeast mixture and the egg mixture to the dry ingredients. Mix on low speed for about 2 minutes until a shaggy dough forms.
- Add the butter: With the mixer running on low, add the softened butter one tablespoon at a time, allowing each piece to incorporate before adding the next. Continue until the dough becomes smooth and glossy, about 8-10 minutes.
- Knead until smooth: Increase speed to medium and knead for 5-7 minutes. The dough should be soft, slightly sticky, and pass the windowpane test.
- First rise: Transfer the dough to a lightly oiled bowl, turning once to coat. Cover with plastic wrap or a damp towel. Let it rise in a warm spot for 1.5-2 hours, until doubled in size.
- Shape the dough: Punch down the dough gently. Turn it out onto a lightly floured surface. Divide into two pieces: one large piece (about 2/3) for the base, and one smaller piece (1/3) for the bone decorations.
- Form the base: Shape the large piece into a smooth round ball. Place it on a parchment-lined baking sheet, about 6 inches wide and 2 inches tall.
- Make the bones: Divide the smaller piece into 4 equal parts. Roll each into a rope about 6 inches long, then into a thinner rope about 3/8 inch thick. Cut each rope into two long pieces (about 2.5 inches) for the main bones and two shorter pieces (about 1 inch) for the knobs.
- Assemble the decorations: Place two long ropes across the top of the dough round in a cross pattern, pressing gently to adhere. Place the shorter pieces at the four points where the ropes meet the edge of the bread.
- Second rise: Cover loosely with plastic wrap and let rise again for 45-60 minutes until puffy and almost doubled.
- Preheat and egg wash: About 20 minutes before baking, preheat oven to 350°F (175°C). Whisk one egg with a tablespoon of water and gently brush over the entire surface of the bread.
- Bake: Place the baking sheet in the center of the oven. Bake for 25-30 minutes, rotating halfway through, until deep golden brown and hollow when tapped. Internal temperature should reach 190°F (88°C).
- Cool completely: Transfer the bread to a wire rack and let it cool for at least 1 hour before glazing.
- Make the glaze: In a medium bowl, whisk together the powdered sugar, fresh orange juice, orange blossom water, and salt until smooth. It should be thick but pourable.
- Glaze and decorate: Place the cooled bread on a rack over a baking sheet. Pour the glaze over the top, letting it cascade down the sides. While still wet, sprinkle with extra orange zest and coarse sugar if using.
- Let the glaze set: Allow the glaze to firm up for about 30 minutes before serving.
Notes
Temperature is key: milk should be 110°F to activate yeast. The dough is sticky; use wet hands to handle it. Rise times vary by kitchen temperature—trust the dough, not the clock. Cool bread completely before glazing to prevent a soggy crust. The bread tastes even better on day two as the orange blossom flavor mellows.
Nutrition
- Serving Size: 1/8 of the loaf with
- Calories: 380
- Sugar: 28
- Sodium: 290
- Fat: 12
- Saturated Fat: 7
- Carbohydrates: 58
- Fiber: 2
- Protein: 8
Keywords: Pan de Muerto, Day of the Dead bread, orange blossom, Mexican sweet bread, Día de Muertos, holiday bread, brioche-style bread


