I was digging through the back of my pantry last Tuesday, looking for a bag of all-purpose flour I was sure I’d bought, when my hand brushed against a half-empty jar of currants. And just like that—I was eight years old, standing on a rickety wooden stool in my neighbor Mrs. Gable’s kitchen, watching her dump a handful of those same tiny, dark berries into a bowl of flour. She was a tiny woman with flour permanently dusted on her apron, and she made Irish soda bread every single Thursday morning like it was a religious obligation. I never really thought about it much back then. I just ate the warm slices slathered with butter and thought, well, this is just what bread is supposed to taste like. Then she moved away, and I didn’t eat it again for almost twenty years.
Honestly, I’d forgotten all about it until that moment in my pantry. But the smell of those currants—sweet and a little tangy, like dried grapes that have seen better days—brought it all back. I mean, it was weird how specific the memory was. The way the kitchen window fogged up. The sound of her wooden spoon clanking against the ceramic bowl. I had to make that bread. Right then. But here’s the thing—I had zero time. It was a Tuesday night, I was tired, and the last thing I wanted was to deal with yeast and rising times and all that nonsense. That’s when I remembered: soda bread doesn’t need yeast. It uses baking soda. It’s the fastest bread you’ll ever make, and you don’t have to wait around for it.
Maybe you’ve been there—standing in your kitchen with a craving that hits you out of nowhere, but you’re too exhausted to commit to a two-hour project. That was me. And let me tell you, this Quick Irish Soda Bread with Currants was the answer. It came together in about ten minutes of active work, baked for thirty-five, and by the time I’d finished cleaning up the counter, it was ready. I ate a slice still warm, with butter melting into every crevice, and for a second, I was back on that stool in Mrs. Gable’s kitchen. That’s why I keep making it. Not because it’s fancy, but because it feels like a hug from someone you miss.
Why You’ll Love This Recipe
Look, I’ve tested a lot of soda bread recipes over the years. Some were too dry, some were too dense, and some just tasted like baking soda. This one? It’s the Goldilocks version—just right. And I say that after making it about a dozen times to get the ratios perfect. Here’s what makes it worth your time:
- Quick & Easy: From start to finish, this bread is on your table in 45 minutes. No yeast, no proofing, no fuss. Perfect for a weeknight when you need bread now.
- Simple Ingredients: You probably have everything in your pantry right now. Flour, buttermilk, baking soda, salt, sugar, and currants. That’s it. No special grocery trips required.
- Perfect for a Quick Dinner Side: This bread pairs beautifully with soups, stews, or even just a bowl of butter. It’s the kind of thing that makes a simple meal feel special without any extra effort.
- Crowd-Pleaser: My kids devour it. My husband eats three slices before dinner is even served. It’s got that rustic, hearty quality that everyone seems to love.
- Unbelievably Delicious: The crust is golden and slightly crisp, the inside is tender and soft, and the currants add these little bursts of sweetness that make every bite interesting. It’s comfort food at its simplest.
What makes this recipe different from all the others? It’s the ratio of buttermilk to flour and the way I handle the dough. Most recipes tell you to knead it, which makes the bread tough. I keep it shaggy and barely handle it. That’s the secret. Plus, I use a hot oven—400°F—to get that crust perfect without drying out the inside. It’s not just another version of soda bread. It’s the version you’ll actually want to make on a random Tuesday night when you’re craving something warm and real.
This recipe isn’t just good—it’s the kind that makes you close your eyes after the first bite. It’s simple, honest, and deeply satisfying. Perfect for impressing guests without stress, or turning a simple meal into something you’ll remember.
What Ingredients You Will Need
This recipe uses simple, wholesome ingredients to deliver bold flavor and satisfying texture without the fuss. Most of these are pantry staples, which is exactly what you want on a busy weeknight. Let’s break down each one so you know exactly what to look for.
- All-purpose flour (3 cups / 360g): The backbone of this bread. I use unbleached all-purpose flour for the best texture. If you only have bleached flour, it’ll work fine, but unbleached gives a slightly better crumb. I’ve tested this with King Arthur Flour and Gold Medal—both work beautifully.
- Granulated sugar (3 tablespoons / 36g): Just enough to add a touch of sweetness without making it a dessert bread. You can reduce it to 2 tablespoons if you prefer a more savory loaf, but I find 3 tablespoons balances the tangy buttermilk perfectly.
- Baking soda (1 teaspoon / 5g): This is your leavening agent. Make sure it’s fresh—if it’s been sitting in your cupboard for a year, it might not work as well. To test, drop a little in vinegar; if it fizzes vigorously, it’s good to go.
- Salt (1 teaspoon / 5g): Don’t skip this. Salt isn’t just for flavor—it also strengthens the gluten structure and balances the sweetness. I use fine sea salt, but table salt works too.
- Cold unsalted butter (4 tablespoons / 56g): This is cut into the flour to create a tender crumb. It needs to be cold—like, straight-from-the-fridge cold. If you use salted butter, just reduce the added salt to ½ teaspoon. I recommend Kerrygold or any European-style butter for extra richness.
- Currants (¾ cup / 110g): These little dried berries are smaller and tarter than raisins, and they’re traditional in Irish soda bread. You can substitute raisins, dried cranberries, or even chopped dried apricots if that’s what you have. I’ve used all three at different times, and they all work. Just make sure your dried fruit isn’t rock-hard—if it is, soak it in warm water for 10 minutes, then drain and pat dry before using.
- Buttermilk (1¼ cups / 300ml): This is non-negotiable for the real deal. Buttermilk reacts with the baking soda to create carbon dioxide bubbles, which is what makes the bread rise. If you don’t have buttermilk, you can make a quick substitute: add 1 tablespoon of lemon juice or white vinegar to 1¼ cups of whole milk, stir, and let it sit for 5 minutes. It’ll thicken and curdle slightly—that’s what you want. Full-fat buttermilk gives the best texture, but low-fat works too.
One thing I’ve learned from making this bread over and over: measure your flour correctly. Scooping directly from the bag can pack it down, and you’ll end up with too much flour and a dry loaf. Instead, spoon the flour into your measuring cup and level it off with a knife. It takes an extra five seconds and makes a huge difference.
For the currants, I prefer the ones from Bob’s Red Mill or the bulk bin at my local co-op. They tend to be plumper and more flavorful. But honestly, any brand will work—this bread is forgiving.
Equipment Needed
You don’t need a lot of fancy tools for this recipe, which is another reason I love it for weeknights. Here’s what you’ll need:
- Large mixing bowl: Something big enough to hold all the flour and still have room for mixing. I use a standard ceramic bowl, but any large bowl will do.
- Pastry cutter or two forks: For cutting the cold butter into the flour. You want the butter to be in pea-sized pieces. If you don’t have a pastry cutter, two forks work, or you can even use your fingertips—just work quickly so the butter doesn’t warm up.
- Measuring cups and spoons: Accurate measurements matter in baking. I use dry measuring cups for the flour and currants, and a liquid measuring cup for the buttermilk.
- Wooden spoon or rubber spatula: For mixing the dough. Don’t use an electric mixer—you’ll overwork it.
- Baking sheet or cast iron skillet: A baking sheet lined with parchment paper works perfectly. But if you have a cast iron skillet, use it—it gives the bread a gorgeous, crispy crust. I’ve used both, and honestly, the cast iron version is slightly better, but the baking sheet version is still excellent.
- Sharp knife or bench scraper: For scoring the top of the loaf. You want to cut a deep X into the dough. This isn’t just for looks—it helps the bread bake evenly and allows the center to cook through.
- Cooling rack: Essential for letting the bread cool slightly before slicing. If you leave it on the baking sheet, the bottom can get soggy.
I bought my pastry cutter at a thrift store for two dollars, and it’s still going strong after five years. Don’t feel like you need to spend a lot on equipment—this recipe is about simplicity.
Preparation Method
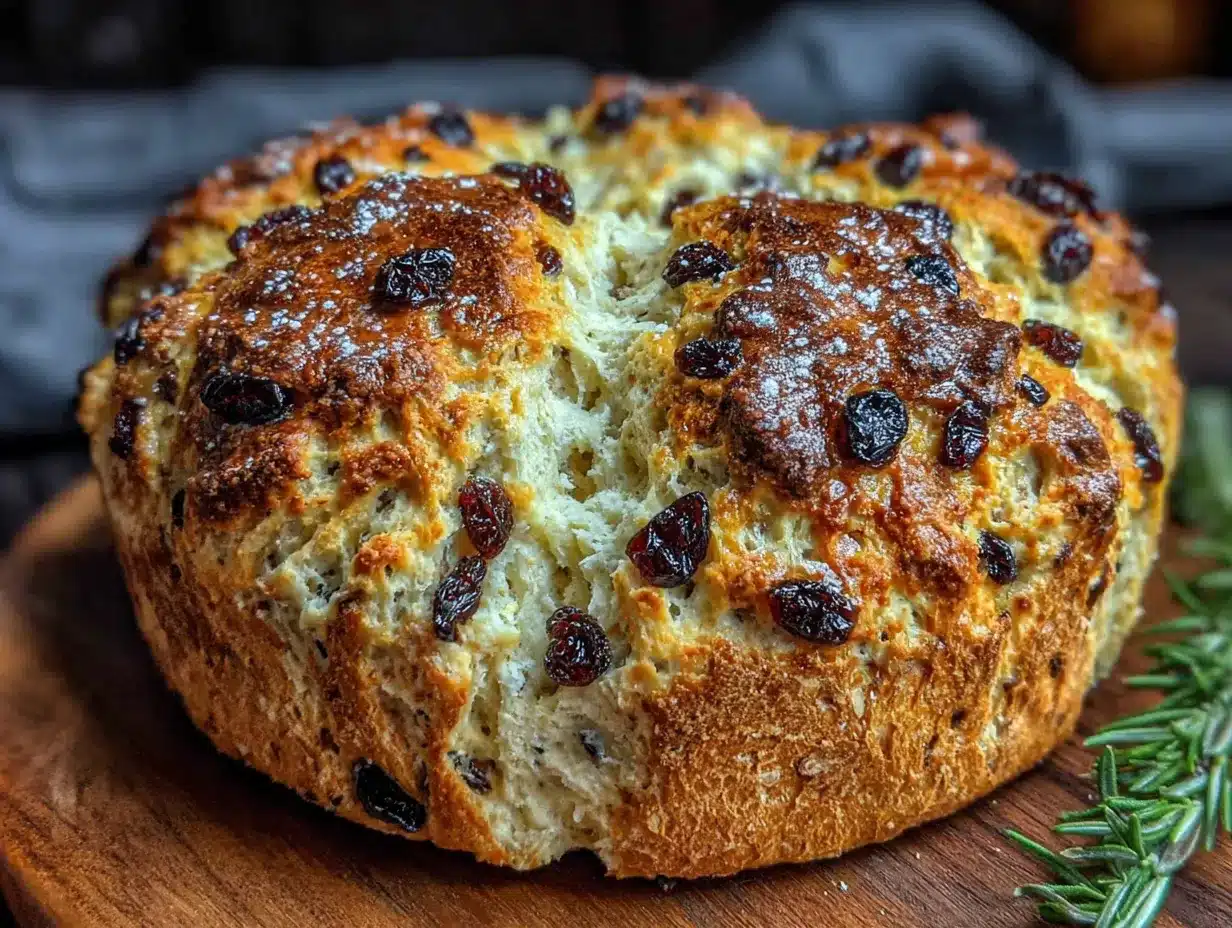
Alright, let’s make some bread. This whole process takes about 10 minutes of active work, then 35 minutes of baking. Here’s exactly how to do it.
- Preheat your oven to 400°F (200°C). Place a rack in the middle position. If you’re using a cast iron skillet, put it in the oven now to heat up. If you’re using a baking sheet, line it with parchment paper and set it aside.
- Mix the dry ingredients. In a large mixing bowl, whisk together 3 cups (360g) of all-purpose flour, 3 tablespoons (36g) of sugar, 1 teaspoon (5g) of baking soda, and 1 teaspoon (5g) of salt. Make sure the baking soda is evenly distributed—if it clumps, you’ll get bitter spots in your bread. I learned this the hard way after my first batch had a weird, metallic taste in one corner.
- Cut in the butter. Take 4 tablespoons (56g) of cold unsalted butter and cut it into small cubes. Drop them into the flour mixture. Using a pastry cutter or two forks, cut the butter into the flour until the mixture looks like coarse meal with pea-sized bits of butter throughout. Don’t overdo it—you want visible pieces of butter. They’ll create steam pockets in the oven, making the bread tender. This should take about 2 minutes.
- Add the currants. Toss in ¾ cup (110g) of currants and stir them through the flour mixture. Make sure they’re evenly distributed so every slice gets some.
- Add the buttermilk. Make a well in the center of the flour mixture and pour in 1¼ cups (300ml) of buttermilk. Using a wooden spoon or rubber spatula, stir until just combined. The dough will look shaggy and messy—that’s exactly what you want. Do NOT overmix. Stop as soon as you don’t see any more dry flour. If the dough seems too dry, add another tablespoon of buttermilk. If it seems too wet, add a tablespoon of flour. But honestly, if you measured correctly, it should be perfect.
- Shape the dough. Turn the dough out onto a lightly floured surface. With floured hands, gently bring the dough together into a round loaf shape. Don’t knead it—just pat it into a disk about 6 inches in diameter and 1½ inches thick. The surface should be rough and craggy. That’s the look we’re going for.
- Transfer to baking surface. If using a baking sheet, place the dough on the parchment-lined sheet. If using a preheated cast iron skillet, carefully remove it from the oven (use oven mitts!) and place the dough in the center. The dough will sizzle slightly—that’s a good sign.
- Score the top. Using a sharp knife or bench scraper, cut a deep X across the top of the loaf, about ½ inch deep. This is the traditional mark for soda bread—it’s said to let the fairies out, but practically, it helps the bread bake evenly and prevents the center from being doughy.
- Bake. Place the bread in the oven and bake for 35-40 minutes, until the top is golden brown and the loaf sounds hollow when you tap the bottom. If you have an instant-read thermometer, the internal temperature should be around 190°F (88°C).
- Cool. Transfer the bread to a cooling rack and let it cool for at least 15 minutes before slicing. I know it’s tempting to cut into it right away, but the texture sets as it cools. Plus, the butter will melt better if the bread is still slightly warm but not steaming.
One thing I always do: about halfway through baking, I rotate the bread 180 degrees to ensure even browning. Ovens can have hot spots, and this simple step prevents one side from getting too dark.
Cooking Tips & Techniques
After making this bread more times than I can count, I’ve picked up a few tricks that make a real difference. Here are the things I wish someone had told me when I started.
The cold butter rule is real. I cannot stress this enough. If your butter is even slightly soft, it will melt into the flour instead of staying in distinct pieces. Those pieces are what create the tender, flaky texture. I once left my butter on the counter for 20 minutes before starting, and the bread turned out dense and greasy. Now I cut the butter into cubes and pop it back in the fridge while I measure the dry ingredients. It takes an extra 30 seconds and saves the whole recipe.
Don’t overmix the dough. This is the most common mistake people make with soda bread. You’re not making a yeast bread that needs kneading. Soda bread relies on a chemical reaction between the buttermilk and baking soda, and overmixing kills the bubbles before they can do their job. Mix until the flour is just incorporated, then stop. The dough should look rough and shaggy, not smooth and elastic. If it looks like a normal bread dough, you’ve gone too far.
Use a bench scraper for sticky dough. Soda bread dough can be sticky, and trying to shape it with your hands alone can get messy. I use a bench scraper to lift and fold the dough onto itself, which helps it hold its shape without adding extra flour. Less flour means a more tender bread. If you don’t have a bench scraper, a metal spatula works in a pinch.
Score deeply enough. That X on top isn’t just decorative. If you only cut a shallow line, the bread will crack open in an unpredictable way, and the center might not bake through. Cut at least ½ inch deep. I’ve had loaves where I was too timid with the knife, and the bread split open on the side instead of the top—still delicious, but not as pretty.
Let it cool properly. I know the smell is intoxicating, but slicing into hot soda bread is a recipe for a gummy texture. The steam inside needs time to redistribute. I’ve made this mistake more times than I’ll admit, and every time, the slices were sticky and fell apart. Fifteen minutes of patience makes all the difference.
Multitask like a pro. While the bread is baking, you can prep the rest of your meal. I usually start a pot of soup or stew, and by the time the bread is cool enough to slice, dinner is ready. It’s the perfect weeknight system.
Variations & Adaptations
This recipe is forgiving, so feel free to play around. Here are some variations I’ve tried and loved.
Savory Irish Soda Bread: Omit the sugar and currants, and add 1 cup of shredded sharp cheddar cheese, 2 tablespoons of fresh rosemary (chopped), and ½ teaspoon of black pepper. Cut the butter into the flour as usual, then stir in the cheese and rosemary before adding the buttermilk. This version is incredible with a bowl of tomato soup or alongside a hearty beef stew. I made this for St. Patrick’s Day last year, and it disappeared in minutes.
Whole Wheat Version: Substitute 1 cup of the all-purpose flour with whole wheat flour. You’ll need an extra 2-3 tablespoons of buttermilk because whole wheat flour absorbs more liquid. The bread will be denser and nuttier, with a more rustic texture. I use this version when I’m trying to sneak more fiber into my family’s diet—they don’t even notice the difference.
Gluten-Free Adaptation: Use a 1:1 gluten-free all-purpose flour blend that contains xanthan gum. I’ve tested this with Bob’s Red Mill 1-to-1 Baking Flour, and it works well. The texture is slightly more crumbly than the original, but it’s still delicious. Add an extra tablespoon of buttermilk to compensate for the drier gluten-free flour.
Dairy-Free Version: Replace the butter with cold coconut oil or vegan butter, and use a dairy-free buttermilk substitute. To make dairy-free buttermilk, add 1 tablespoon of lemon juice to 1¼ cups of unsweetened almond or oat milk, and let it sit for 5 minutes. I’ve tried this with oat milk, and the bread was surprisingly tender—though it doesn’t brown quite as well, so you might need to bake it an extra 5 minutes.
Add-ins and Swaps: Don’t have currants? Use raisins, dried cranberries, chopped dried figs, or even chocolate chips for a sweeter version. I once made a version with dried cherries and orange zest, and it was absolutely divine. You can also add ½ teaspoon of caraway seeds for a more traditional Irish flavor—though I’ll be honest, that’s an acquired taste.
Mini Loaves: Divide the dough into 4 equal pieces and shape them into small rounds. Bake for 20-25 minutes instead of 35-40. These are perfect for gifting or for portion control (not that I’ve ever had trouble eating an entire mini loaf by myself).
Serving & Storage Suggestions
This bread is best served warm, but it’s still excellent at room temperature. Here’s how to make the most of it.
Serving Temperature: I prefer it slightly warm—about 15 minutes after it comes out of the oven. The butter melts into the crevices without turning the bread soggy. If you’re serving it later, reheat slices in a 300°F oven for 5-7 minutes, or pop them in the toaster. Avoid the microwave—it makes the bread rubbery.
What to Serve With It: Irish soda bread is incredibly versatile. It’s amazing with butter and jam for breakfast, alongside a bowl of soup or stew for dinner, or even as a base for avocado toast. My favorite pairing is a simple bowl of tomato basil soup—the tangy bread and the creamy soup are a match made in heaven. For a more indulgent option, serve it with salted butter and a drizzle of honey.
Storage: Store the bread in an airtight container or wrapped tightly in plastic wrap at room temperature for up to 3 days. Do not refrigerate it—the cold temperature will dry it out and make it stale faster. If you live in a humid climate, you might want to store it in a paper bag instead to prevent the crust from getting soft.
Freezing: This bread freezes beautifully. Let it cool completely, then wrap it tightly in plastic wrap, followed by a layer of aluminum foil. Freeze for up to 3 months. To thaw, leave it at room temperature for a few hours, then reheat in a 300°F oven for 10 minutes. You can also freeze individual slices—just pop them in the toaster straight from the freezer for a quick breakfast.
How Flavors Develop: Honestly, this bread is best on the day it’s made. The crust stays crisp, and the inside is soft and tender. By day two, the crust softens, but the flavor actually deepens—the currants become more pronounced, and the tangy buttermilk flavor mellows into something more complex. It’s still delicious, just different.
Nutritional Information & Benefits
Here’s the estimated nutritional breakdown per slice (assuming 8 slices per loaf):
- Calories: 245
- Fat: 6g
- Saturated Fat: 3.5g
- Carbohydrates: 42g
- Fiber: 2g
- Sugar: 12g
- Protein: 6g
- Sodium: 380mg
This bread is relatively low in sugar compared to most baked goods, and the currants provide a small amount of iron and potassium. The buttermilk adds calcium and probiotics (if you’re using cultured buttermilk). It’s not health food by any means, but it’s a whole lot better than store-bought bread loaded with preservatives and high-fructose corn syrup.
One thing I appreciate about this recipe is that it’s egg-free and nut-free, making it safe for common allergies. If you use the dairy-free adaptation, it becomes vegan-friendly as well. For those watching their sodium, you can reduce the salt to ½ teaspoon without significantly affecting the texture—though the flavor will be a bit flat.
From a wellness perspective, I love that this bread is made from real, recognizable ingredients. There’s nothing artificial here. It’s the kind of food that nourishes both body and soul—simple, honest, and made with care.
Conclusion
This Quick Irish Soda Bread with Currants is more than just a recipe—it’s a little piece of warmth you can create in under an hour. It’s the bread you make when you’re tired, when you’re craving something real, when you want to fill your kitchen with a smell that feels like home. It’s forgiving enough for a beginner, but good enough to impress anyone.
I hope you’ll try it, and I hope you’ll make it your own. Add more currants if you like them. Swap in different dried fruit. Go savory with cheese and herbs. The beauty of this bread is that it’s a blank canvas—it’s waiting for your personal touch.
When you make it, I’d love to hear how it turns out. Drop a comment below and let me know: did you stick with the classic version, or did you try a variation? What did you serve it with? Your feedback helps other readers, and honestly, it makes my day to hear about your kitchen adventures.
Now go preheat your oven. That loaf is waiting.
Frequently Asked Questions
Can I use raisins instead of currants?
Absolutely. Raisins are a great substitute—they’re slightly larger and sweeter than currants, but they work perfectly in this recipe. If your raisins are very dry, soak them in warm water for 10 minutes, then drain and pat dry before adding them to the dough.
Why did my soda bread turn out dense and heavy?
This usually happens for one of two reasons: you overmixed the dough, or your baking soda is old. Overmixing develops the gluten and deflates the air bubbles, leading to a dense loaf. Old baking soda loses its potency and won’t create enough rise. Always check the expiration date and mix just until combined.
Can I make this bread without buttermilk?
Yes, you can make a quick buttermilk substitute. Add 1 tablespoon of lemon juice or white vinegar to 1¼ cups of whole milk, stir, and let it sit for 5 minutes. It will thicken and curdle slightly—that’s exactly what you need. The bread won’t be quite as tangy, but it will still be delicious.
How do I know when the bread is fully baked?
The top should be golden brown, and the loaf should sound hollow when you tap the bottom. For the most accurate test, use an instant-read thermometer—the internal temperature should reach 190°F (88°C). If you don’t have a thermometer, insert a skewer into the center; it should come out clean or with just a few crumbs.
Can I double this recipe?
Yes, you can easily double the recipe to make two loaves. Mix the dry ingredients in a larger bowl, then divide the dough in half after adding the buttermilk. Bake both loaves on the same baking sheet, spaced at least 3 inches apart, or use two separate sheets. The baking time remains the same.
Pin This Recipe!
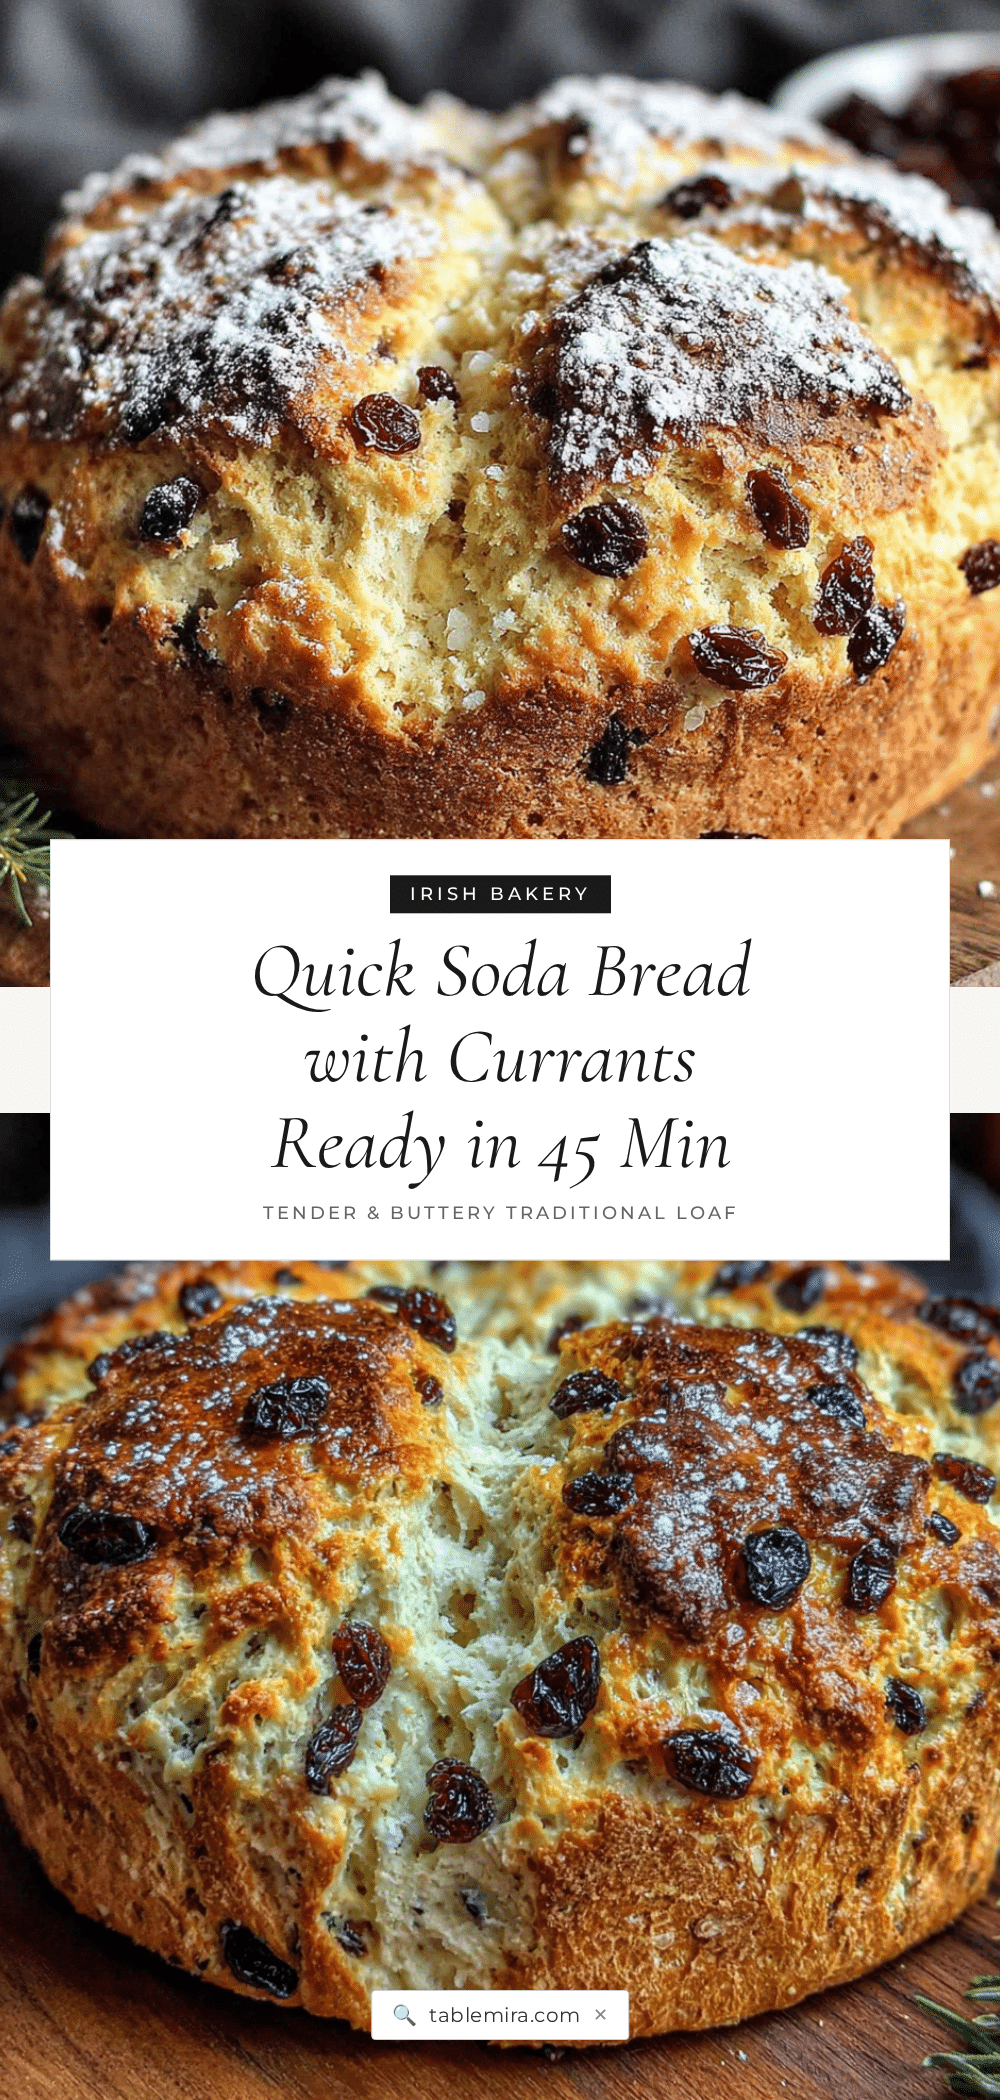
Quick Irish Soda Bread with Currants – Easy 45-Minute Recipe
This Quick Irish Soda Bread with Currants is a simple, no-yeast bread that comes together in just 45 minutes. It’s tender, slightly sweet, and studded with currants, perfect for a weeknight side or a comforting snack.
- Prep Time: 10 minutes
- Cook Time: 35 minutes
- Total Time: 45 minutes
- Yield: 8 servings 1x
- Category: Bread
- Cuisine: Irish
Ingredients
- 3 cups (360g) all-purpose flour
- 3 tablespoons (36g) granulated sugar
- 1 teaspoon (5g) baking soda
- 1 teaspoon (5g) salt
- 4 tablespoons (56g) cold unsalted butter, cubed
- 3/4 cup (110g) currants
- 1 1/4 cups (300ml) buttermilk
Instructions
- Preheat your oven to 400°F (200°C). Place a rack in the middle position. If using a cast iron skillet, put it in the oven to heat up. If using a baking sheet, line it with parchment paper.
- In a large mixing bowl, whisk together the flour, sugar, baking soda, and salt until evenly combined.
- Add the cold butter cubes to the flour mixture. Using a pastry cutter or two forks, cut the butter into the flour until the mixture resembles coarse meal with pea-sized bits of butter.
- Stir in the currants until evenly distributed.
- Make a well in the center of the flour mixture and pour in the buttermilk. Stir with a wooden spoon or rubber spatula until just combined. The dough should be shaggy and messy; do not overmix.
- Turn the dough out onto a lightly floured surface. With floured hands, gently shape it into a round loaf about 6 inches in diameter and 1 1/2 inches thick. Do not knead.
- Transfer the dough to the prepared baking sheet or preheated cast iron skillet.
- Using a sharp knife or bench scraper, cut a deep X across the top of the loaf, about 1/2 inch deep.
- Bake for 35-40 minutes, until the top is golden brown and the loaf sounds hollow when tapped on the bottom. Internal temperature should reach 190°F (88°C).
- Transfer the bread to a cooling rack and let cool for at least 15 minutes before slicing.
Notes
For best results, use cold butter and do not overmix the dough. The bread is best served warm. Store in an airtight container at room temperature for up to 3 days. Freeze for up to 3 months.
Nutrition
- Serving Size: 1 slice
- Calories: 245
- Sugar: 12
- Sodium: 380
- Fat: 6
- Saturated Fat: 3.5
- Carbohydrates: 42
- Fiber: 2
- Protein: 6
Keywords: Irish soda bread, quick bread, currant bread, no yeast bread, easy bread recipe, 45-minute bread


