“You know, this tastes like the inside of a cinnamon roll, but for toast.” My friend Jess said that halfway through a spoonful of my first experimental batch, and honestly, I haven’t looked at preserves the same way since. I was just trying to use up the last of the fall pears from my neighbor’s tree before they turned into mush on the counter. But that one comment—it stuck with me. She was right. Most fruit preserves lean hard into sweet-tart territory, which is great, but sometimes you want something that feels like a hug in a jar.
I spent that whole weekend playing around with ratios in my tiny kitchen. I wanted something that tasted like it belonged on a warm biscuit with a pat of butter, not just on a cheese board. The first few tries were disasters—too watery, not enough spice, or the pears turned into a weird, grainy paste. But then I stumbled on this combination: just enough sugar to preserve the fruit, a generous hand with the cinnamon, and a splash of vanilla to round everything out. The result was exactly what I was hoping for. It’s thick, spreadable, and tastes like you put way more effort into it than you actually did.
These Easy Spiced Cinnamon Pear Preserves are now a staple in my fridge. They are the kind of thing you make on a lazy Sunday afternoon, and then you have a little jar of gold to pull out when you need to make a simple breakfast feel special. It is not about showing off or having a pantry full of fancy equipment. It is about capturing a moment of fall—or winter, or whenever you find good pears—and keeping it on your shelf. Trust me on this one. It is easier than you think, and the payoff is ridiculous.
Why You Will Love This Recipe
I have tested this recipe more times than I can count, tweaking the spice levels and cooking times until it was just right. This is not one of those finicky canning projects that requires a degree in food science. This is a straightforward, forgiving recipe that delivers incredible results every single time. Here is why you are going to love it:
- Quick & Easy: This comes together in about 45 minutes from start to finish. No complicated water bath canning required—you just cook it down on the stove and pop it in the fridge. Perfect for a mid-week project or a lazy weekend morning.
- Simple Ingredients: You likely already have everything you need in your kitchen right now. Pears, sugar, lemon juice, cinnamon, and vanilla. That is it. No pectin, no special preservatives.
- Perfect for Gifting: Tie a ribbon around a jar of this, and you have the most thoughtful homemade gift. It is so much more personal than something store-bought, and people always rave about it. I have made batches for holiday hostess gifts, and they are always a hit.
- Crowd-Pleaser: Even people who say they do not like fruit preserves love this. The cinnamon and vanilla make it feel almost like a dessert topping. It is fantastic on everything from toast to pancakes to ice cream.
- Unbelievably Delicious: The texture is just right—thick enough to spread without being stiff, with soft chunks of pear throughout. The flavor is warm, cozy, and absolutely addictive. It is the kind of thing you find yourself eating straight from the jar with a spoon (no judgment here).
This recipe is different because it focuses on the spice blend to create a flavor profile that feels more like a baked good than a standard fruit preserve. It is comfort food in a jar—simple, honest, and deeply satisfying. You will feel like a kitchen pro when you see those jars cooling on the counter.
What Ingredients You Will Need
This recipe uses simple, humble ingredients to create something truly special. The magic is in the balance of warm spices and the natural sweetness of the pears. Let’s break down what you need and why each ingredient matters.
- Pears (about 2.5 pounds, or roughly 6-7 medium pears): This is the star of the show. You want pears that are ripe but still firm. If they are too soft, they will break down into mush. If they are too hard, they won’t have enough natural sweetness. Bosc or Bartlett pears are my go-tos. Bosc hold their shape a bit better, while Bartletts break down more for a smoother texture. I personally love using a mix of both. Peel them, core them, and chop them into about ½-inch cubes. (Pro tip: you do not need to be super precise with the cubes—rustic is fine!)
- Granulated Sugar (2 cups / 400g): Sugar does double duty here. It sweetens the preserves, of course, but it also acts as a natural preservative and helps achieve that perfect, thick consistency. Do not be tempted to cut the sugar drastically—it is essential for the texture and shelf life. If you want to reduce it, you can try using 1.5 cups, but the preserves will be slightly thinner and will not keep as long. I use standard white granulated sugar for the cleanest flavor.
- Fresh Lemon Juice (3 tablespoons / 45ml): This is not just for tang. The acid in the lemon juice helps balance the sweetness and activates the natural pectin in the pears, which helps the preserves set. It also keeps the pears from turning brown while you are prepping them. Always use fresh lemon juice—the bottled stuff has a flat, metallic taste that you will notice in the final product.
- Ground Cinnamon (2 teaspoons): This is where the “spiced” part of the name comes from. Cinnamon and pears are a classic pairing for a reason. It adds warmth and depth that makes these preserves taste like fall in a jar. I recommend using a good-quality cinnamon, like Ceylon if you can find it. It has a milder, more complex flavor than the standard Cassia cinnamon. But honestly, whatever you have in your spice cabinet will work great.
- Vanilla Extract (1 teaspoon): This is my secret weapon. A splash of vanilla rounds out all the other flavors and adds a subtle, almost floral note that makes the preserves taste more complex. Use pure vanilla extract, not imitation vanilla. It makes a real difference.
- Pinch of Salt: Just a tiny pinch. Salt does not make the preserves taste salty—it enhances all the other flavors and helps balance the sweetness. It is a small step that makes a big difference.
Ingredient Substitution Notes: If you want to experiment, you can swap the cinnamon for a combination of cinnamon, nutmeg, and a tiny pinch of cloves for a more complex spice profile. For a sugar-free version, you can try using a sugar substitute like monk fruit or erythritol, but keep in mind the texture will be different and the preserves will not keep as long. I have not had great luck with honey or maple syrup in this recipe—they change the flavor too much and make the preserves too runny.
Equipment Needed
You do not need a fancy canning setup for this recipe. Here is what you will need:
- Large, Heavy-Bottomed Pot or Dutch Oven: A heavy pot distributes heat evenly and prevents the preserves from scorching on the bottom. I use my trusty 5-quart Le Creuset Dutch oven, but any large, heavy pot will do. Avoid thin, flimsy pots—you will end up with burnt sugar and a mess to clean up. If you only have a thinner pot, just stir more frequently and keep the heat on the lower side.
- Wooden Spoon or Silicone Spatula: You need something sturdy to stir with. A wooden spoon is great because it does not scratch your pot. A high-heat silicone spatula also works well. You will be stirring pretty frequently, so make sure it is comfortable to hold.
- Sharp Knife and Cutting Board: For peeling and chopping the pears. A good, sharp knife makes the job so much faster and safer. Dull knives are more dangerous than sharp ones because they slip more easily.
- Vegetable Peeler: To peel the pears quickly. A standard Y-peeler is my favorite—it is fast and easy to control.
- Measuring Cups and Spoons: For accurate measurements. I cannot stress this enough—baking and preserving are sciences. Be precise with your measurements for the best results.
- Glass Jars with Lids (2-3 half-pint jars): For storing the finished preserves. Make sure they are clean and completely dry. You can use any size jar you like, but half-pint jars are perfect for gifting or using within a few weeks. I like to run them through the dishwasher on the sanitize cycle before using them. If you do not have a dishwasher, wash them in hot, soapy water and then rinse them with boiling water.
- Funnel (optional but helpful): A wide-mouth funnel makes filling the jars much less messy. It is a small investment that saves a lot of cleanup time. If you do not have one, you can use a ladle and a steady hand.
Budget-friendly tip: You do not need to buy a special canning pot or rack. Since we are making refrigerator preserves (not shelf-stable canned goods), you can skip all that expensive equipment. Just cook the preserves in a regular pot and store them in any clean glass jar you have on hand—even an old pasta sauce jar works perfectly.
Preparation Method
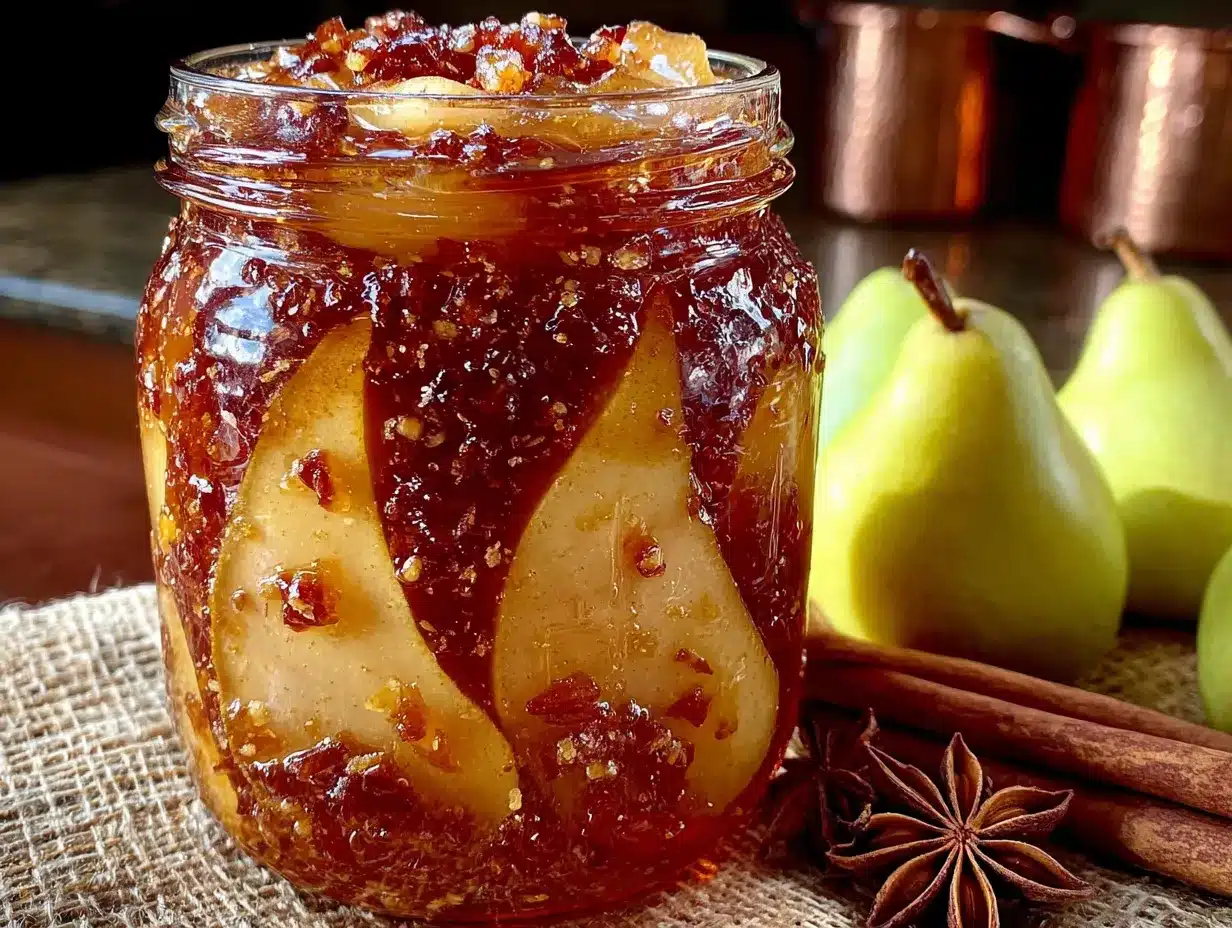
Alright, let’s get to the fun part. Here is how to make these Easy Spiced Cinnamon Pear Preserves. Follow these steps, and you will have a jar of pure gold in under an hour.
- Prep the pears (10 minutes): Wash your pears thoroughly. Peel them using a vegetable peeler. Cut each pear in half lengthwise, then use a melon baller or a small spoon to scoop out the core and seeds. Cut the pears into ½-inch cubes. Do not worry about making them perfect—rustic is fine. You should have about 5-6 cups of chopped pears. Place them in a large bowl and toss them with the lemon juice immediately to prevent browning. This step is important—the lemon juice stops the pears from turning an unappealing brown color while you work.
- Maceration (15 minutes, mostly hands-off): In your large, heavy-bottomed pot, combine the chopped pears, sugar, and lemon juice. Stir everything together until the sugar starts to dissolve and the pears are well coated. Let the mixture sit for about 15 minutes. During this time, the sugar will draw out the natural juices from the pears, creating a syrupy liquid. This is called maceration, and it helps the pears break down more evenly during cooking. You will see the sugar crystals dissolve and the liquid become translucent. (If you are short on time, you can skip this step, but the cooking time will be a bit longer.)
- Cook the preserves (25-30 minutes): Place the pot over medium heat. Stir occasionally as the mixture comes to a gentle boil. Once it is bubbling, reduce the heat to medium-low so it stays at a steady simmer. Add the ground cinnamon and the pinch of salt. Stir well. Now, you need to stir the mixture frequently—about every 2-3 minutes—to prevent it from sticking to the bottom and burning. You will see the liquid start to reduce and thicken, and the pears will soften and begin to break down. The mixture will go from looking like chunky fruit in syrup to a thick, jammy consistency. This usually takes about 25-30 minutes. You are looking for the preserves to thicken enough that they coat the back of a spoon. (I like to do the “plate test”: put a small spoonful of the hot preserves on a cold plate. Let it sit for 30 seconds, then run your finger through it. If it stays separated and does not run back together, it is done.)
- Add the vanilla (1 minute): Once the preserves have reached the desired thickness, remove the pot from the heat. Stir in the vanilla extract. The heat will help the vanilla flavor bloom and incorporate into the preserves. Give it one last good stir.
- Cool and jar (10-15 minutes): Let the preserves cool in the pot for about 10 minutes. This makes them easier to handle and reduces the risk of breaking your jars. While they are cooling, make sure your jars and lids are clean and dry. Using a funnel (or a steady hand and a ladle), carefully spoon the warm preserves into the jars, leaving about ½ inch of headspace at the top. Wipe the rims of the jars with a clean, damp paper towel to remove any sticky residue. Screw on the lids tightly but not overly tight—you want a good seal, but do not crank them down so hard you cannot get them open later.
- Cool completely and refrigerate (2-3 hours): Let the jars cool completely on the counter. You will hear a satisfying “pop” as the lids seal (if you are using standard canning jars). Once they are cool to the touch, transfer them to the refrigerator. The preserves will continue to thicken as they cool. They are ready to eat immediately, but the flavors will meld and deepen after 24 hours in the fridge. I always try to save one jar for a few days later—it is worth the wait.
Important note: If you are using jars that are not specifically designed for canning (like repurposed pasta sauce jars), make sure the preserves are not piping hot when you pour them in. Let them cool to warm, not hot, to avoid thermal shock that could crack the glass. Also, these are refrigerator preserves, meaning they are not processed in a water bath and are not shelf-stable. They must be stored in the refrigerator and consumed within 3-4 weeks.
Cooking Tips & Techniques
I have made this recipe more times than I care to count, and I have learned a few things the hard way. Here are my best tips to ensure your preserves turn out perfect every single time.
Do not walk away from the pot. I know it is tempting to set a timer and go fold laundry, but trust me—do not do it. The line between perfectly thickened preserves and burnt, scorched sugar is a thin one. The mixture can go from simmering to scorching in a matter of minutes if you are not paying attention. Stir frequently, especially towards the end of the cooking time when the liquid has reduced and the preserves are thicker. I learned this lesson the hard way when I ruined my first batch. The smell of burnt sugar is not one you want in your kitchen.
Use the cold plate test. This is my go-to method for checking doneness. Before you start cooking, put a small plate in the freezer. When you think the preserves are close to done, drop a small spoonful onto the cold plate. Let it sit for 30 seconds, then tilt the plate. If the preserves run slowly like thick honey, they are done. If they are still watery, keep cooking for another 5 minutes and test again. This method is much more reliable than guessing based on time alone.
Adjust the sweetness to your taste. The recipe calls for 2 cups of sugar, which gives a balanced sweetness that is not cloying. But if you prefer a tarter preserve, you can reduce the sugar to 1.5 cups. Just know that the preserves will be slightly thinner and will not keep as long. If you like things sweeter, you can add another ¼ cup of sugar, but I would not go overboard—the pears themselves are quite sweet when ripe.
Be patient with the texture. The preserves will seem too runny when they are hot. Do not panic. They will thicken significantly as they cool. I always think mine are not done, and then I wake up the next morning to perfectly thick, spreadable preserves. Trust the process. If you cook them until they are thick while hot, they will turn into a stiff, almost candy-like paste when they cool. You want them to be a bit looser than your desired final consistency.
Use a heavy-bottomed pot. This is non-negotiable. A thin pot will cause the sugar to burn before the pears have a chance to break down properly. A heavy pot distributes heat evenly and prevents hot spots. If you only have a thin pot, keep the heat on low and stir almost constantly. It will take a bit longer, but it will still work.
Timing and multitasking: This recipe is perfect for multitasking. While the pears are macerating, you can wash and sterilize your jars. While the preserves are cooking, you can clean up your workspace or prep the jars. The entire process takes about 45 minutes of active time, but you can easily fit it into a busy morning or afternoon.
Variations & Adaptations
One of the best things about this recipe is how easy it is to customize. Here are a few of my favorite variations to keep things interesting.
- Spiced Pear and Ginger Preserves: Add 1 tablespoon of freshly grated ginger along with the cinnamon. The ginger adds a warm, slightly spicy kick that pairs beautifully with the pears. I made this version for a holiday gift exchange, and it was the first jar to disappear. The ginger also adds a bit of brightness that cuts through the sweetness.
- Pear and Vanilla Bean Preserves: Instead of vanilla extract, use the seeds from one whole vanilla bean. Split the bean lengthwise, scrape out the seeds, and add them to the pot along with the cinnamon. You can also toss the empty pod into the pot while it cooks—it infuses the preserves with even more vanilla flavor. Just remember to fish the pod out before jarring. This version is incredibly elegant and looks beautiful with the tiny black vanilla specks throughout.
- Low-Sugar Version: If you are watching your sugar intake, you can reduce the sugar to 1 cup and add 2 tablespoons of chia seeds to help thicken the preserves. The chia seeds will absorb some of the liquid and create a gel-like consistency. This version will be less sweet and have a slightly different texture, but it is still delicious. It will also not keep as long—plan to use it within 2 weeks.
- Boozy Pear Preserves: Add 2 tablespoons of bourbon or dark rum along with the vanilla extract at the end of cooking. The alcohol will cook off, leaving behind a warm, complex flavor that is absolutely divine. I made a batch with bourbon for a friend’s birthday, and she has been requesting it ever since. The alcohol also acts as a preservative, so this version will keep a bit longer.
- Savory-Sweet Pairing: For a less sweet version, reduce the sugar to 1.5 cups and add ½ teaspoon of black pepper and a pinch of cayenne pepper along with the cinnamon. The heat from the peppers balances the sweetness and creates a fantastic pairing for cheese boards. Try it with a sharp cheddar or a creamy brie—it is a game-changer.
I have tried all of these variations, and each one has its own charm. The ginger version is my personal favorite for fall, while the bourbon version is perfect for holiday gifting. Do not be afraid to experiment—that is half the fun of making preserves at home.
Serving & Storage Suggestions
These preserves are incredibly versatile. Here is how I like to serve and store them.
Serving: These preserves are best served at room temperature or slightly chilled. If you keep them in the fridge, let them sit out for about 15 minutes before serving to take the chill off. This allows the flavors to open up and makes them easier to spread. They are fantastic on buttered toast, warm biscuits, scones, or English muffins. I also love them swirled into yogurt, spooned over pancakes or waffles, or served alongside a cheese board. They pair beautifully with sharp cheddar, creamy brie, or tangy goat cheese. For a simple dessert, warm a few spoonfuls in a small saucepan and drizzle over vanilla ice cream. It is incredibly easy and feels fancy.
Storage: Since these are refrigerator preserves, they must be stored in the refrigerator at all times. They will keep for 3-4 weeks in an airtight container. I have found that the flavor actually improves after a day or two in the fridge—the spices meld together and the sweetness becomes more balanced. If you want to keep them longer, you can freeze them. Spoon the cooled preserves into freezer-safe containers or zip-top bags, leaving about ½ inch of headspace for expansion. They will keep in the freezer for up to 6 months. To thaw, transfer a jar to the refrigerator and let it thaw overnight. The texture might be slightly softer after freezing, but the flavor will still be excellent.
Reheating: You do not need to reheat these preserves, but if you want a warm topping for pancakes or ice cream, just spoon some into a small saucepan and warm it over low heat for a few minutes. Do not microwave them in the jar—the metal lid can spark, and the uneven heating can cause the jar to crack.
Flavor development: I have noticed that the cinnamon flavor becomes more pronounced after a few days in the fridge. The vanilla also becomes more rounded and less sharp. If you are making these for a special occasion, try to make them at least a day in advance to let the flavors meld. The difference is subtle but noticeable.
Nutritional Information & Benefits
While these preserves are a treat, they do have some redeeming qualities. Here is a rough nutritional breakdown per 2-tablespoon serving:
| Nutrient | Amount per serving |
|---|---|
| Calories | 60 |
| Total Fat | 0g |
| Sodium | 1mg |
| Total Carbohydrates | 16g |
| Sugars | 14g |
| Fiber | 1g |
| Protein | 0g |
Health benefits: Pears are a good source of dietary fiber, which aids in digestion and helps you feel full. They also contain vitamin C and antioxidants, which support immune health. The cinnamon in this recipe has anti-inflammatory properties and may help regulate blood sugar levels. Of course, this is still a sugar-heavy preserve, so enjoy it in moderation. I like to think of it as a way to add a little bit of fruit and spice to my morning toast in a way that feels special and satisfying.
Dietary considerations: This recipe is naturally gluten-free, dairy-free, and vegan. It contains no common allergens like nuts, soy, or eggs. If you are using a sugar substitute, make sure it is one that is suitable for cooking and preserving. Always check the labels of your ingredients if you have specific dietary needs.
Conclusion
These Easy Spiced Cinnamon Pear Preserves are one of those recipes that feels like a secret weapon. They are simple enough to make on a whim, but impressive enough to give as gifts or serve at a brunch. The combination of sweet pears, warm cinnamon, and rich vanilla is just perfect. It is the kind of recipe that makes you feel like you have accomplished something wonderful with very little effort.
I love that this recipe is forgiving and adaptable. You can tweak the spices, adjust the sweetness, or add your own twist, and it will still turn out delicious. It has become a fall tradition in my house, and I look forward to making it every year when pears are in season. There is something so satisfying about seeing those jars lined up on the counter, knowing you made them yourself.
I would love to hear how yours turn out! Leave a comment below and let me know if you tried any variations or if you have a favorite way to serve them. Do not forget to share this recipe with a friend who loves homemade gifts, and if you are looking for more cozy fall recipes, check out our cozy pumpkin spice bagels or these pumpkin cream cheese muffins for more seasonal baking inspiration. Happy preserving, friends!
Frequently Asked Questions
Can I use canned pears for this recipe?
Technically, yes, but I would not recommend it. Canned pears are already cooked and packed in syrup, so they will break down too quickly and the preserves will be much sweeter and thinner. Fresh pears give you much better control over the texture and flavor. If you are in a pinch, drain the canned pears well and reduce the sugar to 1.5 cups.
Do I need to use pectin for this recipe?
No, you do not! Pears have natural pectin, especially when they are slightly underripe. The combination of the pears, sugar, and lemon juice is enough to create a thick, spreadable consistency without any added pectin. If you want an even thicker set, you can add 1 tablespoon of powdered pectin, but I find it is not necessary.
How long do these preserves last in the fridge?
They will keep for 3-4 weeks in an airtight container in the refrigerator. Make sure to use clean, dry utensils every time you scoop out some preserves to avoid introducing bacteria. If you see any mold or off smells, discard the preserves immediately.
Can I can these preserves to make them shelf-stable?
Yes, you can! If you want to make these shelf-stable, you will need to process the jars in a boiling water bath for 10 minutes (adjust for altitude if necessary). Use proper canning jars with new lids and follow standard canning safety guidelines. This recipe is safe for water bath canning because it has enough sugar and acid (from the lemon juice) to prevent bacterial growth. Just be sure to use a tested canning recipe if you are new to canning.
What if my preserves are too runny?
Do not worry—this happens to everyone. If your preserves are still too runny after cooling, you can pour them back into the pot and cook them for another 5-10 minutes over medium-low heat. Stir constantly to prevent burning. You can also mix 1 tablespoon of cornstarch with 2 tablespoons of cold water to make a slurry, stir it into the preserves, and cook for another 2-3 minutes until thickened. This will change the texture slightly, but it is a great fix in a pinch.
Pin This Recipe!
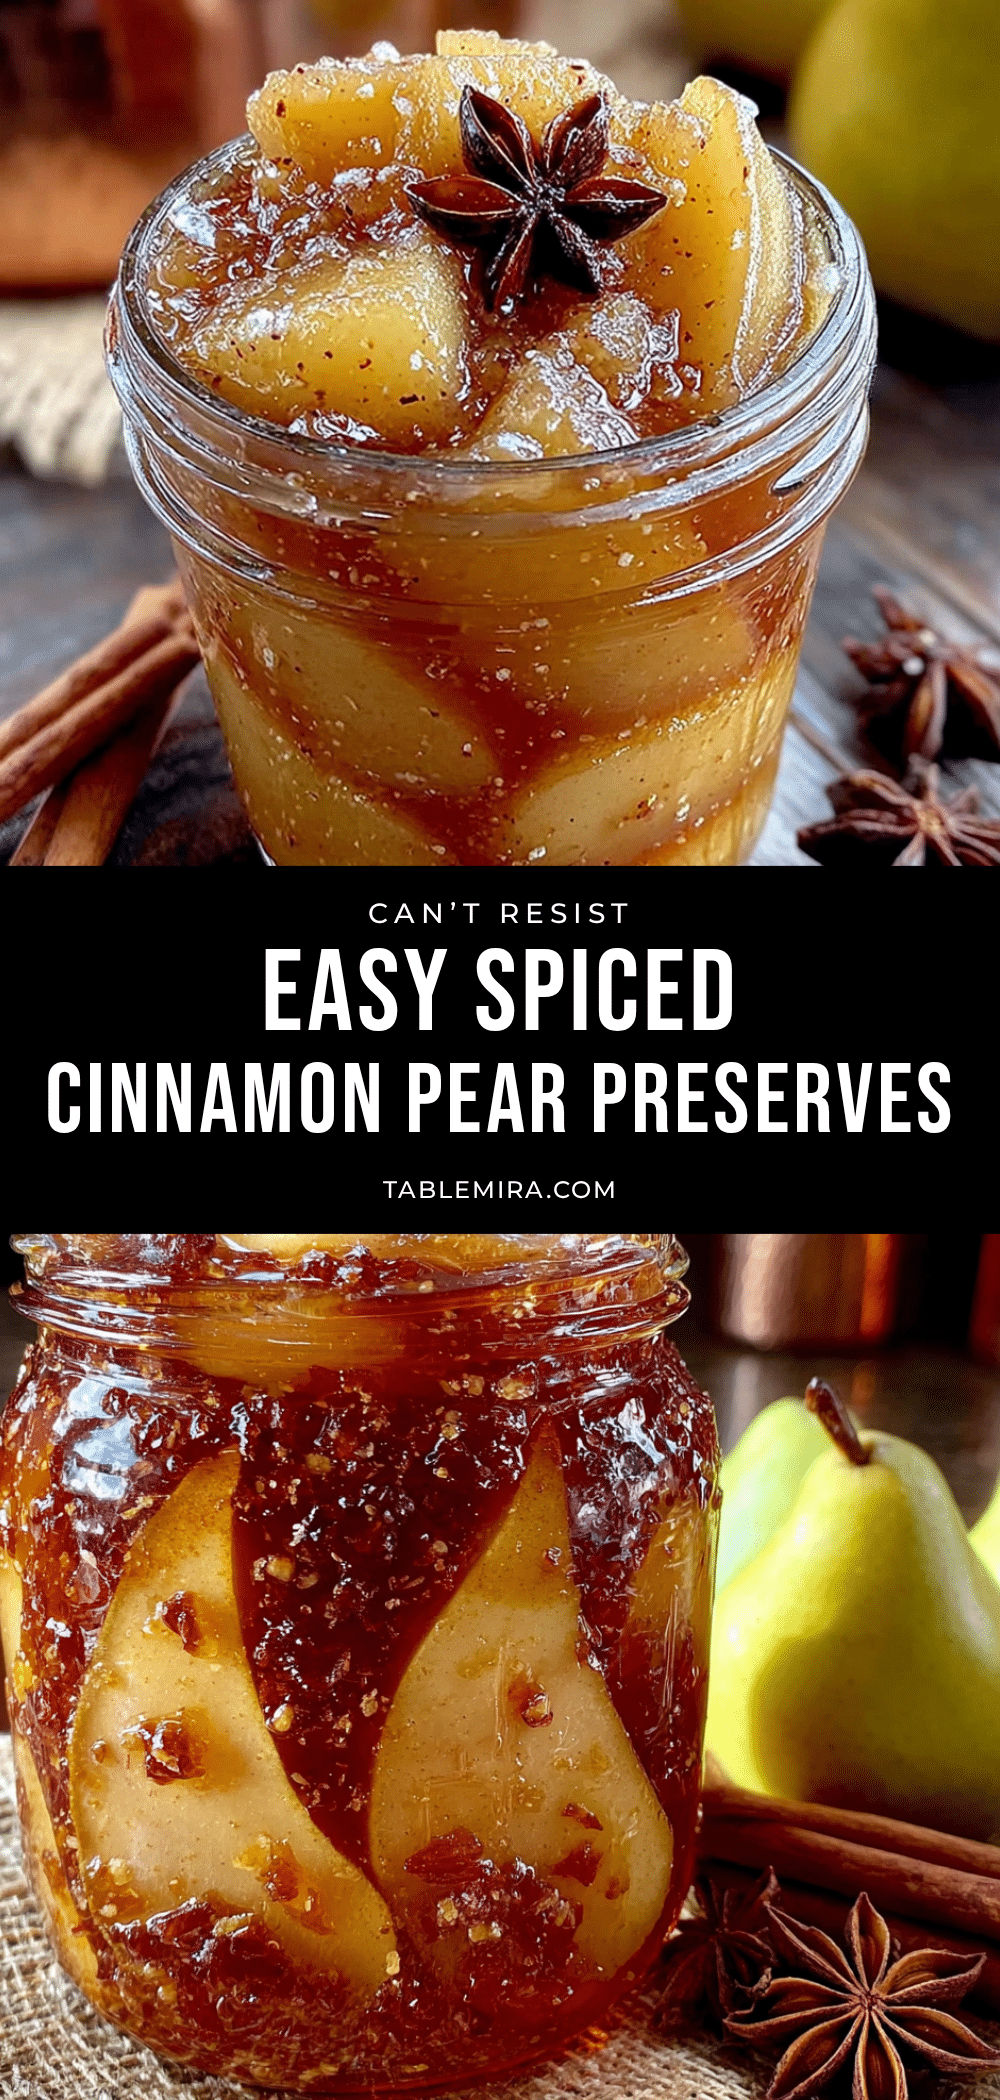
Easy Spiced Cinnamon Pear Preserves Recipe
These Easy Spiced Cinnamon Pear Preserves are thick, spreadable, and taste like the inside of a cinnamon roll. Made with simple ingredients and no pectin, they come together in about 45 minutes and are perfect for toast, biscuits, or gifting.
- Prep Time: 15 minutes
- Cook Time: 30 minutes
- Total Time: 45 minutes
- Yield: 3 half-pint jars (about 3 cups) 1x
- Category: Preserves
- Cuisine: American
Ingredients
- 2.5 pounds (about 6-7 medium) pears, ripe but firm (Bosc or Bartlett), peeled, cored, and cut into ½-inch cubes
- 2 cups (400g) granulated sugar
- 3 tablespoons (45ml) fresh lemon juice
- 2 teaspoons ground cinnamon
- 1 teaspoon pure vanilla extract
- Pinch of salt
Instructions
- Prep the pears: Wash, peel, core, and cut pears into ½-inch cubes. Toss with lemon juice to prevent browning.
- Maceration: In a large, heavy-bottomed pot, combine chopped pears, sugar, and lemon juice. Stir until sugar starts to dissolve. Let sit for 15 minutes to draw out juices.
- Cook the preserves: Place pot over medium heat and bring to a gentle boil. Reduce heat to medium-low to maintain a steady simmer. Add cinnamon and salt. Stir frequently (every 2-3 minutes) for 25-30 minutes until mixture thickens and coats the back of a spoon. Use the cold plate test to check doneness.
- Add vanilla: Remove pot from heat and stir in vanilla extract.
- Cool and jar: Let preserves cool in the pot for 10 minutes. Spoon into clean, dry glass jars (2-3 half-pint jars), leaving ½ inch headspace. Wipe rims and screw on lids.
- Cool completely and refrigerate: Let jars cool on the counter, then refrigerate. Preserves will thicken as they cool. Best after 24 hours. Store in refrigerator for up to 3-4 weeks.
Notes
These are refrigerator preserves, not shelf-stable. Must be stored in the refrigerator and consumed within 3-4 weeks. For a thicker set, you can add 1 tablespoon of powdered pectin. To make shelf-stable, process jars in a boiling water bath for 10 minutes. The preserves will continue to thicken as they cool. Do not walk away from the pot while cooking to prevent scorching.
Nutrition
- Serving Size: 2 tablespoons
- Calories: 60
- Sugar: 14
- Sodium: 1
- Carbohydrates: 16
- Fiber: 1
Keywords: pear preserves, cinnamon pear preserves, easy preserves, homemade preserves, spiced pear preserves, no pectin preserves, refrigerator preserves, fall preserves, pear jam, cinnamon pear jam


