My nephew asked for these on a Tuesday afternoon in mid-October, three days after I’d made them for his class Halloween party. Not candy, not a toy—these. He stood at my kitchen counter, still in his backpack, and said, “Auntie, can we make the dirt cups again?” And I knew, right then, that this wasn’t just another Halloween dessert. It was the one that stuck.
I’d originally thrown them together the night before the party, honestly not expecting much. A few crushed cookies, some pudding, a handful of gummy worms. Standard stuff, right? But watching twenty kindergarteners absolutely lose their minds over a cup of chocolate pudding dressed up like a graveyard made me realize something. Sometimes the simplest things hit the hardest.
These Easy No-Bake Graveyard Dirt Pudding Cups are exactly that—simple, silly, and somehow unforgettable. They take about fifteen minutes of actual work, require zero oven time, and deliver that perfect mix of creamy chocolate and crunchy cookie that kids (and let’s be real, adults) can’t resist. No fancy piping skills needed. No complicated techniques. Just a spoon, a cup, and a little imagination.
What I love most about this recipe is how it brings people together. There’s something about assembling a tiny graveyard in a cup that makes everyone smile. It’s not about perfection. It’s about the messy, joyful process of making something fun. And honestly? That’s the kind of cooking I live for.
Why You’ll Love This Recipe
I’ve tested this recipe about a dozen times now, tweaking the pudding ratio, experimenting with different cookies, and even bribing my neighbor’s kids to be taste testers. Here’s why this version works so well.
- No Oven Required : This is a true no-bake dessert. No preheating, no baking sheets, no waiting for anything to cool. Just mix, layer, and chill. Perfect for busy Halloween prep or last-minute classroom treats.
- Simple Ingredients : You probably already have most of these in your pantry. Instant pudding mix, milk, Oreos, cream cheese, whipped topping. No weird specialty items or expensive decorations.
- Perfect for Halloween Parties : These are the star of any spooky spread. They look impressive but take almost no effort. Great for school events, potlucks, or just a fun family night.
- Crowd-Pleaser : I’ve served these to kids, adults, and everyone in between. The combination of creamy pudding, crunchy cookie crumbs, and playful gummy worms is universally loved.
- Unbelievably Delicious : The texture is next-level. The pudding stays silky and smooth, the cream cheese layer adds a subtle tang, and the crushed Oreos provide that perfect crunch. It’s comfort food in a cup.
What makes this different from other dirt cup recipes? It’s the cream cheese layer. Most versions just use chocolate pudding and crushed cookies. Adding a layer of cream cheese mixed with whipped topping gives it a richness that feels more like a dessert and less like a snack. It’s the kind of detail that makes people ask, “Wait, what’s in this?”
This recipe isn’t just good. It’s the kind that makes you close your eyes after the first bite. It’s Halloween magic without the stress.
What Ingredients You Will Need
This recipe uses simple, everyday ingredients to create something that feels special. Most of these are pantry staples, which makes this perfect for spontaneous Halloween fun.
For the Pudding Layer
- 1 box (3.9 oz) instant chocolate pudding mix (I recommend Jell-O brand for consistent results, but any brand works)
- 2 cups cold whole milk (Use 2% if that’s what you have, but whole milk gives the creamiest texture. For dairy-free, use oat milk or almond milk)
For the Cream Cheese Layer
- 4 oz cream cheese, softened to room temperature (Philadelphia is my go-to. Let it sit out for at least 30 minutes so it blends smoothly)
- 1/4 cup powdered sugar (Adds sweetness without grittiness)
- 1/2 tsp vanilla extract (Pure vanilla extract makes a difference, but imitation works in a pinch)
- 1 cup thawed frozen whipped topping (Cool Whip or any store brand. Make sure it’s fully thawed in the fridge overnight)
For the Dirt & Decorations
- 1 package (14.3 oz) Oreo cookies (Regular Oreos work best. Double Stuf is fine but creates slightly less crumb. Avoid using the whole cookie if you want a darker “dirt” color—remove the cream filling)
- Gummy worms (About 2-3 per cup. I like the sour ones for extra flavor contrast)
- Small Halloween-themed candy decorations (Optional: candy pumpkins, skeleton bones, or small plastic spiders for extra spook factor)
Optional Garnishes
- Chocolate shavings (Adds a more realistic “dirt” look)
- Crushed graham crackers (For a lighter “sand” effect if you want variety)
- Mini marshmallows (To look like tombstones or ghosts—just stick a toothpick in them)
Ingredient Selection Tip : For the best texture, use full-fat cream cheese and whole milk. Low-fat versions can make the pudding and cream cheese layer thinner. If you’re looking for a dairy-free option, I’ve had good luck with Kite Hill cream cheese and oat milk. The texture is slightly different but still delicious.
Equipment Needed
You don’t need fancy equipment for this recipe. Here’s what you’ll need.
- Small clear plastic cups (8 to 10 oz size works best. I use the clear Solo cups so you can see the layers. You can also use small mason jars or glass dessert cups)
- Mixing bowls (One medium for the pudding, one small for the cream cheese mixture)
- Whisk or electric hand mixer (A whisk works fine for the pudding, but a hand mixer makes the cream cheese layer much smoother. If you only have a whisk, just make sure the cream cheese is really soft)
- Rolling pin or zip-top bag (For crushing the Oreos. A rolling pin is satisfying, but a heavy pan works too. I actually prefer the zip-top bag method—less mess)
- Spatula (For scraping every last bit of cream cheese mixture—trust me, you don’t want to waste any)
- Spoon or small cookie scoop (For layering. A cookie scoop makes even layers, but a spoon works just fine)
- Plastic wrap or lids (To cover the cups while they chill)
Budget-Friendly Tip : Don’t buy special Halloween cups if you don’t want to. I’ve used everything from recycled yogurt containers to wine glasses. The kids don’t care what the cup looks like—they just want the dirt and worms.
Preparation Method
This recipe comes together in about 15 minutes of active time, plus at least 2 hours of chilling. Here’s how to do it.
- Make the chocolate pudding : In a medium bowl, whisk together the instant chocolate pudding mix and 2 cups of cold milk. Whisk for about 2 minutes until it starts to thicken. It will be soft-set, not fully firm. Set it aside for 5 minutes to let it set up a little more while you work on the next step.
- Crush the Oreos : Place the Oreo cookies in a large zip-top bag. Seal it, then use a rolling pin or the bottom of a heavy pan to crush them into fine crumbs. You want a mix of fine dirt-like crumbs and some slightly larger pieces for texture. Don’t go too crazy—a few bigger chunks add nice crunch. Set aside about 1/4 cup of the crumbs for topping later. (Tip: If you want darker “dirt,” scrape the cream filling out of about half the cookies before crushing. I usually leave them in because I’m lazy and it tastes better.)
- Make the cream cheese layer : In a small bowl, beat the softened cream cheese with a hand mixer until smooth and fluffy. Add the powdered sugar and vanilla extract, then beat again until fully combined. Gently fold in the thawed whipped topping using a spatula. Be gentle—you want to keep it light and airy, not deflate it.
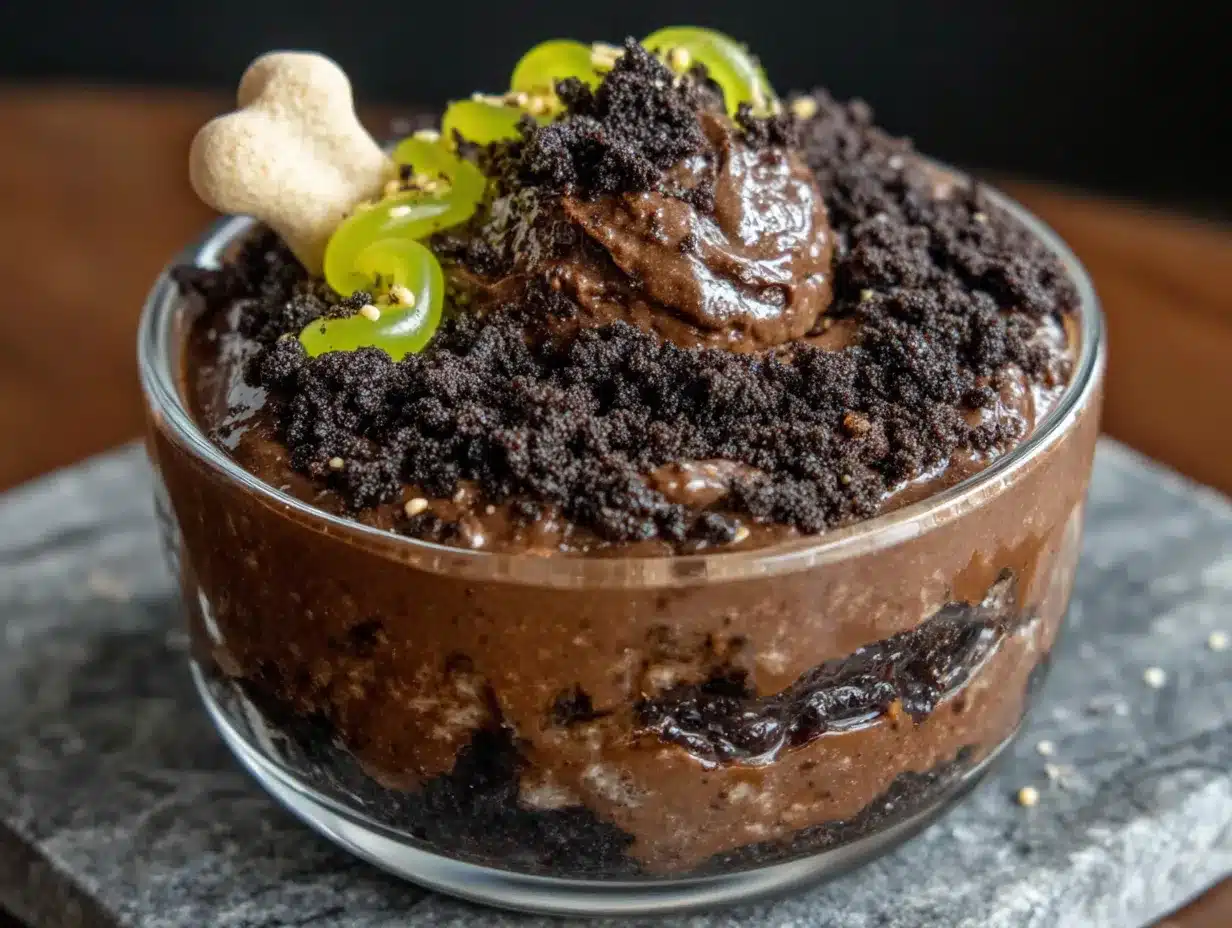
- Layer the cups : Start with a spoonful of crushed Oreos at the bottom of each cup. About 1 to 2 tablespoons per cup. This creates the “ground” layer. Next, add a layer of the cream cheese mixture. About 2 to 3 tablespoons per cup, spread evenly. Then add a layer of chocolate pudding. About 3 to 4 tablespoons per cup. Finally, top with another generous layer of crushed Oreos. This is your “dirt” layer.
- Add the decorations : Place 2 to 3 gummy worms on top of each cup, pushing them slightly into the “dirt” so they look like they’re crawling out. You can also add candy pumpkins, skeleton bones, or small plastic spiders. For tombstones, I sometimes cut a marshmallow in half, stick a toothpick in it, and write “R.I.P.” with a food-safe marker.
- Chill : Cover each cup with plastic wrap or a lid. Refrigerate for at least 2 hours, preferably 4 hours or overnight. This allows the pudding to fully set and the flavors to meld together. The longer they chill, the better they taste.
- Serve : Remove from the fridge just before serving. The cups are best enjoyed cold. If you’re serving them at a party, you can make them a day ahead—they actually get better after 24 hours in the fridge.
Sensory Cues : When the pudding is ready, it should be thick enough to coat the back of a spoon but still pourable. The cream cheese mixture should be smooth and fluffy, like a soft cloud. When you press the top Oreo layer, it should feel like actual dirt—crumbly and slightly springy.
Troubleshooting : If your pudding is too thin, you might have used too much milk or not whisked it enough. Let it sit for 10 minutes—it will thicken as it sets. If your cream cheese mixture is lumpy, your cream cheese wasn’t soft enough. Next time, let it sit out for an hour. For now, just beat it a little longer with the hand mixer.
Cooking Tips & Techniques
I’ve made these about twenty times now, and I’ve learned a few things the hard way.
Don’t skip the chilling step. I know it’s tempting to serve these right away, especially when kids are hovering. But the pudding needs time to set properly. If you serve them too soon, the layers will run together and you’ll end up with chocolate soup with cookie floaties. Trust me, I’ve been there. Two hours is the minimum, but four is better.
Crush the Oreos in batches. If you’re making a big batch, don’t try to crush all the Oreos at once. The bag will burst, and you’ll be sweeping cookie dust off your floor. Do it in two or three batches. Also, use a freezer-weight zip-top bag—the regular ones tear too easily.
Use room temperature cream cheese. This is non-negotiable. Cold cream cheese creates lumps that no amount of beating can fully fix. Let it sit on the counter for at least 30 minutes before you start. If you’re in a hurry, you can microwave it for 10 seconds, but be careful—it melts fast.
Make it ahead. These cups actually improve with time. The cookies soften slightly, the pudding sets perfectly, and the flavors blend together. I usually make them the night before a party. They’re the perfect make-ahead dessert.
Keep the worms on top until serving. If you put the gummy worms in the fridge too early, they’ll get hard and lose their chewiness. Add them just before serving, or at most an hour before. Same goes for any candy decorations—they’ll sweat and get sticky if left in the fridge too long.
One mistake I made: The first time I made these, I used sugar-free pudding mix to be “healthier.” Don’t do that. It sets up too firm and tastes artificial. The full-sugar version is worth it for the texture and flavor alone.
Variations & Adaptations
This recipe is incredibly flexible. Here are a few ways to change it up.
Gluten-Free Version : Use gluten-free chocolate sandwich cookies. I’ve tried a few brands, and Glutino makes a decent one. The texture is slightly different, but the flavor is still great. Just make sure your pudding mix is also gluten-free—most are, but check the label.
Dairy-Free Version : Use dairy-free cream cheese (Kite Hill is my favorite), coconut milk-based whipped topping, and oat milk for the pudding. The texture is a little less rich, but it’s still delicious. I made this version for a friend with lactose intolerance, and she couldn’t tell the difference.
Peanut Butter Twist : Add a tablespoon of creamy peanut butter to the cream cheese mixture. It adds a nutty depth that pairs beautifully with the chocolate. Just make sure you mix it in thoroughly so there are no streaks. (Obviously skip this for nut-free events.)
Pumpkin Spice Version : For a fall twist, add 1/4 cup of pumpkin puree and 1/2 teaspoon of pumpkin pie spice to the cream cheese mixture. It gives it a subtle pumpkin flavor that works surprisingly well with the chocolate. I tried this last October and it was a hit. If you’re looking for more pumpkin inspiration, check out my cozy pumpkin chai latte overnight oats for another easy fall treat.
Mint Chocolate Version : Add 1/4 teaspoon of peppermint extract to the pudding. It gives the cups a cool, refreshing flavor that’s perfect for Christmas or a winter-themed party. Top with crushed candy canes instead of gummy worms.
Individual Serving Tip : If you’re making these for a party where people might not finish a whole cup, use smaller cups (4 oz shot glasses work great). They’re perfect for bite-sized treats.
Serving & Storage Suggestions
These cups are best served cold, straight from the fridge. The contrast between the cold, creamy pudding and the crunchy cookie top is part of the magic.
Serving Temperature : Serve them chilled. If they sit out at room temperature for more than 30 minutes, the cream cheese layer will start to soften and the cookies will get soggy. For parties, I keep them in the fridge until the last minute and only bring out a few at a time.
Presentation Ideas : Arrange the cups on a platter with extra gummy worms scattered around. For a spooky touch, add a few plastic spiders or skeleton hands. You can also label each cup with a small tombstone-shaped sign made from cardstock. For a sheet pan nacho bar-style setup, place all the cups on a large tray and let guests grab their own.
Complementary Dishes : These pair beautifully with other Halloween treats. I love serving them alongside my crispy mummy hot dogs for a sweet-and-savory Halloween spread. For a full spooky menu, add some crispy witch finger breadsticks and spiderweb pumpkin cheesecake for variety.
Storage Instructions : Cover each cup tightly with plastic wrap or a lid. Store in the refrigerator for up to 3 days. The cookies will soften over time, which some people actually prefer. If you want to keep them crunchier, store the crushed Oreos separately and add them just before serving.
Freezing : I don’t recommend freezing these. The pudding and cream cheese layers will separate when thawed, and the texture will be watery. Make them fresh or up to 2 days ahead.
Flavor Development : These cups actually taste better the next day. The flavors meld together, the pudding sets perfectly, and the cream cheese layer becomes more cohesive. If you can wait, make them 24 hours before serving.
Nutritional Information & Benefits
Let’s be real—this is a treat, not a health food. But here’s what you’re working with per serving (based on one cup made with whole milk and full-fat cream cheese).
| Nutrient | Amount Per Serving |
|---|---|
| Calories | 320-380 |
| Total Fat | 18g |
| Saturated Fat | 10g |
| Cholesterol | 35mg |
| Sodium | 320mg |
| Total Carbohydrates | 42g |
| Dietary Fiber | 1g |
| Sugars | 30g |
| Protein | 5g |
Health Benefits of Key Ingredients : The cream cheese provides a small amount of calcium and protein. The milk adds vitamin D and more calcium. The Oreos? Well, they provide happiness. That’s a health benefit too, right?
Dietary Considerations : This recipe contains dairy and gluten. For a gluten-free version, use gluten-free cookies. For a dairy-free version, use the substitutions listed above. It is not suitable for vegans in its current form, but you can make it vegan by using plant-based cream cheese, whipped topping, and milk.
Potential Allergens : Milk, wheat, and soy (in the Oreos). Check your specific brands if you have allergies.
My Personal Perspective : I’m not one to pretend that dessert is health food. But I believe in balance. These cups are a special treat for Halloween, not an everyday snack. And honestly? The joy they bring is worth every calorie. Life is too short to skip the gummy worms.
Conclusion
These Easy No-Bake Graveyard Dirt Pudding Cups are more than just a Halloween dessert. They’re a memory in the making. I think about my nephew standing at my counter, asking for them again, and I smile every time.
What I love most about this recipe is how accessible it is. You don’t need to be a baker. You don’t need fancy tools. You just need a little time, a few simple ingredients, and a willingness to have fun. The kids will love the gummy worms. The adults will love the creamy, crunchy texture. And everyone will love how simple it is to put together.
I encourage you to make these your own. Add your favorite candy. Experiment with different cookie flavors. Use whatever cups you have on hand. The beauty of this recipe is its flexibility. It’s a template for creativity, not a rigid set of rules.
So go ahead. Make a batch for your next Halloween party. Make them with your kids on a rainy October afternoon. Make them just because. And when you do, drop a comment below and tell me how they turned out. I’d love to hear about your graveyard creations—especially if someone asks for them again three days later.
Happy Halloween, friends. May your dirt be crunchy, your pudding be creamy, and your worms be plentiful.
Frequently Asked Questions
Can I make these dirt pudding cups ahead of time?
Absolutely. In fact, they taste better the next day. Make them up to 2 days in advance and store them covered in the refrigerator. Just add the gummy worms and decorations right before serving so they don’t get hard or sticky.
Can I use homemade chocolate pudding instead of instant?
Yes, but it will change the texture. Homemade pudding is usually thinner than instant, so it won’t set up as firmly. If you want to use homemade, cook it until it’s quite thick, then chill it for at least 4 hours before layering. I’ve done it before, and it works, but instant is easier and more reliable for this recipe.
How do I keep the Oreo “dirt” from getting soggy?
This is the million-dollar question. The key is to add the top layer of crushed Oreos just before serving, or at most an hour before. If you’re making them ahead, store the crushed cookies separately and sprinkle them on right before you bring them out. The bottom layer will get a little soft, but that’s actually part of the charm—it becomes like a cookie crust.
Can I use a different type of cookie?
Totally. Chocolate wafer cookies, gluten-free sandwich cookies, or even crushed graham crackers work. For a darker “dirt” look, use dark chocolate cookies. For a lighter “sand” effect, use vanilla wafers or crushed shortbread. Just keep in mind that different cookies have different textures, so the crunch factor might vary.
How many cups does this recipe make?
This recipe makes about 6 to 8 cups, depending on the size of your cups. If you’re using 8 oz cups, you’ll get 6 generous servings. If you’re using smaller 4 oz cups, you’ll get about 10 to 12. I usually double the recipe for parties because they disappear fast.
Pin This Recipe!
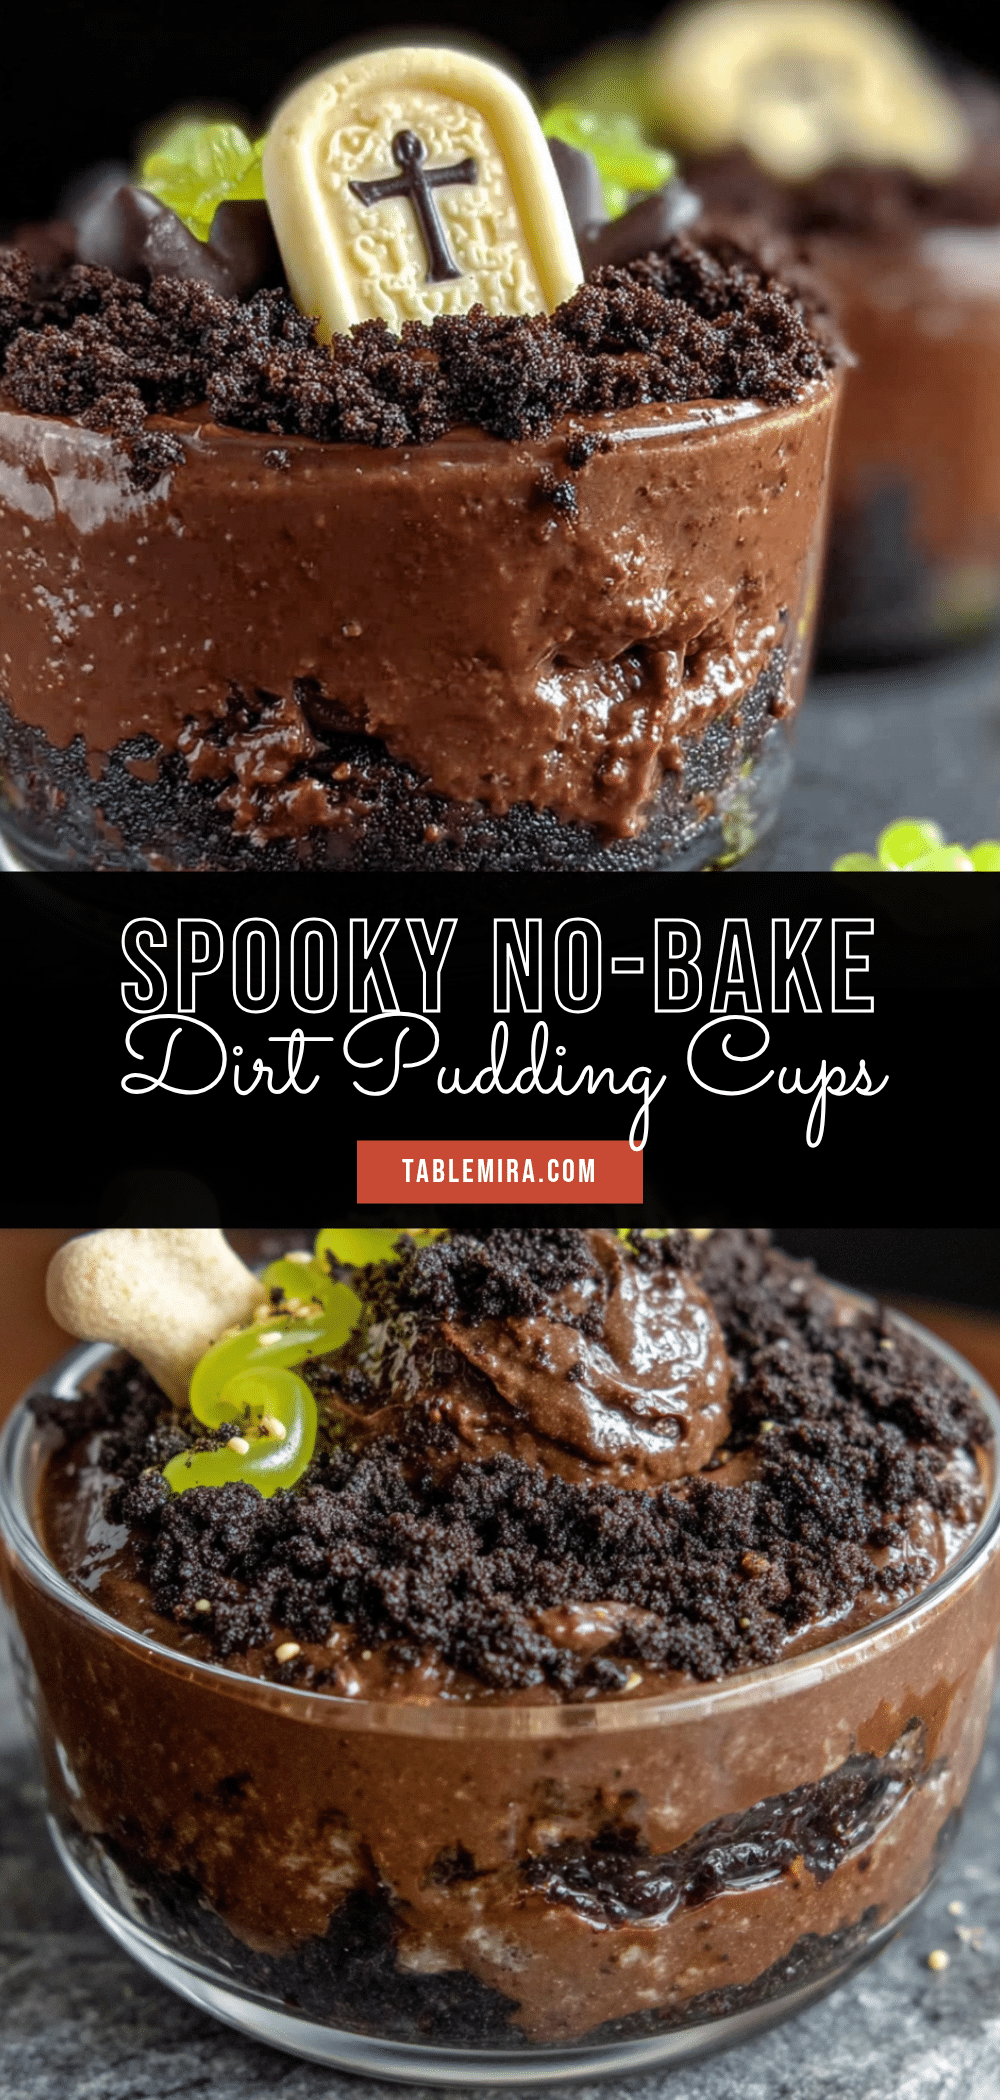
Easy No-Bake Graveyard Dirt Pudding Cups: Best Halloween Dessert

These Easy No-Bake Graveyard Dirt Pudding Cups are a simple, silly, and unforgettable Halloween dessert. With creamy chocolate pudding, a tangy cream cheese layer, crunchy Oreo ‘dirt,’ and playful gummy worms, they come together in about 15 minutes with no oven required.
- Prep Time: 15 minutes
- Cook Time: 0 minutes
- Total Time: 2 hours 15 minutes (includes chilling)
- Yield: 6-8 servings 1x
- Category: Dessert
- Cuisine: American
Ingredients
- 1 box (3.9 oz) instant chocolate pudding mix
- 2 cups cold whole milk
- 4 oz cream cheese, softened to room temperature
- 1/4 cup powdered sugar
- 1/2 tsp vanilla extract
- 1 cup thawed frozen whipped topping
- 1 package (14.3 oz) Oreo cookies
- Gummy worms (about 2-3 per cup)
- Small Halloween-themed candy decorations (optional)
- Chocolate shavings (optional)
- Crushed graham crackers (optional)
- Mini marshmallows (optional)
Instructions
- Make the chocolate pudding: In a medium bowl, whisk together the instant chocolate pudding mix and 2 cups of cold milk. Whisk for about 2 minutes until it starts to thicken. Set aside for 5 minutes to let it set up a little more.
- Crush the Oreos: Place the Oreo cookies in a large zip-top bag. Seal it, then use a rolling pin or the bottom of a heavy pan to crush them into fine crumbs. Set aside about 1/4 cup of the crumbs for topping later.
- Make the cream cheese layer: In a small bowl, beat the softened cream cheese with a hand mixer until smooth and fluffy. Add the powdered sugar and vanilla extract, then beat again until fully combined. Gently fold in the thawed whipped topping using a spatula.
- Layer the cups: Start with a spoonful of crushed Oreos at the bottom of each cup (about 1 to 2 tablespoons). Next, add a layer of the cream cheese mixture (about 2 to 3 tablespoons). Then add a layer of chocolate pudding (about 3 to 4 tablespoons). Finally, top with another generous layer of crushed Oreos.
- Add the decorations: Place 2 to 3 gummy worms on top of each cup, pushing them slightly into the ‘dirt.’ Add optional candy decorations or marshmallow tombstones.
- Chill: Cover each cup with plastic wrap or a lid. Refrigerate for at least 2 hours, preferably 4 hours or overnight.
- Serve: Remove from the fridge just before serving. The cups are best enjoyed cold.
Notes
Don’t skip the chilling step—it allows the pudding to set properly. Use room temperature cream cheese to avoid lumps. For best results, make the cups a day ahead; they taste even better after 24 hours. Add gummy worms just before serving to keep them chewy.
Nutrition
- Serving Size: 1 cup
- Calories: 350
- Sugar: 30
- Sodium: 320
- Fat: 18
- Saturated Fat: 10
- Carbohydrates: 42
- Fiber: 1
- Protein: 5
Keywords: Halloween dessert, no-bake, dirt pudding cups, graveyard, chocolate pudding, Oreo, gummy worms, easy, kid-friendly