The breadsticks vanished before I even poured my first cup of tea. Third Halloween party in a row. Someone nudged me mid-conversation, whispering, “Can I please have that recipe?” Nothing’s quite as satisfying as seeing a platter emptied faster than you expected — especially when it’s these Crispy Witch Finger Breadsticks with Roasted Garlic Marinara. Honestly, I wasn’t sure if the spooky look would win people over, but the crispy texture and that garlicky dip? Game changer.
It all started one chilly October evening. I wanted something playful, a little eerie but still comforting enough to handle the slow creep of autumn chills. The idea of turning simple breadsticks into something that looked like witch fingers—complete with almond “nails”—came to me after a quick rummage through the pantry and fridge. The roasted garlic marinara was a last-minute save; I needed a dip that wasn’t just tomato sauce but had a mellow, caramelized sweetness to balance out the salty crunch.
That night, as the first batch came out golden and crackling, I realized this recipe wasn’t just a Halloween novelty. It was something folks genuinely enjoyed, and the texts the next day asking for it confirmed it. There’s a quiet joy in crafting a recipe that makes people smile and linger around the table a little longer. These breadsticks do just that—combining a bit of whimsy with bold, satisfying flavor. It’s the kind of recipe that sticks with you, not because it’s fancy, but because it’s just right for those moments when you want fun and flavor to come together effortlessly.
Why You’ll Love This Recipe
- Quick & Easy: Ready in under 45 minutes, perfect for last-minute party prep or a fun family snack.
- Simple Ingredients: You probably have most of these in your pantry already—no special trips needed.
- Perfect for Halloween Gatherings: The creepy, creative shape turns ordinary breadsticks into a conversation starter.
- Crowd-Pleaser: Kids and adults alike rave about the satisfying crunch and flavorful dip combo.
- Unbelievably Delicious: The contrast between the crispy exterior and soft interior is just right, with the roasted garlic adding a smooth depth to the marinara.
This isn’t just another breadstick recipe you’ll find floating around. The secret lies in shaping the dough with a few slashes and pressing sliced almonds as nails—giving it that authentic “witch finger” look that stays crispy after baking. Plus, roasting the garlic before blending it into the marinara mellows its bite and adds a rich, almost sweet undertone that pairs perfectly with the breadsticks’ buttery crunch.
Honestly, it’s the kind of recipe that sneaks up on you—fun to make, satisfying to eat, and just a little spooky for the season without trying too hard. If you’ve ever turned a simple meal into a memorable night, you know what I mean. This one’s stuck around on my recipe list because it hits that sweet spot every time.
What Ingredients You Will Need
This recipe uses simple, wholesome ingredients to deliver bold flavor and a satisfying texture without the fuss. Most are pantry staples, and the roasted garlic marinara adds an unexpected twist that makes it all come together.
- For the Witch Finger Breadsticks:
- 1 ½ cups warm water (110°F/43°C) – to activate the yeast
- 2 ¼ teaspoons active dry yeast (1 packet)
- 1 tablespoon granulated sugar – helps yeast bloom
- 3 ½ cups all-purpose flour – I recommend King Arthur for consistent texture
- 1 teaspoon salt – balances flavor
- 2 tablespoons unsalted butter, melted – adds richness
- Almond slices – for the “nails” (choose thin, curved slices for best effect)
- 1 egg, beaten with 1 tablespoon water – for egg wash to get that golden crisp
- Coarse sea salt (optional) – sprinkle for extra crunch and flavor
- For the Roasted Garlic Marinara Dip:
- 1 whole head of garlic – roasted until soft and caramelized
- 1 (28-ounce/796g) can crushed tomatoes – San Marzano if you can find it
- 2 tablespoons olive oil – for roasting and sautéing
- 1 small yellow onion, finely chopped
- 1 teaspoon dried oregano
- 1 teaspoon dried basil
- Salt and freshly ground black pepper to taste
- Pinch of crushed red pepper flakes (optional) – for a slight kick
Feel free to swap all-purpose flour with a gluten-free blend if needed, though the texture will change slightly. For a dairy-free option, use olive oil in place of melted butter. The roasted garlic is the star here—don’t skip roasting it; it transforms the marinara from ordinary to something special.
Equipment Needed
- Baking sheet lined with parchment paper or a silicone baking mat – helps prevent sticking and makes cleanup easy.
- Mixing bowls – one for proofing the yeast and another for combining dough.
- Wooden spoon or dough hook attachment if using a stand mixer – I find a stand mixer speeds things up, but hand mixing works fine too.
- Pastry brush – for applying the egg wash precisely on each breadstick.
- Sharp knife or kitchen scissors – to make the finger slashes and detail.
- Aluminum foil – for roasting garlic.
- Small saucepan – to simmer the marinara sauce.
If you don’t have a stand mixer, don’t worry. I’ve made this dough by hand plenty of times and it still turns out great (though it takes a little elbow grease). Using parchment paper is a game changer – no scrubbing trays later. For roasting garlic, wrapping it in foil and baking at 400°F (205°C) brings out that perfect soft, buttery texture.
Preparation Method
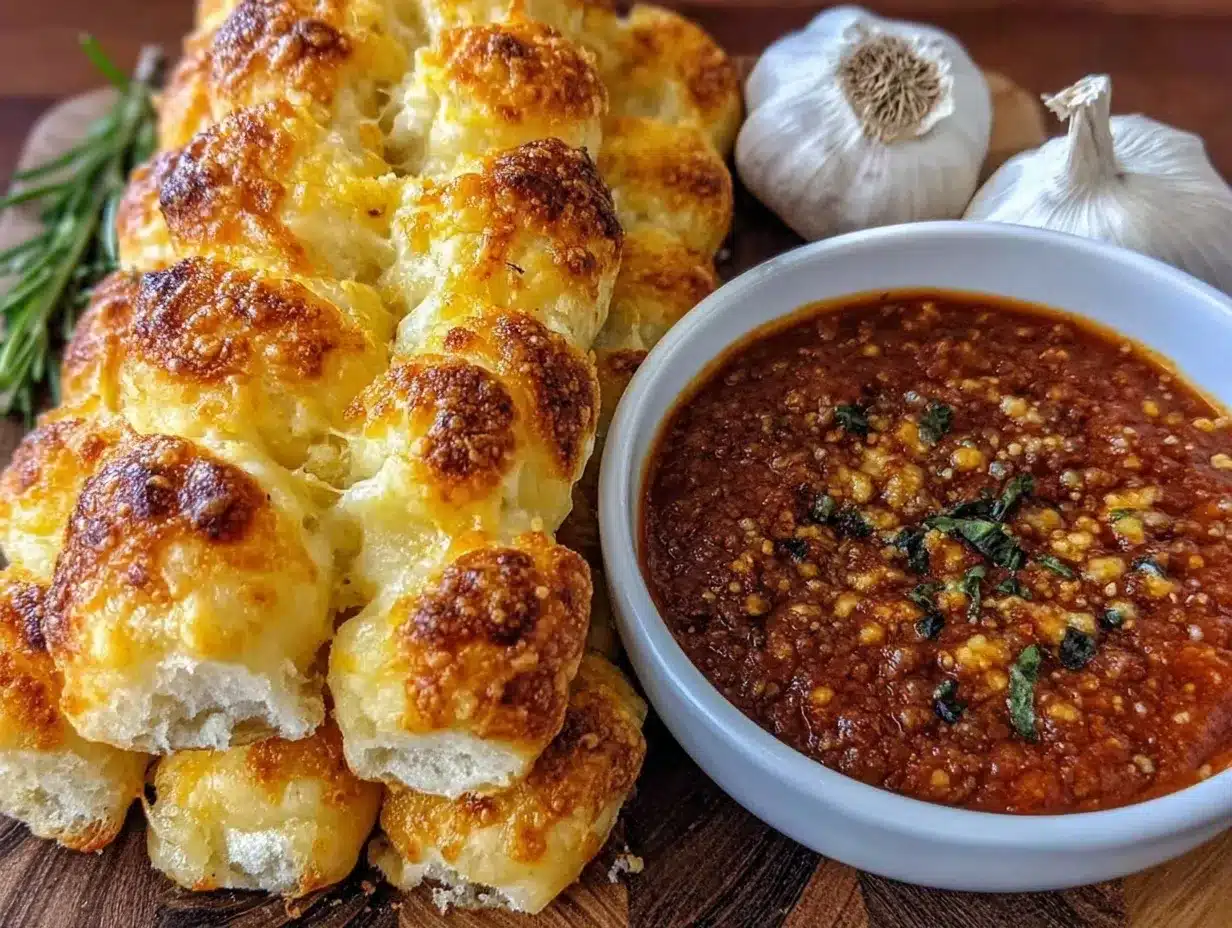
- Activate the Yeast: In a small bowl, combine warm water (110°F/43°C), sugar, and yeast. Stir gently and let sit for 5-10 minutes until foamy. If it doesn’t foam, your yeast might be dead—start over with fresh yeast.
- Make the Dough: In a large mixing bowl (or stand mixer bowl), whisk together flour and salt. Add melted butter and the activated yeast mixture. Mix until it forms a rough dough.
- Knead the Dough: Knead for 8-10 minutes by hand on a floured surface or 6-7 minutes with a stand mixer dough hook until smooth and elastic. The dough should be slightly tacky but not sticky.
- First Rise: Place the dough in a lightly oiled bowl, cover with a damp cloth or plastic wrap, and let it rise in a warm place for about 1 hour or until doubled in size.
- Prepare Roasted Garlic: While dough rises, preheat oven to 400°F (205°C). Slice off the top of the garlic head to expose cloves. Drizzle with olive oil, wrap in foil, and roast for 30-35 minutes until soft and golden. Let cool.
- Shape the Witch Fingers: Punch down the dough and divide into 12 equal pieces (about 85g / 3 oz each). Roll each into a finger-shaped stick roughly 6 inches (15 cm) long. Use a sharp knife to make 3-4 shallow slashes along each “finger” to mimic knuckles.
- Add Almond Nails: Press a sliced almond at the tip of each finger as a nail. Brush the entire finger lightly with egg wash and sprinkle with coarse sea salt if desired.
- Second Rise: Place shaped breadsticks on the prepared baking sheet, cover loosely, and let rise for 20-30 minutes until puffy.
- Bake: Bake at 375°F (190°C) for 18-22 minutes until golden brown and crispy on the edges. Keep an eye to avoid burning the almond nails.
- Make the Marinara Dip: While breadsticks bake, heat olive oil in a saucepan over medium heat. Sauté onions until translucent (about 5 minutes). Squeeze the roasted garlic cloves from their skins and add to the pan. Pour in crushed tomatoes, oregano, basil, and red pepper flakes if using. Simmer gently for 15-20 minutes, stirring occasionally. Season with salt and pepper to taste.
- Serve: Transfer breadsticks to a platter and serve warm with the roasted garlic marinara in a bowl for dipping.
Pro tip: If your dough feels too sticky when shaping, dust your hands lightly with flour but don’t overdo it—too much flour can make the breadsticks tough. The slashes for knuckles should be shallow but distinct enough to puff up during baking. I’ve learned that brushing the egg wash right before baking locks in that beautiful golden color.
Cooking Tips & Techniques
Getting these Crispy Witch Finger Breadsticks just right is all about balance. You want the outside to snap gently when bitten, while the inside stays soft and chewy. Here are some tips I’ve picked up after a few trial runs:
- Watch your water temperature for yeast activation. Too hot and it kills the yeast; too cold and it won’t bloom. Aim for about 110°F (43°C).
- Knead well but don’t overdo it. Dough should be elastic and smooth but not tough. If the dough resists stretching, it needs more kneading.
- Don’t skip the second rise. It might feel like extra time but it really helps develop those light pockets inside the breadsticks.
- Roast garlic properly. Roasting makes the garlic sweet and mellow, which transforms the marinara. Raw garlic would overpower the dip.
- Use an egg wash. This gives the breadsticks that irresistible golden sheen and helps the almond nails stick better.
- Keep an eye on baking time. Oven temps vary, so check at 18 minutes. Overbaking dries them out; underbaking leaves doughy centers.
One time, I forgot the egg wash and the breadsticks looked pale and sad. Not the same effect at all. Also, pressing the almond nails at the very end of shaping ensures they don’t burn or fall off. If your almond slices are thick, try to find those thin, curved ones—they look more like real nails!
Variations & Adaptations
- Spicy Version: Add ½ teaspoon cayenne or smoked paprika to the dough for a subtle kick. Spice up the marinara with extra red pepper flakes.
- Gluten-Free: Use a high-quality gluten-free all-purpose flour blend. The texture will be a bit different but still tasty. Let the dough rest longer for better hydration.
- Vegan Adaptation: Replace butter with olive oil and swap the egg wash for a plant-based milk or olive oil brush.
- Herb-Infused: Mix fresh rosemary or thyme into the dough for an earthy aroma. Sprinkle some fresh herbs on top after baking for an extra pop.
- Cheesy Fingers: Stuff a small piece of mozzarella inside each finger before shaping, or sprinkle grated Parmesan on top before baking.
I once tried adding a bit of pumpkin puree into the dough for a fall twist—added moisture and subtle sweetness, but you’ll need to reduce water slightly to keep dough manageable. If you’re hosting a Halloween party, these variations can help you customize for different tastes or dietary needs without losing the fun factor.
Serving & Storage Suggestions
These breadsticks are best served warm, straight from the oven, with plenty of roasted garlic marinara for dunking. The contrast between the crispy fingers and the smooth, aromatic dip is what makes this recipe shine. For a festive touch, arrange them on a platter with some fresh herbs or a sprinkle of cracked black pepper on the marinara.
They pair wonderfully with hearty soups or stews—you might find them a great accompaniment to a cozy one-pot chicken and wild rice soup. Or try alongside a simple salad like the fresh Greek orzo pasta salad to balance out the richness.
To store, place cooled breadsticks in an airtight container at room temperature for up to 2 days. For longer storage, freeze them wrapped tightly in foil or plastic wrap for up to 1 month. Reheat in a 350°F (175°C) oven for 5-7 minutes to restore crispiness.
The marinara can be refrigerated for up to a week and tastes even better the next day after flavors meld. Warm gently on the stove before serving again.
Nutritional Information & Benefits
Each serving (about 2 breadsticks with dip) provides approximately 250-300 calories, depending on exact portion sizes. The breadsticks offer a comforting source of carbohydrates and moderate protein from the flour and butter. The roasted garlic adds antioxidants and vitamins, while the marinara provides lycopene from tomatoes—a heart-healthy compound.
This recipe can be adapted for low-dairy or gluten-free diets without losing much flavor. Keep in mind the almond “nails” may be a concern for nut allergies, so you can substitute with small pieces of olives or pumpkin seeds for a similar look and texture.
From a wellness perspective, roasting garlic mellows its pungency and increases beneficial compounds that support immune health. Plus, making bread from scratch means you control the ingredients and avoid preservatives common in store-bought snacks.
Conclusion
These Crispy Witch Finger Breadsticks with Roasted Garlic Marinara aren’t just a novelty—they’re a fun, tasty way to bring a little magic (and crunch) to your table. Whether you’re hosting a Halloween bash or just craving something playful and delicious, this recipe hits the spot.
Feel free to tweak the herbs, spice level, or dip to suit your taste. For me, the charm lies in the blend of simple ingredients turned into something special enough to inspire smiles and second helpings. It’s become a recipe I reach for when I want to impress without stress—plus, it’s just fun to say “witch fingers” out loud while baking!
If you try this recipe, I’d love to hear how your breadsticks turn out or what creative variations you come up with. Sharing these little kitchen wins always makes my day.
Frequently Asked Questions
How do I make the breadsticks extra crispy?
Brush them with an egg wash before baking and bake until golden brown, about 18-22 minutes. Using parchment paper helps prevent sogginess, too.
Can I prepare the dough ahead of time?
Yes! You can make the dough the night before and refrigerate it after the first rise. Bring it back to room temperature before shaping.
What can I use if I don’t have almond slices for the nails?
Try thinly sliced olives, pumpkin seeds, or even small pieces of bell pepper for a similar effect.
Is the roasted garlic necessary for the marinara?
It’s what gives the sauce its mellow sweetness and depth. You could use raw garlic, but the flavor will be sharper and less balanced.
Can I freeze these breadsticks?
Absolutely. Freeze cooled breadsticks wrapped tightly and reheat in the oven at 350°F (175°C) for 5-7 minutes to regain crispiness.
Pin This Recipe!
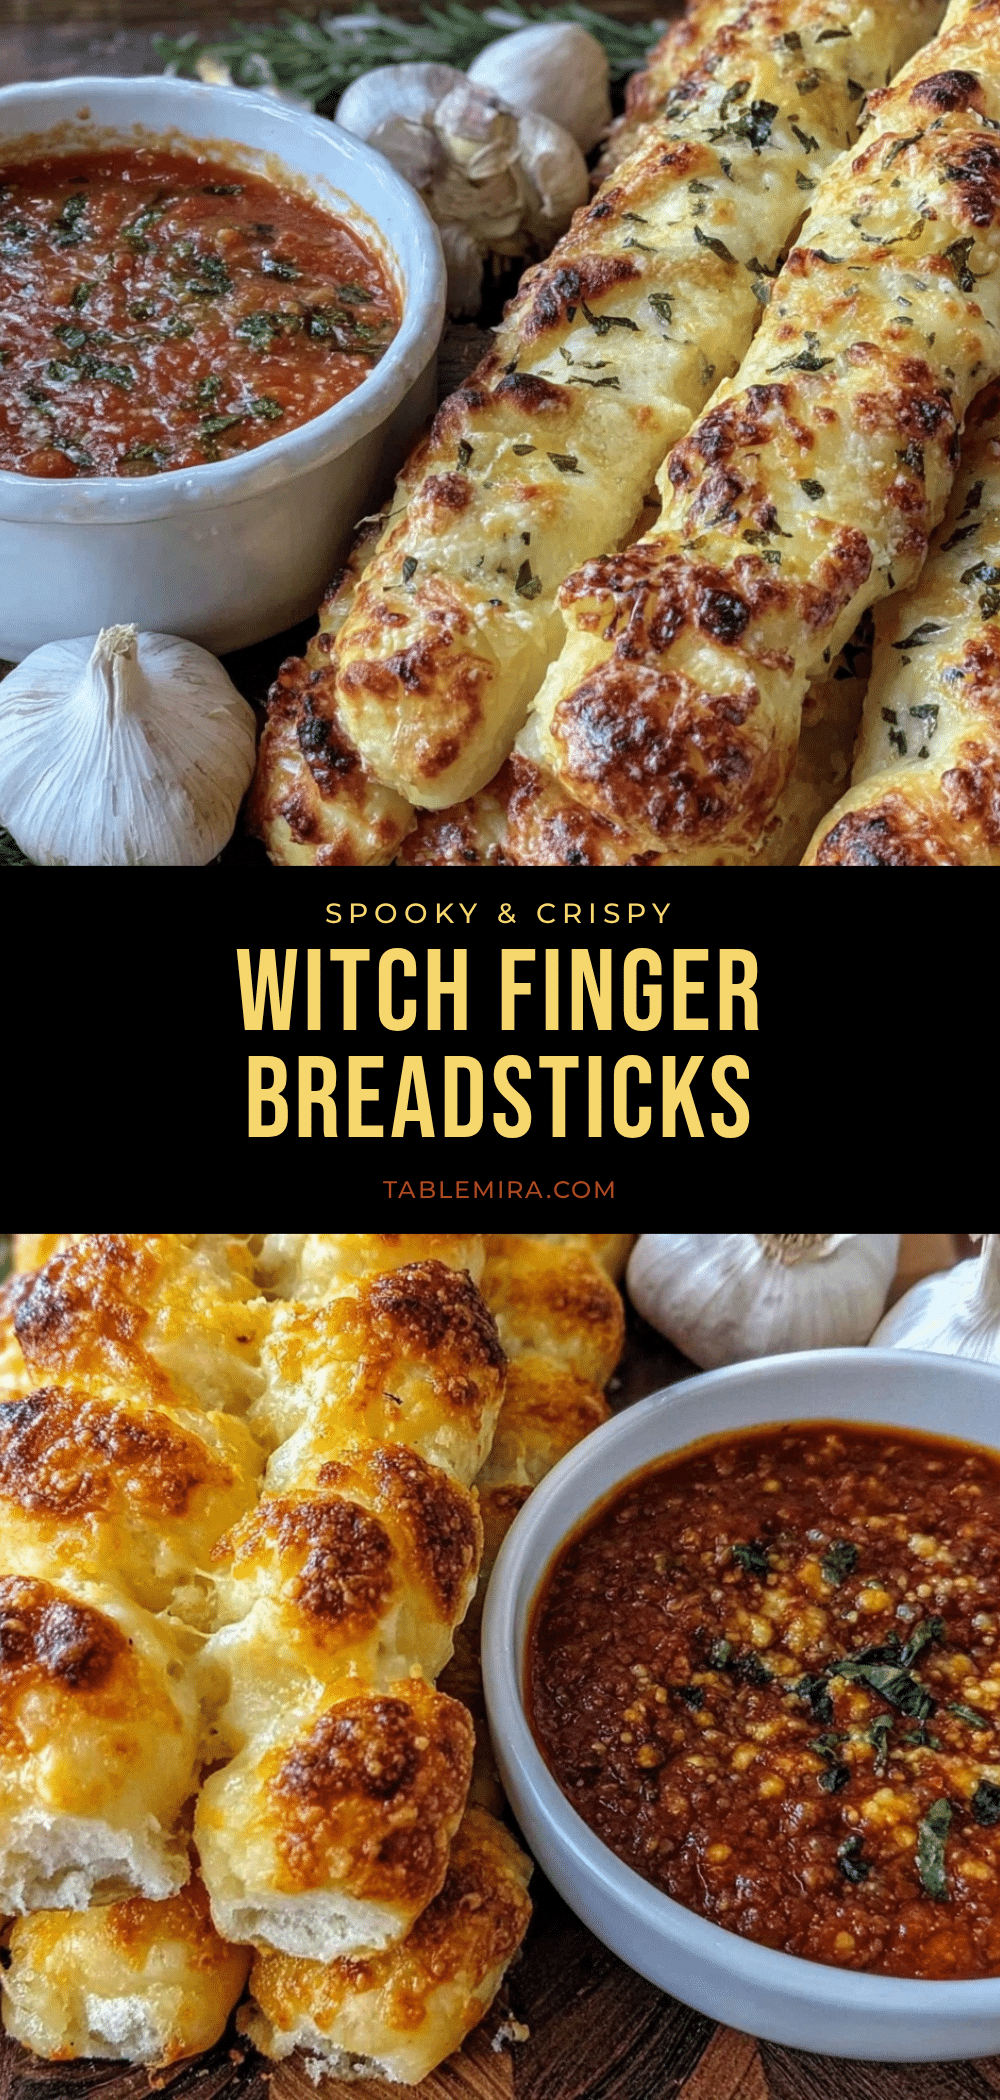
Crispy Witch Finger Breadsticks Recipe with Easy Roasted Garlic Marinara Dip
These Crispy Witch Finger Breadsticks with Roasted Garlic Marinara are a fun and flavorful Halloween treat featuring crispy breadsticks shaped like witch fingers with almond nails and a mellow, caramelized garlic marinara dip.
- Prep Time: 15 minutes
- Cook Time: 40 minutes
- Total Time: 55 minutes
- Yield: 12 breadsticks (about 6 servings) 1x
- Category: Appetizer
- Cuisine: American
Ingredients
- 1 ½ cups warm water (110°F/43°C) – to activate the yeast
- 2 ¼ teaspoons active dry yeast (1 packet)
- 1 tablespoon granulated sugar – helps yeast bloom
- 3 ½ cups all-purpose flour
- 1 teaspoon salt – balances flavor
- 2 tablespoons unsalted butter, melted – adds richness
- Almond slices – for the “nails” (thin, curved slices recommended)
- 1 egg, beaten with 1 tablespoon water – for egg wash
- Coarse sea salt (optional) – sprinkle for extra crunch and flavor
- 1 whole head of garlic – roasted until soft and caramelized
- 1 (28-ounce/796g) can crushed tomatoes
- 2 tablespoons olive oil – for roasting and sautéing
- 1 small yellow onion, finely chopped
- 1 teaspoon dried oregano
- 1 teaspoon dried basil
- Salt and freshly ground black pepper to taste
- Pinch of crushed red pepper flakes (optional)
Instructions
- Activate the yeast by combining warm water (110°F/43°C), sugar, and yeast in a small bowl. Stir gently and let sit for 5-10 minutes until foamy.
- In a large mixing bowl, whisk together flour and salt. Add melted butter and the activated yeast mixture. Mix until it forms a rough dough.
- Knead the dough for 8-10 minutes by hand on a floured surface or 6-7 minutes with a stand mixer dough hook until smooth and elastic.
- Place the dough in a lightly oiled bowl, cover, and let rise in a warm place for about 1 hour or until doubled in size.
- Preheat oven to 400°F (205°C). Slice off the top of the garlic head, drizzle with olive oil, wrap in foil, and roast for 30-35 minutes until soft and golden. Let cool.
- Punch down the dough and divide into 12 equal pieces (about 3 oz each). Roll each into a 6-inch finger-shaped stick. Make 3-4 shallow slashes along each finger to mimic knuckles.
- Press a sliced almond at the tip of each finger as a nail. Brush each finger with egg wash and sprinkle with coarse sea salt if desired.
- Place shaped breadsticks on a prepared baking sheet, cover loosely, and let rise for 20-30 minutes until puffy.
- Bake at 375°F (190°C) for 18-22 minutes until golden brown and crispy on the edges.
- While breadsticks bake, heat olive oil in a saucepan over medium heat. Sauté onions until translucent (about 5 minutes).
- Squeeze roasted garlic cloves from skins and add to the pan. Add crushed tomatoes, oregano, basil, and red pepper flakes if using. Simmer gently for 15-20 minutes, stirring occasionally. Season with salt and pepper to taste.
- Serve breadsticks warm with roasted garlic marinara dip.
Notes
Use thin, curved almond slices for the most realistic nails. Brush egg wash right before baking to lock in golden color. Roast garlic to mellow its flavor and add sweetness to the marinara. If dough is sticky when shaping, dust hands lightly with flour but avoid over-flouring to keep breadsticks tender. Check breadsticks at 18 minutes to avoid overbaking.
Nutrition
- Serving Size: About 2 breadsticks
- Calories: 275
- Sugar: 4
- Sodium: 350
- Fat: 8
- Saturated Fat: 3
- Carbohydrates: 40
- Fiber: 3
- Protein: 6
Keywords: Halloween, breadsticks, witch fingers, roasted garlic, marinara, party snack, crispy breadsticks, almond nails


