I was wrapping the last strip of crescent dough around a hot dog when my daughter walked in from school. She stopped mid-sentence, dropped her backpack, and whispered, “Mom. Those are the best things I have ever seen.” She was still in her coat. I hadn’t even said hello yet. That was the moment I knew these mummy hot dog bites were going to be a thing in our house.
Honestly, I wasn’t trying to be clever. I had about twenty minutes before we needed to leave for her school’s fall festival, and I needed something fast that looked like I tried. You know how that goes. I grabbed a can of crescent rolls from the fridge, some hot dogs from the back of the drawer, and just started wrapping. No plan. Just hope.
These easy mummy hot dog Halloween bites turned out way better than I expected. They were gone before the first game of musical chairs started. Other parents kept walking by the snack table and grabbing two or three at a time. One dad asked me if I had a catering side hustle. I laughed, but I also wrote down exactly what I did so I could make them again.
That is what I love about this recipe. It is not fancy. It is not complicated. But it delivers every single time. It is the kind of snack that makes you look like a Halloween hero without spending hours in the kitchen. And honestly, that is my favorite kind of recipe.
Why You Will Love This Recipe
Let me tell you why these mummy hot dog bites have become my go-to Halloween snack. I have tested this recipe at three different parties now, and the reaction is always the same. People grab one, pause, and then go back for more. It is almost funny how fast they disappear.
- Ready in 20 Minutes: From fridge to table in under half an hour. That includes preheating the oven. You can literally make these while your kids are putting on their costumes.
- Simple Ingredients: You only need three things. Hot dogs, crescent roll dough, and mustard or candy eyes for the faces. That is it. No special trip to the store required.
- Perfect for Halloween Parties: These work for class parties, trunk-or-treat events, or just a fun dinner before trick-or-treating. They are portable, kid-friendly, and not too messy.
- Crowd-Pleaser: I have yet to meet a kid who does not love these. Adults too, honestly. There is something about the flaky dough wrapped around a salty hot dog that just works.
- Customizable: You can swap in turkey dogs, use different dough types, or get creative with the faces. Every batch can look a little different.
What makes this recipe different from other Halloween snacks? It is the texture. The crescent dough gets golden and flaky while the hot dog stays juicy inside. That contrast is what keeps people coming back. Plus, the mummy look is just cute enough to be fun without being fussy. I have tried other Halloween recipes that look great but taste mediocre. These actually taste as good as they look.
This is the kind of snack that makes you feel like you pulled off something special, even though it took almost no effort. And honestly, that is the best kind of cooking.
What Ingredients You Will Need
This recipe uses the simplest ingredients, but a few small choices make a big difference. Here is what you need and why each ingredient matters.
- Hot dogs (1 package, 8 count): Standard beef hot dogs work great. I usually go with all-beef because they have better flavor and hold up well during baking. You can use turkey or chicken dogs if you prefer. Just avoid the jumbo size for this recipe, they are too thick and the dough does not wrap as nicely. I like Nathan’s or Hebrew National for the best snap.
- Crescent roll dough (1 can, 8 ounces): Pillsbury is the classic choice here. The dough comes pre-cut into triangles, which you will cut into thinner strips. The buttery, flaky texture is exactly what you want. If you want a slightly sturdier wrap, you can use pizza dough or puff pastry, but crescent rolls give the best golden color and soft texture.
- Mustard or candy eyes for decoration: Yellow mustard works perfectly for drawing mummy faces. It adds a tangy kick that balances the richness of the dough and hot dog. If you want a sweeter look, use candy eyes with a tiny dab of frosting or mustard to stick them on. I have done both, and honestly, the mustard faces are faster and less messy.
- Egg wash (1 egg + 1 tablespoon water): This is optional but highly recommended. Brushing the dough with egg wash before baking gives it that deep golden brown color that makes the mummies look like they just came out of a bakery. Skip it if you are in a rush, but the visual difference is noticeable.
- Sesame seeds or poppy seeds (optional): A light sprinkle adds texture and makes the mummies look even more authentic. Think of it like little specks of sand from the tomb. Totally optional but fun.
That is really all you need. Three main ingredients plus a few optional extras. The beauty of this recipe is how little it requires. I love recipes that feel like magic but are actually just clever assembly. If you are looking for another crowd-pleasing party snack, check out these crispy buffalo cauliflower game day bites for a vegetarian option that disappears just as fast.
Equipment Needed
You do not need much for this recipe, which is part of why I love it. Here is what you will need:
- Baking sheet: A standard half-sheet pan works perfectly. Line it with parchment paper or a silicone baking mat for easy cleanup. I have forgotten the parchment before, and let me tell you, scraping melted cheese off a baking sheet is not fun.
- Sharp knife or pizza cutter: You will need to cut the crescent dough triangles into thin strips. A pizza cutter makes this incredibly fast. A sharp knife works just as well. Do not use a dull knife, it will squish the dough.
- Pastry brush: For applying the egg wash. If you do not have one, you can use a paper towel or even your fingers. I have done all three. The pastry brush gives the most even coating.
- Small bowl: For whisking the egg wash. Any small bowl works.
- Toothpicks (optional): If you want to secure the dough ends so they do not unroll during baking. I usually skip this, but if your dough is particularly sticky or warm, toothpicks can help.
I have made these in a toaster oven before when my main oven was occupied with a crockpot Halloween chili bar. They came out just as good, just watch them closely because toaster ovens run hot. No fancy equipment required. Just basic kitchen tools you probably already own.
Preparation Method
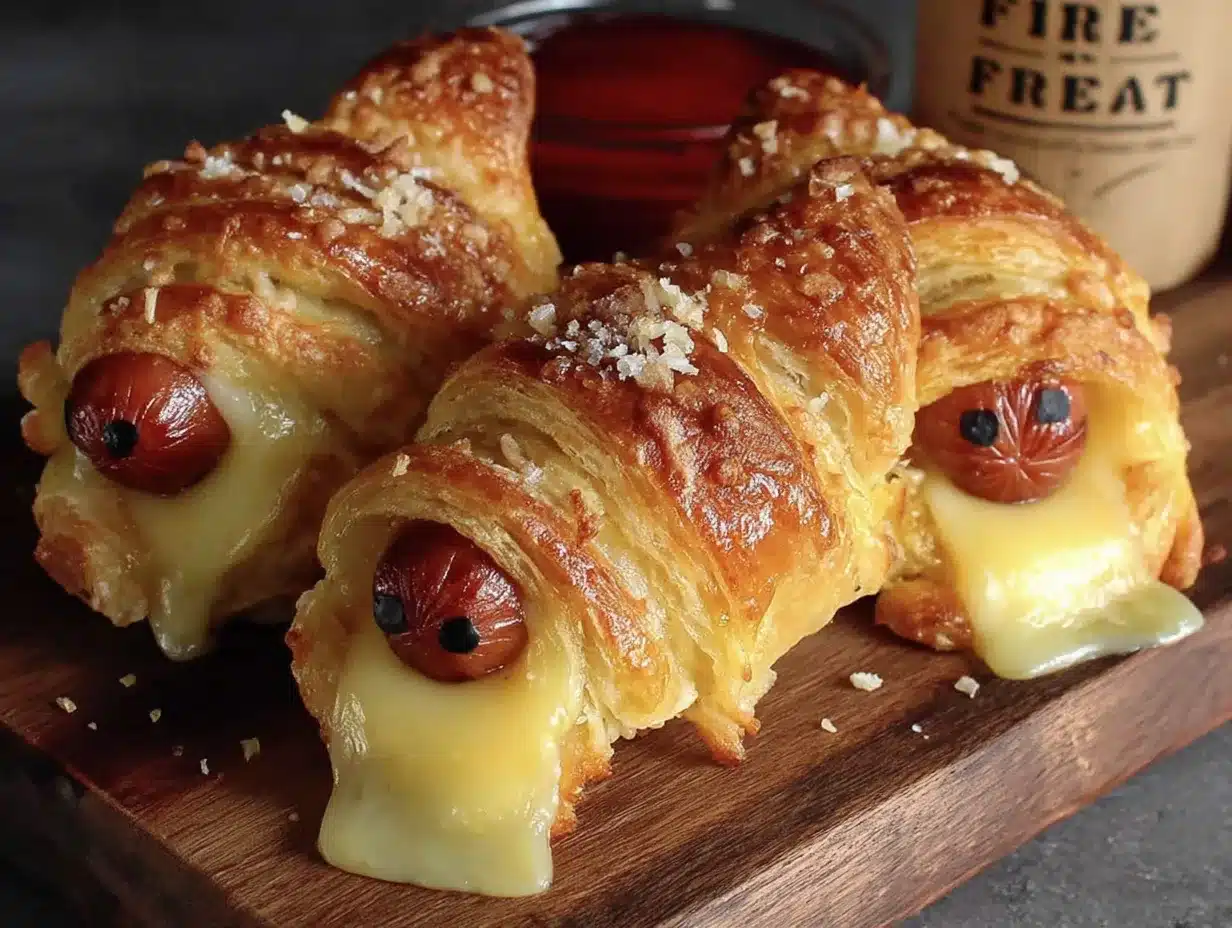
Let me walk you through this step by step. I have made these so many times that I have it down to a rhythm now. You will too after the first batch.
- Preheat your oven to 375°F (190°C). Line a baking sheet with parchment paper or a silicone mat. Do not skip the parchment. Trust me on this one.
- Unroll the crescent dough. Separate it into the 8 pre-cut triangles along the perforated lines. Lay them flat on a cutting board. You will see that each triangle has a wide end and a pointed end.
- Cut each triangle into thin strips. Using a sharp knife or pizza cutter, slice each triangle lengthwise into 3 or 4 thin strips. The strips should be about 1/2 inch wide. Do not worry if they are not perfectly even. Imperfect mummies look more authentic anyway.
- Prepare the hot dogs. If your hot dogs are standard size, leave them whole. If they are longer than the dough strips, cut them in half crosswise. I usually cut mine into thirds for smaller bite-sized mummies that are perfect for little hands.
- Wrap the hot dogs. Take one strip of dough and wrap it around a hot dog piece. Start at one end and wrap diagonally, leaving a small gap at the top for the face. Overlap the dough slightly as you go. Press the end gently to seal. Repeat with all hot dog pieces. Each hot dog piece should get about 2-3 strips of dough depending on how thick you cut them.
- Place on the baking sheet. Arrange the wrapped mummies about 1 inch apart on the prepared baking sheet. Make sure the seam side is facing down so they do not unroll during baking.
- Apply the egg wash. In a small bowl, whisk together 1 egg and 1 tablespoon of water. Brush this mixture lightly over each mummy. This gives them that gorgeous golden color. If you are using sesame seeds or poppy seeds, sprinkle them on now.
- Bake for 10-12 minutes. The mummies are done when the dough is golden brown and puffed. The hot dogs should be heated through. Keep an eye on them after 10 minutes, especially if your oven runs hot.
- Add the faces. Let the mummies cool for 2-3 minutes on the baking sheet. Then use a toothpick to dot on mustard for eyes. If you are using candy eyes, press them gently into a tiny dab of mustard or frosting. The mustard also works for drawing little mouth lines if you want.
- Serve immediately. These are best warm, when the dough is still flaky and the hot dog is juicy. They cool quickly, so serve them right away if you can.
A few things I have learned the hard way. Do not overwork the dough. Crescent roll dough gets sticky if you handle it too much. If it starts sticking to your fingers, dust your hands lightly with flour. Also, if your kitchen is warm, the dough might get soft. Pop it in the fridge for 5 minutes before wrapping if that happens. And here is a pro tip: if you are making these for a party, you can prep them a few hours ahead and keep them in the fridge on the baking sheet. Just add a few extra minutes to the bake time if they go in cold.
Cooking Tips and Techniques
I have made these mummy hot dog bites at least a dozen times now, and I have collected a few tricks along the way. Let me share what I have learned so you do not have to make the same mistakes I did.
Keep the dough cold. Crescent roll dough is much easier to work with when it is cold. If it gets too warm, it becomes sticky and tears easily. If your kitchen is warm, pop the dough in the fridge for 10 minutes before you start cutting. I learned this after my first batch turned into a sticky mess that looked more like abstract art than mummies.
Cut the strips thin enough. I made the mistake of cutting my strips too wide the first time. The mummies looked more like burritos than bandaged bodies. Thin strips, about half an inch wide, give that nice layered mummy look. You want to see the hot dog peeking through in a few places.
Do not overbake. The dough can go from golden to burned very quickly. Start checking at 10 minutes. You want the dough to be golden brown, not dark brown. The hot dogs are already cooked, so you are really just heating them through and cooking the dough.
Let them cool slightly before adding faces. If you add mustard eyes right out of the oven, the heat will make the mustard runny. Wait 2-3 minutes. The mustard will stay put and look much cleaner. I learned this after my first batch looked like crying mummies with mustard tears running down their faces. Kind of sad, honestly.
Make extra. Seriously. Double the recipe if you are serving more than four people. These disappear fast. I once made a single batch for a party of eight and they were gone in under five minutes. Now I always make at least two batches. If you are planning a full Halloween spread, these pair perfectly with spooky no-bake spider web cheesecake bars for a complete sweet and savory lineup.
Variations and Adaptations
One of the best things about this recipe is how easy it is to change up. Here are some variations I have tried and loved.
Cheese-stuffed mummies: Before wrapping, slice the hot dog lengthwise almost all the way through and stuff a thin strip of cheddar or mozzarella cheese inside. The cheese melts as it bakes and creates a gooey surprise inside. My kids went crazy for these.
Turkey or chicken dogs: Swap in your favorite poultry hot dogs for a lighter version. They work exactly the same way. Just check the package because some turkey dogs are thinner and may need less bake time.
Puff pastry version: Use frozen puff pastry instead of crescent dough. Thaw it, cut it into strips, and wrap the same way. Puff pastry gives a flakier, more buttery result. It takes a few extra minutes to bake, about 15 minutes at 400°F.
Veggie dog option: Plant-based hot dogs work surprisingly well here. Just make sure to get the kind that holds its shape during baking. Some veggie dogs get mushy, so look for firmer brands like Field Roast or Lightlife.
Spicy mummies: Brush the hot dogs with a little hot sauce or sriracha before wrapping. The heat cuts through the buttery dough nicely. I did this for a Halloween party for adults and they were a hit.
Breakfast mummies: Use breakfast sausage links instead of hot dogs. Wrap with crescent dough and bake. Serve with maple syrup for dipping. I made these for a Halloween morning breakfast and they were gone before the coffee finished brewing.
Serving and Storage Suggestions
These mummy hot dog bites are best served warm, straight from the oven. The dough is flaky, the hot dog is juicy, and the mustard faces are still perfectly in place. I like to arrange them on a platter with a small bowl of ketchup and mustard for dipping. They look adorable lined up like a little mummy army.
For a Halloween party, serve them alongside other finger foods like easy Halloween charcuterie board for a spread that covers all the bases. The salty, savory mummies balance out the sweet treats perfectly.
Storage: Leftover mummies can be stored in an airtight container in the refrigerator for up to 3 days. The dough will soften over time, so they will not be as crispy as fresh ones. To reheat, pop them in a 350°F oven for 5-7 minutes or until warmed through. The microwave works in a pinch but the dough will be soft, not crispy.
Freezing: You can freeze the unbaked mummies. Arrange them on a baking sheet and freeze until solid, then transfer to a freezer bag. They will keep for up to 2 months. Bake from frozen, adding 3-5 minutes to the bake time. I have done this for last-minute Halloween emergencies and it works beautifully.
Make-ahead tip: You can assemble the mummies up to 24 hours in advance. Keep them covered in the refrigerator on the baking sheet. Bake just before serving. The dough might be slightly less flaky than fresh, but still delicious.
Nutritional Information and Benefits
Let me be honest here. These are not health food. They are a fun Halloween treat. But here is the nutritional breakdown per mummy (based on using standard beef hot dogs and crescent dough):
- Calories: approximately 180-200 per mummy
- Protein: 7-8 grams
- Carbohydrates: 12-14 grams
- Fat: 12-14 grams
- Sodium: 450-500 mg
If you are watching your sodium, turkey dogs can cut that by about 100 mg per serving. Using low-fat crescent dough also reduces the fat content slightly. But honestly, these are meant to be a once-in-a-while treat. They are perfect for Halloween because they are fun, quick, and satisfying without being overly indulgent.
The hot dogs provide a decent amount of protein, which helps keep kids full during a long night of trick-or-treating. The crescent dough offers quick energy for all that walking. And the mustard adds a tiny bit of turmeric, which has anti-inflammatory properties. Every little bit counts, right?
Conclusion
These easy mummy hot dog Halloween bites have become a tradition in our house, and I have a feeling they will in yours too. They are the kind of recipe that proves you do not need fancy ingredients or complicated techniques to make something memorable. Just three ingredients, a little creativity, and twenty minutes.
I love that this recipe brings people together. Whether it is the kids helping wrap the dough strips or the adults sneaking extras from the platter, there is something about these little mummies that makes everyone smile. And honestly, that is what Halloween is all about. Fun, a little bit spooky, and completely delicious.
I would love to hear how yours turn out. Did you add cheese? Use turkey dogs? Make funny faces with the mustard? Drop a comment below and let me know. And if you have your own Halloween snack tradition, share that too. I am always looking for new ideas to add to our rotation. Happy Halloween, and happy snacking!
Frequently Asked Questions
Can I make these mummy hot dog bites ahead of time?
Yes, you can assemble them up to 24 hours in advance. Keep them covered in the refrigerator on the baking sheet. Bake just before serving for the best texture. You may need to add 2-3 minutes to the bake time if they go in cold.
Can I use puff pastry instead of crescent rolls?
Absolutely. Thaw the puff pastry, cut it into thin strips, and wrap the same way. Bake at 400°F for about 15 minutes. Puff pastry gives a flakier, more buttery result. Just watch them closely because puff pastry browns faster than crescent dough.
What can I use instead of mustard for the eyes?
You have several options. Candy eyes work great if you stick them on with a tiny dab of frosting or mustard. You can also use small dots of ketchup, sriracha, or even melted cheese. For a sweeter version, use frosting and sprinkles.
How do I keep the dough from unrolling during baking?
Make sure the seam side is facing down on the baking sheet. You can also press the end of the dough strip gently to seal it. If the dough is particularly sticky, use a toothpick to secure the end. Remove the toothpick before serving.
Can I make these in an air fryer?
Yes, you can. Preheat the air fryer to 350°F. Place the mummies in a single layer in the basket, leaving space between each one. Cook for 6-8 minutes, checking at the 6-minute mark. The air fryer makes them extra crispy on the outside.
Pin This Recipe!
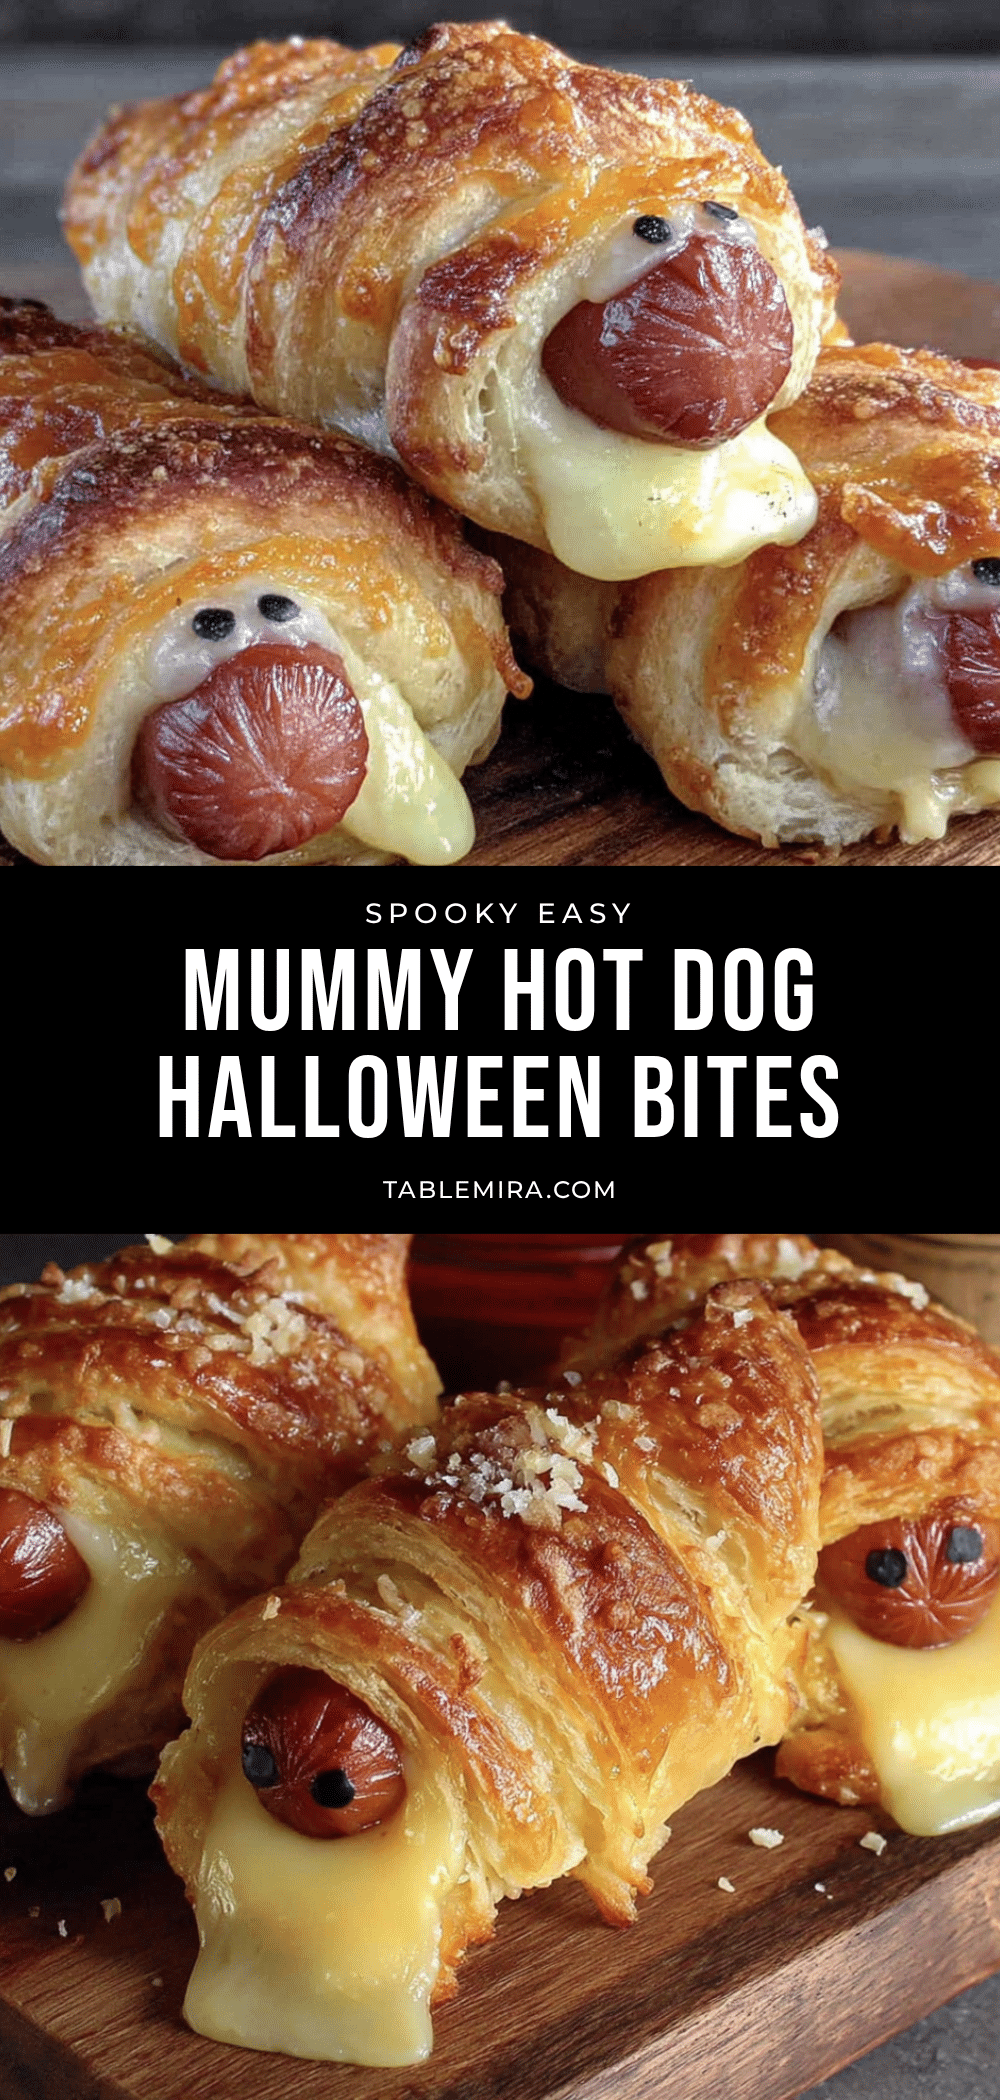
Easy Mummy Hot Dog Bites: Best Halloween Snack for Kids

These easy mummy hot dog bites are the perfect Halloween snack, ready in just 20 minutes with only three ingredients. Flaky crescent dough wraps around juicy hot dogs to create a fun, kid-friendly treat that disappears fast at any party.
- Prep Time: 10 minutes
- Cook Time: 12 minutes
- Total Time: 22 minutes
- Yield: 8 servings (1 mummy per serving, or 16-24 bite-sized mummies) 1x
- Category: Appetizer
- Cuisine: American
Ingredients
- 1 package (8 count) hot dogs (standard beef, turkey, or chicken)
- 1 can (8 ounces) crescent roll dough (e.g., Pillsbury)
- Mustard or candy eyes for decoration
- 1 egg (for egg wash, optional)
- 1 tablespoon water (for egg wash, optional)
- Sesame seeds or poppy seeds (optional)
Instructions
- Preheat your oven to 375°F (190°C). Line a baking sheet with parchment paper or a silicone mat.
- Unroll the crescent dough and separate it into 8 pre-cut triangles along the perforated lines. Lay them flat on a cutting board.
- Using a sharp knife or pizza cutter, slice each triangle lengthwise into 3 or 4 thin strips, about 1/2 inch wide.
- If hot dogs are longer than the dough strips, cut them in half crosswise or into thirds for smaller bite-sized pieces.
- Take one strip of dough and wrap it around a hot dog piece diagonally, leaving a small gap at the top for the face. Overlap the dough slightly and press the end gently to seal. Repeat with all hot dog pieces, using 2-3 strips per piece.
- Place the wrapped mummies about 1 inch apart on the prepared baking sheet, seam side down.
- In a small bowl, whisk together 1 egg and 1 tablespoon of water. Brush this egg wash lightly over each mummy. Sprinkle with sesame seeds or poppy seeds if desired.
- Bake for 10-12 minutes, until the dough is golden brown and puffed. Check at 10 minutes to avoid overbaking.
- Let the mummies cool for 2-3 minutes on the baking sheet. Use a toothpick to dot on mustard for eyes, or press candy eyes into a tiny dab of mustard or frosting.
- Serve immediately while warm and flaky.
Notes
Keep the dough cold for easier handling. Cut strips thin (about 1/2 inch) for a better mummy look. Do not overbake; start checking at 10 minutes. Let cool slightly before adding mustard faces to prevent running. Double the recipe for larger crowds. Can be assembled up to 24 hours in advance and refrigerated. Freeze unbaked mummies for up to 2 months; bake from frozen, adding 3-5 minutes.
Nutrition
- Serving Size: 1 mummy (standard si
- Calories: 190
- Sugar: 2
- Sodium: 475
- Fat: 13
- Saturated Fat: 4.5
- Carbohydrates: 13
- Protein: 7.5
Keywords: mummy hot dog bites, Halloween snack, easy Halloween recipe, kid-friendly snack, crescent roll hot dogs, spooky appetizer


