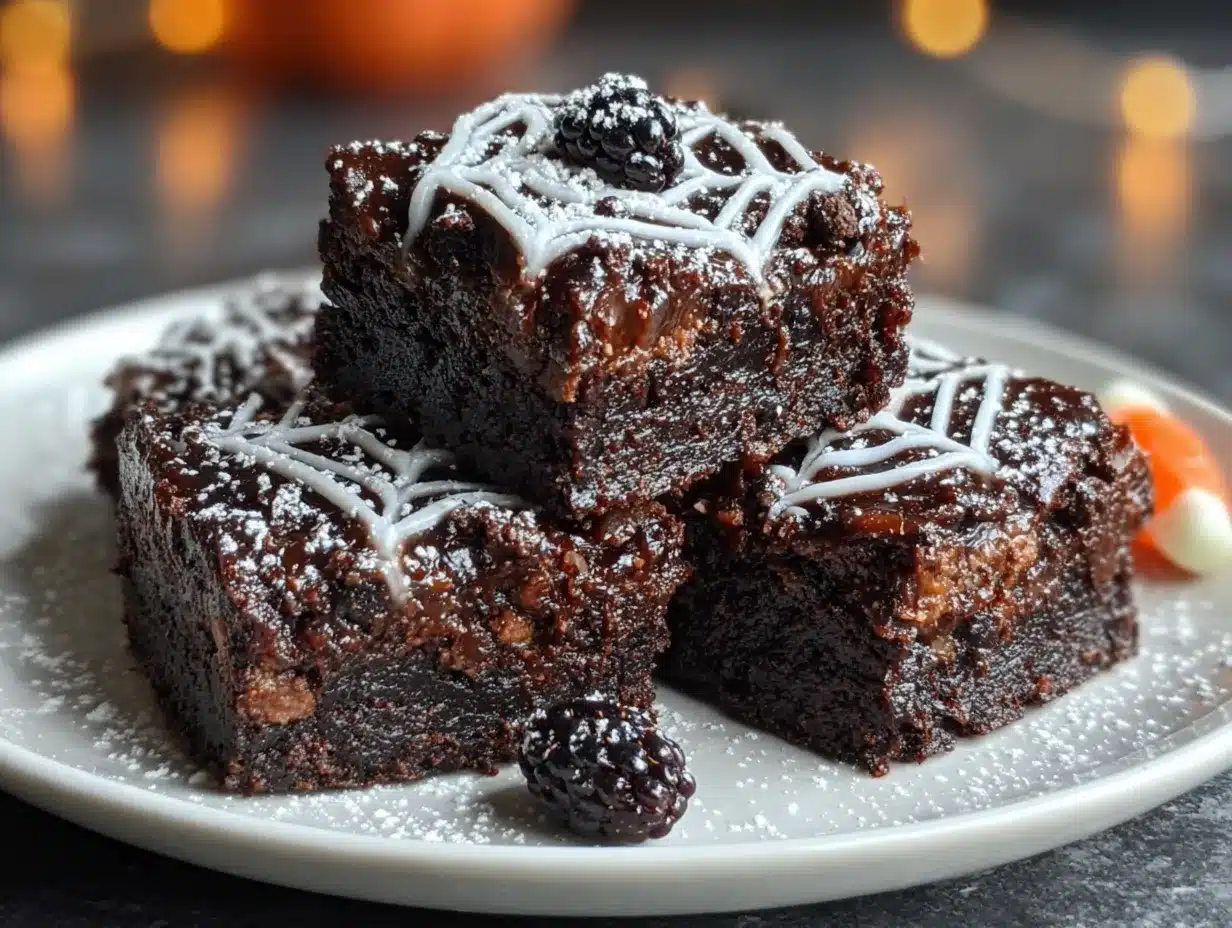
A plate of something white and swirly sat on the counter. My neighbor’s kid peeked over my shoulder and whispered, “Is that a spider web? Can I eat it?” That was the moment I knew these bars were going to be a problem — the good kind. I hadn’t even snapped a proper photo yet, and already a seven-year-old was negotiating for a corner piece.
Honestly, this recipe started as a bit of a panic project. I had volunteered to bring dessert to a Halloween block party, and then promptly forgot until the night before. Store-bought cookies felt boring, and I definitely didn’t have time for a layered cake with fancy frosting. I needed something that looked like I spent hours on it but actually came together in the time it takes to watch one episode of a sitcom. That’s when the idea for these Spooky No-Bake Spider Web Cheesecake Bars hit me.
I wanted a dessert that was undeniably festive but didn’t taste like pure sugar and food coloring. A creamy, tangy cheesecake filling on a buttery crust, all topped with a dramatic spider web design that looks way harder than it is. It’s the kind of trick that makes you feel like a pastry wizard, even when you’re just swirling a toothpick around. And the best part? No oven required. These bars are the reason I showed up to that party looking calm, cool, and collected — even if my kitchen looked like a flour bomb went off.
Why You’ll Love This Recipe
Let’s be real for a second. Halloween desserts can be a total letdown. You either get something that looks amazing but tastes like cardboard, or something delicious that looks like a blob. These bars break that cycle. They are the perfect marriage of creepy-cute presentation and genuinely good flavor.
- No Oven Required: This is the biggest win. You don’t need to turn on the oven, which is perfect for those still-warm October days or when your oven is already full of other spooky snacks.
- Simple Ingredients: You probably have most of this stuff in your pantry right now. Cream cheese, butter, sugar, vanilla, and some chocolate. No weird gelatin or hard-to-find candy melts.
- Perfect for Halloween Parties: These bars are a total showstopper on any dessert table. They look intricate and impressive, but they are secretly one of the easiest things you can make.
- Crowd-Pleaser: I’ve made these for kids and adults, and they disappear just as fast from both groups. The creamy texture and buttery crust are universally loved.
- Make-Ahead Magic: You can make these a day or two in advance. The flavors actually get better as they chill, and it frees you up on the day of your party to focus on other things (like carving that pumpkin or mixing up a creamy pumpkin cold foam latte).
This isn’t just another Halloween dessert. It’s the one that gets you the “Oh my gosh, you MADE these?” reaction. It’s the one that feels special without the stress. It’s the one you’ll find yourself making year after year, not just for Halloween, but for any occasion that calls for a little bit of spooky fun.
What Ingredients You Will Need
This recipe uses simple, everyday ingredients to build something that looks and tastes far more complex than its parts. Here’s what you need to grab from your kitchen.
For the Crust
- 2 cups (200g) graham cracker crumbs – You can buy these pre-crushed or crush about 14-16 full graham cracker sheets yourself in a food processor or a zip-top bag with a rolling pin.
- 1/2 cup (113g) unsalted butter, melted – This binds the crust together and gives it that rich, buttery flavor. I prefer salted butter for a little contrast, but unsalted works great too.
- 1/4 cup (50g) granulated sugar – Just a touch of sweetness to balance the salty butter.
- 1/4 teaspoon salt – Don’t skip this. It makes the crust taste like a real cookie, not just sweet crumbs.
For the Cheesecake Filling
- 16 oz (450g) full-fat cream cheese, softened – This is non-negotiable for the creamiest texture. Low-fat cream cheese can make the filling too runny. Let it sit out for at least 30 minutes before you start.
- 1/2 cup (100g) granulated sugar – Sweetens the filling without making it cloying.
- 1 teaspoon vanilla extract – Pure vanilla extract adds a warmth that imitation just can’t match.
- 1 cup (240ml) heavy whipping cream – This is what gives the filling that light, mousse-like texture. Make sure it’s very cold.
- 1/4 cup (30g) powdered sugar – Helps stabilize the whipped cream and adds a silky sweetness.
For the Spider Web Topping
- 1/2 cup (90g) semi-sweet chocolate chips – I recommend using a brand like Ghirardelli or Guittard for the best melt and shine.
- 2 tablespoons (30ml) heavy whipping cream – This helps create a smooth, drizzle-able chocolate ganache.
- Optional: 1 tablespoon coconut oil – This thins the chocolate just a bit more, making it easier to create those delicate spider web lines.
That’s it. No crazy ingredients, no last-minute runs to a specialty store. Just real food that comes together to make something magical.
Equipment Needed
You don’t need a fancy kitchen to pull these off. Here’s what you’ll want to have on hand.
- 9×9-inch square baking pan – This is the perfect size for thick, satisfying bars. An 8×8 pan will also work, but your bars will be slightly thicker and may need a few more minutes to set.
- Parchment paper – Line your pan with two overlapping strips, leaving some overhang on the sides. This creates “handles” that let you lift the entire block of cheesecake out cleanly.
- Electric hand mixer or stand mixer – You need to whip the cream and beat the cream cheese until smooth. A whisk and some elbow grease can work, but you’ll be tired.
- Medium mixing bowls – One for the crust, one for the filling, and one for the chocolate.
- Rubber spatula – For scraping every last bit of that creamy filling into the pan.
- Toothpick or skewer – This is your spider web drawing tool. A toothpick works great for the fine lines.
- Piping bag or small zip-top bag – To drizzle the chocolate. A zip-top bag with a tiny corner snipped off works perfectly.
If you have a food processor, it makes crushing the graham crackers a breeze, but a rolling pin and a sturdy bag do the job just fine. I’ve made these in a tiny apartment kitchen with a hand mixer and a butter knife, and they came out perfect.
Preparation Method
Alright, let’s get to it. This is easier than you think, I promise.
- Prep Your Pan: Line your 9×9-inch baking pan with parchment paper, leaving a 2-inch overhang on two opposite sides. This is your secret weapon for lifting the bars out later. Set it aside.
- Make the Crust: In a medium bowl, combine the graham cracker crumbs, 1/4 cup sugar, and 1/4 teaspoon salt. Pour in the melted butter and stir with a fork until all the crumbs are moistened and look like wet sand. Dump the mixture into your prepared pan and press it down firmly and evenly. I use the bottom of a flat measuring cup to really pack it in. Pop this in the fridge to set while you make the filling.
- Whip the Cream: In a large, clean bowl (or the bowl of your stand mixer), combine the cold heavy cream and the 1/4 cup of powdered sugar. Beat on medium-high speed until stiff peaks form. This means when you lift the beaters, the cream stands up straight without flopping over. Be careful not to over-whip, or you’ll end up with butter. Set this aside.
- Make the Cheesecake Filling: In another large bowl, beat the softened cream cheese with the 1/2 cup of granulated sugar and the vanilla extract until it’s completely smooth and fluffy. There should be no lumps. Scrape down the sides of the bowl a couple of times. This is important for a silky texture.
- Fold It Together: Take about a third of your whipped cream and stir it into the cream cheese mixture to lighten it up. Then, gently fold in the remaining whipped cream with your rubber spatula. Fold until just combined — you don’t want to deflate all that air you just whipped in. The mixture should be thick, creamy, and cloud-like.
- Assemble the Base: Spoon the cheesecake filling onto your chilled crust. Spread it into an even layer, smoothing the top with your spatula. Give the pan a few gentle taps on the counter to release any air bubbles.
- Make the Spider Web Ganache: Place the chocolate chips and 2 tablespoons of heavy cream in a small microwave-safe bowl. Microwave in 20-second bursts, stirring after each, until the chocolate is completely melted and smooth. If you’re using the coconut oil, stir it in now. Let it cool for about 2 minutes so it doesn’t melt your cheesecake.
- Create the Web: Spoon the melted chocolate into your piping bag or zip-top bag and snip off a tiny corner. Starting from the center of the cheesecake, pipe a small dot of chocolate. Then, pipe concentric circles around it, like a bullseye. Don’t worry about being perfect — a little wobble makes it look more organic.
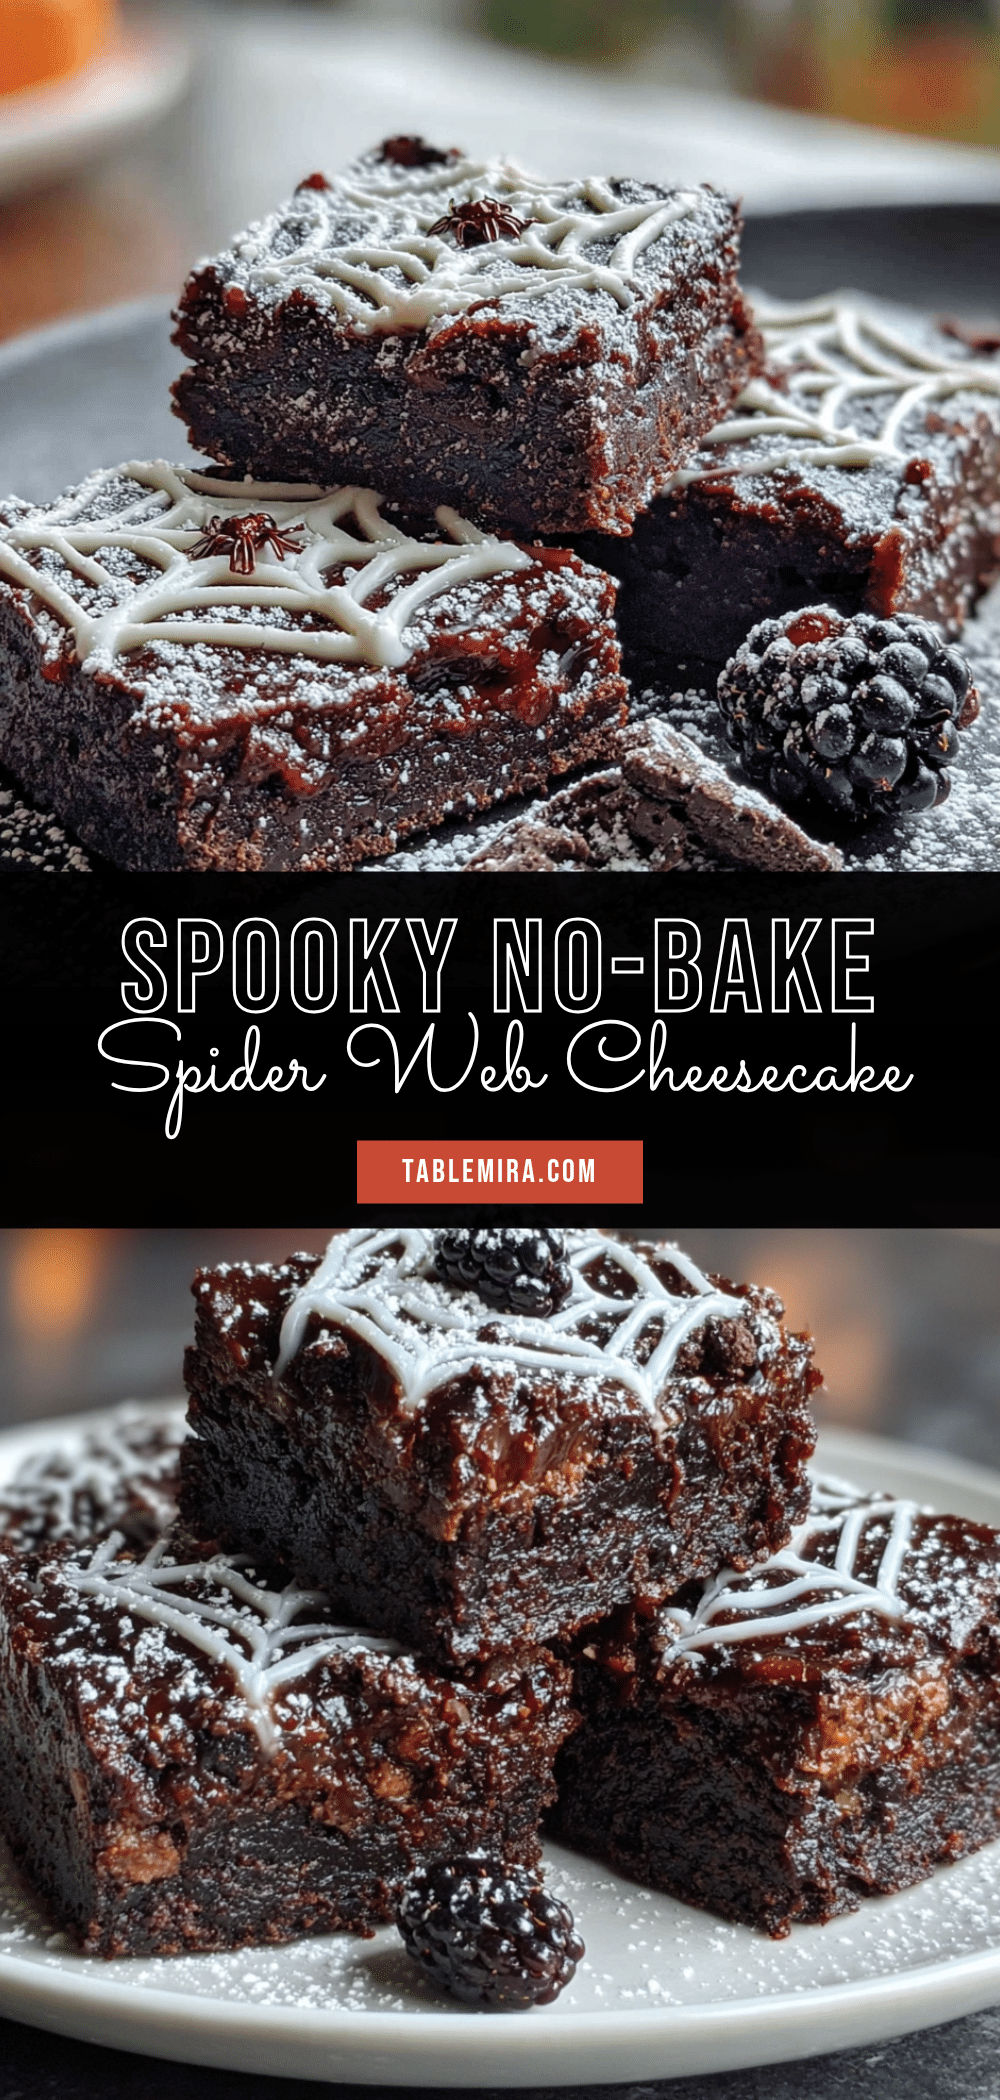
- The Swirl Trick: Now for the magic. Take your toothpick or skewer and, starting from the center dot, drag it outward through all the circles towards the edge of the pan. Wipe the toothpick clean. Then, move over about an inch and drag another line from the center to the edge. Repeat all the way around the cheesecake, spacing your lines evenly. You’ll see the spider web pattern appear instantly.
- Chill to Set: Place the pan in the refrigerator for at least 4 hours, but preferably overnight. This allows the cheesecake to set completely so you get clean, sharp slices. Patience is key here!
- Slice and Serve: Once fully chilled and firm, use the parchment paper overhang to lift the entire block out of the pan. Place it on a cutting board. Use a sharp, large knife to slice it into bars. For the cleanest cuts, wipe the knife clean between each slice.
Cooking Tips & Techniques
I’ve made these bars about a dozen times now, and I’ve learned a few things the hard way so you don’t have to.
Don’t rush the cream cheese softening. I know, it’s tempting to pop it in the microwave for 10 seconds. But that can create hot spots that make your filling lumpy. Just let it sit on the counter. While you crush the graham crackers and make the crust, it’s getting perfect.
Cold cream is happy cream. For the whipped cream, make sure your bowl and beaters are also cold. I sometimes pop my metal mixing bowl in the freezer for 10 minutes before I start. It makes a huge difference in how quickly the cream whips up.
The toothpick is your best friend. When you’re creating the spider web, the key is to wipe the toothpick clean after every single line you drag. If you don’t, you’ll just smear chocolate everywhere and lose the crisp, clean web effect. I keep a paper towel right next to me and wipe after each pull.
Let the ganache cool. If you pour hot ganache onto the cold cheesecake, it will sink in and create a mess instead of sitting on top. Let it cool for those 2-3 minutes until it’s still liquid but no longer hot to the touch.
Patience for the slice. I know you want to eat them immediately. But if you cut into them before they’ve fully set, you’ll get a goopy, messy bar. The 4-hour minimum is real. Overnight is even better. The texture firms up beautifully and the flavors meld together.
Variations & Adaptations
This recipe is a great base for all kinds of spooky fun. Here are some ways I’ve mixed it up.
- Chocolate Crust: Swap the graham crackers for chocolate wafer cookies or Oreo crumbs (filling removed) for a darker, more decadent base. It gives the whole bar a richer, more intense flavor.
- Pumpkin Spice Version: Add 1/2 cup of pumpkin puree and 1 teaspoon of pumpkin pie spice to the cream cheese mixture before folding in the whipped cream. This creates a beautiful orange-tinted, fall-flavored filling that pairs perfectly with the chocolate web. It’s like a pumpkin cream cheese muffin in bar form!
- Peanut Butter Swirl: Before adding the chocolate web, drop spoonfuls of melted peanut butter on top of the cheesecake filling and swirl it in with a knife. Then add your chocolate spider web on top. The salty-sweet combo is incredible.
- White Chocolate Web: Use white chocolate chips instead of semi-sweet for a ghostly, pale spider web. You can even add a drop of black gel food coloring to the white chocolate to make a true gray web.
- Gluten-Free Adaptation: This recipe is naturally gluten-free if you use certified gluten-free graham crackers or gluten-free vanilla wafers for the crust. Everything else is already gluten-free.
Serving & Storage Suggestions
These bars are best served cold, straight from the fridge. The texture is firm and creamy, almost like a cheesecake mousse. I like to cut them into 9 large squares or 16 smaller bite-sized pieces for a party.
Presentation: For a full spooky effect, arrange the bars on a black platter or a dark serving board. You can add a few fake plastic spiders on top for a fun, creepy touch. A dusting of powdered sugar around the edges looks like a light frost.
What to Serve With Them: A glass of cold milk is the classic pairing. For an adult gathering, they’re fantastic with a hot cup of coffee or a creamy pumpkin cold foam latte. The tangy cheesecake is a great counterpoint to the warm, bitter notes of coffee.
Storage: Store any leftover bars in an airtight container in the refrigerator. They will stay fresh for up to 5 days. The crust will soften slightly over time, but the flavor actually gets better.
Freezing: These bars freeze beautifully! Once they are fully set, cut them into bars and place them on a baking sheet lined with parchment paper. Freeze for 1 hour, or until solid. Then transfer the frozen bars to a freezer-safe bag or container. They will keep for up to 3 months. Thaw them in the refrigerator overnight before serving.
Nutritional Information & Benefits
Let’s be honest, this is a dessert, not a health food. But knowing what’s in it can help you enjoy it mindfully. The following is an estimate for one large bar (1/9th of the recipe).
| Nutrient | Amount |
|---|---|
| Calories | ~450 |
| Fat | 32g |
| Carbohydrates | 35g |
| Protein | 6g |
| Sugar | 25g |
Key Ingredient Benefits: Cream cheese provides a good amount of calcium and protein. The heavy cream adds richness and healthy fats that help keep you full. The graham cracker crust offers a bit of whole grain fiber depending on the brand you use.
Dietary Considerations: This recipe is vegetarian. To make it gluten-free, simply use certified gluten-free graham crackers. It contains dairy and gluten (unless adapted). It is nut-free as written, making it safe for school parties where nut allergies are a concern.
Conclusion
These Spooky No-Bake Spider Web Cheesecake Bars are the Halloween dessert you’ve been looking for. They are impressive, delicious, and almost laughably easy to make. The look on people’s faces when they realize you made that intricate spider web with a toothpick is priceless. It’s a little bit of kitchen magic that anyone can pull off.
I love this recipe because it proves you don’t need to be a professional baker to create something special. It’s a dessert that brings joy without bringing stress. It’s the kind of thing you make when you want to show up for the party without spending all day in the kitchen.
Now I want to see your creations! If you make these bars, leave a comment below and tell me how they turned out. Did you add any fun variations? Did the kids go wild for them? Share a photo on social media and tag me — I love seeing your spooky masterpieces. Happy Halloween, and happy baking (or, you know, no-baking)!
Frequently Asked Questions
Can I use a different pan size?
Yes! You can use an 8×8 pan for slightly thicker bars, but you may need to chill them for an extra hour to ensure they set properly. You can also double the recipe and use a 9×13 pan for a larger crowd.
My chocolate seized up when I melted it. What happened?
This usually happens if a tiny bit of water gets into the chocolate or if you overheat it. Make sure your bowl and spoon are completely dry. Always microwave in short bursts and stir well. If it seizes, you can try stirring in a teaspoon of vegetable oil or coconut oil to bring it back.
Can I make these dairy-free?
You can! Use a dairy-free cream cheese alternative (like Kite Hill or Tofutti), a plant-based butter for the crust, and full-fat coconut cream (the solid part from a can of coconut milk) instead of heavy cream. The texture will be slightly different but still delicious.
How far in advance can I make these?
These bars are perfect for making ahead. You can prepare them up to 2 days in advance and keep them covered in the refrigerator. They also freeze well for up to 3 months. Just thaw in the fridge before serving.
My spider web didn’t look clean. What did I do wrong?
The most common mistake is not wiping the toothpick clean between each pull. You must wipe it after every single line. Also, make sure your chocolate ganache isn’t too thick. If it is, add another teaspoon of cream to thin it out. Practice on a piece of parchment paper first if you’re nervous!
Pin This Recipe!
Spooky No-Bake Spider Web Cheesecake Bars
These creamy, no-bake cheesecake bars feature a buttery graham cracker crust and a dramatic spider web chocolate topping. They’re the perfect easy Halloween dessert that looks impressive but comes together in no time.
- Prep Time: 20 minutes
- Cook Time: 0 minutes
- Total Time: 4 hours 20 minutes (includes chilling)
- Yield: 9 large bars or 16 small bars 1x
- Category: Dessert
- Cuisine: American
Ingredients
- 2 cups (200g) graham cracker crumbs
- 1/2 cup (113g) unsalted butter, melted
- 1/4 cup (50g) granulated sugar
- 1/4 teaspoon salt
- 16 oz (450g) full-fat cream cheese, softened
- 1/2 cup (100g) granulated sugar
- 1 teaspoon vanilla extract
- 1 cup (240ml) heavy whipping cream
- 1/4 cup (30g) powdered sugar
- 1/2 cup (90g) semi-sweet chocolate chips
- 2 tablespoons (30ml) heavy whipping cream
- 1 tablespoon coconut oil (optional)
Instructions
- Line a 9×9-inch baking pan with parchment paper, leaving a 2-inch overhang on two opposite sides. Set aside.
- In a medium bowl, combine graham cracker crumbs, 1/4 cup sugar, and 1/4 teaspoon salt. Pour in melted butter and stir until all crumbs are moistened. Press mixture firmly into the prepared pan. Refrigerate while making the filling.
- In a large bowl, beat cold heavy cream and powdered sugar on medium-high speed until stiff peaks form. Set aside.
- In another large bowl, beat softened cream cheese, 1/2 cup granulated sugar, and vanilla extract until smooth and fluffy.
- Fold about one-third of the whipped cream into the cream cheese mixture to lighten it. Then gently fold in the remaining whipped cream until just combined.
- Spoon the cheesecake filling onto the chilled crust and spread into an even layer. Tap the pan gently on the counter to release air bubbles.
- In a small microwave-safe bowl, combine chocolate chips and 2 tablespoons heavy cream. Microwave in 20-second bursts, stirring after each, until melted and smooth. Stir in coconut oil if using. Let cool for 2 minutes.
- Spoon the melted chocolate into a piping bag or zip-top bag and snip off a tiny corner. Pipe a small dot in the center of the cheesecake, then pipe concentric circles around it.
- Using a toothpick or skewer, start from the center dot and drag outward through all the circles toward the edge. Wipe the toothpick clean. Repeat every inch around the cheesecake to create a spider web pattern.
- Refrigerate for at least 4 hours, preferably overnight, until fully set.
- Use the parchment paper overhang to lift the cheesecake out of the pan. Slice into bars with a sharp knife, wiping the knife clean between cuts.
Notes
For clean spider web lines, wipe the toothpick clean after each pull. Let the ganache cool slightly before piping to prevent it from sinking into the cheesecake. For best results, chill overnight.
Nutrition
- Serving Size: 1 large bar (1/9 of
- Calories: 450
- Sugar: 25
- Sodium: 280
- Fat: 32
- Saturated Fat: 18
- Carbohydrates: 35
- Fiber: 1
- Protein: 6
Keywords: Halloween dessert, no-bake cheesecake, spider web, cheesecake bars, easy Halloween recipe


