I did not trust peppermint mochas. For years, they felt like a marketing trick dressed up in holiday cheer. You know the ones—sickly sweet, artificial mint flavor that tastes more like toothpaste than actual peppermint, and a coffee base that seems like an afterthought. I walked past the seasonal signs every November with a shrug.
Then my sister showed up at my door on a freezing December afternoon with two paper cups. She shoved one into my hands and said, “Just try it. I made it myself.” I took a sip, and honestly? I had to sit down. The peppermint was real, subtle, and natural. The chocolate was rich but not cloying. And the coffee? It was actually the star of the show. That moment changed everything for me.
That homemade version ruined store-bought for me forever. I spent the next week in my kitchen, tweaking ratios and testing different chocolate-to-coffee balances until I landed on something that felt just right. This Easy Homemade Peppermint Mocha Recipe is the result of that obsession. It’s the kind of drink that makes you want to wrap your hands around the mug and stay still for a minute. No hype. Just warmth.
Why You’ll Love This Recipe
This isn’t just another coffee drink you make once and forget about. I’ve tested this recipe more times than I care to admit, and each batch taught me something new about balance. Here’s what makes it stand out from the usual holiday coffee shop lineup.
- Perfectly Balanced Flavor: The peppermint doesn’t overpower the coffee, and the chocolate doesn’t drown everything in sweetness. Every sip has a clear voice.
- Simple Ingredients: No fancy syrups or obscure extracts needed. Most of what you need is probably already in your pantry.
- Quick & Easy: From start to finish, this takes about 10 minutes. Faster than waiting in that drive-thru line.
- Customizable Sweetness: You control how much sugar goes in. Want it less sweet? Easy. Want it indulgent? Go for it.
- Budget-Friendly: One batch costs a fraction of what you’d pay at a coffee shop. And it tastes better, honestly.
- Crowd-Pleaser: I’ve served this at holiday gatherings and watched people go back for seconds. It works for cozy mornings and festive parties alike.
What makes this recipe different from the rest is the technique. Most recipes dump everything into a mug and call it done. I take a slightly different approach that brings out the chocolate and peppermint without muting the coffee. It’s a small change, but it makes a big difference. Trust me on this one.
What Ingredients You Will Need
This recipe uses simple, everyday ingredients to create something that feels special. No weird additives or hard-to-find components. Just real food and drink staples that come together beautifully.
- Strong Brewed Coffee (1 cup / 240 ml): Use a dark roast or espresso for best results. The coffee flavor needs to hold its own against the chocolate and mint. I prefer a French press or pour-over for cleaner taste.
- Whole Milk (1 cup / 240 ml): Full-fat milk gives the creamiest texture. You can use 2% or oat milk if you prefer, but whole milk really makes this sing. (I use organic whole milk from a local dairy and it makes a noticeable difference.)
- Unsweetened Cocoa Powder (2 tablespoons / 10 g): Use a high-quality cocoa like Ghirardelli or Valrhona. The better your cocoa, the richer your mocha. Dutch-processed cocoa works best here for a smoother flavor.
- Granulated Sugar (2 tablespoons / 25 g): Adjust this to your taste. Start with 2 tablespoons and go from there. You can also use honey or maple syrup if you prefer natural sweeteners.
- Pure Peppermint Extract (1/4 teaspoon / 1 ml): This is crucial. Do not use peppermint oil—it’s too strong and can ruin the drink. Pure extract gives you that clean, natural mint flavor without the artificial aftertaste.
- Vanilla Extract (1/2 teaspoon / 2 ml): Adds depth and rounds out the chocolate and mint. Don’t skip this—it’s the secret to making everything taste cohesive.
- Pinch of Salt: A tiny pinch enhances all the flavors and balances the sweetness. You won’t taste it directly, but you’ll notice if it’s missing.
- Whipped Cream (for topping): Optional but highly recommended. Homemade whipped cream is best, but store-bought works in a pinch.
- Crushed Peppermint Candies (for garnish): Adds a festive crunch and visual appeal. You can also use candy canes crushed into small pieces.
Substitution Notes: For a dairy-free version, use oat milk or almond milk. Coconut milk adds a subtle sweetness that works well. If you’re avoiding caffeine, use decaf coffee or a chicory-based coffee substitute. For a sugar-free option, use stevia or monk fruit sweetener—just adjust to taste since they vary in sweetness levels.
Equipment Needed
You don’t need fancy barista tools for this recipe. Most of what you need is probably already in your kitchen. Here’s the full list:
- Saucepan (small to medium): For heating the milk and chocolate mixture. A non-stick pan works well and makes cleanup easier.
- Whisk: Essential for combining the cocoa powder smoothly without lumps. A silicone whisk is my favorite because it doesn’t scratch pans.
- Measuring Cups and Spoons: Precision matters here, especially with the peppermint extract. Too much and your drink tastes like mouthwash.
- Mug (12-16 oz capacity): Pick your favorite cozy mug. The size matters because you need room for the coffee, milk mixture, and toppings.
- Small Bowl: For crushing peppermint candies. A ziplock bag and rolling pin work too if you don’t have a mortar and pestle.
- Hand Frother or Blender (optional): For frothing the milk if you want that cafe-style foam. A French press can also work for frothing warm milk.
- Sieve or Fine-Mesh Strainer (optional): For straining out any cocoa lumps if your whisking isn’t perfect. Not strictly necessary but helpful for a silky texture.
I’ve made this recipe with just a saucepan and a whisk more times than I can count. The fancy tools are nice, but they’re not required. If you have a microwave, you can even heat the milk in a microwave-safe bowl and skip the stovetop entirely.
Preparation Method

This comes together fast, so I recommend having all your ingredients measured and ready before you start. Trust me, hunting for the peppermint extract while your milk is boiling over is not fun. Ask me how I know.
- Brew your coffee. Make 1 cup of strong coffee using your preferred method. I use a French press with dark roast beans ground medium-coarse. If you’re using an espresso machine, pull a double shot and dilute with hot water to make 1 cup. Set the coffee aside while you prepare the milk mixture.
- Combine dry ingredients. In your saucepan, whisk together the cocoa powder, sugar, and salt. This step prevents lumps from forming later. Make sure there are no visible clumps of cocoa powder before you add any liquid.
- Add a splash of milk. Pour about 2 tablespoons of milk into the saucepan with the dry ingredients. Whisk vigorously to form a smooth paste. This is the most important step—if you add all the milk at once, you’ll end up with lumpy cocoa. The paste method guarantees a silky texture.
- Add remaining milk. Slowly pour in the rest of the milk while whisking continuously. The mixture should look smooth and uniform at this point.
- Heat the milk mixture. Place the saucepan over medium heat. Whisk frequently as it warms up. You want it hot but not boiling—small bubbles around the edges are your cue. This usually takes about 3-4 minutes. Do not walk away during this step. Milk can go from perfect to scorched in seconds.
- Remove from heat and add flavorings. Take the saucepan off the stove. Stir in the vanilla extract and peppermint extract. Taste it here and adjust if needed. Want more mint? Add another 1/8 teaspoon. Want it sweeter? Stir in another teaspoon of sugar.
- Combine with coffee. Pour the brewed coffee into your mug. Slowly stream in the hot peppermint chocolate milk mixture. Stir gently to combine. The color should be a rich, deep brown with a slight reddish hue from the cocoa.
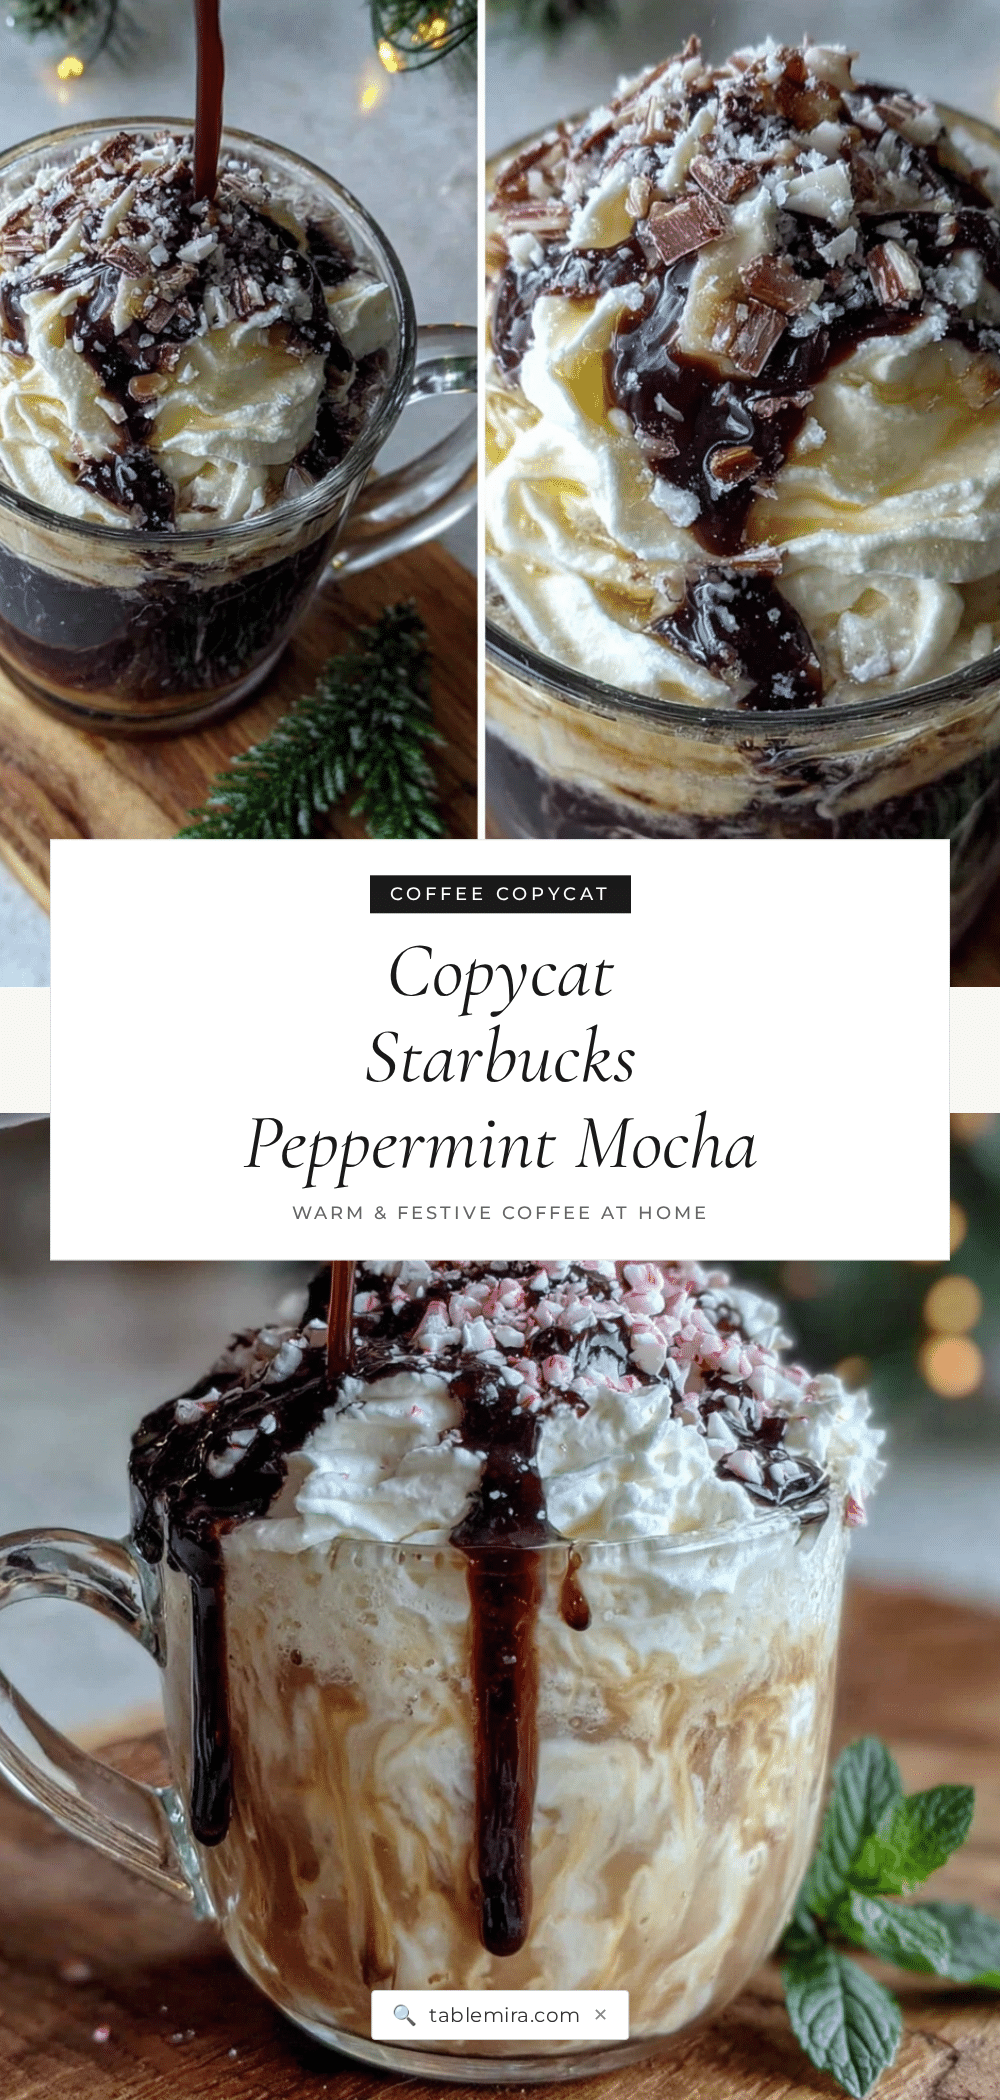
- Top and garnish. Add a generous dollop of whipped cream on top. Sprinkle crushed peppermint candies over the cream. If you’re feeling extra fancy, drizzle a little chocolate syrup over everything.
- Serve immediately. This drink is best enjoyed hot, right after preparation. The whipped cream will start to melt into the coffee, creating a beautiful marbled effect. Take a moment to enjoy the aroma before your first sip.
Pro tip from experience: If you’re making this for a crowd, you can multiply the ingredients and keep the milk mixture warm in a thermos. Just reheat the coffee separately and combine when ready to serve. I did this for a holiday brunch and it was a lifesaver.
Cooking Tips & Techniques
I’ve made this recipe dozens of times, and I’ve definitely learned a few things the hard way. Here are the tips I wish someone had told me before I started experimenting.
Don’t boil the milk. This is the number one mistake I made early on. Boiling milk changes its flavor and creates a skin on top that ruins the texture. Heat it gently and watch for those tiny bubbles. If you see steam rising consistently, you’re in the perfect zone.
Crush peppermint candies the right way. Put them in a ziplock bag and use a rolling pin or heavy pan. But here’s the trick—don’t crush them into dust. You want small pieces, not powder. Powder dissolves too quickly and doesn’t give you that satisfying crunch. Aim for pieces about the size of coarse sand.
Make your own whipped cream. It takes 2 minutes and tastes infinitely better than the canned stuff. Whip 1/2 cup of heavy cream with 1 tablespoon of powdered sugar and 1/2 teaspoon of vanilla extract until soft peaks form. It’s worth the minimal effort.
Adjust the peppermint carefully. Peppermint extract is potent. Start with 1/4 teaspoon and taste before adding more. You can always add, but you can’t take away. I once added 1/2 teaspoon thinking “more is better” and ended up with a drink that tasted like a candy cane fight club.
Warm your mug first. Pour hot water into your mug and let it sit for a minute while you prepare everything. Empty it before adding your coffee. This keeps your drink hot longer and prevents that sad lukewarm experience halfway through.
For a truly indulgent experience, I sometimes make a batch of creamy peppermint bark fudge with white chocolate swirl to serve alongside this mocha. The combination is dangerously good.
Variations & Adaptations
One of the best things about this recipe is how easily it adapts to different tastes and dietary needs. Here are some variations I’ve tried and loved.
Dairy-Free Version: Substitute the whole milk with oat milk or cashew milk. Oat milk gives the creamiest texture of all the non-dairy options. I’ve used oat milk in this recipe multiple times and honestly couldn’t tell the difference. Coconut milk also works but adds a slight coconut flavor that can be lovely if you’re into that.
Extra Chocolatey Mocha: Add 2 ounces of chopped dark chocolate (70% cocoa or higher) to the milk mixture while it heats. Stir until melted and smooth. This creates a richer, more indulgent drink that feels like dessert in a mug. I do this on particularly cold days when I need extra comfort.
Iced Peppermint Mocha: Perfect for warmer months or if you prefer cold coffee drinks. Brew the coffee double-strength and let it cool. Prepare the milk mixture as directed, then let it cool to room temperature. Fill a glass with ice, pour in the coffee and milk mixture, and stir. Top with cold foam if you’re feeling fancy.
White Chocolate Peppermint Mocha: Replace the cocoa powder with 3 tablespoons of white chocolate chips. Melt them into the milk mixture along with the vanilla and peppermint. The result is a sweeter, creamier version that tastes like a winter wonderland. It’s my niece’s absolute favorite.
Spiced Peppermint Mocha: Add 1/4 teaspoon of cinnamon and a tiny pinch of nutmeg to the cocoa powder mixture. The warm spices complement the peppermint beautifully and add a layer of complexity. This version has become my go-to during the holiday season.
If you’re hosting a holiday gathering, this mocha pairs wonderfully with a batch of cozy eggnog snickerdoodle cookies. The spiced cookies and minty coffee create a flavor combination that feels like Christmas morning.
Serving & Storage Suggestions
This drink is best enjoyed fresh, but I’ve found a few ways to make it work for different situations.
Serving Temperature: Serve hot immediately after preparation. The ideal drinking temperature is around 140°F (60°C)—hot enough to warm you up but not so hot that it burns your tongue. If you’ve let it sit, pop it in the microwave for 20 seconds to bring it back to life.
Presentation Ideas: Rim your mug with melted chocolate and crushed peppermint for a festive touch. Use a clear glass mug to show off the beautiful layers of coffee and milk. Add a cinnamon stick as a stirrer for extra visual appeal and a hint of spice.
Complementary Dishes: This mocha pairs beautifully with buttery shortbread cookies, chocolate croissants, or a simple slice of pound cake. For a full holiday spread, serve it alongside a Christmas morning breakfast bake for a cozy morning that feels special without requiring hours in the kitchen.
Storage: If you have leftover milk mixture (unlikely, but possible), store it in an airtight container in the refrigerator for up to 3 days. Reheat gently on the stovetop or in the microwave, stirring frequently. Do not store the fully assembled drink—the coffee will become bitter and the whipped cream will deflate.
Reheating Tips: Reheat the milk mixture separately from the coffee. Fresh coffee always tastes better. If you’re reheating the whole drink, do it gently in 15-second intervals in the microwave, stirring between each interval. Never boil it again.
Flavor Development: The milk mixture actually tastes better after sitting in the fridge for a few hours. The flavors meld together and the peppermint becomes more integrated. I sometimes make the milk mixture the night before and just reheat it with fresh coffee in the morning.
Nutritional Information & Benefits
Here’s the approximate nutritional breakdown for one serving of this peppermint mocha (made with whole milk and 2 tablespoons of sugar, without whipped cream):
- Calories: 195
- Protein: 8g
- Fat: 8g
- Carbohydrates: 24g
- Sugar: 20g
- Fiber: 2g
- Caffeine: 95mg (approximately, depending on coffee strength)
Health Benefits: Cocoa powder is rich in antioxidants called flavonoids, which support heart health and reduce inflammation. Coffee provides a natural energy boost and is linked to improved focus and mood. Peppermint has been shown to aid digestion and provide a refreshing, calming effect.
Dietary Considerations: This recipe is naturally vegetarian. For a vegan version, use plant-based milk and skip the whipped cream or use a coconut-based whipped topping. For a lower-sugar option, reduce the sugar to 1 tablespoon or use a sugar substitute like monk fruit. The cocoa powder and peppermint extract are naturally gluten-free.
Potential Allergens: Contains dairy (if using milk and cream). Some peppermint extracts may contain trace amounts of alcohol, though the amount is negligible after heating. Always check labels if you have specific allergies.
Conclusion
This Easy Homemade Peppermint Mocha Recipe has become a December tradition in my house, and I think it deserves a spot in yours too. It’s the kind of drink that makes cold mornings feel cozy and holiday gatherings feel complete. The best part? You don’t need a barista degree or fancy equipment to make it.
I love this recipe because it’s forgiving. You can tweak it to match your exact preferences and it still turns out delicious. Too sweet? Cut the sugar. Not chocolatey enough? Add more cocoa. That flexibility is what makes it a keeper in my book.
I’d love to hear how yours turns out. Did you try a variation? Add something unexpected? Drop a comment below and let me know. And if you’re looking for more cozy drink ideas, check out our creamy no-churn salted caramel ice cream for a cold treat that hits different when you want something indulgent. Happy sipping, friends!
Frequently Asked Questions
Can I use peppermint syrup instead of extract?
Yes, you can. Use about 1 to 2 tablespoons of peppermint syrup instead of the extract. Keep in mind that syrup adds extra sweetness, so you may want to reduce the sugar in the recipe. Start with 1 tablespoon and adjust to taste.
Can I make this recipe caffeine-free?
Absolutely. Use decaffeinated coffee or a chicory-based coffee substitute. The flavor profile will be slightly different, but the chocolate and peppermint will still shine through. This is a great option for evening sipping or if you’re sensitive to caffeine.
How do I make this recipe for a crowd?
Multiply the ingredients by the number of servings you need. Prepare the milk mixture in a large pot and keep it warm in a slow cooker on the “warm” setting. Brew a large batch of coffee separately. Let guests combine their own coffee and milk mixture, then add their own toppings. This makes for a fun DIY drink bar at parties.
Why did my cocoa powder turn lumpy?
Lumps happen when you add liquid too quickly or don’t whisk enough. The fix is simple: always make a paste first by mixing the cocoa powder and sugar with just a small amount of milk. Once the paste is smooth, gradually add the rest of the milk while whisking. If lumps still appear, strain the mixture through a fine-mesh sieve before combining with the coffee.
Can I use dark chocolate instead of cocoa powder?
Yes, and it’s delicious. Use 2 ounces of chopped dark chocolate (at least 70% cocoa) instead of the cocoa powder. Melt the chocolate into the warm milk mixture, stirring until completely smooth. This creates a richer, more decadent mocha with a deeper chocolate flavor. You may want to reduce the sugar slightly since dark chocolate adds its own sweetness.
Pin This Recipe!
Easy Homemade Peppermint Mocha Recipe (Best Ever)

This Easy Homemade Peppermint Mocha is perfectly balanced with real peppermint, rich chocolate, and strong coffee. It’s quick, customizable, and budget-friendly—better than any coffee shop version.
- Prep Time: 5 minutes
- Cook Time: 5 minutes
- Total Time: 10 minutes
- Yield: 1 serving 1x
- Category: Beverage
- Cuisine: American
Ingredients
- 1 cup (240 ml) strong brewed coffee (dark roast or espresso)
- 1 cup (240 ml) whole milk (or 2%, oat milk for dairy-free)
- 2 tablespoons (10 g) unsweetened cocoa powder (Dutch-processed preferred)
- 2 tablespoons (25 g) granulated sugar (adjust to taste)
- 1/4 teaspoon (1 ml) pure peppermint extract (not peppermint oil)
- 1/2 teaspoon (2 ml) vanilla extract
- Pinch of salt
- Whipped cream (for topping, optional)
- Crushed peppermint candies (for garnish, optional)
Instructions
- Brew 1 cup of strong coffee using your preferred method (French press, pour-over, or espresso diluted with hot water). Set aside.
- In a small saucepan, whisk together the cocoa powder, sugar, and salt until no lumps remain.
- Add about 2 tablespoons of milk to the dry ingredients and whisk vigorously to form a smooth paste.
- Slowly pour in the remaining milk while whisking continuously until the mixture is smooth.
- Place the saucepan over medium heat and whisk frequently until hot but not boiling (small bubbles around the edges). About 3-4 minutes.
- Remove from heat and stir in the vanilla extract and peppermint extract. Taste and adjust if needed.
- Pour the brewed coffee into a mug. Slowly stream in the hot peppermint chocolate milk mixture and stir gently to combine.
- Top with whipped cream and sprinkle crushed peppermint candies over the top. Serve immediately.
Notes
Don’t boil the milk—heat gently until small bubbles form. Crush peppermint candies into small pieces, not powder. Warm your mug with hot water before assembling to keep the drink hot longer. For a dairy-free version, use oat milk or cashew milk. For extra chocolatey flavor, add 2 ounces of chopped dark chocolate to the milk mixture.
Nutrition
- Serving Size: 1 mug (about 12-16 o
- Calories: 195
- Sugar: 20
- Sodium: 100
- Fat: 8
- Saturated Fat: 5
- Carbohydrates: 24
- Fiber: 2
- Protein: 8
Keywords: peppermint mocha, homemade mocha, holiday coffee, peppermint coffee, easy mocha recipe


