“You know what would make this better? Peppermint. And white chocolate. And maybe some fudge.” That’s what my sister said last December, standing in my kitchen with a half-eaten chocolate bark in her hand. I remember looking at her like she’d just suggested we add glitter to the turkey. But then she took another bite, and I watched her face do that thing—you know, the little eye-close-and-sigh thing—and I thought, okay, maybe she’s onto something.
I wasn’t trying to invent a new holiday recipe that day. Honestly, I was just trying to use up the leftover candy canes from a failed attempt at homemade hot cocoa bombs. (Don’t ask. It involved a lot of melted chocolate and some very sticky countertops.) But my sister, she’s always been the one who sees potential in leftovers. She grabbed a bag of white chocolate chips from the pantry and started talking about how the creamy sweetness would balance the sharp mint. And then she said the word “fudge,” and I stopped cleaning and started listening.
So we did it. We melted, we swirled, we crushed candy canes with a rolling pin (which is way more satisfying than it sounds), and we poured it all into a pan. The result was this creamy, dreamy, ridiculously easy peppermint bark fudge that honestly ruined me for regular fudge forever. It’s the kind of dessert you make for a holiday party and suddenly everyone’s asking for the recipe while standing around the dessert table with their mouths full. And the best part? It takes maybe twenty minutes of actual work. The rest is just waiting—which, let’s face it, is the hardest part.
This recipe has become my go-to for Christmas gifting, cookie exchanges, and those nights when you just need a little something sweet and minty. It’s not fancy. It’s not complicated. But it’s the kind of treat that makes people stop and say, “Wait, you made this?” And that’s always a good feeling.
Why You’ll Love This Recipe
Let me tell you why this creamy peppermint bark fudge is about to become your new holiday MVP. I’ve tested this recipe more times than I care to admit, tweaking the ratios, adjusting the swirl technique, and even accidentally leaving a batch in the fridge overnight (spoiler: it was still perfect). So trust me when I say this one’s a winner.
- Quick & Easy : This comes together in under 20 minutes of active time. No candy thermometers, no boiling sugar, no stress. Just melt, stir, pour, and chill. Perfect for those last-minute holiday cravings or unexpected guests.
- Simple Ingredients : You probably already have most of what you need in your kitchen. No fancy extracts or specialty chocolates—just good-quality white chocolate chips, sweetened condensed milk, butter, and peppermint extract. Plus candy canes for that signature crunch.
- Perfect for Holiday Gifting : This fudge looks gorgeous in a little tin or wrapped in cellophane with a ribbon. It’s the kind of homemade gift that actually gets eaten, not regifted. And it travels well, which is a huge plus during the holiday chaos.
- Crowd-Pleaser : I’ve brought this to cookie swaps, office parties, and family gatherings, and it always disappears first. Even people who “don’t like mint” have been converted. The creamy white chocolate swirl mellows out the peppermint, making it approachable for everyone.
- Unbelievably Delicious : The texture is what gets me every time. It’s creamy but firm, with little pockets of melted white chocolate and crunchy bits of candy cane. The flavor is perfectly balanced—not too sweet, not too minty. Just right.
What makes this recipe different from all the other peppermint bark recipes out there? It’s the fudge base. Most bark recipes are just melted chocolate with candy canes on top. This one has that rich, creamy fudge texture that melts in your mouth. The white chocolate swirl isn’t just for looks—it adds a whole other layer of flavor and creaminess that takes this from good to unforgettable. I’ve tried dozens of versions, and this is the one I keep coming back to. It’s the one my family requests every year. And now it’s yours.
What Ingredients You Will Need
This recipe uses simple, everyday ingredients to create something that tastes anything but ordinary. The magic happens when the creamy fudge base meets the bright peppermint and the sweet white chocolate swirl. Here’s everything you’ll need:
For the Fudge Base
- 3 cups white chocolate chips (I prefer Ghirardelli or Guittard for the smoothest melt—trust me on this one)
- 1 can (14 ounces) sweetened condensed milk (full-fat, not evaporated milk—this is key for the creamy texture)
- 2 tablespoons unsalted butter (adds richness and helps the fudge set up perfectly)
- 1 teaspoon peppermint extract (use pure extract, not peppermint oil, unless you want a very intense mint experience)
- 1/4 teaspoon salt (balances the sweetness and enhances all the flavors)
For the White Chocolate Swirl
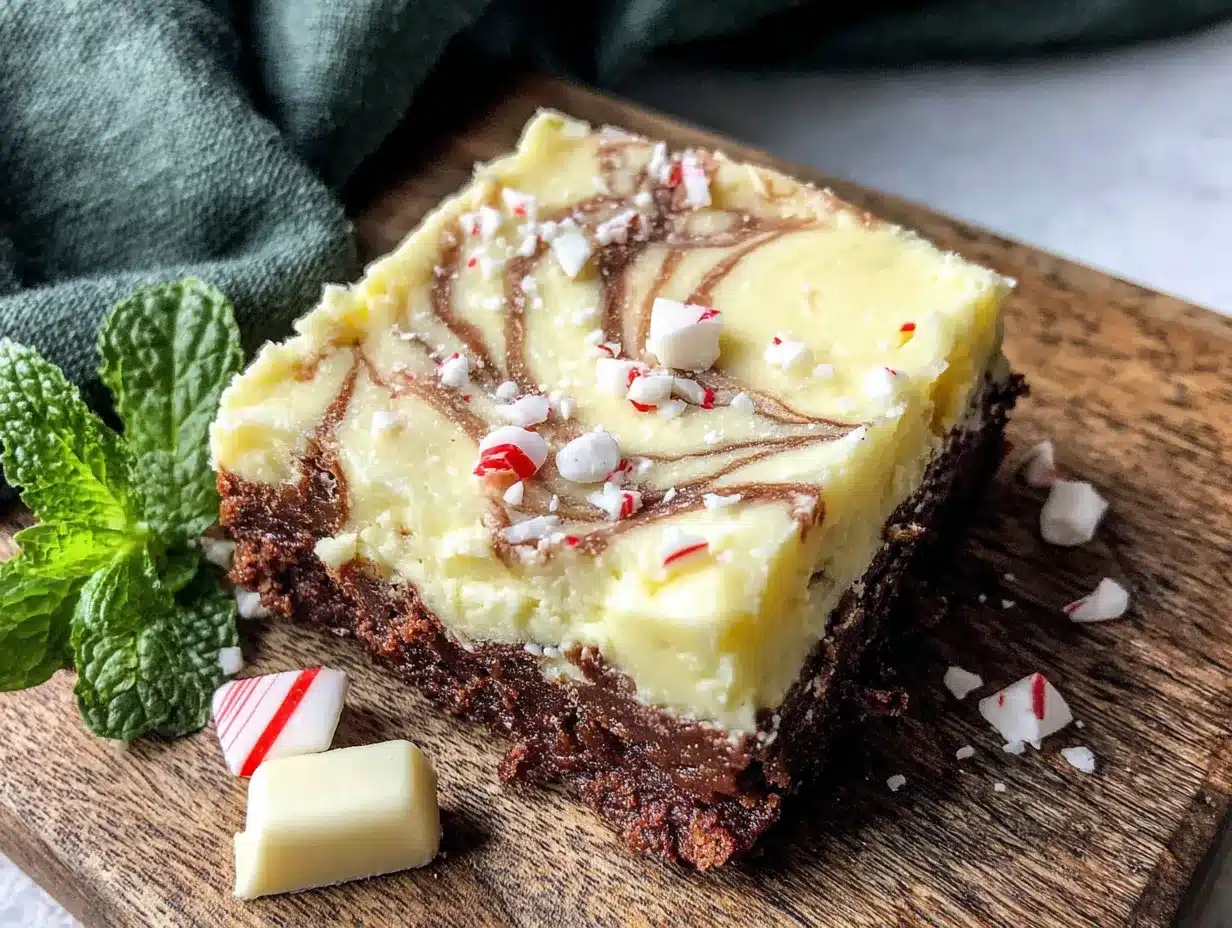
- 1/2 cup white chocolate chips (same brand as above for consistency)
- 1 tablespoon coconut oil or vegetable shortening (helps the swirl stay smooth and prevents it from seizing)
For the Topping
- 1/2 cup crushed candy canes or peppermint candies (about 6-8 regular-sized candy canes, crushed into small pieces—not powder)
- Optional: 1/4 cup additional crushed candy canes for garnish (because more crunch is always better)
Ingredient Tips & Substitutions
- White chocolate chips : Look for brands that contain cocoa butter, not just palm oil. Better-quality chips melt more smoothly and taste creamier. If you’re dairy-free, use a good-quality dairy-free white chocolate alternative.
- Peppermint extract : If you only have peppermint oil, use just 1/4 teaspoon—it’s much more concentrated. And please, please don’t use mint extract meant for savory dishes. Learn from my mistakes.
- Candy canes : You can use any flavor of candy cane, but classic peppermint works best. I’ve tried strawberry and cinnamon, and while they’re interesting, they don’t quite hit the same nostalgic note.
- Coconut oil : If you don’t have coconut oil, vegetable shortening works perfectly. Butter will also work in a pinch, but it changes the texture slightly.
Equipment Needed
You don’t need a fancy kitchen to make this fudge. Here’s what you’ll need:
- 8×8-inch baking pan (glass or metal both work fine—just make sure it’s not nonstick if you’re using metal, as the fudge needs something to grip)
- Parchment paper (for lining the pan—makes removal a breeze and keeps cleanup to a minimum)
- Medium saucepan (for melting the fudge base)
- Small microwave-safe bowl (for melting the white chocolate swirl)
- Spatula (silicone is best—it won’t scratch your pan and it’s great for scraping every last bit of fudge)
- Rolling pin or meat mallet (for crushing candy canes—place them in a zip-top bag first to contain the mess)
- Sharp knife (for cutting the fudge into clean squares—a chef’s knife works best)
- Toothpick or skewer (for creating the swirl pattern)
If you don’t have an 8×8 pan, a 9×9 pan will work—your fudge will just be slightly thinner. A loaf pan also works in a pinch, but you’ll get thicker pieces. I’ve used all three, and honestly, they all turn out great. Just adjust your cutting size accordingly.
Preparation Method
Alright, let’s make some fudge. This is the fun part. Here’s how to do it:
- Prep your pan. Line your 8×8-inch baking pan with parchment paper, leaving some overhang on two opposite sides. This will act as handles later when you lift the fudge out. Lightly grease the parchment with butter or cooking spray—just a thin layer so the fudge doesn’t stick.
- Crush your candy canes. Place your candy canes in a sturdy zip-top bag and seal it tight. Then go to town with a rolling pin or meat mallet. You want a mix of small pieces and a little bit of powder—the powder will dissolve into the fudge and add flavor, while the chunks provide that satisfying crunch. Aim for pieces about the size of small peas. Set aside about 1/4 cup for the final garnish.
- Start the fudge base. In a medium saucepan over low heat, combine the 3 cups of white chocolate chips, the sweetened condensed milk, and the butter. Stir constantly with your spatula. I cannot stress this enough—low heat and constant stirring. White chocolate is sensitive and can seize (turn grainy and clumpy) if you rush it. Be patient. It’ll take about 5-7 minutes to fully melt.
- Know when it’s ready. The mixture is done when it’s completely smooth, glossy, and slightly thickened. It should coat the back of a spoon and flow like thick honey. If you see any lumps, keep stirring—they’ll smooth out. Remove the pan from heat immediately once it’s smooth.
- Add the peppermint. Stir in the peppermint extract and salt. Give it a good mix—about 30 seconds of stirring—to make sure the flavor is evenly distributed. Taste a tiny bit (careful, it’s hot!) and adjust if needed. I like a strong peppermint presence, but you can use less if you prefer a milder flavor.
- Pour the fudge base. Pour the fudge mixture into your prepared pan. Use your spatula to spread it evenly into all four corners. Give the pan a gentle tap on the counter to release any air bubbles. Set it aside while you prepare the white chocolate swirl.
- Make the white chocolate swirl. In a small microwave-safe bowl, combine the 1/2 cup white chocolate chips and the coconut oil. Microwave in 20-second intervals, stirring after each, until completely smooth. This usually takes about 60-90 seconds total. Be careful not to overheat—white chocolate burns easily and will turn grainy.
- Create the swirl pattern. Drizzle the melted white chocolate over the fudge base in a random pattern. Don’t try to be perfect—the imperfections are what make it look beautiful. Use a toothpick or skewer to drag through the white chocolate, creating swirls and ribbons. Go in different directions for a marbled effect. Don’t over-swirl, or you’ll lose the contrast.
- Add the candy cane topping. While the fudge is still warm, sprinkle the crushed candy canes evenly over the top. Press them gently into the surface with your fingers or the back of a spoon so they stick. Add the reserved 1/4 cup for extra crunch on top.
- Chill and set. Place the pan in the refrigerator for at least 3 hours, or until the fudge is completely firm. I usually let it chill overnight for the best texture. The fudge should be solid to the touch and easy to lift out of the pan using the parchment overhang.
- Cut and serve. Once the fudge is fully set, lift it out of the pan using the parchment handles. Place it on a cutting board. Use a sharp knife to cut it into small squares—about 1-inch pieces work well. Wipe the knife clean between cuts for the cleanest edges. If the fudge starts to soften, pop it back in the fridge for 10 minutes before continuing.
Cooking Tips & Techniques
I’ve made this fudge more times than I can count, and I’ve learned a few things along the way. Here are my best tips for success:
- Low and slow is the way to go. White chocolate is notoriously finicky. If you rush the melting process, it can seize up and become grainy. Keep the heat low, stir constantly, and be patient. Your reward will be silky-smooth fudge.
- Don’t skip the salt. I know it seems weird in a sweet recipe, but that tiny pinch of salt makes a world of difference. It balances the sweetness and makes the peppermint flavor pop. I learned this the hard way after making a batch that was just… flat.
- Room temperature ingredients matter. If your butter or sweetened condensed milk is cold, it can cause the chocolate to seize. Let everything come to room temperature before you start. I once forgot to take the butter out ahead of time and ended up with a lumpy mess. Not my finest moment.
- Use a sharp knife for clean cuts. A dull knife will drag through the fudge and create messy edges. I use a chef’s knife and wipe it clean with a damp paper towel between each cut. For the prettiest presentation, let the fudge sit at room temperature for about 5 minutes before cutting—it’ll be slightly softer and cut more cleanly.
- Watch the temperature. If your kitchen is warm (above 75°F), the fudge might take longer to set. In that case, pop it in the freezer for 30 minutes before transferring to the fridge. If it’s cold and dry, it’ll set faster. I’ve made this in both summer and winter, and the difference is noticeable.
- Double the recipe for gifting. This fudge freezes beautifully, so I always make a double batch. One for now, one for later. Or one for me, one for everyone else. No judgment.
Variations & Adaptations
One of the best things about this recipe is how easy it is to customize. Here are some variations I’ve tried and loved:
- Dark Chocolate Base : Swap the white chocolate chips in the fudge base for dark chocolate chips (60-70% cocoa). The bitterness of the dark chocolate pairs beautifully with the sweet white chocolate swirl and the mint. This is my husband’s favorite version.
- Milk Chocolate Swirl : Instead of white chocolate for the swirl, use milk chocolate chips. It creates a more subtle contrast but is equally delicious. I did this once when I ran out of white chocolate, and honestly, it was a happy accident.
- Peppermint + Chocolate Chips : Fold in 1/2 cup of mini chocolate chips along with the candy canes for extra chocolatey goodness. The little chocolate pockets are a delightful surprise in every bite.
- Gluten-Free Version : This recipe is naturally gluten-free! Just double-check that your candy canes and white chocolate chips are certified gluten-free if that’s a concern. Most are, but it’s always worth verifying.
- Vegan Option : Use dairy-free white chocolate chips, vegan sweetened condensed milk (like Nature’s Charm), and vegan butter. The texture will be slightly different—a bit softer—but still delicious. I’ve tested this with a friend who’s vegan, and she gave it two thumbs up.
- Extra Minty : If you’re a mint fanatic like me, add an extra 1/4 teaspoon of peppermint extract. You can also use starlight mints instead of candy canes for a different shape and texture. Just crush them the same way.
- Holiday Sprinkle Version : Before the fudge sets, sprinkle on some festive holiday sprinkles along with the candy canes. Red and green sprinkles make it extra festive for Christmas. I did this for a cookie exchange last year, and they were a hit.
Serving & Storage Suggestions
This fudge is versatile enough for any occasion. Here’s how to serve and store it:
Serving
- Temperature : Serve the fudge cold from the fridge for the firmest texture, or let it sit at room temperature for about 10 minutes for a creamier, softer bite. Both are delicious—it just depends on your preference.
- Presentation : Arrange the fudge squares on a festive platter or in a decorative tin. For gifting, layer them in a box with parchment paper between layers. A little sprinkle of extra crushed candy canes on top makes it look extra special.
- Pairings : This fudge is amazing with a cup of hot coffee or a warm mug of hot chocolate. The minty sweetness complements the bitterness of coffee perfectly. I also love serving it alongside a creamy pumpkin cold foam latte for a cozy holiday treat.
- Occasions : Perfect for Christmas cookie exchanges, holiday parties, teacher gifts, neighbor gifts, or just because it’s Tuesday and you deserve something sweet.
Storage
- Refrigerator : Store the fudge in an airtight container in the refrigerator for up to 2 weeks. Layer the pieces with parchment paper to prevent sticking. The flavor actually improves after a day or two as the peppermint mellows and blends with the white chocolate.
- Freezer : This fudge freezes beautifully! Place the cut pieces in a single layer on a baking sheet and freeze for 1 hour, then transfer to a freezer-safe container or zip-top bag. It’ll keep for up to 3 months. Thaw in the refrigerator overnight before serving.
- Room Temperature : You can keep the fudge at room temperature for up to 3 days, but it will be softer and more prone to melting. If you’re taking it to a party, I recommend keeping it chilled until just before serving.
One thing I love about this fudge is how the flavors develop over time. The first day, the peppermint is bright and punchy. By day three, it’s mellowed into something more subtle and sophisticated. The texture also firms up beautifully after a full day in the fridge. So if you can resist eating it all at once, you’ll be rewarded with an even better experience later.
Nutritional Information & Benefits
Let’s be real—this is a treat, not a health food. But that doesn’t mean it can’t have some redeeming qualities. Here’s the estimated nutritional breakdown per piece (based on 36 pieces):
| Nutrient | Amount Per Piece |
|---|---|
| Calories | 145 |
| Total Fat | 8g |
| Saturated Fat | 5g |
| Cholesterol | 10mg |
| Sodium | 35mg |
| Total Carbohydrates | 18g |
| Sugars | 16g |
| Protein | 2g |
Now, let’s talk about the good stuff. White chocolate contains cocoa butter, which is rich in antioxidants and healthy fats. Peppermint has been shown to aid digestion and freshen breath (bonus!). And let’s not forget the psychological benefits of treating yourself to something delicious—there’s real value in that, especially during the busy holiday season.
This recipe is gluten-free and can be made vegan with the right substitutions. It does contain dairy and soy (from the white chocolate), so it’s not suitable for those with allergies to those ingredients. But for everyone else, it’s a wonderful indulgence that’s worth every single bite.
Conclusion
This creamy peppermint bark fudge with white chocolate swirl has become a holiday tradition in my house, and I have a feeling it’s about to become one in yours too. It’s the kind of recipe that feels special enough for gift-giving but easy enough for a random Tuesday night craving. The combination of rich, creamy fudge, bright peppermint, and sweet white chocolate swirl is just… perfect.
I love how forgiving this recipe is. You can mess up the swirl, over-crush the candy canes, or forget to add the salt, and it still turns out delicious. It’s the kind of recipe that builds confidence in the kitchen, even for beginners. And honestly, isn’t that what cooking should be about? Having fun, making mistakes, and eating something wonderful anyway.
So go ahead—make a batch for your next holiday party, your coworkers, your neighbors, or just for yourself. You deserve it. And when someone asks for the recipe (because they will), send them my way. I’d love to hear how yours turns out. Did you add extra peppermint? Try the dark chocolate version? Forget to chill it and end up eating it warm with a spoon? (No judgment—I’ve been there.) Drop a comment below and let me know. Happy cooking, and happy holidays!
Frequently Asked Questions
Can I use peppermint oil instead of peppermint extract?
Yes, but be careful—peppermint oil is much more concentrated. Use only 1/4 teaspoon instead of the full teaspoon of extract. Too much oil can make the fudge taste like toothpaste, and nobody wants that. I learned this lesson the hard way with a batch that was… memorable, to say the least.
Why did my white chocolate seize up?
White chocolate is sensitive to heat and moisture. If it seizes (turns grainy and clumpy), it’s usually because the heat was too high or a drop of water got into the mixture. To prevent this, always melt white chocolate over low heat, stir constantly, and make sure your utensils are completely dry. If it does seize, you can try adding a teaspoon of vegetable oil or coconut oil and stirring vigorously—sometimes that saves it.
Can I make this fudge without sweetened condensed milk?
Sweetened condensed milk is the secret to this fudge’s creamy texture. Without it, you’d need to make a traditional fudge with sugar, cream, and a candy thermometer—which is a whole different process. If you’re in a pinch, you can make your own sweetened condensed milk by simmering whole milk and sugar until reduced, but honestly, it’s easier to just buy a can. Trust me on this one.
How do I get clean, neat cuts?
Use a sharp chef’s knife and wipe it clean with a damp paper towel between each cut. Let the fudge sit at room temperature for about 5 minutes before cutting—it’ll be slightly softer and less likely to crack. If you’re going for perfect squares, measure and mark your cuts before you start. And if you end up with a few imperfect pieces, just call them “taster’s samples” and enjoy them yourself.
Can I freeze this fudge for later?
Absolutely! This fudge freezes beautifully for up to 3 months. Place the cut pieces in a single layer on a baking sheet and freeze for 1 hour, then transfer to a freezer-safe container or zip-top bag with parchment paper between layers. Thaw in the refrigerator overnight before serving. The texture and flavor remain excellent—I’ve tested this extensively, and it’s one of the best things about this recipe.
What if I don’t have candy canes?
You can use any hard peppermint candy, like starlight mints or peppermint discs. Just crush them the same way you would candy canes. If you don’t have any peppermint candies at all, you can skip the topping and just enjoy the fudge with the swirl. It won’t have the same crunch, but it’ll still be delicious. Or you can top it with crushed nuts, sprinkles, or even sea salt for a different twist.
Pin This Recipe!
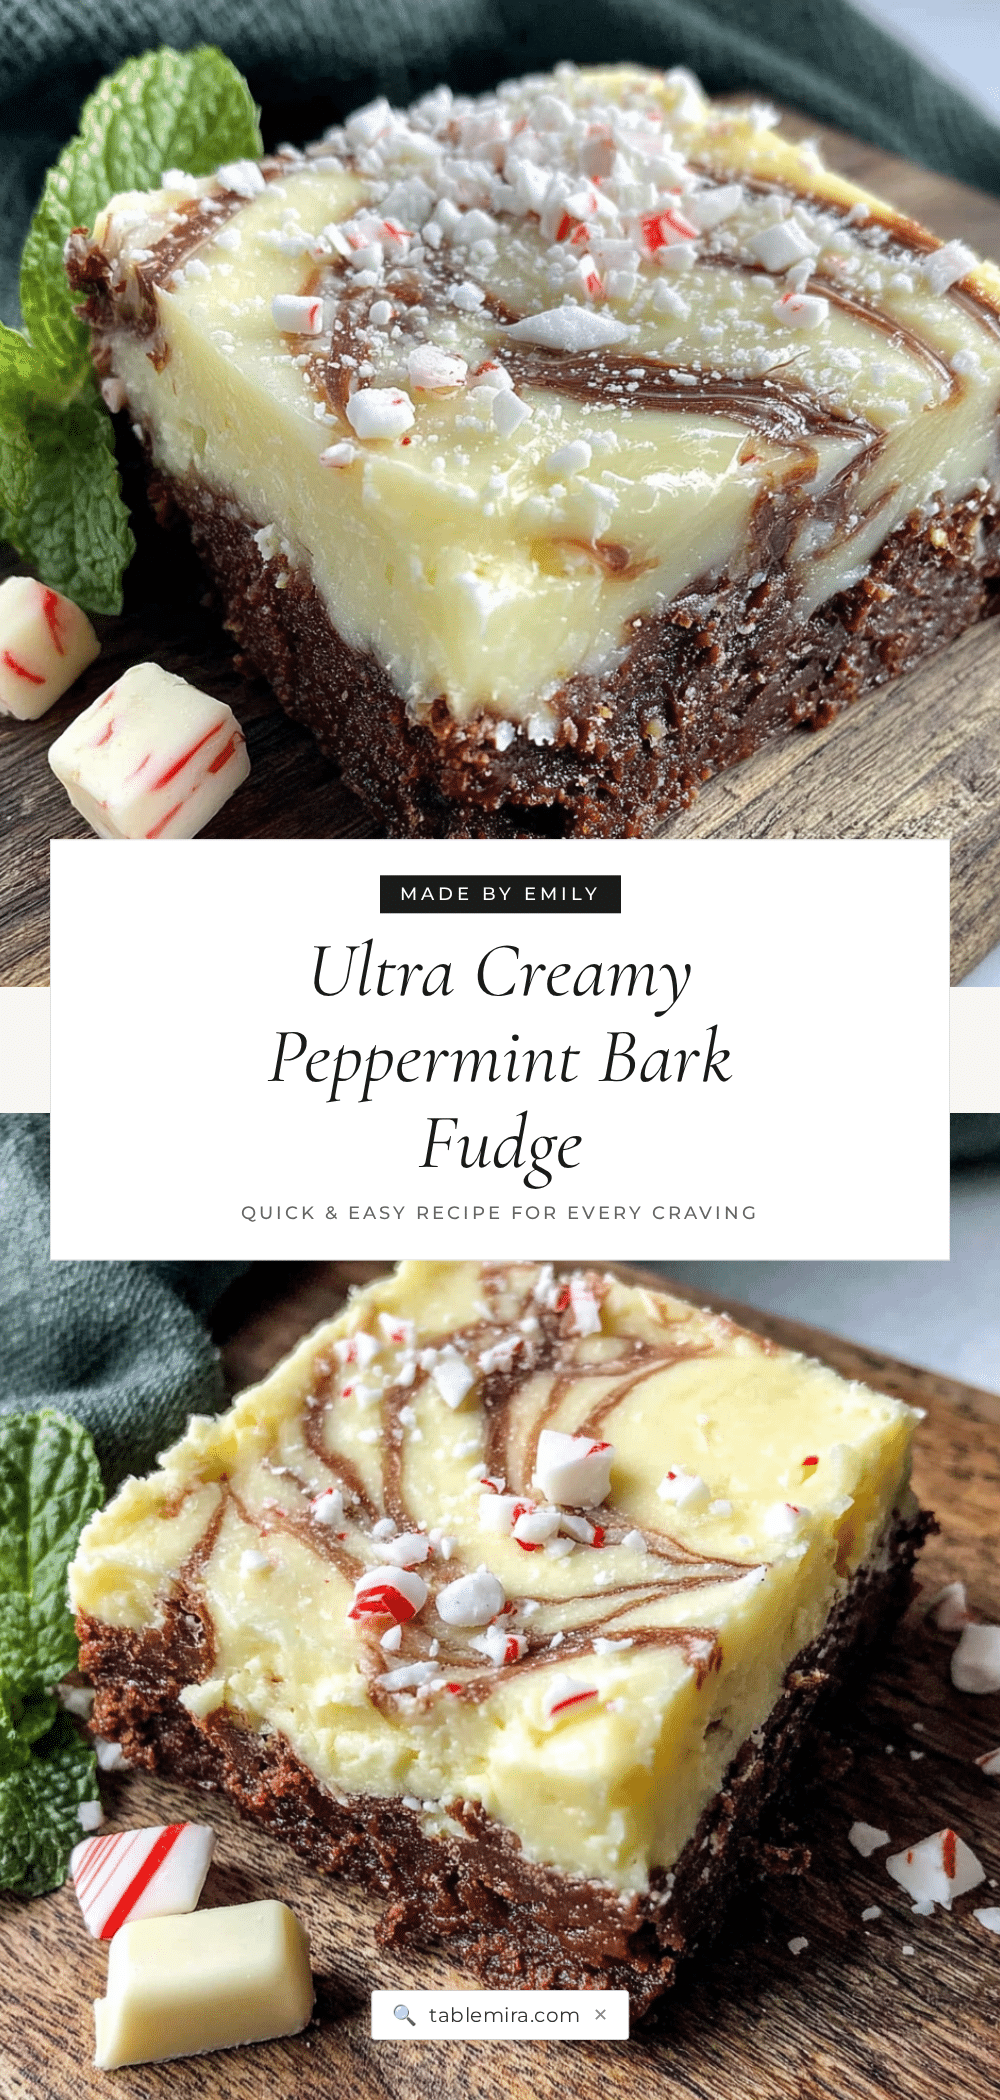
Creamy Peppermint Bark Fudge with White Chocolate Swirl

This creamy, dreamy, ridiculously easy peppermint bark fudge combines a rich white chocolate fudge base with a sweet white chocolate swirl and crunchy candy cane pieces. Perfect for holiday gifting, cookie exchanges, or whenever you need a quick and delicious minty treat.
- Prep Time: 20 minutes
- Cook Time: 10 minutes
- Total Time: 3 hours 30 minutes (includes chilling time)
- Yield: 36 pieces 1x
- Category: Dessert
- Cuisine: American
Ingredients
- 3 cups white chocolate chips (preferably Ghirardelli or Guittard)
- 1 can (14 ounces) sweetened condensed milk (full-fat)
- 2 tablespoons unsalted butter
- 1 teaspoon peppermint extract (pure extract, not oil)
- 1/4 teaspoon salt
- 1/2 cup white chocolate chips (for swirl)
- 1 tablespoon coconut oil or vegetable shortening (for swirl)
- 1/2 cup crushed candy canes or peppermint candies (about 6–8 regular-sized candy canes)
- Optional: 1/4 cup additional crushed candy canes for garnish
Instructions
- Prep your pan. Line an 8×8-inch baking pan with parchment paper, leaving overhang on two opposite sides. Lightly grease the parchment with butter or cooking spray.
- Crush your candy canes. Place candy canes in a sturdy zip-top bag and crush with a rolling pin or meat mallet to a mix of small pieces and some powder. Set aside about 1/4 cup for garnish.
- Start the fudge base. In a medium saucepan over low heat, combine 3 cups white chocolate chips, sweetened condensed milk, and butter. Stir constantly until completely smooth, glossy, and slightly thickened (about 5-7 minutes). Remove from heat immediately.
- Add the peppermint. Stir in the peppermint extract and salt. Mix for about 30 seconds to evenly distribute flavor.
- Pour the fudge base. Pour the mixture into the prepared pan and spread evenly. Tap the pan gently on the counter to release air bubbles.
- Make the white chocolate swirl. In a small microwave-safe bowl, combine 1/2 cup white chocolate chips and coconut oil. Microwave in 20-second intervals, stirring after each, until completely smooth (about 60-90 seconds total).
- Create the swirl pattern. Drizzle the melted white chocolate over the fudge base in a random pattern. Use a toothpick or skewer to drag through the white chocolate, creating swirls and ribbons. Do not over-swirl.
- Add the candy cane topping. While the fudge is still warm, sprinkle crushed candy canes evenly over the top. Press them gently into the surface. Add reserved 1/4 cup for extra crunch.
- Chill and set. Refrigerate for at least 3 hours, or until completely firm (overnight is best).
- Cut and serve. Lift the fudge out using parchment handles. Cut into 1-inch squares using a sharp knife, wiping the knife clean between cuts.
Notes
Use low heat and constant stirring when melting white chocolate to prevent seizing. Let ingredients come to room temperature before starting. For clean cuts, let fudge sit at room temperature for 5 minutes before cutting and wipe knife clean between cuts. Fudge can be stored in the refrigerator for up to 2 weeks or frozen for up to 3 months.
Nutrition
- Serving Size: 1 piece (1-inch squa
- Calories: 145
- Sugar: 16
- Sodium: 35
- Fat: 8
- Saturated Fat: 5
- Carbohydrates: 18
- Protein: 2
Keywords: peppermint bark fudge, white chocolate fudge, holiday fudge, easy fudge recipe, Christmas fudge, peppermint fudge, no-bake fudge


