My neighbor across the hall, a retired baker named Mrs. Gable, watched me one October evening as I tried to balance a grocery bag, my keys, and a too-heavy pumpkin. She didn’t say anything at first. Then she just shook her head with a knowing smile and disappeared back into her apartment. Ten minutes later, there was a knock at my door, and she handed me a warm square of something that smelled like autumn itself, wrapped in foil. “This,” she said, “is what you actually wanted to make.”
That was my first taste of an easy 5-ingredient pumpkin dump cake, and honestly, it changed my whole approach to fall baking. I had been wrestling with complicated pie crusts and fussy layer cakes, and here was this simple, golden creation that tasted like hours of work but came together in minutes. Mrs. Gable laughed when I asked for the recipe. “It’s not even a recipe,” she said. “It’s a shortcut I figured out when my kids were little and I had no time.”
Maybe you’ve been there, standing in the baking aisle overwhelmed by all the choices and wondering if there’s a way to get that cozy pumpkin flavor without spending your whole Sunday in the kitchen. This dump cake is that answer. I’ve tweaked Mrs. Gable’s version just a bit over the years, but the heart of it stays the same: five ingredients, one dish, and the kind of dessert that makes people close their eyes after the first bite. It’s the recipe I keep coming back to, year after year, because it actually works when life is busy.
Why You’ll Love This Recipe
Let me tell you why this easy 5-ingredient pumpkin dump cake has become my go-to fall dessert, and why I think it will become yours too. I’ve tested this recipe more times than I can count, tweaking the bake time and checking the texture, and it delivers every single time. Here is what makes it special:
- Quick & Easy: You can have this in the oven in under 10 minutes. No mixer needed, no complicated steps, just dump and bake. Perfect for those weeknights when you need dessert fast.
- Simple Ingredients: Five basic ingredients you can find at any grocery store. No special trips to specialty shops or expensive gourmet items.
- Perfect for Fall Gatherings: Great for Thanksgiving, potlucks, or just a cozy night in. It feeds a crowd without any stress.
- Crowd-Pleaser: I have brought this to work parties and family dinners, and it disappears every time. Kids and adults both go for seconds.
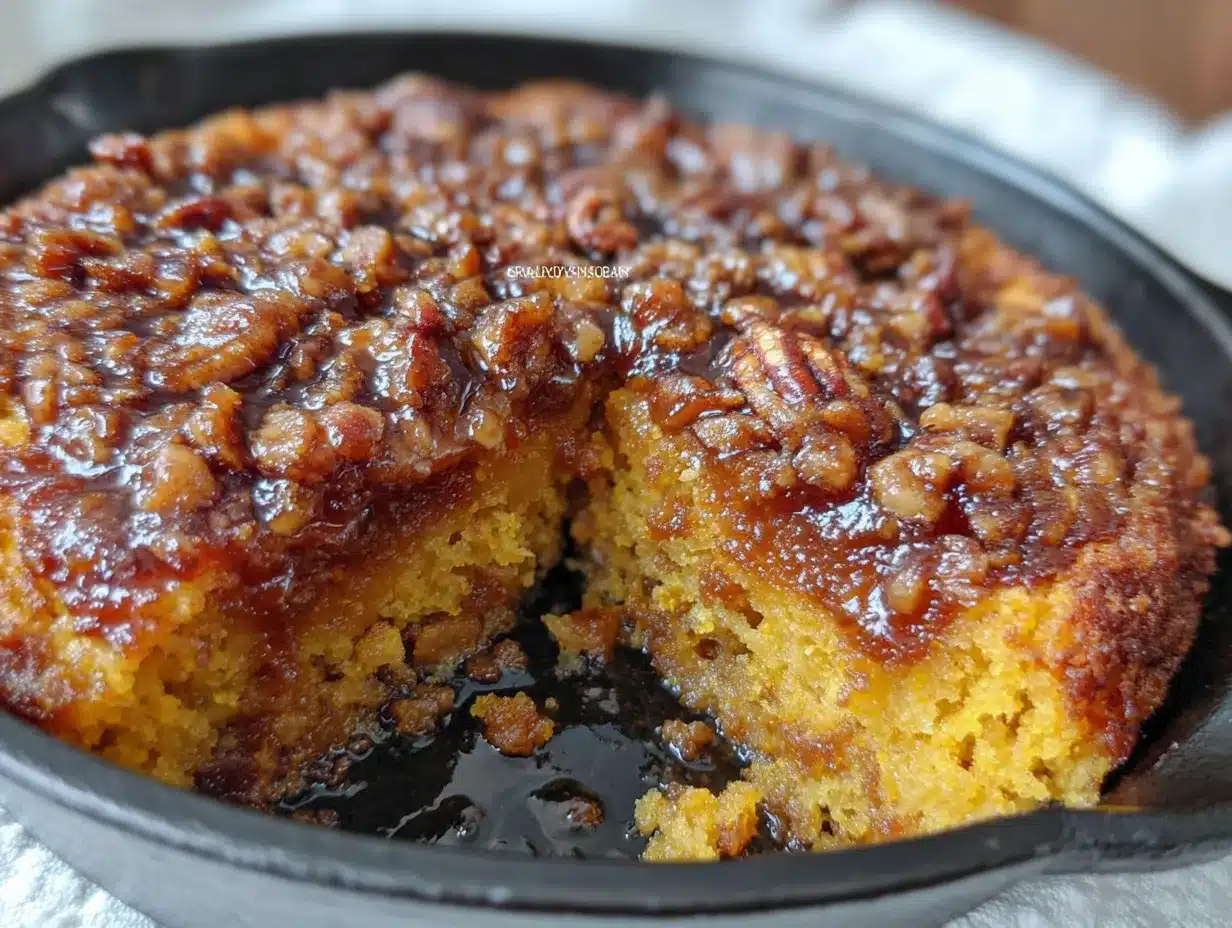
- Unbelievably Delicious: The top gets golden and slightly crunchy, while the bottom stays soft and pumpkin-y. It is comfort food at its finest.
What makes this recipe different from other pumpkin desserts is how forgiving it is. You don’t have to worry about a perfect crust or a smooth filling. It is practically foolproof, which is exactly what you need on a busy weeknight. This is the kind of dessert that makes you look like a hero with almost no effort.
What Ingredients You Will Need
This recipe uses simple, wholesome ingredients to deliver that cozy fall flavor without any fuss. Most of these are probably already in your pantry, which is exactly the point.
- 1 can (15 oz) pumpkin puree – Not pumpkin pie filling, just pure pumpkin. I prefer Libby’s for its consistent texture, but any brand works fine. Make sure it is 100% pumpkin.
- 1 can (12 oz) evaporated milk – This adds richness without making it too heavy. You can use regular milk in a pinch, but evaporated milk gives a better texture. (adds creaminess)
- 1 box yellow cake mix – This is the magic ingredient. A standard 15.25 oz box works perfectly. Duncan Hines or Betty Crocker both work great. Do not use a sugar-free mix, as it changes the texture.
- 1 cup unsalted butter – Melted and slightly cooled. Salted butter works too, just reduce any added salt. I always use unsalted so I can control the salt level. (adds richness)
- 1 tablespoon pumpkin pie spice – This is the flavor shortcut. You can make your own with cinnamon, nutmeg, ginger, and cloves, but the pre-mixed blend is so easy. I use McCormick brand.
Optional add-ins: If you want to get fancy, add 1/2 cup chopped pecans or walnuts on top before baking. A sprinkle of coarse sugar on top gives a nice crunch. Some people like to add a teaspoon of vanilla extract to the pumpkin mixture for extra depth.
Ingredient selection tips: Look for pumpkin puree that is firm and not watery. Shake the can before opening to check. For the cake mix, yellow or butter cake mix both work well. Avoid spice cake mix as it can overpower the pumpkin flavor. If you are dairy-free, use a plant-based butter alternative, but make sure it is meant for baking.
Equipment Needed
You do not need much for this recipe, which is part of the beauty. Here is what you will need:
- 9×13 inch baking dish – Glass or metal both work. I prefer glass because I can see how the bottom is baking. A ceramic dish works too, but may need a few extra minutes in the oven.
- Medium mixing bowl – For whisking the pumpkin mixture. Any bowl works, but a wide one makes mixing easier.
- Whisk or fork – To combine the pumpkin, evaporated milk, and spice. A fork works if you do not have a whisk.
- Measuring cups and spoons – For the butter and spice. A liquid measuring cup for the butter is easiest.
- Spatula or spoon – For spreading the cake mix evenly. An offset spatula is nice but not necessary.
- Oven mitts – The dish gets hot, so protect your hands.
That is it. No mixer, no special pans, no fancy gadgets. I have made this in a friend’s vacation rental with mismatched bowls and a rusty whisk, and it turned out perfect. Do not let missing equipment stop you from making this.
Preparation Method
Follow these steps carefully, and you will have a perfect pumpkin dump cake every time. The oven temperature is important, so preheat first.
- Preheat your oven to 350°F (175°C). This is important because the cake needs a consistent temperature to bake evenly. While it preheats, get your ingredients ready.
- Grease your 9×13 inch baking dish lightly. Use butter, cooking spray, or a little oil. This helps the cake release easily later. I use a paper towel with a bit of butter to coat the bottom and sides.
- In your medium bowl, whisk together the pumpkin puree, evaporated milk, and pumpkin pie spice. Whisk until smooth and well combined. It should be a uniform orange color with no streaks of spice. This takes about 30 seconds of whisking. The mixture will be thin, that is normal.
- Pour the pumpkin mixture into the prepared baking dish. Spread it evenly with your spatula. Make sure it reaches all the corners. The layer should be about 1/2 inch deep.
- Sprinkle the dry cake mix evenly over the pumpkin mixture. This is the key step. Do not stir it in. Just pour the dry mix over the top and use your fingers or a fork to spread it into an even layer. It should cover the pumpkin completely. Some people like to tap the dish gently to settle the mix.
- Pour the melted butter evenly over the cake mix layer. Try to cover as much of the dry mix as possible. The butter will soak in as it bakes. If some spots look dry, that is okay, just do your best. The butter helps create that golden, crunchy top.
- Bake for 45 to 50 minutes. The top should be golden brown and the edges should be bubbly. A toothpick inserted into the center should come out mostly clean, though some moist crumbs are fine. The pumpkin layer underneath will be set but still soft.
- Let it cool for at least 15 minutes before serving. This allows the layers to set. If you serve it too hot, it will be runny. Warm is perfect, but not straight from the oven hot.
Visual cue: When it is done, the top will be a deep golden brown with some slightly darker spots. You might see a few bubbles around the edges where the pumpkin mixture is peeking through. The kitchen will smell like a fall candle, which is always a good sign.
Cooking Tips & Techniques
I have made this easy 5-ingredient pumpkin dump cake at least twenty times, and I have learned a few things the hard way. Here are my best tips to make sure yours turns out perfect.
Do not overmix the pumpkin layer. I know it is tempting to keep whisking, but stop as soon as it is combined. Overmixing can make the pumpkin layer too thin and watery. A few small lumps are fine.
Spread the cake mix evenly. This is the most common mistake I see. If you dump all the mix in one spot, you will get clumps of dry mix that never bake through. Take the extra 30 seconds to spread it evenly with your fingers.
Use cold butter if you forget to melt it. I once forgot to melt the butter and was in a hurry. I sliced cold butter into thin pats and laid them over the top. It worked surprisingly well, though it took a few extra minutes to melt in the oven. Not ideal, but a good backup plan.
Check your oven temperature. Ovens run differently. If your top is browning too fast, tent it with foil for the last 10 minutes. If it is still pale at 45 minutes, give it another 5. Trust your eyes more than the timer.
Let it rest. I know you want to dig in right away, but that 15-minute rest is crucial. The first time I made this, I served it after 5 minutes and it was a soupy mess. Patience pays off here.
Make it ahead. This cake actually tastes better the next day. The flavors meld together and the texture becomes even more fudgy. Bake it the night before and reheat gently in the microwave or oven.
Variations & Adaptations
One of the best things about this recipe is how easy it is to change up. Here are some variations I have tried and loved.
- Gluten-Free Version: Use a gluten-free yellow cake mix. I have used King Arthur Measure for Measure blend with good results. The texture is slightly different, more crumbly, but still delicious. Check your pumpkin pie spice is gluten-free too.
- Dairy-Free Option: Substitute the butter with a plant-based butter like Miyoko’s or Earth Balance. Use canned coconut milk instead of evaporated milk. The coconut flavor is subtle and works well with pumpkin.
- Spice It Up: Add 1/2 teaspoon of ground ginger or a pinch of cayenne pepper to the pumpkin mixture for a little heat. I tried this last Thanksgiving and it was a hit with the adults. The warmth sneaks up on you.
- Nutty Crunch: Sprinkle 1/2 cup of chopped pecans or walnuts over the cake mix before adding the butter. The nuts toast as it bakes and add a lovely crunch. I do this every time now.
- Chocolate Lover’s Version: Use a chocolate cake mix instead of yellow. This sounds weird but trust me, chocolate and pumpkin are a great pair. My kids love this version and ask for it year-round.
- Slow Cooker Method: You can make this in a slow cooker. Grease the insert, layer the ingredients the same way, and cook on low for 3 to 4 hours. The top will be softer, but the flavor is still amazing. Great for potlucks where you need to keep it warm.
I personally love the nutty crunch version best. The toasted pecans add a texture that makes it feel more special, even though it is still just five ingredients plus the nuts.
Serving & Storage Suggestions
This pumpkin dump cake is versatile when it comes to serving. Here is how I like to do it.
Serving temperature: Warm is best. Let it cool for 15 to 20 minutes after baking, then serve while still warm. The pumpkin layer is soft and the top is slightly crisp. If you have leftovers, reheat individual portions in the microwave for 20 seconds.
Toppings: A scoop of vanilla ice cream is the classic choice. The cold ice cream melting into the warm cake is pure magic. Whipped cream works too, or a drizzle of caramel sauce. For a less sweet option, a dollop of Greek yogurt works surprisingly well.
What to serve with it: This cake is rich enough to stand alone, but it pairs beautifully with a cup of coffee or spiced tea. For a full fall meal, serve it after a bowl of chili or roasted chicken soup. The contrast of savory and sweet is lovely.
Storage: Cover the dish tightly with foil or plastic wrap and store in the refrigerator for up to 5 days. The texture will become more dense and fudgy over time, which some people prefer. I actually like it better on day two.
Freezing: This freezes well. Let it cool completely, then cut into portions. Wrap each piece in plastic wrap and then foil. Freeze for up to 3 months. Thaw in the refrigerator overnight and reheat in the microwave or a 300°F oven for 10 minutes.
Reheating: The microwave is fastest, about 30 seconds per slice. For a crisper top, reheat in a 350°F oven for 10 minutes. Do not overheat or the pumpkin layer can become watery.
Nutritional Information & Benefits
Here is the approximate nutritional breakdown for one serving (based on 12 servings):
- Calories: 380
- Fat: 18g
- Carbohydrates: 52g
- Fiber: 3g
- Sugar: 32g
- Protein: 5g
- Vitamin A: 190% DV
Pumpkin is packed with vitamin A, which is great for eye health and immune function. It is also a good source of fiber, which helps with digestion. The evaporated milk adds calcium and protein. While this is definitely a treat, it has some redeeming qualities compared to other desserts.
Dietary considerations: This recipe contains gluten, dairy, and eggs (in the cake mix). For gluten-free and dairy-free options, see the variations section. It is nut-free as written, but check your cake mix label for cross-contamination warnings if that is a concern.
I like to think of this as a dessert that feels indulgent but uses real, simple ingredients. It is not health food, but it is not loaded with artificial stuff either. That balance works for my family.
Conclusion
This easy 5-ingredient pumpkin dump cake is the kind of recipe that proves you do not need to be a professional baker to make something truly special. It is forgiving, fast, and absolutely delicious. Mrs. Gable was right all those years ago, sometimes the simplest things are the best.
I hope you give this recipe a try and make it your own. Add your favorite toppings, try a different cake mix, or throw in some nuts. The beauty of this recipe is that it welcomes your personal touch. And when you take that first warm, buttery bite, I think you will understand why I keep coming back to it year after year.
If you make this, I would love to hear about it. Leave a comment below and tell me how it turned out, or share your own twist on it. And if you are looking for more easy fall desserts, check out my easy apple crisp recipe or this simple pumpkin bread for another quick treat. Happy baking, friends!
Frequently Asked Questions
Can I use pumpkin pie filling instead of pumpkin puree?
No, do not use pumpkin pie filling. It already has sugar and spices added, which will make your dump cake too sweet and throw off the texture. Stick with 100% pure pumpkin puree for the best results.
Why is my dump cake runny in the middle?
This usually happens if it is underbaked or if you did not let it cool long enough. Make sure you bake for the full 45 to 50 minutes and let it rest for at least 15 minutes before serving. The pumpkin layer will set as it cools.
Can I make this in a different size pan?
Yes, but the baking time will change. An 8×8 pan will need about 10 extra minutes, and a 9×9 will need about 5 extra. A larger pan like an 11×15 will bake faster, so start checking at 30 minutes.
Do I need to refrigerate leftovers?
Yes, because of the dairy in the evaporated milk. Cover the dish tightly and store in the refrigerator for up to 5 days. You can also freeze individual portions for longer storage.
Can I use a sugar-free cake mix?
I do not recommend it. Sugar-free cake mixes have different ratios of ingredients and often use artificial sweeteners that do not bake the same way. The texture will be off and the top may not brown properly. Stick with regular yellow cake mix for the best results.
Pin This Recipe!
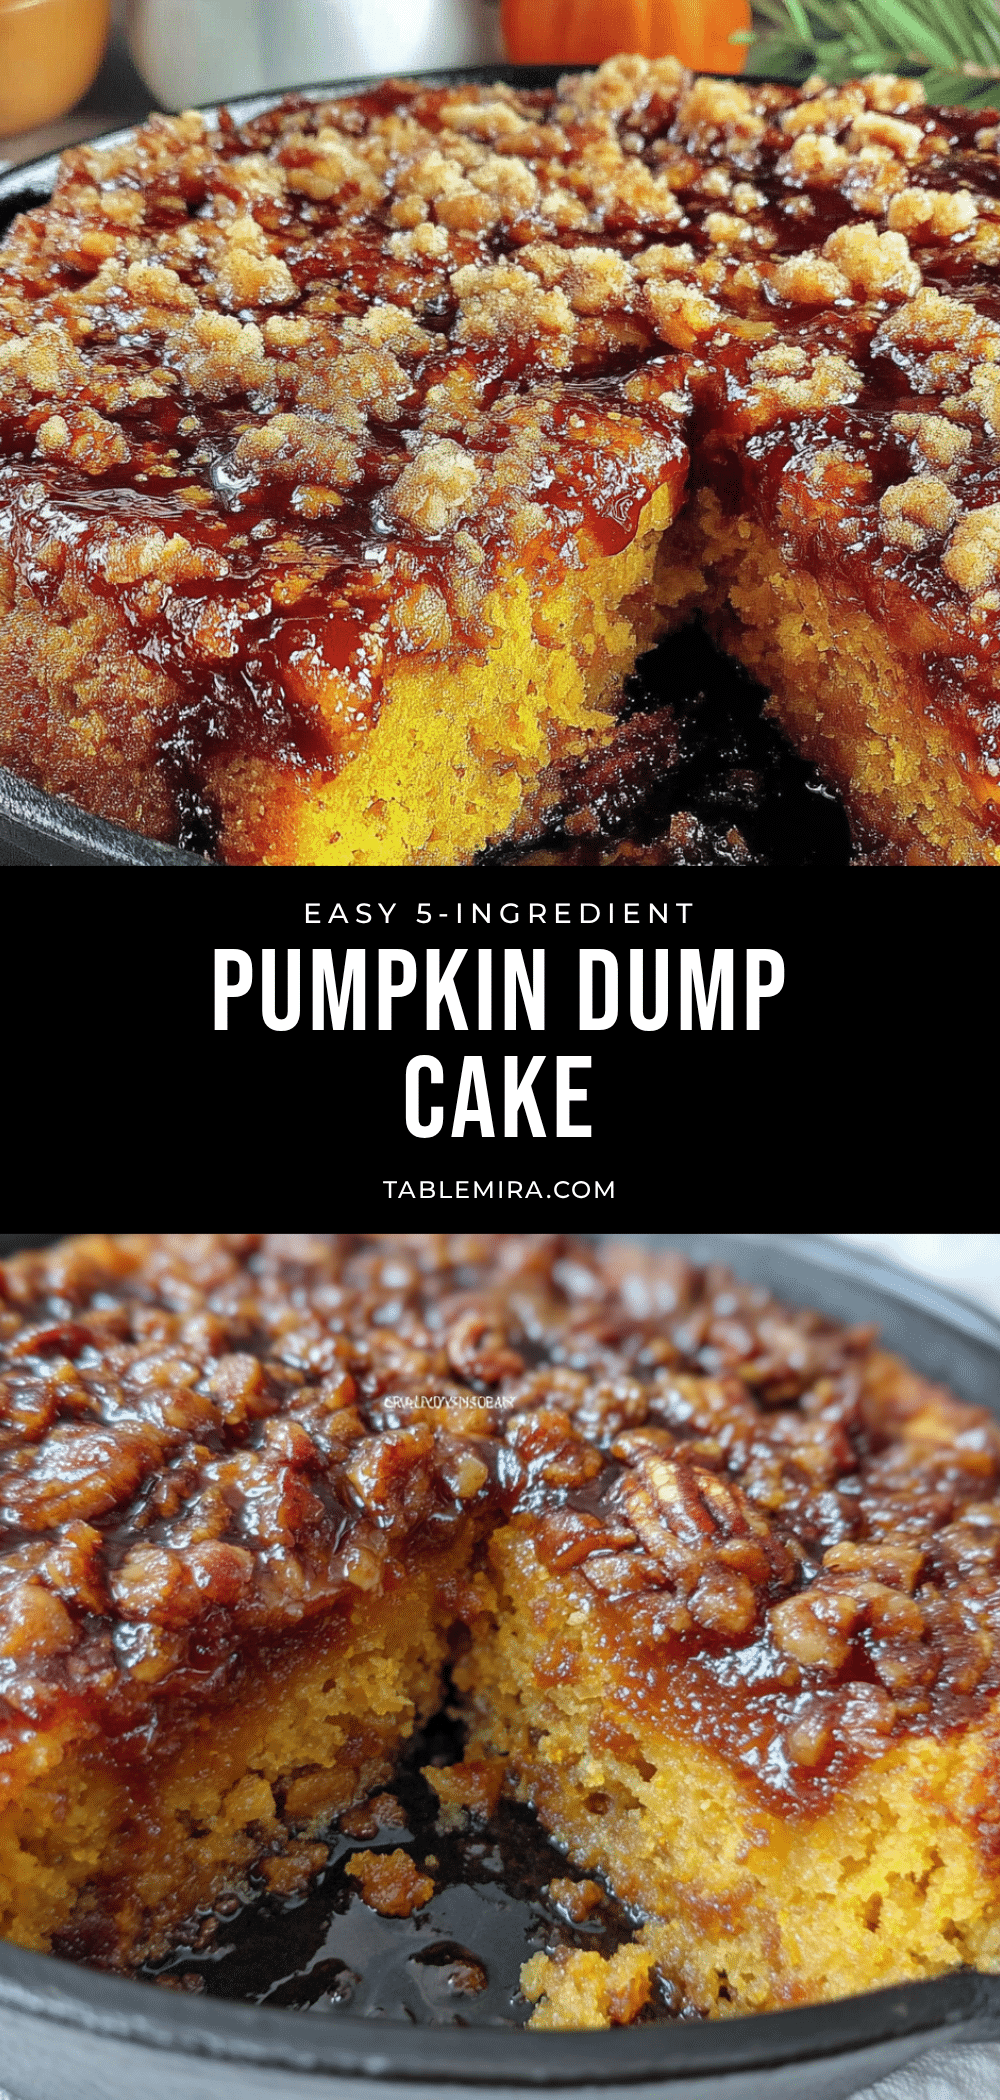
Easy 5-Ingredient Pumpkin Dump Cake: Best Fall Dessert
This easy 5-ingredient pumpkin dump cake is a simple, forgiving fall dessert that comes together in minutes. With a golden, crunchy top and a soft pumpkin layer, it’s perfect for busy weeknights or holiday gatherings.
- Prep Time: 10 minutes
- Cook Time: 45 minutes
- Total Time: 55 minutes
- Yield: 12 servings 1x
- Category: Dessert
- Cuisine: American
Ingredients
- 1 can (15 oz) pumpkin puree
- 1 can (12 oz) evaporated milk
- 1 box (15.25 oz) yellow cake mix
- 1 cup unsalted butter, melted
- 1 tablespoon pumpkin pie spice
Instructions
- Preheat your oven to 350°F (175°C).
- Grease a 9×13 inch baking dish lightly with butter or cooking spray.
- In a medium bowl, whisk together the pumpkin puree, evaporated milk, and pumpkin pie spice until smooth.
- Pour the pumpkin mixture into the prepared baking dish and spread evenly.
- Sprinkle the dry cake mix evenly over the pumpkin mixture. Do not stir.
- Pour the melted butter evenly over the cake mix layer.
- Bake for 45 to 50 minutes, until the top is golden brown and the edges are bubbly.
- Let cool for at least 15 minutes before serving.
Notes
Do not use pumpkin pie filling; use 100% pure pumpkin puree. Let the cake rest for 15 minutes before serving to allow the layers to set. For a nutty crunch, sprinkle 1/2 cup chopped pecans or walnuts over the cake mix before adding the butter. Leftovers can be stored in the refrigerator for up to 5 days or frozen for up to 3 months.
Nutrition
- Serving Size: 1 slice (1/12 of cak
- Calories: 380
- Sugar: 32
- Sodium: 380
- Fat: 18
- Saturated Fat: 11
- Carbohydrates: 52
- Fiber: 3
- Protein: 5
Keywords: pumpkin dump cake, easy pumpkin dessert, 5 ingredient dessert, fall dessert, pumpkin cake


