My niece did not trust me when I said we could make spider webs out of sugar cookie dough and chocolate icing. She stood there, eight years old, arms crossed, giving me that look kids master by the time they hit kindergarten. The one that says “I am not falling for this.” I had promised a spooky Halloween baking session, and she expected something impressive, not some sad cookie with a squiggly line of frosting. Honestly, I wasn’t totally sure myself if it would work the way I pictured it in my head. Pinterest makes everything look effortless, but real life? Real life is a sticky counter and melted chocolate on your favorite apron. But I had this vision of dark chocolate webs stretched across buttery cookies, and I was determined to see it through.
We started with the dough, her rolling it out with way more enthusiasm than precision. It was a mess, the kind of mess that makes you question your life choices for a second. But somewhere between flour clouds and giggles, something clicked. The first cookie we tried to decorate looked like a spider had a seizure on it. We laughed so hard we almost gave up. But then we tried again, slower this time, and the web actually appeared. Thin chocolate lines connecting into that classic spiral pattern. Her face changed from skeptical to something else entirely. Wonder, maybe. Or just the pure satisfaction of proving yourself wrong.
These spooky chocolate spider web sugar cookies became our thing after that. Every October, we make a batch, and I swear they get better every year. Not because the recipe changes, but because we stop trying so hard to make them perfect. The imperfections are what make them look genuinely spooky, like something a real spider might have woven overnight. If you have ever wanted to make a Halloween dessert that looks way harder than it actually is, this is it. Trust me on this one.
Why You’ll Love This Recipe
I have tested this recipe about a dozen times across different kitchens, different ovens, different humidity levels. It holds up every single time. That is the kind of reliability you want in a holiday cookie, especially when you are baking with kids or trying to impress at a party.
- Surprisingly Simple : The decorating technique looks professional but uses a basic piping method anyone can master in five minutes. No fancy tools required.
- Pantry-Friendly Ingredients : Butter, sugar, flour, cocoa powder, and chocolate chips. You probably have most of this already, which means no last-minute store runs.
- Perfect for Halloween Gatherings : These cookies disappear fast at parties, and they pair beautifully with other spooky treats like a slow cooker Halloween chili bar for a full themed spread.
- Kid-Approved and Adult-Loved : Not too sweet, with a deep chocolate flavor that satisfies grown-ups without overwhelming little ones.
- Make-Ahead Friendly : The dough freezes beautifully, and decorated cookies stay fresh for days. Perfect for staggered Halloween celebrations.
What makes these different from every other sugar cookie recipe out there is the texture. They are crisp on the edges but have a slight chewiness in the center that most rolled cookies lack. I figured this out by accident, honestly, when I got distracted and left the dough in the fridge longer than planned. The chilled butter created pockets in the oven that gave the cookies this lovely, tender crumb. It was a happy mistake I have never stopped using.
These cookies are the kind that make you feel like you actually accomplished something in the kitchen. Not every recipe does that. Some leave you frustrated with a sink full of dishes and a mediocre result. This one leaves you with a plate of cookies that look like you spent hours on them, when really, you spent maybe an hour total. That is my favorite kind of baking.
What Ingredients You Will Need
This recipe relies on basic baking staples with a few small twists that make the chocolate flavor really sing. Nothing exotic, nothing expensive. Just smart choices that add up to a cookie worth bragging about.
For the Sugar Cookies
- Unsalted butter, 1 cup (226g), softened – I prefer using European-style butter like Kerrygold for a richer flavor, but any unsalted butter works. Just make sure it is truly softened, not melted.
- Granulated sugar, 1 cup (200g) – Regular white sugar gives these cookies the right structure. Do not substitute with brown sugar here; it changes the spread too much.
- Large egg, 1, room temperature – Cold eggs can make the dough seize up. Set yours out about 30 minutes before starting.
- Vanilla extract, 2 teaspoons – Pure vanilla makes a difference here. The imitation stuff tastes artificial in a cookie this simple.
- All-purpose flour, 2 ½ cups (312g) – Spoon and level your flour. Scooping directly from the bag packs in too much and makes dry cookies.
- Unsweetened cocoa powder, ¼ cup (20g) – I use Dutch-process cocoa for a darker, more intense chocolate flavor. Natural cocoa works too but gives a lighter color.
- Baking powder, 1 teaspoon – Helps the cookies spread just enough without puffing up too much.
- Salt, ½ teaspoon – Balances the sweetness and deepens the chocolate taste. Do not skip it.
For the Spider Web Icing
- Semi-sweet chocolate chips, 1 cup (175g) – Ghirardelli or Guittard melt the smoothest. Avoid generic brands that seize up when melted.
- Coconut oil or vegetable shortening, 1 teaspoon – This thins the chocolate just enough for piping without making it greasy. Coconut oil adds a faint flavor I actually like, but shortening is neutral.
- White candy melts or white chocolate chips, ½ cup (85g) – For the spider web details. Candy melts are easier to work with, but white chocolate tastes better.
Optional Decorations
- Edible glitter or sanding sugar in orange or black – Adds a little sparkle without overwhelming the design.
- Mini spider rings or candy eyeballs – A fun addition if you are making these for a kids’ party. Press them on while the icing is still wet.
When it comes to chocolate chips, I have learned the hard way that quality matters. Cheap chocolate chips contain stabilizers that prevent them from melting into a smooth, pipeable consistency. Spend the extra dollar on a good brand. Your piping hand will thank you.
Equipment Needed
You do not need a professional bakery setup for these cookies. Most of this stuff is probably already in your kitchen. But a few specific tools make the process significantly easier and less frustrating.
- Stand mixer or hand mixer – Creaming butter and sugar by hand is possible but exhausting. A mixer does it in two minutes flat.
- Rolling pin with thickness guides – Consistent thickness is crucial for even baking. Adjustable rings take the guesswork out.
- Round cookie cutters, 2.5 to 3 inches – Any round cutter works. I have used a drinking glass in a pinch, and it worked fine.
- Parchment paper or silicone baking mats – Non-negotiable. Cookies stick to bare pans, and cleanup is miserable.
- Piping bags or zip-top bags – For the chocolate web. Snip a tiny corner off a zip-top bag if you do not own piping bags.
- Small round piping tip (size 2 or 3) – Optional but gives you cleaner lines. Without it, the chocolate can come out too thick.
- Cooling rack – Cookies need to cool completely before decorating. A rack speeds this up significantly.
- Offset spatula – Not required, but helpful if you want to smooth out any icing mistakes.
I bought a cheap set of piping tips years ago and honestly, they work just as well as the expensive ones. Do not feel pressured to buy fancy equipment for a once-a-year baking project. A zip-top bag with a clipped corner will get the job done, even if it is not as elegant.
Preparation Method
Step 1: Make the Cookie Dough
In a large mixing bowl, beat the softened butter and granulated sugar together on medium speed until light and fluffy, about 3 minutes. Scrape down the sides halfway through. Add the egg and vanilla extract, then beat until fully incorporated, about 1 minute more. The mixture should look pale and creamy.
In a separate bowl, whisk together the flour, cocoa powder, baking powder, and salt. Gradually add the dry ingredients to the wet mixture, mixing on low speed until just combined. Do not overmix. Stop as soon as you no longer see streaks of flour. The dough will be soft but not sticky.
Step 2: Chill the Dough
Divide the dough into two equal discs. Wrap each tightly in plastic wrap and refrigerate for at least 2 hours, or up to 3 days. Chilling is non-negotiable here. Warm dough spreads too much in the oven, and your spider webs will end up on oddly shaped blobs instead of round cookies. I learned this the frustrating way when I tried to rush the process for a party. The cookies turned into flat, shapeless discs that looked nothing like the Pinterest photos.
Step 3: Roll and Cut
Preheat your oven to 350°F (175°C). Line two baking sheets with parchment paper. Remove one disc of dough from the fridge and let it sit at room temperature for about 5 minutes. On a lightly floured surface, roll the dough to ¼-inch thickness. Use your round cookie cutter to cut out shapes. Re-roll scraps once, then discard or bake the remaining scraps as snack pieces.
Place cookies about 2 inches apart on the prepared baking sheets. Bake for 8 to 10 minutes. The cookies are done when the edges look set and the centers appear slightly underdone. They will continue baking on the hot pan. Let them cool on the baking sheet for 5 minutes, then transfer to a cooling rack to cool completely.
Step 4: Prepare the Chocolate Icing
While the cookies cool, melt the semi-sweet chocolate chips with the coconut oil in a microwave-safe bowl. Heat in 30-second intervals, stirring between each, until completely smooth. Let it cool slightly, about 5 minutes. It should still be fluid but not hot to the touch. Transfer the melted chocolate to a piping bag fitted with a small round tip, or to a zip-top bag with a tiny corner snipped off.
Melt the white candy melts or white chocolate chips separately in another bowl, using the same method. Transfer to a separate piping bag.
Step 5: Create the Spider Webs
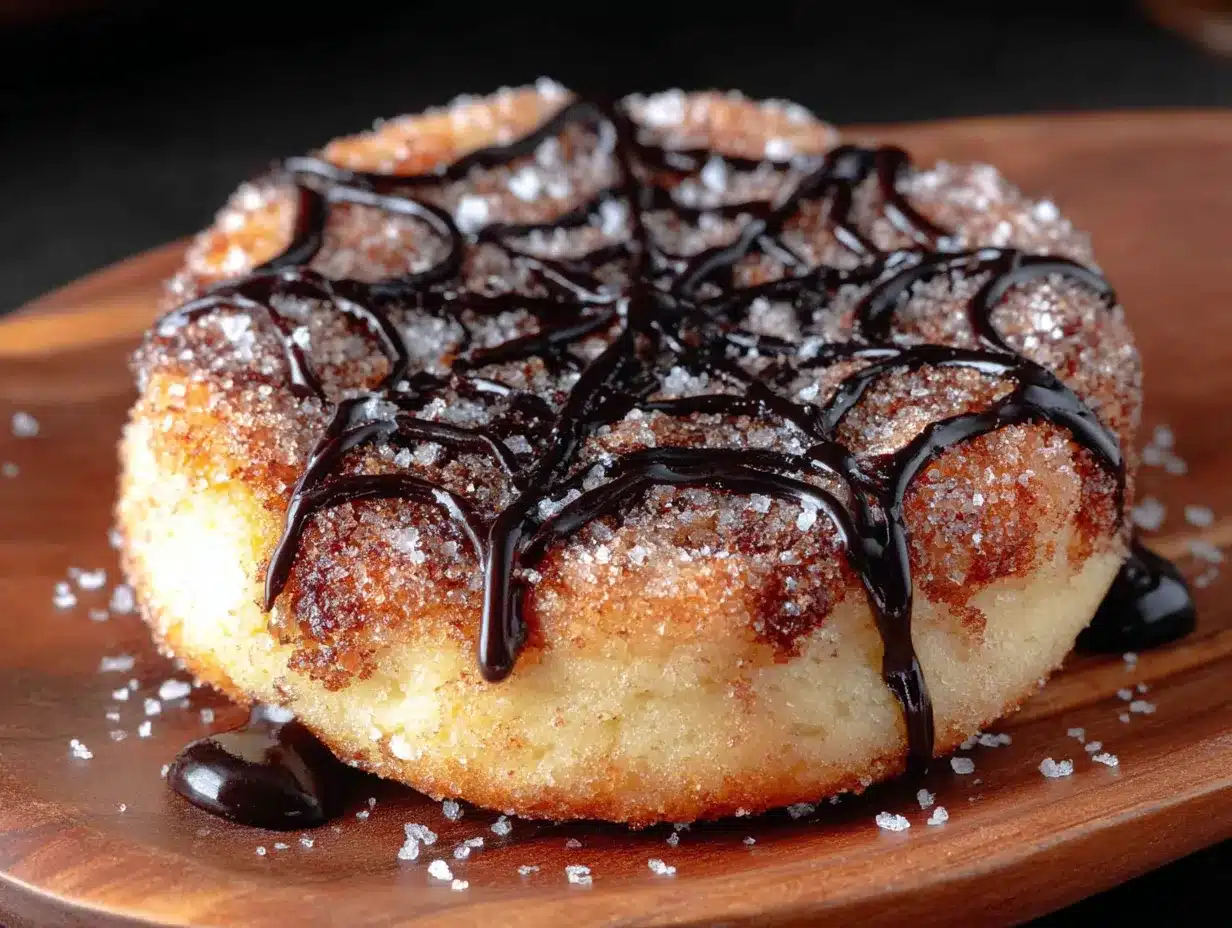
This part looks complicated but is actually deceptively simple. Start with a completely cooled cookie. Using the dark chocolate, pipe a small dot in the center of the cookie. Pipe 4 to 6 straight lines radiating outward from the center dot to the edges of the cookie, like spokes on a wheel.
Next, pipe curved lines connecting the spokes, starting from the center and working outward. Imagine drawing a spiral that gets wider as it goes. The dark chocolate lines should be thin but visible. Do not worry about perfection. Uneven lines look more organic and spider-like.
While the dark chocolate is still wet, use the white chocolate to pipe small dots or dashes along the outer edge of the web. You can also add a tiny white spider in the center by piping a small white dot with eight tiny legs extending from it. Let the cookies sit at room temperature until the chocolate sets completely, about 30 minutes to 1 hour.
Cooking Tips & Techniques
After making these cookies more times than I care to count, I have collected a few hard-won lessons. The first and most important one is patience with the dough. I know it is tempting to skip the chilling step, especially when you are excited to bake. Do not do it. Chilled dough holds its shape, spreads evenly, and gives you a flat surface that actually supports the spider web design. Warm dough creates puffy cookies with rounded tops, and the chocolate just slides right off.
Another mistake I made early on was using chocolate that was too hot for piping. Hot chocolate is thin and runny, and it spreads everywhere the second it hits the cookie. You want the chocolate to be warm enough to flow through the tip but thick enough to hold its shape on the cookie. Let it cool for a few minutes after melting, and test a small line on a piece of parchment paper before committing to a cookie.
If your chocolate seizes up while melting, you added water somewhere. Even a single drop of water can turn smooth melted chocolate into a grainy, clumpy mess. Always use completely dry bowls and utensils. If it happens anyway, there is no saving it. Start over with fresh chocolate. I have ruined two batches this way, and it is always heartbreaking.
For the cleanest spider web lines, hold the piping bag at a 90-degree angle above the cookie, not at an angle. Let the chocolate fall onto the surface rather than dragging the tip through it. This gives you more control and prevents accidental smudging. Practice on a piece of parchment paper first if you are nervous. Nobody has to see your practice cookies except you.
Timing matters too. Decorate the cookies the same day you plan to serve them for the best visual effect. The chocolate stays glossy and sharp for about 24 hours, then starts to dull slightly. They still taste fine, but the presentation loses some of its wow factor.
Variations & Adaptations
One of the best things about this recipe is how adaptable it is. I have made versions for different holidays, different dietary needs, and different flavor preferences. Here are a few variations worth trying.
Gluten-Free Version
Substitute the all-purpose flour with a 1-to-1 gluten-free baking flour blend that contains xanthan gum. I have used King Arthur Measure for Measure with great results. The dough will be slightly more crumbly, so handle it gently. Chill it for an extra 30 minutes to help it hold together during rolling.
Vegan Adaptation
Replace the butter with a high-quality vegan butter stick, not the spreadable kind in a tub. Use a flax egg (1 tablespoon ground flaxseed mixed with 3 tablespoons water, left to sit for 5 minutes) instead of the regular egg. For the icing, use vegan chocolate chips and skip the white chocolate, or find a dairy-free white chocolate alternative. The texture is slightly less tender but still delicious.
Peppermint Chocolate Spider Webs
Add ½ teaspoon peppermint extract to the cookie dough along with the vanilla. Crush a few candy canes and sprinkle the pieces over the wet chocolate icing before it sets. The combination of dark chocolate and peppermint is surprisingly good for Halloween. It feels festive without being overwhelming.
Orange Chocolate Variation
Add 1 tablespoon of orange zest to the sugar and butter during the creaming stage. The citrus cuts through the richness of the chocolate and adds a bright, unexpected note. I made these for a Halloween brunch once, and they were the first thing to disappear from the table.
If you are feeling extra creative, turn these into part of a larger Halloween dessert spread. They look fantastic next to no-bake spider web cheesecake bars for a themed dessert table that will impress everyone.
Serving & Storage Suggestions
These cookies are best served at room temperature, which lets the chocolate icing stay firm but not hard. Arrange them on a platter in a circular pattern, with the spider webs facing upward so the design is visible. If you are bringing them to a party, place them in a single layer in a container, separated by parchment paper. Stacking them directly on top of each other will smudge the webs.
For storage, keep the cookies in an airtight container at room temperature for up to 5 days. Do not refrigerate them. The fridge introduces moisture that can make the chocolate bloom, creating white streaks on the surface. They will still taste fine, but they will not look as pretty. If you need to store them longer, freeze the undecorated cookies for up to 3 months. Thaw them at room temperature, then decorate fresh. The chocolate web does not freeze well and will crack when thawed.
Reheating is not necessary for these cookies, but if you want a slightly warm, gooey texture, pop one in the microwave for about 8 seconds. The chocolate will soften without melting completely. This is my preferred way to eat them, honestly. Something about warm chocolate and buttery cookie dough feels extra indulgent.
Flavors actually develop nicely over the first 24 hours. The cocoa powder settles into the dough and the vanilla becomes more pronounced. If you can resist eating them all immediately, they taste even better the next day. That is a big if, I know.
Nutritional Information & Benefits
Let us be real here. These are sugar cookies with chocolate icing. They are a treat, not a health food. But that does not mean they cannot fit into a balanced lifestyle. One cookie contains approximately 180 calories, 9 grams of fat, 24 grams of carbohydrates, and 2 grams of protein. The exact numbers depend on your ingredient choices and cookie size.
The cocoa powder in these cookies actually provides a small amount of antioxidants, specifically flavonoids, which are linked to heart health benefits. It is not a significant amount, but it is something. Dark chocolate in the icing also contains iron and magnesium in trace amounts. Again, we are not calling these a superfood, but it is nice to know there is a little something good in there.
For those with dietary restrictions, this recipe contains gluten, dairy, and eggs. The gluten-free and vegan variations above address those concerns. I have also made these with dairy-free butter and oat milk in the icing, and they turned out well. Just be mindful of cross-contamination if you are baking for someone with celiac disease or a severe allergy.
I personally believe that treats like this have a place in a healthy life. Baking and sharing food is good for the soul, and that counts for something too.
Conclusion
These spooky chocolate spider web sugar cookies are everything I want in a Halloween dessert. They look impressive enough to steal the show at any party, but they are simple enough that you can make them with kids on a random October afternoon. The chocolate is rich without being heavy, the cookies are tender without being fragile, and the spider web design is genuinely fun to create.
I hope you give these a try, and I hope you make them your own. Add extra chocolate, skip the white icing, use different cookie cutters, whatever feels right to you. That is the beauty of a simple recipe. It leaves room for your personality to shine through. If you make these, tag me in your photos or leave a comment below telling me how they turned out. I love seeing the different ways people interpret the spider web design. Some are neat and precise, others are wild and chaotic. Both are beautiful in their own way.
Happy Halloween, and happy baking. May your chocolate stay smooth and your spider webs stay spooky.
Frequently Asked Questions
Can I use store-bought sugar cookie dough for this recipe?
Yes, you absolutely can. The homemade version tastes better and has a nicer texture, but in a pinch, refrigerated sugar cookie dough from the store works fine. Just roll it out and cut it into rounds before baking. The decorating process stays the same.
Why did my chocolate icing seize up?
Chocolate seizes when it comes into contact with even a tiny amount of water. Make sure your bowl, spatula, and utensils are completely dry before melting. If your chocolate does seize, there is no way to fix it. You have to start over with fresh chocolate. This is one of those lessons you only learn once.
How far in advance can I make these cookies?
You can bake the cookies up to 3 days ahead and store them in an airtight container at room temperature. Decorate them the day you plan to serve them for the best visual effect. The chocolate stays glossy and sharp for about 24 hours before it starts to dull slightly.
Can I freeze decorated spider web cookies?
I do not recommend freezing cookies after they have been decorated with chocolate icing. The chocolate can crack or bloom when thawed, ruining the design. Freeze the undecorated cookies instead, then thaw and decorate them fresh. They will look and taste much better that way.
What if I do not have a piping bag?
No problem at all. Use a zip-top plastic bag instead. Fill it with the melted chocolate, seal the top, and snip off a tiny corner. The smaller the hole, the thinner your lines will be. Start with a very small cut, you can always make it bigger if needed. Practice on a piece of parchment paper first to get a feel for the flow.
Pin This Recipe!
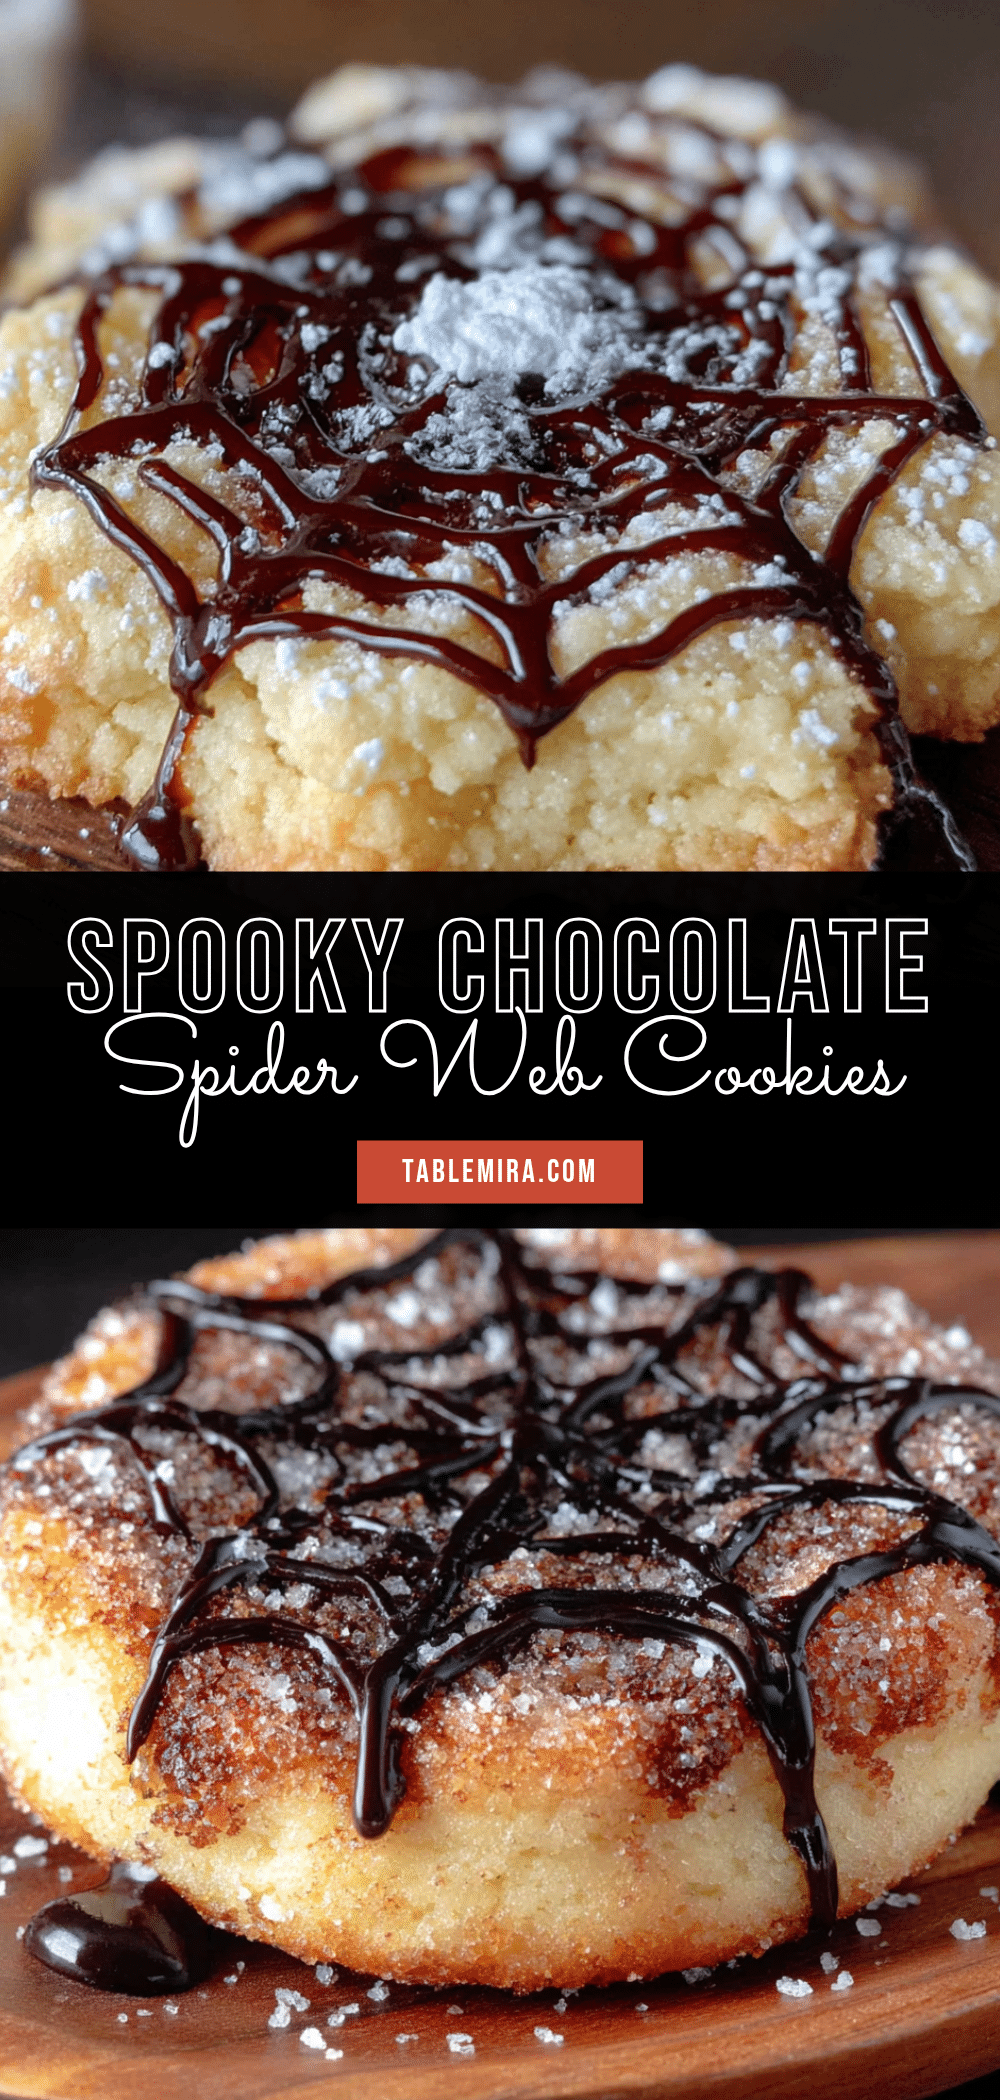
Decorate Spooky Spider Web Sugar Cookies for Halloween
These spooky chocolate spider web sugar cookies are everything you want in a Halloween dessert. They look impressive enough to steal the show at any party, but they are simple enough that you can make them with kids on a random October afternoon.
- Prep Time: 20 minutes
- Cook Time: 10 minutes
- Total Time: 2 hours 30 minutes (includes chilling)
- Yield: 24 servings 1x
- Category: Dessert
- Cuisine: American
Ingredients
- 1 cup (226g) unsalted butter, softened
- 1 cup (200g) granulated sugar
- 1 large egg, room temperature
- 2 teaspoons vanilla extract
- 2 ½ cups (312g) all-purpose flour
- ¼ cup (20g) unsweetened cocoa powder
- 1 teaspoon baking powder
- ½ teaspoon salt
- 1 cup (175g) semi-sweet chocolate chips
- 1 teaspoon coconut oil or vegetable shortening
- ½ cup (85g) white candy melts or white chocolate chips
- Edible glitter or sanding sugar in orange or black (optional)
- Mini spider rings or candy eyeballs (optional)
Instructions
- In a large mixing bowl, beat the softened butter and granulated sugar together on medium speed until light and fluffy, about 3 minutes. Scrape down the sides halfway through. Add the egg and vanilla extract, then beat until fully incorporated, about 1 minute more. The mixture should look pale and creamy.
- In a separate bowl, whisk together the flour, cocoa powder, baking powder, and salt. Gradually add the dry ingredients to the wet mixture, mixing on low speed until just combined. Do not overmix. Stop as soon as you no longer see streaks of flour. The dough will be soft but not sticky.
- Divide the dough into two equal discs. Wrap each tightly in plastic wrap and refrigerate for at least 2 hours, or up to 3 days.
- Preheat your oven to 350°F (175°C). Line two baking sheets with parchment paper. Remove one disc of dough from the fridge and let it sit at room temperature for about 5 minutes. On a lightly floured surface, roll the dough to ¼-inch thickness. Use your round cookie cutter to cut out shapes. Re-roll scraps once, then discard or bake the remaining scraps as snack pieces.
- Place cookies about 2 inches apart on the prepared baking sheets. Bake for 8 to 10 minutes. The cookies are done when the edges look set and the centers appear slightly underdone. They will continue baking on the hot pan. Let them cool on the baking sheet for 5 minutes, then transfer to a cooling rack to cool completely.
- While the cookies cool, melt the semi-sweet chocolate chips with the coconut oil in a microwave-safe bowl. Heat in 30-second intervals, stirring between each, until completely smooth. Let it cool slightly, about 5 minutes. It should still be fluid but not hot to the touch. Transfer the melted chocolate to a piping bag fitted with a small round tip, or to a zip-top bag with a tiny corner snipped off.
- Melt the white candy melts or white chocolate chips separately in another bowl, using the same method. Transfer to a separate piping bag.
- Start with a completely cooled cookie. Using the dark chocolate, pipe a small dot in the center of the cookie. Pipe 4 to 6 straight lines radiating outward from the center dot to the edges of the cookie, like spokes on a wheel.
- Next, pipe curved lines connecting the spokes, starting from the center and working outward. Imagine drawing a spiral that gets wider as it goes. The dark chocolate lines should be thin but visible.
- While the dark chocolate is still wet, use the white chocolate to pipe small dots or dashes along the outer edge of the web. You can also add a tiny white spider in the center by piping a small white dot with eight tiny legs extending from it. Let the cookies sit at room temperature until the chocolate sets completely, about 30 minutes to 1 hour.
Notes
Chilling the dough is non-negotiable for even baking. Use completely dry bowls and utensils when melting chocolate to prevent seizing. Decorate cookies the same day you plan to serve for the best visual effect. Store undecorated cookies in an airtight container at room temperature for up to 5 days; freeze undecorated cookies for up to 3 months.
Nutrition
- Serving Size: 1 cookie
- Calories: 180
- Sugar: 14
- Sodium: 95
- Fat: 9
- Saturated Fat: 5
- Carbohydrates: 24
- Fiber: 1
- Protein: 2
Keywords: spider web cookies, Halloween cookies, sugar cookies, chocolate cookies, spooky cookies, Halloween dessert, easy Halloween recipe


