“You have to make those spiderweb brownies again,” my niece said, not even looking up from her phone last October. And that was it. I hadn’t thought about that particular Halloween experiment in a couple of years, but suddenly I was back in my tiny apartment kitchen, squeezing Nutella from a sandwich baggie, trying to make webs that actually looked like webs and not like a spider had a seizure.
That first batch was, honestly, a disaster. The Nutella was too cold, the webs broke apart, and I ended up with brownies that looked more like a crime scene than a Halloween treat. But here’s the thing about baking failures—they teach you more than the successes ever do. I learned that the temperature of your Nutella matters more than you’d think, and that a toothpick is your best friend when it comes to fixing broken web lines.
These Spooky Spiderweb Nutella Halloween Brownies are the result of that trial and error. They’re the brownies I now bring to every Halloween party, the ones that disappear before the punch bowl gets touched. And honestly? They’re easier than they look. You get that rich, fudgy brownie base, a creamy Nutella layer, and then the web design that makes everyone think you spent hours on it. I won’t tell if you don’t.
Why You’ll Love This Recipe
I’ve tested this recipe more times than I care to admit, and every single time, the reaction is the same. People’s eyes get wide, they pull out their phones, and then they take a bite and go quiet for a second. That’s the moment I know it worked.
- Quick & Easy: From start to finish, you’re looking at about 45 minutes. That includes baking time. Perfect for when you realize tomorrow is the school Halloween party and you promised to bring something.
- Simple Ingredients: You probably have most of this stuff already. Butter, sugar, eggs, flour, cocoa powder. The only “special” ingredient is Nutella, and let’s be honest, there’s probably a jar in your pantry right now.
- Perfect for Halloween: This is the dessert that steals the show at any Halloween gathering. It’s festive without being overly complicated or requiring fondant or food coloring that stains your hands for days.
- Crowd-Pleaser: Kids love the spiderweb design. Adults love the rich chocolate and hazelnut flavor. Everyone wins.
- Unbelievably Delicious: The brownie itself is fudgy and dense, with that crackly top that brownie lovers dream about. The Nutella adds a creamy, hazelnut layer that takes it from good to unforgettable.
What makes this recipe different from all the other spiderweb brownies out there? It’s the technique. Most recipes tell you to just dollop Nutella on top and swirl it with a knife. That works, sort of, but you end up with muddy, undefined webs. My method uses a piping bag (or a zip-top baggie, no judgment) and a specific pattern that actually looks like a web. Plus, I’ve figured out the exact Nutella consistency that gives you clean, sharp lines every time.
This is the kind of dessert that makes you feel like a baking rockstar, even if you’re just a regular person who occasionally burns toast. The first time you pull a pan of these out of the oven and see those perfect webs staring back at you, you’ll understand why I keep making them year after year.
What Ingredients You Will Need
This recipe uses simple, everyday ingredients to create something that looks like it came from a fancy bakery. Most of these are pantry staples, which means you can whip up a batch whenever the Halloween mood strikes.
For the Brownie Base:
- 1 cup (226g) unsalted butter, melted and slightly cooled (I use Kerrygold for the rich flavor, but any good butter works)
- 2 cups (400g) granulated sugar (adds sweetness and helps create that crackly top)
- 4 large eggs, room temperature (cold eggs will seize the melted butter)
- 1 tablespoon vanilla extract (pure, not imitation—it makes a difference)
- 1 cup (120g) all-purpose flour (spooned and leveled, not scooped)
- 3/4 cup (75g) unsweetened cocoa powder (I prefer Dutch-process for a darker, richer color)
- 1/2 teaspoon salt (balances the sweetness and enhances the chocolate flavor)
- 1/2 teaspoon baking powder (gives just a little lift without making the brownies cakey)
For the Spiderweb Topping:
- 1/2 cup (150g) Nutella (or any chocolate-hazelnut spread—I’ve tried generic brands and they work fine, but Nutella has the best consistency for piping)
- 2-3 tablespoons powdered sugar, for dusting (optional, but adds a spooky, ethereal look)
Ingredient Tips:
For the best results, make sure your eggs are truly at room temperature. I set mine out on the counter about 30 minutes before I start baking. If you’re in a rush, place the eggs in a bowl of warm water for 5 minutes. The melted butter should be warm but not hot—you don’t want to scramble the eggs when you mix them together.
The cocoa powder you use really matters here. Dutch-process cocoa gives a darker, more intense color that makes the spiderwebs pop. Natural cocoa works too, but the brownies will be a bit lighter in color and slightly more acidic in flavor.
If you want to make these gluten-free, substitute the all-purpose flour with a good 1:1 gluten-free baking flour. I’ve had success with King Arthur’s Measure for Measure blend. The texture will be slightly different, but the spiderweb effect works just as well.
Equipment Needed
You don’t need any fancy equipment for these brownies, which is one of the reasons I love this recipe. Here’s what you’ll need:
- 9×13-inch baking pan (a metal pan gives the best results, but glass works too)
- Parchment paper (non-negotiable—it makes lifting the brownies out so much easier)
- Large mixing bowl (for the brownie batter)
- Medium mixing bowl (for dry ingredients)
- Whisk (for mixing the wet ingredients)
- Rubber spatula (for folding in the dry ingredients)
- Small piping bag or zip-top baggie (for the Nutella web)
- Toothpick (for creating the web lines)
- Wire cooling rack (essential for even cooling)
If you don’t have a piping bag, don’t worry. A zip-top baggie with the corner snipped off works perfectly. I actually prefer the baggie method because it’s easier to control and you don’t have to wash a piping bag afterward. Just don’t cut too big of a hole—start small and test the flow on a paper towel first.
I’ve made these brownies in both metal and glass pans, and I honestly prefer metal. Glass pans tend to hold heat longer, which can lead to overbaked edges. If you’re using glass, reduce the baking time by about 5 minutes and check for doneness earlier.
Preparation Method
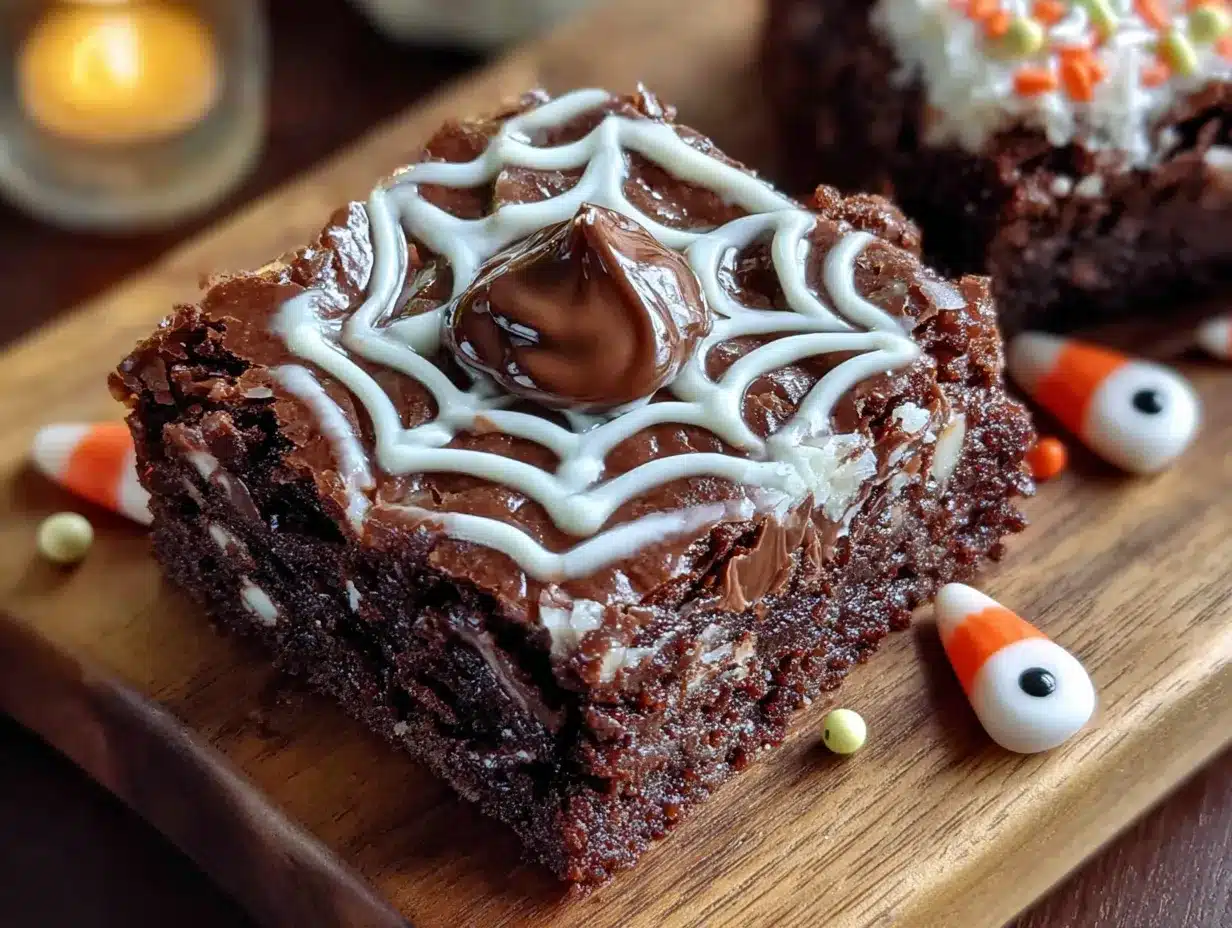
This method might look long, but I promise it’s straightforward. I’ve broken it down into clear steps with all the little details that make the difference between good brownies and great ones.
Step 1: Prepare Your Pan and Preheat
Preheat your oven to 350°F (175°C). Line your 9×13-inch baking pan with parchment paper, leaving some overhang on the long sides. This creates handles that make it easy to lift the brownies out later. Lightly grease the parchment with butter or non-stick spray.
Step 2: Melt the Butter
Melt the butter in a large microwave-safe bowl, heating in 30-second intervals until just melted. You want it melted but not hot—if it’s too hot, it can cook the eggs when you add them. Let it sit for a couple of minutes to cool slightly. The butter should be warm to the touch but not steaming.
Step 3: Mix the Wet Ingredients
Add the sugar to the melted butter and whisk until combined. The mixture will look grainy, and that’s okay. Add the eggs one at a time, whisking well after each addition. The mixture should become smooth and glossy. Add the vanilla extract and whisk again. This is where the magic starts to happen—the mixture should look thick and almost pudding-like.
Step 4: Combine the Dry Ingredients
In a separate bowl, whisk together the flour, cocoa powder, salt, and baking powder. Make sure there are no lumps in the cocoa powder. I usually sift the cocoa powder through a fine-mesh strainer to break up any clumps, but whisking vigorously works too.
Step 5: Fold Everything Together
Add the dry ingredients to the wet mixture and fold gently with a rubber spatula. Don’t overmix! Fold just until you see the last streaks of flour disappear. Overmixing develops gluten, which makes brownies tough and cakey instead of fudgy. The batter should be thick and shiny.
Step 6: Bake the Brownies
Pour the batter into the prepared pan and spread it evenly. Bake at 350°F (175°C) for 22-25 minutes. The brownies are done when a toothpick inserted into the center comes out with a few moist crumbs attached. If it comes out clean, you’ve overbaked them. The edges should be set and starting to pull away from the sides of the pan.
Step 7: Cool the Brownies
Let the brownies cool in the pan for about 10 minutes. This is important because the Nutella web needs a slightly set surface to work properly. If the brownies are too hot, the Nutella will melt into the surface and you’ll lose the definition of the webs.
Step 8: Prepare the Nutella
While the brownies are cooling, scoop the Nutella into a small microwave-safe bowl. Microwave for 10-15 seconds, just until it’s slightly looser than room temperature. You don’t want it hot—just warm enough to pipe easily. Stir it well. Test the consistency by dropping a small amount from a spoon—it should flow slowly but not run.
Step 9: Create the Spiderwebs
Transfer the warm Nutella to a small piping bag or a zip-top baggie. If using a baggie, snip off a tiny corner—start smaller than you think you need. You can always cut more, but you can’t undo a too-big hole.
Pipe concentric circles on the surface of the slightly cooled brownies. Start with a small circle in the center, then pipe larger circles around it, spacing them about 1 inch apart. Don’t worry if they’re not perfect—the web effect is very forgiving.
Step 10: Create the Web Lines
Here’s the trick that makes all the difference. Take a toothpick and drag it from the center outward through all the circles, like you’re drawing spokes on a wheel. Space these spokes about 1 inch apart around the circle. Then, starting from the center again, drag the toothpick in the opposite direction between each spoke. This creates the classic web pattern. Wipe the toothpick clean between each drag to keep the lines sharp.
Step 11: Let the Web Set
Let the brownies cool completely at room temperature. The Nutella web will set as it cools, becoming firm enough to slice cleanly. If you’re in a hurry, you can pop the pan in the refrigerator for about 20 minutes, but room temperature cooling gives the best results.
Step 12: Slice and Serve
Once completely cool, lift the brownies out of the pan using the parchment paper handles. Place them on a cutting board and slice into squares using a sharp knife. Wipe the knife clean between cuts for the cleanest edges. For an extra spooky touch, dust with powdered sugar just before serving.
Cooking Tips & Techniques
I’ve made these brownies at least a dozen times, and I’ve learned a few things the hard way. Here are the tips that make the difference between “pretty good” and “everyone asks for the recipe.”
The biggest mistake I see people make is overbaking the brownies. Remember, you want a toothpick to come out with moist crumbs, not clean. Brownies continue to cook from residual heat after you take them out of the oven, so pulling them a minute or two early is better than leaving them in too long. The first time I made these, I overbaked them by about 3 minutes, and the brownies were dry and crumbly instead of fudgy.
The Nutella temperature is crucial. If it’s too cold, it won’t pipe smoothly and will break apart when you try to drag the toothpick through it. If it’s too hot, it will melt into the brownie surface and create a mess instead of a web. The sweet spot is when the Nutella is just slightly warmer than room temperature—it should flow like thick honey.
When piping the Nutella circles, work quickly but carefully. The brownies are still warm, and the Nutella will start to set as it cools. If you take too long, the later circles won’t blend as well with the earlier ones. I usually pipe all the circles first, then go back and do the toothpick drags.
For the cleanest webs, wipe your toothpick after every single drag. This keeps the Nutella from smearing and creating muddy lines. I keep a paper towel nearby and wipe the toothpick between each spoke. It takes an extra 30 seconds, and it makes a huge difference in the final look.
If you’re making these for a party, you can bake the brownies a day ahead and add the spiderweb the next day. Just reheat the brownies slightly in a 300°F oven for about 5 minutes before piping the web. The warmth helps the Nutella adhere to the surface.
Variations & Adaptations
One of the best things about this recipe is how adaptable it is. I’ve tried several variations over the years, and here are my favorites.
Peanut Butter Spiderwebs: Swap the Nutella for creamy peanut butter. Warm it slightly and pipe the same way. The peanut butter creates a slightly different texture, but the web effect works just as well. This is a huge hit with kids who aren’t into hazelnut flavor.
White Chocolate Webs: Melt white chocolate chips with a teaspoon of coconut oil and pipe that instead of Nutella. The white chocolate creates a striking contrast against the dark brownie and looks especially spooky when dusted with black cocoa powder or edible glitter.
Gluten-Free Version: Substitute the all-purpose flour with a 1:1 gluten-free baking flour. I’ve tested this with King Arthur’s Measure for Measure blend, and the results are nearly identical to the original. Just be careful not to overmix, as gluten-free batters can get gummy if overworked.
Spooky Add-Ins: Fold in 1/2 cup of mini chocolate chips or chopped Reese’s cups before baking. The pockets of melted chocolate add another layer of flavor and texture. You can also add a teaspoon of espresso powder to the dry ingredients to deepen the chocolate flavor without making the brownies taste like coffee.
Individual Spiderweb Brownies: Bake the batter in a 12-cup muffin tin lined with paper liners. Reduce the baking time to 15-18 minutes. Pipe smaller spiderwebs on each individual brownie. These are perfect for Halloween parties where you want grab-and-go portions.
I once tried making these with a dark chocolate hazelnut spread instead of Nutella, and honestly, it was a mistake. The dark chocolate spread was too thick and didn’t pipe well. Stick with the regular Nutella or a similar creamy spread for the best results.
Serving & Storage Suggestions
These brownies are best served at room temperature, which lets the Nutella web stay firm while the brownie stays fudgy. If you’ve refrigerated them, let them sit out for about 15 minutes before serving.
For presentation, I love to arrange the brownies on a dark platter or a black cake stand. The contrast makes the spiderwebs really pop. Dust them with powdered sugar right before serving for an extra spooky, cobweb-like effect. You can also add a few plastic spiders on top for a fun, creepy touch.
These pair beautifully with a cold glass of milk, a scoop of vanilla ice cream, or a warm mug of coffee. For Halloween parties, I like to serve them alongside a spooky chili bar for a sweet and savory combo that always works.
Storage: Store leftover brownies in an airtight container at room temperature for up to 3 days. The Nutella web will stay intact, though it might soften slightly over time. If you need to store them longer, refrigerate for up to a week. Let them come to room temperature before serving.
Freezing: These brownies freeze beautifully. Once completely cool, wrap the whole slab (or individual pieces) tightly in plastic wrap, then in aluminum foil. Freeze for up to 3 months. To thaw, unwrap and let sit at room temperature for about 2 hours. The Nutella web might lose some definition after freezing, but the flavor is still amazing.
If you’re making these for a Halloween party, I recommend baking them the day before and adding the spiderweb the morning of the party. The flavors actually develop and deepen overnight, making the brownies even better the next day.
Nutritional Information & Benefits
Let’s be real—these are a treat, not a health food. But knowing what’s in them helps you enjoy them mindfully. Here’s the estimated nutritional breakdown per brownie (assuming 16 servings):
- Calories: 285
- Fat: 15g
- Carbohydrates: 36g
- Protein: 4g
- Fiber: 2g
- Sugar: 26g
The cocoa powder in these brownies is actually a surprising source of antioxidants. Dark chocolate (and by extension, cocoa powder) contains flavonoids that can help reduce inflammation and support heart health. The hazelnuts in Nutella provide healthy fats and vitamin E. Of course, these benefits are balanced against the sugar and butter content, so moderation is key.
These brownies are not gluten-free unless you make the substitution mentioned above. They contain dairy, eggs, and nuts (hazelnuts in the Nutella). If you have nut allergies, use the peanut butter variation instead (peanuts are legumes, not tree nuts, but check with your doctor).
For a slightly lighter version, you can replace half the butter with unsweetened applesauce. The texture will be a bit more cake-like, but the spiderweb effect still works beautifully.
Conclusion
These Spooky Spiderweb Nutella Halloween Brownies are the dessert that keeps on giving. They look impressive enough for a magazine cover, but they’re simple enough for a weeknight baking project with the kids. The first time you pull that pan out of the oven and see those perfect webs staring back at you, you’ll feel like a baking genius.
What I love most about this recipe is how it brings people together. There’s something about the spiderweb design that makes everyone smile. Kids think it’s cool, adults think it’s clever, and everyone wants to know how you did it. It’s the kind of recipe that becomes a tradition—the thing people ask for year after year.
I’d love to hear how yours turn out! Did you try a different variation? Did your kids help with the piping? Drop a comment below and let me know. And if you’re looking for more Halloween inspiration, check out my no-bake spider web cheesecake bars or these black velvet Halloween cupcakes. Happy baking, and may your spiderwebs always be perfectly spooky!
Frequently Asked Questions
Can I make these brownies ahead of time?
Absolutely! You can bake the brownies up to 2 days ahead and add the spiderweb the day you plan to serve them. Just reheat the brownies slightly before piping the Nutella to help it stick.
Why did my spiderweb turn into a muddy mess?
This usually happens when the Nutella is too hot or the brownies are too warm when you pipe the web. Let the brownies cool for at least 10 minutes before adding the Nutella, and make sure the Nutella is just slightly warm, not hot.
Can I use a different chocolate spread?
Yes, but stick with creamy spreads that have a similar consistency to Nutella. Avoid spreads with chunky pieces or very thick textures, as they won’t pipe smoothly.
How do I get clean slices without smearing the web?
Use a sharp knife and wipe it clean between each cut. For the cleanest slices, refrigerate the brownies for about 15 minutes before cutting. The Nutella web will be firmer and less likely to smear.
Can I double this recipe?
Yes! Double all the ingredients and bake in a half-sheet pan (18×13 inches). Increase the baking time by about 5-8 minutes. You’ll need more Nutella for the web, so plan accordingly.
Pin This Recipe!
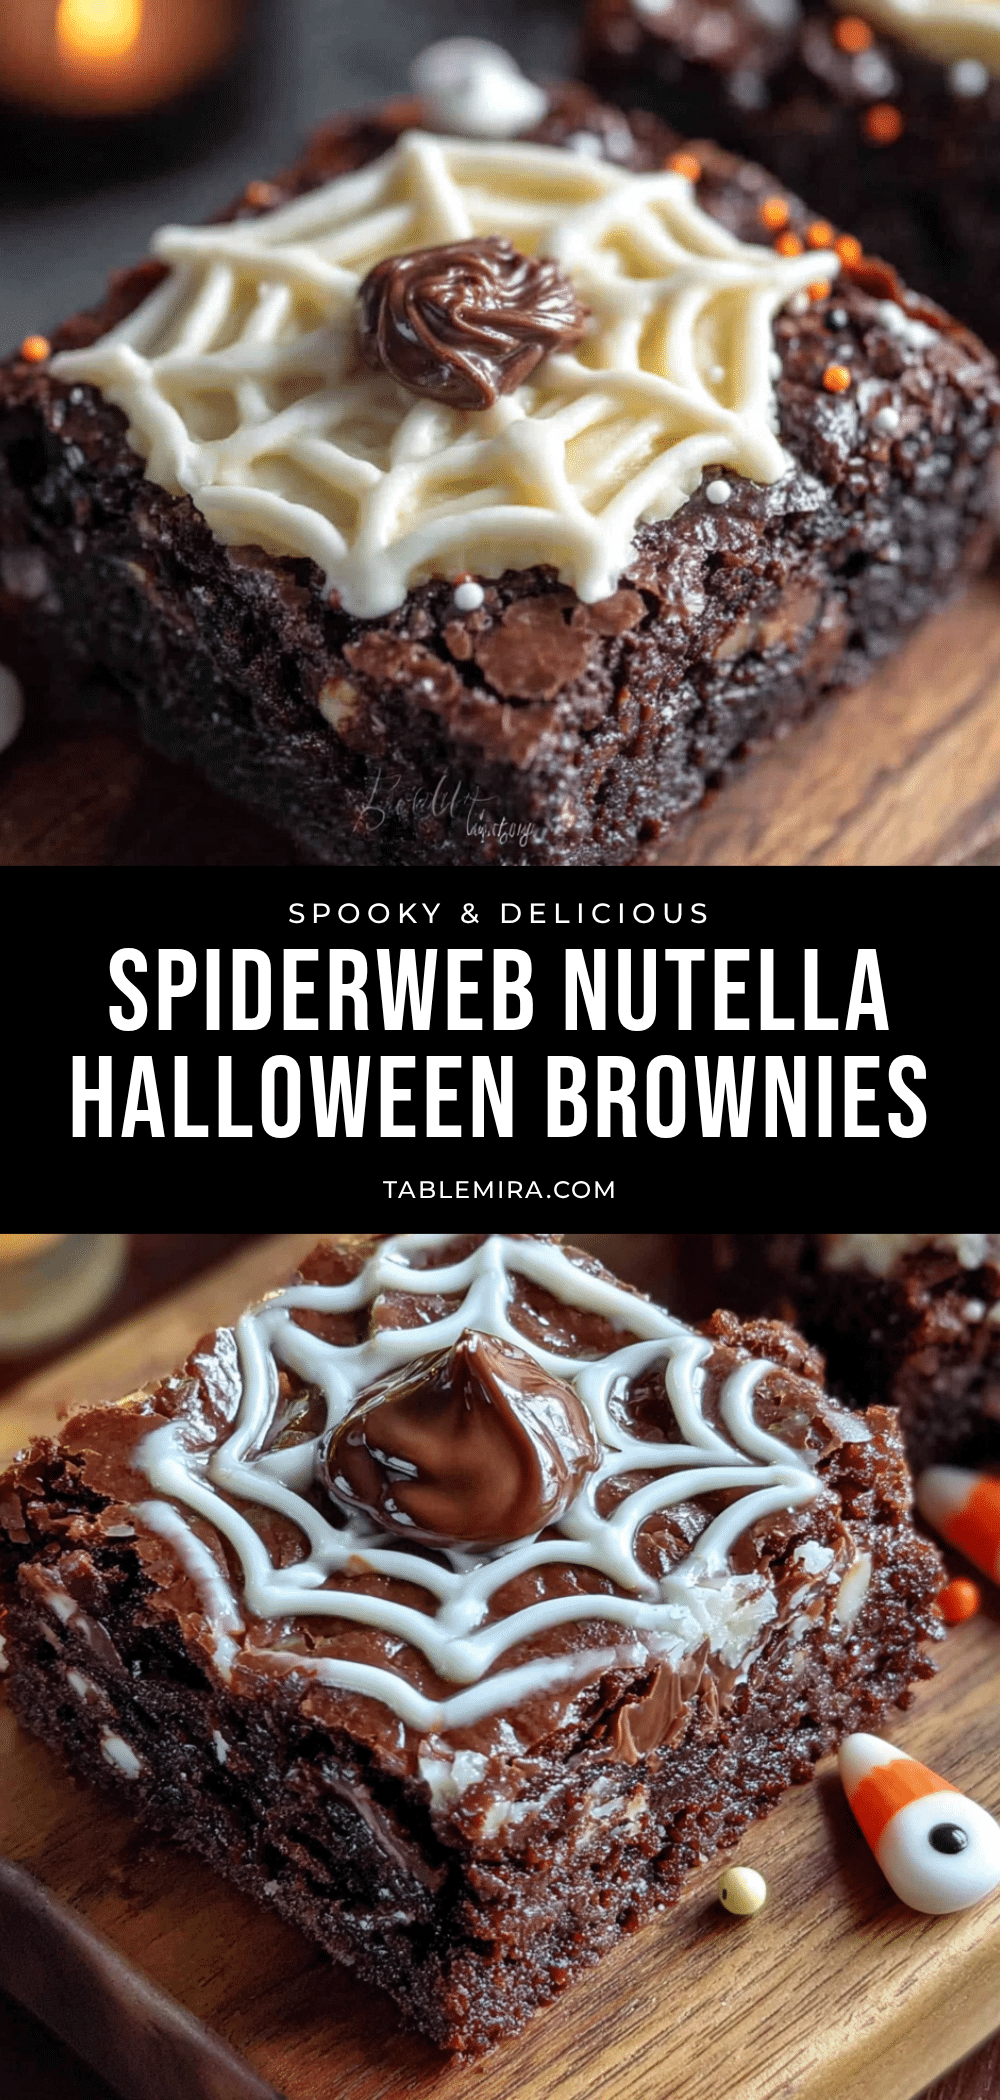
Spooky Spiderweb Nutella Halloween Brownies
Rich, fudgy brownies topped with a creamy Nutella spiderweb design that looks impressive but is surprisingly easy to make. Perfect for Halloween parties and gatherings.
- Prep Time: 15 minutes
- Cook Time: 25 minutes
- Total Time: 45 minutes
- Yield: 16 servings 1x
- Category: Dessert
- Cuisine: American
Ingredients
- 1 cup (226g) unsalted butter, melted and slightly cooled
- 2 cups (400g) granulated sugar
- 4 large eggs, room temperature
- 1 tablespoon vanilla extract
- 1 cup (120g) all-purpose flour, spooned and leveled
- 3/4 cup (75g) unsweetened cocoa powder (preferably Dutch-process)
- 1/2 teaspoon salt
- 1/2 teaspoon baking powder
- 1/2 cup (150g) Nutella (or chocolate-hazelnut spread)
- 2–3 tablespoons powdered sugar, for dusting (optional)
Instructions
- Preheat oven to 350°F (175°C). Line a 9×13-inch baking pan with parchment paper, leaving overhang on the long sides. Lightly grease the parchment.
- Melt butter in a large microwave-safe bowl in 30-second intervals until just melted. Let cool slightly until warm but not hot.
- Add sugar to melted butter and whisk until combined. Add eggs one at a time, whisking well after each addition. Add vanilla extract and whisk until smooth and glossy.
- In a separate bowl, whisk together flour, cocoa powder, salt, and baking powder until no lumps remain.
- Add dry ingredients to wet mixture and fold gently with a rubber spatula until just combined. Do not overmix.
- Pour batter into prepared pan and spread evenly. Bake for 22-25 minutes, until a toothpick inserted in the center comes out with a few moist crumbs. Cool in pan for 10 minutes.
- While brownies cool, place Nutella in a small microwave-safe bowl and microwave for 10-15 seconds until slightly looser than room temperature. Stir well.
- Transfer Nutella to a small piping bag or zip-top baggie. Snip off a tiny corner.
- Pipe concentric circles on the surface of the slightly cooled brownies, starting with a small circle in the center and spacing circles about 1 inch apart.
- Using a toothpick, drag from the center outward through all circles to create spokes, spacing about 1 inch apart. Then drag in the opposite direction between each spoke to create the web pattern. Wipe toothpick clean between each drag.
- Let brownies cool completely at room temperature until the Nutella web sets.
- Lift brownies out of pan using parchment handles. Slice into squares with a sharp knife, wiping clean between cuts. Dust with powdered sugar before serving if desired.
Notes
For best results, ensure eggs are at room temperature and Nutella is just slightly warm (not hot) for piping. Overbaking will result in dry brownies; pull them when a toothpick comes out with moist crumbs. For gluten-free version, substitute all-purpose flour with a 1:1 gluten-free baking flour. Brownies can be baked a day ahead; reheat slightly before adding the web.
Nutrition
- Serving Size: 1 brownie
- Calories: 285
- Sugar: 26
- Sodium: 120
- Fat: 15
- Saturated Fat: 9
- Carbohydrates: 36
- Fiber: 2
- Protein: 4
Keywords: Halloween brownies, spiderweb brownies, Nutella brownies, easy Halloween dessert, fudgy brownies, chocolate hazelnut brownies


