I figured black velvet cake was just red velvet with food coloring swapped. It took about one bite of these Spooky Black Velvet Halloween Cupcakes with Orange Buttercream for that assumption to fall apart completely. The first batch I made looked great—dramatically dark, almost gothic—but tasted flat, like chocolate had been erased rather than replaced. I sat there staring at a dozen perfectly black cupcakes that nobody wanted to eat. That was the moment I stopped treating this like a color experiment and started treating it like an actual recipe. Turns out, getting that deep, inky crumb without losing moisture or flavor takes more than a bottle of gel dye. It needs real cocoa, the right acid balance, and a method that keeps the texture tender instead of tough.
I spent the next three weekends working through variations. Too dry. Too dense. Too sweet. The color would be perfect but the crumb would crumble, or the crumb would be perfect but the color would land somewhere between gray and depressing. Then I tried adding a little instant espresso—honestly, just a half teaspoon—and everything clicked. The coffee didn’t make it taste like coffee. It just made the chocolate taste more like itself, and the black coloring finally had something to latch onto. That version? That one disappeared in about ten minutes at a Halloween party, and someone actually asked if I’d bought them from a bakery. I said yes. I was too embarrassed to admit I’d made six failed batches before that one.
These cupcakes have become my October go-to. They’re not trying to be anything other than what they are—a really good, really dark chocolate cupcake with a buttercream that practically glows. The orange buttercream isn’t just for looks either. That citrus edge cuts through the richness in a way that makes you keep reaching for another one. And honestly, that’s the kind of recipe worth keeping around.
Why You’ll Love This Recipe
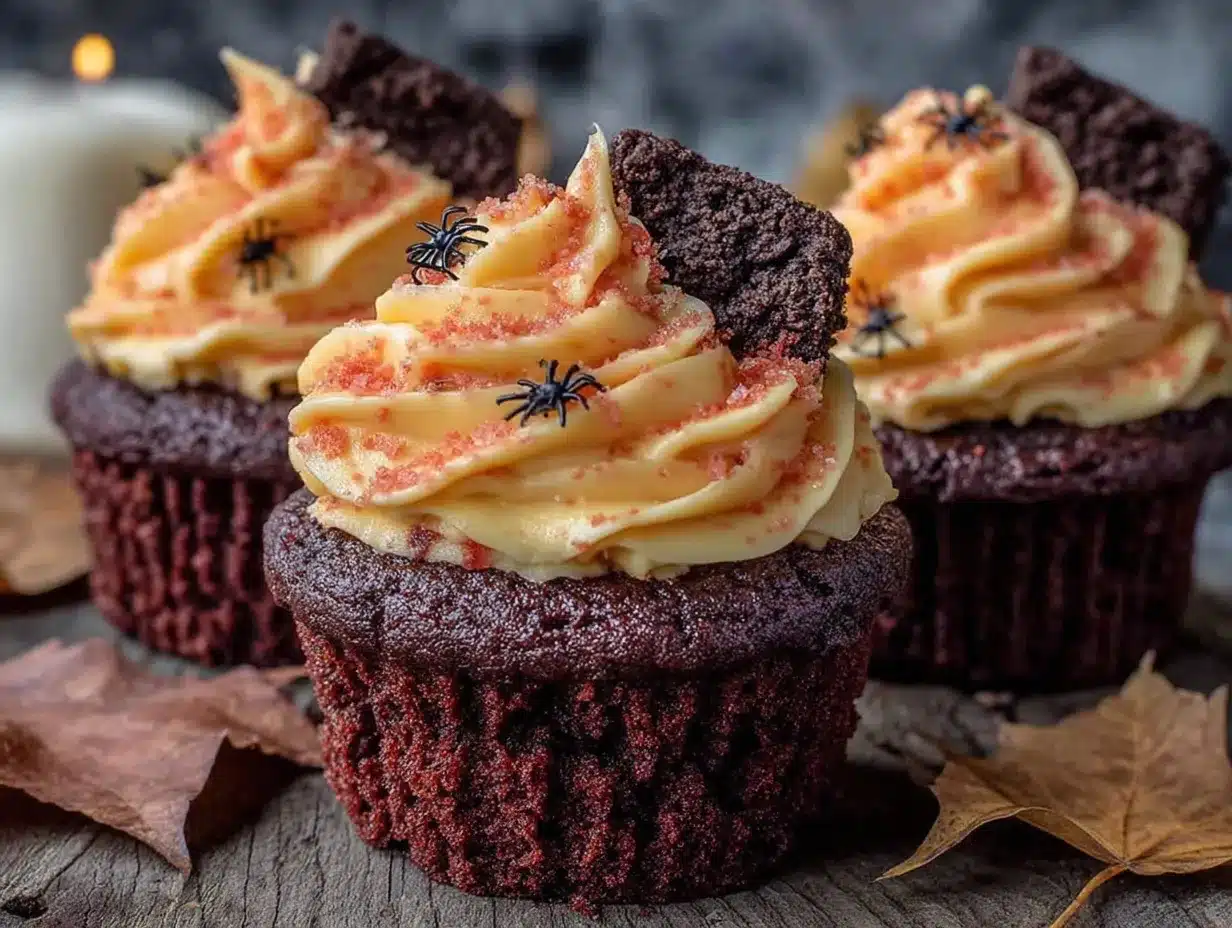
- Stunning Visuals : The contrast between the black velvet crumb and bright orange buttercream is pure Halloween magic. These cupcakes look like they belong on a dessert table at a haunted mansion party.
- Surprisingly Simple Ingredients : No fancy extracts or hard-to-find components. You probably have most of these in your pantry right now, minus maybe the black gel food coloring.
- Perfect for Halloween Gatherings : Whether you’re hosting a costume party, sending treats to a school event, or just want something festive for the family, these cupcakes deliver the theme without sacrificing taste.
- Crowd-Pleasing Flavor : The subtle cocoa base with tangy buttermilk creates a tender crumb that even non-chocolate lovers enjoy. And that buttercream? People fight over the extra dollop on the spatula.
- Make-Ahead Friendly : The cupcakes freeze beautifully, and the buttercream can sit at room temperature for a day. You can spread out the work and assemble everything the morning of your event.
What makes this recipe different from all those other black velvet recipes floating around? It’s the balance. So many versions either taste like plain white cake dyed black or end up dry and crumbly because the cocoa and coloring dry out the batter. I tested this until the texture stayed soft for three days. The buttermilk and oil keep it moist, the vinegar reacts with the baking soda for lift, and the espresso powder deepens the chocolate flavor so it actually tastes like something. This isn’t just a Halloween gimmick—it’s a genuinely good cupcake that happens to look spooky.
This is the kind of recipe that makes you close your eyes after the first bite. It’s comfort food with a costume on—familiar, satisfying, but dressed up for the occasion. Perfect for impressing guests without spending all day in the kitchen.
What Ingredients You Will Need
This recipe uses simple, mostly pantry-friendly ingredients to build a cupcake that’s rich, tender, and deeply dark. The magic happens in how they work together, not in how many obscure items you have to hunt down.
For the Black Velvet Cupcakes
- All-purpose flour – 1 ½ cups (180g). Provides structure without making the crumb heavy. Spoon and level for accuracy—scooping directly from the bag packs in too much flour.
- Granulated sugar – 1 cup (200g). Just enough sweetness to balance the cocoa and tangy buttermilk.
- Unsweetened cocoa powder – ¼ cup (20g). Use natural cocoa powder, not Dutch-process. The acidity helps activate the baking soda and keeps the crumb tender.
- Baking soda – 1 teaspoon. Reacts with the buttermilk and vinegar for lift.
- Salt – ½ teaspoon. Enhances every flavor, including the chocolate.
- Instant espresso powder – ½ teaspoon. This is my secret weapon. It doesn’t make the cupcakes taste like coffee—it deepens the chocolate flavor and helps the black coloring pop. I use Medaglia d’Oro because it dissolves instantly.
- Vegetable oil – ½ cup (120ml). Keeps the cupcakes moist for days. Melted butter works too, but oil gives a softer crumb that stays tender even when cold.
- Buttermilk – ¾ cup (180ml), room temperature. The acidity tenderizes the gluten and reacts with the baking soda. No buttermilk? Add 1 tablespoon of white vinegar or lemon juice to regular milk and let it sit for 5 minutes.
- Large eggs – 2, room temperature. Room temperature eggs emulsify better into the batter, creating a smoother, more uniform crumb.
- White vinegar – 1 teaspoon. Sounds weird, I know. It reacts with the baking soda for extra lift and helps neutralize the cocoa’s bitterness.
- Vanilla extract – 2 teaspoons. Use pure vanilla if you have it—the flavor difference is noticeable.
- Black gel food coloring – About 1 to 1 ½ tablespoons. Liquid coloring won’t give you that deep, true black. Gel is concentrated and won’t thin out the batter. I recommend AmeriColor Super Black or Wilton Color Right Black.
For the Orange Buttercream
- Unsalted butter – 1 cup (226g), softened to room temperature. Let it sit out for at least an hour. Cold butter won’t cream properly and leaves lumps.
- Powdered sugar – 3 to 4 cups (360g to 480g). Start with 3 cups and add more if you want a stiffer frosting for piping.
- Heavy cream – 2 to 3 tablespoons. Adds creaminess and helps achieve the right piping consistency.
- Orange gel food coloring – A few drops. I use AmeriColor Orange for that bright, neon Halloween shade. Liquid coloring works but gives a paler result.
- Vanilla extract – 1 teaspoon. Rounds out the citrus flavor without competing.
- Salt – A tiny pinch. Cuts the sweetness and makes the buttercream taste more balanced.
For the best texture, make sure your buttermilk and eggs are truly at room temperature. Cold ingredients seize the oil and create a denser, less tender cupcake. I take mine out of the fridge about 30 minutes before I start mixing.
Equipment Needed
- Standard 12-cup muffin tin – Non-stick or light-colored metal works best. Dark pans absorb more heat and can over-brown the edges.
- Paper cupcake liners – Black or orange liners add to the spooky theme. I like the foil-lined ones for easy peeling.
- Two large mixing bowls – One for dry ingredients, one for wet.
- Whisk – For combining dry ingredients evenly.
- Hand mixer or stand mixer – A hand mixer works fine for the buttercream. A stand mixer with the paddle attachment is even better.
- Rubber spatula – For scraping down the bowl and folding in the food coloring.
- Cooling rack – Metal wire rack lets air circulate so the cupcakes cool evenly without soggy bottoms.
- Piping bag with star tip – A Wilton 1M or 2D tip creates those beautiful rosettes. No piping bag? A zip-top bag with the corner snipped off works in a pinch.
- Offset spatula – Optional, but helpful for smoothing buttercream if you’re not piping.
If you don’t have a piping bag, don’t stress. You can spread the buttercream with a knife for a rustic look, or use a zip-top bag with a small cut in the corner. I’ve done both, and honestly, the taste is exactly the same.
Preparation Method
-
Preheat and prepare. Preheat your oven to 350°F (175°C). Line your muffin tin with 12 cupcake liners. I like using dark-colored liners for Halloween—black and orange stripes are my favorite. Set the tin aside.
-
Mix the dry ingredients. In a large bowl, whisk together the flour, granulated sugar, cocoa powder, baking soda, salt, and instant espresso powder. Whisk for about 30 seconds to aerate everything and break up any cocoa lumps. Set aside.
-
Combine the wet ingredients. In a separate medium bowl, whisk together the vegetable oil, buttermilk, eggs, white vinegar, and vanilla extract. Whisk until the eggs are fully incorporated and the mixture looks smooth and slightly thickened, about 1 minute.
-
Make the black batter. Pour the wet ingredients into the dry ingredients. Stir gently with a rubber spatula or whisk until just combined. Do not overmix—about 15 to 20 strokes is enough. A few small lumps are fine. Overmixing develops gluten and makes the cupcakes tough.
-
Add the black coloring. Add 1 tablespoon of black gel food coloring to the batter. Stir until the color is evenly distributed. If the batter looks more dark gray than true black, add another ½ tablespoon. The batter should look like black ink—almost unsettlingly dark. That’s exactly what you want. The color will lighten slightly during baking, so go darker than you think you need.
-
Fill the liners. Divide the batter evenly among the 12 cupcake liners. Each liner should be about ⅔ full. An ice cream scoop or large cookie scoop makes this mess-free and ensures even-sized cupcakes.
-
Bake the cupcakes. Bake for 18 to 22 minutes, rotating the pan halfway through. The cupcakes are done when a toothpick inserted into the center comes out clean or with a few moist crumbs. The tops should spring back when lightly pressed. Do not overbake—dry cupcakes are sad cupcakes.
-
Cool completely. Let the cupcakes cool in the pan for 5 minutes. Then transfer them to a wire cooling rack to cool completely before frosting. This is crucial. If the cupcakes are even slightly warm, the buttercream will melt into a greasy puddle. I learned this the hard way. Wait at least 30 minutes, preferably an hour.
-
Make the orange buttercream. While the cupcakes cool, make the frosting. In a large bowl, beat the softened butter with a hand mixer or stand mixer on medium speed until smooth and creamy, about 2 minutes. Add the vanilla extract and a tiny pinch of salt, then beat again.
-
Add the sugar. Gradually add the powdered sugar, 1 cup at a time, beating on low speed after each addition. After the first 3 cups, add 2 tablespoons of heavy cream. Beat on medium-high speed for 2 to 3 minutes until light and fluffy. If the frosting is too thick, add another tablespoon of cream. If it’s too thin, add more powdered sugar, ¼ cup at a time.
-
Color the buttercream. Add a few drops of orange gel food coloring. Beat on low until the color is even. Add more drops until you reach that bright, almost neon Halloween orange. I usually end up using about 6 to 8 drops of gel coloring.
-
Frost the cupcakes. Fit a piping bag with a large star tip (Wilton 1M or similar). Fill the bag with the orange buttercream. Pipe a swirl onto each cooled cupcake, starting from the outside edge and working inward. Or just spread it on with a knife—I won’t judge.
-
Decorate (optional). Add Halloween sprinkles, candy eyeballs, or a dusting of black cocoa powder on top. I like to press a few orange and black sprinkles into the buttercream for extra crunch and color.
Cooking Tips & Techniques
Room temperature ingredients matter more than you think. Cold buttermilk and eggs will make the oil seize up, creating a denser cupcake. I’ve tested this side by side, and the difference is real. Set everything out on the counter 30 to 45 minutes before you start. If you forget, place the eggs in a bowl of warm water for 5 minutes and microwave the buttermilk for 15 seconds.
Don’t overmix the batter. This is the most common mistake I see in velvet-style cakes. Mix until the flour disappears into the wet ingredients, then stop. Overmixing develops gluten, which gives you tough, rubbery cupcakes instead of tender ones. A few small lumps are perfectly fine—they’ll bake out.
Go heavy on the black coloring. I know it feels wrong to add that much gel food coloring. But the color fades during baking, and a grayish cupcake just looks sad. Aim for an ink-black batter before it goes in the oven. If you’re nervous about staining, wear disposable gloves when handling the coloring.
Test for doneness early. Every oven runs differently. Start checking at 18 minutes. Insert a toothpick into the center of a cupcake—if it comes out clean or with a few moist crumbs, they’re done. If there’s wet batter on the toothpick, give them 2 more minutes and check again.
Let the buttercream come together fully. When you first add the powdered sugar, the mixture will look dry and crumbly. That’s normal. Keep beating, and it will eventually come together into a smooth, creamy frosting. If it still looks dry after 3 minutes of beating, add another tablespoon of cream.
I once forgot to add the vinegar to a batch of these cupcakes. They came out flat and dense—still edible, but not the light, tender crumb I was after. That tiny splash of acid makes a real difference. Don’t skip it.
Variations & Adaptations
Gluten-Free Version. Substitute the all-purpose flour with a 1:1 gluten-free baking flour blend that contains xanthan gum. I’ve used Bob’s Red Mill 1-to-1 Baking Flour with excellent results. The texture is slightly more delicate, so handle the batter gently and don’t overbake.
Dairy-Free Adaptation. Replace the buttermilk with ¾ cup of unsweetened almond or oat milk mixed with 1 tablespoon of white vinegar. Let it sit for 5 minutes before using. Use a plant-based butter stick (like Miyoko’s or Country Crock Plant Butter) for the frosting. The texture will be slightly less fluffy but still delicious.
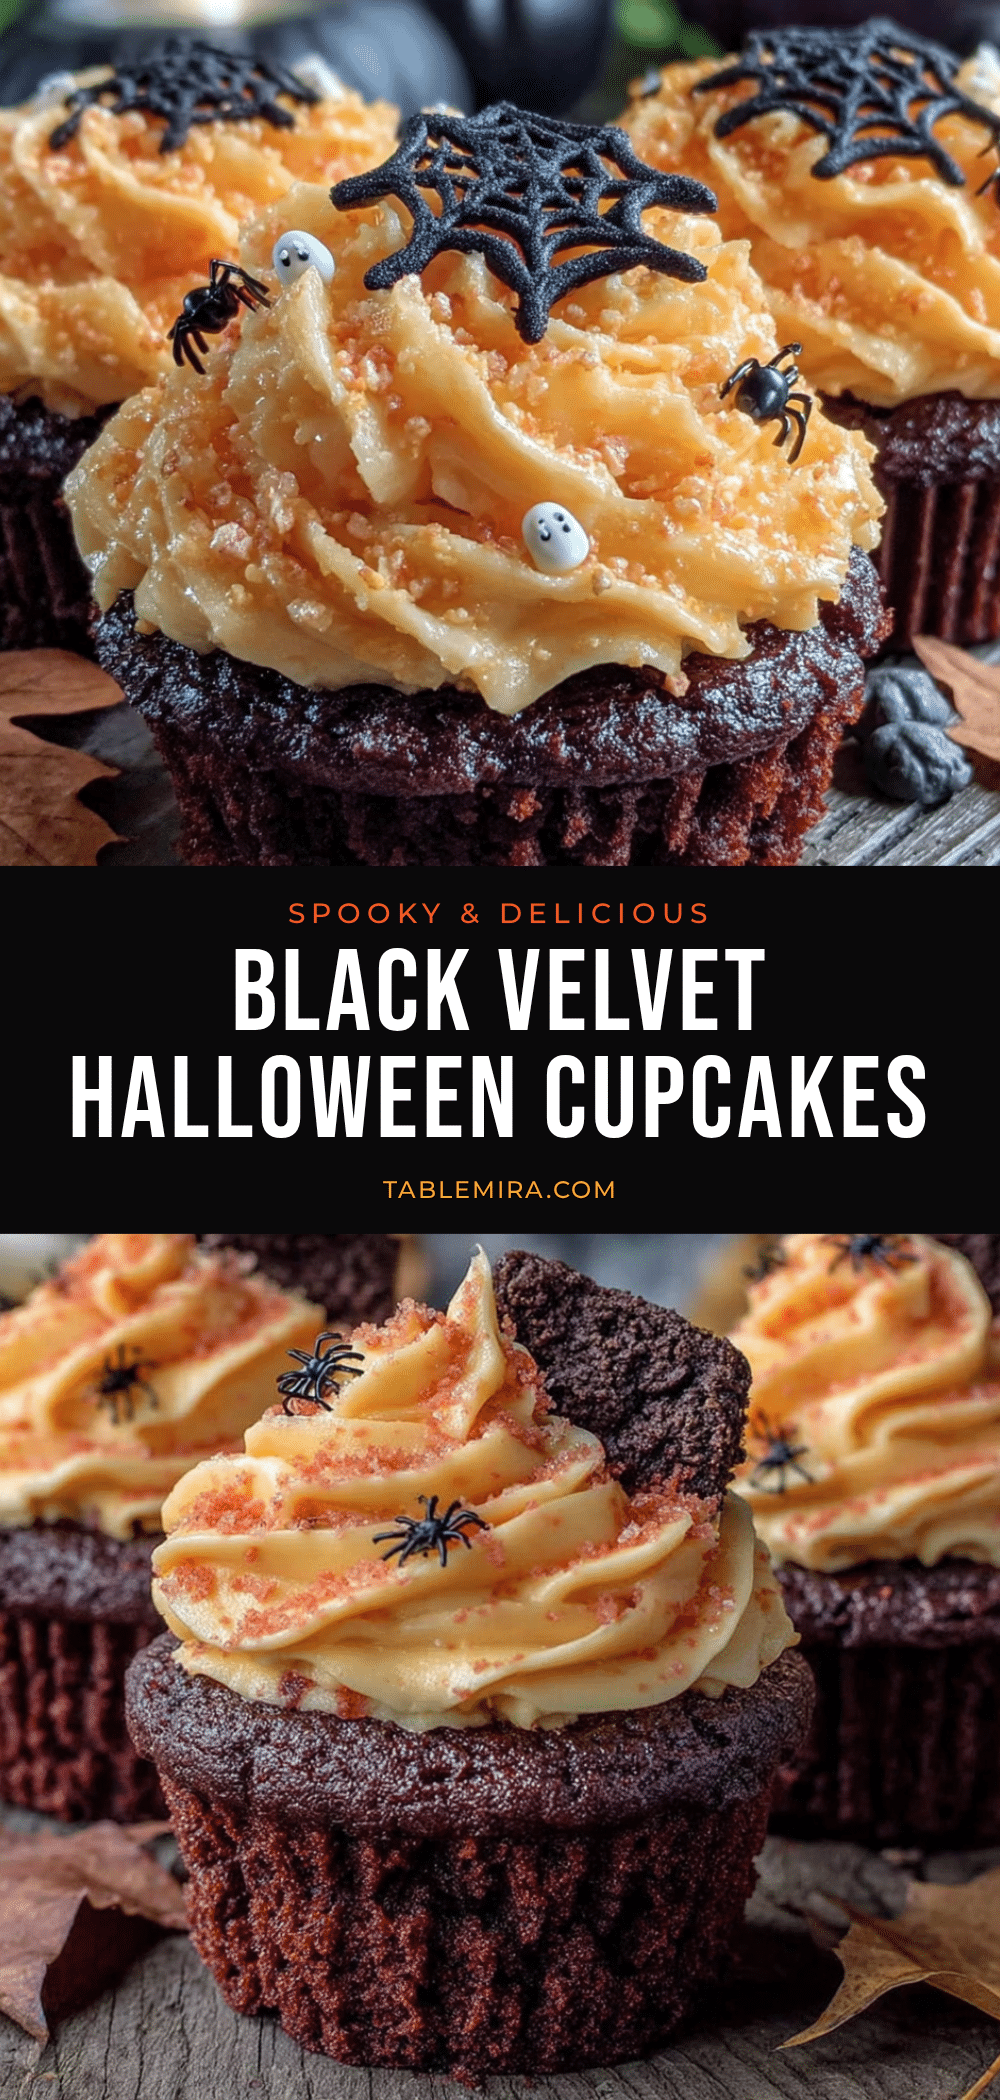
Spooky Spiderweb Design. Instead of a simple swirl, pipe the orange buttercream in a flat layer on top. Then pipe a small circle of black gel icing in the center. Drag a toothpick outward from the center to the edge in 6 to 8 directions to create a web pattern. It looks impressive but takes about 30 seconds.
Chocolate Orange Twist. Add ½ teaspoon of orange extract to the cupcake batter along with the vanilla. The orange-chocolate combination is classic and pairs beautifully with the orange buttercream. You can also zest an orange into the frosting for extra citrus punch.
Mini Cupcake Version. Use a mini muffin tin and bake for 10 to 12 minutes instead of 18 to 22. This yields about 36 mini cupcakes—perfect for parties where people want to sample multiple treats. The frosting-to-cake ratio is also more forgiving with minis.
I tried a version last year where I added a teaspoon of cinnamon to the batter, thinking it would add warmth. It didn’t. It just made the cupcakes taste like chocolate with a hint of chai, which wasn’t bad, but it wasn’t the spooky Halloween vibe I wanted. Stick with the original unless you’re feeling adventurous.
Serving & Storage Suggestions
These cupcakes are best served at room temperature. The buttercream softens slightly and the crumb feels tender and moist. If you’ve refrigerated them, let them sit out for 20 to 30 minutes before serving.
For a Halloween party spread, arrange the cupcakes on a black cake stand or a tray lined with orange and black napkins. They pair beautifully with a warm creamy pumpkin cold foam latte for a cozy autumn treat. You could also serve them alongside a slice of perfect pumpkin pie cheesecake for a dessert table that covers all the fall flavor bases.
Refrigerator Storage: Store unfrosted cupcakes in an airtight container at room temperature for up to 3 days. Frosted cupcakes should be refrigerated in a single layer in an airtight container for up to 5 days. The buttercream will firm up in the fridge, so let them sit at room temperature for 15 minutes before eating.
Freezer Storage: Unfrosted cupcakes freeze beautifully for up to 3 months. Wrap each one individually in plastic wrap, then place them in a freezer-safe bag. Thaw at room temperature for about an hour before frosting. I do this all the time for Halloween parties—bake the cupcakes a week ahead, freeze them, then make the buttercream and decorate the day before the event.
Reheating: If you prefer a warm cupcake, microwave an unfrosted one for 10 to 15 seconds. Do not microwave frosted cupcakes—the buttercream will melt into a puddle. Trust me on this one.
The flavors actually deepen after a day in the fridge. The chocolate becomes more pronounced, and the orange buttercream mellows into something almost caramel-like. These are one of those rare baked goods that taste even better on day two.
Nutritional Information & Benefits
Per cupcake (based on 12 servings with buttercream):
- Calories: 410
- Fat: 22g
- Saturated Fat: 11g
- Carbohydrates: 52g
- Sugar: 40g
- Protein: 4g
- Fiber: 1g
- Sodium: 280mg
These are definitely a treat, not an everyday snack. But there are a few redeeming qualities. The cocoa powder contains antioxidants called flavanols, which can support heart health. Buttermilk adds calcium and probiotics (if you use cultured buttermilk). And the espresso powder provides a tiny hit of caffeine—about 5mg per cupcake—which is roughly the same as a square of dark chocolate.
For dietary considerations: This recipe contains gluten, dairy, and eggs. It can be adapted to gluten-free and dairy-free as noted in the variations section. The cupcakes are nut-free as written, making them safe for school events where nut allergies are a concern.
I don’t pretend these are health food. They’re cupcakes. But if you’re going to indulge, doing it with real butter, quality cocoa, and ingredients you can pronounce feels better than reaching for a packaged version with a dozen unpronounceable additives.
Conclusion
These Spooky Black Velvet Halloween Cupcakes with Orange Buttercream are the kind of recipe that makes people stop and stare—then grab a second one before anyone notices. The black crumb is dramatic without being gimmicky, the orange buttercream is bright and cheerful, and the whole thing tastes like a really good chocolate cupcake that happens to be dressed up for the occasion.
Don’t be afraid to make them your own. Add different sprinkles. Pipe the buttercream in a different pattern. Swap the orange for purple or green if that’s more your vibe. The base recipe is solid enough to handle whatever creative spin you throw at it.
I still make these every October, and every year someone asks for the recipe. That’s the best compliment a baker can get. If you try these, I’d love to hear how they turned out. Drop a comment below, tag me in your photos, or share your own twist on the recipe. Happy Halloween, and happy baking!
Frequently Asked Questions
Can I use liquid food coloring instead of gel?
You can, but you’ll need a lot more to achieve a true black color, and the extra liquid can throw off the batter consistency. Gel food coloring is concentrated, so it gives you that deep, inky black without thinning out the batter. I really recommend sticking with gel for this recipe.
Why did my cupcakes turn out gray instead of black?
This usually happens when you don’t use enough food coloring, or when the cocoa powder is too light. The batter should look almost black before it goes into the oven. If it looks dark gray, add another ½ tablespoon of black gel coloring. Also, make sure you’re using natural cocoa powder—Dutch-process cocoa is darker and can make the final color look muddy.
Can I make these cupcakes ahead of time?
Absolutely. You can bake the cupcakes up to 3 days ahead and store them unfrosted in an airtight container at room temperature. Or freeze them for up to 3 months. Make the buttercream the day you plan to serve them for the freshest flavor and texture. Assemble everything the morning of your event.
How do I get that bright neon orange color in the buttercream?
Use orange gel food coloring instead of liquid. Start with 4 to 5 drops and add more until you reach your desired shade. If you want that super bright Halloween orange, add a tiny drop of yellow gel coloring along with the orange. It makes the color pop without looking artificial.
Can I make this recipe into a cake instead of cupcakes?
Yes. Pour the batter into two greased and floured 8-inch round cake pans. Bake at 350°F (175°C) for 25 to 30 minutes, or until a toothpick comes out clean. Let cool completely before frosting. You’ll need about 1.5 times the buttercream recipe to fill and frost a two-layer cake. The visual contrast between the black cake layers and orange frosting is stunning for a Halloween party centerpiece.
Pin This Recipe!
Best Easy Spooky Black Velvet Halloween Cupcakes
These Spooky Black Velvet Halloween Cupcakes with Orange Buttercream are deeply dark, moist, and tender, with a bright citrus frosting that cuts through the richness. Perfect for Halloween gatherings, they look dramatic and taste like a really good chocolate cupcake dressed up for the occasion.
- Prep Time: 20 minutes
- Cook Time: 20 minutes
- Total Time: 40 minutes
- Yield: 12 cupcakes 1x
- Category: Dessert
- Cuisine: American
Ingredients
- 1 ½ cups (180g) all-purpose flour
- 1 cup (200g) granulated sugar
- ¼ cup (20g) unsweetened cocoa powder (natural, not Dutch-process)
- 1 teaspoon baking soda
- ½ teaspoon salt
- ½ teaspoon instant espresso powder
- ½ cup (120ml) vegetable oil
- ¾ cup (180ml) buttermilk, room temperature
- 2 large eggs, room temperature
- 1 teaspoon white vinegar
- 2 teaspoons vanilla extract
- 1 to 1 ½ tablespoons black gel food coloring
- 1 cup (226g) unsalted butter, softened
- 3 to 4 cups (360g to 480g) powdered sugar
- 2 to 3 tablespoons heavy cream
- A few drops orange gel food coloring
- 1 teaspoon vanilla extract (for buttercream)
- A tiny pinch of salt (for buttercream)
Instructions
- Preheat oven to 350°F (175°C). Line a 12-cup muffin tin with paper liners.
- In a large bowl, whisk together flour, sugar, cocoa powder, baking soda, salt, and instant espresso powder for 30 seconds.
- In a separate bowl, whisk together vegetable oil, buttermilk, eggs, white vinegar, and vanilla extract until smooth and slightly thickened, about 1 minute.
- Pour wet ingredients into dry ingredients. Stir gently with a rubber spatula or whisk until just combined (15-20 strokes). Do not overmix; a few lumps are fine.
- Add 1 tablespoon black gel food coloring and stir until evenly distributed. Add another ½ tablespoon if batter looks dark gray instead of true black. Batter should be ink-black.
- Divide batter evenly among the 12 liners, filling each about ⅔ full.
- Bake for 18 to 22 minutes, rotating the pan halfway through. Cupcakes are done when a toothpick inserted into the center comes out clean or with a few moist crumbs. Do not overbake.
- Let cupcakes cool in the pan for 5 minutes, then transfer to a wire rack to cool completely (at least 30 minutes to 1 hour) before frosting.
- For the buttercream: In a large bowl, beat softened butter with a hand mixer or stand mixer on medium speed until smooth and creamy, about 2 minutes. Add vanilla extract and a pinch of salt; beat again.
- Gradually add powdered sugar, 1 cup at a time, beating on low after each addition. After 3 cups, add 2 tablespoons heavy cream. Beat on medium-high for 2-3 minutes until light and fluffy. Adjust consistency with more cream or powdered sugar as needed.
- Add a few drops of orange gel food coloring and beat until evenly colored. Add more drops to reach desired bright orange shade.
- Fit a piping bag with a large star tip (e.g., Wilton 1M). Fill with buttercream and pipe a swirl onto each cooled cupcake, starting from the outside and working inward. Alternatively, spread with a knife.
- Optional: Decorate with Halloween sprinkles, candy eyeballs, or a dusting of black cocoa powder.
Notes
Room temperature ingredients are crucial for best texture. Don’t overmix the batter. Go heavy on black gel coloring as color fades during baking. Let cupcakes cool completely before frosting to prevent buttercream from melting. The flavors deepen after a day in the fridge.
Nutrition
- Serving Size: 1 cupcake
- Calories: 410
- Sugar: 40
- Sodium: 280
- Fat: 22
- Saturated Fat: 11
- Carbohydrates: 52
- Fiber: 1
- Protein: 4
Keywords: black velvet cupcakes, Halloween cupcakes, orange buttercream, spooky cupcakes, chocolate cupcakes, Halloween dessert, black food coloring


