Sunday morning, 9:47 AM. The living room still smells like last night’s popcorn, and I’m standing in front of the pantry, staring at a bag of tortilla chips and a can of chipotle peppers in adobo. My team doesn’t kick off until 1 PM, but I’ve already been thinking about what to serve for three days. Not because I’m trying to impress anyone—but because game day snacks, for me, have always been a quiet kind of ritual.
I grew up in a house where the TV was always on during football season, but the real action happened in the kitchen. My dad would set up a little buffet on the counter—paper plates, napkins, bowls of this and that—and we’d graze for four hours straight. It wasn’t fancy. It was just… ours. So when I started hosting my own game days, I wanted that same energy. But I also wanted something that felt a little more put together. Something you could hold in one hand while yelling at the ref with the other.
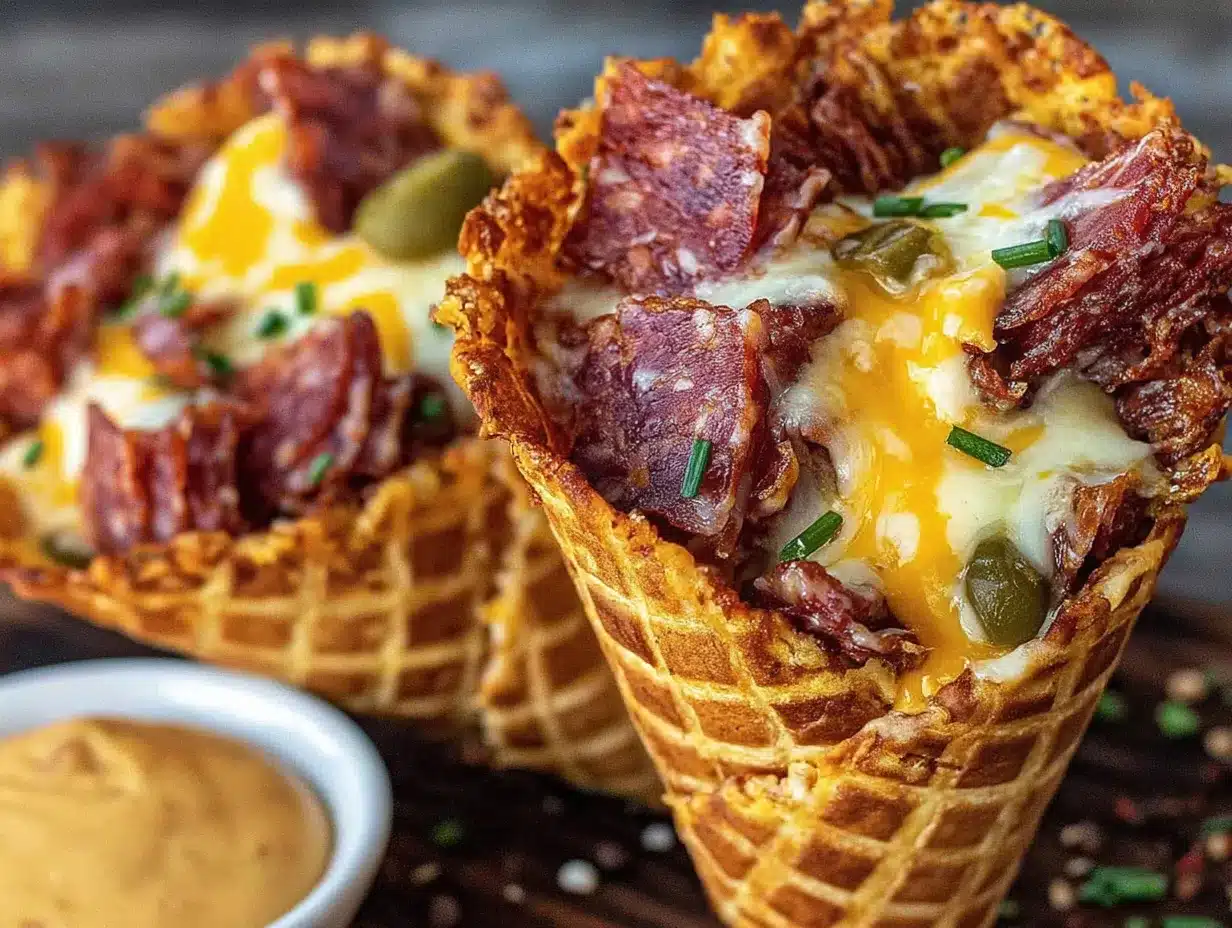
That’s how these Smoky Chipotle Football Charcuterie Cones were born. They’re basically a walking charcuterie board—stuffed into a crispy cone and topped with all the smoky, spicy, creamy goodness you could want. I tested the first version during a preseason game, and honestly, I ate three before halftime. They were messy, but in that perfect way where you don’t care because it tastes so good. I tweaked the chipotle ratio a few times (too much and you’re sweating, too little and it’s boring), and landed on a creamy, smoky dressing that ties everything together without overpowering the other ingredients.
These cones aren’t just a snack. They’re the kind of thing that makes people hover around the kitchen island, grabbing one after another, asking for the recipe before the game’s even over. And honestly? That’s exactly the feeling I was going for.
Why You’ll Love This Recipe
I’ve made a lot of game day snacks over the years—some that disappeared in minutes, and some that sat untouched next the veggie platter (we’ve all been there). These Smoky Chipotle Football Charcuterie Cones fall firmly into the first category. Here’s why they work so well:
- Quick & Easy: From start to finish, you’re looking at about 20 minutes of active prep. The cones bake in 10 minutes flat, so you can have them ready before the pre-game show ends.
- Simple Ingredients: No weird specialty items here. You probably already have most of what you need—tortillas, cream cheese, chipotle peppers, shredded chicken, and some crunchy veggies.
- Perfect for Game Day: Handheld, customizable, and mess-friendly (in the best way). These cones let guests build their own or grab one pre-assembled. Either way, they’re a win.
- Crowd-Pleaser: I’ve served these at parties with friends who swear they don’t like spicy food, and even they went back for seconds. The smoky chipotle flavor is bold but not overwhelming—it’s more about depth than heat.
- Unbelievably Delicious: The combination of crispy cone, creamy chipotle sauce, tender chicken, and fresh toppings is honestly next-level. It’s comfort food that feels a little elevated, without being fussy.
What makes this recipe different from other charcuterie boards or snack cones is the smoky chipotle dressing. I tested it against a standard ranch and a plain sour cream base, and the chipotle version won every time. It adds this subtle heat and smokiness that makes every bite feel intentional. Plus, the cones themselves are baked, not fried—so they stay crunchy without being greasy.
This isn’t just another snack. It’s the one that makes people close their eyes after the first bite. And on game day, that’s exactly the kind of energy you want in the room.
What Ingredients You Will Need
This recipe uses simple, wholesome ingredients to deliver bold flavor and satisfying texture without the fuss. Most of these are pantry staples or easy to find at any grocery store. Here’s what you’ll need:
For the Cones
- Flour tortillas (6-inch) – 6 large tortillas (use burrito-size for bigger cones if you want)
- Olive oil spray – or any neutral cooking spray (adds crispiness)
- Salt – a pinch for sprinkling
For the Smoky Chipotle Dressing
- Cream cheese – 4 oz, softened (full-fat works best for creaminess)
- Sour cream – ½ cup (Greek yogurt works too, but sour cream is richer)
- Chipotle peppers in adobo sauce – 2 peppers, minced + 1 tablespoon adobo sauce (I recommend La Morena brand for consistent heat)
- Lime juice – 2 tablespoons, fresh squeezed (bottled won’t give the same brightness)
- Garlic powder – ½ teaspoon
- Cumin – ¼ teaspoon (adds earthy warmth)
- Salt – ¼ teaspoon, or to taste
For the Filling
- Cooked shredded chicken – 2 cups (rotisserie chicken works great here—I use it all the time)
- Black beans – ½ cup, drained and rinsed
- Corn kernels – ½ cup (frozen and thawed, or canned and drained)
- Red bell pepper – ½ cup, diced small
- Green onion – 3 stalks, thinly sliced
- Cilantro – ¼ cup, chopped (optional, but highly recommended)
- Cotija cheese – ½ cup, crumbled (or feta if you can’t find cotija)
For Topping (Optional but Fun)
- Pickled jalapeños – for extra heat
- Extra cilantro
- Lime wedges – for squeezing over the top
Ingredient Tips: For the best texture, use full-fat cream cheese—low-fat versions can make the dressing watery. If you’re sensitive to spice, start with one chipotle pepper instead of two and taste as you go. You can always add more heat, but you can’t take it out. For a vegetarian version, swap the chicken for extra black beans or roasted sweet potatoes—both hold up really well in the cones.
Equipment Needed
You don’t need anything fancy for this recipe, which is part of why I love it. Here’s what you’ll need:
- Baking sheet – standard half-sheet size works perfectly
- Parchment paper – for easy cleanup and to prevent sticking
- Small bowl – for mixing the chipotle dressing
- Muffin tin – to shape the cones while they bake (you’ll flip it upside down and drape the tortillas over the cups)
- Chef’s knife – for dicing veggies and mincing chipotles
- Cutting board
- Measuring spoons and cups
- Spatula – for mixing the filling
Budget-Friendly Tip: If you don’t have a muffin tin, you can shape the tortillas into cones by hand and secure them with a piece of foil. Just mold the foil into a cone shape, wrap the tortilla around it, and bake. It’s a little more work, but it gets the job done. I’ve done this when traveling and it works fine.
Personal Note: I’ve tried using both metal and silicone muffin tins for this, and metal gives you a crispier cone. The silicone ones don’t conduct heat as well, so the tortillas end up softer. If that’s your preference, go for it—but for that satisfying crunch, stick with metal.
Preparation Method
Let’s get into the actual cooking. I’ve broken this down into clear steps so you can follow along without any guesswork. Trust me—once you make these once, you’ll have the process memorized.
Step 1: Make the Smoky Chipotle Dressing
In a small bowl, combine the softened cream cheese, sour cream, minced chipotle peppers, adobo sauce, lime juice, garlic powder, cumin, and salt. Stir until smooth and well combined. Taste it—you want a balance of smoky, tangy, and creamy. If it’s too thick, add a teaspoon of milk or water. If you want more heat, add another teaspoon of adobo sauce. Set aside. (This can be made up to 3 days in advance and stored in the fridge.)
Step 2: Prepare the Tortilla Cones
Preheat your oven to 375°F (190°C). Line a baking sheet with parchment paper. Flip your muffin tin upside down so the cups are facing downward. Lightly spray each tortilla with olive oil on both sides and sprinkle with a tiny pinch of salt. Take one tortilla and gently press it over an upside-down muffin cup, shaping it into a cone. Repeat with the remaining tortillas. Bake for 8-10 minutes, or until the tortillas are golden brown and crispy. Keep an eye on them—they can go from golden to burnt fast. Let them cool completely on the muffin tin before removing. They’ll harden more as they cool.
Step 3: Mix the Filling
In a large bowl, combine the shredded chicken, black beans, corn, diced red bell pepper, green onion, and cilantro. Add about ¾ of the chipotle dressing (reserve the rest for drizzling) and toss until everything is evenly coated. The filling should be moist but not soupy. If it seems dry, add a little more dressing.
Step 4: Assemble the Cones
Carefully hold each cooled tortilla cone upright (you can rest them in a small glass or cup if needed). Spoon the filling into each cone, pressing gently to pack it in. Don’t overstuff—you want to be able to eat these without everything falling out. Top with crumbled cotija cheese, a drizzle of the remaining chipotle dressing, and any extra toppings you like (pickled jalapeños, more cilantro, a squeeze of lime).
Step 5: Serve Immediately
These cones are best eaten within 30 minutes of assembly. The tortillas stay crispy for a while, but the filling will eventually soften them. Arrange them on a platter with extra lime wedges and napkins—trust me, you’ll need them.
Pro Tip: If you’re serving a crowd, set up a “cone bar” with the baked tortilla cones, the filling, and all the toppings. Let everyone build their own. It’s interactive, fun, and takes the pressure off you.
Cooking Tips & Techniques
I’ve made these cones at least a dozen times now, and I’ve learned a few things the hard way. Here are my best tips for getting it right every time:
- Don’t skip the oil spray. The olive oil is what gives the tortillas that golden, crispy texture. Without it, they’ll be pale and chewy. Not the vibe.
- Shape the cones while the tortillas are still warm. If your tortillas are cold, they’ll crack when you try to mold them. Microwave them for 10 seconds first to make them pliable.
- Watch the oven like a hawk. Tortillas brown fast. At 375°F, mine are usually done at the 9-minute mark, but every oven runs differently. Start checking at 7 minutes.
- Let the cones cool completely. I know it’s tempting to start filling them right away, but if they’re even slightly warm, the dressing will soften them instantly. Patience pays off here.
- Double the dressing if you’re a sauce person. I always do. The chipotle dressing is so good that I use it as a dip for the cones too. It also works great as a salad dressing or sandwich spread later in the week.
- Use rotisserie chicken. I’ve cooked and shredded my own chicken for this, and honestly? The rotisserie version tastes better and saves you 30 minutes. It’s a no-brainer.
Mistake I Made: The first time I made these, I overfilled the cones and they collapsed under the weight. Keep the filling light and packed loosely—think taco, not burrito. You want to be able to bite into it without everything exploding out the bottom.
Variations & Adaptations
One of the best things about this recipe is how flexible it is. Here are some ways to switch it up based on what you have on hand or who you’re feeding:
- Vegetarian Version: Swap the shredded chicken for extra black beans, pinto beans, or roasted sweet potatoes. The smoky chipotle dressing pairs beautifully with the sweetness of roasted squash or sweet potatoes.
- Low-Carb / Keto: Use cheese wraps or large lettuce leaves instead of tortillas. You won’t get the same crunch, but the filling is so flavorful that you won’t miss it. I’ve done this for a friend who’s keto and she loved it.
- Spicier Version: Add a diced jalapeño to the filling, use extra chipotle peppers in the dressing, or top with fresh sliced habanero if you’re brave. For a milder version, use just the adobo sauce without the peppers.
- Breakfast Cones: Swap the chicken for scrambled eggs, black beans, and shredded cheese. Drizzle with the chipotle dressing and you’ve got a breakfast taco in cone form. Perfect for brunch game days.
- Seafood Twist: Use cooked shrimp or flaked white fish instead of chicken. The smoky chipotle flavor works surprisingly well with seafood—especially if you add a squeeze of lime.
Personal Favorite: I once made these with leftover crockpot pulled pork instead of chicken, and it was incredible. The smoky pork plus the chipotle dressing was a match made in game day heaven. If you have leftover pulled pork from a weekend cookout, definitely try it.
Serving & Storage Suggestions
These cones are best served fresh, but there are a few ways to prep ahead and store leftovers.
Serving: Arrange the filled cones upright on a platter, leaning against each other for support. Serve with extra lime wedges, pickled jalapeños, and a small bowl of the leftover chipotle dressing for dipping. They’re perfect as a stand-alone snack, but they also pair well with a simple side salad or a bowl of creamy slow cooker white chicken chili for a fuller meal.
Storage: If you have leftover filling, store it in an airtight container in the fridge for up to 4 days. The baked tortilla cones can be stored in a ziplock bag at room temperature for up to 2 days—just keep them away from moisture. Do not assemble the cones ahead of time, or the tortillas will get soggy.
Reheating: To reheat the cones, place them on a baking sheet in a 350°F oven for 3-5 minutes. This will bring back some of the crispiness. You can also reheat the filling in a skillet over medium heat for a few minutes. I don’t recommend microwaving the assembled cones—the tortillas turn rubbery.
Flavor Development: The chipotle dressing actually tastes better after a day in the fridge. The flavors meld together and the heat becomes more rounded. So if you’re planning ahead, make the dressing 1-2 days in advance.
Nutritional Information & Benefits
Here’s an approximate breakdown per cone (based on 6 servings, using the recipe as written):
- Calories: 310
- Protein: 22g
- Fat: 14g
- Carbohydrates: 24g
- Fiber: 4g
- Sugar: 3g
- Sodium: 520mg
Health Highlights: This recipe packs a good amount of protein from the chicken and black beans, which helps keep you full during a long game. The chipotle peppers contain capsaicin, which has anti-inflammatory properties and can boost metabolism. The bell peppers and lime juice add a solid dose of vitamin C. And the cilantro? It’s a natural detoxifier—bonus.
Dietary Considerations: This recipe is gluten-free (use certified GF tortillas if needed) and can be made dairy-free by swapping the cream cheese and sour cream for plant-based alternatives. It’s also nut-free and egg-free. If you’re watching sodium, use low-sodium black beans and skip the added salt in the dressing.
Personal Note: I don’t usually count calories on game day, but I like knowing that this snack isn’t just empty carbs. It’s got enough protein and fiber to keep you going through the fourth quarter without that heavy, sluggish feeling.
Conclusion
These Smoky Chipotle Football Charcuterie Cones are the kind of recipe that makes game day feel special without making you feel stressed. They’re quick enough for a last-minute gathering, but impressive enough that people will think you spent hours on them. The smoky chipotle dressing is the star—creamy, tangy, with just enough heat to keep things interesting—and the crispy tortilla cone holds everything together in the most satisfying way.
I love that you can customize these based on what you have in your fridge or who’s coming over. Vegetarian, keto, extra spicy—they adapt beautifully. And honestly? They’re just fun to eat. There’s something about eating out of a cone that makes everything taste better. It’s like a taco and a charcuterie board had a baby, and that baby is perfect for football season.
If you make these, I’d love to hear how they turn out. Leave a comment below or tag me in your photos—I’m always looking for new variations to try. And if you’re in the mood for more game day snacks, don’t miss my flavorful sheet pan nacho bar with chipotle pulled chicken or these easy no-bake chocolate chip cookie dough football truffles for dessert. Happy game day, and happy eating!
Frequently Asked Questions
Can I make the tortilla cones ahead of time?
Yes! You can bake the tortilla cones up to 2 days in advance. Store them in an airtight container at room temperature. Just keep them away from any moisture—they’ll stay crispy for days.
What if I don’t have chipotle peppers in adobo?
You can substitute with 1 teaspoon of smoked paprika mixed with ½ teaspoon of cayenne pepper and a tablespoon of tomato paste. It won’t be exactly the same, but it’ll give you a similar smoky heat.
Can I use flour tortillas or corn tortillas?
Either works, but flour tortillas hold their shape better and are less likely to crack. Corn tortillas are more fragile—you’ll need to warm them thoroughly before shaping. I recommend flour for first-timers.
How do I keep the cones from getting soggy?
Let the cones cool completely before adding any filling. Also, don’t over-moisten the filling—if it’s too wet, it’ll soften the tortillas quickly. Serve within 30 minutes of assembly for best results.
Can I make this recipe dairy-free?
Absolutely. Use dairy-free cream cheese and sour cream alternatives (I like Kite Hill or Violife brands). The flavor will be slightly different, but the smoky chipotle taste still shines through.
Pin This Recipe!
Smoky Chipotle Football Charcuterie Cones: Easy Game Day Snack

These Smoky Chipotle Football Charcuterie Cones are a handheld charcuterie board stuffed into a crispy cone, topped with smoky, spicy, creamy goodness. Perfect for game day, they’re quick, easy, and a crowd-pleaser.
- Prep Time: 20 minutes
- Cook Time: 10 minutes
- Total Time: 30 minutes
- Yield: 6 servings 1x
- Category: Appetizer
- Cuisine: Mexican
Ingredients
- 6 large flour tortillas (6-inch)
- Olive oil spray
- Salt, a pinch
- 4 oz cream cheese, softened
- ½ cup sour cream
- 2 chipotle peppers in adobo sauce, minced
- 1 tablespoon adobo sauce
- 2 tablespoons fresh lime juice
- ½ teaspoon garlic powder
- ¼ teaspoon cumin
- ¼ teaspoon salt
- 2 cups cooked shredded chicken (rotisserie chicken works great)
- ½ cup black beans, drained and rinsed
- ½ cup corn kernels (frozen and thawed, or canned and drained)
- ½ cup red bell pepper, diced small
- 3 stalks green onion, thinly sliced
- ¼ cup cilantro, chopped (optional)
- ½ cup cotija cheese, crumbled (or feta)
- Pickled jalapeños (optional, for topping)
- Extra cilantro (optional, for topping)
- Lime wedges (optional, for serving)
Instructions
- Make the Smoky Chipotle Dressing: In a small bowl, combine softened cream cheese, sour cream, minced chipotle peppers, adobo sauce, lime juice, garlic powder, cumin, and salt. Stir until smooth. Taste and adjust seasoning. Set aside.
- Prepare the Tortilla Cones: Preheat oven to 375°F (190°C). Line a baking sheet with parchment paper. Flip a muffin tin upside down. Lightly spray each tortilla with olive oil on both sides and sprinkle with a pinch of salt. Press each tortilla over an upside-down muffin cup to form a cone. Bake for 8-10 minutes until golden and crispy. Let cool completely on the muffin tin.
- Mix the Filling: In a large bowl, combine shredded chicken, black beans, corn, red bell pepper, green onion, and cilantro. Add about ¾ of the chipotle dressing and toss until evenly coated. Reserve the remaining dressing for drizzling.
- Assemble the Cones: Hold each cooled tortilla cone upright. Spoon the filling into each cone, pressing gently to pack. Do not overstuff. Top with crumbled cotija cheese, a drizzle of remaining dressing, and optional toppings like pickled jalapeños, extra cilantro, and a squeeze of lime.
- Serve Immediately: Arrange cones on a platter with extra lime wedges and napkins. Best eaten within 30 minutes of assembly.
Notes
For best texture, use full-fat cream cheese. If sensitive to spice, start with one chipotle pepper. For a vegetarian version, swap chicken for extra black beans or roasted sweet potatoes. Cones can be baked up to 2 days in advance and stored in an airtight container at room temperature. Do not assemble cones ahead of time to avoid sogginess. The chipotle dressing can be made up to 3 days in advance and tastes better after a day in the fridge.
Nutrition
- Serving Size: 1 cone
- Calories: 310
- Sugar: 3
- Sodium: 520
- Fat: 14
- Saturated Fat: 6
- Carbohydrates: 24
- Fiber: 4
- Protein: 22
Keywords: game day snack, charcuterie cones, chipotle, football snack, easy appetizer, handheld snack


