I was standing in the grocery store aisle last Tuesday, staring at a bag of candy corn I had no business buying, when the smell hit me. Not the candy corn—somehow, underneath all that plastic and sugar, I caught a whiff of something else. Something sharp and briny, mixed with the faint sweetness of dried fruit. And just like that, I was seven years old, sitting cross-legged on my neighbor Mrs. Kowalski’s linoleum kitchen floor, watching her arrange little piles of cheese and crackers on a wooden board shaped like a pumpkin. She always let me help, even though my tiny fingers were terrible at placing things neatly. I’d get distracted, eat half the olives, and she’d just laugh and say, “The mess is part of the charm, kiddo.”
Honestly, I haven’t thought about those afternoons in years. Mrs. Kowalski moved away when I was twelve, and I never really learned to make her boards—I just watched. So when I found myself in that grocery store, I grabbed a block of cheddar, some prosciutto, and a bag of pretzel sticks, and decided to figure it out myself. Let me tell you, my first attempt was a disaster. The cheese was too soft, the meat was all stuck together, and I forgot the crackers entirely. But the second time? That was the one. And the third time, I realized I could do it in ten minutes flat, which is honestly the only way I cook on a weeknight anyway.
This quick Halloween charcuterie board in 10 minutes is the result of those messy, happy experiments. It’s not fancy, and it’s definitely not perfect—but it tastes exactly like I remember. Maybe you’ve been there, chasing a taste you can’t quite name. This is that board for me.
Why You’ll Love This Recipe
Look, I’ve tested this board about a dozen times now, and I’m not ashamed to admit I’ve eaten it for dinner more nights than I’d like to count. It’s that good. Here’s why it works so well for busy weeknights and Halloween gatherings alike:
- Quick & Easy: Comes together in under 10 minutes, no cooking required. Perfect for those evenings when you walk in the door and the kids are already asking for snacks.
- Simple Ingredients: No fancy grocery trips needed. You likely already have cheese, crackers, and a few Halloween-themed treats in your pantry.
- Perfect for Halloween: Great for parties, school events, or just a fun weeknight dinner that feels special without the stress.
- Crowd-Pleaser: Always gets rave reviews from kids and adults alike. The spooky presentation makes everyone smile.
- Unbelievably Delicious: The mix of salty, sweet, and savory is next-level comfort food in board form.
What makes this board different from the rest? It’s the balance. Most Halloween boards go overboard with candy and forget the actual food. This one keeps things grounded with real cheese and meat, then adds just enough spooky flair to feel festive. It’s comfort food reimagined—faster, easier, but with the same soul-soothing satisfaction. Perfect for impressing guests without stress, or turning a simple Tuesday into something memorable.
What Ingredients You Will Need
This recipe uses simple, mostly pantry-stable ingredients to deliver a board that looks impressive without the fuss. Most of these are things you can grab on a quick grocery run, and the Halloween touches are easy to find in the seasonal aisle.
- For the Cheese:
- 8 ounces sharp cheddar cheese, sliced into cubes or triangles (I like Tillamook for consistent quality)
- 4 ounces brie or camembert, left whole or cut into wedges (adds that creamy, luxurious texture)
- 4 ounces gouda or smoked cheese, sliced (the smoky flavor balances the sweet elements)
- For the Meat:
- 4 ounces prosciutto or salami, thinly sliced (fold into ribbons or rosettes for visual appeal)
- 4 ounces pepperoni or summer sausage, sliced (optional, but adds a kid-friendly option)
- For the Crackers & Bread:
- 1 cup assorted crackers (I recommend a mix of buttery rounds and salty squares)
- 1/2 cup pretzel sticks or rods (great for dipping and adds a salty crunch)
- 1/2 cup sliced baguette or crostini (optional, for a more substantial board)
- For the Halloween Touches:
- 1/4 cup candy corn or candy pumpkins (adds the festive color and sweetness)
- 1/4 cup black olives, pitted (for a spooky “eyeball” effect)
- 1/4 cup dried cranberries or cherries (for a pop of red, like little blood drops)
- 1/4 cup pumpkin seeds, roasted and salted (adds crunch and fits the theme)
- 1 small apple or pear, sliced (optional, for freshness and to prevent browning, toss in lemon juice)
- For the Dip (Optional but Recommended):
- 1/2 cup hummus or spinach dip (I like using a store-bought roasted red pepper hummus for color)
- 1/4 cup honey or fig jam (for drizzling over brie or pairing with cheese)
For substitutions, use any cheese you have on hand—just make sure you have a mix of textures (soft, hard, and creamy). Swap prosciutto for turkey slices if you prefer a lighter option. For a vegetarian board, skip the meat and add more cheese, nuts, and roasted vegetables.
Equipment Needed
You don’t need much for this board, which is part of the beauty. Here’s what I use:
- Large wooden board or serving platter: A 12×16 inch board works best. If you don’t have one, a baking sheet lined with parchment paper works perfectly—honestly, I’ve done it more times than I’d like to admit.
- Small bowls or ramekins: For dips, olives, and candy. I use little ceramic ones I picked up at a thrift store.
- Cheese knife or paring knife: For slicing cheese and fruit. A good sharp knife makes all the difference.
- Cutting board: For prepping ingredients. Keep it separate from your serving board to avoid cross-contamination.
- Tongs or small spoons: For serving. Guests can use their hands, but tongs keep things tidy.
If you’re using a baking sheet, just make sure it’s clean and dry. I’ve also used a large cutting board in a pinch—works like a charm.
Preparation Method
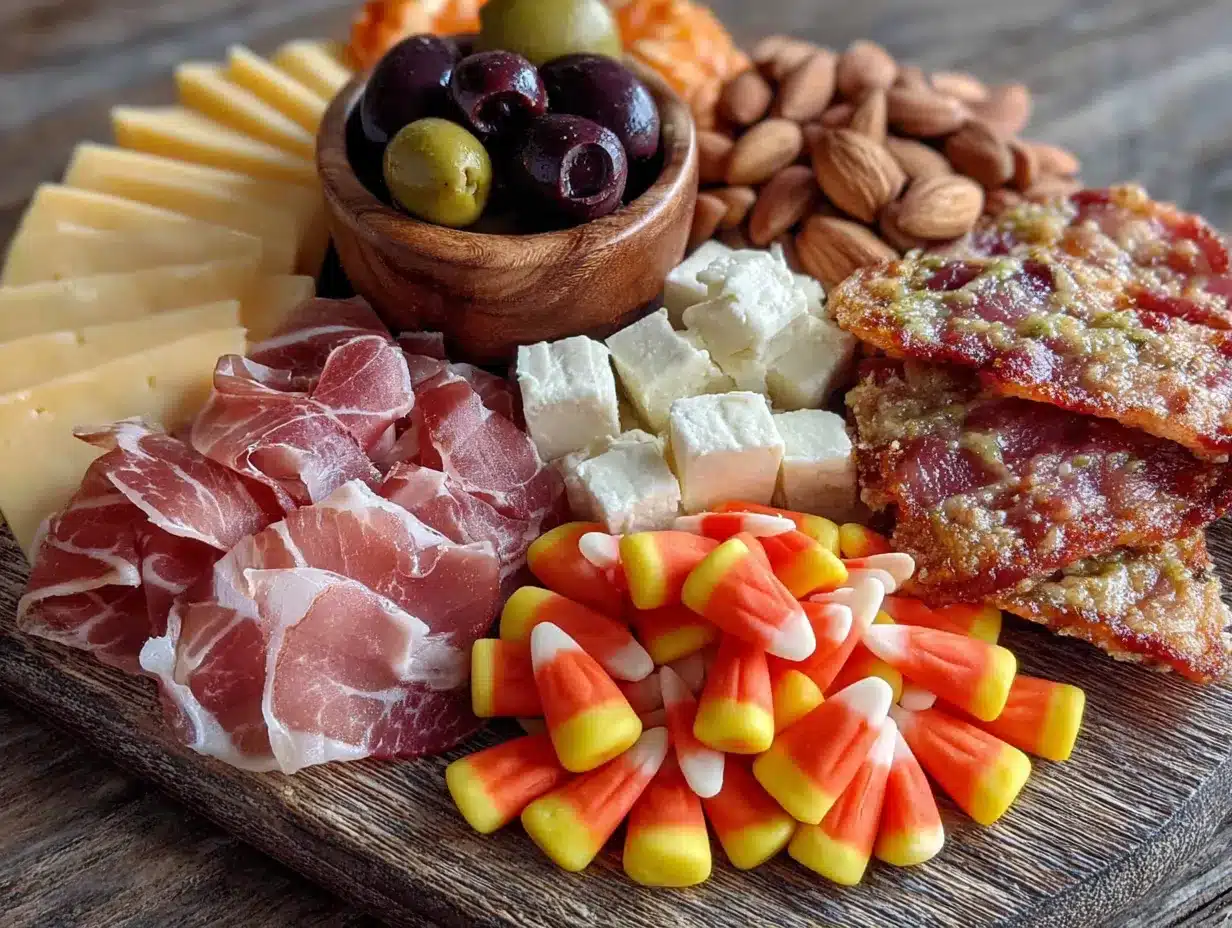
This board comes together in 10 minutes flat. Here’s how I do it, step by step:
- Prep your board (1 minute): Place your board or platter on the counter. If using a baking sheet, line it with parchment paper for easy cleanup—trust me on this one.
- Place the dips and bowls (1 minute): Set your small bowls for hummus, honey, olives, and candy corn on the board. Spread them out evenly so they act as anchors for the rest of the ingredients.
- Add the cheese (2 minutes): Arrange your cheese in clusters around the board. Place the brie whole or in wedges, then scatter the cheddar cubes and gouda slices. Leave some space between clusters so guests can easily grab pieces.
- Layer the meat (2 minutes): Fold prosciutto slices into loose ribbons or rosettes and place them near the cheese. For salami or pepperoni, layer them in a small pile or fan them out. The meat should look inviting, not like a pile of deli slices.
- Fill in with crackers and bread (2 minutes): Scatter crackers, pretzel sticks, and baguette slices in the empty spaces. Don’t overcrowd—leave room for the Halloween touches. I like to place crackers near the cheese and meat so guests can easily pair them.
- Add the Halloween touches (2 minutes): Sprinkle candy corn, pumpkin seeds, and dried cranberries around the board. Place the black olives in small clusters—they look like little eyeballs and add a fun spooky touch. If using apple slices, tuck them in near the cheese.
- Finish with garnishes (30 seconds): Drizzle a little honey over the brie or place a small spoonful of fig jam next to it. If you have fresh herbs like rosemary or thyme, add a few sprigs for color—it’s optional but looks gorgeous.
- Serve immediately (30 seconds): Your board is ready! Place it in the center of the table and let everyone dig in. No need to wait—it’s best enjoyed fresh.
Pro tip: If you’re making this ahead, prep all the ingredients (slice cheese, fold meat, portion crackers) and store them separately. Assemble the board just before serving to keep everything fresh and crisp.
Cooking Tips & Techniques
Over the years, I’ve learned a few tricks that make this board even better. Here are my favorites:
- Balance textures: A good board has soft cheese (brie), hard cheese (cheddar), crunchy crackers, and chewy dried fruit. Don’t skip any category—it’s what makes each bite interesting.
- Don’t overthink the placement: I used to stress about making everything look perfect, but honestly, guests just grab what they want. Cluster ingredients by type, then let the board fill in naturally.
- Use Halloween-themed picks: Little plastic spiders or pumpkin-shaped toothpicks add a fun touch without extra effort. I found a pack at a dollar store and use them every year.
- Keep cheese at room temperature: Take the cheese out of the fridge 15-20 minutes before serving. It tastes so much better when it’s not cold—the flavors really open up.
- Watch the candy corn: It’s sweet, so don’t overdo it. A small handful scattered around is enough to look festive without overwhelming the savory elements.
Common mistake to avoid: Don’t pile everything in the center. Spread ingredients out so guests can easily reach everything without knocking over a bowl of olives. I learned this the hard way at a party—let’s just say there was a lot of cleanup involved.
Variations & Adaptations
This board is endlessly customizable. Here are a few ways I’ve adapted it over the years:
- Vegetarian version: Skip the meat and add roasted chickpeas, marinated artichoke hearts, or extra cheese. I’ve done this for a friend who doesn’t eat meat, and it was a hit.
- Gluten-free version: Use gluten-free crackers or rice cakes instead of regular crackers. Many cheeses and meats are naturally gluten-free, so just check labels on the dips.
- Kid-friendly version: Swap the brie for cheddar cubes, use string cheese cut into pieces, and add more candy corn or gummy worms. Kids love the fun shapes and sweet treats.
- Spooky upgrade: Add “mummy” cheese sticks (wrap string cheese with strips of prosciutto) or “spider” olives (cut olives in half and place on pretzel sticks for legs). It takes an extra minute but looks incredible.
- Seasonal swap: In fall, add sliced apples and pears. In winter, use pomegranate seeds and dried figs. The base stays the same, but the fruit changes with the season.
I once tried a version with ghost-shaped cheese slices using a cookie cutter—it was messy but adorable. The kids at the party didn’t care that the ghosts were slightly lopsided.
Serving & Storage Suggestions
This board is best served at room temperature, so let it sit out for 10-15 minutes after assembling. I like to place it in the center of the table with small plates and napkins nearby—guests can graze as they mingle.
For drinks, pair it with apple cider, a light red wine like pinot noir, or even sparkling water with a splash of cranberry juice. The sweetness of the cider or juice plays nicely with the salty cheese and meat.
Storage: If you have leftovers (unlikely, but possible!), separate the components and store them in airtight containers. Cheese keeps for 3-5 days in the fridge, meat for 2-3 days, and crackers in a cool, dry place. Don’t store the assembled board—the crackers will get soft and the fruit will dry out.
Reheating: This board is served cold or at room temperature, so no reheating needed. If you want to serve the brie warm, pop it in the oven at 350°F for 5-7 minutes before adding it to the board.
Flavors actually improve over time for the cheese and meat—they meld together in the fridge. But the crackers and fruit are best fresh, so assemble just before serving for the best experience.
Nutritional Information & Benefits
This board is more balanced than you might think. Here’s a rough estimate per serving (about 1/4 of the board):
- Calories: 350-450
- Protein: 15-20 grams
- Fat: 25-30 grams
- Carbohydrates: 20-25 grams
- Fiber: 2-4 grams
- Sugar: 10-15 grams (mostly from dried fruit and candy corn)
Cheese provides calcium and protein, while nuts and seeds add healthy fats and fiber. The dried fruit offers a quick energy boost. For a lower-calorie option, use less cheese and more vegetables like cucumber slices or bell pepper strips.
Dietary considerations: This recipe contains dairy and gluten (from crackers). For a dairy-free version, use vegan cheese and dairy-free crackers. The meat is naturally gluten-free, but always check labels on processed meats.
I love that this board feels indulgent but isn’t overly heavy—it’s a treat you can feel good about, especially when paired with fresh fruit and veggies.
Conclusion
This quick Halloween charcuterie board in 10 minutes is exactly what weeknight cooking should be: fast, fun, and full of flavor. It’s the kind of recipe that makes you look like a hero without actually working hard—and honestly, isn’t that the best kind?
I love this board because it brings people together. There’s something about sharing food from a single platter that makes conversation flow easier, laughter come quicker, and even a regular Tuesday feel like a party. Plus, it’s endlessly adaptable—you can make it your own with whatever you have in the fridge.
So go ahead, give it a try. Grab your favorite cheese, some spooky candy, and a board (or baking sheet—no judgment here). Let me know in the comments how it turned out, or share your own Halloween twist. I’d love to hear about your creations!
Frequently Asked Questions
Can I make this board ahead of time?
Yes! Prep all the ingredients (slice cheese, fold meat, portion crackers) and store them separately. Assemble the board just before serving to keep everything fresh and crisp. The cheese and meat can be prepped up to 24 hours in advance.
What if I don’t have a wooden board?
No problem! Use a large baking sheet, a cutting board, or even a clean pizza pan. Just line it with parchment paper for easy cleanup. The board doesn’t have to be fancy—it’s about the food and the fun.
How do I keep the apple slices from browning?
Toss them in a little lemon juice or lime juice right after slicing. This stops oxidation and keeps them looking fresh for hours. Alternatively, use pear slices instead—they brown less quickly.
Can I make this dairy-free or vegan?
Absolutely! Use vegan cheese (many brands melt and slice well), dairy-free crackers, and skip the meat. Add roasted chickpeas, marinated vegetables, and extra nuts for protein. The Halloween touches like candy corn and pumpkin seeds are naturally vegan-friendly.
How many people does this board serve?
This recipe serves 4-6 people as a snack or light meal. For a party of 8-10, double the ingredients and use a larger board or two smaller boards. It’s easy to scale up—just keep the balance of cheese, meat, crackers, and treats in mind.
Pin This Recipe!
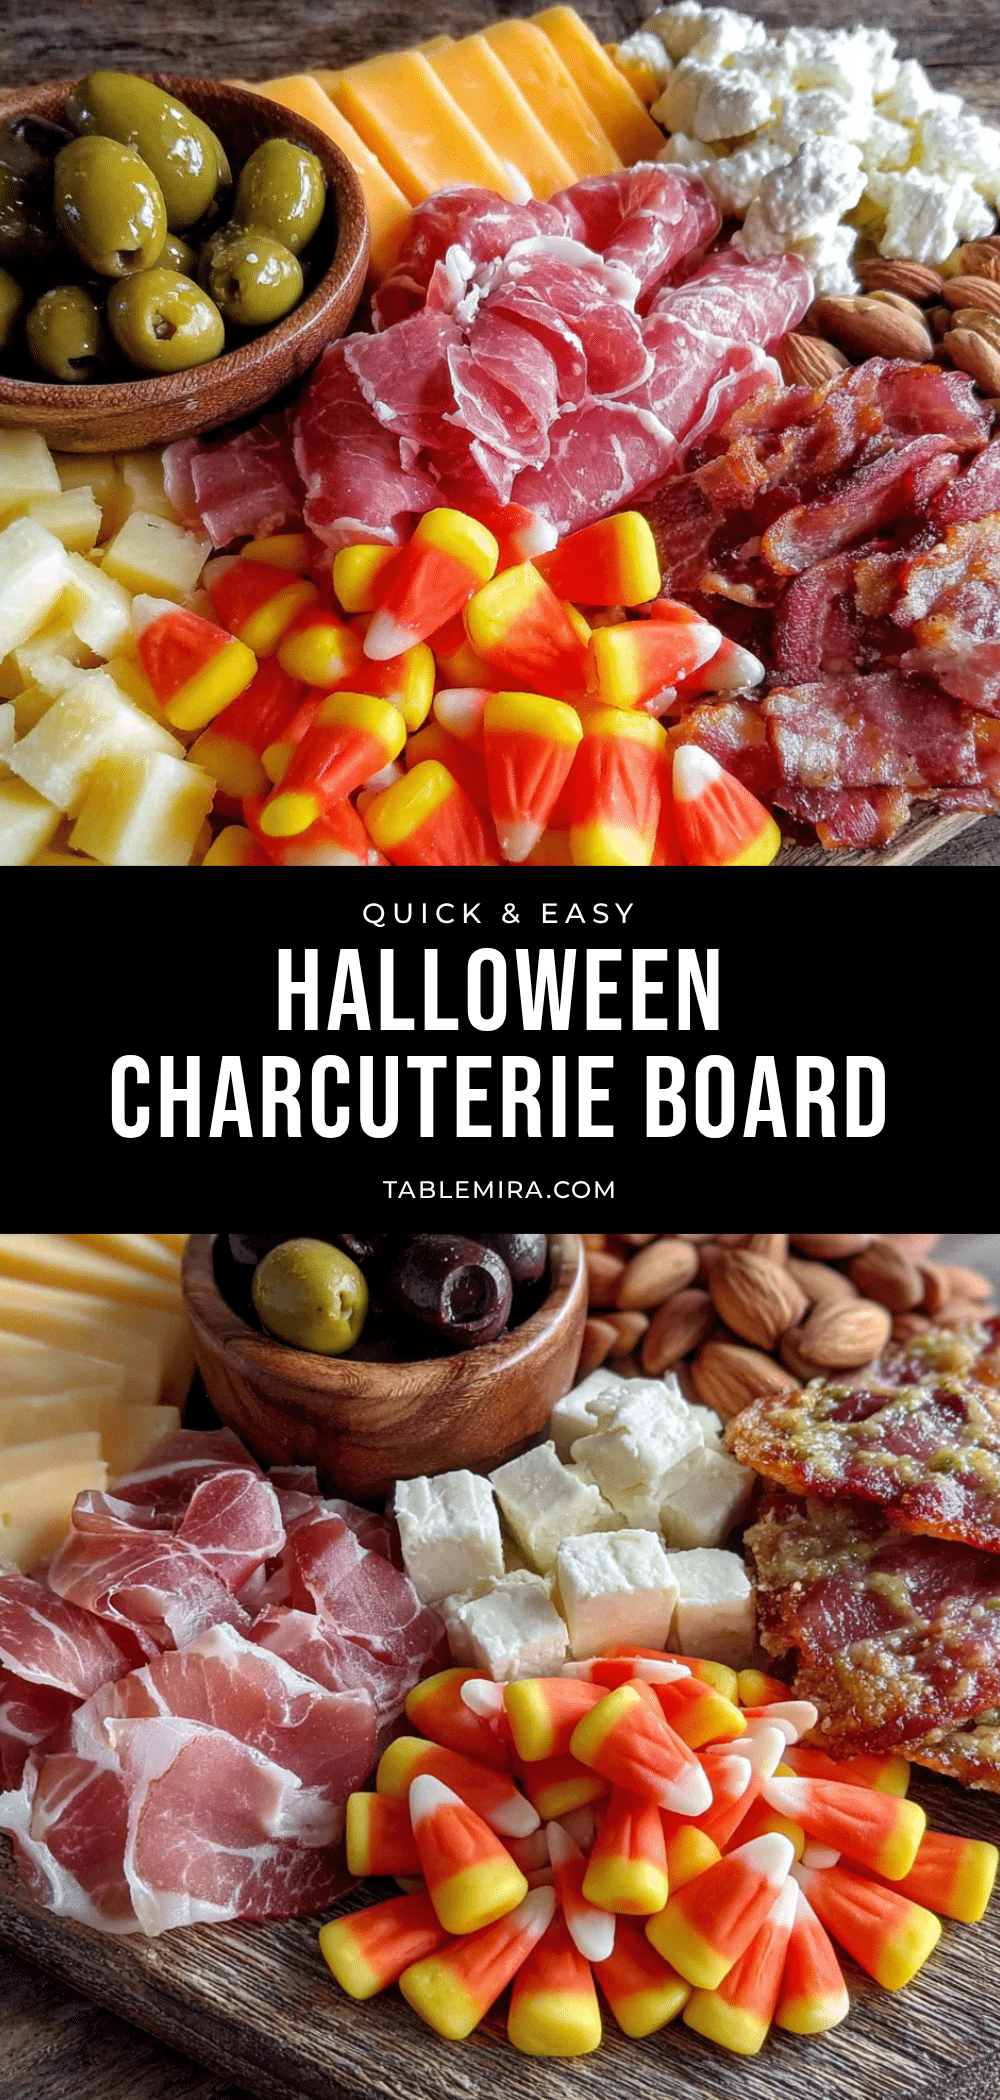
Quick Halloween Charcuterie Board in 10 Minutes
A quick and easy Halloween charcuterie board that comes together in just 10 minutes, featuring a balanced mix of cheese, meat, crackers, and spooky treats. Perfect for weeknight dinners or Halloween gatherings.
- Prep Time: 10 minutes
- Cook Time: 0 minutes
- Total Time: 10 minutes
- Yield: 4-6 servings 1x
- Category: Appetizer
- Cuisine: American
Ingredients
- 8 ounces sharp cheddar cheese, sliced into cubes or triangles
- 4 ounces brie or camembert, left whole or cut into wedges
- 4 ounces gouda or smoked cheese, sliced
- 4 ounces prosciutto or salami, thinly sliced
- 4 ounces pepperoni or summer sausage, sliced (optional)
- 1 cup assorted crackers
- 1/2 cup pretzel sticks or rods
- 1/2 cup sliced baguette or crostini (optional)
- 1/4 cup candy corn or candy pumpkins
- 1/4 cup black olives, pitted
- 1/4 cup dried cranberries or cherries
- 1/4 cup pumpkin seeds, roasted and salted
- 1 small apple or pear, sliced (optional, tossed in lemon juice)
- 1/2 cup hummus or spinach dip (optional)
- 1/4 cup honey or fig jam (optional)
Instructions
- Prep your board (1 minute): Place your board or platter on the counter. If using a baking sheet, line it with parchment paper for easy cleanup.
- Place the dips and bowls (1 minute): Set your small bowls for hummus, honey, olives, and candy corn on the board. Spread them out evenly so they act as anchors for the rest of the ingredients.
- Add the cheese (2 minutes): Arrange your cheese in clusters around the board. Place the brie whole or in wedges, then scatter the cheddar cubes and gouda slices. Leave some space between clusters so guests can easily grab pieces.
- Layer the meat (2 minutes): Fold prosciutto slices into loose ribbons or rosettes and place them near the cheese. For salami or pepperoni, layer them in a small pile or fan them out.
- Fill in with crackers and bread (2 minutes): Scatter crackers, pretzel sticks, and baguette slices in the empty spaces. Don’t overcrowd—leave room for the Halloween touches.
- Add the Halloween touches (2 minutes): Sprinkle candy corn, pumpkin seeds, and dried cranberries around the board. Place the black olives in small clusters. If using apple slices, tuck them in near the cheese.
- Finish with garnishes (30 seconds): Drizzle a little honey over the brie or place a small spoonful of fig jam next to it. If you have fresh herbs like rosemary or thyme, add a few sprigs for color.
- Serve immediately (30 seconds): Your board is ready! Place it in the center of the table and let everyone dig in.
Notes
For best flavor, let cheese sit at room temperature for 15-20 minutes before serving. If making ahead, prep ingredients separately and assemble just before serving. For a vegetarian version, skip the meat and add more cheese, nuts, and roasted vegetables. For a gluten-free version, use gluten-free crackers or rice cakes.
Nutrition
- Serving Size: 1/4 of the board
- Calories: 350450
- Sugar: 1015
- Sodium: 600800
- Fat: 2530
- Saturated Fat: 1015
- Carbohydrates: 2025
- Fiber: 24
- Protein: 1520
Keywords: Halloween charcuterie board, quick appetizer, no-cook recipe, spooky snacks, party platter


