The neighborhood block party was in four hours and I’d completely forgotten. Everyone else would be bringing their signature dishes — slow-smoked brisket that had been marinating for two days, hand-rolled sushi, some kind of fancy layered dessert that looked like it belonged in a bakery window. I opened my fridge and stared at a pack of chicken thighs, a sad wedge of Parmesan, and half a head of garlic. My neighbor Maria texted asking what I was bringing. I typed back “something amazing” while silently panicking.
Let me tell you, there’s nothing like a deadline to spark creativity. I grabbed my air fryer — honestly, my most-used kitchen gadget — and started experimenting. I figured if I coated these thighs right, cranked up the heat, and crossed my fingers, maybe I’d end up with something edible. I mean, chicken thighs are forgiving, right? They’ve got enough fat to stay juicy even when you’re rushing.
Twenty-five minutes later, I walked over to the party with a platter of these golden, crispy air fryer chicken thighs. The garlic and Parmesan had melted into this incredible crust that was shatteringly crisp on the outside and impossibly tender inside. People actually stopped mid-conversation to grab one. Someone asked for the recipe before I’d even set the platter down. And the best part? I’d spent maybe ten minutes of actual hands-on work. Maybe you’ve been there — that moment when the simplest thing you threw together becomes the star of the show.
That’s how this recipe was born. Not from hours of testing or fancy techniques, but from a frantic afternoon and a fridge full of basic ingredients. And honestly? That’s why I keep coming back to it. It’s the kind of meal that makes you look like you tried way harder than you actually did.
Why You’ll Love This Recipe
Let me be straight with you — I’ve tested this recipe at least a dozen times to get it just right. I wanted chicken that was actually crispy (not that sad, soggy skin you sometimes get from air fryers) with flavor that goes all the way through. Here’s what makes these thighs special:
- Ready in 25 Minutes: From fridge to plate in under half an hour. That’s faster than delivery and way better for you.
- Pantry-Friendly Ingredients: Chicken thighs, garlic, Parmesan, and basic seasonings. No trips to specialty stores required.
- Perfect for Busy Weeknights: This is the dinner you make when you’re tired, hungry, and need something good on the table fast.
- Kid-Approved and Crowd-Pleasing: Even picky eaters go back for seconds. The crispy coating is basically chicken nuggets for grown-ups.
- Actually Crispy Skin: The air fryer magic creates that golden, crunchy exterior without deep frying. It’s science, but it tastes like magic.
What sets this apart from other air fryer chicken recipes? It’s the double-coating technique. Most recipes just toss the chicken in oil and seasonings, but I’ve found that a light dusting of Parmesan mixed with the seasonings creates a crust that stays crispy even after sitting for a few minutes. Plus, the garlic isn’t just sprinkled on top — it’s mixed into the coating so every bite has that savory punch.
This isn’t just good chicken. It’s the kind that makes you close your eyes after the first bite. It’s comfort food that comes together faster than you can decide what to order for takeout. Perfect for those nights when you need dinner on the table and you need it to be actually satisfying.
What Ingredients You Will Need
This recipe uses simple, everyday ingredients to deliver big flavor without the fuss. Most of these are probably already in your kitchen, which is exactly what you want on a busy weeknight.
For the Chicken
- 4 bone-in, skin-on chicken thighs (about 1.5 pounds total) — The skin is crucial for that crispy texture. Boneless thighs work too, but you’ll need to adjust cooking time.
- 1 tablespoon olive oil — Helps the seasoning stick and promotes browning. Avocado oil works great too.
- 1 teaspoon salt — I prefer kosher salt for better distribution. Diamond Crystal is my go-to brand.
- ½ teaspoon black pepper — Freshly ground makes a difference here.
- 1 teaspoon garlic powder — Not the same as fresh garlic, but essential for that all-over flavor.
- 1 teaspoon paprika — Adds color and a subtle smokiness. Smoked paprika is amazing if you have it.
- ½ teaspoon onion powder — Rounds out the savory notes.
For the Garlic Parmesan Coating

- ¼ cup grated Parmesan cheese — Buy the good stuff in a block and grate it yourself. The pre-shredded kind has anti-caking agents that don’t melt as well. Parmigiano-Reggiano is worth the splurge here.
- 3 cloves garlic, minced — Fresh garlic is non-negotiable for this recipe. The jarred stuff won’t give you the same punch.
- 2 tablespoons melted butter — Adds richness and helps the coating crisp up. Use salted or unsalted, just adjust the added salt slightly.
- 2 tablespoons chopped fresh parsley — For color and freshness. Dried parsley works in a pinch, use 2 teaspoons.
Optional but Recommended
- Lemon wedges for serving — The acidity cuts through the richness beautifully.
- Red pepper flakes — If you like a little heat.
- Extra Parmesan for garnish — Because more cheese is never a bad thing.
Equipment Needed
You don’t need a professional kitchen to make this happen. Here’s what you’ll need:
- Air fryer — Any brand works. I use a 5.8-quart Cosori, but even the smaller ones can handle 4 thighs if you don’t overcrowd. If you have a basket-style air fryer, you might need to cook in batches.
- Large bowl — For mixing the seasoning and coating the chicken. A glass or stainless steel bowl works best.
- Tongs — For flipping the chicken without piercing the skin. Silicone-tipped ones won’t scratch your air fryer basket.
- Small skillet — For toasting the garlic in butter. Any small pan works.
- Cutting board and knife — For mincing garlic and chopping parsley. A microplane is great for grating Parmesan if you have one.
- Paper towels — Essential for patting the chicken dry. Don’t skip this step.
If you don’t have an air fryer, you can make these in a convection oven at 400°F for about 30 minutes. The texture won’t be quite as crispy, but they’ll still be delicious. I’ve also made them in a regular oven by placing the thighs on a wire rack over a baking sheet — that helps air circulate and keeps the bottom from getting soggy.
Pro tip: Line your air fryer basket with parchment paper liners (the ones with holes) for easier cleanup. Just make sure they’re rated for air fryer temperatures.
Preparation Method
Let’s get cooking. This whole process takes about 25 minutes from start to finish, and most of that is hands-off cooking time.
- Pat the chicken dry. This is the most important step for crispy skin. Use paper towels to thoroughly dry each thigh on both sides. If the skin is wet, it’ll steam instead of crisp. I usually pat them dry, then let them sit on a paper towel-lined plate for 5 minutes while I prep everything else.
- Season the chicken. In a large bowl, combine the olive oil, salt, pepper, garlic powder, paprika, and onion powder. Add the chicken thighs and toss to coat evenly. Make sure every bit of skin gets some seasoning. Let them sit for 5 minutes while the flavors start to penetrate.
- Make the garlic butter. In a small skillet over medium-low heat, melt the butter. Add the minced garlic and cook for about 30 seconds — just until fragrant. You don’t want the garlic to brown, or it’ll turn bitter. Remove from heat immediately. The residual heat will continue to cook the garlic slightly.
- Preheat the air fryer. Set your air fryer to 400°F (200°C) and let it preheat for 3 minutes. This ensures the chicken starts cooking immediately, which helps the skin crisp up.
- Arrange the chicken. Place the seasoned thighs in the air fryer basket, skin side down. Leave at least ½ inch between each piece — overcrowding will trap steam and prevent crisping. If your air fryer is small, cook in two batches. I know it’s tempting to cram them all in, but trust me on this one.
- Cook the first side. Air fry at 400°F for 12 minutes. The skin should be starting to turn golden and crispy. Don’t open the basket to check too early — every time you open it, you let heat escape and extend the cooking time.
- Flip and brush. Using tongs, carefully flip each thigh. Brush the garlic butter mixture over the skin side. You’ll hear it sizzle — that’s a good sign. Sprinkle the grated Parmesan evenly over the tops. Don’t worry if some falls off; it’ll melt into the skin.
- Finish cooking. Air fry for another 8-10 minutes at 400°F. The internal temperature should reach 175-180°F (79-82°C) when measured at the thickest part, not touching bone. The skin should be deep golden brown and crispy to the touch. If it needs a minute or two more, go ahead — air fryers vary.
- Rest and garnish. Let the chicken rest in the basket for 2 minutes after cooking. This lets the juices redistribute. Transfer to a serving plate, sprinkle with fresh parsley, and add an extra grating of Parmesan if you’re feeling fancy. Serve with lemon wedges on the side.
Sensory cues to watch for: The chicken should make a slight tapping sound when you touch the skin — that’s how you know it’s crispy. The garlic butter should smell nutty and fragrant, not burnt. When you cut into a thigh, the juices should run clear, and the meat should pull away from the bone easily.
Cooking Tips & Techniques
After making these chicken thighs more times than I can count, I’ve learned a few things the hard way. Here are my best tips for guaranteed success:
Don’t skip drying the chicken. I know it seems like an extra step, but moisture is the enemy of crispy skin. I once rushed through this step and ended up with pale, rubbery skin that made me want to cry. Pat them dry, then pat them again.
Use bone-in, skin-on thighs. Boneless thighs cook faster but they don’t get nearly as crispy. The bone helps conduct heat and keeps the meat juicier. Plus, the skin acts like a protective barrier that traps moisture inside while getting crispy on the outside.
Preheat your air fryer. This is non-negotiable. Starting with a cold air fryer means the chicken spends too long in the “steaming” phase before it starts crisping. That extra 3 minutes of preheating makes a huge difference.
Don’t overcrowd the basket. I learned this lesson when I tried to squeeze six thighs into my air fryer. They came out soggy and unevenly cooked. Leave space between each piece so the hot air can circulate properly. If you need to cook more, do it in batches.
Use a meat thermometer. Chicken thighs are forgiving, but they still need to reach a safe internal temperature. I use an instant-read thermometer and aim for 175°F. Dark meat actually benefits from cooking a bit higher than white meat — it breaks down the connective tissue and makes the meat more tender.
Let them rest. I know you’re hungry, but those 2 minutes of resting time are crucial. The juices need to settle back into the meat, and the skin continues to crisp as it cools slightly. If you cut into them immediately, all those delicious juices will run out onto the plate.
Variations & Adaptations
One of the best things about this recipe is how adaptable it is. Here are some variations I’ve tried and loved:
Spicy Buffalo Version
Skip the garlic butter and toss the cooked thighs in ¼ cup of buffalo sauce mixed with 2 tablespoons of melted butter. Sprinkle with blue cheese crumbles instead of Parmesan. I made this for a game day party and they disappeared in minutes.
Lemon Herb Variation
Add the zest of one lemon to the seasoning mix and replace the parsley with fresh thyme and rosemary. Squeeze fresh lemon juice over the finished chicken. This version is lighter and brighter — perfect for spring dinners.
Low-Carb/Keto Friendly
This recipe is already naturally low-carb! Just make sure your Parmesan is full-fat and skip any sugary seasonings. The almond flour crowd might want to add a light dusting of almond flour to the coating for extra crunch, but honestly, it’s not necessary.
Spice It Up
Add 1 teaspoon of cayenne pepper to the seasoning mix, or toss the finished thighs in gochujang (Korean chili paste) mixed with a little honey. The sweet-spicy combination is incredible.
Dairy-Free Option
Use a dairy-free Parmesan alternative (I like the Follow Your Heart brand) and replace the butter with olive oil or vegan butter. The texture will be slightly different, but still delicious.
Serving & Storage Suggestions
These chicken thighs are incredibly versatile when it comes to serving. Here’s how to make the most of them:
Serve immediately. These are best enjoyed fresh from the air fryer while the skin is still shatteringly crisp. I usually serve them with a simple side salad and some crusty bread to soak up any juices.
Perfect pairings: They go beautifully with roasted vegetables (asparagus, broccoli, or Brussels sprouts), mashed potatoes, rice pilaf, or a simple Greek salad. For a low-carb option, serve over cauliflower rice or zucchini noodles.
Storage: Leftover chicken thighs can be stored in an airtight container in the refrigerator for up to 4 days. The skin will lose its crispiness, but the meat stays juicy. I actually love them cold, sliced over a salad the next day.
Reheating: The air fryer is your best friend here. Reheat at 375°F for 3-4 minutes, and the skin will crisp right back up. You can also reheat in a 400°F oven for about 10 minutes. Avoid the microwave — it’ll make the skin rubbery and sad.
Freezing: Cooked chicken thighs freeze well for up to 3 months. Let them cool completely, then wrap individually in plastic wrap and place in a freezer bag. To reheat, thaw in the refrigerator overnight, then crisp up in the air fryer.
One thing I love about this recipe is how the flavors develop. If you make extra, the cold chicken makes an amazing lunch the next day — just slice it over a bed of greens with some cherry tomatoes and a simple vinaigrette. Honestly, sometimes I look forward to the leftovers more than the original meal.
Nutritional Information & Benefits
Here’s the nutritional breakdown per serving (1 thigh):
| Nutrient | Amount |
|---|---|
| Calories | 385 |
| Protein | 32g |
| Fat | 26g |
| Saturated Fat | 9g |
| Carbohydrates | 3g |
| Fiber | 0.5g |
| Sugar | 0.5g |
| Sodium | 680mg |
Chicken thighs are actually a nutritional powerhouse. They’re rich in selenium, which supports thyroid function, and contain more iron and zinc than chicken breasts. The skin provides healthy fats that help your body absorb fat-soluble vitamins. Plus, the protein content keeps you full and satisfied for hours.
This recipe is naturally gluten-free and low-carb, making it suitable for keto, paleo, and Whole30 diets (just skip the Parmesan if you’re strict Whole30). The main allergens are dairy (from the butter and Parmesan) and potentially garlic for those with sensitivities.
From a wellness perspective, I love that this recipe lets me enjoy crispy, satisfying chicken without the guilt of deep frying. The air fryer uses a fraction of the oil, which means less fat and fewer calories, but you’d never know it from the taste.
Conclusion
Look, I’m not going to tell you this is the fanciest chicken recipe you’ll ever make. It’s not. But it is the kind of recipe that saves your dinner plans when you’re tired, hungry, and staring at a fridge full of nothing. It’s the recipe you’ll memorize because it’s so simple, and the one people will ask you for because it’s so good.
These quick crispy air fryer chicken thighs with garlic Parmesan are proof that you don’t need complicated techniques or exotic ingredients to make something truly delicious. Sometimes the best meals come from the simplest combinations — chicken, garlic, cheese, and a little bit of heat.
I’d love to hear how yours turn out. Did you try a different variation? Add your own twist? Drop a comment below and let me know. And if you share a photo on Pinterest or Instagram, tag me — I always love seeing your creations. Now go make some chicken. You’ve got this.
Frequently Asked Questions
Can I use boneless, skinless chicken thighs?
You can, but the texture will be different. Boneless thighs cook faster (about 15-18 minutes total) and won’t get as crispy without the skin. If you use them, reduce the cooking time and check for doneness at 165°F. They’ll still be tasty, just not as crunchy.
Why is my chicken skin not getting crispy?
Most likely, the chicken wasn’t dried thoroughly before seasoning. Moisture is the enemy of crispy skin. Also, check that your air fryer is preheated and that you’re not overcrowding the basket. If the skin still isn’t crisping, try cooking at 400°F for a few extra minutes.
Can I make this recipe in a regular oven?
Absolutely. Preheat your oven to 425°F and place the seasoned thighs on a wire rack set over a baking sheet. Bake for 25-30 minutes, flipping halfway through. Brush with the garlic butter and add Parmesan during the last 5 minutes. The texture won’t be quite as crispy as the air fryer, but it’ll still be delicious.
How do I prevent the Parmesan from burning?
Add the Parmesan during the last 5-8 minutes of cooking, not at the beginning. The cheese needs time to melt and crisp, but too much time will cause it to burn. Also, make sure your garlic butter isn’t too hot when you brush it on — let it cool slightly first.
Can I meal prep these chicken thighs?
Yes! Cook the chicken as directed, let it cool completely, and store in an airtight container in the fridge for up to 4 days. The skin will soften during storage, but you can reheat in the air fryer at 375°F for 3-4 minutes to bring back the crispiness. They’re great for meal prep lunches over salads or with roasted vegetables.
Pin This Recipe!
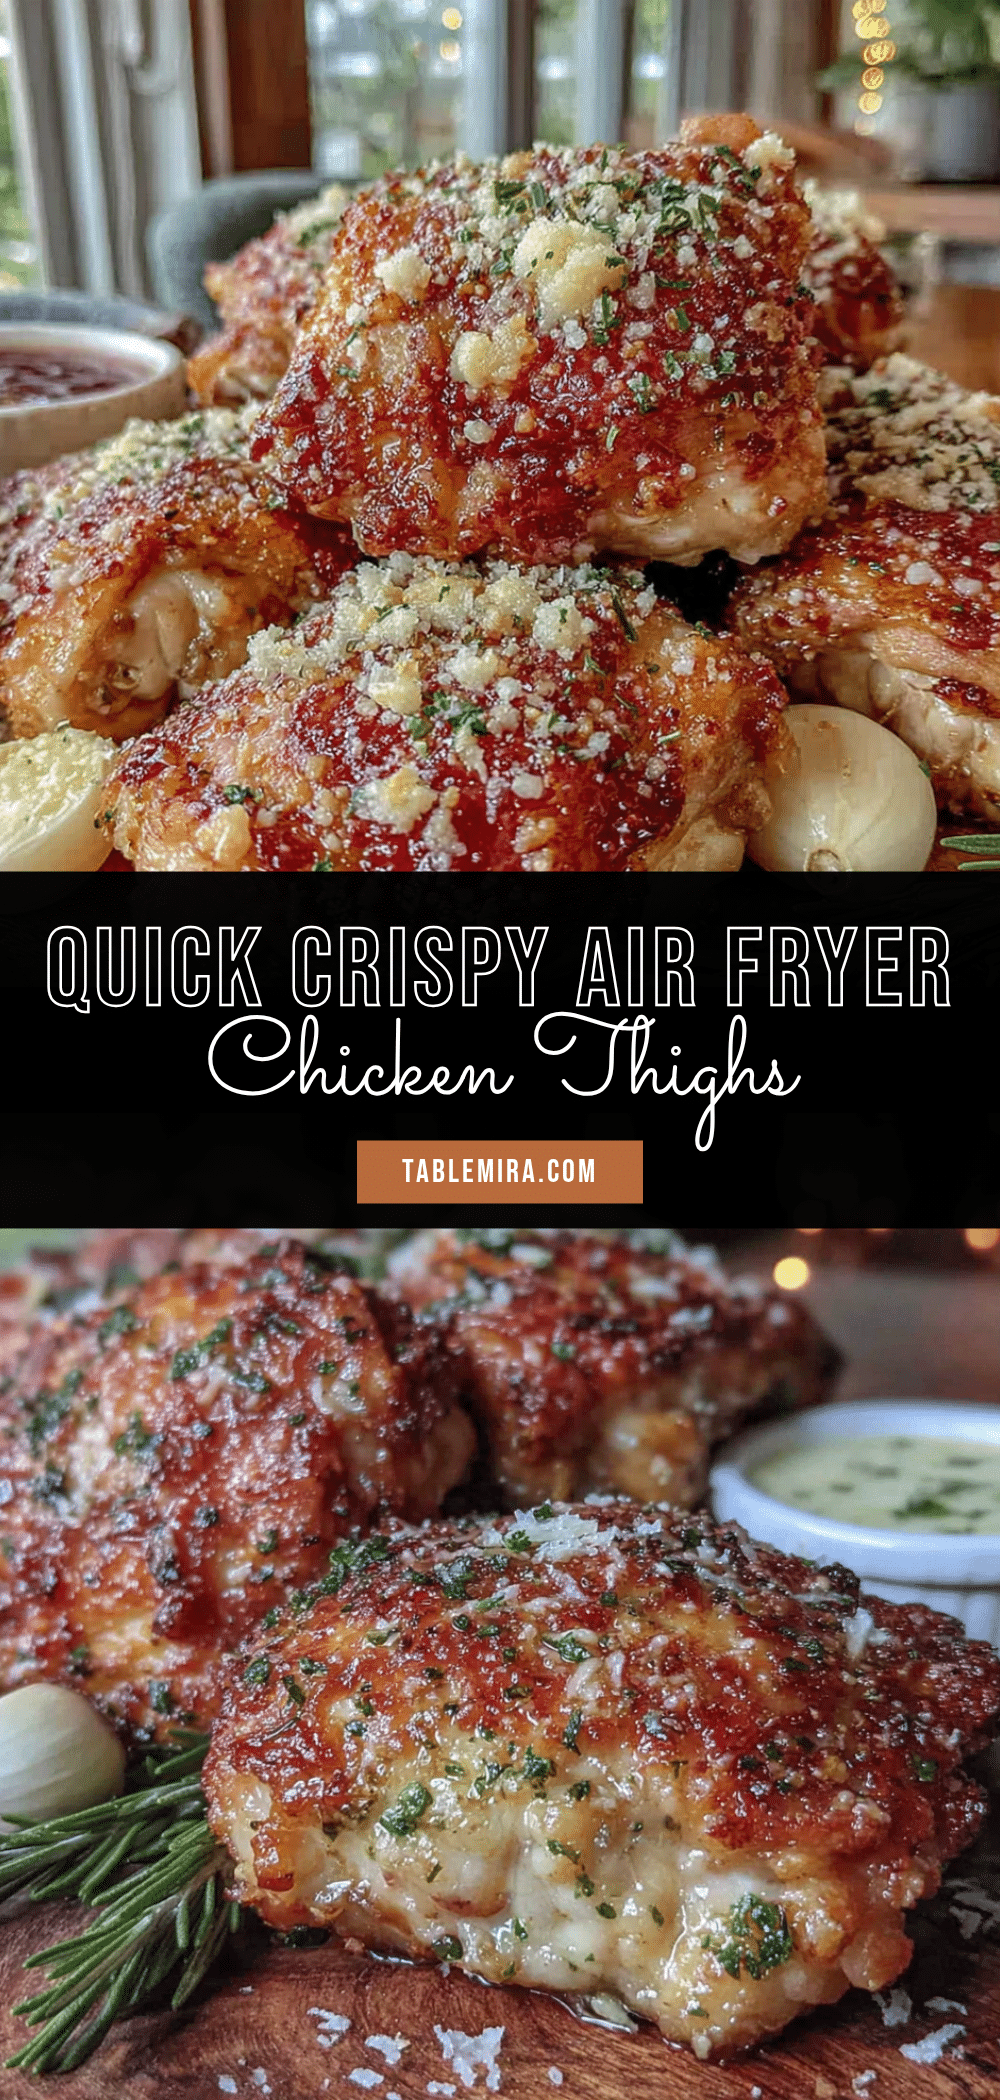
Quick Crispy Air Fryer Chicken Thighs with Garlic Parmesan

Golden, crispy air fryer chicken thighs with a garlic Parmesan crust that’s shatteringly crisp on the outside and tender inside. Ready in just 25 minutes with simple pantry ingredients, this is the perfect weeknight dinner that tastes like you tried way harder than you did.
- Prep Time: 10 minutes
- Cook Time: 20-22 minutes
- Total Time: 25 minutes
- Yield: 4 servings 1x
- Category: Main Course
- Cuisine: American
Ingredients
- 4 bone-in, skin-on chicken thighs (about 1.5 pounds total)
- 1 tablespoon olive oil
- 1 teaspoon salt (kosher preferred)
- ½ teaspoon black pepper (freshly ground)
- 1 teaspoon garlic powder
- 1 teaspoon paprika (smoked paprika works great)
- ½ teaspoon onion powder
- ¼ cup grated Parmesan cheese (freshly grated from a block)
- 3 cloves garlic, minced
- 2 tablespoons melted butter
- 2 tablespoons chopped fresh parsley (or 2 teaspoons dried)
- Lemon wedges for serving (optional)
- Red pepper flakes (optional)
- Extra Parmesan for garnish (optional)
Instructions
- Pat the chicken dry thoroughly with paper towels on both sides. Let sit on a paper towel-lined plate for 5 minutes while prepping other ingredients.
- In a large bowl, combine olive oil, salt, pepper, garlic powder, paprika, and onion powder. Add chicken thighs and toss to coat evenly. Let sit for 5 minutes.
- In a small skillet over medium-low heat, melt the butter. Add minced garlic and cook for about 30 seconds until fragrant, but not browned. Remove from heat immediately.
- Preheat air fryer to 400°F (200°C) for 3 minutes.
- Place seasoned thighs in the air fryer basket, skin side down, leaving at least ½ inch between each piece. Cook in batches if necessary to avoid overcrowding.
- Air fry at 400°F for 12 minutes. Do not open the basket to check too early.
- Using tongs, carefully flip each thigh. Brush the garlic butter mixture over the skin side. Sprinkle grated Parmesan evenly over the tops.
- Air fry for another 8-10 minutes at 400°F until internal temperature reaches 175-180°F (79-82°C) at the thickest part, not touching bone. Skin should be deep golden brown and crispy.
- Let chicken rest in the basket for 2 minutes. Transfer to a serving plate, sprinkle with fresh parsley, and add extra Parmesan if desired. Serve with lemon wedges on the side.
Notes
Pat chicken very dry for crispiest skin. Don’t overcrowd the air fryer basket. Add Parmesan during last 5-8 minutes to prevent burning. For regular oven, bake at 425°F on a wire rack over a baking sheet for 25-30 minutes. Leftovers keep 4 days in fridge; reheat in air fryer at 375°F for 3-4 minutes to restore crispiness.
Nutrition
- Serving Size: 1 chicken thigh
- Calories: 385
- Sugar: 0.5
- Sodium: 680
- Fat: 26
- Saturated Fat: 9
- Carbohydrates: 3
- Fiber: 0.5
- Protein: 32
Keywords: air fryer chicken thighs, crispy chicken thighs, garlic parmesan chicken, quick chicken dinner, weeknight dinner, air fryer recipe, chicken thighs recipe


