Third time in as many days I’d pulled out the same half-used can of pumpkin puree, staring at it like it owed me something. The first batch came out too dense, more like a pumpkin hockey puck than a muffin. The second batch? Edible, sure, but they lacked that pillowy crumb I was chasing—the kind that makes you close your eyes on the first bite. By attempt number three, I had flour dusted across my favorite sweater and a quiet, stubborn determination settling in my chest. It wasn’t about being hungry anymore. It was about cracking the code on a single, perfect muffin that didn’t leave me with a dozen leftovers I’d inevitably shove in the freezer and forget about.
That’s the thing about living alone or with just one other person—most muffin recipes are written for a crowd. They assume you want twenty-four of something, which is great for a bake sale but terrible for a Tuesday night when you just want one warm, tender muffin with your tea. I needed a recipe that respected the small-can life. One that used exactly half the can, gave you six perfect domes, and didn’t leave you drowning in batter. This is that recipe. It’s the one I kept coming back to until I got it right, and now it’s the only pumpkin chocolate chip muffin I make. No leftovers guilt, just pure, small-batch satisfaction.
Why You’ll Love This Recipe
These aren’t just any pumpkin chocolate chip muffins. They are the result of obsessive tweaking and a deep understanding of what makes a small-batch recipe actually work. I’ve tested this with different flours, different fat ratios, and even different chocolate chip sizes. Trust me, this version is the winner.
- Perfectly Sized: Makes exactly six muffins. No waste, no temptation to eat a dozen, just the right amount for a cozy weekend treat or a grab-and-go breakfast.
- Simple Pantry Ingredients: You likely have everything in your kitchen right now. No fancy extracts or hard-to-find flours. Just real, basic baking staples.
- Incredibly Moist: The combination of pumpkin puree and a touch of oil creates a crumb that stays soft for days. These muffins don’t dry out by lunchtime.
- Packed with Flavor: Warm pumpkin spice mingles with rich, melted chocolate chips in every single bite. It’s the ultimate fall flavor combo, perfected.
- Quick & Easy: From mixing bowl to oven in under 15 minutes. Perfect for when that pumpkin craving hits hard and fast.
What makes these different from every other pumpkin muffin recipe out there? It’s the technique. I use a little trick—blooming the spices in the warm melted butter before adding the rest of the wet ingredients. It wakes up the cinnamon, nutmeg, and cloves, making their flavor more pronounced and cozy. It’s a small step, but it’s the difference between a good muffin and one that makes you stop and savor each bite. Honestly, this is the kind of recipe that feels like a warm hug on a crisp autumn morning. It’s simple, it’s satisfying, and it’s exactly what you want when you need a little pumpkin comfort without the commitment of a full-sized batch.
What Ingredients You Will Need
This recipe leans on simple, wholesome ingredients that work together to create something truly special. Each one plays a crucial role, from the moisture of the pumpkin to the richness of the chocolate. Here’s what you’ll need to grab from your pantry.
- All-Purpose Flour (1 cup / 120g): The backbone of our muffins. For the best texture, spoon the flour into your measuring cup and level it off. Don’t scoop directly from the bag, or you’ll end up with dense muffins. I use Gold Medal unbleached all-purpose flour for consistent results.
- Granulated Sugar (1/2 cup / 100g): Adds sweetness and helps create that tender crumb. You can reduce it to 1/3 cup if you prefer a less sweet muffin, but don’t go lower, or the texture will suffer.
- Light Brown Sugar (1/4 cup / 50g), packed: This is my secret weapon. Brown sugar adds moisture and a subtle molasses flavor that pairs beautifully with pumpkin. Make sure it’s packed firmly into your measuring cup.
- Pumpkin Puree (1/2 cup / 120g): Use pure pumpkin puree, not pumpkin pie filling. The filling has added sugar and spices that will throw off the recipe. Libby’s is a reliable brand, but store-brand works just as well. Leftover puree? Freeze it in 1/2 cup portions for later.
- Vegetable Oil (1/4 cup / 60ml): Keeps the muffins incredibly moist. You can substitute melted coconut oil or a neutral-flavored avocado oil. Avoid olive oil here—its flavor is too strong.
- Large Egg (1): Binds everything together and adds structure. Let it come to room temperature before using for the best emulsion.
- Milk (2 tablespoons / 30ml): Adds a touch of liquid to thin the batter slightly. Any milk works—dairy, almond, oat. Whole milk will give the richest result.
- Pumpkin Pie Spice (1 1/2 teaspoons): The classic fall flavor. If you don’t have it, mix 3/4 teaspoon cinnamon, 1/2 teaspoon ginger, 1/4 teaspoon nutmeg, and a pinch of cloves.
- Baking Powder (1 teaspoon): Our leavening agent. Make sure it’s fresh—test it by dropping a bit in hot water; if it fizzes, it’s good.
- Baking Soda (1/4 teaspoon): Helps with browning and lift.
- Salt (1/4 teaspoon): Balances the sweetness and enhances all the flavors. Don’t skip it.
- Semi-Sweet Chocolate Chips (1/2 cup / 90g): The star of the show. I prefer Ghirardelli 60% cacao chips for their deep flavor and melty texture. You can use milk chocolate, dark chocolate, or even mini chips for more even distribution.
Equipment Needed
You don’t need a professional bakery setup for this one. Just a few basic tools you probably already own. Here’s what I use every time.
- Standard 12-Cup Muffin Pan: You’ll only need 6 of the cups for this batch, but a full pan ensures even heat distribution. If you only have a 6-cup pan, that works perfectly too.
- Muffin Liners (6): Paper liners make cleanup a breeze and give the muffins a nice, neat shape. I like the unbleached parchment-style liners for a rustic look.
- Large Mixing Bowl: For combining your dry ingredients. Any bowl will do, but a wide one makes whisking easier.
- Medium Mixing Bowl: For your wet ingredients.
- Whisk: Essential for aerating the dry ingredients and ensuring everything is lump-free.
- Rubber Spatula: For folding the wet and dry ingredients together gently. Overmixing is the enemy of tender muffins, so a spatula gives you more control than a mixer.
- Measuring Cups and Spoons: Accurate measurements are key in baking. Use dry measuring cups for flour and sugar, and a liquid measuring cup for oil and milk.
- Kitchen Scale (Optional but Recommended): For the most accurate results, especially with flour. It’s a game-changer for consistent baking.
- Cooling Rack: Allows air to circulate around the muffins, preventing soggy bottoms.
Preparation Method
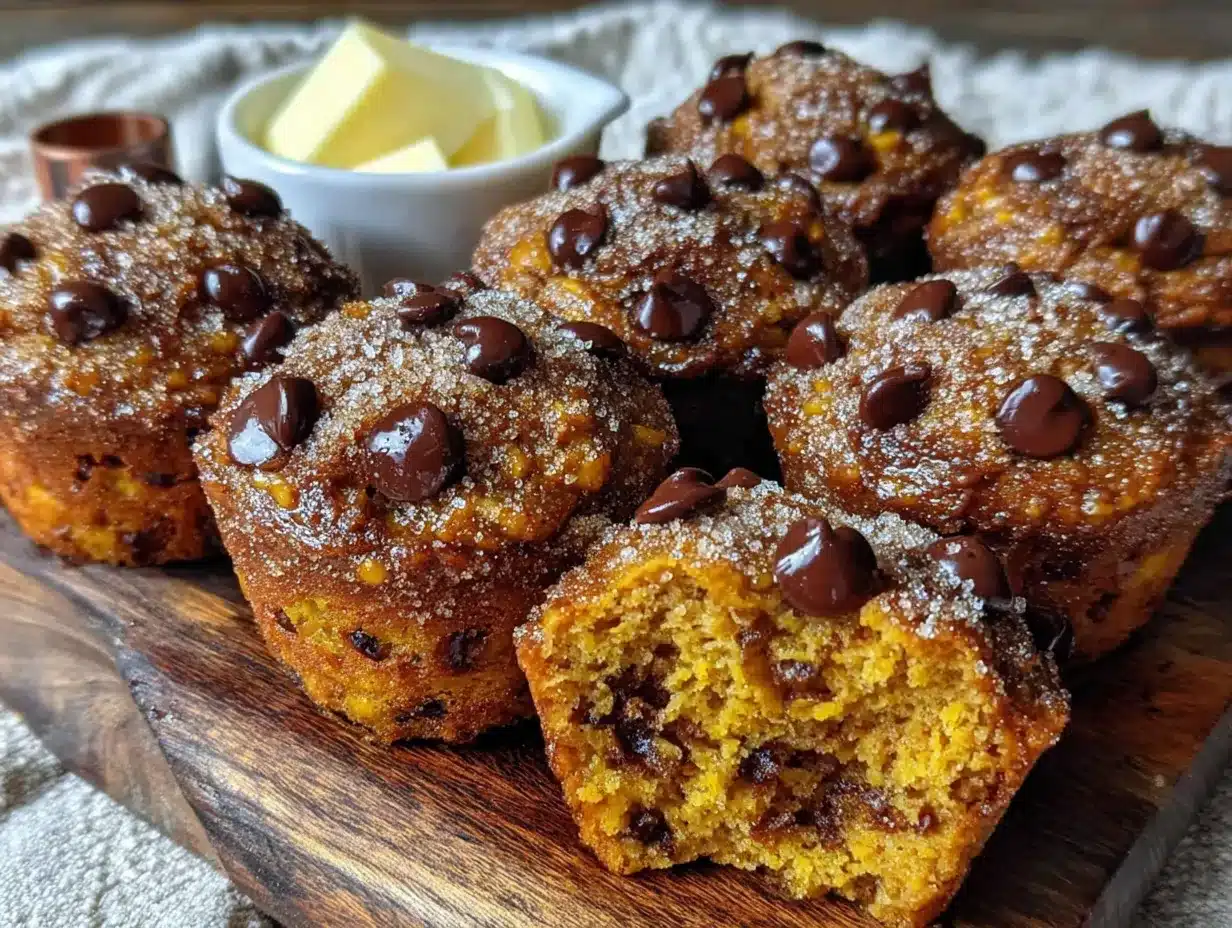
Let’s get baking. Follow these steps, and you’ll have perfectly domed, bakery-style pumpkin chocolate chip muffins in no time. I’ve included all the little details that make a difference.
- Preheat and Prep: Preheat your oven to 425°F (220°C). Line 6 cups of your muffin pan with paper liners. If you’re not using liners, generously grease the cups with butter or non-stick spray. The high initial temperature is what creates that beautiful dome.
- Bloom the Spices (My Secret Step): In your medium bowl, melt 2 tablespoons of the vegetable oil (reserve the remaining 2 tablespoons for later) in the microwave for about 20 seconds. Stir in the pumpkin pie spice. Let it sit for 1-2 minutes. This simple step wakes up the essential oils in the spices, making their flavor much more pronounced. You’ll smell the difference immediately.
- Mix the Wet Ingredients: To the bloomed spice mixture, add the remaining 2 tablespoons of vegetable oil, the granulated sugar, and the packed brown sugar. Whisk vigorously for about 1 minute until the mixture looks like a thick, sandy paste. Add the pumpkin puree, the egg, and the milk. Whisk until everything is completely smooth and uniform. The batter will be a beautiful, deep orange.
- Combine the Dry Ingredients: In your large mixing bowl, whisk together the all-purpose flour, baking powder, baking soda, and salt. Whisk for about 20 seconds to aerate the flour and distribute the leaveners evenly. This step is crucial for even rising.
- Fold the Batter: Pour the wet ingredients into the bowl of dry ingredients. Use your rubber spatula to gently fold them together. Use a cutting motion—down the middle, scrape the side, and over the top. Stop as soon as you see a few streaks of flour remaining. Do not overmix! A few lumps are perfectly fine. Overmixing develops gluten, which leads to tough, rubbery muffins.
- Add the Chocolate Chips: Sprinkle the semi-sweet chocolate chips over the batter. Gently fold them in with just 3-4 strokes. You want them evenly distributed, but you don’t want to overwork the batter.
- Fill the Muffin Cups: Divide the batter evenly among the 6 prepared muffin cups. The batter will be quite thick and will almost fill the cups to the top. This is intentional—it gives you those high, domed tops. Use a cookie scoop or two spoons to get clean portions.
- Bake for the Dome: Place the pan in the preheated 425°F (220°C) oven. Bake for 5 minutes. Then, without opening the oven door, reduce the temperature to 350°F (175°C). Bake for another 12-15 minutes, or until a toothpick inserted into the center of a muffin comes out clean or with just a few moist crumbs. The initial blast of high heat sets the dome, while the lower temperature bakes the centers through without burning the tops.
- Cool and Enjoy: Let the muffins cool in the pan for 5 minutes. This allows them to set. Then, carefully transfer them to a wire cooling rack to cool completely. If you try to eat them too soon, the chocolate chips will be molten lava. Not that I’m speaking from experience or anything.
Cooking Tips & Techniques
Over the years, I’ve made every mistake in the book so you don’t have to. Here are the lessons I learned the hard way, plus a few professional tricks to guarantee success.
- The Room Temperature Rule: Your egg and milk should be at room temperature. Cold ingredients don’t emulsify properly, which can lead to a denser muffin. Take them out of the fridge 20-30 minutes before you start baking. In a pinch, place the egg in a bowl of warm water for 5 minutes.
- Don’t Overmix: I cannot stress this enough. Overmixing is the number one cause of tough muffins. Mix until the flour is just incorporated. Lumps are your friends. They’ll bake out in the oven.
- The Resting Advantage: If you have the time, let the batter rest in the muffin pan for 15-20 minutes after filling the cups. This allows the starches in the flour to hydrate, resulting in a taller, more tender muffin. I do this while the oven is preheating.
- Chocolate Chip Distribution: Toss the chocolate chips with 1 teaspoon of flour before adding them to the batter. This prevents them from all sinking to the bottom of the muffin during baking. It’s a small step that makes a big difference.
- Check for Doneness: Every oven is different. Start checking your muffins at the 12-minute mark after the temperature reduction. The tops should be golden brown and spring back lightly when touched. A toothpick test is the most reliable method.
- My Biggest Failure: I once forgot the baking powder entirely. The muffins came out as flat, dense, sad little discs. They tasted okay, but they looked nothing like the beautiful domes I was after. Always double-check your ingredients before you start mixing!
Variations & Adaptations
This recipe is a fantastic base, but it loves to be played with. Here are some of my favorite ways to change it up, depending on what I’m craving or what I have on hand.
- Gluten-Free Version: Substitute the all-purpose flour with a 1:1 gluten-free baking flour blend. I’ve had great success with King Arthur Measure for Measure. Add 1/4 teaspoon of xanthan gum if your blend doesn’t include it. The texture will be slightly more delicate, but still delicious.
- Dairy-Free Adaptation: Use a dairy-free milk like oat milk or unsweetened almond milk. Ensure your chocolate chips are dairy-free as well. Many dark chocolate chips are naturally dairy-free, but always check the label.
- Nutty Crunch: Swap half the chocolate chips for 1/4 cup of chopped toasted pecans or walnuts. The nutty crunch adds a wonderful textural contrast to the soft muffin. Toast the nuts in a dry pan for 3-4 minutes to deepen their flavor.
- Spice it Up: Add 1/4 teaspoon of ground ginger or a pinch of cayenne pepper to the spice blend for a warm, unexpected kick. It pairs surprisingly well with the chocolate.
- Mini Muffins: Use a mini muffin pan and bake at 350°F (175°C) for 10-12 minutes. This yields about 18-20 mini muffins, perfect for snacking or lunchboxes.
- Personal Favorite: I once added a handful of dried cranberries along with the chocolate chips. The tartness of the cranberries against the sweet, rich chocolate was an absolute revelation. It’s now my go-to holiday variation.
Serving & Storage Suggestions
These muffins are perfect on their own, but a little extra love never hurts. Here’s how to serve and store them to keep them at their best.
- Serving Temperature: These are best served slightly warm. Pop a muffin in the microwave for 10-15 seconds to re-melt the chocolate chips. The gooey chocolate against the soft, spiced crumb is pure bliss.
- Presentation: For a cozy breakfast spread, arrange the muffins on a wooden board with a small bowl of softened butter or honey butter. A dusting of powdered sugar and a few extra chocolate chips on top makes them look bakery-worthy.
- Perfect Pairings: Serve with a hot cup of coffee, a chai latte, or a cold glass of milk. For a more decadent treat, split a muffin in half and toast it in a skillet with a little butter. It gets wonderfully crispy on the outside and soft in the middle.
- Room Temperature Storage: Store leftover muffins in an airtight container at room temperature for up to 3 days. Place a paper towel in the bottom of the container to absorb excess moisture, and another on top to keep the tops from getting sticky.
- Freezing Instructions: These muffins freeze beautifully. Let them cool completely, then place them in a single layer in a freezer-safe bag or container. They’ll keep for up to 3 months. To thaw, leave them on the counter for an hour, or microwave for 20-30 seconds.
- Flavor Development: Honestly, these muffins taste even better on day two. The flavors have time to meld and deepen. If you can resist eating them all on day one, you’re in for a real treat on day two.
Nutritional Information & Benefits
While these are definitely a treat, they do have some redeeming qualities. Here’s a quick look at what’s in each muffin, based on the recipe as written.
- Estimated Per Muffin: Approximately 320 calories, 15g fat, 45g carbohydrates, 5g protein, 25g sugar, and 3g fiber. Values will vary based on specific brands and substitutions.
- Pumpkin Power: Pumpkin puree is packed with Vitamin A (beta-carotene), which is great for eye health and immune function. It also adds moisture and fiber without a ton of calories.
- Antioxidant Boost: Dark chocolate is rich in antioxidants called flavonoids, which can help improve heart health. The darker the chocolate, the more benefits you get.
- Dietary Considerations: This recipe is easily adapted to be gluten-free and dairy-free (see variations above). It’s also nut-free as written, making it a safe choice for many lunchboxes.
- Potential Allergens: Contains wheat (gluten), eggs, and milk. Always check the labels on your chocolate chips for potential cross-contamination if allergies are a concern.
- My Take: I believe in balance. These muffins are a wonderful, soul-warming treat that uses real, wholesome ingredients. They’re not health food, but they’re a far cry from the preservative-laden stuff you’d buy at a gas station. Enjoy them without the guilt.
Conclusion
There you have it—my perfectly imperfect, obsessively tested recipe for small-batch pumpkin chocolate chip muffins. These aren’t just a recipe; they’re a solution to the eternal problem of wanting a homemade treat without the commitment of a full batch. They’re for quiet mornings, rainy afternoons, and any time you need a little taste of fall without the fanfare.
I genuinely love this recipe because it feels like a secret. It’s the one I pull out when I want something special just for me, or when I want to surprise my partner with a warm, fresh-from-the-oven treat without a ton of effort. It’s forgiving, it’s flexible, and it never disappoints. If you try them, I’d love to hear about it. Did you add nuts? Swap the chips for white chocolate? Forget the sugar and add a whole stick of butter? (Okay, maybe don’t do that last one). Drop a comment below and tell me how your batch turned out. And if you’re looking for more cozy fall baking, you have to try my cozy pumpkin snickerdoodle cookies or this tender one-bowl pumpkin coffee cake — they’re both made for small-batch living, too. Happy baking!
Frequently Asked Questions
Can I use pumpkin pie filling instead of pumpkin puree?
No, do not use pumpkin pie filling. It contains added sugar, spices, and thickeners that will completely alter the texture and sweetness of your muffins. Always use 100% pure pumpkin puree for the best results.
Can I make these muffins vegan?
Yes, with a few simple swaps. Use a flax egg (1 tablespoon ground flaxseed mixed with 3 tablespoons water, let sit for 5 minutes) instead of a regular egg. Use a plant-based milk like oat or almond milk. Ensure your chocolate chips are vegan. The texture will be slightly less tender, but they’ll still be delicious.
Why did my muffins turn out dense and flat?
This is usually caused by one of two things: overmixing the batter or using old leavening agents (baking powder and baking soda). Overmixing develops gluten, which makes the muffins tough. Always mix until just combined. Check the expiration dates on your baking powder and baking soda.
How do I get the perfect domed top?
The secret is the high-heat start. Baking the muffins at 425°F (220°C) for the first 5 minutes creates steam, which pushes the batter up and sets the dome. Then, lowering the temperature to 350°F (175°C) allows the centers to bake through without burning the tops. Also, filling the muffin cups almost to the top helps.
Can I use a different type of chocolate chip?
Absolutely! This recipe is very flexible when it comes to chocolate. You can use milk chocolate chips for a sweeter muffin, dark chocolate chips for a richer, more intense flavor, or white chocolate chips for a creamy, sweet contrast. Mini chips are great for even distribution. Chopped chocolate bars also work wonderfully and create melty pools of chocolate.
Pin This Recipe!
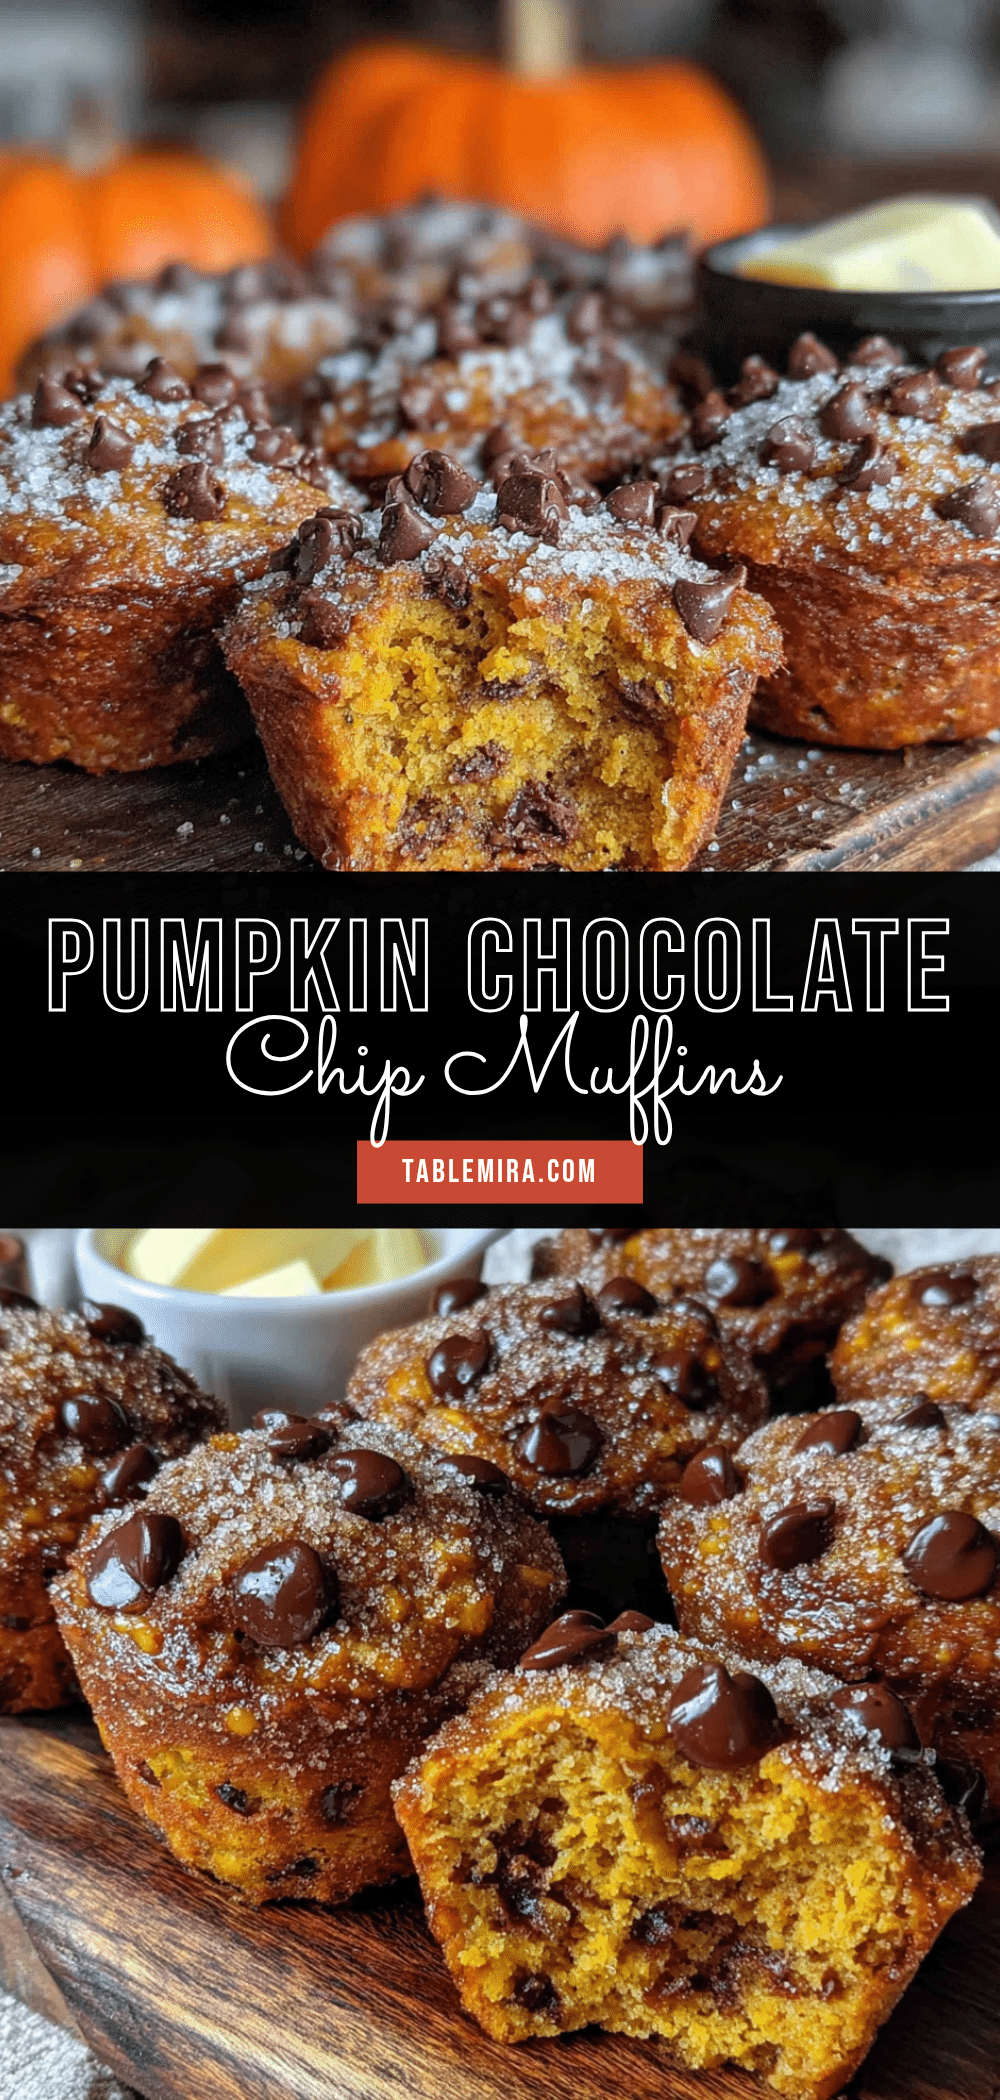
Perfect Small-Batch Pumpkin Chocolate Chip Muffins Recipe
These small-batch pumpkin chocolate chip muffins make exactly six perfectly domed, moist, and flavorful muffins. They’re the ideal solution for when you want a homemade treat without a dozen leftovers, using simple pantry ingredients and a secret spice-blooming technique for maximum flavor.
- Prep Time: 15 minutes
- Cook Time: 17-20 minutes
- Total Time: 32-35 minutes
- Yield: 6 muffins 1x
- Category: Breakfast, Dessert
- Cuisine: American
Ingredients
- 1 cup (120g) all-purpose flour
- 1/2 cup (100g) granulated sugar
- 1/4 cup (50g) light brown sugar, packed
- 1/2 cup (120g) pumpkin puree (not pumpkin pie filling)
- 1/4 cup (60ml) vegetable oil (divided: 2 tbsp for blooming spices, 2 tbsp for batter)
- 1 large egg, room temperature
- 2 tablespoons (30ml) milk, room temperature
- 1 1/2 teaspoons pumpkin pie spice
- 1 teaspoon baking powder
- 1/4 teaspoon baking soda
- 1/4 teaspoon salt
- 1/2 cup (90g) semi-sweet chocolate chips
Instructions
- Preheat oven to 425°F (220°C). Line 6 cups of a standard muffin pan with paper liners or grease generously.
- In a medium bowl, melt 2 tablespoons of the vegetable oil in the microwave for about 20 seconds. Stir in the pumpkin pie spice and let sit for 1-2 minutes to bloom the spices.
- Add the remaining 2 tablespoons vegetable oil, granulated sugar, and packed brown sugar to the spice mixture. Whisk vigorously for about 1 minute until it forms a thick, sandy paste.
- Add the pumpkin puree, egg, and milk. Whisk until completely smooth and uniform.
- In a large bowl, whisk together the all-purpose flour, baking powder, baking soda, and salt for about 20 seconds to aerate.
- Pour the wet ingredients into the dry ingredients. Gently fold with a rubber spatula using a cutting motion until just combined (a few streaks of flour are okay). Do not overmix.
- Sprinkle the chocolate chips over the batter and fold in with 3-4 strokes until evenly distributed.
- Divide the batter evenly among the 6 prepared muffin cups (cups will be nearly full).
- Bake at 425°F (220°C) for 5 minutes. Without opening the oven, reduce temperature to 350°F (175°C) and bake for another 12-15 minutes, until a toothpick inserted in the center comes out clean or with a few moist crumbs.
- Let muffins cool in the pan for 5 minutes, then transfer to a wire rack to cool completely.
Notes
For best results, use room temperature egg and milk. Do not overmix the batter. For taller muffins, let batter rest in the pan for 15-20 minutes before baking. Toss chocolate chips with 1 teaspoon flour to prevent sinking. Muffins taste even better on day two. Store in an airtight container at room temperature for up to 3 days, or freeze for up to 3 months.
Nutrition
- Serving Size: 1 muffin
- Calories: 320
- Sugar: 25
- Sodium: 220
- Fat: 15
- Saturated Fat: 4
- Carbohydrates: 45
- Fiber: 3
- Protein: 5
Keywords: pumpkin chocolate chip muffins, small batch muffins, pumpkin muffins, fall baking, easy muffin recipe, moist pumpkin muffins


