“Wait—these have cream cheese inside?” My sister-in-law Megan peered over my shoulder while I was piping filling onto a chilled disk of pumpkin cookie dough. I just nodded, trying not to lose my focus. She’d shown up unannounced (as she does) and caught me mid-experiment on a drizzly Saturday afternoon. I hadn’t planned on sharing these with anyone—they were supposed to be a test batch for a fall baking class I was teaching the following week. But Megan has a sixth sense for kitchen activity. She grabbed a spoon and waited.
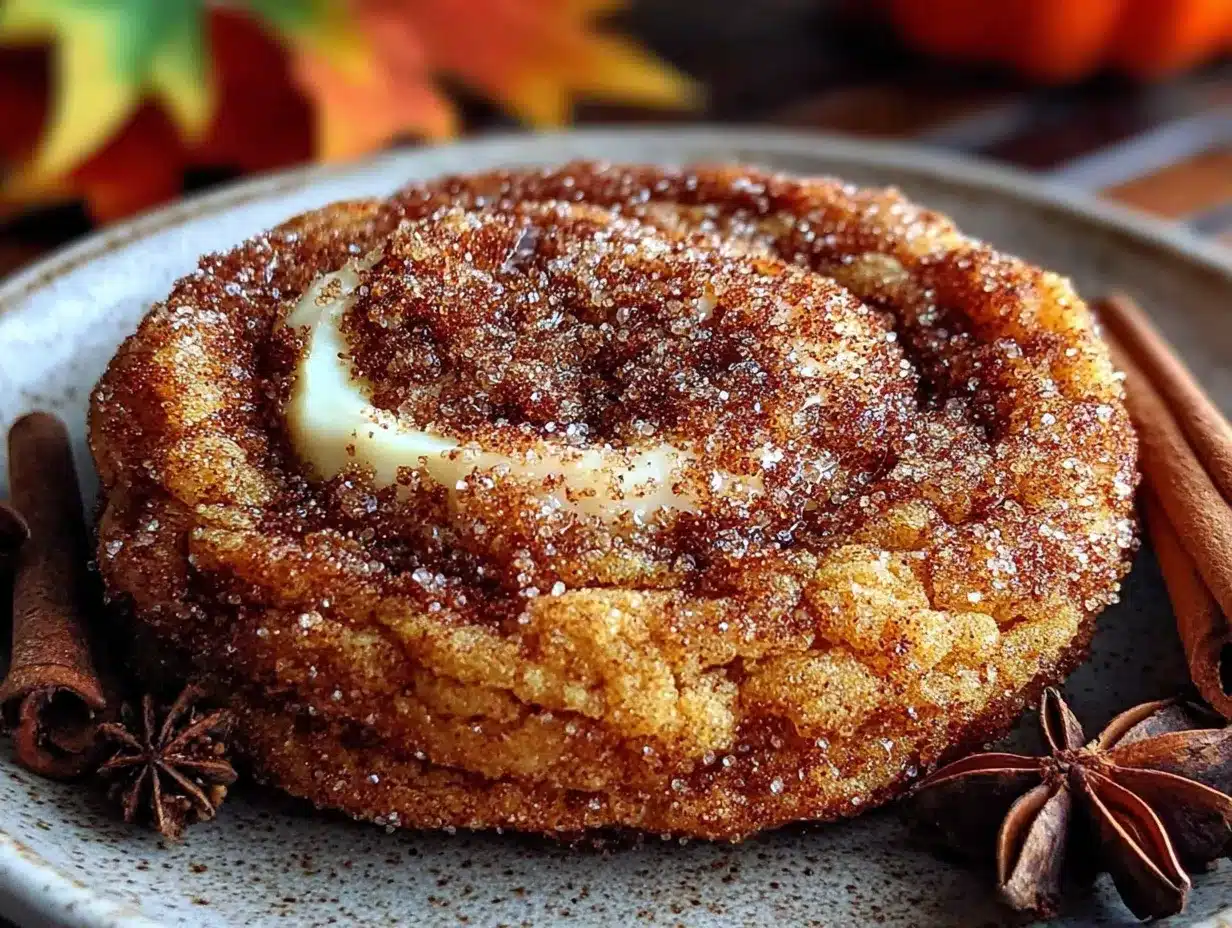
Twenty minutes later, when I pulled the tray out of the oven, the kitchen smelled like a candle shop had collided with a bakery. The cookies were puffed, crackled, and dusted in cinnamon sugar—looking every bit like classic snickerdoodles. But the real magic was hiding inside. I handed Megan one while it was still warm, and she bit into it without waiting. The look on her face—that involuntary eyebrow raise, the slight head tilt—that’s the exact reaction these cookies get every single time.
These Perfect Pumpkin Snickerdoodle Cookies with Cream Cheese Filling are the kind of recipe that makes you feel like you’ve discovered a secret. They start with a soft, pumpkin-spiced cookie dough that gets rolled in cinnamon sugar and baked until the edges are just set. But the center holds a surprise: a tangy, silky cream cheese filling that stays soft and almost gooey. It’s like a pumpkin snickerdoodle and a cheesecake had a baby, and that baby is absolutely perfect for sweater weather.
I’ve tested this recipe about seven times to get the filling-to-dough ratio right—because nobody wants a cream cheese pocket that disappears into the dough or, worse, leaks out into a sugary puddle on the pan. The trick is all in the chilling and the technique, and I promise you can nail it on your first try. These cookies are the kind of thing you bring to a Friendsgiving and watch disappear before the turkey even hits the table.
Why You’ll Love This Recipe
Let me tell you why these cookies have become my most-requested fall recipe. I’ve brought them to potlucks, cookie swaps, and even a book club meeting where someone threatened to fight me for the last one. They’re that good.
- Two Desserts in One Bite : You get the warm, spiced pumpkin cookie exterior and a luscious cream cheese center. It’s like a snickerdoodle and a cheesecake had a beautiful, delicious moment together.
- Perfectly Spiced Without Being Overwhelming : The pumpkin flavor is subtle—it’s more about the warmth of cinnamon, nutmeg, and cloves. The cream cheese filling cuts through the sweetness with a tang that keeps you coming back.
- No Fancy Equipment Needed : You don’t need a stand mixer with a paddle attachment or a pastry bag (though both help). A hand mixer and a zip-top bag with the corner snipped off works perfectly.
- Make-Ahead Friendly : The dough and filling can both be prepped a day in advance. You can even freeze the assembled cookies and bake them straight from frozen—which is a lifesaver for holiday entertaining.
- They Look Impressive but Are Surprisingly Simple : When you cut one open and reveal that creamy center, people think you’re a pastry wizard. But honestly? The technique is straightforward once you know the trick.
I’ve tested this recipe with different pumpkin purées, cream cheese brands, and even a dairy-free cream cheese alternative. The version I’m sharing today is the one that consistently delivers that perfect contrast—a soft, crackly cookie with a creamy, tangy heart. It’s the kind of cookie that makes you close your eyes after the first bite. Trust me on this one.
What Ingredients You Will Need
This recipe uses simple, accessible ingredients to create something that tastes far more complicated than it is. Most of these are pantry staples during fall baking season. Here’s what you’ll need:
For the Pumpkin Snickerdoodle Cookie Dough
- Unsalted butter, 1 cup (2 sticks), softened to room temperature. I use Kerrygold for baking—the higher butterfat content gives a richer flavor and better texture.
- Granulated sugar, 1 cup. This provides sweetness and helps create that signature crackly top.
- Light brown sugar, ½ cup, packed. Adds moisture and a hint of molasses depth.
- Pumpkin purée, ½ cup. Make sure you’re using 100% pumpkin purée, not pumpkin pie filling. I’ve tested this with Libby’s and with homemade roasted pumpkin—both work, but canned gives a more consistent texture.
- Large egg, 1, at room temperature. Cold eggs can cause the butter to seize up.
- Vanilla extract, 1 teaspoon. Use pure vanilla extract, not imitation—it makes a difference in the final flavor.
- All-purpose flour, 2 ½ cups. Spoon and level your flour—don’t scoop directly from the bag, or you’ll end up with dry cookies.
- Cream of tartar, 2 teaspoons. This is non-negotiable for snickerdoodles—it gives them that signature tangy flavor and helps with the crackly texture.
- Baking soda, 1 teaspoon.
- Salt, ½ teaspoon. I use fine sea salt.
- Ground cinnamon, 1 ½ teaspoons.
- Ground nutmeg, ½ teaspoon.
- Ground cloves, ¼ teaspoon.
- Ground ginger, ¼ teaspoon.
For the Cream Cheese Filling
- Full-fat cream cheese, 4 ounces (half a block), softened to room temperature. Do not use low-fat or whipped cream cheese—the filling won’t hold its shape during baking. Philadelphia is my go-to for consistency.
- Powdered sugar, 3 tablespoons, sifted to avoid lumps.
- Vanilla extract, ½ teaspoon.
For the Cinnamon Sugar Coating
- Granulated sugar, ¼ cup.
- Ground cinnamon, 1 tablespoon.
Ingredient Selection Tips: For the pumpkin purée, look for cans labeled “100% pumpkin” and avoid anything with added spices or sugar. If you’re using homemade pumpkin purée, make sure to drain it through a cheesecloth or paper towels for about 30 minutes to remove excess moisture—wet pumpkin will make your dough sticky and hard to handle.
Substitution Guidance: If you’re dairy-free, you can use a block-style vegan cream cheese (like Miyoko’s or Violife) for the filling, but note that the texture may be slightly softer. For the butter, vegan butter sticks work well—just make sure they’re at least 80% fat content. I haven’t tested this with a gluten-free flour blend, but a 1:1 gluten-free baking flour should work in theory.
Equipment Needed
You don’t need a professional bakery setup for these cookies. Here’s what I use and what you can substitute:
- Electric hand mixer or stand mixer : A hand mixer works perfectly for creaming the butter and sugar and making the filling. If you’re using a stand mixer, use the paddle attachment.
- Large mixing bowls : You’ll need at least two—one for the dough and one for the filling.
- Baking sheets : Two standard half-sheet pans work best. Line them with parchment paper or silicone baking mats—parchment is easier for cleanup.
- Piping bag or zip-top bag : For the cream cheese filling. A quart-size zip-top bag with a small corner snipped off works just as well as a piping bag.
- Cookie scoop or tablespoon : I use a #40 cookie scoop (about 1.5 tablespoons) for consistent dough portions.
- Plastic wrap : For chilling the dough and the filled cookies.
- Cooling rack : Wire racks help the cookies cool evenly without getting soggy bottoms.
Budget-Friendly Options: If you don’t have a cookie scoop, use two spoons to portion the dough. A piping bag can be replaced with a sturdy zip-top bag—just be careful not to overfill it, or the seam might split when you squeeze.
Preparation Method
Let’s walk through this step by step. I’ve included all the little details that make the difference between a good cookie and a “I need this recipe immediately” cookie.
Step 1: Make the Cream Cheese Filling
In a small bowl, beat the softened cream cheese with the sifted powdered sugar and vanilla extract until smooth and completely lump-free. This takes about 2 minutes with a hand mixer. Scrape down the sides of the bowl halfway through. Once it’s smooth, transfer the filling to a piping bag or a zip-top bag. Snip off a tiny corner—about ¼ inch wide. Pipe 12 small dollops (about 1 teaspoon each) onto a parchment-lined plate or small baking sheet. You want them to look like small coins. Freeze these for at least 30 minutes, or until they’re firm to the touch. This step is crucial—frozen filling won’t melt into the dough during baking.
Step 2: Cream the Butter and Sugars
In a large bowl, beat the softened butter, granulated sugar, and brown sugar together on medium speed until light and fluffy—about 3 minutes. You’ll notice the mixture turn pale and increase in volume. Scrape down the sides and bottom of the bowl to ensure everything is evenly combined.
Step 3: Add the Wet Ingredients
Add the pumpkin purée, egg, and vanilla extract to the butter mixture. Beat on low speed until just combined. The mixture might look slightly curdled at this point—that’s normal. Don’t overmix. The pumpkin adds moisture, so the batter will look a bit loose compared to regular cookie dough.
Step 4: Combine the Dry Ingredients
In a separate bowl, whisk together the flour, cream of tartar, baking soda, salt, and all the spices (cinnamon, nutmeg, cloves, ginger). Whisking ensures the baking soda and cream of tartar are evenly distributed—if they clump, you’ll get bitter spots in your cookies.
Step 5: Combine Wet and Dry
Gradually add the dry ingredients to the wet mixture, mixing on low speed. Stop as soon as the flour disappears—overmixing develops gluten and makes cookies tough. The dough will be soft and slightly sticky. That’s what you want.
Step 6: Chill the Dough
Cover the bowl with plastic wrap and refrigerate for at least 1 hour. Chilling firms up the butter, which prevents the cookies from spreading too much in the oven. It also gives the flavors time to meld. You can chill the dough for up to 24 hours if you’re planning ahead.
Step 7: Assemble the Cookies
Preheat your oven to 350°F (175°C). Line two baking sheets with parchment paper. Scoop out about 1.5 tablespoons of dough and flatten it into a disk about 2½ inches wide in the palm of your hand. Place one frozen cream cheese dollop in the center. Gently fold the edges of the dough up and over the filling, pinching to seal completely. Roll the sealed ball between your palms to smooth it out. Repeat with the remaining dough and filling.
Step 8: Coat in Cinnamon Sugar
In a small bowl, mix the ¼ cup granulated sugar with 1 tablespoon cinnamon. Roll each filled dough ball in the cinnamon sugar mixture until fully coated. Place the coated balls on the prepared baking sheets, spacing them about 2 inches apart—they will spread slightly.
Step 9: Chill Again (Yes, Again)
Place the baking sheets in the refrigerator for 15 minutes. This final chill ensures the butter is cold when the cookies hit the oven, which gives you that perfect crackled top and prevents the filling from leaking.
Step 10: Bake
Bake for 11-13 minutes, or until the edges are set and the tops are crackled and lightly golden. The centers will look slightly underdone—that’s fine. They’ll continue to set as they cool. Let the cookies cool on the baking sheet for 5 minutes, then transfer to a wire rack to cool completely. The filling will be molten-hot right out of the oven, so patience is key here.
Cooking Tips & Techniques
I’ve made about every mistake you can imagine with these cookies, so you don’t have to. Here’s what I’ve learned:
Don’t Skip the Cream of Tartar —This is what gives snickerdoodles their signature tangy flavor and crackly top. If you don’t have it, you can substitute with 1 teaspoon of lemon juice or white vinegar mixed into the wet ingredients, but the texture won’t be quite the same.
Freeze the Filling Solid —The first time I made these, I only chilled the cream cheese dollops for 15 minutes. They weren’t firm enough, and most of the filling melted into the dough during baking. I ended up with pumpkin cookies that had a faint cream cheese flavor but no distinct center. Freeze them for at least 30 minutes, or even overnight if you’re prepping ahead.
Seal the Dough Completely —When you’re wrapping the dough around the filling, make sure there are no gaps or thin spots. If the filling peeks through, it will leak out during baking and create a sugary mess on your pan. Pinch the seams firmly and roll the ball smooth.
Use Parchment, Not Silicone —I’ve tested these on silicone baking mats, and they tend to spread more. Parchment paper gives a slightly crisper bottom and better structure. If you only have silicone mats, reduce the oven temperature by 25°F.
Bake One Test Cookie —If you’re unsure about your oven temperature or dough consistency, bake just one cookie first. It takes 12 minutes, and it’ll tell you everything you need to know about spread, bake time, and filling behavior.
Variations & Adaptations
These cookies are incredibly versatile. Here are some ways to switch things up:
Chocolate-Dipped Version —Once the cookies are completely cool, dip half of each cookie into melted dark chocolate and sprinkle with flaky sea salt. The chocolate adds a nice bitterness that balances the sweetness. I did this for a holiday cookie box, and they were the first ones to disappear.
Maple Cream Cheese Filling —Replace the powdered sugar in the filling with 2 tablespoons of pure maple syrup and reduce the vanilla to ¼ teaspoon. The maple flavor pairs beautifully with the pumpkin and spices. Just note that the filling will be slightly softer, so freeze the dollops for a full hour.
Gluten-Free Option —Substitute the all-purpose flour with a 1:1 gluten-free baking flour blend that contains xanthan gum. I’ve tested this with King Arthur Measure for Measure, and the texture is very close to the original. The dough will be slightly more delicate, so handle it gently.
Vegan Adaptation —Use vegan butter sticks (like Miyoko’s), a flax egg (1 tablespoon ground flaxseed mixed with 3 tablespoons water, left to sit for 5 minutes), and vegan cream cheese. The texture will be slightly less tender, but the flavor is still fantastic. I’d recommend chilling the dough for an extra 30 minutes.
Spiced Sugar Coating —Add ¼ teaspoon of cardamom or allspice to the cinnamon sugar mixture. It adds a warm, aromatic note that makes the cookies feel even more autumnal. I’ve also added a pinch of cayenne for a subtle heat—it’s unexpected but works.
Serving & Storage Suggestions
These cookies are best served slightly warm, when the cream cheese center is still soft and the edges are just a little crisp. Let them cool for at least 10 minutes after baking—the filling will be molten-hot straight out of the oven.
Presentation Ideas: Arrange them on a rustic wooden board with a dusting of cinnamon and a few whole star anise for visual appeal. They also look beautiful in a clear glass jar with a ribbon tied around the neck—perfect for gifting during the holiday season.
What to Serve With Them: A hot cup of chai tea, a Pumpkin Cold Foam Latte, or a glass of cold milk. If you’re serving them as part of a dessert spread, they pair wonderfully with Pumpkin Cream Cheese Muffins or a slice of Maple Walnut Pumpkin Bread.
Storage: Store the cookies in an airtight container in the refrigerator for up to 5 days. The cream cheese filling needs to stay chilled. Let them sit at room temperature for about 15 minutes before serving to soften the filling slightly.
Freezing Instructions: You can freeze the baked cookies for up to 3 months. Place them in a single layer on a baking sheet and freeze until solid, then transfer to a freezer-safe container with parchment paper between layers. Thaw in the refrigerator overnight. You can also freeze the unbaked, assembled cookies (before the cinnamon sugar coating) for up to 3 months. When ready to bake, roll them in the cinnamon sugar while still frozen and add 2-3 minutes to the baking time.
Reheating: Pop a cookie in the microwave for 10-15 seconds to warm the filling back to that soft, gooey state. Alternatively, warm them in a 300°F oven for 5 minutes.
Nutritional Information & Benefits
Here’s an approximate nutritional breakdown for one cookie (based on 12 cookies):
- Calories: 285
- Fat: 14g (9g saturated)
- Carbohydrates: 38g
- Fiber: 1g
- Sugar: 24g
- Protein: 4g
- Vitamin A: 45% of the Daily Value (from the pumpkin)
- Calcium: 4% DV
- Iron: 6% DV
Health Benefits of Key Ingredients: Pumpkin is packed with vitamin A (in the form of beta-carotene), which supports eye health and immune function. It’s also low in calories and adds moisture to baked goods without requiring extra fat. Cream cheese provides a small amount of protein and calcium, while cinnamon has anti-inflammatory properties and may help regulate blood sugar levels.
Dietary Considerations: This recipe contains dairy, gluten, and eggs. For a dairy-free version, see the variations section above. These cookies are not low-carb or keto-friendly due to the sugar content—they’re a treat, and they’re meant to be enjoyed as such.
Personal Wellness Perspective: I believe in balance. These cookies are indulgent, and that’s okay. They’re the kind of thing you make for a special occasion, a cozy weekend, or when you just need a little extra comfort. Life is too short to skip dessert.
Conclusion
These Perfect Pumpkin Snickerdoodle Cookies with Cream Cheese Filling are the fall dessert you didn’t know you needed. They’ve got the nostalgic snickerdoodle crackle, the warmth of pumpkin spice, and a surprise cream cheese center that makes every bite feel special. I’ve made them for picky eaters, serious bakers, and people who “don’t really like pumpkin desserts”—and every single person has asked for the recipe.
What I love most about this recipe is how adaptable it is. You can keep it classic or dress it up with chocolate, maple, or extra spices. It’s forgiving enough for a beginner baker but impressive enough to steal the show at a holiday party. And honestly? The look on someone’s face when they bite into that creamy center never gets old.
I’d love to hear how these turn out for you. Did you try a variation? Did they disappear at your gathering? Drop a comment below and let me know—I read every single one. And if you’re looking for more cozy fall baking inspiration, don’t miss our Pumpkin Spice Bagels with Maple Cream Cheese or these Brown Butter Snickerdoodle Bars for another twist on a classic.
Happy baking, friends. May your kitchen smell like cinnamon and your cookies always have that perfect crackle.
Frequently Asked Questions
Can I use pumpkin pie spice instead of individual spices?
Absolutely. Substitute 2 teaspoons of pumpkin pie spice for the cinnamon, nutmeg, cloves, and ginger listed in the recipe. The flavor will be slightly different (pumpkin pie spice often includes allspice), but it works beautifully.
Why did my cream cheese filling leak out during baking?
This usually happens for one of three reasons: the filling wasn’t frozen solid enough, the dough wasn’t sealed completely around the filling, or the dough was too warm when it went into the oven. Make sure to freeze the filling dollops for at least 30 minutes, pinch the dough seams firmly, and chill the assembled cookies for 15 minutes before baking.
Can I make the dough and filling ahead of time?
Yes! The dough can be refrigerated for up to 24 hours before baking. The cream cheese filling can be made, piped into dollops, and frozen for up to a week. You can also assemble the cookies completely (without the cinnamon sugar coating) and freeze them for up to 3 months.
How do I know when the cookies are done baking?
Look for set edges and crackled tops. The centers will look slightly underdone and soft—that’s exactly what you want. If you wait until the centers look fully set, the cookies will be overbaked and dry. The residual heat from the baking sheet will finish cooking them as they cool.
Can I double this recipe?
Definitely. The recipe doubles beautifully. Just make sure your mixing bowl is large enough to accommodate the extra dough, and bake in batches to avoid overcrowding the oven. You may need to add a minute or two to the baking time if you’re baking multiple trays at once—rotate the trays halfway through for even baking.
Pin This Recipe!
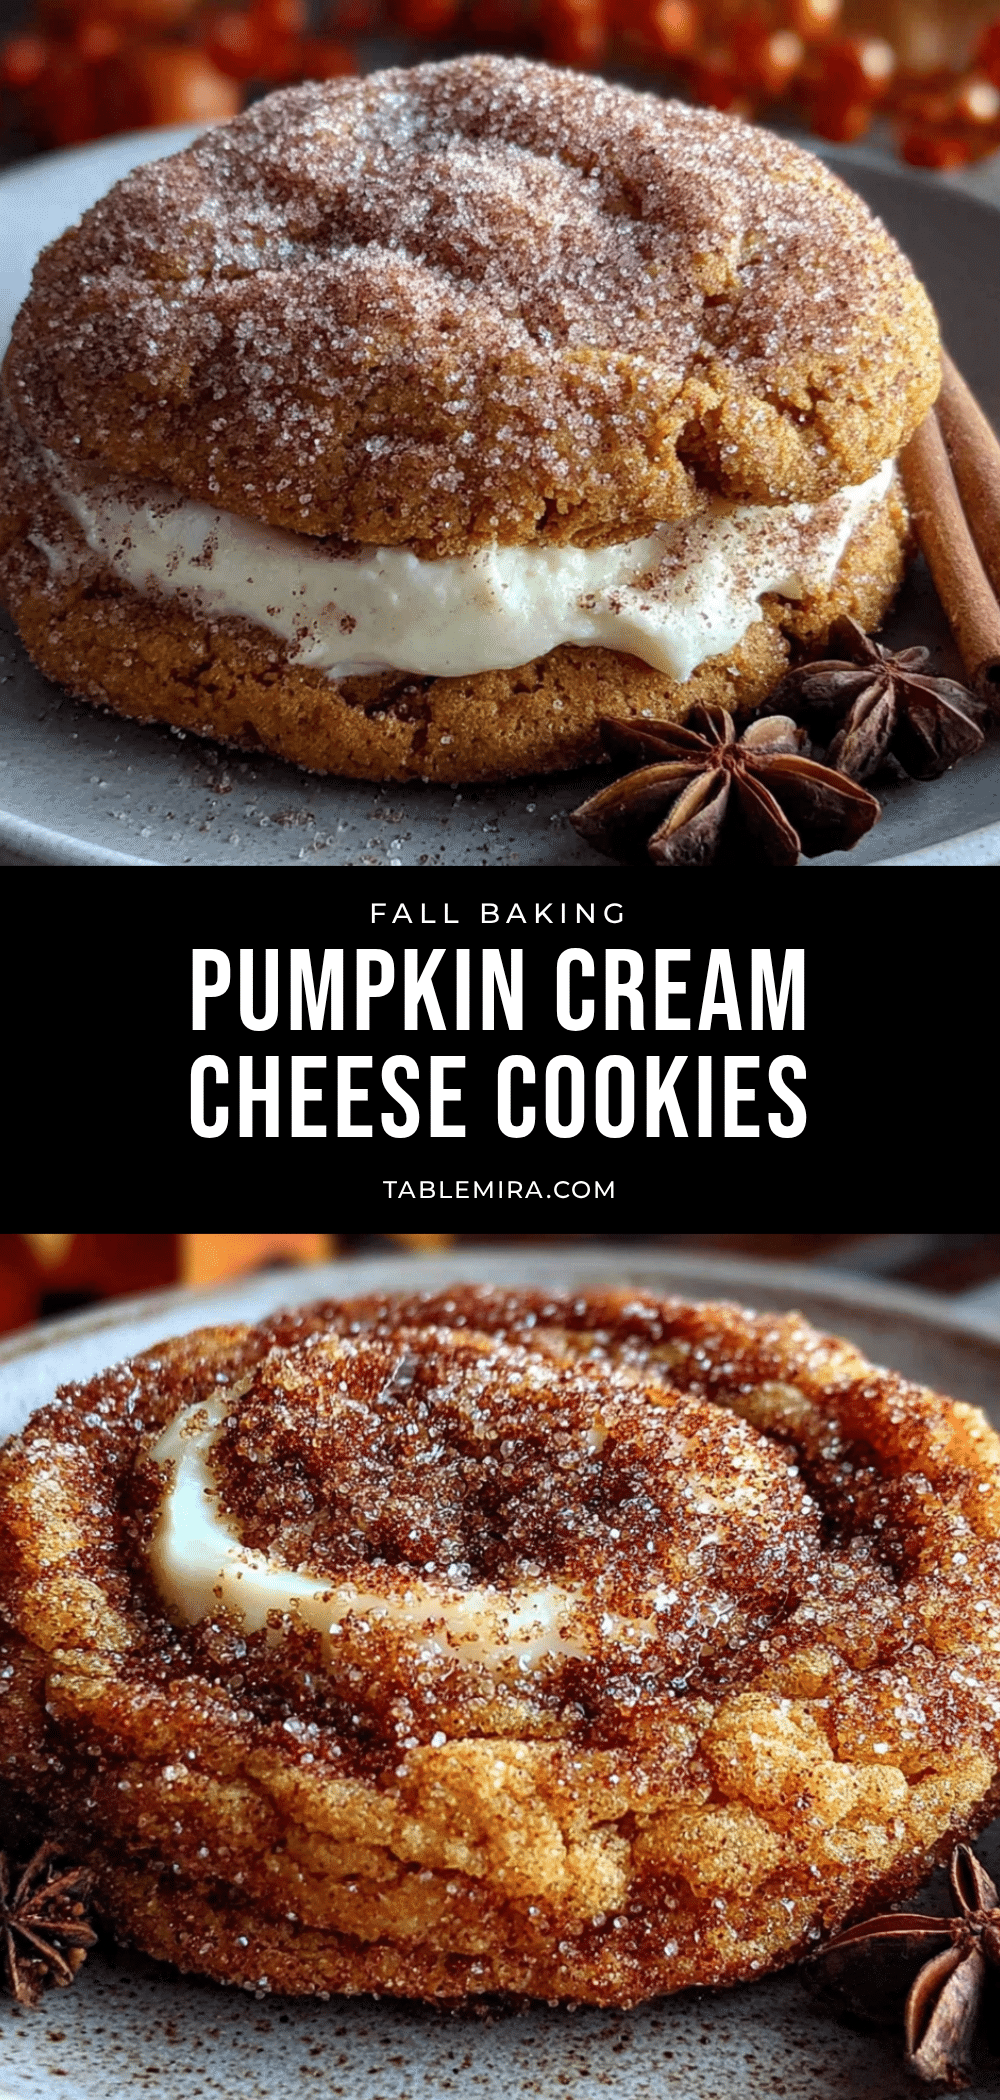
Perfect Pumpkin Snickerdoodle Cookies with Cream Cheese Filling
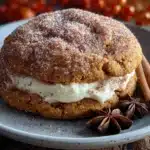
Soft, pumpkin-spiced snickerdoodle cookies with a surprise tangy cream cheese center. These cookies are the perfect fall treat, combining the classic snickerdoodle crackle with a creamy, gooey filling.
- Prep Time: 30 minutes
- Cook Time: 12 minutes
- Total Time: 1 hour 42 minutes (includes chilling)
- Yield: 12 cookies 1x
- Category: Dessert
- Cuisine: American
Ingredients
- 1 cup (2 sticks) unsalted butter, softened
- 1 cup granulated sugar
- ½ cup light brown sugar, packed
- ½ cup pumpkin purée (100% pumpkin, not pie filling)
- 1 large egg, room temperature
- 1 teaspoon vanilla extract
- 2 ½ cups all-purpose flour
- 2 teaspoons cream of tartar
- 1 teaspoon baking soda
- ½ teaspoon fine sea salt
- 1 ½ teaspoons ground cinnamon
- ½ teaspoon ground nutmeg
- ¼ teaspoon ground cloves
- ¼ teaspoon ground ginger
- 4 ounces full-fat cream cheese, softened
- 3 tablespoons powdered sugar, sifted
- ½ teaspoon vanilla extract
- ¼ cup granulated sugar (for coating)
- 1 tablespoon ground cinnamon (for coating)
Instructions
- Make the cream cheese filling: In a small bowl, beat softened cream cheese, sifted powdered sugar, and ½ teaspoon vanilla extract until smooth. Transfer to a piping bag or zip-top bag. Pipe 12 small dollops (about 1 teaspoon each) onto a parchment-lined plate. Freeze for at least 30 minutes until firm.
- Cream the butter and sugars: In a large bowl, beat softened butter, granulated sugar, and brown sugar on medium speed until light and fluffy, about 3 minutes. Scrape down the bowl.
- Add wet ingredients: Add pumpkin purée, egg, and 1 teaspoon vanilla extract. Beat on low speed until just combined. The mixture may look slightly curdled.
- Combine dry ingredients: In a separate bowl, whisk together flour, cream of tartar, baking soda, salt, cinnamon, nutmeg, cloves, and ginger.
- Combine wet and dry: Gradually add dry ingredients to wet mixture, mixing on low speed until just combined. Dough will be soft and slightly sticky.
- Chill dough: Cover bowl with plastic wrap and refrigerate for at least 1 hour (up to 24 hours).
- Assemble cookies: Preheat oven to 350°F (175°C). Line baking sheets with parchment. Scoop 1.5 tablespoons of dough, flatten into a 2½-inch disk. Place one frozen cream cheese dollop in center. Fold dough edges over filling, pinch to seal, and roll into a smooth ball.
- Coat in cinnamon sugar: Mix ¼ cup granulated sugar with 1 tablespoon cinnamon. Roll each filled ball in the mixture until fully coated.
- Chill again: Place coated balls on baking sheets and refrigerate for 15 minutes.
- Bake: Bake for 11-13 minutes, until edges are set and tops are crackled and lightly golden. Cool on baking sheet for 5 minutes, then transfer to a wire rack to cool completely.
Notes
Freeze the cream cheese filling dollops solid for at least 30 minutes to prevent leaking. Seal dough completely around filling. Chill assembled cookies before baking for best crackle. Store in refrigerator up to 5 days; reheat in microwave 10-15 seconds.
Nutrition
- Serving Size: 1 cookie
- Calories: 285
- Sugar: 24
- Sodium: 200
- Fat: 14
- Saturated Fat: 9
- Carbohydrates: 38
- Fiber: 1
- Protein: 4
Keywords: pumpkin snickerdoodle, cream cheese filled cookies, fall cookies, pumpkin cookies, snickerdoodle recipe