Late February, and the rain is tapping against the kitchen window in a rhythm that feels almost lazy. I’d bought a pint of strawberries at the market without really planning what to do with them—they were just too red, too fragrant to leave behind. The cheesecake was an afterthought, born from a block of cream cheese that needed using and a quiet craving for something that felt like a small celebration. These Perfect Chocolate Covered Strawberry Cheesecake Bites happened by accident, the way the best kitchen discoveries often do.
I wasn’t trying to create a recipe. I was just standing there, eating a strawberry dipped in leftover cheesecake filling (don’t judge), when it hit me—why not combine all three? The chocolate, the berry, the creamy tang. So I grabbed a mini muffin tin, pressed some graham cracker crumbs into the bottom, and started layering. By the time the chocolate shell set, I knew I’d stumbled onto something worth repeating. Honestly, I’ve made these at least a dozen times since that rainy afternoon, and they still make me pause after that first bite.
There’s something about the way the chocolate cracks just slightly when you bite in, giving way to the cold, silky cheesecake and that burst of strawberry in the middle. It’s not complicated—that’s the thing. It’s just three good things that belong together, wrapped up in a bite-sized package. Trust me on this one.
Why You’ll Love This Recipe
I’ve tested this recipe more times than I care to count, tweaking the ratios until the filling stayed firm enough to dip without falling apart, but still soft and luscious on the inside. These aren’t just another dessert bite—they’re the kind of treat that disappears before you’ve finished arranging them on the plate.
- Quick & Easy: From start to finish, you’re looking at about 20 minutes of active work. The hardest part is waiting for them to chill.
- Simple Ingredients: Cream cheese, heavy cream, powdered sugar, strawberries, chocolate chips, and a little vanilla. That’s it. No weird extracts or specialty items.
- Perfect for Date Night or Celebrations: These look fancy enough for Valentine’s Day, anniversaries, or birthday parties, but they’re casual enough for a Tuesday night craving.
- Crowd-Pleaser: I brought these to a friend’s gathering last month and watched grown adults hover around the platter like they were guarding treasure. Kids love them too—though honestly, so does everyone.
- Unbelievably Delicious: The contrast between the snappy chocolate shell, the cold creamy cheesecake, and the juicy strawberry inside is honestly next-level. It’s comfort food dressed up in its Sunday best.
What makes this recipe different from other chocolate-covered strawberry desserts? It’s the texture. Most versions use plain cream cheese, which can be dense and heavy. I whip mine with a little heavy cream until it’s light and almost mousse-like. That airy texture against the firm chocolate and the soft berry? That’s the magic.
This isn’t just a recipe—it’s the kind that makes you close your eyes after the first bite. The kind you’ll text your friends about. The kind that turns a regular evening into something that feels just a little bit special.
What Ingredients You Will Need
This recipe relies on simple, high-quality ingredients to deliver that perfect balance of creamy, fruity, and chocolatey. Most of these are pantry staples for anyone who bakes regularly, and the substitutions are straightforward if you need them.
- 8 oz cream cheese, softened – Use full-fat block cream cheese for the best texture and stability. I personally prefer Philadelphia—it’s consistent and whips up beautifully. Let it sit out for at least 30 minutes before starting, or you’ll end up with lumps.
- 1/4 cup powdered sugar – Also called confectioners’ sugar. This dissolves instantly into the cream cheese, giving sweetness without any graininess. Sift it if yours is clumpy.
- 1/2 teaspoon vanilla extract – Pure vanilla extract makes a difference here. The flavor is clean and warm. Avoid imitation vanilla if you can—it leaves a slightly chemical aftertaste.
- 2 tablespoons heavy cream – This is the secret to the light, mousse-like texture. Don’t skip it. If you don’t have heavy cream, you can use full-fat sour cream or mascarpone, though the texture will be slightly denser.
- 12-15 fresh strawberries, medium-sized – Look for berries that are firm, evenly red, and not too large. Huge strawberries are hard to dip evenly and throw off the cheesecake-to-berry ratio. Rinse and dry them very thoroughly—any moisture on the surface will make the chocolate seize.
- 1 cup semi-sweet chocolate chips – I use Ghirardelli or Guittard for the smoothest melting. Semi-sweet balances the sweetness of the cheesecake without being overpowering. Dark chocolate (60-70%) works beautifully too if you prefer less sweetness.
- 1 tablespoon coconut oil or vegetable shortening – This is optional but highly recommended. It thins the melted chocolate slightly, making it easier to dip and giving a shinier finish. Coconut oil adds a faint tropical note that I actually love with the strawberries.
- 1/2 cup graham cracker crumbs – For the optional base layer. You can skip this if you want a fully smooth bite, but I love the little crunch and the nostalgic cheesecake-crust vibe. Pulse about 4 full sheets in a food processor or crush them in a bag with a rolling pin.
- 1 tablespoon melted butter – Mixed with the graham crumbs if you’re using them. Just enough to hold them together when pressed.
For the chocolate drizzle on top, you’ll want an extra 1/4 cup of white chocolate chips or a contrasting dark chocolate. Totally optional, but it makes them look like they came from a bakery.
Equipment Needed
- Mini muffin tin – Standard size works, but mini makes these truly bite-sized and perfect for parties. If you don’t have one, you can shape the cheesecake mixture into balls and freeze them before dipping.
- Hand mixer or stand mixer – A whisk and some elbow grease will work, but an electric mixer gives you that light, fluffy texture in under 2 minutes.
- Small microwave-safe bowls – For melting the chocolate. Glass or ceramic works best.
- Rubber spatula – For scraping every last bit of cheesecake filling. Trust me, you won’t want to waste any.
- Piping bag or zip-top bag – For filling the muffin cups neatly. A small zip-top bag with the corner snipped off works perfectly and costs nothing.
- Fork or dipping tool – For coating the frozen cheesecake bites in chocolate. A regular dinner fork works fine; just tap off the excess gently.
- Parchment-lined baking sheet – To hold the dipped bites while the chocolate sets. Parchment paper is non-negotiable here—wax paper will stick.
I’ve made these with just a bowl, a whisk, and a mini muffin tin before, and they turned out fine. The electric mixer just saves your arm and gives a better texture. If you’re new to candy-making, don’t stress—this is one of the most forgiving recipes I know.
Preparation Method
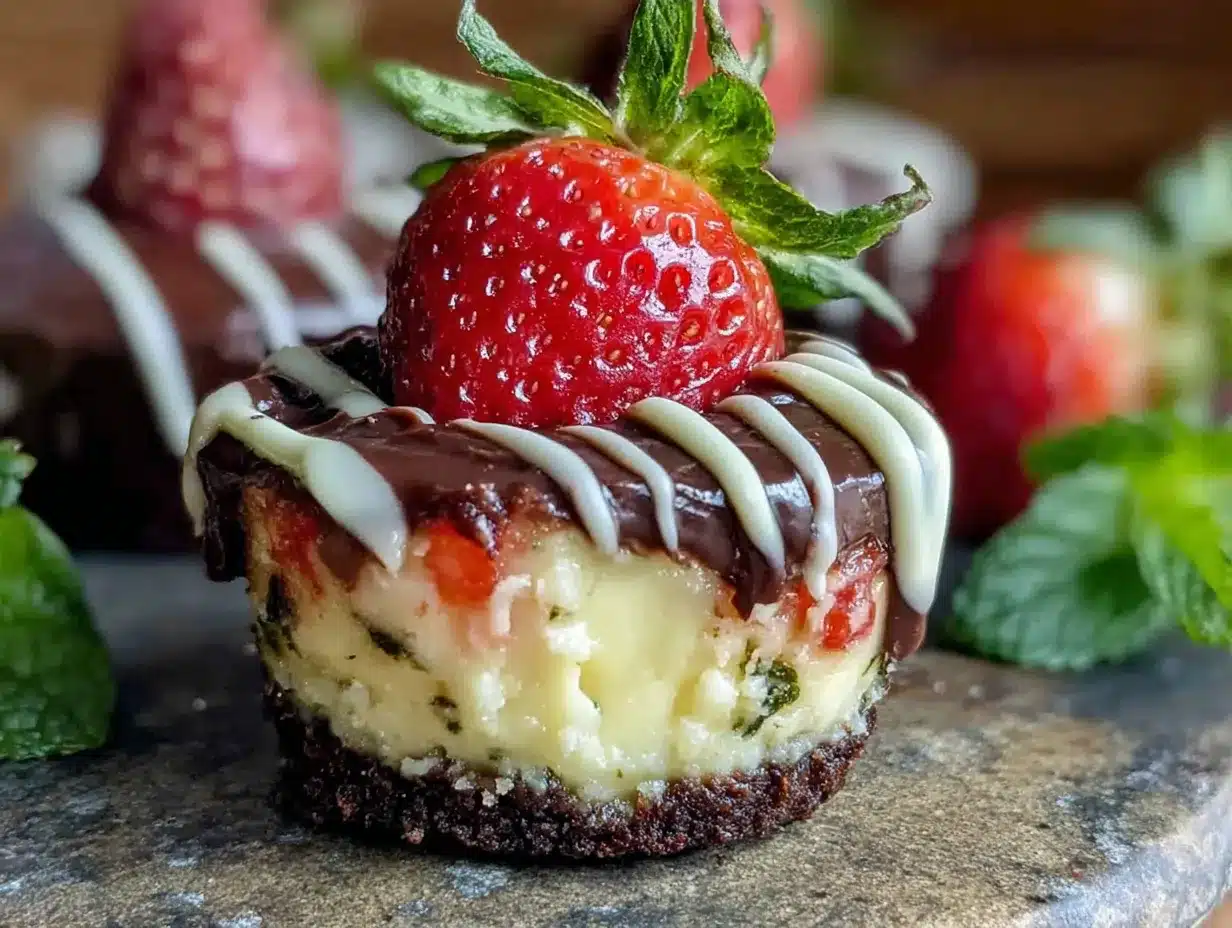
- Prep the strawberries – Wash and dry the strawberries thoroughly. Any water left on the surface will make the chocolate seize and turn grainy. Pat them dry with paper towels, then let them sit on a clean towel for 10 minutes to air-dry completely. Remove the green tops and set aside.
- Make the graham cracker crust (optional) – In a small bowl, combine 1/2 cup graham cracker crumbs with 1 tablespoon melted butter. Stir until the crumbs are evenly moistened. Press about 1 teaspoon of the mixture into the bottom of each mini muffin cup. Use the back of a small spoon or a shot glass to press it down firmly. Set aside.
- Whip the cheesecake filling – In a medium bowl, beat the softened cream cheese with an electric mixer on medium speed until smooth and creamy, about 1 minute. Add the powdered sugar and vanilla extract, and beat until fully incorporated. Scrape down the sides of the bowl. Add the heavy cream and beat on medium-high for 2-3 minutes, until the mixture is light, fluffy, and holds soft peaks. It should look like a thick mousse.
- Fill the muffin cups – Transfer the cheesecake mixture to a piping bag or a zip-top bag with a small corner snipped off. Pipe the filling into each mini muffin cup, filling them almost to the top. Smooth the tops with a small offset spatula or the back of a spoon if needed.
- Insert the strawberries – Gently press one strawberry, pointed end up, into the center of each cheesecake-filled cup. The strawberry should be standing upright, with the cheesecake filling hugging the bottom half. Don’t push it all the way down—leave about 1/4 inch of the strawberry visible above the filling.
- Freeze until firm – Place the mini muffin tin in the freezer for at least 2 hours, or until the cheesecake bites are completely solid. This step is crucial—if they’re not frozen solid, they’ll fall apart when you dip them in chocolate. I usually leave them overnight.
- Melt the chocolate – About 15 minutes before you’re ready to dip, combine 1 cup semi-sweet chocolate chips and 1 tablespoon coconut oil in a microwave-safe bowl. Microwave in 30-second intervals, stirring well after each, until the chocolate is smooth and fully melted. Be careful not to overheat—chocolate burns easily and turns grainy.
- Dip the frozen bites – Remove the cheesecake bites from the freezer. Working quickly, pop one bite out of the muffin tin and place it on a fork. Lower it into the melted chocolate, spooning chocolate over the top if needed to cover the cheesecake portion. Lift it out and gently tap the fork on the edge of the bowl to remove excess chocolate. Place the dipped bite on a parchment-lined baking sheet.
- Add drizzle (optional) – If you want that bakery look, melt 1/4 cup white chocolate chips in a small bowl and drizzle it over the dipped bites using a fork or a small piping bag. Do this while the dark chocolate is still wet so the drizzle sticks.
- Let the chocolate set – Place the baking sheet in the refrigerator for about 15-20 minutes, or until the chocolate is firm and shiny. If you’re in a hurry, you can pop them back in the freezer for 10 minutes.
Your kitchen will smell like a chocolate shop at this point. Try not to eat all of them before anyone else gets a chance.
Cooking Tips & Techniques
I learned some of these the hard way—like the time I tried to dip room-temperature cheesecake bites and ended up with a chocolate soup full of cream cheese chunks. Not my finest moment. Here’s what actually works:
Freeze them solid. I cannot stress this enough. The cheesecake filling needs to be completely frozen before it hits the warm chocolate. If it’s even slightly soft, it will slide right off the strawberry and into the chocolate bowl. Two hours minimum, overnight is better.
Dry your strawberries like your life depends on it. Wet strawberries + melted chocolate = a grainy, streaky mess. After washing, lay them on a clean kitchen towel and pat them dry individually. Then let them sit for another 10 minutes. I know it seems excessive, but chocolate is unforgiving about water.
Work in small batches. Don’t try to melt all the chocolate at once and dip everything. Melt half, dip a few bites, then melt the rest. Chocolate cools and thickens as it sits, and you’ll end up with thick, clumpy coatings if you try to stretch it too far.
Use a fork, not your fingers. I know it’s tempting to just grab them, but the heat from your hands will start melting the cheesecake immediately. A fork gives you control and keeps everything cold. If you have a candy-dipping tool, even better.
Tap off the excess gently. When you lift the dipped bite out of the chocolate, give the fork a few gentle taps on the side of the bowl. This helps the excess chocolate drip off and prevents a thick, uneven coating. You want a thin shell that cracks when you bite into it, not a thick armor.
One more thing—if your chocolate starts to thicken while you’re dipping, just pop it back in the microwave for 10 seconds and stir. It happens. No shame in reheating.
Variations & Adaptations
This recipe is endlessly adaptable, and I’ve tried several variations myself. Here are a few favorites:
White Chocolate Strawberry Cheesecake Bites – Swap the semi-sweet chocolate for white chocolate chips. The sweetness pairs beautifully with the tart strawberries. Add a drop of pink food coloring to the white chocolate for a Valentine’s Day theme.
Dark Chocolate Raspberry Version – Replace strawberries with fresh raspberries (smaller ones work best). Use dark chocolate (70% cacao) for a richer, less sweet bite. The raspberry’s tartness cuts through the dark chocolate beautifully.
Vegan Adaptation – Use vegan cream cheese (I like Miyoko’s or Kite Hill), coconut cream instead of heavy cream, and dairy-free chocolate chips. The texture will be slightly softer, so freeze them extra long before dipping.
Gluten-Free Option – Skip the graham cracker crust entirely, or use gluten-free graham crackers. The rest of the recipe is naturally gluten-free, so this is an easy swap.
Holiday Theme – For Christmas, use red and green sprinkles on top of the wet chocolate. For Halloween, drizzle with orange-colored white chocolate. For a birthday party, add rainbow sprinkles. The possibilities are endless.
I once made a batch with a thin layer of salted caramel spread under the cheesecake filling. It was ridiculous—in the best way. If you’re feeling adventurous, try adding a teaspoon of your favorite jam or fruit preserve to the bottom of each muffin cup before piping in the cheesecake.
Serving & Storage Suggestions
These bites are best served cold, straight from the refrigerator. The chocolate should be firm and snappy, the cheesecake filling cold and creamy, and the strawberry should still have a little fresh crunch. I like to arrange them on a white platter for maximum visual impact—the contrast between the dark chocolate, the red strawberry tip, and any white chocolate drizzle really pops.
Storage: Keep these in an airtight container in the refrigerator for up to 5 days. Layer them between sheets of parchment paper so they don’t stick together. If you’re stacking them, make sure the chocolate is fully set before layering.
Freezer Storage: These freeze beautifully. Place the fully set bites in a single layer on a baking sheet and freeze for 1 hour, then transfer to a freezer-safe container or zip-top bag. They’ll keep for up to 3 months. Thaw in the refrigerator for about 30 minutes before serving—don’t let them come to room temperature, or the chocolate may sweat.
Reheating: Don’t. These are meant to be eaten cold. If you absolutely must warm the chocolate slightly (for a melty effect), let them sit at room temperature for no more than 10 minutes.
The flavors actually develop beautifully overnight. The strawberry releases a little juice into the cheesecake, and the chocolate sets into that perfect snappy shell. I honestly think they’re even better on day two.
These pair wonderfully with a glass of cold milk, a cup of hot coffee, or a dessert wine like a late-harvest Riesling. If you’re serving them at a party, consider arranging them alongside other bite-sized desserts like our no-bake s’mores icebox cake or a platter of sweet and savory charcuterie for variety.
Nutritional Information & Benefits
Per serving (1 bite, based on 15 servings):
- Calories: 145
- Fat: 10g
- Saturated Fat: 6g
- Carbohydrates: 13g
- Sugar: 10g
- Fiber: 1g
- Protein: 2g
- Sodium: 55mg
These are an indulgence, no doubt about it. But there are a few bright spots: strawberries are packed with vitamin C and antioxidants, and dark chocolate contains flavonoids that support heart health. The cream cheese provides a small amount of calcium and protein.
If you’re watching your sugar intake, you can reduce the powdered sugar in the cheesecake filling to 2 tablespoons without compromising the texture too much. Using dark chocolate with 70% or higher cacao also cuts down on sugar while adding more antioxidants.
For a lower-calorie version, use reduced-fat cream cheese and skip the graham cracker crust. Each bite saves about 30 calories and 3 grams of fat. The texture will be slightly less rich, but still delicious.
As always, these are a treat, not a health food. But life needs treats, and these are worth every single bite.
Conclusion
These Perfect Chocolate Covered Strawberry Cheesecake Bites are the kind of recipe that makes you look like a kitchen hero with very little actual effort. They’re elegant enough for a fancy dinner party, simple enough for a Tuesday night craving, and endlessly customizable to suit whatever you have on hand.
I love that they feel special without being fussy. No complicated techniques, no obscure ingredients, no hours of standing over a hot stove. Just good food made with care, the way it should be.
If you make these—and I hope you do—I’d love to hear how they turn out. Did you add a drizzle? Swap the strawberries for raspberries? Double the batch because one pan wasn’t enough? Drop a comment below or tag me in your photos. There’s nothing that makes my day like seeing someone else enjoy a recipe that started in my kitchen on a rainy February afternoon.
Go ahead. Treat yourself. You’ve earned it.
Frequently Asked Questions
Can I use frozen strawberries for this recipe?
Fresh strawberries are strongly recommended. Frozen strawberries release too much moisture as they thaw, which will make the cheesecake filling watery and cause the chocolate to seize. Stick with fresh, firm berries for the best results.
Why did my chocolate turn grainy?
Grainy chocolate usually means one of two things: water got into the chocolate (from wet strawberries or a damp bowl), or the chocolate was overheated. Always dry your strawberries thoroughly and melt chocolate slowly in short bursts. If it does seize, you can try whisking in a teaspoon of coconut oil or shortening to smooth it out, but it’s often best to start fresh.
Can I make these without a mini muffin tin?
Absolutely. Shape the cheesecake mixture into 1-inch balls around each strawberry, freeze them solid, and then dip. They’ll be round instead of flat-bottomed, but just as delicious. You can also use a silicone mini muffin mold if you have one—they’re easier to pop the bites out of.
How far in advance can I make these?
You can make the cheesecake bites (un-dipped) up to 2 days ahead and keep them frozen. Dip them the day you plan to serve for the freshest chocolate shell. Once dipped, they’ll keep in the refrigerator for up to 5 days or in the freezer for up to 3 months.
Can I use milk chocolate instead of semi-sweet?
Yes, but milk chocolate is softer and sweeter. It won’t set as firmly as semi-sweet or dark chocolate, so the shell will be a bit softer. If you prefer milk chocolate, try adding an extra tablespoon of coconut oil to help it set more firmly. The flavor will be much sweeter, so you may want to reduce the powdered sugar in the cheesecake filling slightly.
If you’re looking for another easy, crowd-pleasing dessert, you might also enjoy our no-churn salted caramel ice cream or these gingerbread cheesecake bars for a seasonal twist. Both are simple to make and disappear just as fast.
Pin This Recipe!
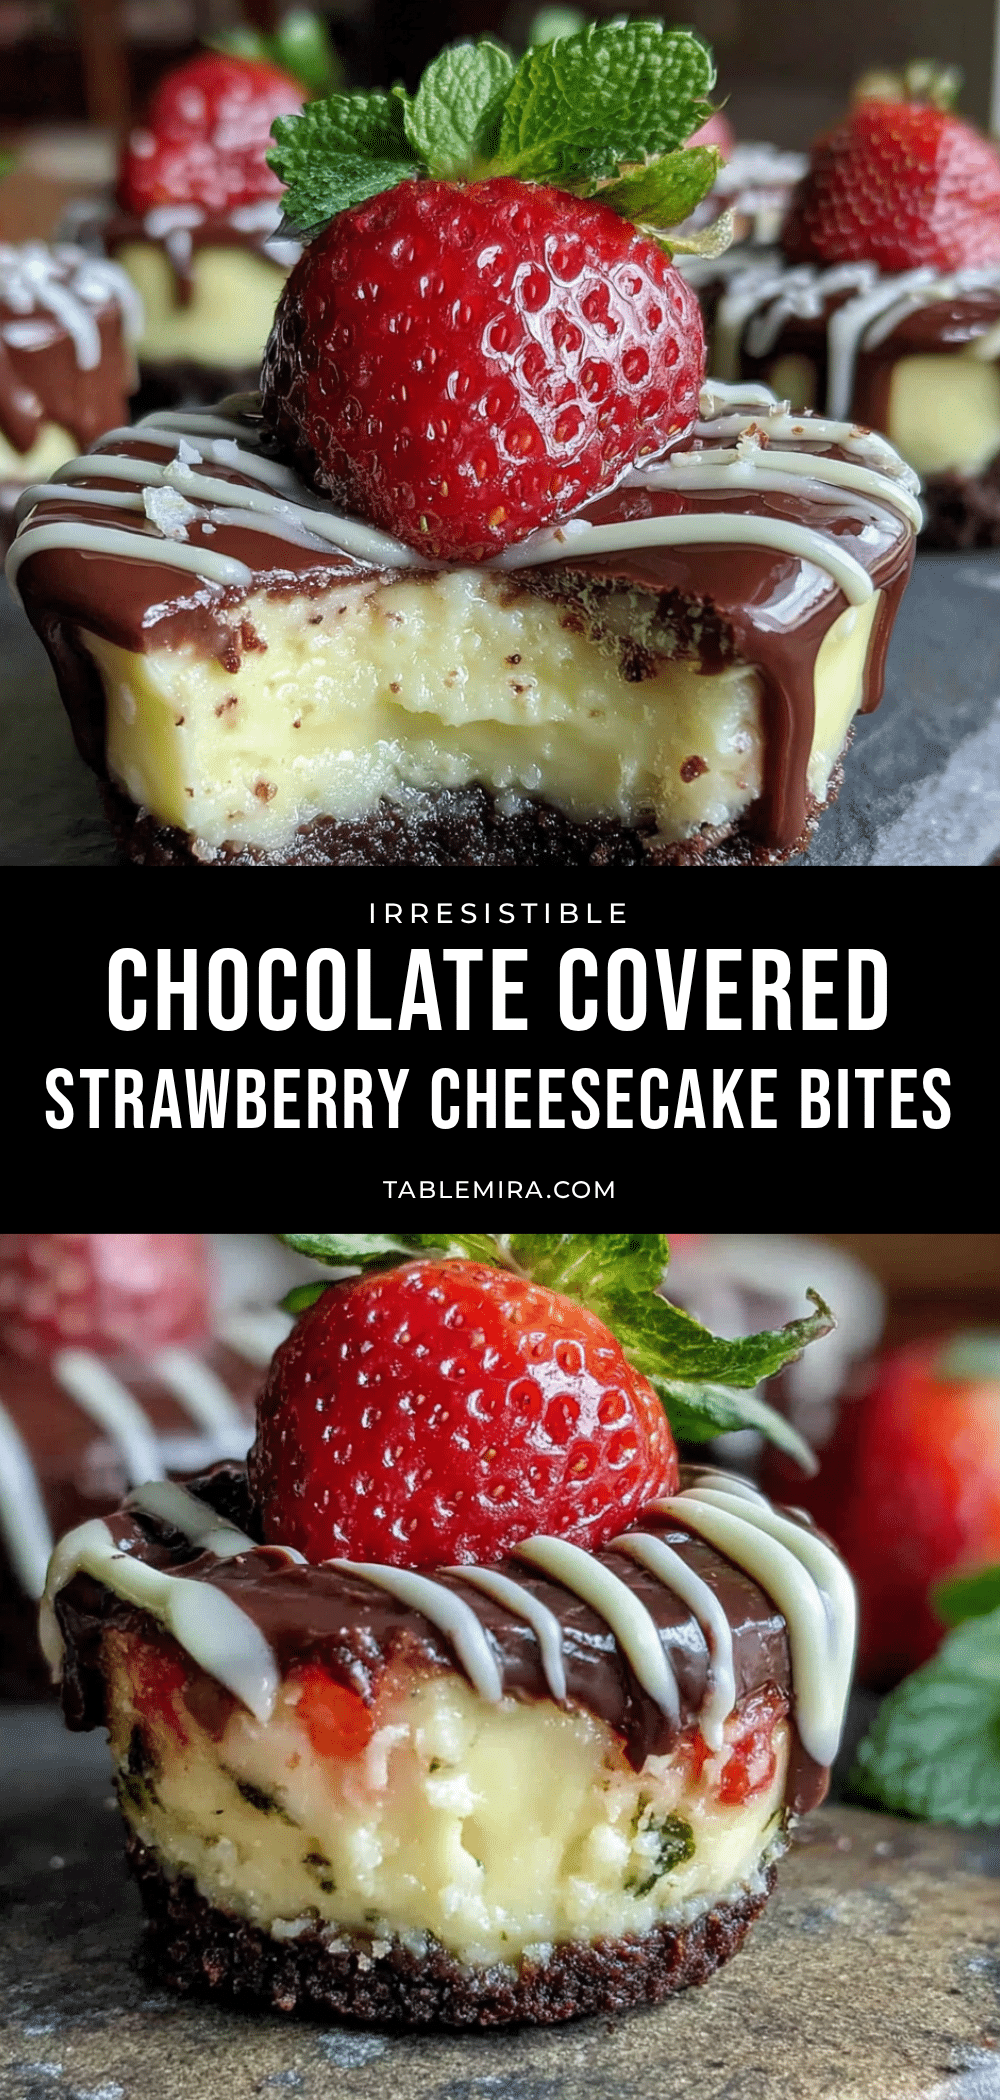
Perfect Chocolate Covered Strawberry Cheesecake Bites Easy Recipe
These Perfect Chocolate Covered Strawberry Cheesecake Bites combine a creamy, mousse-like cheesecake filling with fresh strawberries, all wrapped in a snappy chocolate shell. They’re an easy, elegant treat perfect for date night, celebrations, or a simple Tuesday night craving.
- Prep Time: 20 minutes
- Cook Time: 0 minutes
- Total Time: 2 hours 20 minutes (includes freezing time)
- Yield: 15 servings 1x
- Category: Dessert
- Cuisine: American
Ingredients
- 8 oz cream cheese, softened
- 1/4 cup powdered sugar
- 1/2 teaspoon vanilla extract
- 2 tablespoons heavy cream
- 12–15 fresh strawberries, medium-sized
- 1 cup semi-sweet chocolate chips
- 1 tablespoon coconut oil or vegetable shortening
- 1/2 cup graham cracker crumbs
- 1 tablespoon melted butter
- 1/4 cup white chocolate chips (optional, for drizzle)
Instructions
- Prep the strawberries: Wash and dry the strawberries thoroughly. Pat them dry with paper towels, then let them sit on a clean towel for 10 minutes to air-dry completely. Remove the green tops and set aside.
- Make the graham cracker crust (optional): In a small bowl, combine 1/2 cup graham cracker crumbs with 1 tablespoon melted butter. Stir until the crumbs are evenly moistened. Press about 1 teaspoon of the mixture into the bottom of each mini muffin cup. Use the back of a small spoon or a shot glass to press it down firmly. Set aside.
- Whip the cheesecake filling: In a medium bowl, beat the softened cream cheese with an electric mixer on medium speed until smooth and creamy, about 1 minute. Add the powdered sugar and vanilla extract, and beat until fully incorporated. Scrape down the sides of the bowl. Add the heavy cream and beat on medium-high for 2-3 minutes, until the mixture is light, fluffy, and holds soft peaks. It should look like a thick mousse.
- Fill the muffin cups: Transfer the cheesecake mixture to a piping bag or a zip-top bag with a small corner snipped off. Pipe the filling into each mini muffin cup, filling them almost to the top. Smooth the tops with a small offset spatula or the back of a spoon if needed.
- Insert the strawberries: Gently press one strawberry, pointed end up, into the center of each cheesecake-filled cup. The strawberry should be standing upright, with the cheesecake filling hugging the bottom half. Don’t push it all the way down—leave about 1/4 inch of the strawberry visible above the filling.
- Freeze until firm: Place the mini muffin tin in the freezer for at least 2 hours, or until the cheesecake bites are completely solid. This step is crucial—if they’re not frozen solid, they’ll fall apart when you dip them in chocolate. I usually leave them overnight.
- Melt the chocolate: About 15 minutes before you’re ready to dip, combine 1 cup semi-sweet chocolate chips and 1 tablespoon coconut oil in a microwave-safe bowl. Microwave in 30-second intervals, stirring well after each, until the chocolate is smooth and fully melted. Be careful not to overheat—chocolate burns easily and turns grainy.
- Dip the frozen bites: Remove the cheesecake bites from the freezer. Working quickly, pop one bite out of the muffin tin and place it on a fork. Lower it into the melted chocolate, spooning chocolate over the top if needed to cover the cheesecake portion. Lift it out and gently tap the fork on the edge of the bowl to remove excess chocolate. Place the dipped bite on a parchment-lined baking sheet.
- Add drizzle (optional): If you want that bakery look, melt 1/4 cup white chocolate chips in a small bowl and drizzle it over the dipped bites using a fork or a small piping bag. Do this while the dark chocolate is still wet so the drizzle sticks.
- Let the chocolate set: Place the baking sheet in the refrigerator for about 15-20 minutes, or until the chocolate is firm and shiny. If you’re in a hurry, you can pop them back in the freezer for 10 minutes.
Notes
Freeze the cheesecake bites solid before dipping to prevent them from falling apart. Dry strawberries thoroughly to avoid chocolate seizing. Work in small batches to keep chocolate from thickening. For best results, chill dipped bites until chocolate is firm and shiny.
Nutrition
- Serving Size: 1 bite
- Calories: 145
- Sugar: 10
- Sodium: 55
- Fat: 10
- Saturated Fat: 6
- Carbohydrates: 13
- Fiber: 1
- Protein: 2
Keywords: chocolate covered strawberry cheesecake bites, easy dessert, no bake, mini cheesecake, party dessert, Valentine's Day, strawberry dessert


