My sister swore she hated cheesecake. For years. The whole family knew it—Thanksgiving, birthdays, Easter, she’d wave it away with a wrinkled nose. “Too heavy,” she’d say. “Makes me feel sluggish.” I believed her completely, never questioned it once. Then last October, I was testing this lightened-up version in my tiny apartment kitchen, the one with the cracked yellow countertop, just for myself honestly. I’d spent the afternoon trying to make a Halloween dessert that wouldn’t leave everyone in a sugar coma. My sister stopped by unannounced, walked straight to the fridge, and I caught her—fork in hand, mid-bite, eyes closed—eating what I’d planned to photograph the next morning. She didn’t even say anything. Just pointed at the pan with her fork and raised her eyebrows. That’s when I knew this recipe was something special. It’s the kind of dessert that changes minds without even trying, and honestly, maybe you’ve been there too—looking for something festive that doesn’t feel like a brick of guilt afterward. These Light Spiderweb Chocolate Cheesecake Bars have become my go-to for fall gatherings, and I keep making them because they prove you can have your Halloween treat and feel good about it too.
Why You’ll Love This Recipe
Let me tell you, after testing this recipe six times in two weeks—my neighbors started knocking, I swear—I landed on something I’m genuinely proud of. These bars hit that sweet spot between indulgent and sensible, and here’s why they keep disappearing at every party I bring them to:
- Quick & Easy: Comes together in about 30 minutes of active work, then the oven does the rest. Perfect for busy Halloween week when you’re juggling costumes and candy.
- Simple Ingredients: No weird specialty items here. Cream cheese, cocoa powder, Greek yogurt—stuff you probably already have or can grab in one aisle.
- Perfect for Halloween Parties: That spiderweb design looks impressive but takes five minutes to create. People will think you slaved away for hours.
- Crowd-Pleaser: I’ve watched kids grab these next to candy bars and adults ask for the recipe before finishing their first bite. It’s that good.
- Surprisingly Light: The texture is creamy and satisfying without being heavy. Greek yogurt replaces some of the cream cheese, and the chocolate flavor is rich enough that nobody misses the extra fat.
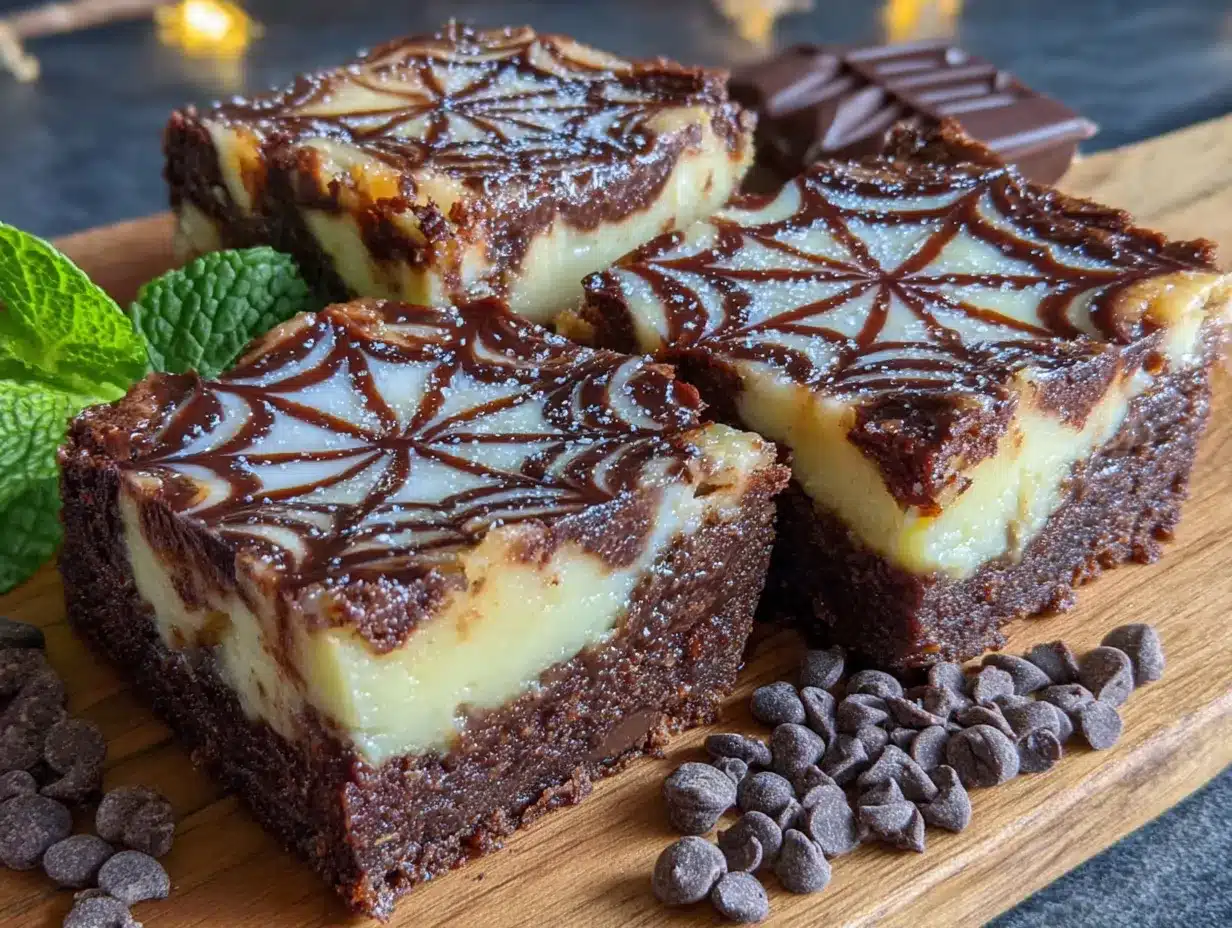
What makes these different from every other cheesecake bar recipe out there? It’s the balance. Most Halloween desserts are either pure sugar bombs or they taste like diet food. These bars use a clever technique—blending cottage cheese until silky smooth—to create that luscious texture without the heaviness. The chocolate layer is deep and dark, the cheesecake layer is tangy and light, and that spiderweb pattern on top makes everyone stop and stare. This is comfort food reimagined for people who want to feel good about what they’re eating, without sacrificing any of the joy.
What Ingredients You Will Need
This recipe uses simple, wholesome ingredients to deliver that rich chocolate flavor and creamy texture without the usual heavy feeling. Most of these are pantry staples, and I’ve tested substitutions so you can adapt based on what you have.
For the Crust
- 1 ½ cups chocolate wafer crumbs (about 24 wafers) — I prefer Nabisco Famous Chocolate Wafers for the deepest flavor
- 3 tablespoons melted coconut oil or unsalted butter
- 1 tablespoon maple syrup or honey
- Pinch of salt
For the Cheesecake Layer
- 8 ounces reduced-fat cream cheese, softened (Neufchâtel works beautifully here)
- ½ cup cottage cheese (small-curd, full-fat or low-fat both work)
- ⅓ cup granulated sugar
- ¼ cup plain Greek yogurt (I use 2% Fage for thickness)
- 1 large egg, room temperature
- 1 teaspoon vanilla extract
- 1 tablespoon all-purpose flour (helps prevent cracking)
For the Chocolate Layer
- 4 ounces dark chocolate (60-70% cacao), chopped — Ghirardelli or Lindt are my go-to brands
- ¼ cup reduced-fat cream cheese, softened
- 2 tablespoons powdered sugar
- 1 tablespoon milk (any kind works)
For the Spiderweb Topping
- 3 tablespoons white chocolate chips or melting wafers
- 1 teaspoon coconut oil (helps thin the chocolate for drizzling)
Ingredient Tips: Let your cream cheese and egg sit on the counter for 30 minutes before starting. Cold ingredients create lumpy cheesecake, and nobody wants that. For the cottage cheese, look for small-curd with no added gums—Good Culture brand has a clean ingredient list. If you’re dairy-free, swap the cream cheese with a good-quality vegan version and use coconut yogurt instead of Greek yogurt. The texture will be slightly softer but still delicious. In summer, I sometimes add a tablespoon of fresh lemon juice to the cheesecake layer for brightness, but in fall, I keep it pure and cozy.
Equipment Needed
You don’t need a fancy kitchen to pull these off, but a few specific tools make the process smoother. Here’s what I use every time:
- 8×8-inch baking pan — Glass or metal both work, but line it with parchment paper so the bars lift out cleanly
- Food processor or blender — For smoothing the cottage cheese into that silky texture (a high-speed blender works best)
- Electric mixer — Handheld or stand mixer, either is fine. You want the cream cheese to be completely smooth
- Small saucepan — For melting the chocolate gently. Double boiler method works too if you’re fancy
- Piping bag or zip-top bag — For the spiderweb design. Honestly, a zip-top bag with the corner snipped works perfectly
- Offset spatula — Helps spread the cheesecake layer evenly. A regular spatula works in a pinch
If you don’t have a food processor, you can buy pre-crushed chocolate cookie crumbs at some stores, or crush the wafers in a zip-top bag with a rolling pin. It’s a little arm workout, but it gets the job done. I’ve broken two cheap food processors over the years, so I recommend spending a little extra on a Cuisinart if you bake often—it’s worth every penny.
Preparation Method
Take your time with these steps, and you’ll end up with bars that look like they came from a bakery. I’ve included all the little details I wish someone had told me the first time I made these.
- Preheat and prep the pan. Preheat your oven to 325°F (163°C). Line an 8×8-inch baking pan with parchment paper, leaving some overhang on two sides. This creates handles for lifting the bars out later. Lightly spray the parchment with cooking spray—trust me on this, it prevents sticking.
- Make the crust. Pulse the chocolate wafer crumbs in a food processor until they’re fine and sandy. Add the melted coconut oil, maple syrup, and salt, then pulse until the mixture looks like wet sand and holds together when pressed. Dump it into the prepared pan and press firmly and evenly into the bottom. I use the bottom of a measuring cup to get it really compact. Bake for 10 minutes, then set aside to cool slightly while you make the filling.
- Blend the cottage cheese. In your food processor or blender, blitz the cottage cheese for about 60 seconds until it’s completely smooth—no lumps at all. You’re looking for a yogurt-like consistency. Scrape down the sides halfway through. This step is the secret to that light, creamy texture without the heavy feeling.
- Make the cheesecake filling. In a large bowl, beat the softened cream cheese with an electric mixer until smooth and fluffy, about 2 minutes. Add the sugar and beat for another minute. Add the blended cottage cheese, Greek yogurt, vanilla, and flour, and beat until just combined. Add the egg and beat on low until incorporated—don’t overmix or the cheesecake can crack. The batter should be smooth and slightly thick.
- Prepare the chocolate layer. Melt the dark chocolate in a small saucepan over very low heat, stirring constantly. Once smooth, remove from heat and stir in the cream cheese, powdered sugar, and milk until glossy and combined. Let it cool for 2-3 minutes—if it’s too hot, it will melt the cheesecake batter.
- Layer the batters. Pour the cheesecake filling over the crust and spread it evenly. Drop spoonfuls of the chocolate mixture randomly over the top—about 8-10 dollops. Use a butter knife or skewer to gently swirl the chocolate into the cheesecake, creating a marbled pattern. Don’t over-swirl or you’ll lose the contrast.
- Bake the bars. Place the pan in the center of the oven and bake for 28-32 minutes. The edges should be set and slightly puffed, but the center will still jiggle when you gently shake the pan. That’s perfect—it will continue setting as it cools. Overbaking makes cheesecake dry and grainy.
- Cool completely. Let the bars cool on a wire rack for 1 hour at room temperature, then refrigerate for at least 4 hours or overnight. This is crucial—don’t rush it. The bars need time to firm up so you get clean slices.
- Create the spiderweb. Once the bars are fully chilled and set, melt the white chocolate chips with the coconut oil in 15-second bursts in the microwave, stirring between each. Transfer to a small zip-top bag and snip a tiny corner. Pipe a spiral starting from the center of the bars, working outward. While the white chocolate is still wet, drag a toothpick from the center through each ring to create the web effect. Wipe the toothpick clean between each drag for crisp lines.
- Slice and serve. Lift the bars out using the parchment overhang. Use a sharp knife, wiping it clean between each cut, to get neat squares. For the cleanest slices, run the knife under hot water and dry it before each cut.
Cooking Tips & Techniques
I’ve messed up this recipe more times than I care to admit, so let me save you the trouble. Here’s what I learned the hard way:
Don’t skip the cottage cheese blending step. The first time I made these, I just stirred the cottage cheese in without blending it first. Big mistake. The texture was grainy and weird, not silky at all. Blending it for a full minute makes it disappear into the batter, creating that light, airy texture that makes these bars special.
Room temperature ingredients matter. I know, I know, everyone says this. But here’s the thing—when you beat cold cream cheese, it gets lumpy and you end up overmixing trying to smooth it out, which incorporates too much air. That extra air expands in the oven and then collapses, causing cracks. Let everything sit out for 30 minutes. Set a timer. I’ve learned this lesson at least five times and I’m still not perfect about it.
The jiggle test is your friend. When you think the bars might be done, gently shake the pan. If the center wobbles like Jell-O, they need more time. If the whole thing moves as one solid mass, they’re done. I once overbaked a batch by 10 minutes because I was scared of underbaking, and the texture turned out dry and crumbly. Trust the jiggle.
Chill overnight for best results. Four hours is the minimum, but overnight is where the magic happens. The flavors meld together, the texture firms up perfectly, and slicing becomes effortless. I’ve tried rushing this step and ended up with messy, goopy bars. Patience pays off here.
Multitasking strategy: While the crust bakes, blend your cottage cheese and measure out your other ingredients. While the cheesecake bakes, melt your white chocolate for the spiderweb and let it cool slightly. This way everything flows together without feeling rushed.
Variations & Adaptations
One of the best things about this recipe is how flexible it is. Here are some ways I’ve adapted it depending on who I’m feeding:
Gluten-Free Version: Use gluten-free chocolate wafer cookies for the crust. I’ve tested this with Schar brand and it works perfectly. Also swap the tablespoon of flour with almond flour or a gluten-free all-purpose blend. Nobody will notice the difference.
Dairy-Free Adaptation: Use vegan cream cheese (Miyoko’s is my favorite), dairy-free Greek yogurt, and coconut cream instead of cottage cheese. The texture is slightly less firm but still delicious. For the chocolate layer, use dairy-free dark chocolate and coconut milk. I brought this version to a friend’s house who’s lactose intolerant and she nearly cried happy tears.
Pumpkin Spice Twist: Add ¼ cup pumpkin puree and 1 teaspoon pumpkin pie spice to the cheesecake batter, reducing the Greek yogurt by 2 tablespoons. The pumpkin pairs beautifully with the chocolate, and it makes these bars perfect for Thanksgiving too. I made this version last November and my sister-in-law asked for the recipe three times.
Peppermint Holiday Version: Swap the spiderweb design with crushed candy canes sprinkled on top after baking. Add ¼ teaspoon peppermint extract to the chocolate layer. These disappear fast at Christmas parties, let me tell you.
Lower Sugar Option: Use a sugar substitute like monk fruit sweetener in the cheesecake layer and sugar-free chocolate for the topping. The texture holds up well, though the flavor is slightly less rich. I’ve tested this for a friend watching her sugar intake and she was thrilled with the result.
Serving & Storage Suggestions
These bars are best served cold, straight from the refrigerator. The texture is firm and creamy, and the spiderweb design stays crisp. Let them sit at room temperature for 5 minutes before serving if you want a slightly softer texture—but don’t leave them out longer or the cheesecake gets too soft.
Presentation ideas: Cut into 16 small squares for parties—they’re rich enough that a little goes a long way. Arrange on a dark platter to make the spiderweb pattern pop. Add a few candy pumpkins or black licorice spiders around the plate for extra Halloween flair. I once served these on a slate board with fake cobwebs draped around and people went crazy taking photos.
What to serve with them: A dollop of whipped cream (lightly sweetened) balances the dark chocolate perfectly. For drinks, a cup of hot coffee or a glass of cold milk is classic. If you’re serving adults, a dark stout beer or a glass of red wine pairs beautifully with the chocolate notes.
Storage: Keep leftover bars in an airtight container in the refrigerator for up to 5 days. Layer them with parchment paper between each row so the spiderweb doesn’t smudge. I’ve never had them last longer than 3 days in my house, but theoretically they hold up well.
Freezing instructions: These freeze beautifully for up to 2 months. Wrap each bar individually in plastic wrap, then place in a freezer-safe bag. To thaw, transfer to the refrigerator overnight. The texture remains creamy and the spiderweb stays intact. I always keep a batch in the freezer for unexpected guests or last-minute Halloween cravings.
Flavor development: Honestly, these taste even better on day two. The chocolate flavor deepens and the cheesecake texture becomes silkier. So don’t stress about making them a day ahead—it’s actually better that way.
Nutritional Information & Benefits
Here’s the thing—I’m not a nutritionist, but I’ve done my homework on these bars because I wanted a Halloween dessert that didn’t derail my healthy habits. Per bar (based on 16 servings):
- Calories: 185
- Fat: 11g
- Saturated Fat: 6g
- Carbohydrates: 18g
- Fiber: 1g
- Sugar: 12g
- Protein: 5g
What makes these lighter: Using reduced-fat cream cheese and Greek yogurt cuts the saturated fat significantly compared to traditional cheesecake. The cottage cheese adds protein without the heaviness of extra cream cheese. Dark chocolate provides antioxidants and that rich flavor means you’re satisfied with a smaller portion. Plus, the portion-controlled bar format helps with mindful eating—you grab one instead of slicing into a whole cheesecake.
Dietary considerations: These bars are vegetarian. For gluten-free, use the adaptation above. They’re not low-carb due to the sugar and crust, but the protein content helps balance blood sugar response. If you have dairy sensitivities, the dairy-free version works well. Always check your ingredient labels for hidden allergens.
For me, these bars represent balance. I can enjoy a Halloween treat that feels indulgent without the heavy, sluggish feeling I get from traditional cheesecake. And honestly, knowing I’m eating something with a bit of protein and less sugar makes that second bar feel a lot less guilty.
Conclusion
These Light Spiderweb Chocolate Cheesecake Bars have become my signature fall dessert, and I think they’ll become yours too. They’re festive enough for Halloween parties, light enough that you don’t regret eating them, and genuinely delicious in a way that surprises everyone who tries them. The spiderweb design is fun to make, the chocolate and cheesecake layers complement each other perfectly, and the whole thing comes together with ingredients you can feel good about.
I love that this recipe proves you don’t have to choose between healthy and indulgent. You can have your Halloween treat and feel great about it—no guilt, no compromises. Plus, watching someone’s face light up when they see that spiderweb design is pure joy.
I’d love to hear how yours turn out! Did you add a twist? Did your family devour them before you could photograph them? Drop a comment below and share your version. And if you’re looking for more lightened-up desserts, check out my healthy chocolate avocado mousse or these pumpkin protein muffins for more guilt-free treats. Happy Halloween, and happy baking!
Frequently Asked Questions
Can I use full-fat cream cheese instead of reduced-fat?
Absolutely. The texture will be slightly richer and creamier, and the calorie count will go up a bit, but the recipe works perfectly either way. I’ve tested both versions and honestly can’t tell a huge difference in taste. Just make sure it’s softened to room temperature before mixing.
Why did my cheesecake layer crack?
This usually happens from overbaking or overmixing. Make sure you’re not beating the batter too long after adding the egg, and pull the bars out when the center still jiggles slightly. Also, cooling them gradually—first on the counter, then in the fridge—helps prevent sudden temperature changes that cause cracks.
Can I make these without a food processor?
Yes! For the crust, crush the chocolate wafers in a zip-top bag with a rolling pin. For the cottage cheese, press it through a fine-mesh sieve with the back of a spoon until smooth. It takes a bit more elbow grease, but the result is the same. A blender also works for the cottage cheese if you have one.
How far in advance can I make these?
You can make the full recipe, including the spiderweb design, up to 2 days ahead and keep them refrigerated. They actually taste better on day two. For longer storage, freeze the plain bars (without the spiderweb) for up to 2 months, then add the spiderweb design after thawing for the freshest look.
My spiderweb design turned into a blob. What went wrong?
The white chocolate was probably too warm when you piped it, or you dragged the toothpick too aggressively. Let the white chocolate cool until it’s just barely warm to the touch—it should flow smoothly but not be runny. Also, use a light hand when dragging the toothpick, and wipe it clean between each line for the best effect. Practice makes perfect!
Pin This Recipe!
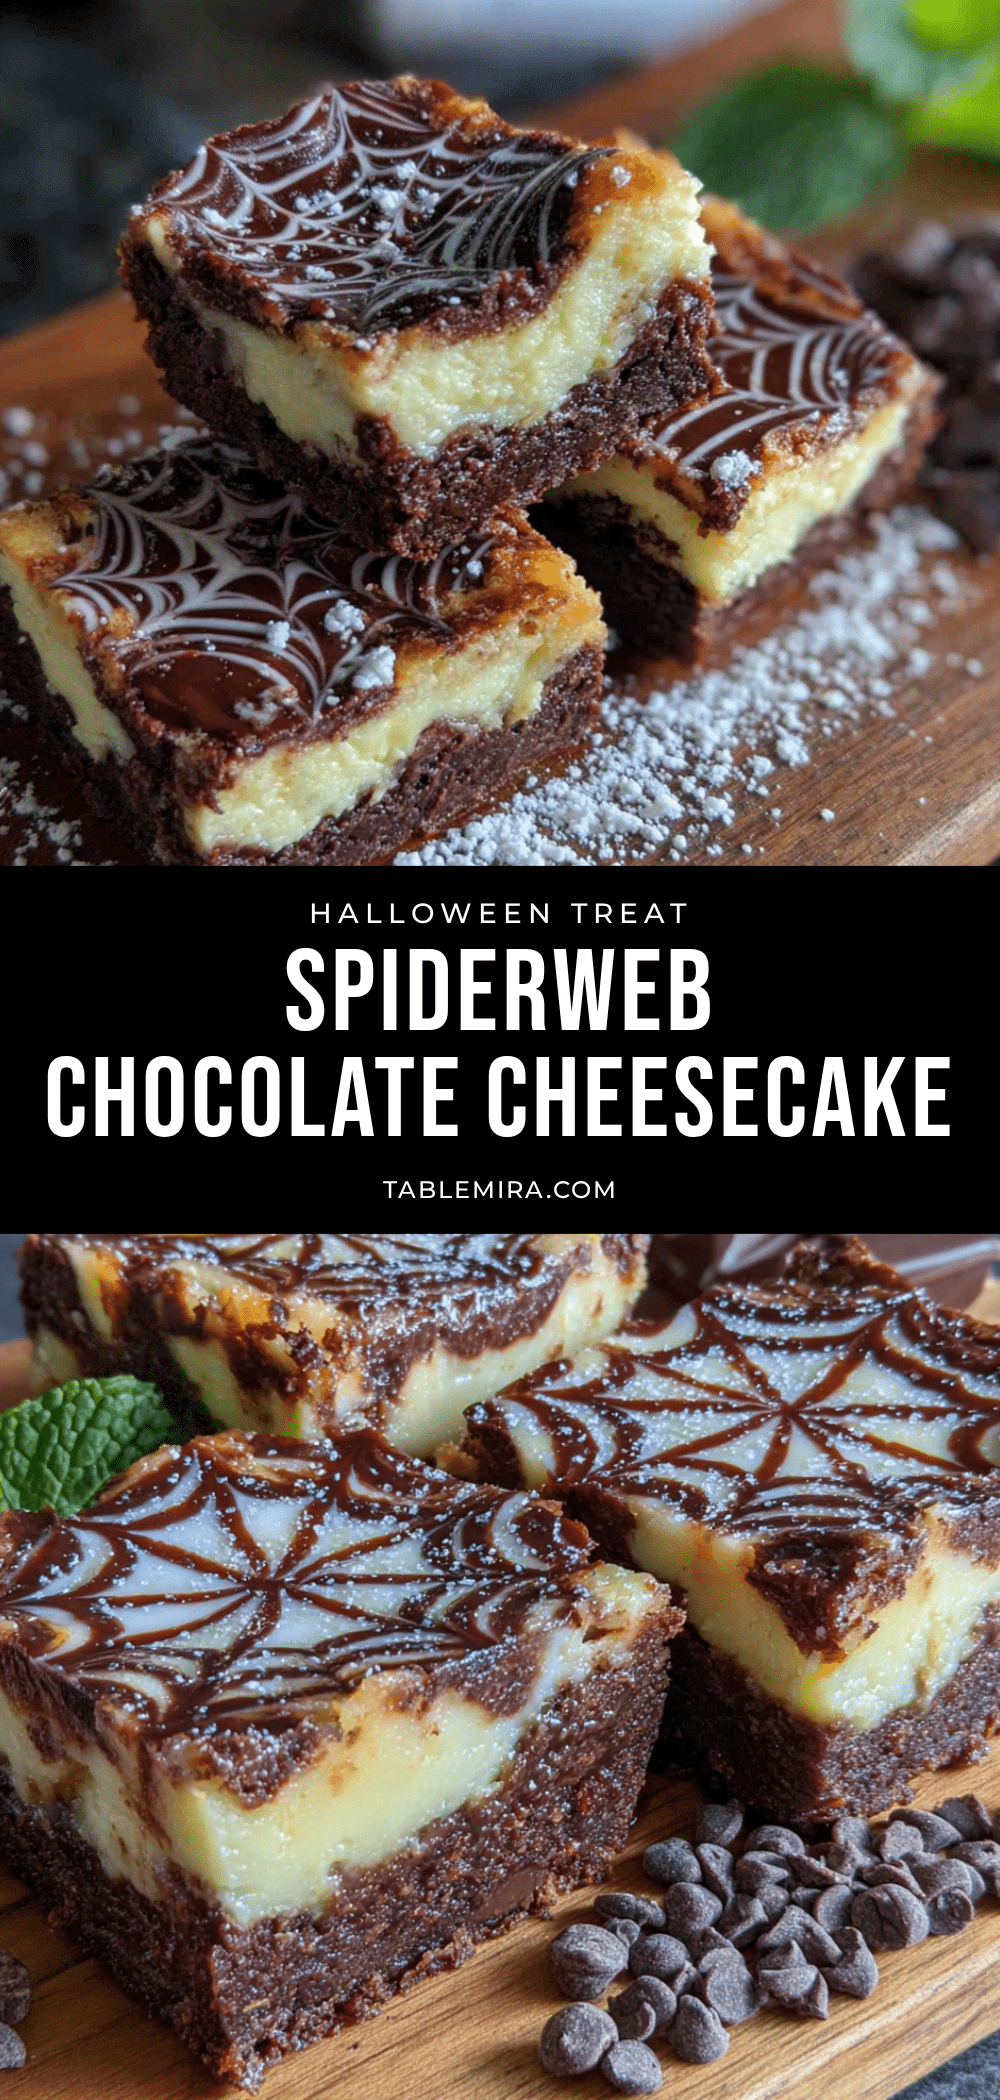
Light Spiderweb Chocolate Cheesecake Bars: Easy Halloween Dessert
These light and creamy chocolate cheesecake bars feature a festive spiderweb design, using Greek yogurt and cottage cheese for a guilt-free Halloween treat that’s rich in flavor but light on heaviness.
- Prep Time: 30 minutes
- Cook Time: 32 minutes
- Total Time: 5 hours 2 minutes (includes chilling)
- Yield: 16 servings 1x
- Category: Dessert
- Cuisine: American
Ingredients
- 1 ½ cups chocolate wafer crumbs (about 24 wafers)
- 3 tablespoons melted coconut oil or unsalted butter
- 1 tablespoon maple syrup or honey
- Pinch of salt
- 8 ounces reduced-fat cream cheese, softened
- ½ cup cottage cheese (small-curd)
- ⅓ cup granulated sugar
- ¼ cup plain Greek yogurt (2% recommended)
- 1 large egg, room temperature
- 1 teaspoon vanilla extract
- 1 tablespoon all-purpose flour
- 4 ounces dark chocolate (60-70% cacao), chopped
- ¼ cup reduced-fat cream cheese, softened
- 2 tablespoons powdered sugar
- 1 tablespoon milk
- 3 tablespoons white chocolate chips or melting wafers
- 1 teaspoon coconut oil
Instructions
- Preheat oven to 325°F (163°C). Line an 8×8-inch baking pan with parchment paper, leaving overhang on two sides. Lightly spray parchment with cooking spray.
- Make the crust: Pulse chocolate wafer crumbs in a food processor until fine. Add melted coconut oil, maple syrup, and salt; pulse until mixture holds together. Press firmly into prepared pan. Bake for 10 minutes; set aside to cool slightly.
- Blend cottage cheese in food processor or blender for about 60 seconds until completely smooth.
- Make cheesecake filling: In a large bowl, beat softened cream cheese with electric mixer until smooth, about 2 minutes. Add sugar and beat for 1 minute. Add blended cottage cheese, Greek yogurt, vanilla, and flour; beat until just combined. Add egg and beat on low until incorporated. Do not overmix.
- Prepare chocolate layer: Melt dark chocolate in a small saucepan over very low heat, stirring constantly. Remove from heat and stir in cream cheese, powdered sugar, and milk until glossy. Let cool 2-3 minutes.
- Pour cheesecake filling over crust and spread evenly. Drop spoonfuls of chocolate mixture randomly on top (8-10 dollops). Gently swirl with a butter knife or skewer to create a marbled pattern.
- Bake for 28-32 minutes until edges are set and center jiggles slightly when shaken.
- Cool on a wire rack for 1 hour at room temperature, then refrigerate for at least 4 hours or overnight.
- Create spiderweb: Melt white chocolate chips with coconut oil in microwave in 15-second bursts. Transfer to a zip-top bag, snip a tiny corner, and pipe a spiral on top of chilled bars. Drag a toothpick from center through each ring to create web effect. Wipe toothpick clean between each drag.
- Lift bars out using parchment overhang. Slice with a sharp knife, wiping clean between cuts.
Notes
Let cream cheese and egg sit at room temperature for 30 minutes before starting. Chill overnight for best texture. For gluten-free, use gluten-free chocolate wafer cookies and almond flour. For dairy-free, use vegan cream cheese, dairy-free yogurt, and coconut cream.
Nutrition
- Serving Size: 1 bar
- Calories: 185
- Sugar: 12
- Fat: 11
- Saturated Fat: 6
- Carbohydrates: 18
- Fiber: 1
- Protein: 5
Keywords: Halloween dessert, light cheesecake, chocolate cheesecake bars, spiderweb, healthy dessert, fall dessert


