My neighbor, an older woman named Mrs. Kowalski, watched me struggle with a bag of baby carrots at the community garden potluck last October. She didn’t say anything at first. Then she reached into her own cooler and pulled out the most ridiculous, wonderful thing I’d ever seen—a tray of vegetables arranged to look like a grinning jack-o’-lantern, with a dip bowl that had a spider web drawn on top in sour cream.
I laughed out loud. Honestly, I was a little embarrassed about my sad bag of store-bought crudités. But she just shrugged and said, “You have to trick them into eating the healthy stuff. My grandkids think this is a treat.” She was right. Her tray was picked clean in twenty minutes, while my carrots sat untouched. I asked her how she did it, and she walked me through the whole thing right there, between bites of her famous potato salad.
That conversation stuck with me. I mean, how many times have we all stood in the kitchen, wondering how to get the kids to eat their vegetables without a full-on negotiation? This Kid-Approved Halloween Veggie Tray with Spider Web Ranch Dip isn’t just another snack idea—it’s a secret weapon. It turns the usual veggie platter into something fun, festive, and genuinely exciting for little ones. Maybe you’ve been there, staring at a bunch of untouched celery sticks after a party. This tray solves that problem in the most creative way.
I’ve made this tray every Halloween since, tweaking it here and there. I’ve learned that the key isn’t just the shapes—it’s the presentation. The spider web dip is the star of the show, and once the kids see it, they’re hooked. This recipe stayed with me because it’s proof that a little bit of effort can turn a healthy snack into the highlight of the party. Let me show you how to make it your own.
Why You’ll Love This Recipe
This isn’t your average veggie tray. It’s designed to be a showstopper that even the pickiest eaters will gravitate toward. I’ve tested this with my own kids and their friends, and let me tell you—it works every single time. Here’s why this recipe stands out:
- Quick & Easy: You can put this together in under 20 minutes. It’s perfect for last-minute Halloween parties or a fun after-school snack that feels special without a lot of fuss.
- Simple Ingredients: No fancy grocery trips needed. You likely already have ranch dressing mix, sour cream, and a few fresh veggies in your fridge. The spider web effect uses just a bit of extra sour cream or cream cheese.
- Perfect for Halloween: This tray is made for spooky celebrations. It fits right in with the candy and costumes, giving kids a fun, healthy option that still feels like a treat.
- Crowd-Pleaser: I’ve served this at multiple Halloween parties, and it always gets rave reviews from kids and adults alike. The adults love the veggies, and the kids love the dip and the fun shapes.
- Unbelievably Delicious: The ranch dip is creamy and flavorful, and the veggies stay crisp and fresh. The combination of textures and the cool, tangy dip is next-level comfort food—even for a veggie tray.
What makes this recipe different from the rest is the attention to detail. It’s not just about cutting veggies into shapes; it’s about creating an experience. The spider web dip is a simple technique that looks professional and impressive. Plus, I’ve included tips for making it even easier, like using pre-cut veggies from the store. This is the kind of recipe that makes you close your eyes after the first bite of that cool, herby ranch. It’s comfort food reimagined—healthier, faster, but with the same soul-soothing satisfaction. Perfect for impressing guests without stress, or turning a simple snack into something memorable.
What Ingredients You Will Need
This recipe uses simple, wholesome ingredients to deliver bold flavor and a fun presentation without the fuss. Most of these items are pantry staples or easy to find at any grocery store. Here’s what you’ll need:
For the Veggie Tray
- Carrots: 1 pound of baby carrots or whole carrots, peeled and cut into sticks. Baby carrots save time, but whole carrots are easier to cut into fun shapes like stars or pumpkins using small cookie cutters.
- Celery: 4-5 stalks, washed and cut into 3-inch sticks. Look for crisp, firm stalks without blemishes.
- Bell Peppers: 2-3 medium bell peppers in orange, yellow, or red. These add color and sweetness. Cut them into strips or use a small cookie cutter to make bat or ghost shapes.
- Cucumber: 1 large cucumber, sliced into rounds or cut into sticks. English cucumbers have fewer seeds and stay crunchier.
- Cherry Tomatoes: 1 pint. These add a pop of red and are easy for little hands to grab. I recommend using the grape variety for a sweeter flavor.
- Broccoli Florets: 1 cup of fresh florets. They look like tiny trees, which is perfect for a Halloween theme. Make sure they are dry before arranging them on the tray.
- Cauliflower Florets: 1 cup. These add a nice contrast in color and texture. You can also use them to make “ghost” shapes if you’re feeling creative.
For the Spider Web Ranch Dip
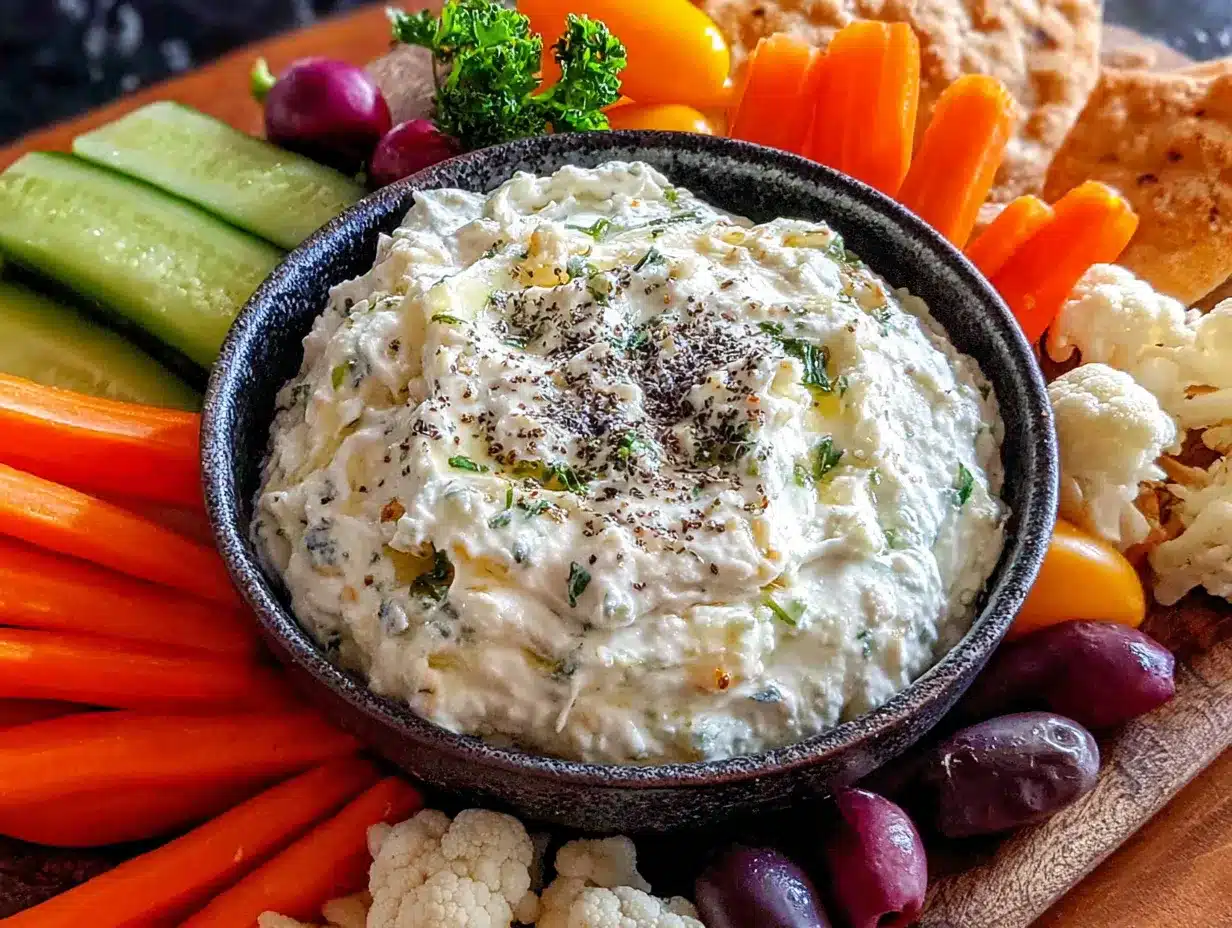
- Ranch Dressing Mix: 1 packet (1 ounce) of your favorite brand. I personally prefer Hidden Valley for that classic flavor, but any brand works well.
- Sour Cream: 1 cup (8 ounces). Full-fat sour cream gives the best texture and flavor. You can use Greek yogurt for a lighter option, but it will be tangier.
- Mayonnaise: 1/2 cup. This adds richness and helps the dip hold its shape. Use a good quality mayo like Hellmann’s or Duke’s.
- Milk: 2-3 tablespoons. This thins the dip to the perfect consistency. Use whole milk for a creamier result.
- For the Spider Web: 2-3 tablespoons of sour cream or cream cheese, softened. This is used to pipe the web design on top of the dip.
- Optional Garnish: A small plastic spider ring or a black olive sliced to look like a spider. This adds a fun, spooky touch.
Ingredient Selection Tips: For the best texture, look for firm, crisp vegetables without any soft spots. If you’re short on time, buy pre-cut veggie trays from the store and arrange them yourself. For the dip, I’ve found that letting it sit in the fridge for at least 30 minutes before serving helps the flavors meld together beautifully.
Substitution Guidance: If you’re dairy-free, use a dairy-free sour cream and mayonnaise alternative. For a gluten-free option, check that your ranch mix is certified gluten-free—most are, but it’s always good to double-check. You can also swap the ranch for a homemade herb dip if you prefer.
Equipment Needed
You don’t need a lot of fancy tools to make this tray, but a few items will make the process much easier and more fun. Here’s what I recommend:
- Large Serving Platter or Cutting Board: A round or rectangular platter works best. I like using a wooden cutting board for a rustic look, but a white platter makes the colors pop.
- Small Round Bowl: For the ranch dip. A bowl that is about 4-5 inches in diameter is perfect. You want it to be shallow enough to show off the spider web design.
- Piping Bag or Ziplock Bag: To pipe the spider web. A small piping bag with a fine tip works best, but a Ziplock bag with a tiny corner snipped off is a great budget-friendly alternative.
- Small Cookie Cutters: Halloween-shaped cutters like bats, ghosts, pumpkins, and stars. These are optional but highly recommended for making the veggie shapes extra fun. I found a set at the dollar store that works perfectly.
- Sharp Knife and Cutting Board: For slicing vegetables. A good chef’s knife makes quick work of carrots and bell peppers.
- Vegetable Peeler: If you’re using whole carrots, a peeler is essential. I prefer a Y-shaped peeler for better control.
Personal Experience: I’ve tried making this with just a knife, and while it works, the cookie cutters really take it to the next level. My kids love helping me press the cutters into the bell peppers and cucumbers. It’s a great way to get them involved in the kitchen. If you don’t have Halloween cutters, you can simply cut the veggies into fun shapes freehand—think triangles for witch hats or circles for eyeballs. The key is to have fun with it.
Maintenance Tips: After using your cookie cutters, wash them immediately to prevent staining from the veggies. A quick soak in warm, soapy water does the trick. For your piping bag, make sure to clean it thoroughly after use to prevent the cream cheese from clogging the tip.
Preparation Method
This recipe comes together quickly, but a little planning goes a long way. Follow these steps for a perfect Halloween veggie tray every time.
- Prepare the Ranch Dip (5 minutes): In a medium bowl, combine 1 cup of sour cream, 1/2 cup of mayonnaise, and 1 packet of ranch dressing mix. Stir until well combined. Add 2-3 tablespoons of milk, one tablespoon at a time, until the dip reaches a smooth, pourable consistency. You want it thick enough to hold the spider web design but thin enough to dip easily. Cover and refrigerate for at least 30 minutes to let the flavors meld. Pro tip: Taste the dip before chilling and adjust the seasoning if needed. Sometimes I add a pinch of garlic powder for extra kick.
- Prepare the Vegetables (10-15 minutes): Wash all your vegetables thoroughly. If using whole carrots, peel them and cut them into 3-inch sticks. For the bell peppers, slice off the tops and bottoms, remove the seeds, and cut them into strips or use your cookie cutters to make shapes. Slice the cucumber into rounds or half-moons. Cut the celery into sticks. Leave the cherry tomatoes whole. Separate the broccoli and cauliflower into small florets. Personal note: I always cut a few extra veggies because my kids tend to snack on them while I’m assembling the tray!
- Make the Spider Web Design (5 minutes): Once the dip has chilled, transfer it to your serving bowl. Smooth the top with a spatula. In a small piping bag or Ziplock bag, add 2-3 tablespoons of softened sour cream or cream cheese. Snip a tiny corner off the bag. Starting from the center of the dip, pipe a small circle. Then pipe concentric circles around it, spacing them about 1/2 inch apart. Using a toothpick or the tip of a knife, gently drag lines from the center outward, through all the circles, to create the web effect. Wipe the toothpick clean between each drag for a clean look. Watch out: If the dip is too cold, the sour cream might not pipe smoothly. Let it sit at room temperature for 5 minutes if needed.
- Assemble the Tray (5 minutes): Arrange your vegetables on the large platter around the dip bowl. Get creative with the layout. I like to group similar colors together for a rainbow effect. Place the Halloween-shaped veggie pieces prominently on top. If you have a plastic spider ring, place it on the edge of the dip bowl or on the tray itself. Sensory cue: The veggies should look crisp and vibrant against the creamy white dip. The contrast is what makes this tray so visually appealing.
- Add Final Touches (2 minutes): If you’re using a black olive spider, slice an olive in half lengthwise for the body, and cut the other half into thin strips for the legs. Place it on the spider web. You can also sprinkle a little paprika or black sesame seeds over the dip for extra texture and color. Troubleshooting tip: If your veggies start to look a little dry, spritz them lightly with cold water and pat them dry with a paper towel before arranging.
- Chill Before Serving (Optional but Recommended): Cover the assembled tray with plastic wrap and refrigerate for 15-20 minutes before serving. This helps the dip firm up and keeps the veggies extra crisp. Time-saving tip: You can prepare the dip and cut the veggies a day in advance. Store them separately in airtight containers in the fridge, and assemble the tray just before serving.
Cooking Tips & Techniques
After making this tray more times than I can count, I’ve picked up a few tricks that make a big difference. Here are my best tips for success:
- Keep the Veggies Cold: Vegetables that are crisp and cold are more appealing. After washing them, I like to soak the carrot sticks and celery in ice water for about 10 minutes. This makes them extra crunchy. Just make sure to pat them dry completely before arranging them on the tray, or the moisture will make the dip watery.
- Pipe the Web Carefully: The spider web is the star of the show, so take your time with it. If you mess up, don’t worry—just smooth the top of the dip with a spatula and start over. I’ve done this many times. The key is to use a steady hand and wipe the toothpick clean between each drag line.
- Common Mistake to Avoid: Don’t overcrowd the tray. Leave a little space between the veggies so the dip is easy to access. If the tray is too full, kids will accidentally knock things over. I learned this the hard way at a party when a little elbow sent a pile of carrots flying.
- Timing and Multitasking: I like to make the dip first and let it chill while I cut the vegetables. This way, everything is ready at the same time. If you’re making this for a party, assemble the tray no more than an hour before serving to keep the veggies fresh.
- Consistency is Key: For the dip, the consistency should be thick enough to hold the web design but not so thick that it’s hard to dip. If it’s too thick, add a splash of milk. If it’s too thin, add a little more sour cream. Trust your instincts—you’ll know when it’s right.
Personal Failure and Lesson: The first time I made this, I used low-fat sour cream and the dip was way too runny. The spider web design disappeared within minutes. Now I always use full-fat sour cream for the best texture. It’s a small change that makes a huge difference.
Variations & Adaptations
This recipe is incredibly versatile. Here are some of my favorite ways to mix it up:
- Dietary Adaptation (Dairy-Free): Use a dairy-free sour cream and mayonnaise alternative. I’ve tried this with a cashew-based sour cream, and it worked beautifully. The spider web can be made with a dairy-free cream cheese or even a thick coconut cream.
- Seasonal Variation (Fall Harvest): Swap some of the veggies for seasonal options like sliced fennel, radishes, or jicama sticks. These add a nice crunch and a slightly different flavor profile. You can also add some apple slices brushed with lemon juice for a sweet contrast.
- Flavor Twist (Spicy Ranch): Add 1/2 teaspoon of cayenne pepper or a dash of hot sauce to the ranch dip for a spicy kick. This is great for adult parties. Just make sure to label it clearly if kids are around.
- Different Cooking Method (Grilled Veggies): For a warmer option, lightly grill the bell peppers, zucchini, and eggplant slices before arranging them on the tray. The smoky flavor pairs surprisingly well with the cool ranch dip. Just let them cool completely before assembling.
- Personal Variation (The “Monster Mash”): One year, I added some pitted black olives and used them to make “monster eyes” on the veggies. I stuck two small olive slices on each cherry tomato with a dab of cream cheese. The kids went wild for them. It’s a simple addition that adds a lot of personality.
Serving & Storage Suggestions
This tray is best served cold, right out of the fridge. The contrast between the cool, creamy dip and the crisp vegetables is what makes it so satisfying. Here are my serving and storage tips:
- Serving Temperature: Serve the tray chilled. If you’re taking it to a party, keep it in a cooler with an ice pack until it’s time to serve. The dip should be cold and firm, and the veggies should be crisp.
- Presentation: Place the tray at the center of the snack table. I like to surround it with some Halloween-themed napkins and small plates. If you have a black tablecloth, the colors of the veggies really pop.
- Complementary Dishes: This tray pairs wonderfully with other Halloween snacks like spiderweb hummus platter, ghost-shaped cheese slices, or mummy hot dogs. For beverages, a batch of Halloween punch for kids is a perfect match.
- Storage Instructions: If you have leftovers, remove the dip from the tray and store it in an airtight container in the fridge for up to 3 days. The veggies can be stored in a separate container or a Ziplock bag with a damp paper towel to keep them crisp. They will last for 2-3 days.
- Reheating Methods: This recipe doesn’t require reheating, but if you’ve made a grilled veggie version, you can reheat the veggies in a skillet over medium heat for 2-3 minutes. Let them cool before serving with the cold dip.
- Flavor Development: The ranch dip actually tastes better after it sits in the fridge for a few hours. The flavors meld together and become more robust. So don’t be afraid to make it a day ahead.
Nutritional Information & Benefits
This veggie tray is a healthy option that doesn’t feel like a sacrifice. Here’s a quick look at the nutritional value and benefits:
- Estimated Nutritional Values (Per Serving, about 1 cup of veggies with 2 tablespoons of dip): Calories: 120, Fat: 8g, Carbohydrates: 10g, Fiber: 3g, Protein: 2g. These values are approximate and will vary based on the specific ingredients you use.
- Health Benefits of Key Ingredients: Carrots are packed with beta-carotene, which is great for eye health. Bell peppers are high in vitamin C, which supports the immune system. Celery is a good source of fiber and has anti-inflammatory properties. The ranch dip, when made with sour cream and mayo, provides calcium and healthy fats that help your body absorb the vitamins from the vegetables.
- Dietary Considerations: This recipe is naturally gluten-free if you use a certified gluten-free ranch mix. It can be made dairy-free with simple substitutions. It’s also low-carb and keto-friendly if you skip the carrots and use more cucumber and bell peppers.
- Potential Allergens: The dip contains dairy and eggs (from the mayonnaise). If you have allergies, use the substitutions mentioned in the variations section.
- Personal Wellness Perspective: I love this recipe because it makes healthy eating fun for the whole family. It’s a great way to get kids to try new vegetables without a fight. Plus, the act of arranging the tray can be a mindful activity that helps you slow down and enjoy the process of creating something beautiful.
Conclusion
This Kid-Approved Halloween Veggie Tray with Spider Web Ranch Dip is more than just a snack—it’s a conversation starter, a way to bring a little magic to the table, and a secret weapon for getting kids to eat their vegetables. I’ve seen it work wonders at parties, and I know it will become a favorite in your home too.
I encourage you to make this recipe your own. Don’t be afraid to experiment with different veggies, shapes, and dip flavors. The beauty of this tray is that it’s completely customizable. Whether you’re hosting a big Halloween bash or just looking for a fun after-school snack, this tray delivers.
Personally, I love this recipe because it reminds me of that conversation with Mrs. Kowalski. It’s a little piece of community and creativity that I get to share with my own family. I hope it brings you the same joy.
If you try this recipe, I’d love to hear about it! Leave a comment below and let me know how your family liked it. Did you add any fun variations? Share your photos and tag me on social media. Let’s make this Halloween a little healthier and a lot more fun!
Happy Halloween, and happy snacking!
Frequently Asked Questions
Can I make this veggie tray ahead of time?
Yes, you can! Prepare the dip and cut the vegetables up to 24 hours in advance. Store them separately in airtight containers in the fridge. Assemble the tray no more than an hour before serving to keep the veggies fresh and the dip looking its best.
What if I don’t have Halloween cookie cutters?
No problem at all! You can cut the vegetables into fun shapes freehand using a sharp knife. Try making triangles for witch hats, circles for eyeballs, or simply cut them into sticks and arrange them in a spooky pattern. The kids will still love it.
Can I use a different dip instead of ranch?
Absolutely! This recipe works well with any creamy dip. Try using a French onion dip, a blue cheese dressing, or even a homemade herb dip. Just make sure the dip is thick enough to hold the spider web design. You can also use hummus for a healthier option.
How do I keep the vegetables from getting soggy?
The key is to make sure your vegetables are completely dry before arranging them on the tray. After washing them, pat them dry with a clean kitchen towel or paper towels. You can also soak carrot and celery sticks in ice water for 10 minutes to make them extra crisp, but dry them thoroughly afterward.
Can I add other Halloween-themed snacks to the tray?
Of course! This tray is very versatile. You can add cheese cubes cut into ghost shapes, pretzel sticks arranged like broomsticks, or even some candy eyeballs for a fun touch. Just keep the focus on the veggies to maintain the healthy aspect of the snack.
Pin This Recipe!
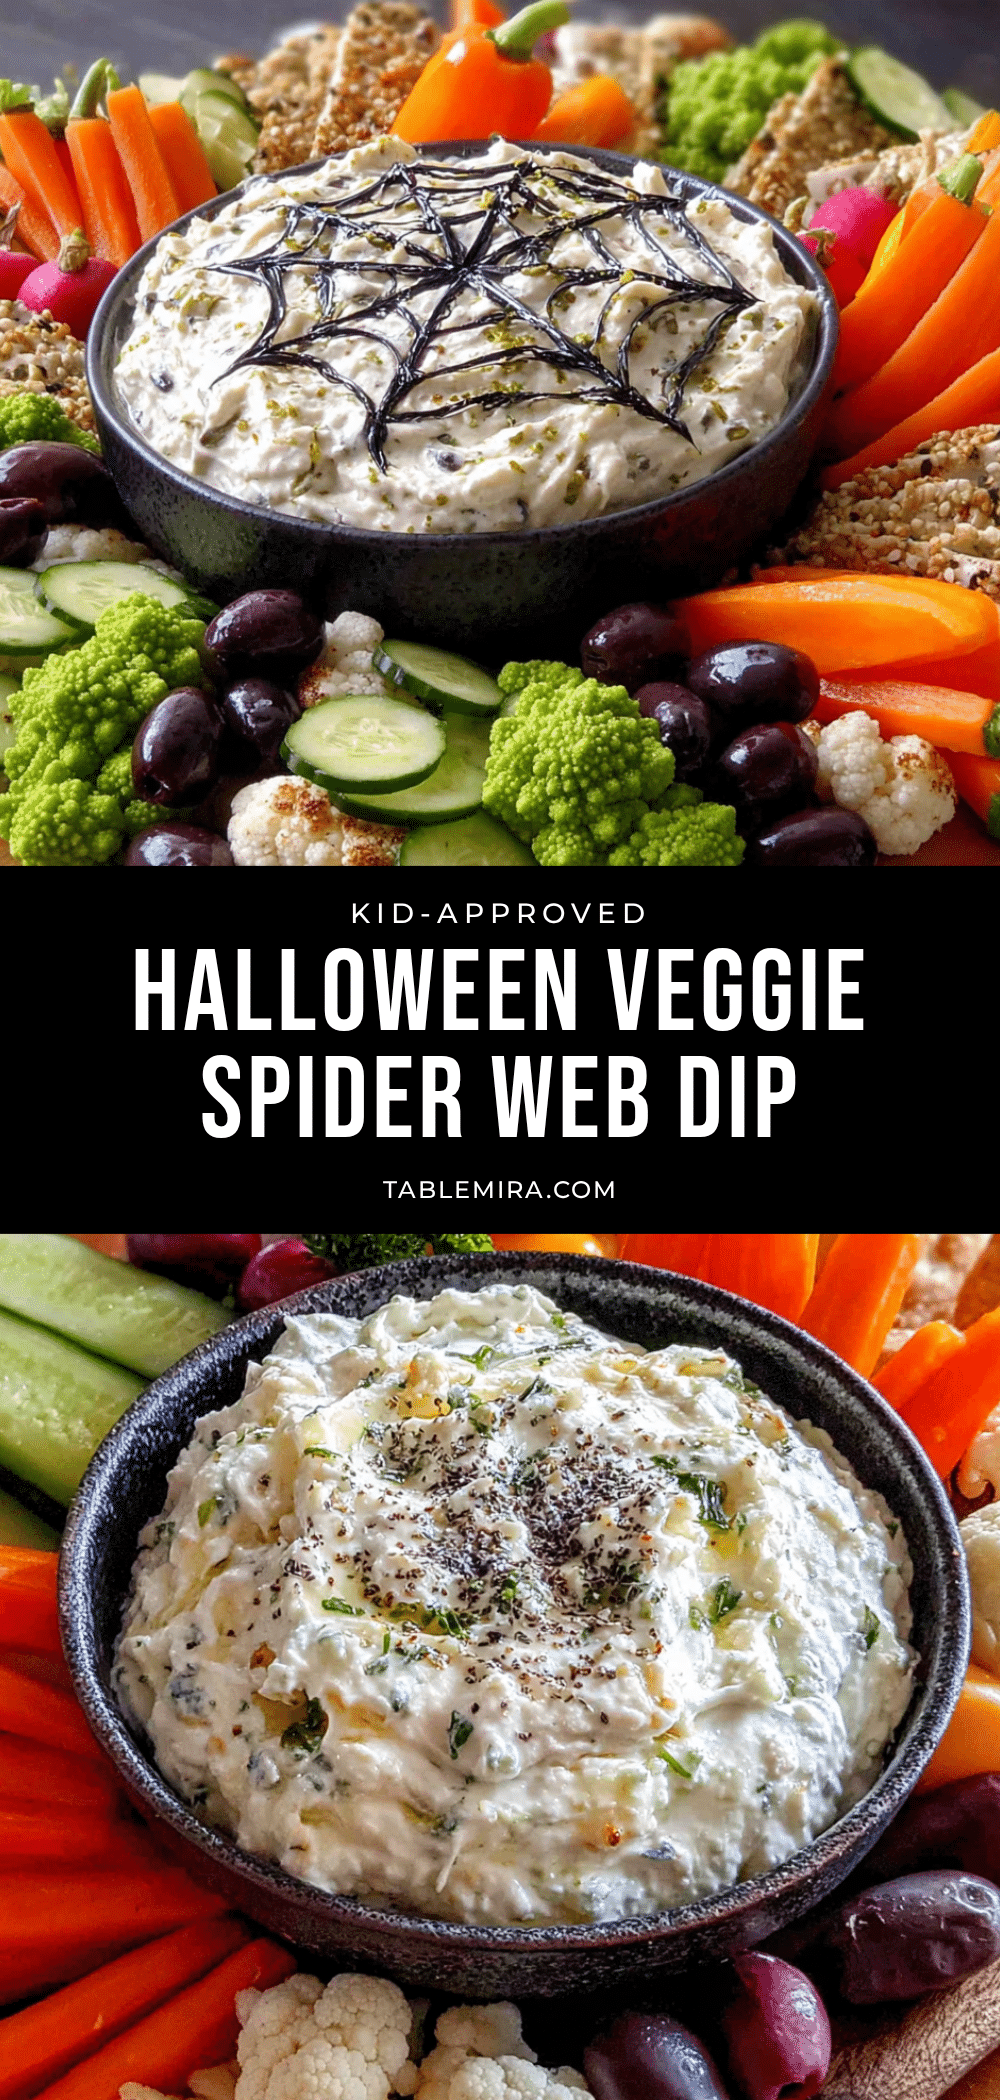
Kid-Approved Halloween Veggie Tray with Spider Web Ranch Dip
A fun and festive Halloween veggie tray featuring crisp vegetables arranged around a creamy ranch dip with a spider web design. This kid-friendly snack is quick to assemble and perfect for parties or after-school treats.
- Prep Time: 20 minutes
- Cook Time: 0 minutes
- Total Time: 20 minutes
- Yield: 8 servings 1x
- Category: Appetizer
- Cuisine: American
Ingredients
- 1 pound baby carrots or whole carrots, peeled and cut into sticks
- 4–5 stalks celery, washed and cut into 3-inch sticks
- 2–3 medium bell peppers (orange, yellow, or red), cut into strips or shapes
- 1 large cucumber, sliced into rounds or cut into sticks
- 1 pint cherry tomatoes
- 1 cup fresh broccoli florets
- 1 cup fresh cauliflower florets
- 1 packet (1 ounce) ranch dressing mix
- 1 cup (8 ounces) sour cream
- 1/2 cup mayonnaise
- 2–3 tablespoons milk
- 2–3 tablespoons sour cream or cream cheese, softened (for spider web)
- Optional: small plastic spider ring or black olive for garnish
Instructions
- Prepare the Ranch Dip: In a medium bowl, combine 1 cup sour cream, 1/2 cup mayonnaise, and 1 packet ranch dressing mix. Stir until well combined. Add 2-3 tablespoons milk, one tablespoon at a time, until the dip reaches a smooth, pourable consistency. Cover and refrigerate for at least 30 minutes.
- Prepare the Vegetables: Wash all vegetables thoroughly. If using whole carrots, peel and cut into 3-inch sticks. Slice bell peppers into strips or use cookie cutters to make shapes. Slice cucumber into rounds or half-moons. Cut celery into sticks. Leave cherry tomatoes whole. Separate broccoli and cauliflower into small florets.
- Make the Spider Web Design: Transfer chilled dip to a serving bowl and smooth the top. Place softened sour cream or cream cheese in a piping bag or Ziplock bag with a tiny corner snipped off. Pipe a small circle in the center, then concentric circles around it, spacing about 1/2 inch apart. Using a toothpick, gently drag lines from the center outward through all circles to create the web effect. Wipe toothpick clean between each drag.
- Assemble the Tray: Arrange vegetables on a large platter around the dip bowl. Group similar colors together for a rainbow effect. Place Halloween-shaped veggie pieces prominently on top. Add a plastic spider ring or black olive spider if desired.
- Add Final Touches: If using a black olive spider, slice an olive in half lengthwise for the body and cut the other half into thin strips for legs. Place on the spider web. Optionally sprinkle paprika or black sesame seeds over the dip.
- Chill Before Serving: Cover assembled tray with plastic wrap and refrigerate for 15-20 minutes before serving to keep veggies crisp and dip firm.
Notes
For extra crunch, soak carrot and celery sticks in ice water for 10 minutes before assembling. Pat dry thoroughly. The ranch dip tastes better after chilling for a few hours. Make ahead: prepare dip and cut veggies up to 24 hours in advance; assemble tray no more than 1 hour before serving.
Nutrition
- Serving Size: 1 cup of veggies wit
- Calories: 120
- Sugar: 5
- Sodium: 320
- Fat: 8
- Saturated Fat: 3
- Carbohydrates: 10
- Fiber: 3
- Protein: 2
Keywords: Halloween, veggie tray, ranch dip, spider web, kid-friendly, healthy snack, party appetizer


