“Why can’t we just draw faces on the fruit?” my nephew asked, holding a banana like it was a magic wand. I was in the middle of explaining how we’d carefully arrange a fruit platter for his Halloween party, complete with spooky shapes and elaborate designs. I stopped mid-sentence. Honestly, I had a whole plan in my head—cutting apples into bat wings, arranging grapes into spider shapes. It was going to be complicated. But he was six, and he had a point. Why make it harder than it needed to be?
I started to explain why that wouldn’t work—then stopped. I mean, who was I to argue with pure, unfiltered logic? So I handed him the knife (the kid-safe one, don’t worry) and let him go to town. What came out of that afternoon was something I never expected: a tray of fruit that looked like a bunch of friendly monsters, and a kid who felt like a total rockstar in the kitchen. The bananas became mouths, the blueberries turned into eyes, and suddenly, we had a fruit tray that was more fun than any candy bowl.
That was two Halloweens ago, and let me tell you, that Kid-Approved Halloween Fruit Tray with Monster Faces has been a staple ever since. It’s not just about the cute factor—though, honestly, seeing a strawberry with googly eyes never gets old. It’s about the moment when my nephew looked at me and said, “See? I told you.” He was right. And I was happy to be wrong. Maybe you’ve been there—trying to make something perfect for the kids, only to realize they already know exactly what they want. This recipe is for those moments.
Why You’ll Love This Recipe
This isn’t just another fruit platter. This is the one that makes your kids actually excited about eating healthy on Halloween night. I’ve tested this with my own family, with neighbor kids, and even with a classroom of skeptical first-graders. The verdict? It’s a total win.
- Quick & Easy: You can put this together in under 20 minutes. Seriously. No baking, no boiling, no waiting around.
- Simple Ingredients: You probably already have most of this stuff in your fridge. Bananas, apples, grapes, berries—the usual suspects.
- Perfect for Halloween Parties: Whether it’s a school party, a neighborhood gathering, or just a fun dinner at home, this tray is a showstopper.
- Crowd-Pleaser: Kids love it because it’s fun. Adults love it because it’s not another bag of candy. Everyone wins.
- Unbelievably Delicious: The combination of fresh fruit with a simple yogurt dip or peanut butter spread? It’s comfort food that’s actually good for you.
What makes this recipe different from all the other fruit trays out there? It’s the monster faces. Instead of just arranging fruit nicely, you’re creating little characters. Each piece of fruit becomes a canvas. A banana slice becomes a mouth. A blueberry becomes an eye. A strawberry becomes a monster’s head. It’s interactive, it’s creative, and it’s the kind of thing that makes kids say, “Can we make this again?”
This recipe isn’t just good—it’s the kind that makes you close your eyes after the first bite. It’s Halloween fun reimagined: healthier, faster, but with the same soul-soothing satisfaction. Perfect for impressing the kids without stress, or turning a simple snack into something memorable.
What Ingredients You Will Need
This recipe uses simple, wholesome ingredients to deliver bold flavor and satisfying texture without the fuss. Most of these are pantry staples you probably already have on hand. Here’s what you’ll need to create your monster faces:
For the Fruit Base
- Bananas, 2 large, peeled and sliced into rounds (use ripe but firm bananas for best results)
- Apples, 2 medium, cored and cut into thin wedges (I prefer Honeycrisp or Gala for sweetness)
- Strawberries, 1 cup, hulled and halved (look for bright red, firm berries)
- Blueberries, 1/2 cup, fresh (these make perfect monster eyes)
- Green grapes, 1 cup, washed and halved (seedless, please)
- Mandarin oranges, 1 can (drained) or 2 fresh clementines, peeled and segmented
- Kiwi, 2, peeled and sliced into rounds (adds a nice green color for monster skin)
For the Monster Faces (Edible Decorations)
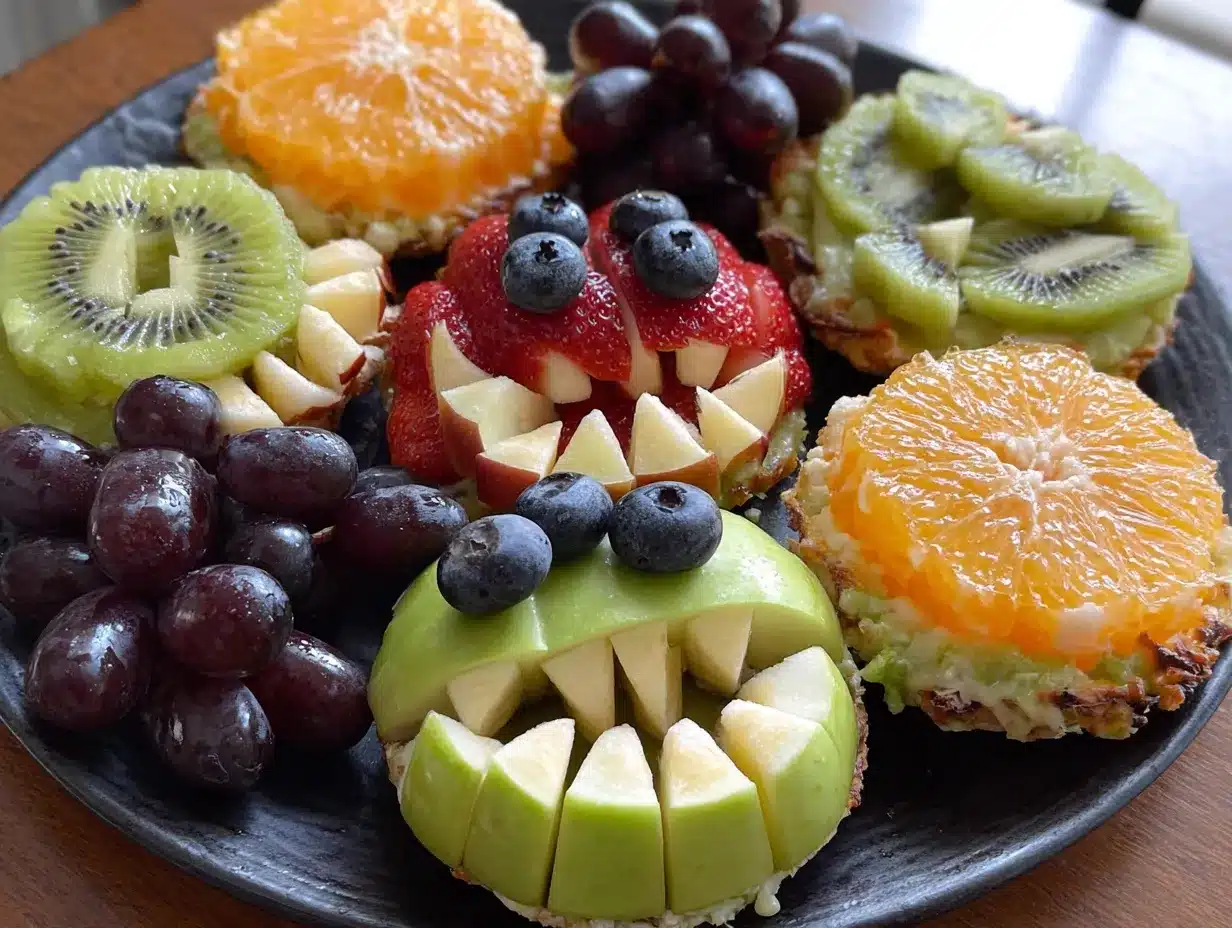
- Sunflower seed butter or peanut butter, 1/4 cup (acts as “glue” for the faces)
- Greek yogurt, 1/2 cup, plain (for dipping and adding “monster teeth”)
- Mini chocolate chips, 2 tablespoons (for pupils or freckles—optional)
- Shredded coconut, 1/4 cup (unsweetened, for “monster fur” or hair)
- Pomegranate seeds, 1/4 cup (look like little monster warts—kids love this)
For the Dip (Optional but Recommended)
- Honey, 1 tablespoon (for sweetness)
- Vanilla extract, 1/2 teaspoon (adds warmth)
- Cinnamon, a pinch (optional, for flavor depth)
I recommend using Justin’s Classic Peanut Butter or SunButter for the best texture when sticking fruit pieces together. If you’re feeding a crowd with allergies, sunflower seed butter works perfectly and doesn’t trigger nut allergies. For the yogurt dip, I prefer Fage Total Plain Greek Yogurt because it’s thick and holds up well.
When selecting bananas, look for ones that are yellow with just a few brown spots—too green and they won’t be sweet, too brown and they’ll get mushy when you try to cut them. For the apples, a crisp variety like Fuji or Granny Smith (if you want a tart contrast) works great. In summer, you can swap in fresh peaches or nectarines instead of mandarin oranges.
Equipment Needed
You don’t need fancy tools for this recipe. Here’s what you’ll need:
- Cutting board: A large, sturdy one. I’ve used the same bamboo board for years, and it’s perfect.
- Sharp paring knife: For cutting fruit into thin slices and shapes. A kid-safe knife works too if little hands are helping.
- Small cookie cutters: Optional, but fun for cutting apple slices into star or bat shapes. I found a set at the dollar store that works great.
- Melon baller: Not necessary, but handy for scooping out small rounds from melon or apple if you want round monster eyes.
- Large serving platter: A white or dark-colored platter makes the fruit colors pop. I use a round white platter from IKEA.
- Small bowls: For the dip and for holding individual fruit pieces while you assemble.
- Toothpicks: For securing tricky monster features (like attaching a blueberry “nose” to a banana slice).
If you don’t have cookie cutters, don’t worry. You can freehand cut shapes with a knife—monster faces don’t need to be perfect. In fact, the wonkier they look, the more character they have. I once forgot my melon baller and used a teaspoon instead. Worked like a charm.
Preparation Method
Alright, let’s get to the fun part. Here’s how to make your Kid-Approved Halloween Fruit Tray with Monster Faces:
Step 1: Prep Your Fruit (5 minutes)
Wash all your fruit thoroughly. Pat them dry with a clean towel—wet fruit makes it harder for the “glue” to stick. Peel the bananas and slice them into rounds about 1/2-inch thick. Core the apples and cut them into thin wedges. Hull the strawberries and halve them. Halve the green grapes. Peel and slice the kiwi into rounds. If using mandarin oranges, drain the can or peel and segment fresh clementines.
Step 2: Make the Monster “Glue” (2 minutes)
In a small bowl, mix the sunflower seed butter (or peanut butter) with a tablespoon of Greek yogurt. This creates a paste that will hold your monster features together. It should be thick but spreadable—think peanut butter consistency. If it’s too thick, add a tiny splash of water. Set aside.
Step 3: Make the Yogurt Dip (2 minutes)
In another small bowl, combine the remaining Greek yogurt with honey, vanilla extract, and a pinch of cinnamon if using. Stir until smooth. This dip goes in the center of your platter. Kids love dipping the monster faces into it.
Step 4: Assemble the Monster Faces (10 minutes)
This is where the magic happens. Arrange your fruit on the platter in little clusters—each cluster is one monster face. Here’s how to build them:
- Basic Monster Face: Place a strawberry half (cut side down) as the head. Use two small dollops of the peanut butter mixture to attach two blueberry “eyes.” Use a thin slice of banana for a mouth, and two small grape halves for ears.
- Banana Monster: Use a banana round as the base. Spread a tiny bit of the “glue” on top, then add a blueberry nose and two mini chocolate chip pupils. Use a thin sliver of apple for a smile.
- Kiwi Monster: Place a kiwi round on the platter. Use two small dollops of yogurt to attach pomegranate seeds as eyes. Use a thin slice of mandarin orange for a mouth. Add shredded coconut around the edges for “fur.”
- Apple Monster: Use an apple wedge as the body. Spread a thin layer of the peanut butter mixture on the flat side. Add three blueberry “buttons” down the center. Use two grape halves as eyes at the top.
Pro tip: If a feature won’t stay put, use a toothpick to secure it. Just remember to remove toothpicks before serving to little ones!
Step 5: Arrange on the Platter (3 minutes)
Place the bowl of yogurt dip in the center of your platter. Arrange the monster faces around it in a circle or scattered pattern. Fill any gaps with extra fruit—grapes, berries, and orange segments work well. The goal is to make it look full and inviting.
Step 6: Add Final Touches (2 minutes)
Sprinkle any remaining pomegranate seeds or shredded coconut over the platter for a “spooky” effect. If you have extra mini chocolate chips, scatter a few around for “monster footprints.” Serve immediately or refrigerate until ready.
Cooking Tips & Techniques
I’ve made this tray more times than I can count, and I’ve learned a few things the hard way. Here are my best tips:
Prep everything before you start assembling. I once tried to cut fruit and assemble at the same time, and let me tell you—it was chaos. The bananas started browning, the kids got impatient, and I ended up with a half-finished monster that looked more like a sad blob. Now I prep all the fruit first, then assemble. It saves time and keeps everything looking fresh.
Use a damp paper towel under your cutting board. This keeps the board from sliding around, especially if you have little helpers. Safety first, right?
Don’t overthink the faces. The first time I made this, I tried to make each monster look perfect. They ended up looking stressed. Kids don’t care if the eyes are uneven or the mouth is crooked. In fact, the wonkier they are, the more personality they have. Embrace the chaos.
Keep the fruit cold. If you’re making this ahead of time, keep the assembled tray in the fridge, covered with plastic wrap. The cold helps the peanut butter “glue” stay firm. Just take it out 10 minutes before serving so the fruit isn’t ice-cold.
Browning bananas? If your banana slices start to brown, give them a quick spritz with lemon juice mixed with water (about 1 tablespoon lemon juice to 1 cup water). It won’t affect the taste, and it keeps them looking bright for hours.
Multitasking tip: While the kids are helping with the monster faces, you can whip up the yogurt dip and set out the platter. It’s a great way to keep them occupied while you handle the “boring” prep work.
Variations & Adaptations
This recipe is super flexible. Here are some ways to switch it up:
Dietary Variations
- Nut-Free: Use sunflower seed butter or WowButter instead of peanut butter. The texture is almost identical, and it’s safe for school parties.
- Dairy-Free: Swap the Greek yogurt with coconut yogurt or a dairy-free alternative. The dip will still be creamy and delicious.
- Low-Sugar: Skip the honey in the dip and use a pinch of stevia or just leave it plain. The fruit is sweet enough on its own.
Seasonal Variations
- Fall: Add slices of fresh pear or pomegranate seeds for a harvest feel. Cinnamon in the dip feels extra cozy.
- Winter: Use blood oranges and star fruit for a festive look. The colors are gorgeous.
- Summer: Swap in fresh peaches, nectarines, and watermelon. The monster faces will look even more vibrant.
Flavor Twists
- Chocolate Monster: Add a drizzle of melted dark chocolate over the fruit before serving. It’s still healthy-ish, and kids go nuts for it.
- Spooky Eyes: Use googly-eye edible candy decorations instead of blueberries. You can find them at baking supply stores.
- Monster Hair: Instead of shredded coconut, use finely chopped dried mango or apricot for a different texture.
I once tried a version with dragon fruit (the pink kind with white spots) and the kids called it “alien monster skin.” It was a hit. Don’t be afraid to experiment with whatever fruit looks good at the store.
Serving & Storage Suggestions
This tray is best served cold or at room temperature. I like to serve it as a centerpiece at Halloween parties—it’s the first thing people grab. For a school party, arrange the monster faces on individual plates or in small cups so each kid gets their own.
What to serve with it: This fruit tray pairs beautifully with a side of popcorn (for a salty-sweet combo) or some cheese cubes. For a full Halloween spread, add some veggie monsters (cucumber rounds with cream cheese faces) and maybe some spooky punch.
Storage: If you have leftovers (which is rare in my house), store the fruit in an airtight container in the fridge. The monster faces will get a little messy, but the fruit itself stays good for 1-2 days. Separate the dip and store it in a small jar—it’ll last up to 3 days.
Reheating: You don’t need to reheat anything here, but if the fruit has been in the fridge for a while, let it sit at room temperature for 10 minutes before serving. The flavors are more pronounced when the fruit isn’t ice-cold.
Flavor development: Honestly, this tray tastes best the day you make it. The fruit is freshest, and the monster faces look their cutest. But the dip actually gets better after a day in the fridge—the flavors meld together beautifully.
Nutritional Information & Benefits
Here’s the thing: this recipe is basically a fruit platter with a fun twist. It’s packed with vitamins, fiber, and antioxidants. Here’s a rough breakdown per serving (about 1 cup of fruit with 2 tablespoons of dip):
| Nutrient | Amount per Serving |
|---|---|
| Calories | 180-220 |
| Total Fat | 6-8g |
| Saturated Fat | 1g |
| Carbohydrates | 30-35g |
| Fiber | 4-5g |
| Sugar | 20-25g (natural from fruit) |
| Protein | 4-6g |
| Vitamin C | 60% DV |
| Potassium | 10% DV |
Health benefits: The bananas provide potassium for muscle function, the apples offer fiber for digestion, and the berries are loaded with antioxidants. The yogurt dip adds probiotics for gut health. It’s a snack that actually fuels your kids instead of sending them on a sugar crash.
Dietary considerations: This recipe is naturally gluten-free, vegetarian, and can be made vegan with a simple swap. The only potential allergens are nuts (if using peanut butter) and dairy (if using Greek yogurt). Always check labels if you’re serving a crowd with allergies.
Conclusion
This Kid-Approved Halloween Fruit Tray with Monster Faces is more than just a snack—it’s a memory. It’s the kind of thing your kids will remember making with you, the kind of thing that makes Halloween feel special without relying on mountains of candy. I still think about that afternoon with my nephew, watching him carefully place a blueberry eye on a banana slice, his tongue sticking out in concentration. He was so proud of what he made. And honestly, so was I.
I hope you give this recipe a try, and I hope you let the kids take the lead. Don’t worry if the monsters look a little silly—that’s the whole point. Customize it with whatever fruit you have on hand, and don’t be afraid to get creative. If your kids come up with a monster face that’s totally wild, I want to hear about it!
Drop a comment below and tell me about your favorite monster creation. Or share a photo on Pinterest and tag me—I love seeing what you come up with. Until next time, happy Halloween and happy snacking!
Frequently Asked Questions
Can I make this fruit tray the night before?
You can prep the fruit the night before, but I recommend assembling the monster faces the day of. The fruit stays fresher, and the peanut butter “glue” works better when it’s freshly applied. If you must assemble ahead, cover the tray tightly with plastic wrap and refrigerate. Add the dip just before serving.
What if my child has a nut allergy?
No problem at all! Use sunflower seed butter or WowButter instead of peanut butter. They have the same sticky texture and work perfectly as “glue.” Just double-check the label to make sure it’s processed in a nut-free facility if needed.
How do I keep the banana slices from turning brown?
Give the banana slices a quick spritz with a mixture of 1 tablespoon lemon juice and 1 cup water. It won’t affect the taste, and it keeps them looking bright for hours. You can also use lime juice for a slightly different flavor.
Can I use frozen fruit?
I don’t recommend it for the monster faces themselves, because frozen fruit gets mushy when it thaws. But you can use frozen berries for the dip or as a background filler on the platter. Just make sure to thaw and drain them well first.
How many servings does this recipe make?
This recipe makes about 8-10 servings, depending on how many monster faces you create. If you’re serving a big crowd, just double the ingredients. The assembly time stays about the same—it’s the prep that takes a little longer.
Pin This Recipe!
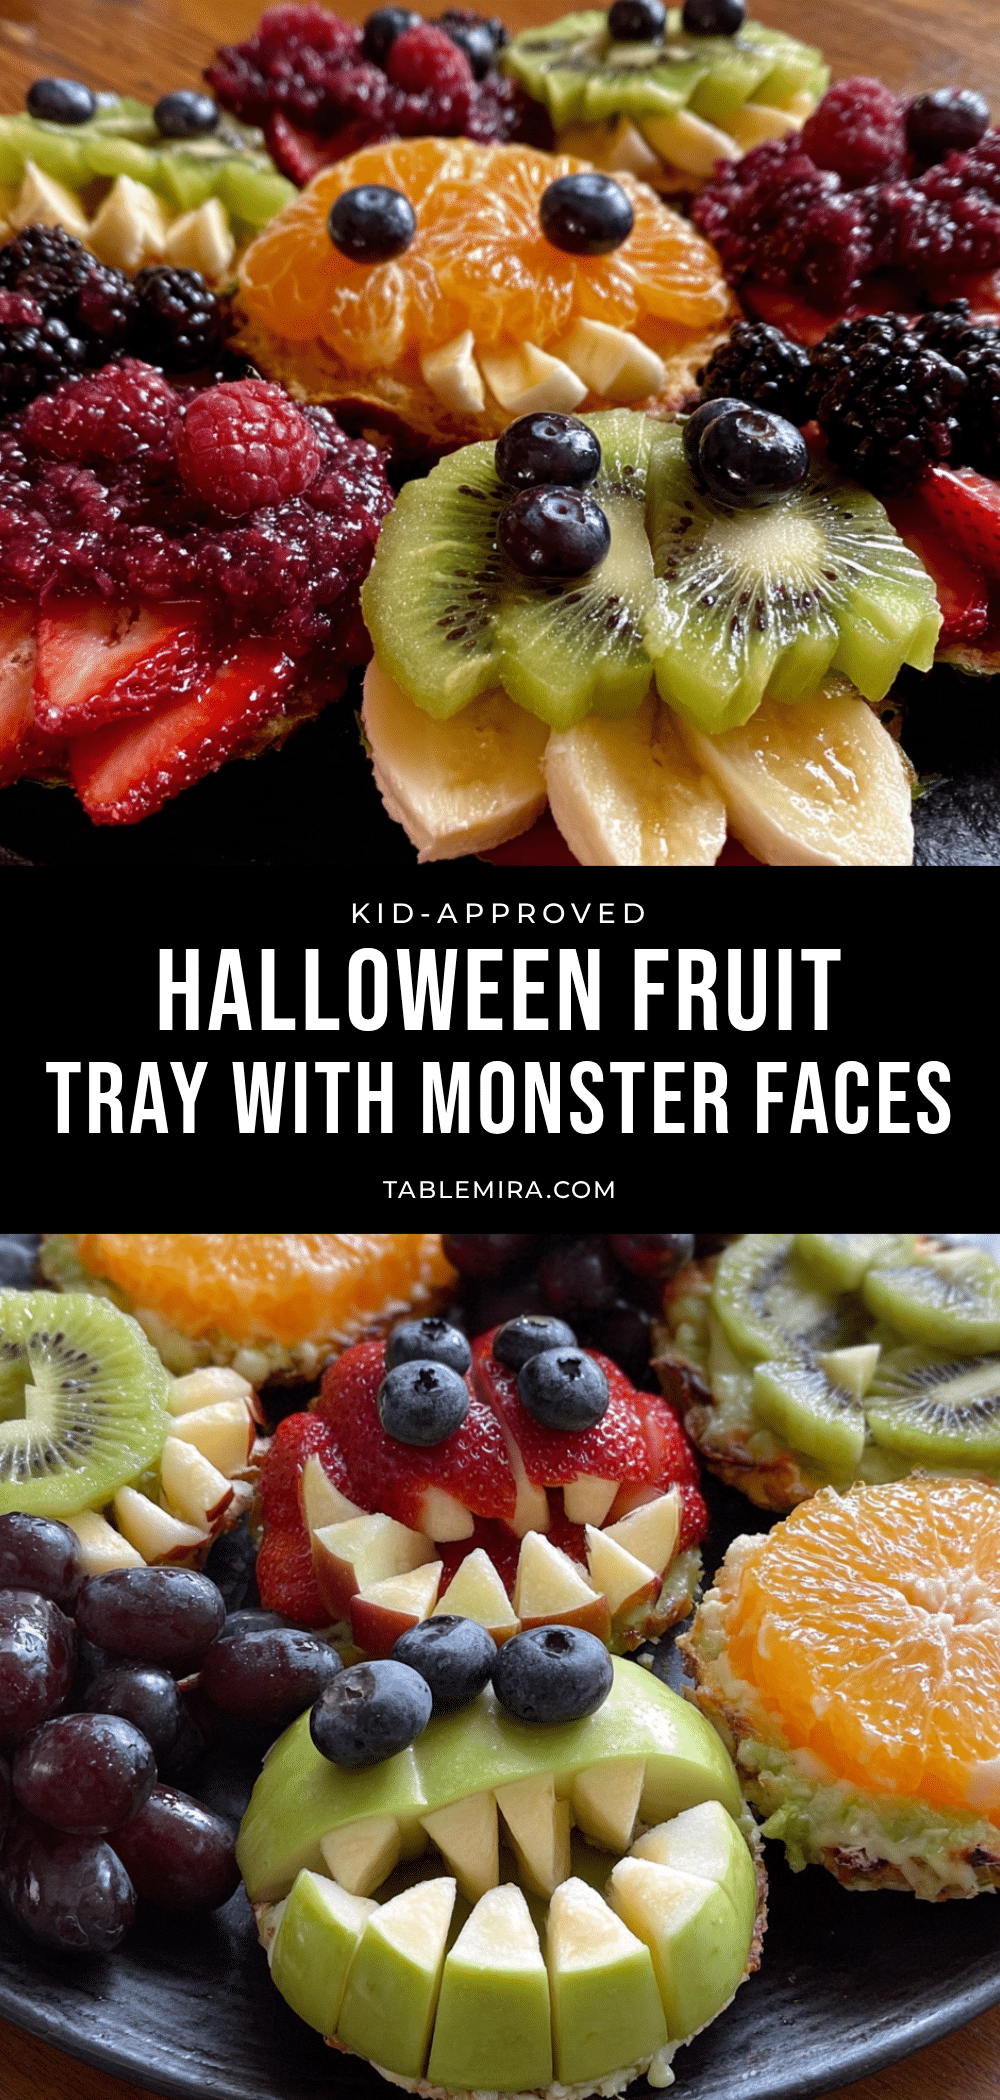
Kid-Approved Halloween Fruit Tray Easy Monster Faces
A fun and healthy Halloween snack featuring fruit arranged into friendly monster faces. Quick to assemble with simple ingredients, this kid-approved tray is perfect for parties and makes healthy eating exciting.
- Prep Time: 15 minutes
- Cook Time: 0 minutes
- Total Time: 15 minutes
- Yield: 8-10 servings 1x
- Category: Snack
- Cuisine: American
Ingredients
- 2 large bananas, peeled and sliced into rounds
- 2 medium apples (Honeycrisp or Gala), cored and cut into thin wedges
- 1 cup strawberries, hulled and halved
- 1/2 cup fresh blueberries
- 1 cup green grapes, washed and halved
- 1 can mandarin oranges (drained) or 2 fresh clementines, peeled and segmented
- 2 kiwi, peeled and sliced into rounds
- 1/4 cup sunflower seed butter or peanut butter
- 1/2 cup plain Greek yogurt
- 2 tablespoons mini chocolate chips (optional)
- 1/4 cup unsweetened shredded coconut
- 1/4 cup pomegranate seeds
- 1 tablespoon honey
- 1/2 teaspoon vanilla extract
- Pinch of cinnamon (optional)
Instructions
- Wash all fruit thoroughly and pat dry. Peel bananas and slice into 1/2-inch rounds. Core apples and cut into thin wedges. Hull strawberries and halve. Halve green grapes. Peel and slice kiwi into rounds. Drain mandarin oranges or peel and segment clementines.
- In a small bowl, mix sunflower seed butter (or peanut butter) with 1 tablespoon Greek yogurt to create a thick, spreadable paste (the ‘monster glue’).
- In another small bowl, combine remaining Greek yogurt with honey, vanilla extract, and a pinch of cinnamon (if using). Stir until smooth to make the yogurt dip.
- Assemble monster faces on a large serving platter: For a basic monster, place a strawberry half (cut side down) as the head. Use small dollops of the peanut butter mixture to attach two blueberry ‘eyes.’ Add a thin banana slice for a mouth and two grape halves for ears. For a banana monster, use a banana round as the base, spread a bit of ‘glue’ on top, add a blueberry nose and mini chocolate chip pupils, and use a thin apple sliver for a smile. For a kiwi monster, place a kiwi round, use yogurt…
- Place the bowl of yogurt dip in the center of the platter. Arrange monster faces around it in a circle or scattered pattern. Fill gaps with extra fruit (grapes, berries, orange segments).
- Sprinkle remaining pomegranate seeds or shredded coconut over the platter for a spooky effect. Scatter extra mini chocolate chips as ‘monster footprints.’ Serve immediately or refrigerate until ready.
Notes
Prep all fruit before assembling to prevent browning. Use a damp paper towel under the cutting board for stability. Don’t overthink the faces—wonky monsters have more personality. Keep assembled tray refrigerated if making ahead; remove 10 minutes before serving. To prevent banana browning, spritz with lemon juice and water mixture (1 tbsp lemon juice to 1 cup water).
Nutrition
- Serving Size: 1 cup of fruit with
- Calories: 200
- Sugar: 23
- Sodium: 50
- Fat: 7
- Saturated Fat: 1
- Carbohydrates: 33
- Fiber: 5
- Protein: 5
Keywords: Halloween fruit tray, monster faces, kid-friendly, healthy Halloween snack, fruit platter


