There used to be a little diner on Route 9, just past the old hardware store, that made the most perfect chicken nuggets. Not the frozen, shapeless kind, but real, hand-cut chicken with a crust so shatteringly crispy it made the most beautiful sound when you bit into it. When they closed down to make way for a gas station—honestly, I was heartbroken. My kids were even more devastated. After twelve tries—some were burnt, some were soggy, some were just sad—I finally cracked the code. This recipe is that exact golden, crunchy magic, made right in your air fryer.
I remember the Tuesday I finally nailed it. My youngest, who usually picks at his dinner, ate twelve nuggets without saying a word. Then he looked up with crumbs all over his face and said, “Mom, these are better than the diner.” That was the moment I knew I had to share this. If you’ve been chasing that perfect homemade nugget that’s actually crispy on the outside and juicy on the inside, let me tell you—this is it. No deep frying, no mess, just pure, budget-friendly comfort food.
Why You’ll Love This Recipe
Let’s be real—feeding a family on a budget while trying to keep everyone happy is no small feat. These air fryer chicken nuggets solve that problem beautifully. They’re quick, they’re cheap, and they’re the kind of thing that makes you feel like a kitchen rockstar without breaking a sweat.
- Quick & Easy: From start to finish, you’re looking at about 25 minutes. Perfect for those nights when soccer practice runs late and everyone is hangry.
- Simple Ingredients: No weird additives, no preservatives, no trips to specialty stores. You probably have most of this stuff in your pantry right now.
- Perfect for Family Meals: These nuggets are a weeknight hero. They’re also fantastic for lunchboxes, birthday parties, or even a lazy Sunday snack.
- Crowd-Pleaser: I’ve served these to picky toddlers, skeptical teenagers, and grown adults who claim they don’t like chicken nuggets. They all disappear.
- Unbelievably Delicious: The secret is in the double-dredge technique—it creates that shatteringly crisp crust that stays crunchy even after cooling down.
What makes this recipe different? It’s the combination of panko breadcrumbs and a tiny bit of grated Parmesan in the coating. That little trick adds a savory depth that store-bought nuggets just can’t touch. Plus, the air fryer gives you that deep-fried texture without the gallon of oil. Honestly, this is comfort food reimagined—healthier, faster, but with the same soul-soothing satisfaction.
What Ingredients You Will Need
This recipe uses simple, wholesome ingredients to deliver big flavor. Most of these are pantry staples, which is exactly what you want when you’re feeding a hungry crew on a Tuesday night.
For the Chicken
- 1 ½ pounds boneless, skinless chicken breasts (about 3 medium breasts) — cut into 1-inch cubes. I prefer buying whole breasts and cutting them myself; it’s cheaper and you control the size.
- 1 teaspoon salt — use fine sea salt for even seasoning.
- ½ teaspoon black pepper — freshly ground if you have it.
- ½ teaspoon garlic powder — not garlic salt, we’re watching the sodium here.
- ½ teaspoon paprika — sweet or smoked, both work great. Adds color and a mild warmth.
For the Coating
- 1 cup all-purpose flour — this is the first layer that helps the egg stick.
- 2 large eggs — beaten until frothy. Room temperature eggs work best for even coating.
- 1 ½ cups panko breadcrumbs — these are non-negotiable for that ultra-crispy texture. Regular breadcrumbs just don’t cut it.
- ¼ cup grated Parmesan cheese — the kind in the green can works fine, but freshly grated adds even more flavor. (Adds richness and helps the crust brown beautifully.)
- 1 teaspoon Italian seasoning — optional, but it adds a lovely herbaceous note.
- Olive oil spray — or any cooking spray. This is what makes them golden in the air fryer.
Substitution Guidance: If you need a gluten-free version, swap the flour for a 1:1 gluten-free baking blend and use gluten-free panko. For a dairy-free option, skip the Parmesan or use a vegan alternative. I’ve tried both, and they work surprisingly well—just keep an eye on the cooking time as gluten-free coatings can brown faster.
I recommend using Kikkoman panko breadcrumbs for the best texture—they’re consistently light and flaky. And for the chicken, look for breasts that are plump and uniform in thickness so they cook evenly. If you’re buying in bulk, like I do from Costco, just portion them out and freeze what you don’t use.
Equipment Needed
You don’t need a fancy kitchen to make these nuggets. Here’s what you’ll need:
- Air fryer — any brand works. I use a 5.8-quart basket style, which fits a full batch without overcrowding.
- Cutting board and sharp knife — for dicing the chicken into uniform pieces.
- Three shallow bowls — for the flour, egg, and breadcrumb mixture. I use pie plates; they’re the perfect size.
- Tongs or a fork — for transferring the coated nuggets without making a mess.
- Measuring spoons and cups — for accuracy, though after a few times you’ll do it by eye.
- Spray bottle with oil — I prefer a refillable Misto sprayer; it’s cheaper and more eco-friendly than canned spray.
Budget-friendly tip: If you don’t have an air fryer, you can bake these on a wire rack set over a baking sheet at 425°F for 12-15 minutes. They won’t be quite as crispy, but they’re still delicious. I’ve also made them in a deep fryer at 375°F for 4 minutes—perfect for a party crowd.
One thing I learned the hard way: don’t skip the oil spray. The first time I made these, I thought the air fryer would do all the work. They came out pale and sad. A light spritz of oil is what gives them that golden, restaurant-quality color.
Preparation Method
Let’s get cooking. This method is foolproof if you follow the steps. Trust me, I’ve tested it more times than I care to admit.
- Prep the chicken: Cut the chicken breasts into 1-inch cubes. Try to make them all the same size so they cook evenly. Pat them dry with paper towels—this helps the seasoning stick. In a medium bowl, toss the chicken pieces with salt, pepper, garlic powder, and paprika. Let them sit for 5 minutes while you set up your dredging station.
- Set up your bowls: In the first shallow bowl, add the flour. In the second bowl, beat the eggs until frothy. In the third bowl, mix the panko breadcrumbs, grated Parmesan, and Italian seasoning. Stir the breadcrumb mixture with a fork to combine everything evenly.
- Dredge the chicken: Working in batches, take a piece of chicken and coat it in the flour. Shake off any excess—you want a thin, even layer. Then dip it into the beaten eggs, letting any excess drip off. Finally, press it into the panko mixture, making sure it’s fully coated. I like to use one hand for the dry ingredients and one for the wet to keep from getting too messy. Place the coated nuggets on a plate or baking sheet while you finish the rest.
- Preheat the air fryer: Set your air fryer to 400°F and let it preheat for 3 minutes. This step is crucial—starting with a hot air fryer ensures the crust sets immediately and doesn’t get soggy.
- Arrange the nuggets: Lightly spray the air fryer basket with oil. Place the nuggets in a single layer, making sure they’re not touching. You want air to circulate around each piece. Depending on the size of your air fryer, you may need to cook in 2-3 batches. Don’t overcrowd—I learned this the hard way when I tried to cram them all in and ended up with steamed nuggets instead of crispy ones.
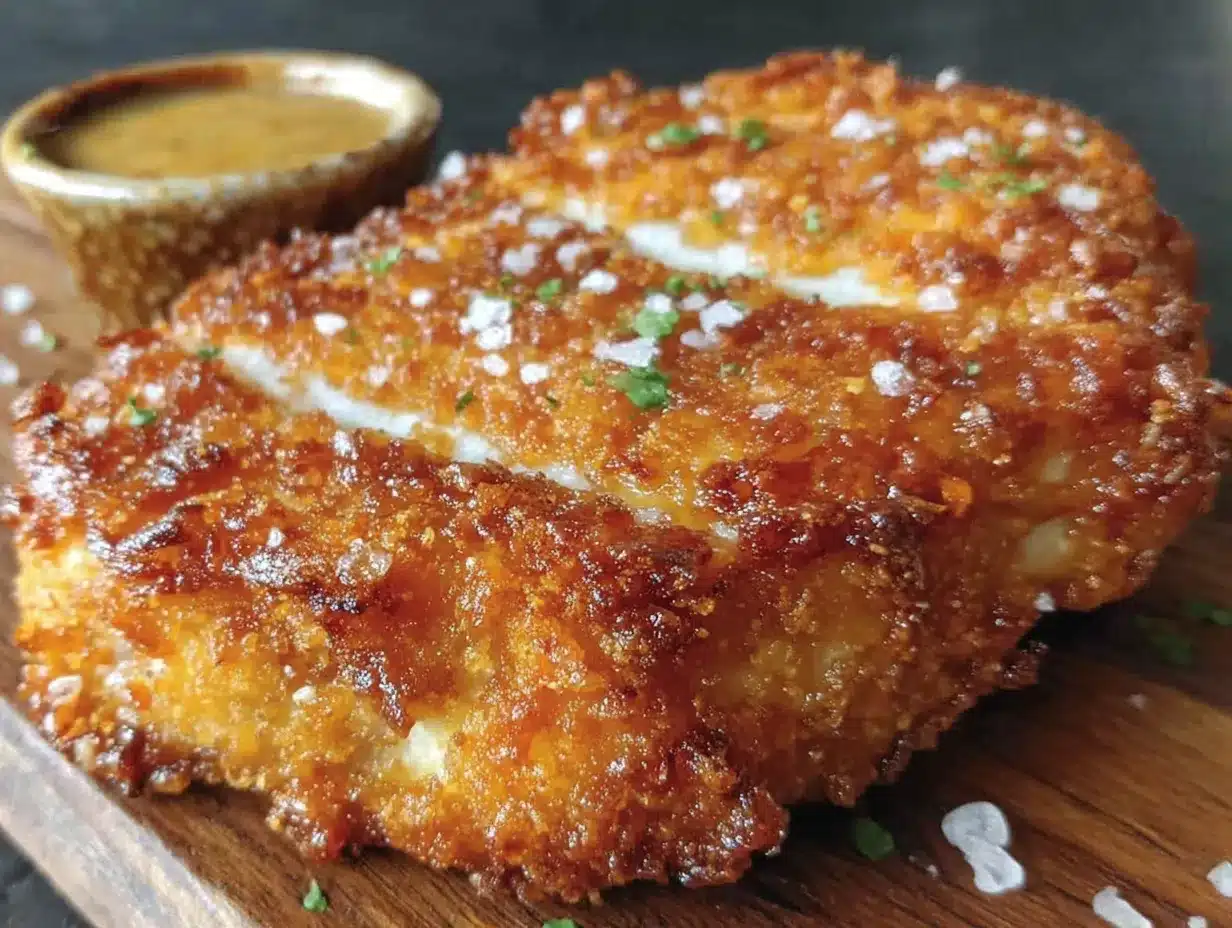
- Spray and cook: Lightly spray the tops of the nuggets with oil. This is what gives them that gorgeous golden color. Cook at 400°F for 8 minutes. Flip each nugget with tongs, spray the other side lightly, and cook for another 4-5 minutes, until the internal temperature reaches 165°F and the crust is deep golden brown.
- Rest and serve: Let the nuggets rest in the air fryer basket for 2 minutes after cooking. This helps the crust set and prevents it from falling off when you bite into them. Transfer to a serving plate and serve immediately with your favorite dipping sauces.
Sensory cues: When you flip the nuggets at the 8-minute mark, you should see a beautiful golden-brown crust on the bottom. The kitchen will smell like a cozy diner—warm, savory, and slightly cheesy from the Parmesan. When they’re done, the nuggets should feel firm to the touch and make a slight tapping sound when you shake the basket.
Troubleshooting tip: If your nuggets are browning too quickly but aren’t cooked through, reduce the temperature to 375°F and add 2-3 minutes of cooking time. Every air fryer runs a little differently—mine runs hot, so I’ve learned to adjust.
Cooking Tips & Techniques
After making these nuggets dozens of times, I’ve picked up a few tricks that make a real difference. Here’s what I wish I knew from the start:
Don’t skip the drying step. Patting the chicken dry before seasoning is non-negotiable. Wet chicken makes the flour coating turn into a paste, and that ruins the crispiness. I learned this after my first batch came out with a weird, gummy coating. Never again.
Use your hands for the panko coating. Tongs just don’t give you the control you need. Press the breadcrumbs firmly into the chicken—this helps them adhere and creates that craggy, crunchy surface. My kids actually love helping with this step; it’s messy but fun.
Work in small batches. I know it’s tempting to load up the air fryer, but overcrowding is the number one reason nuggets turn out soft. Give them room to breathe. If you’re feeding a crowd, keep the cooked nuggets warm in a 200°F oven on a wire rack while you finish the rest.
Double spray for extra crunch. I spray the nuggets before the first cook, flip them, and spray again. That double hit of oil is what gives you that deep-fried texture without the deep fryer. It’s a small step that makes a huge difference.
Let them rest. I know it’s hard to wait, especially when the kids are circling the kitchen like hungry sharks, but letting the nuggets rest for 2 minutes after cooking helps the crust set. If you serve them immediately, the steam trapped inside can make the coating soggy.
One mistake I still make: Sometimes I forget to shake off the excess flour before the egg wash. A thick flour layer turns into a pasty barrier that prevents the egg from sticking. Now I tap the chicken against the side of the bowl to remove any loose flour, and the coating comes out perfect every time.
Variations & Adaptations
One of the best things about this recipe is how flexible it is. Here are some variations I’ve tried and loved:
Spicy Buffalo Nuggets
Add 1 tablespoon of buffalo sauce to the beaten eggs and increase the paprika to 1 teaspoon. Serve with ranch or blue cheese dressing for dipping. My husband loves these for game day—they’re a hit with the adults while the kids stick to the original.
Parmesan Herb Nuggets
Increase the Parmesan to ½ cup and add 1 teaspoon dried parsley and ½ teaspoon dried thyme to the panko mixture. This version is extra savory and pairs beautifully with marinara sauce. It’s my go-to when I want to pretend I’m serving something fancy.
Gluten-Free Nuggets
Use a 1:1 gluten-free flour blend instead of all-purpose flour and gluten-free panko breadcrumbs. I’ve tested this with King Arthur’s blend and it works perfectly. The texture is slightly less crispy, but still delicious. My gluten-sensitive friend requests these every time she comes over.
Baked Version
No air fryer? No problem. Place the nuggets on a wire rack set over a baking sheet, spray with oil, and bake at 425°F for 12-15 minutes, flipping halfway through. The wire rack is key—it allows hot air to circulate underneath, preventing the bottoms from getting soggy.
Kid-Friendly Customization
Let the kids help shape the nuggets into fun shapes using cookie cutters. Stars, dinosaurs, hearts—whatever makes them excited to eat. My daughter loves the star-shaped ones, and honestly, they taste better when you’ve helped make them.
For picky eaters, I’ve also tried adding a tablespoon of finely grated carrot or zucchini to the egg wash. It adds a tiny bit of nutrition without changing the flavor, and my kids have never noticed. Win-win.
Serving & Storage Suggestions
These nuggets are best served hot and fresh, right out of the air fryer. The crust is at its peak crunchiness within the first 15 minutes. Serve them with a variety of dipping sauces—ketchup, honey mustard, barbecue sauce, ranch, or even a simple squeeze of lemon for the adults.
For a complete meal, pair them with crispy sweet potato fries and a simple side salad. They’re also fantastic in wraps or on top of a Caesar salad for a quick lunch. My kids love them with mac and cheese—it’s the ultimate comfort food combo.
Storage: Leftover nuggets can be stored in an airtight container in the refrigerator for up to 3 days. To reheat, place them back in the air fryer at 375°F for 3-4 minutes. The microwave will make them soggy, so avoid it if you can. I’ve also reheated them in a toaster oven with good results.
Freezing: These nuggets freeze beautifully. After coating them, place them on a baking sheet in a single layer and freeze for 2 hours, until solid. Transfer to a freezer-safe bag or container. To cook from frozen, add 3-4 minutes to the cooking time and spray with oil as usual. They’re a lifesaver on busy nights when you need dinner in a hurry.
One thing I love about this recipe is that the flavors actually develop a bit overnight. The next day, the nuggets have a slightly deeper savory note, almost like they’ve marinated in their own deliciousness. Not that they usually last that long in my house.
Nutritional Information & Benefits
These homemade nuggets are a much healthier alternative to fast food or frozen versions. Here’s the approximate nutritional breakdown per serving (about 6 nuggets):
- Calories: 320
- Protein: 32g
- Carbohydrates: 22g
- Fat: 10g
- Saturated Fat: 3g
- Cholesterol: 145mg
- Sodium: 580mg
- Fiber: 1g
- Sugar: 1g
These numbers will vary based on the exact ingredients and portion sizes you use. The key benefit here is that you’re using real, whole chicken breasts instead of processed meat. You’re also controlling the sodium and avoiding preservatives and artificial flavors found in store-bought nuggets.
Chicken breast is an excellent source of lean protein, which supports muscle growth and keeps you feeling full longer. The Parmesan adds a small amount of calcium, and the air frying method significantly reduces the fat content compared to deep frying. For families watching their budget and their health, these nuggets are a win on both fronts.
Dietary considerations: This recipe is naturally nut-free and can be made gluten-free and dairy-free with simple substitutions. It’s also egg-free if you use a flax egg (1 tablespoon ground flaxseed mixed with 3 tablespoons water) in place of the beaten eggs, though the coating won’t be quite as crispy.
Conclusion
These kid-approved crispy air fryer chicken nuggets are proof that homemade doesn’t have to be complicated or expensive. They’re the kind of recipe that becomes a family staple—the one your kids will ask for by name, the one you’ll make without even thinking twice. From that long-gone diner on Route 9 to your kitchen table, this recipe carries a little bit of that magic with it.
I’d love to hear how these turn out for you. Did your kids give them the thumbs up? Did you try a fun variation? Drop a comment below and let me know—I read every single one and I honestly get so excited when someone tells me their family loved a recipe I shared. And if you’re looking for more easy, budget-friendly dinner ideas, don’t forget to check out my one-pan lemon chicken recipe—it’s another weeknight hero.
Happy cooking, friends. Here’s to full bellies and happy tables.
Frequently Asked Questions
Can I use chicken thighs instead of breasts?
Absolutely. Chicken thighs will give you a juicier, more flavorful nugget. Just increase the cooking time by 2-3 minutes since thighs are slightly thicker and have more fat. The coating might brown a little faster, so keep an eye on them.
Why did my coating fall off?
This usually happens for one of three reasons: the chicken wasn’t patted dry before seasoning, the flour layer was too thick, or you didn’t press the breadcrumbs firmly enough. Make sure to shake off excess flour and really press the panko into the chicken. Also, letting the nuggets rest for 2 minutes after cooking helps the coating set.
Can I make these ahead of time for a party?
Yes! You can coat the nuggets up to 24 hours in advance and keep them in the refrigerator on a baking sheet covered with plastic wrap. Cook them just before serving for the best texture. You can also fully cook them, let them cool, and reheat in the air fryer at 375°F for 3-4 minutes.
How do I know when the nuggets are fully cooked?
The safest way is to use an instant-read thermometer. Insert it into the thickest nugget; it should read 165°F. If you don’t have a thermometer, cut one open—the meat should be white all the way through with no pink, and the juices should run clear.
Can I use this coating for other foods?
Definitely. This breading works wonderfully on fish fillets, shrimp, tofu, or even vegetables like zucchini and cauliflower. Adjust the cooking time based on what you’re coating. For fish, cook at 375°F for 6-8 minutes; for tofu, press it first to remove moisture, then follow the same method as the chicken.
Pin This Recipe!
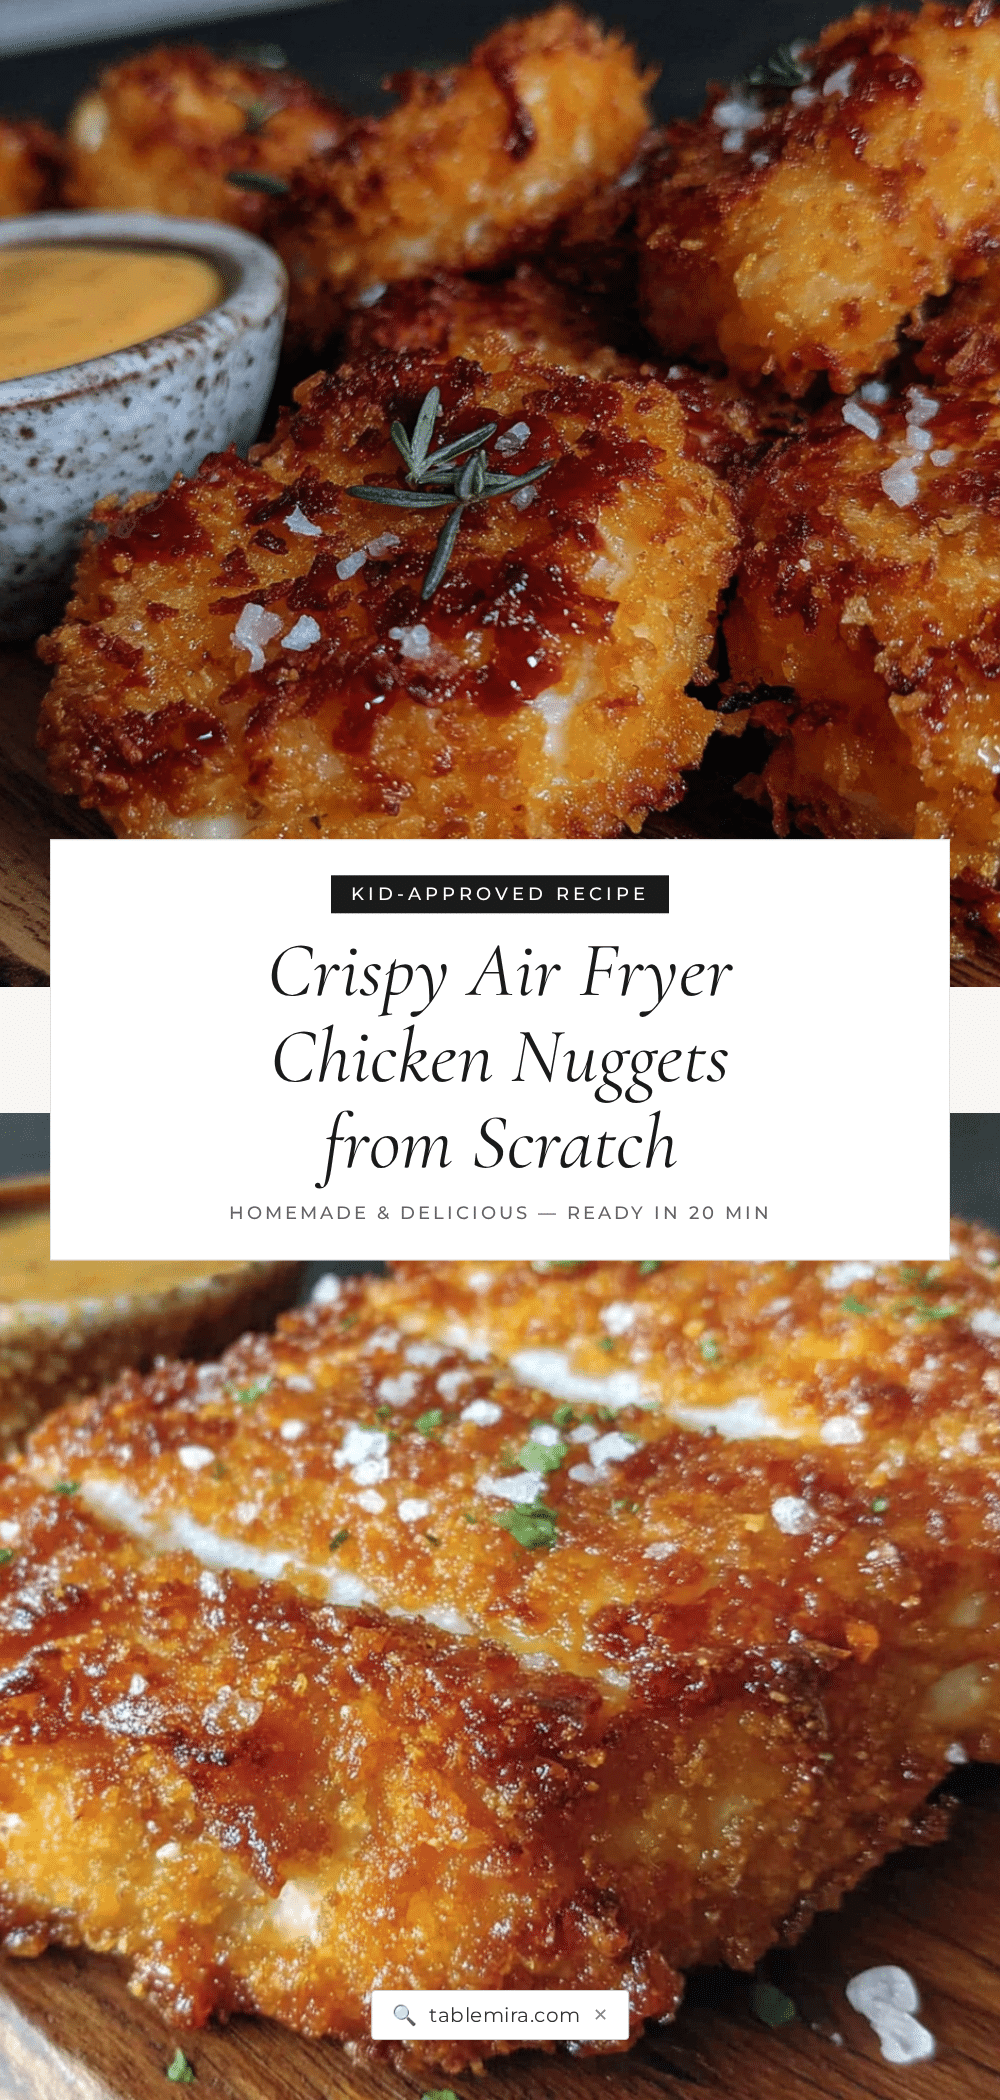
Kid-Approved Crispy Air Fryer Chicken Nuggets from Scratch
These homemade air fryer chicken nuggets are perfectly crispy on the outside and juicy on the inside, made with simple pantry ingredients. A family-friendly, budget-friendly weeknight dinner that comes together in just 25 minutes.
- Prep Time: 15 minutes
- Cook Time: 12 minutes
- Total Time: 27 minutes
- Yield: 4 servings 1x
- Category: Main Course
- Cuisine: American
Ingredients
- 1 ½ pounds boneless, skinless chicken breasts (about 3 medium breasts), cut into 1-inch cubes
- 1 teaspoon salt
- ½ teaspoon black pepper
- ½ teaspoon garlic powder
- ½ teaspoon paprika
- 1 cup all-purpose flour
- 2 large eggs, beaten
- 1 ½ cups panko breadcrumbs
- ¼ cup grated Parmesan cheese
- 1 teaspoon Italian seasoning (optional)
- Olive oil spray
Instructions
- Cut the chicken breasts into 1-inch cubes. Pat dry with paper towels. In a medium bowl, toss the chicken with salt, pepper, garlic powder, and paprika. Let sit for 5 minutes.
- Set up three shallow bowls: one with flour, one with beaten eggs, and one with panko breadcrumbs, Parmesan, and Italian seasoning mixed together.
- Working in batches, coat each piece of chicken in flour, shaking off excess. Dip into beaten eggs, letting excess drip off. Press into panko mixture until fully coated. Place on a plate or baking sheet.
- Preheat air fryer to 400°F for 3 minutes.
- Lightly spray the air fryer basket with oil. Arrange nuggets in a single layer without touching. Cook in batches if needed.
- Spray the tops of the nuggets with oil. Cook at 400°F for 8 minutes. Flip, spray the other side, and cook for another 4-5 minutes until internal temperature reaches 165°F and crust is deep golden brown.
- Let nuggets rest in the air fryer basket for 2 minutes. Transfer to a serving plate and serve immediately with dipping sauces.
Notes
For gluten-free: use 1:1 gluten-free flour blend and gluten-free panko. For dairy-free: omit Parmesan or use vegan alternative. For extra crunch, spray nuggets with oil before and after flipping. Let nuggets rest 2 minutes after cooking to set the crust.
Nutrition
- Serving Size: 6 nuggets
- Calories: 320
- Sugar: 1
- Sodium: 580
- Fat: 10
- Saturated Fat: 3
- Carbohydrates: 22
- Fiber: 1
- Protein: 32
Keywords: air fryer chicken nuggets, homemade chicken nuggets, crispy chicken nuggets, kid-friendly dinner, easy chicken recipe


