I was wide awake, the rain tapping against the window, and I had this sudden, almost primal urge to make something creepy. Not scary, you know? Just… creepy in a fun, bake-sale way. I had every intention of whipping up a batch of normal sugar cookies. I had the butter out, the flour measured. But then I saw the bag of whole almonds in the pantry, and a little lightbulb flickered on. I didn’t have any fancy cookie cutters, but I had hands—my own two, slightly clumsy hands—and the idea just arrived, fully formed. What if I shaped the dough into fingers? What if the almonds were the fingernails? Honestly, it felt a little unhinged, working alone in the quiet kitchen at that hour, but there was something about the rain and the stillness that made it feel like the perfect time to get a little weird. I couldn’t stop grinning as I rolled out the first batch. And let me tell you, the result was so much better than I ever imagined. These Easy Witch Finger Cookies with Almond Nails aren’t just a Halloween party trick; they’re genuinely delicious, buttery shortbread cookies that happen to look like they belong in a cauldron. Maybe you’ve been there—staring at your pantry at a weird hour, looking for a project. This is that project.
Why You’ll Love This Recipe
After testing these creepy cookies about four times (the first batch looked less like fingers and more like sad, lumpy worms), I can confidently say this is the version you need. I’ve worked through the sticky dough problems and the almond-nail-falling-off disasters so you don’t have to. These cookies are a total crowd-pleaser, and they come with a built-in “wow” factor that regular cookies just can’t match.
- Quick & Easy: The dough comes together in about 10 minutes, and the chilling time is minimal. You can have a batch of these spooky treats ready in under an hour.
- Simple Ingredients: You probably have everything in your kitchen right now. Butter, sugar, flour, eggs, and a bag of almonds. No weird gelatin or green food coloring required.
- Perfect for Halloween Parties: These are the star of any spooky spread. They look incredible on a platter and always get a double-take (and a laugh) before someone takes a bite.
- Crowd-Pleaser: Kids and adults both go nuts for them. The “gross” factor is just enough to be fun without being truly off-putting.
- Unbelievably Delicious: Here’s the secret—they taste like classic, melt-in-your-mouth shortbread. The almond on top adds a perfect, nutty crunch that makes them dangerously addictive.
What makes this recipe different from the rest is the texture. I use a specific ratio of butter to flour that makes the dough sturdy enough to shape into long, thin fingers without cracking, but tender enough to shatter when you bite into it. It’s not just another Halloween cookie—it’s the best version of a spooky shortbread you’ll ever make. This is the kind of recipe that makes you feel like a kitchen witch, in the best way possible.
What Ingredients You Will Need
This recipe relies on a handful of basic baking staples to create a buttery, crisp shortbread that holds its shape perfectly. The ingredients are simple, but the way they come together is pure magic.
- 1 cup (2 sticks) unsalted butter, softened: This is the foundation of our cookie. It needs to be truly soft, almost like a thick mayonnaise, for the creaming process to work. I always use unsalted so I can control the salt level. (Kerrygold is my go-to for the best flavor, but any good unsalted butter works).
- 1 cup powdered sugar: Powdered sugar gives these cookies a finer, more tender crumb than granulated sugar. It helps them melt in your mouth.
- 1 large egg: You’ll use the yolk in the dough and the white as a “glue” for the almond nails. It’s efficient and reduces waste. Make sure it’s at room temperature.
- 1 teaspoon vanilla extract: Pure vanilla extract adds a warm, sweet depth. Don’t use imitation vanilla here—the flavor difference is real.
- ½ teaspoon almond extract: This is the secret weapon. It doubles down on the almond flavor from the nail and makes the whole cookie taste incredibly nutty and aromatic.
- 2 ½ cups all-purpose flour: Spoon and level your flour into the measuring cup. Scooping it directly can pack it down and make the dough dry and crumbly.
- ½ teaspoon salt: Salt balances the sweetness and enhances all the other flavors. Don’t skip it.
- 1 (3-4 ounce) package whole almonds: Look for whole, raw almonds. You want them to look as much like a fingernail as possible. Sliced almonds are too small and thin.
- Red food coloring (gel or paste is best): You’ll use this to paint a little “blood” at the cuticle of the nail. A tiny bit goes a long way. I prefer gel colors as they don’t thin out the corn syrup.
- 2 tablespoons light corn syrup: This is mixed with the red food coloring to create a glossy, blood-like effect. It gives the cookies that perfectly gruesome, wet look.
Equipment Needed
You don’t need a lot of fancy tools for this recipe, which is part of its charm. A few basic kitchen staples will get the job done perfectly.
- Electric Hand Mixer or Stand Mixer: While you could cream the butter by hand, a mixer makes it much faster and ensures you get a light, fluffy texture. I’ve used my tired old hand mixer for years, and it works like a charm.
- Large Mixing Bowls: You’ll need one for the dough and a small one for the egg wash.
- Baking Sheets: Two standard, rimmed baking sheets are ideal. Line them with parchment paper for easy cleanup.
- Parchment Paper: A must for preventing sticking and making sure your creepy fingers slide right off.
- Small Pastry Brush: For brushing the egg white onto the almonds. A silicone one is easiest to clean.
- Sharp Knife or Bench Scraper: You’ll use this to make the little knuckle marks on the dough fingers.
- Cooling Rack: Essential for letting the cookies cool completely so the “blood” doesn’t run off.
Preparation Method
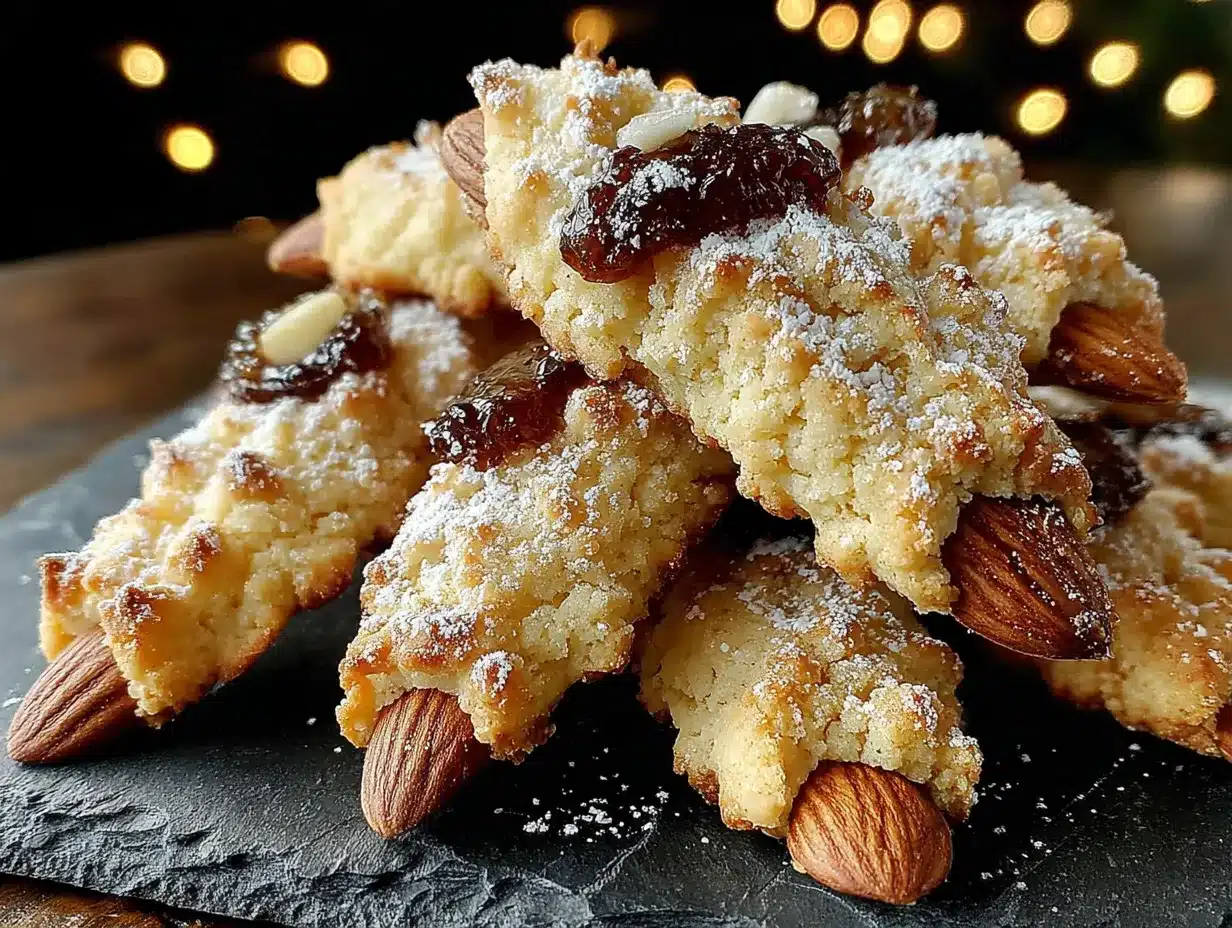
Alright, let’s get our hands dirty—literally. This is the fun part. Follow these steps, and you’ll have a batch of the creepiest, tastiest cookies on the block.
- Cream the Butter and Sugar: In a large bowl, beat the softened butter and powdered sugar together on medium speed until light, fluffy, and pale in color. This takes about 2-3 minutes. Scrape down the sides of the bowl with a spatula. You want it to look like a thick, creamy frosting.
- Add the Wet Ingredients: Separate the egg. Add the yolk to the butter mixture (save the white in a small bowl). Add the vanilla extract and almond extract. Beat on low speed until everything is fully combined and smooth. It might look a little curdled for a second, but keep mixing—it will come together.
- Incorporate the Dry Ingredients: In a separate bowl, whisk together the flour and salt. Gradually add this dry mixture to the wet ingredients, mixing on low speed or stirring with a wooden spoon. Mix just until the dough comes together and no streaks of flour remain. Do not overmix, or the cookies will be tough. The dough will be soft but not sticky.
- Chill the Dough: This is a non-negotiable step. Wrap the dough in plastic wrap and flatten it into a disc. Refrigerate for at least 30 minutes. Chilling firms up the butter, which prevents the cookies from spreading too much in the oven and losing their finger-like shape. If you skip this, you’ll end up with fat, stubby fingers.
- Preheat and Prep: Preheat your oven to 325°F (160°C). Line two baking sheets with parchment paper.
- Shape the Fingers: Take a small piece of dough (about 1 tablespoon) and roll it into a log shape on a clean, lightly floured surface. It should be about 3-4 inches long and about the thickness of your index finger. Gently taper one end to look like a fingertip. Place it on the prepared baking sheet. Repeat with the remaining dough, spacing them about 2 inches apart.
- Create the Knuckles: Use the back of a sharp knife or a bench scraper to gently press 2-3 horizontal lines into each dough finger to create the knuckle joints. Don’t press all the way through—just deep enough to make an indent.
- Attach the Almond Nails: Take a whole almond and dip one end into the reserved egg white. Press the egg white-coated end firmly onto the tapered “fingertip” of the dough. The almond should look like a long, natural fingernail. Repeat for all cookies.
- Bake: Bake for 12-15 minutes, or until the cookies are just set and the bottoms are lightly golden. The tops should not be brown. They will look pale and slightly soft, but they will firm up as they cool.
- Cool and Decorate: Let the cookies cool on the baking sheet for 5 minutes, then transfer them to a cooling rack to cool completely. Once cool, mix the corn syrup with a few drops of red food coloring. Use a toothpick or a small paintbrush to dab a little of this “blood” at the base of the almond nail, where it meets the cookie. It looks best when it seeps out just a tiny bit.
Cooking Tips & Techniques
I learned a few things the hard way while perfecting these. Here are my best tips to save you from the same mistakes.
Don’t Overwork the Dough. The first time I made these, I kept adding flour because the dough felt sticky. It ended up tough and crumbly. The dough should be soft and pliable. If it’s too sticky to handle, chill it for an extra 15 minutes instead of adding more flour.
Chill the Shaped Cookies. If your kitchen is warm, pop the baking sheet with the shaped fingers back into the fridge for 10 minutes before baking. This is a pro move that guarantees your cookies won’t spread or lose their shape. I forgot this step once on a hot day, and my witches looked like they had swollen, arthritic fingers. Not the look we’re going for.
Make the Knuckle Marks Deep Enough. Be bold with your knife. If the indents are too shallow, they will bake right out. You want them to be visible, so the cookies look like realistic (if delicious) severed fingers.
Multitask Strategically. While the first batch of dough is chilling, you can prep your baking sheets and measure out your almonds. While the first sheet bakes, shape the second batch. This makes the whole process flow much faster.
Variations & Adaptations
This recipe is a fantastic base for all kinds of spooky fun. Feel free to get creative and make it your own.
- Green Monster Fingers: Add a few drops of green gel food coloring to the dough before chilling. You’ll end up with classic, witchy green fingers. It’s a super fun twist for a more colorful Halloween spread.
- Chocolate-Dipped Fingertips: After baking and cooling, dip the tips of the fingers (the almond nail part) into melted dark chocolate. Let them set on parchment paper. It adds a rich, decadent layer and looks like the nails are painted with dark polish.
- Spiced Pumpkin Fingers: Swap out ¼ cup of the flour for pumpkin puree and add 1 teaspoon of pumpkin pie spice to the dry ingredients. You might need to chill the dough a little longer for it to be manageable. The flavor is incredible for a fall twist.
- Gluten-Free Adaptation: I’ve tested this with a 1:1 gluten-free baking flour blend (like King Arthur’s), and it works beautifully. Just be sure to chill the dough well, as GF doughs can be a bit more fragile.
Serving & Storage Suggestions
These cookies are best served at room temperature, which is when their buttery, crumbly texture really shines. The “blood” stays glossy and doesn’t get sticky, so they look their best within a few hours of decorating.
For a truly spooky presentation, arrange them on a black or dark purple platter. I like to scatter a few extra almonds around for texture. They pair perfectly with a glass of cold milk, a mug of hot apple cider, or even a spooky cocktail for the adults.
Storage: Store the undecorated cookies (without the corn syrup blood) in an airtight container at room temperature for up to 5 days. The flavor actually gets better after a day! If you’ve already added the “blood,” they are best eaten within 24 hours, as the corn syrup can make the cookie underneath a little soft. You can freeze the baked, undecorated cookies for up to 3 months. Just thaw them at room temperature and add the blood before serving.
Nutritional Information & Benefits
Let’s be real—these are a treat, and they’re meant to be enjoyed as part of a fun, spooky celebration. They aren’t health food, but knowing what’s in them helps you indulge mindfully.
| Nutrient | Per Cookie (approx.) |
|---|---|
| Calories | 145 |
| Fat | 9g |
| Carbohydrates | 15g |
| Protein | 2g |
The almonds provide a small amount of healthy fats, vitamin E, and magnesium. The butter, while rich, offers a dose of fat-soluble vitamins. The main benefit here? The pure, unadulterated joy of making and sharing something delightfully creepy with the people you love. That’s a kind of nourishment, too.
Conclusion
These Easy Witch Finger Cookies with Almond Nails are more than just a Halloween recipe—they’re an experience. They’re the kind of thing that makes people laugh, gasp, and then reach for another one. They’re proof that you don’t need fancy tools or complicated techniques to create something truly memorable and fun. I love this recipe because it captures the playful, slightly mischievous spirit of Halloween without all the stress. So go on, get a little weird in your kitchen. Shape some fingers, paint some blood, and watch everyone’s face light up. If you make these, I’d love to see them! Drop a comment below and tell me how they turned out, or share your own spooky twist on the recipe. Happy haunting!
Frequently Asked Questions
Can I make the dough ahead of time?
Absolutely! You can make the dough up to 3 days in advance and keep it wrapped tightly in the fridge. You can also freeze the dough disc for up to 3 months. Just thaw it overnight in the refrigerator before you’re ready to shape and bake.
My dough is too sticky to shape. What should I do?
Don’t add more flour! This is a common issue. Just pop the dough back in the fridge for 15-20 minutes. The butter needs to firm up again. If it’s still sticky after chilling, lightly dust your hands and your work surface with a tiny bit of flour.
My almond nails keep falling off after baking. How do I fix this?
This usually happens if the egg white “glue” isn’t used generously enough. Make sure you are dipping the almond into the egg white and pressing it firmly onto the dough. Also, make sure your dough isn’t too cold when you attach them—chilled dough is good, but rock-hard dough won’t grip the almond.
Can I use a different nut instead of almonds?
You can, but it will change the look. Sliced almonds are too small and thin to look like fingernails. Whole cashews or macadamia nuts could work, but they are a different shape and texture. The whole almond is really the best option for that long, spooky nail look.
How do I get the “blood” to look realistic?
The key is the corn syrup. It gives the red food coloring a glossy, thick, slightly translucent look that mimics real blood. Use gel food coloring for the most vibrant red. A little dab goes a long way—you want it to look like a small, beaded drop, not a pool of ketchup.
Pin This Recipe!
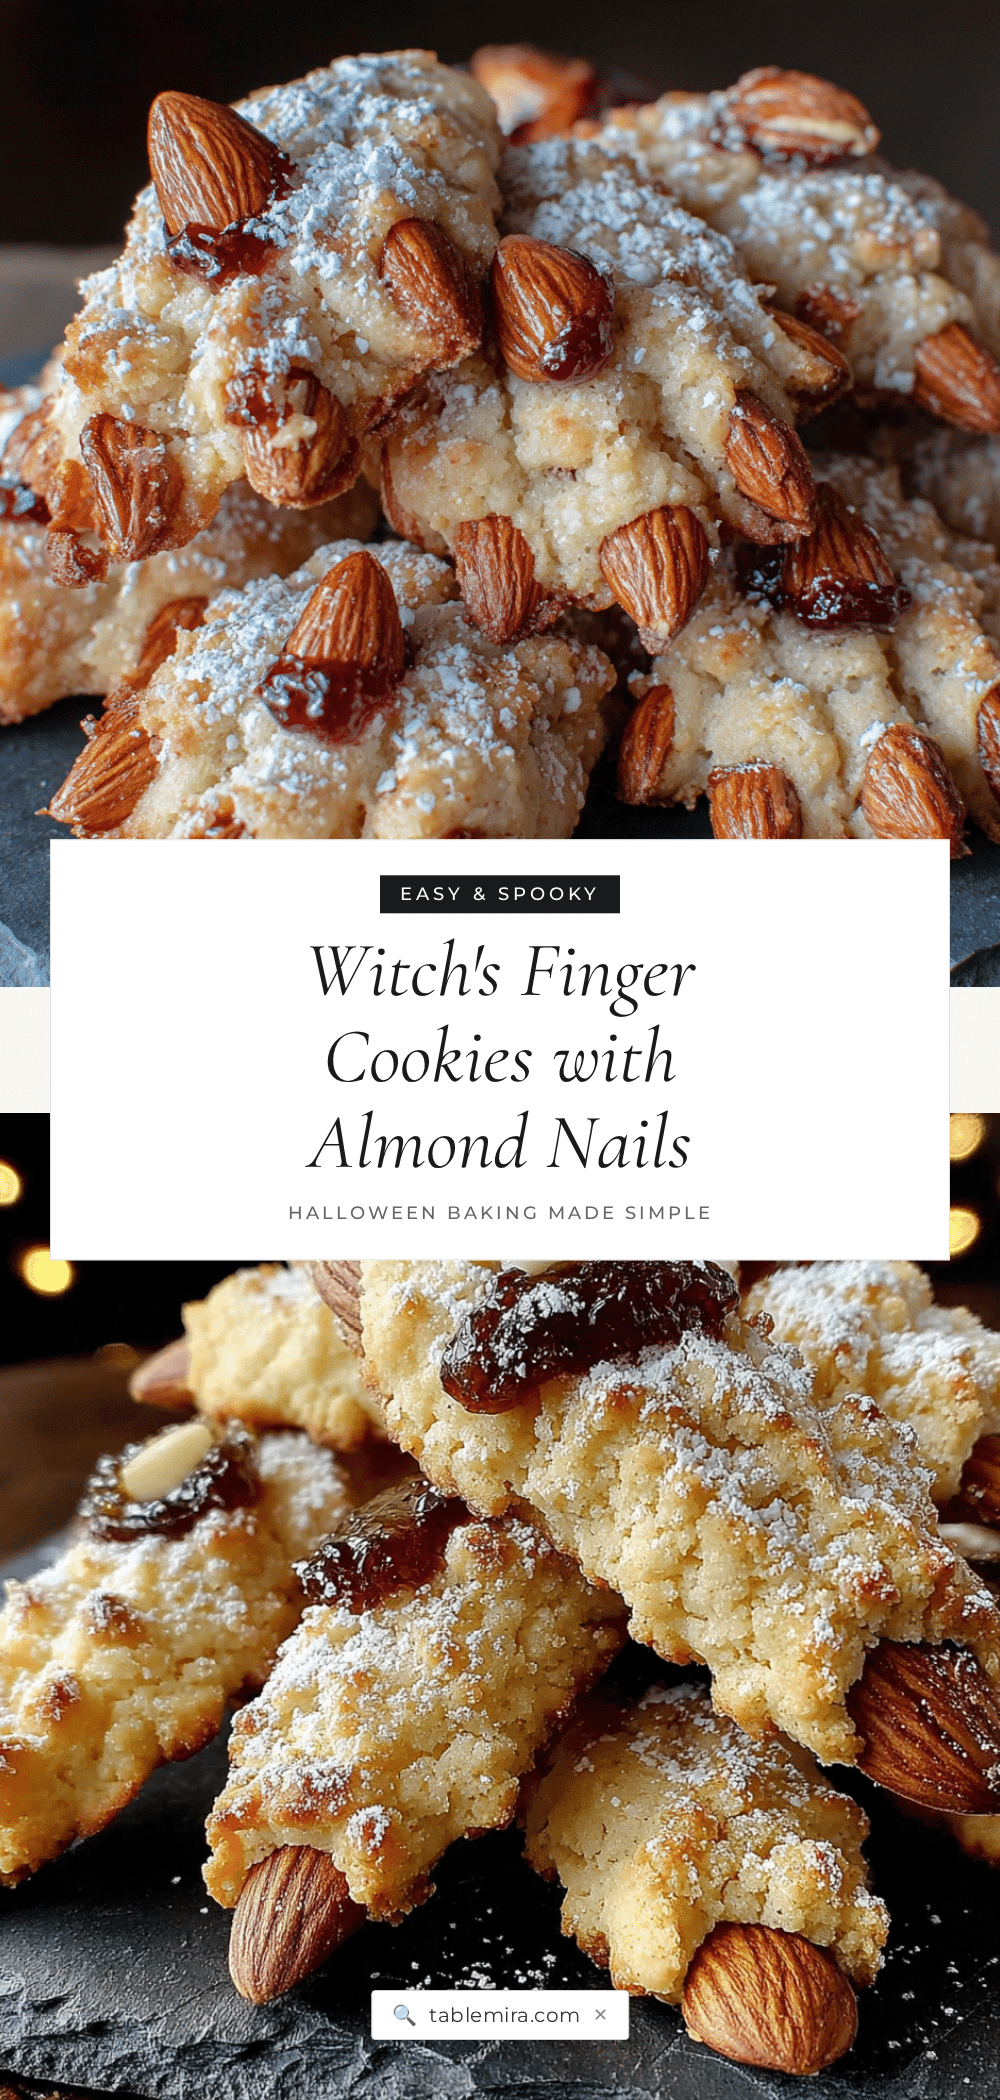
Easy Witch Finger Cookies with Almond Nails
These delightfully creepy buttery shortbread cookies are shaped like fingers with almond fingernails and a touch of glossy red ‘blood’. They’re a fun, easy, and delicious Halloween treat that’s sure to be the star of any spooky party.
- Prep Time: 20 minutes
- Cook Time: 15 minutes
- Total Time: 1 hour 5 minutes (includes 30 minutes chilling)
- Yield: 24 servings 1x
- Category: Dessert
- Cuisine: American
Ingredients
- 1 cup (2 sticks) unsalted butter, softened
- 1 cup powdered sugar
- 1 large egg, separated (yolk for dough, white for glue)
- 1 teaspoon vanilla extract
- ½ teaspoon almond extract
- 2 ½ cups all-purpose flour, spooned and leveled
- ½ teaspoon salt
- 1 (3-4 ounce) package whole almonds
- Red food coloring (gel or paste preferred)
- 2 tablespoons light corn syrup
Instructions
- Cream the Butter and Sugar: In a large bowl, beat the softened butter and powdered sugar together on medium speed until light, fluffy, and pale in color, about 2-3 minutes. Scrape down the sides of the bowl.
- Add the Wet Ingredients: Separate the egg. Add the yolk to the butter mixture (save the white in a small bowl). Add the vanilla extract and almond extract. Beat on low speed until fully combined and smooth.
- Incorporate the Dry Ingredients: In a separate bowl, whisk together the flour and salt. Gradually add this dry mixture to the wet ingredients, mixing on low speed or stirring with a wooden spoon. Mix just until the dough comes together and no streaks of flour remain. Do not overmix.
- Chill the Dough: Wrap the dough in plastic wrap and flatten it into a disc. Refrigerate for at least 30 minutes.
- Preheat and Prep: Preheat your oven to 325°F (160°C). Line two baking sheets with parchment paper.
- Shape the Fingers: Take a small piece of dough (about 1 tablespoon) and roll it into a log shape on a clean, lightly floured surface. It should be about 3-4 inches long and about the thickness of your index finger. Gently taper one end to look like a fingertip. Place it on the prepared baking sheet. Repeat with the remaining dough, spacing them about 2 inches apart.
- Create the Knuckles: Use the back of a sharp knife or a bench scraper to gently press 2-3 horizontal lines into each dough finger to create the knuckle joints. Don’t press all the way through—just deep enough to make an indent.
- Attach the Almond Nails: Take a whole almond and dip one end into the reserved egg white. Press the egg white-coated end firmly onto the tapered ‘fingertip’ of the dough. Repeat for all cookies.
- Bake: Bake for 12-15 minutes, or until the cookies are just set and the bottoms are lightly golden. The tops should not be brown.
- Cool and Decorate: Let the cookies cool on the baking sheet for 5 minutes, then transfer them to a cooling rack to cool completely. Once cool, mix the corn syrup with a few drops of red food coloring. Use a toothpick or a small paintbrush to dab a little of this ‘blood’ at the base of the almond nail, where it meets the cookie.
Notes
Don’t overwork the dough; if sticky, chill longer instead of adding flour. For best shape, chill shaped cookies for 10 minutes before baking if kitchen is warm. Make knuckle marks deep enough so they don’t bake out. Store undecorated cookies in an airtight container at room temperature for up to 5 days, or freeze for up to 3 months. Add ‘blood’ just before serving for best appearance.
Nutrition
- Serving Size: 1 cookie
- Calories: 145
- Sugar: 7
- Sodium: 55
- Fat: 9
- Saturated Fat: 5
- Carbohydrates: 15
- Fiber: 1
- Protein: 2
Keywords: Halloween cookies, witch finger cookies, shortbread cookies, spooky cookies, almond cookies, easy Halloween treat, creepy cookies


