“Mom, I’m not eating that weird bread anymore.”
That’s what my seven-year-old announced one Tuesday morning, pushing aside the sandwich I’d just made. The bread was the same whole wheat I’d bought for years. The turkey was the same deli meat. But apparently, somewhere between Monday and Tuesday, bread had become “weird.”
I stood there, butter knife in hand, realizing I had about eight minutes to figure out lunch before the bus came. So I grabbed a tortilla—leftover from taco night—slapped on some turkey, added a slice of cheddar, and rolled it tight. I sliced it into little pinwheels, dropped them in a container, and handed it over.
He ate every single one. Asked for more the next day.
That’s how these Easy Turkey and Cheddar Lunchbox Roll-Ups were born. Not from a fancy test kitchen or a perfectly planned recipe session. Just a mom staring down a clock and a picky eater, refusing to let either one win.
And honestly? That’s usually where the best recipes come from—the moments when you have to make something work with what you’ve got.
These roll-ups have become my secret weapon for school lunches, quick snacks, and even last-minute picnic packing. They take ten minutes from start to finish. No cooking required. No weird ingredients. Just simple, good food that actually gets eaten.
I’ve made hundreds of these over the past year. Tried different fillings, tested different wraps, figured out what keeps them from getting soggy by lunchtime. What I’m sharing with you today isn’t just a recipe—it’s the version that survived real-world lunchbox testing. The one my kids actually finish.
Let me show you how easy it is.
Why You’ll Love This Recipe
These roll-ups aren’t just another lunch idea. They’re the solution to that 10 AM panic when you realize you have nothing packed. Here’s why they work:
- Ready in 10 Minutes : From fridge to lunchbox in less time than it takes to argue about what to eat. No cooking, no waiting, no stress.
- Simple Ingredients : You probably already have everything in your fridge right now. Tortillas, deli turkey, cheddar cheese, and a spread of your choice. That’s it.
- Perfect for Lunchboxes : These hold up beautifully in a lunch bag. No sogginess, no falling apart. They actually look appetizing when your kid opens their container at school.
- Kid-Approved and Adult-Friendly : I pack these for myself too. They’re equally satisfying for a grown-up lunch or a after-school snack.
- Endlessly Customizable : Once you learn the basic technique, you can swap in any fillings you have on hand. It’s more of a method than a rigid recipe.
What makes these different from other roll-up recipes? I spent months testing the perfect ratio of filling to wrap, figuring out which spreads prevent sogginess, and discovering the best way to slice them so they hold together. This isn’t just another version—it’s the one that actually works for real life.
The first time my son came home and said, “Can you make those roll things again?” I knew I’d stumbled onto something special. It’s that rare lunch that pleases both the picky eater and the parent who wants something wholesome. No arguments, no leftovers coming home uneaten.
Just happy lunchboxes and one less thing to worry about.
What Ingredients You Will Need
This recipe uses simple, everyday ingredients to create something that feels way more exciting than a regular sandwich. Here’s what you’ll need:
For the Base
- Large flour tortillas (10-inch size works best) – I prefer Mission or La Banderita for their flexibility. Burrito-sized tortillas give you enough room to roll without everything squishing out the ends. For a whole wheat option, I’ve had good luck with Tumaro’s wraps.
- Deli turkey slices (about 4-6 ounces per roll-up) – Oven-roasted or smoked both work great. I like Boar’s Head or Applegate for clean ingredients. Ask for thick-cut slices at the deli counter—they hold up better than the pre-packaged super-thin ones.
- Cheddar cheese slices (2-3 slices per roll-up) – Sharp cheddar gives you the most flavor, but mild works fine for kids. Block cheese sliced at home tastes better than pre-sliced, but either works. Tillamook and Cabot are my go-to brands.
For the Spread

- Cream cheese (2-3 tablespoons, softened) – This is my secret weapon. It acts as glue that holds everything together and adds moisture without making things soggy. Full-fat works best for texture, but Neufchâtel (reduced fat) is fine too.
- Optional: Honey mustard or mayo – Sometimes I swap the cream cheese for honey mustard when I want a tangier flavor. Duke’s mayo is also excellent for a classic deli taste.
For Extra Flavor and Texture
- Lettuce leaves (optional) – Romaine or butter lettuce adds crunch. Pat them completely dry before adding—wet lettuce makes everything slide around.
- Thinly sliced tomato (optional) – Roma tomatoes have less moisture than beefsteak. Remove the seeds before adding.
- Salt and pepper – A tiny sprinkle elevates the whole thing.
Ingredient Selection Tips: When buying tortillas, look for ones that are pliable and fresh. If they’re stiff or cracking, they’ll be hard to roll. Warm them for 10 seconds in the microwave if needed. For the turkey, I recommend getting it sliced thick (about 1/8 inch) from the deli counter. The pre-packaged shaved turkey tends to tear when you’re rolling.
Substitution Guidance: Use gluten-free tortillas for a GF option (Siete brand almond flour tortillas work well). Swap cheddar for provolone, Swiss, or pepper jack. Try turkey and havarti for a milder flavor, or turkey and smoked gouda for something richer. No cream cheese? Use hummus, mashed avocado, or even pesto as your spread.
Equipment Needed
You don’t need much for this recipe, which is part of why I love it. Here’s what you’ll need:
- Cutting board – Any size works, but a larger board gives you room to roll without knocking things off the counter.
- Sharp knife – A serrated bread knife actually works best for slicing roll-ups cleanly without squishing them. A chef’s knife works too, just use a gentle sawing motion.
- Butter knife or offset spatula – For spreading the cream cheese evenly. An offset spatula is my favorite tool here—it’s cheap and makes spreading effortless.
- Plastic wrap or wax paper – For wrapping the roll-ups tightly before slicing. This helps them hold their shape.
- Lunchbox container – A small rectangular container that fits the roll-ups snugly prevents them from unrolling during transport.
Budget-Friendly Alternatives: If you don’t have an offset spatula, the back of a spoon works fine. No plastic wrap? Just roll tightly and slice immediately—they’ll hold together well enough. I’ve made these with nothing but a butter knife and a cutting board more times than I can count.
Preparation Method
Let me walk you through exactly how to make these roll-ups perfect every time. I’ve learned these steps through trial and error—trust me, there were some messy failures in the beginning.
- Soften your cream cheese – Take it out of the fridge 15 minutes before starting, or microwave for 10 seconds. You want it spreadable but not melted. Cold cream cheese will tear your tortilla.
- Lay your tortilla flat – Place it on your cutting board. If it’s cold from the fridge, warm it in the microwave for 10 seconds. This makes it flexible and less likely to crack. (I learned this one the hard way after a tortilla split right down the middle.)
- Spread the cream cheese – Using your butter knife or offset spatula, spread an even layer of cream cheese over the entire tortilla. Go all the way to the edges—this acts as glue. Don’t skimp on the edges or your roll-up will fall apart.
- Layer the turkey – Place your turkey slices flat on the cream cheese, overlapping slightly. Cover the entire surface. You want about 4-6 ounces total. Too little turkey and the roll-up feels empty; too much and it won’t roll tightly.
- Add the cheese – Lay your cheddar slices on top of the turkey. Again, overlap slightly. I usually use 2-3 slices depending on the size of your tortilla. Leave about an inch of space at the top edge—this is where the seam will be.
- Add optional extras – If you’re using lettuce or tomato, place them in a single layer on the lower third of the tortilla. Don’t overload it or you won’t be able to roll tightly.
- Roll it up tight – Start at the bottom edge closest to you. Fold it over the filling, then pull back slightly to create tension. Continue rolling, keeping everything snug. Think of it like rolling a sleeping bag—firm but not so tight that filling squeezes out the sides.
- Wrap in plastic – Once rolled, wrap the entire thing tightly in plastic wrap. Twist the ends like a candy wrapper. This step is crucial—it compresses everything together and helps the roll hold its shape. Refrigerate for at least 10 minutes (or up to overnight).
- Slice into pinwheels – Unwrap the roll and place it on your cutting board. Using a serrated knife, slice into 1-inch rounds. Use a gentle sawing motion—don’t press straight down or you’ll squish them. You should get about 6-8 pieces per roll-up.
- Pack and serve – Arrange the pinwheels in your lunchbox container, standing them up on their edges if possible. This keeps them from unrolling and looks way more appetizing than a pile of flattened circles.
Visual Cues: Your cream cheese should be smooth and evenly distributed—no thick clumps. When you roll, the tortilla should feel firm but not stretched. The finished roll should look like a compact cylinder with no gaps at the ends. When you slice, each piece should have a nice spiral pattern with visible layers of tortilla, cream cheese, turkey, and cheddar.
Time Estimates: Prep takes about 5 minutes. Rolling takes 2 minutes. Chilling takes at least 10 minutes (but you can skip this in a pinch). Slicing takes 2-3 minutes. Total active time: about 10 minutes.
Troubleshooting: If your roll-up falls apart when slicing, you probably didn’t use enough cream cheese or didn’t roll tight enough. If the tortilla cracks, it was too cold—warm it next time. If the filling oozes out the sides, you overstuffed it. Less filling, tighter roll.
Cooking Tips & Techniques
After making these dozens of times, I’ve figured out what works and what definitely doesn’t. Here’s what I wish someone had told me:
The Cream Cheese Trick – Don’t skip the cream cheese. I know it seems like an extra step, but it’s what makes these roll-ups stay together. Without it, the turkey slides around and the whole thing falls apart by lunchtime. It also adds moisture that keeps the tortilla from drying out in the fridge.
Temperature Matters – Room temperature ingredients roll better than cold ones. Let your cream cheese soften, let your tortillas warm up slightly. Cold ingredients fight against you. I’ve ruined more roll-ups than I care to admit by rushing this step.
The Plastic Wrap Secret – Wrapping in plastic before chilling isn’t optional—it’s the key to perfect pinwheels. The pressure from the wrap compresses everything together so your slices hold their shape. I once skipped this step because I was in a hurry, and ended up with a pile of flattened, sad-looking roll-ups. Never again.
Sharp Knife, Gentle Hand – Use a serrated knife and don’t press down hard. Let the knife do the work. Pressing down squishes the roll and makes the filling ooze out. A gentle sawing motion gives you clean, beautiful spirals every time.
Make Ahead Strategy – These actually taste better after sitting in the fridge for a few hours. The flavors meld together, and the cream cheese firms up, making the texture perfect. I often make a batch on Sunday night and pack them for the whole week. They keep great for 3-4 days.
My Biggest Failure: The first time I made these, I used cold tortillas straight from the fridge, cold cream cheese, and skipped the chilling step entirely. The result was a cracked, leaking mess that looked like a kitchen disaster. My son took one look and asked for a granola bar instead. Learn from my mistakes—those little steps really do matter.
Variations & Adaptations
Once you’ve mastered the basic technique, the possibilities are endless. Here are some of my favorite variations:
Turkey and Swiss with Dijon – Swap cheddar for Swiss cheese and use Dijon mustard instead of cream cheese. It tastes like a fancy deli sandwich in pinwheel form. My husband’s absolute favorite.
Ham and Provolone with Honey Mustard – Replace turkey with deli ham and cheddar with provolone. Spread honey mustard instead of cream cheese. This one disappears fast at my house.
Veggie Cream Cheese Roll-Ups – Skip the meat entirely. Spread herb and garlic cream cheese, then layer with thinly sliced cucumber, bell pepper strips, and shredded carrots. It’s a great meatless option that still feels satisfying.
Buffalo Chicken Style – Mix shredded rotisserie chicken with buffalo sauce and cream cheese. Spread on the tortilla, add some shredded cheddar or blue cheese crumbles, and roll. Spicy, tangy, and absolutely addictive. If you love this idea, you’ll also enjoy my Crispy Air Fryer Buffalo Chicken Taquitos for another buffalo-inspired lunch option.
Breakfast Roll-Ups – Use cream cheese as the base, add scrambled eggs, crumbled bacon or sausage, and shredded cheddar. Roll and slice for a breakfast-on-the-go that beats any drive-through.
Dietary Adaptations: For gluten-free, use corn tortillas or gluten-free wraps (warm them first for pliability). For low-carb, use large lettuce leaves or low-carb tortillas. For dairy-free, use vegan cream cheese and dairy-free cheese slices—Kite Hill makes excellent options.
I’ve tried every variation I just listed, and honestly? They’re all good. The basic formula is so forgiving that you can throw in almost anything you have in the fridge and it’ll work. That’s the beauty of this recipe.
Serving & Storage Suggestions
These roll-ups are incredibly versatile when it comes to serving. Here’s how to make the most of them:
Serving Temperature: They’re best served cold or at room temperature. Straight from the fridge is fine, but letting them sit out for 5-10 minutes takes the chill off and makes the flavors more pronounced. Don’t microwave them—the tortilla gets rubbery and the cheese turns into a mess.
Presentation Ideas: Arrange the pinwheels standing up in a container with the spiral facing up. It looks way more appetizing than a pile of flattened circles. For lunchboxes, pack them with some baby carrots, apple slices, and a small container of ranch or hummus for dipping. For a party platter, arrange them on a tray with toothpicks stuck through the center to hold them together.
What to Serve With Them: These pair beautifully with a simple side salad, some fresh fruit, or a handful of chips. For a complete lunch, add my Fresh No-Cook Mediterranean Grain Bowl on the side for a satisfying, varied meal. They also work great alongside a cup of tomato soup or some crunchy veggie sticks.
Storage Instructions: Keep assembled, unsliced roll-ups wrapped tightly in plastic wrap in the refrigerator for up to 4 days. Slice only what you plan to eat that day—sliced roll-ups dry out faster. If you need to prep for the whole week, make the rolls on Sunday and slice fresh each morning.
Freezer Tips: You can freeze the unsliced rolls! Wrap tightly in plastic wrap, then foil, and freeze for up to 2 months. Thaw overnight in the fridge before slicing. The texture is slightly softer after freezing, but still delicious. I do this when I find a good sale on tortillas or deli meat.
Reheating: Don’t. Seriously. These are meant to be eaten cold. If you want a warm version, make my Easy 5-Ingredient Honey Mustard Turkey Pinwheel Roll-Ups which are designed to be served warm.
Flavor Development: The flavors actually get better after a day in the fridge. The cream cheese absorbs the turkey and cheese flavors, and everything melds together beautifully. Day-old roll-ups are often better than fresh ones.
Nutritional Information & Benefits
Here’s an approximate nutritional breakdown for one roll-up (made with 10-inch flour tortilla, 2 oz turkey, 1 oz cheddar, 1 tbsp cream cheese):
| Nutrient | Amount per Serving |
|---|---|
| Calories | 280-320 |
| Protein | 18-22g |
| Carbohydrates | 22-26g |
| Fat | 14-18g |
| Saturated Fat | 7-9g |
| Fiber | 1-2g |
| Sodium | 600-800mg |
| Calcium | 15-20% DV |
Health Benefits: Turkey is an excellent source of lean protein, which keeps you full and satisfied. Cheddar provides calcium for bone health and protein for muscle maintenance. If you use whole wheat tortillas, you’ll get additional fiber for digestive health. The cream cheese adds a small amount of vitamin A and healthy fats.
Dietary Considerations: This recipe is naturally nut-free (great for school lunchboxes). For a lower-sodium version, look for low-sodium deli turkey and reduced-sodium cheese. For a lower-fat option, use reduced-fat cream cheese and low-fat cheddar. For a higher-protein version, double the turkey and use a high-protein tortilla like the ones from Ole Mexican Foods.
Potential Allergens: Contains dairy (cream cheese, cheddar) and gluten (tortillas). Use dairy-free alternatives and gluten-free tortillas as needed. Always check deli meat labels for potential allergens in processing.
I personally love that these roll-ups give me a way to pack protein into my kids’ lunches without them complaining. It’s a win-win—they get something they actually want to eat, and I get peace of mind knowing they’re getting real food.
Conclusion
These Easy Turkey and Cheddar Lunchbox Roll-Ups have genuinely changed how I think about lunch. They’re not fancy. They’re not complicated. But they solve a real problem—the daily struggle of packing something that will actually get eaten.
What I love most is how adaptable they are. Some weeks I make them exactly as written. Other weeks, I’m throwing in whatever leftovers I find in the fridge. They work either way. That’s the kind of recipe I need in my life.
I’d love to hear how these turn out for you. Did your kids eat them? Did you try a fun variation? Drop a comment below and let me know. I read every single one, and your ideas might end up in my next batch.
If you’re looking for more lunchbox inspiration, check out my Easy No-Bake Monster Cookie Energy Balls for a sweet treat that packs well, or my Fresh Mini Caprese Bento Box for another no-cook lunch idea that’s ready in minutes.
Here’s to lunches that actually get eaten. Happy rolling!
Frequently Asked Questions
Can I make these roll-ups the night before?
Absolutely! In fact, they’re better the next day. Make the rolls, wrap tightly in plastic, and refrigerate overnight. Slice them in the morning before packing. The flavors meld together beautifully overnight.
How do I keep the roll-ups from getting soggy in the lunchbox?
The cream cheese actually helps prevent sogginess by creating a barrier between the tortilla and the moist fillings. If you’re adding lettuce or tomato, pat them completely dry with paper towels first. Avoid using wet ingredients like sliced cucumbers without drying them first.
Can I use different types of cheese?
Definitely! Provolone, Swiss, havarti, pepper jack, and even mozzarella all work great. Just make sure whatever cheese you use slices easily and isn’t too crumbly. Hard cheeses like parmesan won’t work as well because they don’t melt or stick together.
How long do these roll-ups last in the fridge?
Unsliced rolls wrapped in plastic will keep for 4-5 days in the refrigerator. Sliced roll-ups are best eaten within 2 days as they tend to dry out faster. I recommend storing them unsliced and cutting fresh portions as needed.
Are these roll-ups freezer-friendly?
Yes! Wrap the unsliced rolls tightly in plastic wrap, then in aluminum foil, and freeze for up to 2 months. Thaw overnight in the refrigerator before slicing. The texture will be slightly softer but still delicious. I wouldn’t recommend freezing them already sliced.
Pin This Recipe!
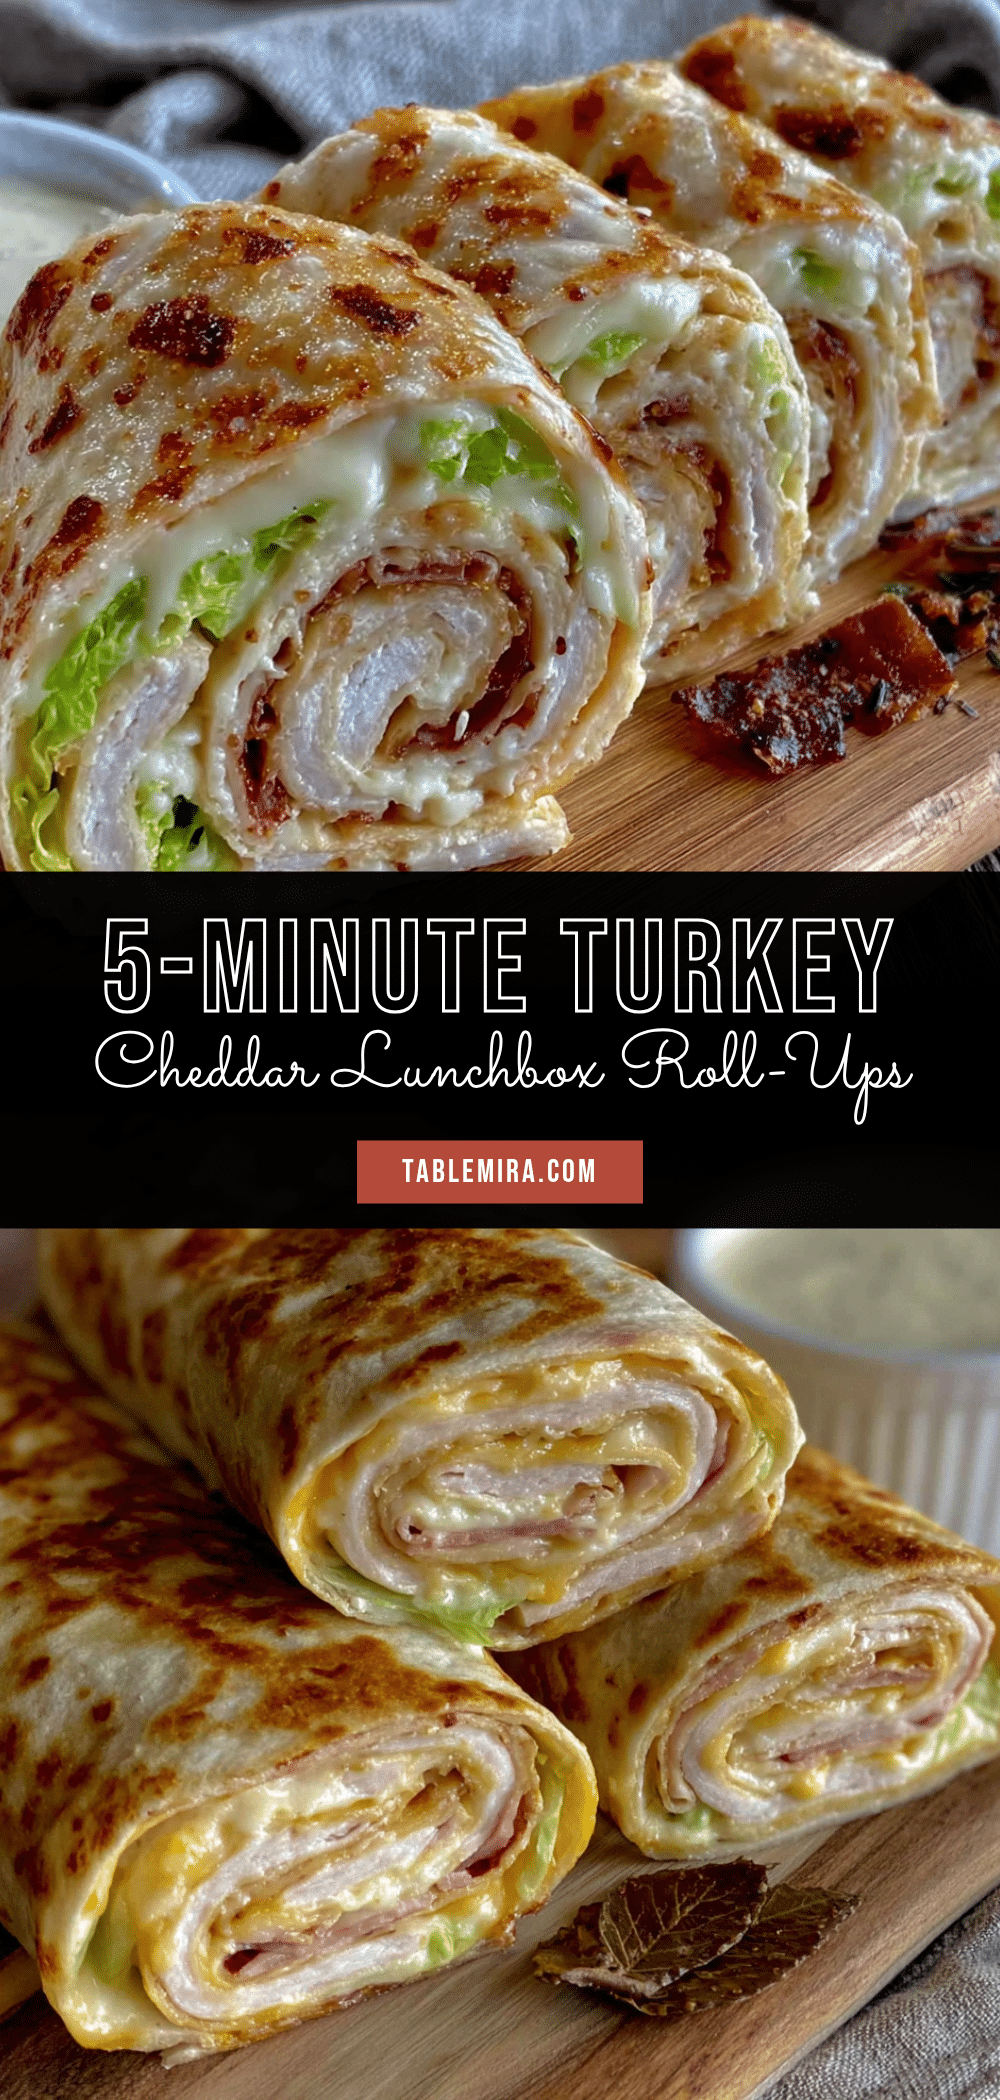
Easy Turkey and Cheddar Lunchbox Roll-Ups: Best 10-Minute Lunch Idea

These quick and easy turkey and cheddar roll-ups are a 10-minute lunch solution that kids and adults love. Made with simple ingredients like tortillas, deli turkey, cheddar cheese, and cream cheese, they’re perfect for lunchboxes, snacks, or picnics.
- Prep Time: 10 minutes
- Cook Time: 0 minutes
- Total Time: 10 minutes
- Yield: 4 servings 1x
- Category: Lunch
- Cuisine: American
Ingredients
- 1 large flour tortilla (10-inch)
- 4–6 ounces deli turkey slices (thick-cut)
- 2–3 slices cheddar cheese
- 2–3 tablespoons cream cheese, softened
- Optional: honey mustard or mayo
- Optional: lettuce leaves, patted dry
- Optional: thinly sliced Roma tomato, seeds removed
- Salt and pepper to taste
Instructions
- Soften cream cheese by leaving it at room temperature for 15 minutes or microwaving for 10 seconds.
- Lay tortilla flat on a cutting board. If cold, microwave for 10 seconds to make pliable.
- Spread an even layer of cream cheese over the entire tortilla, all the way to the edges.
- Layer turkey slices flat on the cream cheese, overlapping slightly, covering the entire surface.
- Place cheddar slices on top of the turkey, overlapping slightly, leaving about 1 inch at the top edge.
- Add optional lettuce, tomato, salt, and pepper in a single layer on the lower third of the tortilla.
- Starting at the bottom edge, roll the tortilla tightly, pulling back slightly to create tension. Continue rolling into a compact cylinder.
- Wrap the rolled tortilla tightly in plastic wrap, twisting the ends like a candy wrapper. Refrigerate for at least 10 minutes (or up to overnight).
- Unwrap and place on a cutting board. Using a serrated knife, slice into 1-inch rounds with a gentle sawing motion.
- Arrange pinwheels in a lunchbox container, standing them up on their edges if possible. Serve cold or at room temperature.
Notes
Cream cheese acts as glue to hold everything together and prevents sogginess. For best results, let cream cheese soften to room temperature and warm tortillas slightly. Wrap in plastic before chilling to help roll-ups hold their shape. Use a serrated knife with a gentle sawing motion for clean slices. Roll-ups can be made ahead and stored unsliced in the fridge for up to 4 days. Freeze unsliced rolls for up to 2 months.
Nutrition
- Serving Size: 1 roll-up (about 6-8
- Calories: 300
- Sugar: 2
- Sodium: 700
- Fat: 16
- Saturated Fat: 8
- Carbohydrates: 24
- Fiber: 1.5
- Protein: 20
Keywords: turkey roll-ups, lunchbox ideas, easy lunch, kid-friendly, no-cook, pinwheels, turkey and cheddar