I wasn’t supposed to be at my neighbor’s house last October. I’d stopped by to borrow a lug wrench—my tire was looking sad and I had zero confidence I could change it myself—and the smell hit me before I even got to the door. Something savory, buttery, and honestly a little bit smoky was drifting through the crack in the screen door. My neighbor, a guy named Dave who I’d only ever seen grilling burgers in cargo shorts, was in his kitchen with his back to me, whistling. He wasn’t trying to impress anyone. He wasn’t making a big deal of it. He was just… wrapping hot dogs in strips of dough like it was the most normal Tuesday night activity in the world.
“What are you making?” I asked, probably drooling a little.
“Oh, these? Just mummy dogs for the kids’ Halloween thing tomorrow,” he said, not even turning around. “They’re stupid easy.”
I mean, he said it like it was nothing. But I stood there watching him for a solid minute, and let me tell you—the way those little dough strips wrapped around the hot dogs, leaving just a tiny gap for the “eyes”? It was oddly satisfying. He’d stuck little mustard dots on them for the eyes, and they looked back at me from the baking sheet like a tiny army of adorable, undead snacks. I forgot about the lug wrench entirely. I just stood there, thinking about how my own Halloween spread was looking pretty sad—a bag of chips and some store-bought candy corn. Maybe you’ve been there, staring at your own lackluster plans while someone else casually makes magic happen with refrigerated dough and hot dogs.
I asked for the recipe. He shrugged and told me the brand of crescent rolls he used. That was it. No fancy notes, no chef secrets. Just a guy, some dough, and a pack of hot dogs making the best Halloween appetizer I’d ever seen. I made them that weekend for my own little get-together, and honestly, I haven’t stopped making them since. They’re the kind of thing that makes people smile before they even take a bite—and then they take a bite and smile even bigger. These easy spooky mummy hot dogs for Halloween are my go-to now, and I’m pretty sure they’ll be yours too.
Why You’ll Love This Recipe
Let’s be real—Halloween appetizers can be a total pain. You want something festive, but you also don’t want to spend hours in the kitchen when you could be carving pumpkins or watching scary movies. These easy spooky mummy hot dogs for Halloween solve that problem completely. They’re the perfect blend of fun and practical, and I’ve tested them enough times to know they work every single time.
- Quick & Easy : Comes together in under 25 minutes, start to finish. Perfect for last-minute Halloween parties or when the kids are already hyped up on candy and you need food fast.
- Simple Ingredients : You only need three main things—hot dogs, crescent roll dough, and something for the eyes. No fancy grocery trips required. You probably have everything already.
- Perfect for Halloween : These are literally the cutest thing on any party table. Kids go wild for them, and adults can’t resist grabbing a second one either.
- Crowd-Pleaser : I’ve brought these to three different Halloween gatherings now, and they disappear every single time. Even people who “don’t like hot dogs” end up eating three.
- Unbelievably Delicious : The flaky, buttery dough wrapped around a juicy hot dog is comfort food at its finest. Add a little dip, and you’ve got something truly special.
What makes these different from every other version out there? It’s in the little details. I use a specific wrapping technique that keeps the dough from unraveling during baking—trust me, I learned that one the hard way. I also figured out the perfect baking time so the dough is golden and flaky but the hot dog stays juicy. Plus, I’ve tested a few different “eye” options, and I’ll share which ones hold up best. This isn’t just another recipe—it’s the version I’ve perfected over three Halloweens, and it’s the one you’ll come back to year after year.
There’s something about these mummy dogs that just feels right for Halloween. They’re spooky but not scary, fun without being fussy. They make people laugh and grab another one. Honestly, that’s the whole point of Halloween food, isn’t it?
What Ingredients You Will Need
This recipe uses the simplest ingredients to deliver something that looks way more impressive than it actually is. That’s the beauty of these easy spooky mummy hot dogs for Halloween—they’re basically a magic trick disguised as dinner. Here’s what you’ll need:
For the Mummy Hot Dogs:
- 1 can (8 oz) refrigerated crescent roll dough — I’ve tested this with Pillsbury and store brands, and honestly, Pillsbury works best. The dough is a little more pliable and doesn’t tear as easily when you’re cutting the strips. If you can find the seamless sheet version, that’s even better—less cutting through pre-perforated lines.
- 8 hot dogs — Go with your favorite brand. I personally use Oscar Mayer beef hot dogs because they’re juicy and have a good snap. You can use turkey dogs, chicken dogs, or even plant-based options—just check the cooking time, since some veggie dogs are already cooked.
- Mustard or ketchup for the eyes — Yellow mustard gives the best “mummy” look because it’s bright and shows up well against the golden dough. Ketchup works too, but it blends in more. You could also use small dots of sriracha for a spicier version.
For the Dipping Sauce (Optional but Highly Recommended):
- 1/4 cup ketchup — Classic choice. Adds that familiar tomato tang.
- 1/4 cup yellow mustard — For the traditional hot dog experience.
- 1/4 cup ranch dressing — I know it sounds weird, but ranch with these mummy dogs is honestly addictive. The creamy, herby flavor balances the salty hot dog perfectly.
- 1/4 cup BBQ sauce — Adds a smoky sweetness that pairs great with the buttery dough.
Ingredient Selection Tips:
For the hot dogs, look for ones that are uniform in size—not too long and not too thick. Standard-sized hot dogs work perfectly. If you buy jumbo dogs, you’ll need to cut them in half or use more dough per dog. I’ve also tried this with cocktail sausages for a mini appetizer version, and those are adorable for parties. Just adjust the baking time down by a few minutes.
The crescent roll dough is the real star here. Make sure it’s cold when you work with it—if it gets too warm, the strips will stick together and tear. I usually keep the dough in the fridge until the moment I’m ready to use it. If you’re gluten-free, there are gluten-free crescent roll options available, but I’ll be honest—they’re a bit more fragile. Handle them gently and don’t over-bake.
Substitution Guidance:
- Use puff pastry sheets instead of crescent rolls for a flakier, more buttery texture. Cut into thin strips and wrap the same way.
- Swap in vegan hot dogs and dairy-free crescent dough for a plant-based version.
- For the eyes, try black sesame seeds or small dots of sriracha for a different look. I’ve even used tiny candy eyes (the kind for baking) and they work great—just add them after baking so they don’t melt.
Equipment Needed
You don’t need much for this recipe, which is part of why I love it. Here’s what you’ll need:
- Baking sheet — A standard half-sheet pan works great. Line it with parchment paper or a silicone baking mat for easy cleanup. I’ve forgotten the parchment before, and the dough stuck to the pan in sad, torn patches. Learn from my mistakes.
- Sharp knife or pizza cutter — You’ll be cutting the crescent roll dough into thin strips, so a sharp blade makes a huge difference. A pizza cutter is actually my favorite tool for this—it glides through the dough without dragging or tearing it. A dull knife will squish the dough and make a mess.
- Cutting board — For cutting the dough strips. Nothing fancy needed.
- Small bowl — For the dipping sauces if you’re making them.
- Toothpicks (optional) — If your dough strips are being stubborn and won’t stay wrapped, a toothpick can hold them in place during baking. Just remove before serving so nobody gets poked.
Budget-Friendly Options: You don’t need any fancy equipment here. If you don’t have a pizza cutter, a regular kitchen knife works fine—just make sure it’s sharp. No parchment paper? Lightly grease your baking sheet with cooking spray or butter. It’ll still work, just with a little more cleanup.
Personal Note: I used a cheap baking sheet for years that warped in the oven, and my mummy dogs always came out unevenly browned. When I finally upgraded to a heavy-duty aluminum sheet, the difference was night and day. Good equipment doesn’t have to be expensive, but it does matter.
Preparation Method
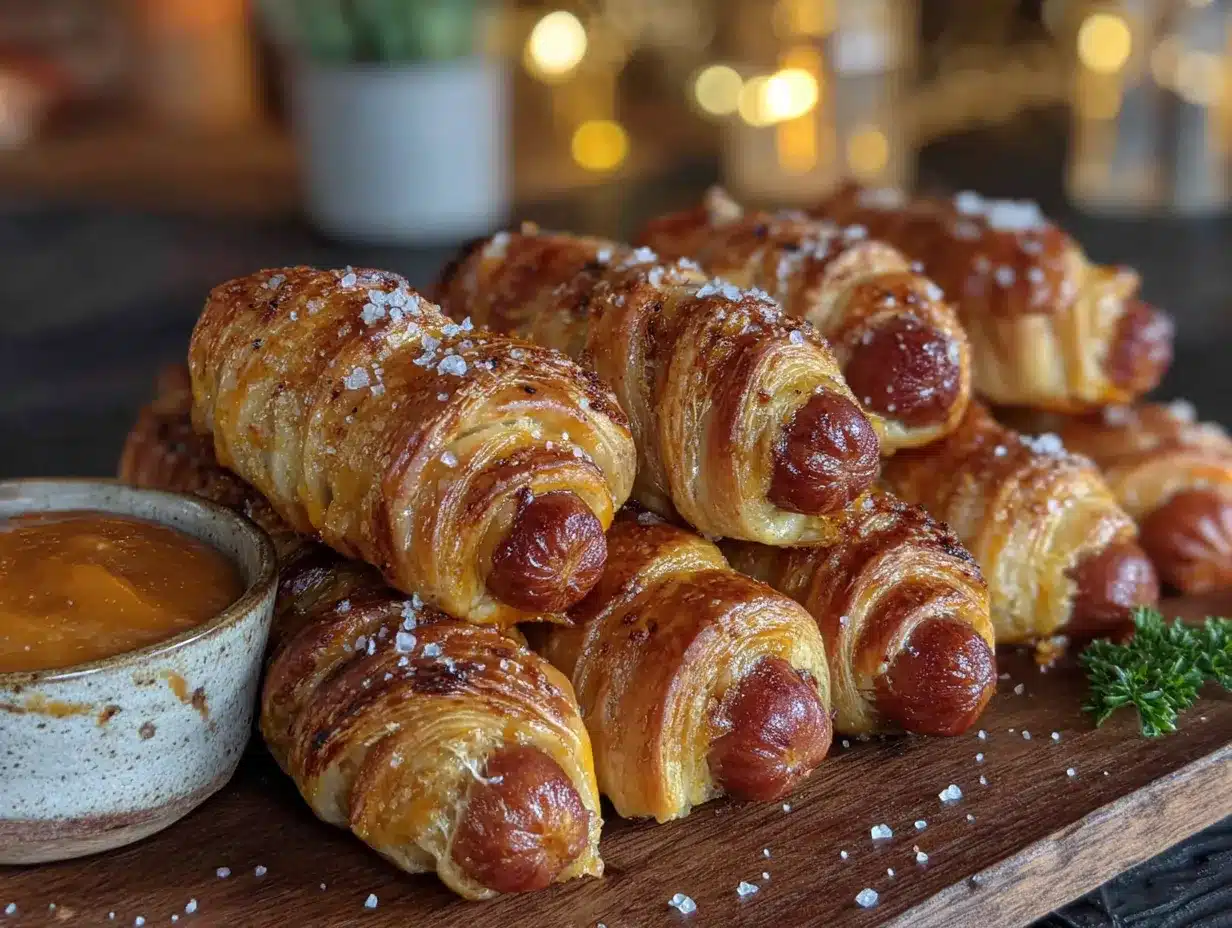
Alright, let’s get to the fun part. These easy spooky mummy hot dogs for Halloween come together in about 20 minutes, and the whole process is honestly kind of relaxing. Put on a spooky playlist or a Halloween movie in the background, and you’ll have a tray of mummies before you know it.
- Preheat your oven to 375°F (190°C). Line a baking sheet with parchment paper or a silicone mat. Getting this done first means you won’t be rushing later.
- Unroll the crescent roll dough onto a cutting board. If you’re using the perforated kind, press the seams together gently with your fingers so you have one solid sheet of dough. I used to skip this step and the strips would fall apart along the perforations. Now I always press the seams, and it makes a huge difference. If you’re using the seamless sheet version, you’re already ahead of the game.
- Cut the dough into thin strips. Using a sharp knife or pizza cutter, slice the dough lengthwise into strips about 1/4 to 1/2 inch wide. You should get about 10 to 12 strips from one sheet. Don’t stress about making them perfectly even—a little variation adds character. The mummies will look more “homemade” and charming that way.
- Prepare the hot dogs. Pat the hot dogs dry with a paper towel. This helps the dough stick better. If you want to make them look extra spooky, you can cut a tiny slit in one end of each hot dog to create a little “mouth” that shows through the dough. I tried this once and thought it was hilarious, but my kids said it looked “too weird.” So now I leave them plain.
- Wrap the hot dogs. Take a strip of dough and wrap it around a hot dog, starting at one end and working your way to the other. Leave a small gap in the middle for the “eyes”—about a 1-inch space where the hot dog is visible. Don’t wrap too tightly, or the dough will tear as it expands during baking. Leave a little slack. The dough should look like loose bandages, not a tight corset.
- Place the wrapped hot dogs on the baking sheet. Space them about 2 inches apart so they have room to puff up and get golden. If the dough ends are loose, tuck them underneath the hot dog to hold them in place.
- Bake for 12 to 15 minutes. You’re looking for the dough to be golden brown and flaky. The hot dogs should be heated through and starting to plump up a little. I usually check at the 12-minute mark and add a minute or two if needed. Every oven runs a little differently, so trust your eyes more than the timer.
- Let them cool for 2 to 3 minutes. This is important—the dough is hot and the hot dogs are even hotter. Give them a minute to settle so you don’t burn your fingers when adding the eyes.
- Add the eyes. Using a toothpick or the tip of a knife, dab a tiny amount of mustard (or ketchup) onto the exposed hot dog in the gap you left. Make two dots close together for the eyes. If you’re using candy eyes, press them gently into the dough while it’s still warm—they’ll stick better.
- Serve immediately. These are best enjoyed warm, when the dough is still flaky and the hot dog is juicy. Set them out with dipping sauces and watch them disappear.
Sensory Cues: When the mummy dogs are done, the kitchen will smell like buttery, toasted dough with that familiar hot dog aroma underneath. The dough should be puffed and golden, with darker brown spots where the butter caramelized. When you bite into one, you should hear a slight crunch from the flaky dough, followed by the soft snap of the hot dog casing.
Common Issue Fix: If your dough strips are tearing as you wrap, they’ve gotten too warm. Pop the dough back in the fridge for 5 minutes to firm up. Cold dough is cooperative dough.
Cooking Tips & Techniques
I’ve made these easy spooky mummy hot dogs for Halloween more times than I care to admit, and I’ve learned a few things along the way. Here are my best tips to get perfect results every time:
The Cold Dough Rule: This is the most important tip I can give you. Keep the crescent roll dough refrigerated until the moment you’re ready to cut it. Warm dough is sticky, stretchy, and prone to tearing. Cold dough cuts cleanly and holds its shape. If your kitchen is warm (like mine gets during October with the oven on), work quickly and put the baking sheet in the fridge for 5 minutes before baking if the dough feels soft.
The Loose Wrap Technique: Don’t wrap the dough strips too tightly around the hot dog. I made this mistake my first time, and the dough split open during baking, leaving me with a sad, un-mummy-like mess. Leave a little bit of space between the dough and the hot dog. The dough will puff up as it bakes, so a loose wrap gives it room to expand without tearing.
Eye Placement Timing: Add the eyes after baking, not before. I tried putting mustard dots on before baking once, and they just baked into weird brown spots that didn’t look like eyes at all. Wait until the mummy dogs come out of the oven, let them cool for a couple of minutes, then add the eyes. The contrast between the golden dough and the bright mustard is much better this way.
Multitasking Strategy: While the mummy dogs are baking, prep your dipping sauces. Mix the ranch, ketchup, mustard, and BBQ sauce into separate small bowls. You can also set up your serving platter and add any Halloween decorations (fake spiderwebs, plastic spiders, etc.) to make the presentation extra festive.
My Biggest Failure: I once tried to double the recipe and bake two trays at the same time, rotating them halfway through. The bottom tray came out pale and undercooked, and the top tray was over-browned. Now I always bake one tray at a time on the middle rack. It takes a little longer, but the results are consistent and worth it.
Consistency Tip: For uniform mummy dogs, try to cut your dough strips roughly the same width. I use a ruler as a guide—not obsessively, just to keep things in the same ballpark. This way, all the mummy dogs bake at the same rate and look like a cohesive set.
Variations & Adaptations
One of the best things about these easy spooky mummy hot dogs for Halloween is how easy they are to customize. I’ve tried quite a few variations over the years, and here are my favorites:
Cheesy Mummy Dogs: Before wrapping the hot dog, cut a slit lengthwise down the center and stuff it with a thin strip of cheddar cheese or a string cheese stick. Wrap as usual and bake. The cheese melts out through the “bandages” and creates a gooey, delicious mess. My kids beg for this version every year.
Spicy Mummy Dogs: Brush the hot dogs with sriracha or your favorite hot sauce before wrapping. You can also mix a little cayenne pepper into the dipping sauce for extra heat. This is my personal favorite—the spicy kick contrasts beautifully with the buttery dough.
Mini Mummy Bites: Use cocktail sausages or cut regular hot dogs into thirds. Cut the dough into smaller strips and wrap each mini sausage. Bake for 8 to 10 minutes instead of 12 to 15. These are perfect for parties where people want to grab and go without committing to a full-sized hot dog.
Breakfast Mummy Dogs: Swap the hot dogs for breakfast sausages and use the same crescent roll wrapping technique. Serve with maple syrup for dipping instead of mustard. I made these for a Halloween-themed brunch once, and they were a massive hit.
Veggie Version: Use plant-based hot dogs (I like the Field Roast brand) and dairy-free crescent dough. The texture is slightly different, but the flavor is still fantastic. My vegetarian friends always appreciate having a festive option.
Gluten-Free Adaptation: There are gluten-free crescent roll options available, but they’re more delicate. Handle the dough gently, keep it cold, and don’t overwork it. You can also use gluten-free puff pastry sheets cut into thin strips for a similar effect.
Personal Variation I Love: I once made these with bacon-wrapped hot dogs before adding the dough strips. Yes, it’s extra. Yes, it’s ridiculous. And yes, it was the best thing I’ve ever put in my mouth. Cook the bacon slightly first (not fully crispy, just starting to render), then wrap the hot dog in bacon, then wrap the dough over everything. Bake as usual. You’ll thank me later.
Serving & Storage Suggestions
These mummy dogs are best served warm, fresh from the oven, when the dough is still flaky and the hot dog is juicy. But let’s be real—Halloween parties are chaotic, and you might not be able to serve them right away. Here’s what I’ve learned:
Serving Temperature: Serve them warm or at room temperature. They’re delicious either way. If you’re bringing them to a party, you can bake them at home, wrap the baking sheet in foil, and transport them. They’ll still be warm by the time you arrive. Or you can reheat them in the oven at 350°F for 5 minutes once you get there.
Presentation Ideas: Arrange the mummy dogs on a platter lined with black or orange napkins. Add some plastic spider rings or fake cobwebs around the edges for a spooky vibe. I like to serve them with small bowls of dipping sauces arranged around the platter—ketchup, mustard, ranch, and BBQ sauce. Label them with little Halloween-themed toothpick flags if you’re feeling extra.
Complementary Dishes: These mummy dogs pair great with other Halloween snacks like pumpkin-shaped cheese crackers, veggie sticks with ranch dip, or a bowl of popcorn tossed with orange and black sprinkles. For drinks, serve them with apple cider, pumpkin punch, or just regular soda.
Storage Instructions: Leftover mummy dogs can be stored in an airtight container in the refrigerator for up to 3 days. The dough will lose some of its flakiness, but they’re still tasty. I don’t recommend freezing them—the texture of the hot dog gets weird when thawed.
Reheating Methods: The best way to reheat is in the oven at 350°F for 5 to 7 minutes. The microwave works in a pinch (30 seconds on high), but the dough will be soft and chewy rather than flaky. If you have an air fryer, that’s actually the best option—3 minutes at 350°F and they’ll be almost as good as fresh.
Flavor Development Note: These honestly taste best the day they’re made. The dough is at its peak flakiness right out of the oven. That said, they’re still perfectly good the next day, especially if you reheat them properly. I’ve never had leftovers last longer than a day anyway—they disappear too fast.
Nutritional Information & Benefits
Let’s be honest—these easy spooky mummy hot dogs for Halloween are a treat, not a health food. But that doesn’t mean they can’t fit into a balanced lifestyle. Here’s the breakdown:
Estimated Nutritional Values (per mummy dog, without dipping sauce):
- Calories: 220
- Fat: 14g
- Carbohydrates: 16g
- Protein: 8g
- Sodium: 620mg
Health Benefits of Key Ingredients: Hot dogs are a source of protein, which helps keep you full and satisfied. Crescent roll dough provides carbohydrates for quick energy—perfect for fueling a night of trick-or-treating. If you use beef hot dogs, you’re also getting some iron and B vitamins.
Dietary Considerations: This recipe can be adapted for various dietary needs. Use turkey or chicken hot dogs for a lower-fat option. Plant-based hot dogs work for vegetarians and vegans. Gluten-free crescent dough makes this accessible for those with celiac disease or gluten sensitivity. Just check the labels on all your ingredients to ensure they meet your dietary requirements.
Potential Allergens: This recipe contains wheat (gluten), dairy (in the crescent dough), and soy (often in hot dogs). If you’re serving a crowd with allergies, make sure to label the ingredients clearly or offer alternative options.
Personal Wellness Perspective: I’m a firm believer that food should be enjoyed, especially on holidays. These mummy dogs are a once-a-year treat, and I don’t stress about the nutritional content. I balance them out with veggie trays and fruit platters at the party, and everyone leaves happy. Life is too short to worry about calories on Halloween.
Conclusion
These easy spooky mummy hot dogs for Halloween have become a staple in my house, and I can’t imagine a Halloween party without them. They’re fun, they’re delicious, and they’re so simple that anyone can make them—even if you’ve never baked anything in your life. That’s the beauty of this recipe. It looks like you put in way more effort than you actually did, and that’s a superpower worth having.
I love how these mummy dogs bring people together. Kids get excited about the spooky eyes. Adults appreciate the nostalgic hot dog flavor with the fancy dough wrapping. And everyone loves dipping them in their favorite sauce. It’s the kind of food that makes a party feel special without making the host feel stressed.
So go ahead and give these a try. Customize them however you want—add cheese, make them spicy, or go mini. Make them your own. And when you do, I’d love to hear about it. Drop a comment below and tell me how your mummy dogs turned out. Did you try a fun variation? Did your kids love them? Share a photo on Pinterest and tag me so I can see your spooky creations.
Happy Halloween, and happy snacking! Remember—the best recipes are the ones that make people smile. These mummy dogs do exactly that.
Frequently Asked Questions
Can I make these mummy hot dogs ahead of time?
Yes, you can assemble them up to 24 hours in advance. Wrap the hot dogs in the dough strips, place them on the baking sheet, cover with plastic wrap, and refrigerate. Bake them just before serving for the best texture. If you bake them ahead of time, reheat in the oven at 350°F for 5 minutes to restore some of the flakiness.
What can I use instead of crescent roll dough?
Puff pastry sheets work great—just cut them into thin strips and wrap the same way. You can also use refrigerated pizza dough, biscuit dough (rolled out thin), or even homemade pie crust. Each option gives a slightly different texture, but they all taste delicious. Just adjust the baking time as needed.
How do I keep the dough from unraveling during baking?
Make sure the dough strips are long enough to wrap around the hot dog at least one and a half times. Tuck the loose end under the hot dog so it’s held in place by the weight of the hot dog itself. If you’re still having trouble, use a toothpick to secure the dough—just remember to remove it before serving.
Can I use turkey or chicken hot dogs?
Absolutely. Turkey and chicken hot dogs work perfectly in this recipe. They’re a little leaner than beef hot dogs, so they might not be as juicy, but they still taste great. Just make sure they’re fully heated through before serving. The baking time should be about the same.
What dipping sauces go best with mummy dogs?
Classic ketchup and mustard are always a hit. Ranch dressing is surprisingly good—the creamy, herby flavor balances the salty hot dog perfectly. BBQ sauce adds a smoky sweetness. For a spicy option, try sriracha mayo or a chipotle dipping sauce. I like to offer a variety so everyone can find their favorite.
Pin This Recipe!
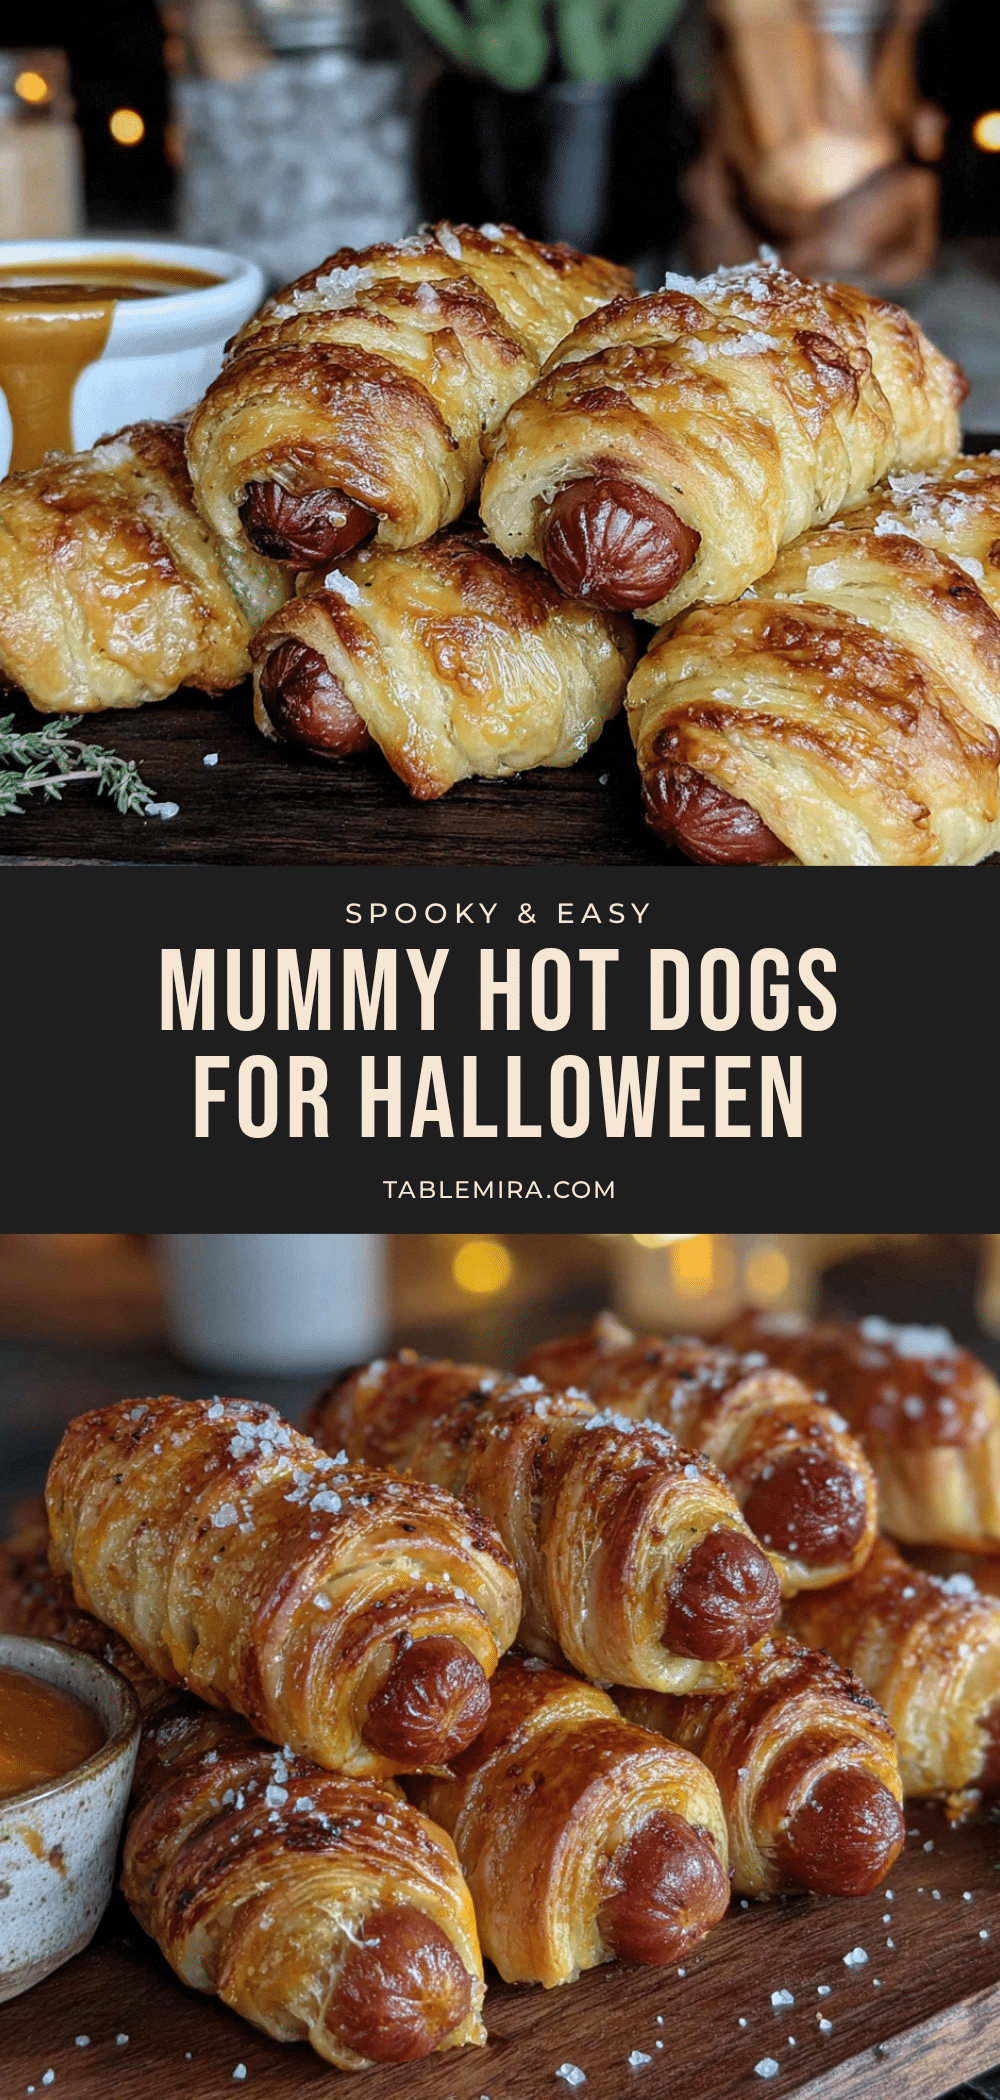
Easy Spooky Mummy Hot Dogs: Best Halloween Appetizer
These easy spooky mummy hot dogs are the perfect Halloween appetizer—fun, delicious, and ready in under 25 minutes. Made with just three main ingredients, they’re a crowd-pleaser that kids and adults love.
- Prep Time: 10 minutes
- Cook Time: 15 minutes
- Total Time: 25 minutes
- Yield: 8 servings 1x
- Category: Appetizer
- Cuisine: American
Ingredients
- 1 can (8 oz) refrigerated crescent roll dough
- 8 hot dogs
- Mustard or ketchup for the eyes
- 1/4 cup ketchup (for dipping sauce, optional)
- 1/4 cup yellow mustard (for dipping sauce, optional)
- 1/4 cup ranch dressing (for dipping sauce, optional)
- 1/4 cup BBQ sauce (for dipping sauce, optional)
Instructions
- Preheat your oven to 375°F (190°C). Line a baking sheet with parchment paper or a silicone mat.
- Unroll the crescent roll dough onto a cutting board. If using perforated dough, press the seams together gently to form one solid sheet.
- Using a sharp knife or pizza cutter, cut the dough lengthwise into thin strips about 1/4 to 1/2 inch wide (about 10 to 12 strips).
- Pat the hot dogs dry with a paper towel to help the dough stick.
- Take a strip of dough and wrap it around a hot dog, starting at one end and working to the other. Leave a small gap (about 1 inch) in the middle for the eyes. Wrap loosely so the dough can expand during baking.
- Place the wrapped hot dogs on the prepared baking sheet, spacing them about 2 inches apart. Tuck loose dough ends underneath the hot dog.
- Bake for 12 to 15 minutes, until the dough is golden brown and flaky and the hot dogs are heated through.
- Let cool for 2 to 3 minutes.
- Using a toothpick or knife tip, dab a small amount of mustard or ketchup onto the exposed hot dog in the gap to create eyes.
- Serve immediately with dipping sauces if desired.
Notes
Keep crescent roll dough cold for easier handling. Wrap dough loosely to prevent tearing during baking. Add eyes after baking for best contrast. For mini mummy bites, use cocktail sausages and bake 8-10 minutes.
Nutrition
- Serving Size: 1 mummy dog
- Calories: 220
- Sugar: 4
- Sodium: 620
- Fat: 14
- Saturated Fat: 4
- Carbohydrates: 16
- Protein: 8
Keywords: Halloween appetizer, mummy hot dogs, easy Halloween recipe, spooky snacks, crescent roll hot dogs


