Monday morning, 7:45 AM. I was staring into the fridge like it owed me money, holding a Tupperware container of something I’d made three days prior. The label said “chicken and rice” but the contents looked sad and dry—a beige landscape of regret. I scraped it into the trash and ordered takeout. Again. That was the moment I decided I needed to figure out this meal prep thing for real, not just half-heartedly throw some chicken and rice into a container and hope for the best.
Look, I was never a meal prep person. The idea of eating the same thing for five days straight sounded like punishment, not convenience. But after spending way too much money on sad desk salads and overpriced grain bowls, something had to give. I needed lunches that actually tasted good, held up through the week, and didn’t require me to channel my inner chef at 6 AM. So I started experimenting—testing different ratios, playing with moisture levels, figuring out what actually stays fresh and what turns into a science experiment by Thursday.
These easy meal prep chicken and rice bowls are the result of that trial-and-error journey. They’re not fancy. They’re not complicated. But they work. The chicken stays juicy, the rice stays fluffy, and the whole thing comes together in about an hour on a Sunday afternoon. I’ve made these for the past six months straight, and honestly? I still look forward to lunch every single day.
Why You’ll Love This Recipe
Let me tell you what makes these chicken and rice bowls different from every other meal prep recipe you’ve seen floating around Pinterest. I’ve tested this recipe at least a dozen times, tweaking the seasoning, adjusting the cooking method, and figuring out the exact storage technique that keeps everything tasting fresh through day four. This isn’t my first rodeo with meal prep—I’ve had plenty of failures along the way.
- Quick & Easy: From start to finish, you’re looking at about 45 minutes to an hour. That’s five lunches sorted in less time than it takes to watch a movie.
- Simple Ingredients: Chicken breasts, rice, vegetables, and pantry staples. No fancy trips to specialty stores, no ingredients you’ll use once and forget about.
- Perfect for Busy Weeks: Whether you’re heading to the office, working from home, or running kids to activities, having these ready in the fridge is a game-changer.
- Completely Customizable: Switch up the protein, swap the vegetables, change the sauce—this is a template, not a rigid formula.
- Actually Delicious: Here’s the thing—these bowls don’t taste like “meal prep food.” They taste like a real, satisfying lunch you’d happily pay $12 for at a cafe.
What makes this version stand out is the technique. Most recipes tell you to just cook everything and throw it in containers. But I’ve learned that how you season the chicken, how you cook the rice, and how you layer everything in the container makes all the difference. The chicken stays tender because of a quick brine. The rice stays fluffy because of the right liquid ratio. And the vegetables maintain their texture because of strategic placement. This isn’t just another version—it’s the version I’ve perfected through trial, error, and a few truly sad lunches.
Ingredients You Will Need
This recipe relies on simple, everyday ingredients that work together to create something genuinely satisfying. No weird health food store finds, no obscure spices you’ll never use again. Just good, honest food that comes together beautifully.
For the Chicken
- 2 pounds boneless, skinless chicken breasts (about 3-4 breasts) — Look for breasts that are similar in size so they cook evenly. I prefer organic when I can find it on sale.
- 2 tablespoons olive oil — Regular olive oil works fine here; save the fancy extra virgin for salads.
- 1 teaspoon garlic powder — Not the same as fresh garlic, but we’re going for convenience here.
- 1 teaspoon onion powder — Adds that savory depth without any chopping.
- 1 teaspoon smoked paprika — This is non-negotiable in my book. It adds color and a subtle smokiness that makes the bowls taste like you tried harder than you did.
- ½ teaspoon salt — I use fine sea salt for even seasoning.
- ½ teaspoon black pepper — Freshly ground if you have it.
- ¼ teaspoon cayenne pepper (optional) — Adds a tiny kick without making it spicy.
For the Rice
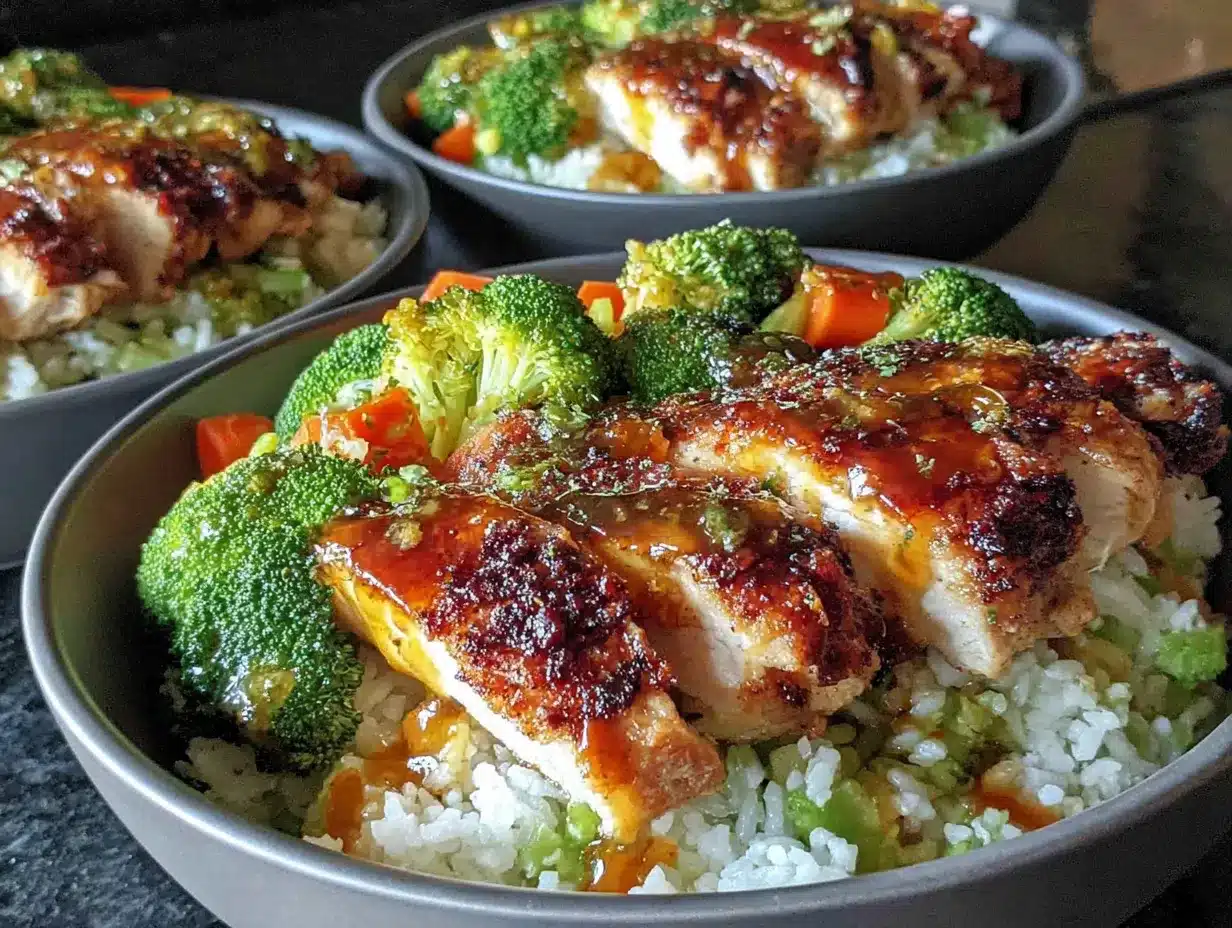
- 2 cups long-grain white rice — Basmati or jasmine both work beautifully. I’ve tested with brown rice too, and while it’s doable, the texture isn’t quite as good by day four.
- 3 cups low-sodium chicken broth — Cooking rice in broth instead of water adds so much flavor. Trust me on this one.
- 1 tablespoon butter — Adds richness and helps keep the rice from getting sticky.
- ½ teaspoon salt
For the Vegetables
- 2 cups broccoli florets — Cut into bite-sized pieces so they cook quickly and evenly.
- 1 red bell pepper, diced — Adds color and sweetness that balances the savory elements.
- 1 cup cherry tomatoes, halved — These add little bursts of acidity that wake up the whole bowl.
For the Sauce (Optional but Recommended)
- ¼ cup plain Greek yogurt — Full-fat works best for creaminess, but 2% is fine too.
- 2 tablespoons olive oil
- 1 tablespoon lemon juice — Fresh is noticeably better here.
- 1 clove garlic, minced
- ½ teaspoon dried oregano
- Salt and pepper to taste
If you’re looking for a different protein option, these bowls work beautifully with the same seasoning used in my crispy parmesan crusted chicken thighs—just skip the breading for meal prep purposes. The lemon herb sauce from that recipe also makes an incredible dressing for these bowls.
Equipment Needed
You don’t need a professional kitchen to pull this off. Here’s what you’ll actually use:
- Large baking sheet — For roasting the chicken and vegetables. A half-sheet pan is perfect.
- Medium saucepan with lid — For cooking the rice. A tight-fitting lid is important for proper steaming.
- Cutting board — Please use a separate one for raw chicken, or sanitize thoroughly between uses.
- Sharp chef’s knife — Dull knives are more dangerous than sharp ones, I swear.
- Mixing bowls — For seasoning the chicken and making the sauce.
- Meat thermometer — This is the difference between perfect chicken and dry chicken. Get one. They’re cheap.
- Meal prep containers — I prefer glass containers with snap-lock lids. They don’t stain, they don’t hold odors, and they microwave beautifully. The 3-compartment divided ones are ideal for keeping everything separate.
- Aluminum foil or parchment paper — For lining the baking sheet and making cleanup a breeze.
If you don’t have a meat thermometer, you can absolutely judge doneness by cutting into the thickest part of the chicken, but honestly? The thermometer is worth the $10 investment. I’ve ruined too many batches of chicken by guessing.
Preparation Method
Step 1: Prep Your Ingredients (10 minutes)
Before you turn on a single burner, get everything ready. Trim any excess fat from the chicken breasts and pat them dry with paper towels. This step matters—dry chicken browns better. Dice the bell pepper, halve the cherry tomatoes, and cut the broccoli into florets. Measure out your rice and broth. Mince that garlic clove. Having everything ready before you start cooking makes the whole process feel effortless.
Step 2: Season and Sear the Chicken (15 minutes)
In a small bowl, combine the garlic powder, onion powder, smoked paprika, salt, black pepper, and cayenne if using. Drizzle the chicken breasts with olive oil, then rub the spice mixture all over them. Don’t be shy—really work it in. Let the chicken sit at room temperature for about 10 minutes while you preheat your oven to 400°F (200°C).
Heat a large oven-safe skillet over medium-high heat. Add a drizzle of oil, then place the chicken breasts in the pan. Sear for 3-4 minutes per side until golden brown. The chicken won’t be cooked through yet—that’s fine. We’re just building flavor and color. Transfer the skillet to the preheated oven and bake for 15-18 minutes, or until the internal temperature reaches 165°F (74°C). Let the chicken rest on a cutting board for at least 5 minutes before slicing. This resting period is crucial—it lets the juices redistribute so your chicken stays moist.
Step 3: Cook the Rice (20 minutes)
While the chicken is in the oven, start the rice. Rinse the rice in a fine-mesh strainer under cold water until the water runs clear. This removes excess starch and prevents gummy rice. In your saucepan, melt the butter over medium heat. Add the rinsed rice and stir for about a minute until it smells nutty and toasty. Pour in the chicken broth and add the salt. Bring to a boil, then reduce the heat to low, cover, and simmer for 15-18 minutes. Don’t lift the lid during cooking—you’ll let out the steam. When the timer goes off, remove the pan from heat and let it sit, still covered, for 5 minutes. Fluff with a fork.
Step 4: Roast the Vegetables (15 minutes)
On a separate baking sheet lined with parchment paper, toss the broccoli florets and diced bell pepper with a drizzle of olive oil, salt, and pepper. Spread them in a single layer—crowding leads to steaming instead of roasting. Roast at 400°F (200°C) for 12-15 minutes, tossing halfway through. The broccoli should be tender with slightly charred edges. Add the cherry tomatoes in the last 5 minutes of roasting; they just need to soften slightly, not turn into sauce.
Step 5: Make the Sauce (5 minutes)
While everything cooks, whisk together the Greek yogurt, olive oil, lemon juice, minced garlic, dried oregano, and a pinch of salt and pepper. Taste it and adjust—more lemon if you like tang, more garlic if you’re me. This sauce keeps beautifully in the fridge for the whole week.
Step 6: Assemble the Bowls (10 minutes)
Slice the rested chicken against the grain into strips or cubes. Now here’s the trick for keeping everything fresh: let all the components cool completely before assembling. Hot food trapped in a container creates condensation, which leads to soggy rice and sad vegetables. I usually spread the rice on a baking sheet to cool faster.
Divide the rice evenly among your containers. Top with the chicken, then the roasted vegetables. Keep the sauce in a separate small container or add it just before eating. This is the secret to meal prep that doesn’t taste like leftovers.
Cooking Tips & Techniques
I’ve made this recipe so many times that I’ve collected a whole list of lessons learned the hard way. Let me save you from repeating my mistakes.
Don’t skip the brine. Even a quick 15-minute soak in salted water makes a noticeable difference in how juicy your chicken stays through the week. If you have time, brine the chicken for 30 minutes before seasoning. If you don’t, at least salt it well and let it sit for 10 minutes before cooking.
Watch your rice-to-liquid ratio. For white rice, 1 cup of rice to 1.5 cups of liquid is my sweet spot. Too much liquid and you get mushy rice that turns into paste by Wednesday. Too little and you’re eating crunchy rice. The chicken broth adds flavor, but water works in a pinch.
Layer strategically. When you’re filling your containers, put the rice on the bottom, then the chicken, then the vegetables on top. The vegetables act as a barrier that keeps the chicken from drying out. If you’re adding fresh greens or avocado, pack those separately and add them right before eating.
Let everything cool completely. I cannot stress this enough. I once rushed the process and put warm rice into containers, then sealed the lids. The next day, the rice was a sticky, soggy mess. Now I spread everything out on baking sheets and let it cool for at least 20 minutes before assembling.
Season in layers. Don’t just season the chicken and call it done. Season the rice with a little salt and butter. Season the vegetables. Even the sauce should be properly seasoned. Each component should taste good on its own, so when they come together, the bowl is greater than the sum of its parts.
Use a meat thermometer. Chicken breasts are notoriously easy to overcook. Pull them from the oven at 160°F (71°C)—they’ll continue cooking to 165°F as they rest. This prevents that dry, stringy texture that gives chicken breasts a bad reputation.
Variations & Adaptations
One of the best things about this recipe is how flexible it is. Here are some of my favorite variations I’ve tested:
Southwest Style: Swap the paprika seasoning for a mix of cumin, chili powder, and lime zest. Use cilantro-lime rice instead of plain. Add black beans, corn, and diced avocado when serving. This version is incredible with a drizzle of chipotle ranch dressing.
Asian-Inspired: Marinate the chicken in soy sauce, ginger, garlic, and a touch of honey. Cook the rice with a splash of sesame oil and a strip of kombu (seaweed) for umami. Top with edamame, shredded carrots, and sliced green onions. A drizzle of sriracha mayo finishes it perfectly.
Greek Style: Season the chicken with oregano, lemon, and garlic. Use orzo instead of rice, or keep the rice and add crumbled feta, Kalamata olives, cucumber, and a drizzle of tzatziki. This version tastes like summer in a bowl.
Vegetarian Option: Skip the chicken and double up on roasted chickpeas, tofu, or tempeh. Season them the same way you’d season the chicken. The rice and vegetables stay the same, and the yogurt sauce works beautifully with any protein.
Low-Carb Adaptation: Swap the rice for cauliflower rice or quinoa. Cook the cauliflower rice in a dry skillet over medium-high heat for 5-7 minutes until tender and slightly charred. Everything else stays the same.
If you’re looking for more meal prep inspiration, these bowls pair beautifully with a batch of dark chocolate almond butter protein balls for a quick snack or dessert throughout the week. The sweet and savory combo keeps things interesting.
Serving & Storage Suggestions
These bowls are designed to be eaten cold or reheated, depending on your preference. I actually prefer them cold—something about the texture of the cold rice and roasted vegetables just works for me. But if you’re a hot lunch person, here’s how to do it right.
To reheat: Remove the lid and microwave for 2-3 minutes, stirring halfway through. If the rice seems dry, sprinkle a teaspoon of water over it before microwaving. For best results, transfer to a plate and reheat in a toaster oven at 350°F for 10 minutes. The vegetables get slightly crispy again, and the chicken stays tender.
Storage: These bowls will keep in the refrigerator for up to 5 days in airtight containers. I don’t recommend freezing them—the texture of the rice and vegetables suffers too much. If you want to freeze, freeze the cooked chicken separately and make fresh rice and vegetables when you’re ready to eat.
Flavor development: Here’s something interesting—these bowls actually taste better on day two and three. The flavors meld together, the chicken absorbs more of the seasoning, and everything becomes more cohesive. By day four, the vegetables start to lose their texture, so I usually eat those bowls first and save the fresher ones for later in the week.
Serving suggestions: These bowls are a complete meal on their own, but if you want to round things out, serve with a simple side salad dressed with lemon vinaigrette or a cup of creamy roasted tomato basil soup for dipping. The combination is incredibly satisfying on a cold day.
Nutritional Information & Benefits
Each serving of these chicken and rice bowls provides a balanced mix of protein, carbohydrates, and healthy fats. Here’s the estimated breakdown per bowl (based on 5 servings):
| Nutrient | Amount per Serving |
|---|---|
| Calories | 425 |
| Protein | 38g |
| Carbohydrates | 45g |
| Fiber | 4g |
| Fat | 12g |
| Saturated Fat | 3g |
| Sodium | 520mg |
The chicken provides lean protein that keeps you full and supports muscle maintenance. The rice offers sustained energy from complex carbohydrates. The vegetables contribute fiber, vitamins A and C, and antioxidants. The Greek yogurt sauce adds probiotics and calcium. This is the kind of meal that fuels your afternoon without weighing you down.
If you’re watching your sodium, use low-sodium broth and reduce the added salt in the seasoning. The smoked paprika and other spices provide plenty of flavor without relying on salt.
FAQs
Can I use chicken thighs instead of breasts?
Absolutely. Chicken thighs are actually more forgiving because they have more fat and stay moist longer. The cooking time will be similar—just check for 165°F internal temperature. Boneless, skinless thighs work best for even cooking.
How do I keep the rice from getting hard in the fridge?
The key is moisture. Cook the rice with a little extra liquid (use broth instead of water) and let it cool completely before refrigerating. When reheating, add a teaspoon of water per serving and cover while microwaving. The steam rehydrates the rice perfectly.
Can I make these bowls gluten-free?
Yes! This recipe is naturally gluten-free as written. Just double-check your chicken broth—some brands contain gluten. Use a certified gluten-free broth, and you’re good to go. The recipe is also dairy-free if you skip the butter in the rice and use a dairy-free yogurt for the sauce.
How long do these bowls actually last in the fridge?
I’ve safely kept them for up to 5 days, but I recommend eating them within 4 days for the best texture. The vegetables start to soften noticeably by day five. If you’re prepping for a full work week, make the bowls on Sunday and eat them Monday through Thursday, then order takeout on Friday. You’ll thank me.
Can I add fresh vegetables after reheating?
Definitely. I often add fresh spinach, arugula, or diced cucumber right before eating. The contrast between the warm rice and chicken and the cool, crisp vegetables is fantastic. Avocado is another great addition—just add it at serving time to prevent browning.
Conclusion
These easy meal prep chicken and rice bowls have genuinely changed my relationship with weekday lunches. No more sad desk salads, no more overpriced delivery, no more staring into the fridge hoping something delicious materializes. Just good, satisfying food that’s ready when I am.
The beauty of this recipe is that it’s a template, not a rigid formula. Once you get comfortable with the basic method, you can swap in whatever vegetables are in season, whatever protein you have on hand, whatever sauce you’re craving. It’s meal prep that actually adapts to your life, not the other way around.
I’d love to hear how these bowls turn out for you. Do you have a favorite variation? A sauce combination that blew your mind? Drop a comment below and share your creation. And if you’re looking for more meal prep inspiration, don’t miss my creamy crockpot lasagna soup—it’s another recipe that reheats beautifully and makes the week feel a little more manageable.
Here’s to lunches you actually look forward to.
Pin This Recipe!
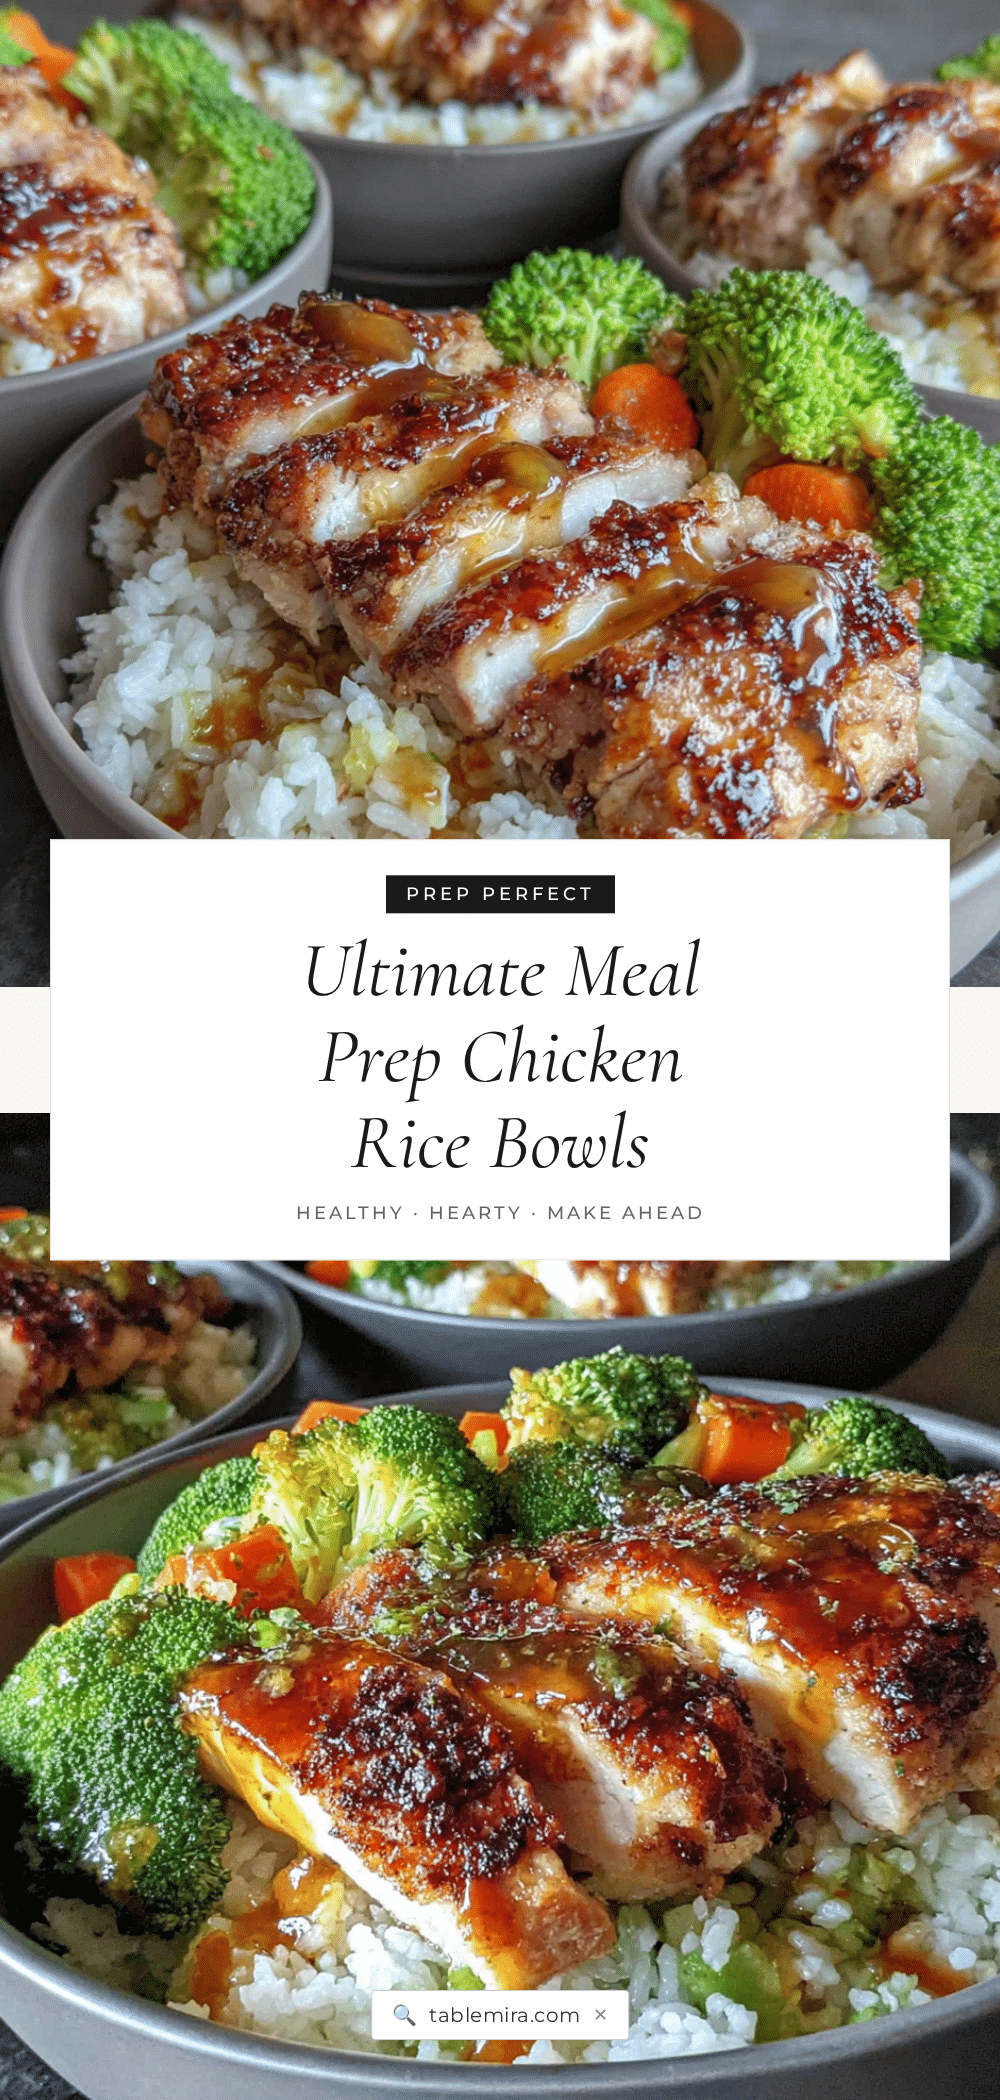
Easy Meal Prep Chicken and Rice Bowls: Best Healthy Lunch
These easy meal prep chicken and rice bowls are the result of trial-and-error journey. They’re not fancy. They’re not complicated. But they work. The chicken stays juicy, the rice stays fluffy, and the whole thing comes together in about an hour on a Sunday afternoon.
- Prep Time: 10 minutes
- Cook Time: 35 minutes
- Total Time: 45 minutes
- Yield: 5 servings 1x
- Category: Main Course
- Cuisine: American
Ingredients
- 2 pounds boneless, skinless chicken breasts (about 3–4 breasts)
- 2 tablespoons olive oil
- 1 teaspoon garlic powder
- 1 teaspoon onion powder
- 1 teaspoon smoked paprika
- ½ teaspoon salt
- ½ teaspoon black pepper
- ¼ teaspoon cayenne pepper (optional)
- 2 cups long-grain white rice
- 3 cups low-sodium chicken broth
- 1 tablespoon butter
- ½ teaspoon salt
- 2 cups broccoli florets
- 1 red bell pepper, diced
- 1 cup cherry tomatoes, halved
- ¼ cup plain Greek yogurt
- 2 tablespoons olive oil
- 1 tablespoon lemon juice
- 1 clove garlic, minced
- ½ teaspoon dried oregano
- Salt and pepper to taste
Instructions
- Prep your ingredients: Trim excess fat from chicken breasts and pat dry. Dice bell pepper, halve cherry tomatoes, cut broccoli into florets. Measure rice and broth. Mince garlic.
- Season and sear the chicken: Combine garlic powder, onion powder, smoked paprika, salt, black pepper, and cayenne. Drizzle chicken with olive oil, rub with spice mixture. Let sit 10 minutes. Preheat oven to 400°F (200°C). Heat an oven-safe skillet over medium-high heat, add oil, sear chicken 3-4 minutes per side until golden. Transfer skillet to oven and bake 15-18 minutes until internal temperature reaches 165°F (74°C). Let rest 5 minutes before slicing.
- Cook the rice: Rinse rice in cold water until water runs clear. In a saucepan, melt butter over medium heat. Add rice, stir 1 minute until nutty. Add chicken broth and salt. Bring to boil, reduce heat to low, cover, simmer 15-18 minutes. Remove from heat, let sit covered 5 minutes. Fluff with fork.
- Roast the vegetables: On a parchment-lined baking sheet, toss broccoli and bell pepper with olive oil, salt, and pepper. Spread in single layer. Roast at 400°F (200°C) for 12-15 minutes, tossing halfway. Add cherry tomatoes in last 5 minutes.
- Make the sauce: Whisk together Greek yogurt, olive oil, lemon juice, minced garlic, dried oregano, salt, and pepper. Adjust to taste.
- Assemble the bowls: Let all components cool completely. Slice chicken against grain into strips or cubes. Divide rice among containers. Top with chicken, then roasted vegetables. Keep sauce separate until serving.
Notes
Don’t skip the brine. Even a quick 15-minute soak in salted water makes a noticeable difference in how juicy your chicken stays through the week. Watch your rice-to-liquid ratio. For white rice, 1 cup of rice to 1.5 cups of liquid is my sweet spot. Layer strategically: put the rice on the bottom, then the chicken, then the vegetables on top. Let everything cool completely before assembling. Season in layers. Use a meat thermometer.
Nutrition
- Serving Size: 1 bowl
- Calories: 425
- Sodium: 520
- Fat: 12
- Saturated Fat: 3
- Carbohydrates: 45
- Fiber: 4
- Protein: 38
Keywords: meal prep, chicken and rice bowls, healthy lunch, easy meal prep, chicken bowls, rice bowls


