Thanksgiving morning, 7:14 AM, the kitchen still dark except for the stove light, and the only thing I wanted was not to be making gravy while the turkey rested. That frantic, last-minute scramble—dripping pan drippings, whisking frantically, praying the lumps would disappear—had been my reality for years. It was a tradition I hated, a knot of stress tied to the one dish that could make or break the meal. So I stopped. I started making gravy the day before, letting it sit in the fridge, and honestly, the calm that settled over my Thanksgiving kitchen was a gift I didn’t know I needed. This easy make-ahead turkey gravy is that gift.
It’s not about shortcuts or sacrificing flavor. It’s about smart planning. You build a rich, deeply savory gravy from a homemade turkey stock, the kind that tastes like it simmered for hours (because it did, just not on the big day). You thicken it with a simple roux, season it with fresh herbs, and let it rest. When the turkey comes out of the oven, you simply reheat the gravy, stir in a splash of those precious pan drippings for a final burst of fresh flavor, and pour. No lumps. No panic. No one ever guesses it wasn’t made in the moment. That quiet confidence, that little secret you hold while everyone else is running around—that’s what makes this recipe stick.
Why You’ll Love This Recipe
This isn’t just another gravy recipe. It’s a system for a more peaceful, delicious holiday. I’ve tested this method for years, tweaking the ratio of stock to roux, perfecting the herb blend, and learning exactly how to reheat it so the texture stays silky. It’s chef-tested and family-approved, meaning it delivers restaurant-quality results without the restaurant-level stress.
- Stress-Free Hosting: The biggest job is done the day before. You reclaim precious oven and stovetop space on the big day.
- Deeper Flavor: Making your own turkey stock from a simple turkey wing or neck creates a foundation of flavor that store-bought broth simply can’t match. It’s the secret to that “I can’t believe this is homemade” taste.
- Perfect Texture Every Time: No more lumpy gravy. By making it ahead, you have time to whisk, adjust, and perfect the consistency without the pressure of a hungry crowd watching.
- Customizable & Foolproof: This recipe is a blueprint. You can make it gluten-free, add wine, or boost it with herbs—it’s incredibly forgiving.
- Unbelievably Delicious: This gravy is rich, velvety, and packed with savory, roasted turkey flavor. It’s the kind that makes you want to find extra things to pour it on—mashed potatoes, stuffing, even the leftovers the next day.
The first time I made this, I remember pulling the gravy out of the fridge on Thanksgiving morning and feeling this wave of relief. While the turkey was roasting, I just relaxed. I had a cup of coffee. I chatted with my family. And when it was time to eat, I reheated the gravy, added a few tablespoons of the hot pan drippings, and it was, honestly, the best gravy I had ever made. That quiet, personal victory is what I want for you.
What Ingredients You Will Need
This recipe uses simple, wholesome ingredients to deliver a gravy that tastes like it took all day. The star of the show is the homemade turkey stock, which builds the deep, savory backbone. Don’t skip it—it’s the key to that incredible, slow-cooked flavor.
- For the Turkey Stock:
- 2 turkey wings (about 1.5 lbs) or 1 turkey neck – These are the most affordable, flavorful parts for stock. I prefer wings for their higher collagen content, which gives the stock a beautiful body.
- 1 large yellow onion, quartered – Adds a sweet, savory base. Don’t peel it; the skins add a gorgeous golden color.
- 2 large carrots, roughly chopped – For sweetness and depth.
- 2 celery stalks, roughly chopped – Adds a subtle, earthy flavor.
- 3 cloves garlic, smashed – A must for aromatic richness.
- 4 sprigs fresh thyme – My go-to herb for gravy. It’s earthy and slightly floral.
- 2 sprigs fresh rosemary – A classic pairing with turkey.
- 1 bay leaf – Adds a subtle, almost tea-like background note.
- 8 cups cold water – Enough to cover the ingredients.
- 1 teaspoon whole black peppercorns – For a gentle heat.
- Salt, to taste – We’ll season the final gravy, not the stock.
- For the Gravy:
- ½ cup unsalted butter (1 stick) – The fat base for the roux. I use unsalted to control the final salt level.
- ½ cup all-purpose flour – The thickener. For a gluten-free version, use a good quality gluten-free all-purpose flour blend, like Bob’s Red Mill 1-to-1.
- 5 cups prepared turkey stock – The heart of the gravy. You’ll have a little extra stock left over, which is perfect for freezing for soup.
- ½ cup dry white wine (optional, but recommended) – Adds a bright, acidic note that balances the richness. A Sauvignon Blanc or Pinot Grigio works perfectly.
- ¼ cup reserved pan drippings (from your roasted turkey) – This is the magic touch you add on serving day. It infuses the gravy with that fresh, just-roasted flavor.
- Salt and freshly ground black pepper, to taste – Essential for seasoning the final gravy.
Equipment Needed
You don’t need a lot of fancy tools for this. A few basics will get you a perfect, silky gravy.
- Large stockpot or Dutch oven (at least 6 quarts): For making the turkey stock. A heavy-bottomed pot is best for even heat distribution.
- Fine-mesh strainer: Essential for straining the stock to get a perfectly clear liquid. A cheesecloth-lined colander works in a pinch.
- Large, high-sided skillet or saucepan: For making the roux and building the gravy. A 4-quart saucepan is perfect.
- Whisk: Your best friend for a lump-free gravy. A flat-bottomed whisk is great for reaching the corners of the pan.
- Measuring cups and spoons: For accuracy.
- Sharp knife and cutting board: For prepping the vegetables.
- Large bowl or container: For storing the finished stock and the finished gravy.
- Wooden spoon or spatula: For stirring the stock as it simmers.
I’ve made this with a cheap stockpot and a whisk from a dollar store, and it still came out beautifully. The key is the technique, not the price tag of your equipment.
Preparation Method
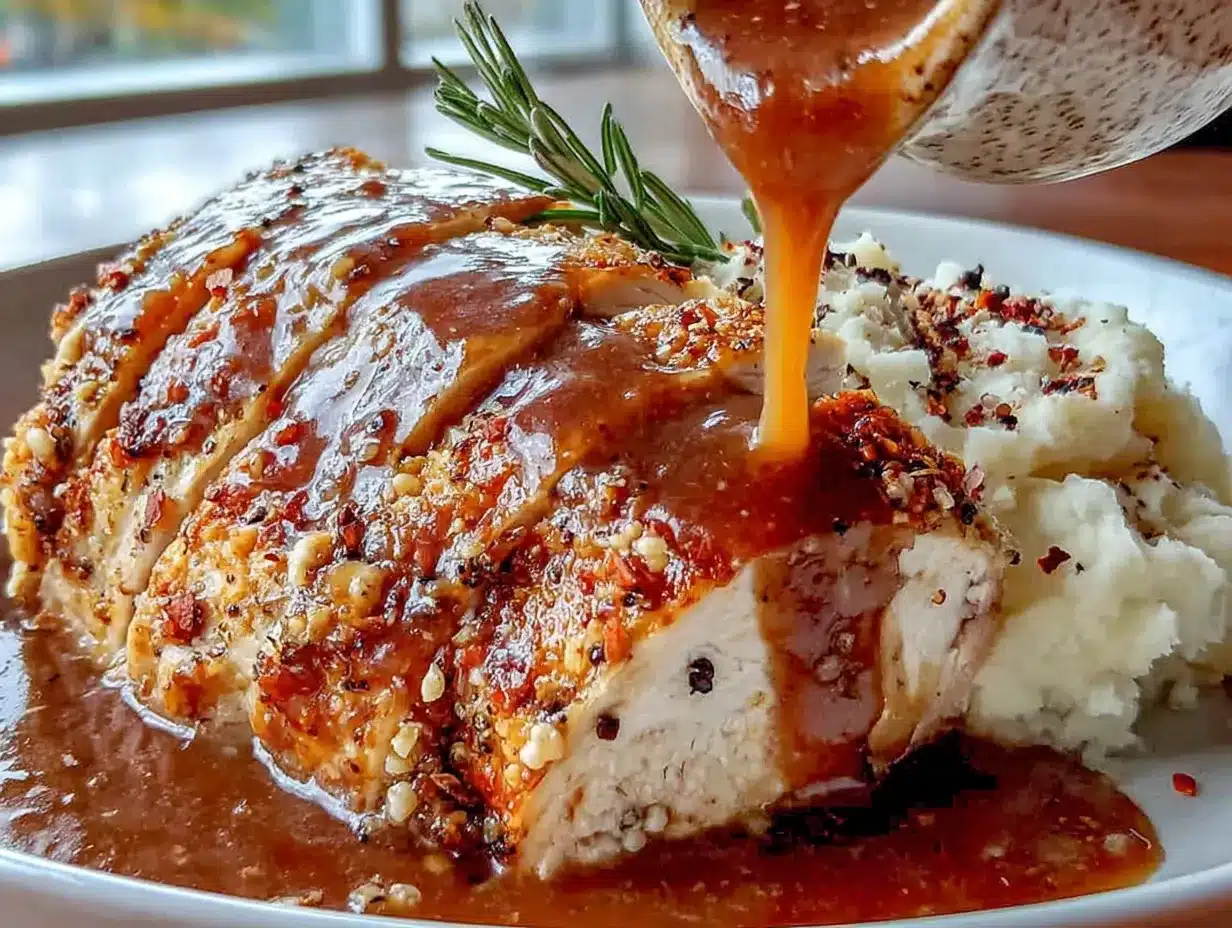
This process is broken into two easy parts: making the stock, and then making the gravy. You can do both on the same day, or make the stock a few days in advance.
Part 1: The Turkey Stock (Day Before or Up to 3 Days Ahead)
- Roast the Turkey Wings (Optional, but Recommended): Preheat your oven to 400°F (200°C). Place the turkey wings on a baking sheet and roast for 30-40 minutes, until they are deeply golden brown. This step adds a phenomenal, roasted depth to the stock. If you’re short on time, you can skip this, but it’s a game-changer.
- Combine Ingredients: In your large stockpot, combine the roasted (or raw) turkey wings, onion, carrots, celery, garlic, thyme, rosemary, bay leaf, and peppercorns. Pour in the 8 cups of cold water.
- Simmer, Don’t Boil: Bring the pot to a gentle simmer over medium-high heat. Once you see small bubbles breaking the surface, reduce the heat to low. You want a lazy simmer, not a rolling boil. Boiling will make the stock cloudy.
- Skim and Simmer: For the first 20 minutes, you’ll see a grayish foam rise to the surface. Use a spoon to skim this off and discard it. This is just impurities and excess fat. Then, let the stock simmer gently, uncovered, for 2 to 2 ½ hours. The liquid will reduce slightly and deepen in color.
- Strain and Cool: Set your fine-mesh strainer over a large bowl or pot. Carefully pour the stock through the strainer, pressing on the solids with a wooden spoon to extract every last drop of flavor. Discard the solids. Let the stock cool completely at room temperature for about an hour.
- Chill and Defat: Once cool, cover the bowl and refrigerate overnight. The fat will rise to the top and solidify into a hard, white layer. This is the easiest way to defat your stock. Before making the gravy, simply scrape off and discard the solid fat. You should have about 6 cups of beautiful, golden stock.
Part 2: The Make-Ahead Gravy (Day Before or Up to 3 Days Ahead)
- Make the Roux: In your large saucepan or skillet, melt the butter over medium heat. Once it’s fully melted and starts to foam, add the flour. Whisk constantly for 2-3 minutes. The mixture will bubble and turn a light, golden brown. It should smell nutty and toasty. This is the foundation of your gravy’s flavor and texture.
- Slowly Add the Stock: This is the most important step. With your whisk in one hand, slowly pour in the 5 cups of cold turkey stock in a thin, steady stream. Whisk vigorously the entire time to prevent lumps from forming. The mixture will immediately thicken.
- Simmer and Thicken: Increase the heat to medium-high and bring the gravy to a gentle simmer. Reduce the heat to low and let it cook, stirring occasionally with your whisk, for 10-15 minutes. It will thicken further and the flavor will meld. It should be thick enough to coat the back of a spoon.
- Add Wine (If Using): Pour in the ½ cup of white wine and whisk to combine. Let it simmer for another 2-3 minutes to cook off the alcohol. You’ll be left with a beautiful, complex flavor.
- Season Lightly: Season the gravy with salt and pepper. Remember, you’ll be adding salty pan drippings later, so go easy on the salt now. The gravy is now ready to be stored.
- Cool and Store: Let the gravy cool completely at room temperature. Transfer it to an airtight container and refrigerate for up to 3 days. The gravy will solidify into a soft, gelatinous texture—this is perfect and exactly what you want.
On Serving Day: The Final Touch
- Reheat the Gravy: Pour the solidified gravy into a saucepan. Warm it over medium-low heat, whisking occasionally. It will loosen up and become silky again. This takes about 5-7 minutes.
- Add the Pan Drippings: Once your turkey is roasted and resting, pour the pan drippings into a fat separator or a glass measuring cup. Let the fat rise to the top. Carefully spoon off the fat, or use the spout of the separator. You want about ¼ cup of the flavorful, brown juices. Whisk these pan drippings into your reheated gravy. This is the step that transforms it from “great make-ahead gravy” to “the best gravy you’ve ever made.”
- Final Taste and Serve: Taste the gravy and adjust the seasoning with salt and pepper. If it’s too thick, whisk in a splash of warm water or chicken broth. If it’s too thin, let it simmer for a few more minutes to reduce. Pour into a warm gravy boat and serve immediately.
Cooking Tips & Techniques
Over the years, I’ve made a few mistakes with this recipe so you don’t have to. Here are my best tips for perfect gravy, every single time.
- The Roux is Everything: Don’t rush the roux. Cooking the flour and butter for a full 2-3 minutes removes the raw flour taste and creates a nutty, toasty flavor that is the backbone of a great gravy. If you cook it too little, your gravy will taste pasty. Too long, and it’ll taste burnt.
- Cold Stock is Your Friend: Adding cold stock to a hot roux helps prevent lumps. The cold liquid helps the fat and flour mixture incorporate smoothly. If you add hot stock, the roux can seize up and create clumps.
- The “Whisking” Technique: Use a whisk, not a spoon. The whisk is designed to break up any small clumps of flour. Whisk in a figure-eight motion to ensure you’re getting every corner of the pan.
- Don’t Over-Season Early: This is my biggest tip. The pan drippings you add on serving day are incredibly salty and flavorful. If you season the make-ahead gravy perfectly, the final product will be too salty. Season it lightly and adjust at the end.
- Texture Troubleshooting: If your gravy is too thick after reheating, just whisk in a little warm water or broth. If it’s too thin, let it simmer for a few more minutes. The starch from the roux will continue to thicken it as it reduces. You can also make a quick slurry (1 tablespoon cornstarch mixed with 2 tablespoons cold water) and whisk it in.
- Timing is Everything: Start reheating your gravy about 15 minutes before you plan to carve the turkey. This gives you plenty of time to whisk, adjust, and add the pan drippings while the turkey rests.
Variations & Adaptations
This recipe is a fantastic base. Feel free to make it your own.
- Gluten-Free Gravy: Simply swap the all-purpose flour for a good quality gluten-free all-purpose flour blend. I’ve had great success with Bob’s Red Mill 1-to-1 Baking Flour. The roux will look a little different, but the final gravy will be just as silky.
- Herbaceous Twist: Add a bundle of fresh herbs (a “bouquet garni”) to the stock as it simmers. A sprig of sage, a few sprigs of parsley, and a sprig of tarragon add a beautiful, complex flavor. You can also stir in a tablespoon of finely chopped fresh sage or thyme just before serving.
- Mushroom & Wine Gravy: For an even deeper, earthier flavor, sauté 8 ounces of finely chopped cremini mushrooms in the butter before making the roux. Then, proceed with the recipe. Use a dry red wine like a Pinot Noir instead of white wine for a robust, savory gravy that’s incredible with roasted meats.
- Giblet Gravy: If you want a traditional giblet gravy, add the turkey neck, heart, and gizzard to the stock pot. Once the stock is done, remove the meat from the neck, finely chop the cooked giblets, and stir them into the finished gravy.
- Vegan/Vegetarian Version: You can absolutely make a delicious version of this gravy without any turkey. Use vegetable stock as the base. For the “roasted” flavor, sauté the vegetables (onion, carrot, celery) until deeply caramelized before adding the water. Add a splash of soy sauce or tamari for umami.
Serving & Storage Suggestions
This gravy is designed to be a star on the Thanksgiving table, but its uses go way beyond the big day.
- Serving Temperature: Serve the gravy hot, in a pre-warmed gravy boat or a small pitcher. A warm vessel helps keep the gravy at the perfect temperature for longer.
- Perfect Pairings: This gravy is obviously a dream with roast turkey, but it’s also incredible on creamy mashed potatoes, stuffing, biscuits, and even roasted vegetables. It makes the best leftover turkey sandwiches you’ve ever had.
- Storage: The prepared gravy (before adding pan drippings) will keep in an airtight container in the refrigerator for up to 3 days. You can also freeze it for up to 3 months. Thaw it overnight in the refrigerator before reheating.
- Reheating: The best way to reheat is on the stovetop over medium-low heat, whisking frequently. You can also reheat it in the microwave in 30-second bursts, stirring between each, but the stovetop gives you the most control over the texture.
- Flavor Development: The flavor of this gravy actually improves after a day or two in the fridge. The herbs and spices have time to meld and deepen. This is one of the great benefits of making it ahead!
Nutritional Information & Benefits
While gravy isn’t a health food, it can be part of a balanced meal. Here are the estimated nutrition facts per ¼ cup serving.
| Nutrient | Amount per Serving (approx.) |
|---|---|
| Calories | 110 |
| Total Fat | 8g |
| Saturated Fat | 5g |
| Cholesterol | 25mg |
| Sodium | 280mg (varies greatly with salt) |
| Total Carbohydrate | 7g |
| Dietary Fiber | 0g |
| Sugars | 1g |
| Protein | 2g |
- Homemade is Healthier: By making your own stock and gravy, you control the sodium and fat content. You also avoid the preservatives, stabilizers, and MSG often found in store-bought gravy packets.
- Collagen from the Stock: The turkey wings and bones release collagen into the stock during simmering. Collagen is great for joint health, skin, and gut health.
- Dietary Considerations: This recipe is naturally low-carb and can easily be made gluten-free. It’s also a great source of protein from the stock.
- Potential Allergens: This recipe contains dairy (butter) and gluten (flour). See the variations section for easy adaptations.
Conclusion
This easy make-ahead turkey gravy is more than a recipe; it’s a strategy for a calmer, more enjoyable holiday. It’s about reclaiming your time, reducing your stress, and still putting a dish on the table that tastes like it was made with love and care—because it was, just not at the last minute. I love this recipe because it represents the best of what cooking can be: thoughtful, deliberate, and rewarding. It’s a little secret you keep, a quiet victory you savor while everyone else is rushing around.
I encourage you to try it this year. Customize the herbs, add a splash of wine, or keep it classic. The beauty is in the base. When you pour that silky, golden gravy over your turkey and see the smiles around your table, you’ll know it was worth the little bit of planning. I can’t wait to hear how it turns out for you. Leave a comment below and tell me about your Thanksgiving gravy triumph!
Frequently Asked Questions
Can I use store-bought chicken or turkey broth instead of making my own stock?
Absolutely, you can. It will still be a good gravy, but it won’t have that deep, roasted turkey flavor. If you use store-bought broth, I recommend using a low-sodium version and adding a splash of soy sauce or a teaspoon of Better than Bouillon roasted chicken base to boost the savory flavor.
My gravy is lumpy. How do I fix it?
Don’t panic! A lumpy gravy is fixable. The easiest way is to pour the whole thing through a fine-mesh strainer into a clean pot. Push it through with a spatula. You’ll have perfectly smooth gravy in seconds. For a less common fix, use an immersion blender directly in the pot to blitz the lumps away.
Can I make this gravy even further in advance, like a month ahead?
Yes! This gravy freezes beautifully. Make the gravy completely (including the wine, but do not add the pan drippings). Let it cool completely, then pour it into a freezer-safe zip-top bag or container. Lay it flat in the freezer. It will keep for up to 3 months. Thaw it overnight in the fridge before reheating.
What if I don’t have any pan drippings on serving day?
No problem at all. The gravy is already delicious on its own. If you want to add a little extra “roasted” flavor, you can stir in a teaspoon of tomato paste or a splash of Worcestershire sauce when you reheat it. It won’t be exactly the same, but it will still be a fantastic gravy.
Can I use this method for chicken gravy?
Yes, 100%. This method works perfectly for chicken gravy too. Just substitute the turkey wings for 2 pounds of chicken wings or a whole chicken back. The process is identical. It’s a great way to have perfect gravy for a roast chicken dinner without any last-minute fuss.
Pin This Recipe!
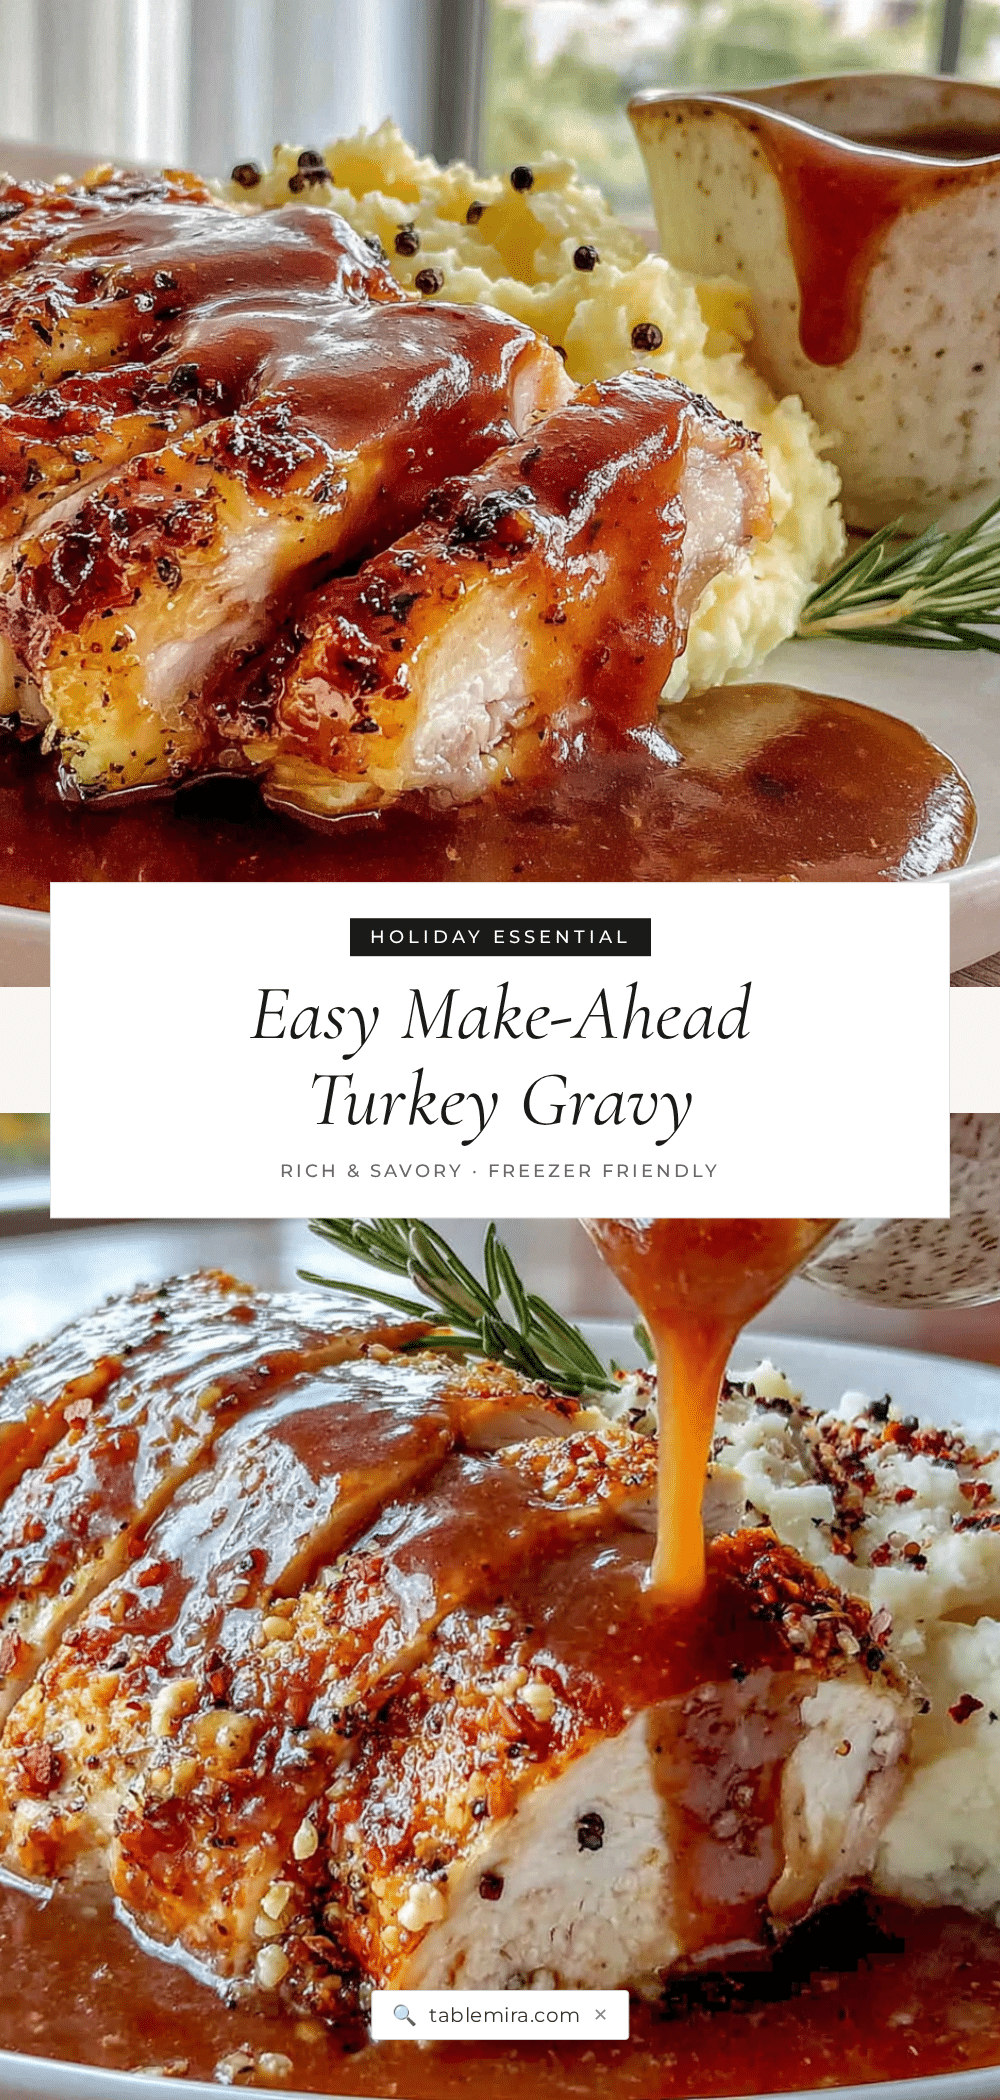
Easy Make-Ahead Turkey Gravy: The Best Homemade Recipe
This make-ahead turkey gravy is a stress-free solution for Thanksgiving, delivering deep, savory flavor without last-minute panic. Made from homemade turkey stock and a simple roux, it can be prepared days in advance and finished with fresh pan drippings for a silky, restaurant-quality result.
- Prep Time: 30 minutes
- Cook Time: 2 hours 30 minutes
- Total Time: 3 hours (plus overnight chilling)
- Yield: 4 servings 1x
- Category: Sauce
- Cuisine: American
Ingredients
- 2 turkey wings (about 1.5 lbs) or 1 turkey neck
- 1 large yellow onion, quartered
- 2 large carrots, roughly chopped
- 2 celery stalks, roughly chopped
- 3 cloves garlic, smashed
- 4 sprigs fresh thyme
- 2 sprigs fresh rosemary
- 1 bay leaf
- 8 cups cold water
- 1 teaspoon whole black peppercorns
- Salt, to taste
- ½ cup unsalted butter (1 stick)
- ½ cup all-purpose flour
- 5 cups prepared turkey stock
- ½ cup dry white wine (optional, but recommended)
- ¼ cup reserved pan drippings (from your roasted turkey)
- Salt and freshly ground black pepper, to taste
Instructions
- Roast the Turkey Wings (Optional, but Recommended): Preheat your oven to 400°F (200°C). Place the turkey wings on a baking sheet and roast for 30-40 minutes, until they are deeply golden brown.
- Combine Ingredients: In your large stockpot, combine the roasted (or raw) turkey wings, onion, carrots, celery, garlic, thyme, rosemary, bay leaf, and peppercorns. Pour in the 8 cups of cold water.
- Simmer, Don’t Boil: Bring the pot to a gentle simmer over medium-high heat. Once you see small bubbles breaking the surface, reduce the heat to low. You want a lazy simmer, not a rolling boil.
- Skim and Simmer: For the first 20 minutes, skim off any grayish foam that rises to the surface. Then, let the stock simmer gently, uncovered, for 2 to 2 ½ hours.
- Strain and Cool: Set your fine-mesh strainer over a large bowl or pot. Carefully pour the stock through the strainer, pressing on the solids with a wooden spoon. Discard the solids. Let the stock cool completely at room temperature for about an hour.
- Chill and Defat: Once cool, cover the bowl and refrigerate overnight. The fat will rise to the top and solidify. Before making the gravy, scrape off and discard the solid fat. You should have about 6 cups of stock.
- Make the Roux: In your large saucepan or skillet, melt the butter over medium heat. Once it’s fully melted and starts to foam, add the flour. Whisk constantly for 2-3 minutes until the mixture turns a light, golden brown and smells nutty.
- Slowly Add the Stock: With your whisk in one hand, slowly pour in the 5 cups of cold turkey stock in a thin, steady stream. Whisk vigorously the entire time to prevent lumps.
- Simmer and Thicken: Increase the heat to medium-high and bring the gravy to a gentle simmer. Reduce the heat to low and let it cook, stirring occasionally, for 10-15 minutes until it thickens enough to coat the back of a spoon.
- Add Wine (If Using): Pour in the ½ cup of white wine and whisk to combine. Let it simmer for another 2-3 minutes to cook off the alcohol.
- Season Lightly: Season the gravy with salt and pepper. Remember, you’ll be adding salty pan drippings later, so go easy on the salt now.
- Cool and Store: Let the gravy cool completely at room temperature. Transfer it to an airtight container and refrigerate for up to 3 days.
- On Serving Day: Reheat the Gravy: Pour the solidified gravy into a saucepan. Warm it over medium-low heat, whisking occasionally, for about 5-7 minutes until it loosens up and becomes silky.
- Add the Pan Drippings: Once your turkey is roasted and resting, pour the pan drippings into a fat separator or a glass measuring cup. Let the fat rise to the top. Carefully spoon off the fat, or use the spout of the separator. You want about ¼ cup of the flavorful, brown juices. Whisk these pan drippings into your reheated gravy.
- Final Taste and Serve: Taste the gravy and adjust the seasoning with salt and pepper. If it’s too thick, whisk in a splash of warm water or chicken broth. If it’s too thin, let it simmer for a few more minutes to reduce. Pour into a warm gravy boat and serve immediately.
Notes
The roux is key: cook it for 2-3 minutes to remove raw flour taste. Add cold stock to hot roux to prevent lumps. Season lightly before adding pan drippings, as drippings are salty. For gluten-free, use a good quality gluten-free all-purpose flour blend. Gravy can be frozen for up to 3 months.
Nutrition
- Serving Size: ¼ cup
- Calories: 110
- Sugar: 1
- Sodium: 280
- Fat: 8
- Saturated Fat: 5
- Carbohydrates: 7
- Protein: 2
Keywords: make-ahead turkey gravy, homemade turkey gravy, Thanksgiving gravy, easy gravy recipe, gluten-free gravy, turkey stock


