My six-year-old looked up from the dinner table and asked why I couldn’t just wrap the hot dogs in the pizza dough instead of making actual pizzas. I started to explain why that wouldn’t work — the dough wouldn’t cook right, the cheese would slide off, it would be a mess. Then I stopped. Honestly, I had no good reason except that I’d never done it that way before. She was patient with me while I grabbed a package of crescent roll dough from the fridge, and within twenty minutes we had a plate of these silly little mummy pizza bites that she was absolutely delighted with. I mean, I was supposed to be the one teaching her how to cook, and she just handed me a better idea without breaking a sweat.
The whole thing happened on a random Wednesday in late September, right when the Halloween candy had started showing up at the grocery store and she was already counting down the days. We had been planning to make mini pizzas for a quick dinner, and I was pulling out the usual ingredients when she dropped her suggestion. I almost laughed it off, but something about the way she said it — so certain, so matter-of-fact — made me pause. Maybe you’ve been there, where a kid just assumes something will work and you realize you’re the one overcomplicating it.
These mummy pizza bites have become our go-to Halloween dinner ever since. They’re not fancy, they’re not complicated, and that’s exactly the point. Every time I make them, I think about how my daughter was right and I was wrong, and honestly, I love being reminded that good ideas come from anywhere — even a six-year-old who just wants dinner to look like a monster.
Why You’ll Love This Recipe
Let me tell you why these mummy pizza bites have earned a permanent spot in our October dinner rotation. I’ve tested this recipe at least a dozen times now, tweaking the dough brands and cheese amounts, and I can say with confidence that this version works every single time.
- Quick & Easy : From start to table in under 30 minutes. No marinating, no complicated steps, no waiting around. Perfect for those busy weeknights when the kids are already asking what’s for dinner before you’ve even started.
- Simple Ingredients : You likely have everything in your kitchen right now. Crescent roll dough, hot dogs, cheese, pizza sauce, and some olive or black olives for the eyes. That’s it.
- Perfect for Halloween : These are made for spooky season. They look like little mummies, which means instant kid approval without any fancy decorating skills required.
- Crowd-Pleaser : My kids devour these, and so do the adults. There’s something about food that looks like a monster that makes everyone happy, regardless of age.
- Unbelievably Delicious : The crescent roll dough gets golden and flaky, the hot dog gets a little crispy on the edges, and the melted cheese pulls apart in strings. It’s comfort food in the best possible way.
What makes this recipe different from every other Halloween snack out there is how simple it actually is. You don’t need cookie cutters, special molds, or any of that stuff that sounds fun but ends up frustrating. You just wrap, bake, and add eyes. It’s the kind of recipe that makes you feel like a good parent without actually trying very hard, and I think we all deserve more of those.
What Ingredients You Will Need
This recipe uses ingredients that are probably already in your fridge and pantry. No special trips to a fancy grocery store, no hunting down obscure items. Here’s what you’ll need:
- 1 can (8 oz) refrigerated crescent roll dough — I prefer Pillsbury for consistent results, but any brand works. You could also use pizza dough if you have it, but crescent roll dough is thinner and wraps more easily.
- 8 hot dogs — Regular beef or pork hot dogs work great. Turkey or chicken hot dogs also work if that’s what your family prefers. Just make sure they’re fully cooked since we’re only warming them through.
- 1 cup shredded mozzarella cheese — Pre-shredded is fine, but freshly shredded melts a little smoother. I’ve used both and honestly can’t tell the difference once they’re baked.
- 1/2 cup pizza sauce — Store-bought or homemade, whatever you have. I usually grab a jar of Rao’s because it’s not too sweet, but my kids actually prefer the cheap stuff. Go figure.
- Olive or black olives for the eyes — You’ll need about 16 olives total, sliced into rounds. I use canned black olives because they’re softer and stick better to the cheese.
- Optional: melted butter or olive oil for brushing — This gives the dough a golden, shiny finish. Totally optional, but it does make them look prettier.
- Optional: garlic powder or Italian seasoning — A light sprinkle over the top adds a little extra flavor. My kids don’t notice it, so I sneak it in.
One thing I’ve learned the hard way — don’t use the thin crescent roll dough sheets that come in one piece. The perforated triangles are actually better for this because you can separate them easily and they wrap around the hot dogs more naturally. If you only have the sheet version, just cut it into triangles yourself.
For the hot dogs, I recommend using regular-sized ones rather than the jumbo or mini versions. Regular hot dogs are the perfect size for one crescent roll triangle to wrap around. Jumbo ones leave too much exposed dough, and mini ones look weird with the mummy wrapping.
Equipment Needed
You don’t need much for this recipe, which is part of why I love it. Here’s what you’ll need:
- Baking sheet — A standard half-sheet pan works perfectly. Line it with parchment paper for easy cleanup, though it’s not strictly necessary.
- Sharp knife or pizza cutter — For cutting the crescent roll dough into strips. A pizza cutter is actually easier for this, but a knife works fine too.
- Small bowl — For the melted butter or olive oil if you’re using it.
- Pastry brush — Optional, but helpful for brushing the butter or oil onto the dough. You can also just use a spoon.
- Toothpicks — If you need to secure the dough strips while baking, though I rarely find this necessary.
That’s genuinely it. No special mummy-shaped cookie cutters, no piping bags, no silicone molds. I’ve made these in my tiny apartment kitchen and in my current house with a decent oven, and they come out the same every time.
If you don’t have parchment paper, just spray the baking sheet with nonstick spray. The crescent roll dough has enough butter in it that it usually doesn’t stick anyway, but the parchment makes cleanup faster.
Preparation Method
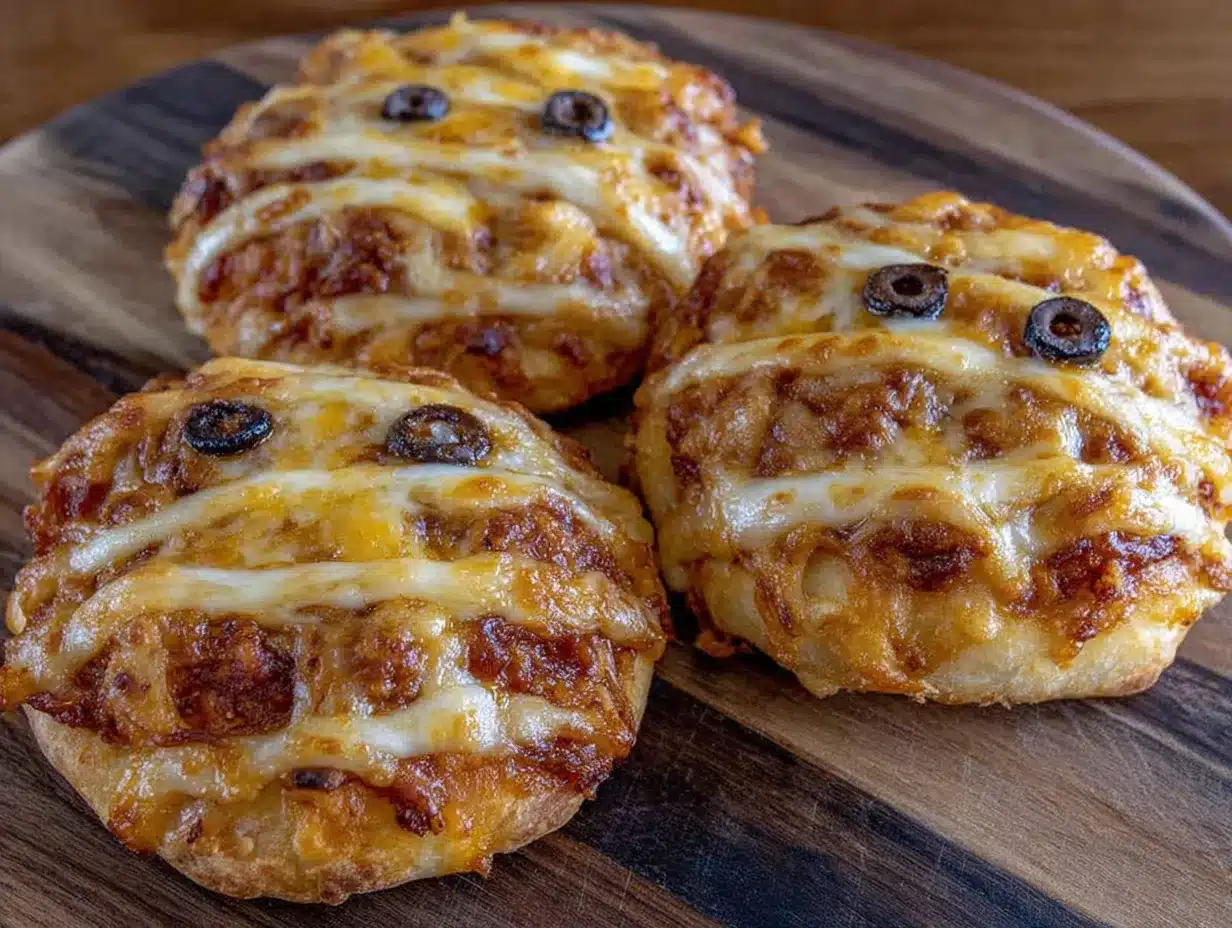
Let me walk you through this step by step. I’ve made these enough times to know exactly where things can go wrong, so I’ll include those notes too.
- Preheat your oven to 375°F (190°C). Line a baking sheet with parchment paper or spray it lightly with nonstick spray. This is one of those steps that seems obvious but trust me, I’ve forgotten to preheat before and then stood there staring at a cold oven while my kids asked why dinner was taking so long.
- Unroll the crescent roll dough and separate it into the pre-cut triangles. You should have 8 triangles. Press the perforated seams together gently so you have solid triangles — the seams can come apart during wrapping if you don’t seal them first.
- Cut each triangle lengthwise into 3-4 strips. You want the strips to be about 1/2 inch wide. A pizza cutter works best for this, but a sharp knife is fine. Don’t worry if they’re not perfectly even — the mummies look better when the wrapping is a little irregular anyway.
- Wrap the dough strips around each hot dog in a spiral pattern, starting at one end and working your way to the other. Leave a small gap near the top of the hot dog where the face will go — about 1 inch of exposed hot dog. The wrapping should look like bandages on a mummy, so leave some spaces between the strips where the hot dog shows through.
- Place the wrapped hot dogs on the prepared baking sheet with the seam side down. This helps keep the dough from unraveling while it bakes. Leave about an inch of space between each one so they brown evenly.
- Bake for 12-15 minutes or until the dough is golden brown and the hot dogs are heated through. The exact time depends on your oven, so start checking at 12 minutes. You want the dough to look puffed and golden, not pale and doughy.
- While they bake, prepare the olive eyes. Slice the olives into rounds — you’ll need 2 rounds per mummy pizza bite. Set them aside on a paper towel to absorb any excess moisture. Wet olives don’t stick well to the cheese.
- Remove from the oven and let them cool for 2-3 minutes on the baking sheet. This is important — the cheese will be molten hot and the dough needs a minute to set. I learned this the hard way when I tried to add eyes immediately and burned my fingers.
- Add a small dollop of pizza sauce to the exposed hot dog area, then sprinkle with shredded mozzarella cheese. You want enough cheese to cover the sauce but not so much that it slides off. About a tablespoon per mummy works well.
- Place two olive slices on the cheese for eyes. Press them in gently so they stick. If the cheese isn’t melted enough to hold them, pop them back in the oven for 1-2 minutes.
- Return to the oven for 2-3 minutes until the cheese is melted and bubbly. Watch closely — you don’t want the cheese to brown, just melt.
- Let them cool for 5 minutes before serving. The hot dog inside stays hot for a while, and kids especially need a minute before biting in.
One thing I want to mention — the first time I made these, I wrapped the dough too tightly around the hot dogs, and the dough didn’t cook through in the middle. You want the strips to be snug but not tight, with a little bit of space between them. Think of it like wrapping a bandage, not shrink wrap.
Cooking Tips & Techniques
I’ve made plenty of mistakes with these mummy pizza bites so you don’t have to. Here’s what I’ve learned:
Don’t overwork the dough. Crescent roll dough is delicate, and if you handle it too much, it gets tough. Just separate the triangles, cut them into strips, and wrap them. Don’t try to reroll scraps or make them perfect.
Leave room for the face. I mentioned this in the instructions, but it’s worth repeating. If you wrap the dough all the way to the top of the hot dog, there’s no place to put the sauce and cheese. Leave about an inch exposed at one end.
Use room temperature hot dogs. Cold hot dogs straight from the fridge can make the dough cold in spots, which leads to uneven baking. Let them sit on the counter for 10 minutes before wrapping. I usually take them out when I start preheating the oven.
Watch the cheese. The second bake is short, so keep an eye on it. Mozzarella can go from melted to browned in about 30 seconds. If your oven runs hot, check at 2 minutes instead of 3.
Make extra sauce for dipping. My kids love dipping these in extra pizza sauce, and honestly, so do I. Heat up a small bowl of sauce on the side for dipping.
One time I forgot to buy crescent roll dough and tried using puff pastry instead. It was a disaster — too thick, too buttery, and it didn’t wrap well. Stick with the crescent rolls for this one. They’re thin enough to cook through and flaky enough to be delicious.
Variations & Adaptations
These mummy pizza bites are pretty forgiving, so feel free to play around with them. Here are some variations I’ve tried:
Cheese-filled version: Before wrapping the hot dog, slice it lengthwise almost all the way through (like a hot dog bun) and stuff a thin strip of cheddar or mozzarella inside. Then wrap as usual. The cheese melts inside and makes them extra gooey.
Pizza sauce inside: Spread a thin layer of pizza sauce on the dough strips before wrapping. It adds more flavor, though it can make the dough a little soggy if you use too much. A light coating is all you need.
Different meats: Smoked sausage, kielbasa, or even chicken sausage work great in place of hot dogs. Just make sure they’re fully cooked before wrapping. I’ve used turkey kielbasa and my kids didn’t even notice the difference.
Vegetarian version: Replace the hot dog with a cheese stick or a thick carrot stick that’s been roasted until tender. My vegetarian friend tried the cheese stick version and said it was surprisingly good.
Spicy version for adults: Add a thin slice of jalapeño under the cheese on the face, or sprinkle red pepper flakes over the top before the second bake. My husband loves these with a little heat.
Gluten-free option: Use gluten-free crescent roll dough if you can find it. The texture is slightly different — a little more crumbly — but the flavor is still good. You could also use gluten-free pizza dough rolled very thin.
My personal favorite variation is the cheese-filled one. I add a small slice of cheddar inside the hot dog, and the melted cheese oozes out when you bite into it. It’s messy but so worth it.
Serving & Storage Suggestions
These mummy pizza bites are best served warm, right after the cheese has melted. The dough is at its flakiest, the hot dog is hot, and the cheese pulls apart in perfect strings.
For presentation, I arrange them on a platter with a small bowl of extra pizza sauce in the center for dipping. You can scatter some pretzel sticks around for a “graveyard” look, or add some baby carrots that look like little fingers. My kids think it’s hilarious.
They pair well with a simple side salad for adults, or with apple slices and carrot sticks for kids. I usually serve them with a vegetable of some kind just to balance out the meal, but honestly, on Halloween night, nobody cares about vegetables.
Storage: Leftover mummy pizza bites can be stored in an airtight container in the refrigerator for up to 3 days. The dough will soften a bit, but they still taste good. I don’t recommend freezing them — the dough gets soggy when thawed.
Reheating: The best way to reheat these is in the oven or toaster oven at 350°F for about 5 minutes. The microwave works in a pinch, but the dough gets chewy and the hot dog can become rubbery. If you must use the microwave, wrap them in a paper towel and heat for 20-30 seconds.
One thing I’ve noticed is that the flavors actually meld together a bit after a day in the fridge. The pizza sauce soaks into the hot dog slightly, and the whole thing tastes more cohesive. They’re not as pretty the next day, but they’re still delicious.
Nutritional Information & Benefits
Let me be honest — these mummy pizza bites are not health food. They’re a fun Halloween treat that happens to work as dinner. But here’s the breakdown if you’re curious:
Per serving (2 mummy pizza bites): Approximately 350-400 calories, 22g fat, 28g carbohydrates, 14g protein. The exact numbers depend on the brands you use and how much cheese you add.
The hot dogs provide protein and some B vitamins, while the cheese adds calcium. The crescent roll dough is mostly carbs and fat, which is why I like to serve these with a vegetable on the side.
If you want to make them a little healthier, use turkey hot dogs or chicken sausage, low-fat cheese, and whole wheat crescent roll dough if you can find it. The taste is slightly different, but my kids didn’t complain when I made the switch.
These are not gluten-free as written, but the gluten-free variation works well. They’re also nut-free and egg-free, which makes them safe for most school parties and playdates.
I’m not a nutritionist, and I don’t pretend to be one. These are a fun dinner for a special occasion, not something you’d eat every night. But honestly, I’ve made them on random weeknights in October just because they make my kids happy, and I think that counts for something.
Conclusion
These Kid-Approved Halloween Mummy Pizza Bites have become a tradition in our house, and I hope they become one in yours too. They’re simple, they’re fun, and they actually taste good — not just like a gimmick that kids will eat but adults will tolerate. The flaky crescent roll dough, the juicy hot dog, the melted cheese, the silly little olive eyes — it all comes together in a way that feels special without being complicated.
What I love most about this recipe is how it started. My daughter had an idea, I almost dismissed it, and she was right. Every time I make these, I remember that good cooking isn’t about knowing everything — it’s about being open to learning from anyone, even a six-year-old who just wants her dinner to look like a monster.
I’d love to hear how these turn out for you. Did your kids help wrap the dough? Did you try any fun variations? Drop a comment below and let me know — I read every single one, and I love seeing photos of your creations. And if you’re looking for more easy Halloween recipes, check out my spooky Halloween pizza bites for another fun option.
Happy Halloween, and happy cooking!
Frequently Asked Questions
Can I make these mummy pizza bites ahead of time?
You can assemble them up to the baking step and refrigerate for up to 24 hours. Just cover them tightly with plastic wrap and bake when ready. You may need to add 2-3 minutes to the baking time since they’ll be cold from the fridge.
Can I use pizza dough instead of crescent roll dough?
Yes, but roll it very thin — about 1/8 inch thick. Pizza dough is denser than crescent roll dough, so it needs to be thin to cook through properly. You’ll also need to bake them a few minutes longer.
How do I get the olive eyes to stay on?
Press them gently into the melted cheese right when it comes out of the oven. If the cheese has cooled too much, pop them back in the oven for 30 seconds to soften the cheese again. You can also use a tiny dab of pizza sauce as glue.
Can I make these in an air fryer?
Absolutely! Cook at 350°F for 8-10 minutes, then add the cheese and eyes and cook for another 2-3 minutes. The air fryer makes the dough extra crispy. Just don’t overcrowd the basket — work in batches if needed.
What if my kids don’t like hot dogs?
Try using chicken sausage, turkey sausage, or even cheese sticks instead. The cheese stick version works surprisingly well — just wrap the dough around a mozzarella stick and bake until the dough is golden. The cheese will melt inside.
Pin This Recipe!
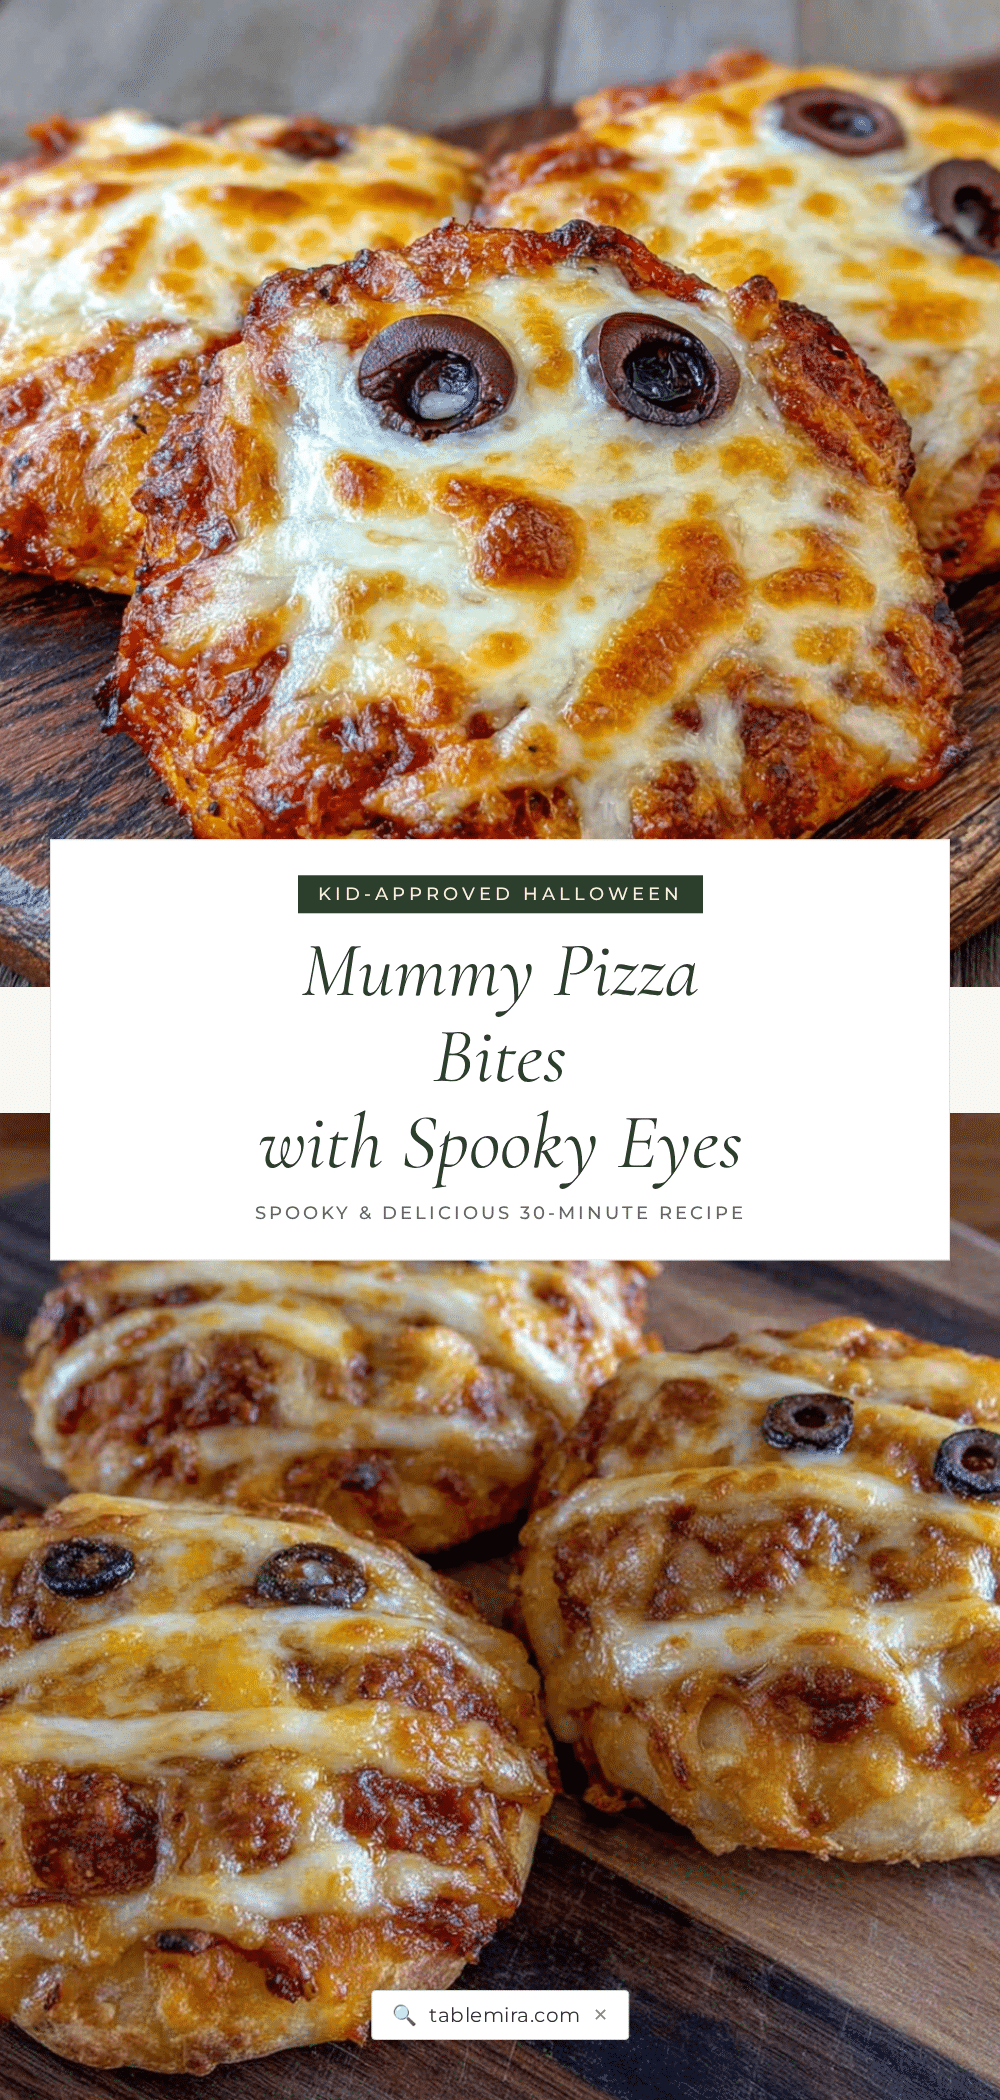
Easy Kid-Approved Halloween Mummy Pizza Bites
These fun and simple mummy pizza bites are made with crescent roll dough, hot dogs, cheese, and olives. They’re a quick, kid-friendly Halloween dinner that comes together in under 30 minutes.
- Prep Time: 10 minutes
- Cook Time: 15 minutes
- Total Time: 25 minutes
- Yield: 4 servings 1x
- Category: Main Course
- Cuisine: American
Ingredients
- 1 can (8 oz) refrigerated crescent roll dough
- 8 hot dogs
- 1 cup shredded mozzarella cheese
- 1/2 cup pizza sauce
- Olive or black olives for the eyes (about 16 olives, sliced into rounds)
- Optional: melted butter or olive oil for brushing
- Optional: garlic powder or Italian seasoning
Instructions
- Preheat your oven to 375°F (190°C). Line a baking sheet with parchment paper or spray it lightly with nonstick spray.
- Unroll the crescent roll dough and separate it into the pre-cut triangles. You should have 8 triangles. Press the perforated seams together gently so you have solid triangles.
- Cut each triangle lengthwise into 3-4 strips, about 1/2 inch wide.
- Wrap the dough strips around each hot dog in a spiral pattern, starting at one end and working your way to the other. Leave a small gap near the top of the hot dog where the face will go — about 1 inch of exposed hot dog.
- Place the wrapped hot dogs on the prepared baking sheet with the seam side down. Leave about an inch of space between each one.
- Bake for 12-15 minutes or until the dough is golden brown and the hot dogs are heated through.
- While they bake, slice the olives into rounds — you’ll need 2 rounds per mummy pizza bite. Set them aside on a paper towel to absorb any excess moisture.
- Remove from the oven and let them cool for 2-3 minutes on the baking sheet.
- Add a small dollop of pizza sauce to the exposed hot dog area, then sprinkle with shredded mozzarella cheese. About a tablespoon per mummy works well.
- Place two olive slices on the cheese for eyes. Press them in gently so they stick.
- Return to the oven for 2-3 minutes until the cheese is melted and bubbly.
- Let them cool for 5 minutes before serving.
Notes
Don’t overwork the dough. Leave room for the face. Use room temperature hot dogs. Watch the cheese during the second bake. Make extra sauce for dipping. For best results, use regular-sized hot dogs and perforated crescent roll dough triangles.
Nutrition
- Serving Size: 2 mummy pizza bites
- Calories: 375
- Sugar: 4
- Sodium: 850
- Fat: 22
- Saturated Fat: 8
- Carbohydrates: 28
- Fiber: 1
- Protein: 14
Keywords: Halloween, mummy pizza bites, kid-friendly, hot dog, crescent roll, quick dinner, spooky, easy recipe


