This was supposed to be a simple batch of chocolate cupcakes for my daughter’s class Halloween party. I had it all planned out—a fancy spiderweb design with piped black icing that would look like something from a bakery. Then the power flickered. Twice. My buttercream seized up, the black gel coloring separated into this weird gray sludge, and I was already running late because I’d spent twenty minutes looking for my piping tips. What came out was nothing like the plan—and better.
I stared at the sad, naked cupcakes and grabbed the only thing I had left: a bag of marshmallows from my son’s s’mores stash. I cut them in half, stuck them on top, and dusted them with powdered sugar. My daughter walked in, squealed, and said they looked like ghosts. Honestly, I was just relieved they weren’t a total loss. But then she took a bite, closed her eyes, and said, “Mom, these are the best ones you’ve ever made.”
That’s the thing about cooking with kids—sometimes the best recipes come from moments when everything goes sideways. You know that feeling when you’re one step away from ordering pizza, and then something clicks? That was this cupcake. The marshmallow frosting isn’t just a shortcut—it’s fluffy, sweet, and exactly what a ghost cupcake should be. Let me tell you, I’ve made these every Halloween since, and now my kids request them year-round. Funny how a disaster can become a tradition.
Why You’ll Love This Recipe
These ghost cupcakes are the kind of recipe that makes you look like a Halloween hero without breaking a sweat. I’ve tested them with my own kids, their friends, and even a classroom of skeptical second-graders, and they disappear every time.
- Quick & Easy : From start to finish, these come together in under 45 minutes. No complicated piping bags or fancy techniques needed—just a knife and some marshmallows.
- Simple Ingredients : You probably have most of this in your pantry right now. No specialty baking stores or expensive extracts required.
- Perfect for Halloween Parties : Whether it’s a school celebration, a neighborhood gathering, or just a spooky movie night at home, these cupcakes fit right in.
- Kid-Approved : My kids helped me make these, and they loved every step—especially the “ghost assembly” part. Picky eaters? These are a guaranteed win.
- Unbelievably Delicious : The combination of moist chocolate cake and fluffy marshmallow frosting is next-level comfort food. It’s sweet but not cloying, with a texture that’s light as air.
What makes this recipe different from the rest? It’s the marshmallow frosting. Instead of a complicated buttercream that can crack or slide off, you get a pillowy topping that stays put and tastes like childhood. Plus, the ghosts are actually edible—no fondant or modeling chocolate to deal with. Just real marshmallows that melt in your mouth.
This recipe isn’t just good—it’s the kind that makes you close your eyes after the first bite. It’s Halloween fun reimagined: faster, easier, but with the same soul-soothing satisfaction. Perfect for impressing your kid’s classmates without stressing yourself out, or turning a simple Tuesday into something memorable.
What Ingredients You Will Need
This recipe uses simple, everyday ingredients to deliver bold Halloween flavor without the fuss. Most of these are pantry staples, so you can whip these up on a whim—even on a school night.
For the Cupcakes
- 1 3/4 cups all-purpose flour (scoop and level for accuracy)
- 3/4 cup unsweetened cocoa powder (I recommend Hershey’s for consistent flavor)
- 1 1/2 teaspoons baking powder
- 1 1/2 teaspoons baking soda
- 1 teaspoon salt
- 2 cups granulated sugar
- 2 large eggs (room temperature, for better emulsion)
- 1 cup whole milk (or 2%—just not skim, the fat matters here)
- 1/2 cup vegetable oil (adds moisture without butter’s fussiness)
- 2 teaspoons vanilla extract
- 1 cup hot water (coffee works too, it deepens the chocolate flavor)
For the Marshmallow Frosting
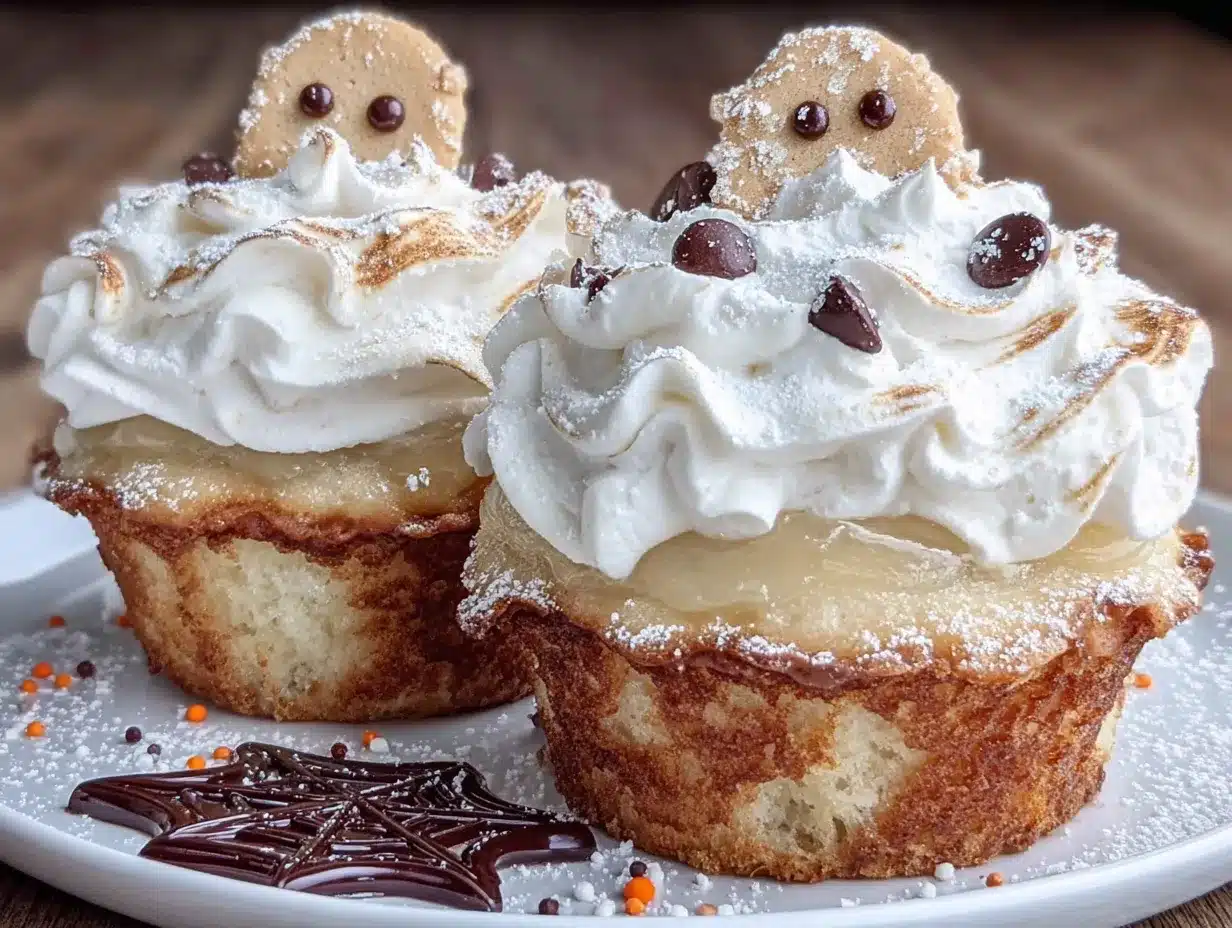
- 1 jar (7 oz) marshmallow creme (like Fluff or store brand)
- 1/2 cup unsalted butter (softened, not melted)
- 1 cup powdered sugar (sifted if clumpy)
- 1 teaspoon vanilla extract
- Pinch of salt
For the Ghost Toppers
- 12 large marshmallows (regular size, not mini)
- 2 tablespoons powdered sugar (for dusting)
- Mini chocolate chips (for eyes, about 24 total)
Ingredient Tips: For the cocoa powder, I’ve tried Dutch-process here and it works, but natural cocoa gives that classic chocolate cupcake flavor that kids love. If you’re out of whole milk, mix 1 cup of 2% with 1 tablespoon of melted butter—it mimics the fat content. The hot water is non-negotiable; it blooms the cocoa and makes the cake incredibly moist. Trust me on this one.
For the marshmallow creme, don’t substitute with mini marshmallows melted down—it changes the texture and makes the frosting grainy. Stick with the jarred stuff. I’ve tried both, and the jar version gives that perfect fluffy consistency every time.
Equipment Needed
Nothing fancy here—just basic baking tools you probably already own.
- 12-cup muffin tin (standard size, not jumbo)
- Paper cupcake liners (Halloween-themed ones add fun, but plain works too)
- Two mixing bowls (one large, one medium)
- Whisk and rubber spatula
- Electric hand mixer or stand mixer (for the frosting)
- Cooling rack
- Sharp knife or kitchen scissors (for cutting marshmallows)
- Small fine-mesh sieve (for dusting powdered sugar)
If you don’t have a hand mixer, you can whisk the frosting by hand—it just takes a few extra minutes and some elbow grease. I’ve done it both ways, and honestly, the arm workout is worth it for that fluffy texture. For the marshmallow cutting, kitchen scissors work better than a knife because the marshmallows don’t stick as much. Just give them a quick spray with non-stick cooking spray first.
Preparation Method
Let’s walk through this step by step. I’ve included all the little details I wish someone had told me the first time.
Step 1: Preheat and Prep
Preheat your oven to 350°F (175°C). Line your muffin tin with 12 paper liners. This seems obvious, but make sure they’re snug—loose liners can cause the batter to leak underneath. I learned this the hard way, and scraping burnt batter off a muffin tin is no one’s idea of fun.
Step 2: Mix Dry Ingredients
In a large bowl, whisk together the flour, cocoa powder, baking powder, baking soda, and salt. Make sure there are no lumps—cocoa powder is notorious for hiding them. I use a fork to break up any stubborn clumps before whisking.
Step 3: Combine Wet Ingredients
In a separate medium bowl, whisk together the sugar, eggs, milk, oil, and vanilla extract. Whisk until smooth and slightly thickened, about 30 seconds. The mixture should look glossy and uniform.
Step 4: Combine Wet and Dry
Pour the wet ingredients into the dry ingredients. Stir with a rubber spatula until just combined—about 10 strokes. A few lumps are fine; overmixing makes tough cupcakes.
Step 5: Add Hot Water
Pour in the hot water and stir gently until the batter is smooth. It will look very thin—that’s normal. The batter should be pourable, almost like a milkshake. This is what gives the cupcakes that tender, moist crumb.
Step 6: Fill and Bake
Divide the batter evenly among the 12 liners, filling each about 2/3 full. I use a 1/4-cup measure for consistency. Bake for 18-22 minutes, or until a toothpick inserted in the center comes out with a few moist crumbs (not wet batter). The tops should spring back when lightly touched.
Step 7: Cool Completely
Let the cupcakes cool in the pan for 5 minutes, then transfer to a wire rack. Cool completely before frosting—about 30 minutes. If you frost them while warm, the marshmallow frosting will melt into a puddle. Not the end of the world, but it won’t look like ghosts.
Step 8: Make the Frosting
In a large bowl, beat the softened butter with an electric mixer until creamy, about 2 minutes. Add the marshmallow creme and beat until smooth. Gradually add the powdered sugar, beating on low speed to avoid a sugar cloud. Add the vanilla and salt, then beat on high for 2-3 minutes until light and fluffy.
Step 9: Assemble the Ghosts
Take each large marshmallow and cut it in half diagonally (corner to corner). You’ll get two triangles. The flat side becomes the bottom of the ghost, and the pointy side is the head. Press two mini chocolate chips into the marshmallow for eyes, pointed side in.
Step 10: Frost and Decorate
Spread a generous layer of frosting on each cooled cupcake. Place a marshmallow ghost on top, pressing gently so it sticks. Use a fine-mesh sieve to dust the ghosts with powdered sugar—this gives them that “spooky” look. Serve immediately or store.
Cooking Tips & Techniques
I’ve made these ghost cupcakes at least a dozen times now, and I’ve learned a few things the hard way. Here are my best tips for success.
Don’t overmix the batter. I know it’s tempting to keep stirring until it’s perfectly smooth, but that develops gluten and makes the cupcakes dense. Stop as soon as the dry ingredients are incorporated. A few lumps are fine—they’ll bake out.
Use room temperature eggs. Cold eggs can cause the batter to curdle or not emulsify properly. If you forgot to take them out ahead of time, place them in a bowl of warm water for 5 minutes. This is a trick my grandmother taught me, and it works every time.
Cut marshmallows with scissors. A knife tends to squish them. Lightly spray your scissors with non-stick spray, and cut in one clean motion. If the marshmallow sticks, wipe the scissors clean between cuts.
Don’t skip the powdered sugar dusting. It’s not just for looks—it adds a subtle sweetness that balances the marshmallow and keeps the ghosts from feeling sticky. Plus, it makes them look like they’ve been in a haunted house.
Make the frosting ahead of time. You can prepare the marshmallow frosting up to 2 days in advance and store it in the fridge. Let it come to room temperature and re-whip for 30 seconds before using. This is a lifesaver on busy Halloween mornings.
One mistake I still make: I always forget to set the butter out to soften. If you’re in a rush, cut the butter into small cubes and microwave it in 5-second bursts. Stop when it’s soft but not melted—melted butter makes the frosting greasy.
Variations & Adaptations
These ghost cupcakes are flexible, so feel free to make them your own. Here are some variations I’ve tried and loved.
Gluten-Free Version
Substitute the all-purpose flour with a 1:1 gluten-free baking flour blend. I use King Arthur Measure for Measure, and it works perfectly. Add 1/4 teaspoon of xanthan gum if your blend doesn’t include it. The texture is slightly more tender but still delicious.
Dairy-Free Version
Use almond milk or oat milk in place of whole milk, and swap the butter for a plant-based butter like Miyoko’s. The marshmallow creme is naturally dairy-free, so that’s one less thing to worry about. The cupcakes will be slightly less rich but still moist.
Different Flavor Cupcakes
Vanilla cupcakes work beautifully here if chocolate isn’t your thing. Just omit the cocoa powder and increase the flour to 2 cups. Add an extra teaspoon of vanilla extract. The ghosts look especially cute on a light background—like little spirits floating on clouds.
Spooky Variations
Instead of ghosts, try cutting the marshmallows into bat wings or pumpkin shapes. For bats, cut the marshmallow in half horizontally, then cut each half into a wing shape. For pumpkins, use orange frosting and a green M&M stem. My kids love mixing it up each year.
Mini Cupcake Version
Use a mini muffin tin and bake for 10-12 minutes. Cut mini marshmallows in half for the ghosts. These are perfect for classroom parties or snack-sized treats. You’ll get about 36 mini cupcakes from one batch.
Serving & Storage Suggestions
These ghost cupcakes are best served at room temperature. The marshmallow frosting stays fluffy, and the cake is perfectly moist. If you’re serving them at a party, arrange them on a platter with some fake spiderwebs or plastic spiders for extra Halloween flair.
For storage: Place leftover cupcakes in an airtight container at room temperature for up to 2 days. The marshmallows will soften slightly, but they’re still delicious. If you need to store them longer, refrigerate for up to 4 days. Let them come to room temperature before serving—cold cupcakes taste dense.
To freeze: Freeze unfrosted cupcakes for up to 3 months. Wrap each one tightly in plastic wrap, then place in a freezer bag. When ready to serve, thaw at room temperature, then make the frosting and assemble. I’ve done this for Halloween parties, and it works great—just don’t freeze the assembled ghosts, as the marshmallows get chewy.
Flavor development note: These cupcakes actually taste better the next day. The chocolate flavor deepens, and the marshmallow frosting settles into a perfect balance. My kids always sneak one for breakfast the morning after Halloween, and honestly, I don’t blame them.
Nutritional Information & Benefits
Let’s be real—these are a treat, not a health food. But knowing what’s in them helps you enjoy them mindfully. Here’s the estimated nutrition per cupcake (based on 12 servings):
| Nutrient | Amount |
|---|---|
| Calories | 345 |
| Total Fat | 14g |
| Saturated Fat | 6g |
| Carbohydrates | 54g |
| Sugar | 38g |
| Protein | 4g |
| Sodium | 310mg |
Health highlights: The cocoa powder is rich in antioxidants called flavonoids, which can support heart health. The eggs provide protein and B vitamins. And the marshmallow creme? Well, it makes people smile—that counts for something, right?
Dietary considerations: This recipe contains gluten, dairy, and eggs. For allergen-friendly versions, see the variations section above. If you’re watching sugar intake, you can reduce the sugar in the cupcake batter to 1 1/2 cups without affecting the texture too much—just don’t touch the frosting sugar, as it’s essential for structure.
My personal take: These are a once-in-a-while treat, not an everyday snack. But for Halloween? They’re worth every calorie. Life’s too short to skip the marshmallow ghosts.
Conclusion
These ghost cupcakes started as a kitchen disaster, but they’ve become one of my favorite Halloween traditions. They’re proof that sometimes the best recipes come from moments when things don’t go according to plan. The marshmallow frosting is fluffy and sweet, the chocolate cake is moist and rich, and the ghosts are so simple that even my five-year-old can help assemble them.
I love that this recipe doesn’t require fancy ingredients or professional piping skills. It’s for real families with real kitchens and real schedules. Whether you’re making them for a school party, a neighborhood gathering, or just a spooky movie night, these cupcakes deliver smiles every time.
Now I want to hear from you. Have you tried making these ghost cupcakes? Did your kids help? Did you add your own twist? Drop a comment below and share your Halloween baking stories. And if you have a recipe that started as a happy accident, I’d love to hear about that too. Happy Halloween, and happy baking!
Frequently Asked Questions
Can I use a boxed cake mix instead of making from scratch?
Absolutely. Use a standard chocolate cake mix and follow the package instructions. The marshmallow frosting and ghost toppers will still work perfectly. I’ve done this when I’m short on time, and honestly, no one can tell the difference once the ghosts are on top.
Why did my marshmallow frosting turn out runny?
This usually happens if the butter was too soft or melted. Make sure your butter is softened but still cool to the touch—not greasy. If your frosting is runny, pop it in the fridge for 15 minutes, then re-whip. You can also add an extra tablespoon of powdered sugar to thicken it up.
Can I make these cupcakes ahead of time for a party?
Yes! Bake the cupcakes up to 2 days in advance and store them in an airtight container. Make the frosting and store it in the fridge. Assemble the ghosts the morning of your party. This way, everything stays fresh and the marshmallows don’t get soggy.
How do I keep the marshmallow ghosts from falling over?
Make sure you cut a flat base on the marshmallow. When you cut it diagonally, the flat side should be wide enough to sit stable. Press it gently into the frosting—the frosting acts like glue. If your ghosts are still tipping, add a little extra frosting underneath for support.
Can I use homemade marshmallows instead of store-bought?
You can, but I don’t recommend it. Homemade marshmallows are softer and won’t hold their shape as well when cut. They also tend to stick more. For this recipe, the store-bought kind works best. If you want to get fancy, try the flavored marshmallows—peppermint or strawberry ghosts are fun for different holidays.
Pin This Recipe!
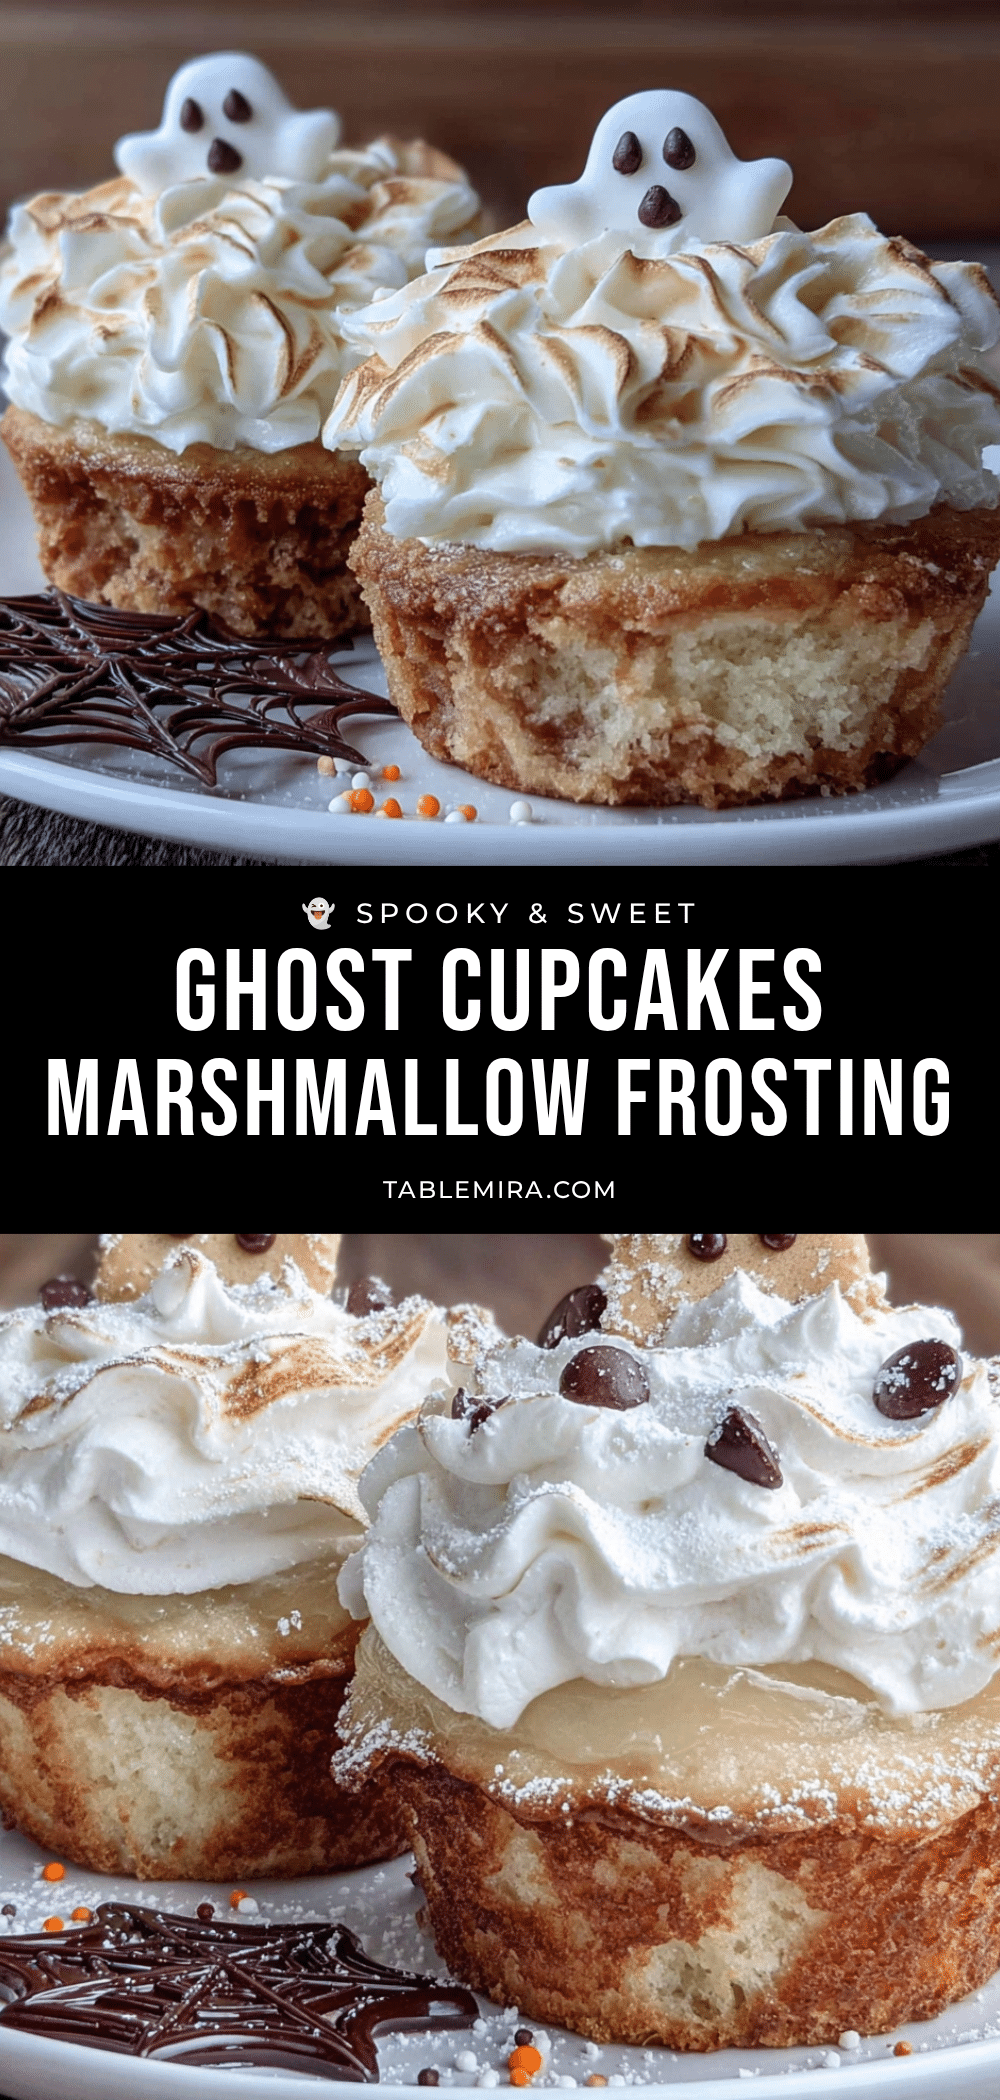
Easy Ghost Cupcakes with Fluffy Marshmallow Frosting
These ghost cupcakes are a quick and easy Halloween treat featuring moist chocolate cake topped with fluffy marshmallow frosting and adorable marshmallow ghosts. Perfect for parties and kid-approved, they come together in under 45 minutes with simple ingredients.
- Prep Time: 15 minutes
- Cook Time: 20 minutes
- Total Time: 45 minutes
- Yield: 12 servings 1x
- Category: Dessert
- Cuisine: American
Ingredients
- 1 3/4 cups all-purpose flour
- 3/4 cup unsweetened cocoa powder
- 1 1/2 teaspoons baking powder
- 1 1/2 teaspoons baking soda
- 1 teaspoon salt
- 2 cups granulated sugar
- 2 large eggs (room temperature)
- 1 cup whole milk
- 1/2 cup vegetable oil
- 2 teaspoons vanilla extract
- 1 cup hot water
- 1 jar (7 oz) marshmallow creme
- 1/2 cup unsalted butter (softened)
- 1 cup powdered sugar (sifted if clumpy)
- 1 teaspoon vanilla extract
- Pinch of salt
- 12 large marshmallows
- 2 tablespoons powdered sugar (for dusting)
- Mini chocolate chips (for eyes, about 24 total)
Instructions
- Preheat oven to 350°F (175°C). Line a 12-cup muffin tin with paper liners.
- In a large bowl, whisk together flour, cocoa powder, baking powder, baking soda, and salt.
- In a separate medium bowl, whisk together sugar, eggs, milk, oil, and vanilla extract until smooth and slightly thickened.
- Pour wet ingredients into dry ingredients. Stir with a rubber spatula until just combined (about 10 strokes). A few lumps are fine.
- Pour in hot water and stir gently until batter is smooth. Batter will be thin.
- Divide batter evenly among the 12 liners, filling each about 2/3 full. Bake for 18-22 minutes, or until a toothpick inserted in the center comes out with a few moist crumbs.
- Let cupcakes cool in the pan for 5 minutes, then transfer to a wire rack to cool completely (about 30 minutes).
- For frosting: In a large bowl, beat softened butter with an electric mixer until creamy (about 2 minutes). Add marshmallow creme and beat until smooth. Gradually add powdered sugar, beating on low speed. Add vanilla and salt, then beat on high for 2-3 minutes until light and fluffy.
- For ghosts: Cut each large marshmallow in half diagonally (corner to corner) to get two triangles. Press two mini chocolate chips into each marshmallow for eyes, pointed side in.
- Spread a generous layer of frosting on each cooled cupcake. Place a marshmallow ghost on top, pressing gently. Use a fine-mesh sieve to dust ghosts with powdered sugar. Serve immediately or store.
Notes
Don’t overmix the batter to avoid dense cupcakes. Use room temperature eggs for better emulsion. Cut marshmallows with scissors lightly sprayed with non-stick spray for clean cuts. The powdered sugar dusting adds sweetness and prevents stickiness. Frosting can be made up to 2 days ahead and stored in the fridge; let come to room temperature and re-whip before using. Cupcakes taste even better the next day as flavors deepen.
Nutrition
- Serving Size: 1 cupcake
- Calories: 345
- Sugar: 38
- Sodium: 310
- Fat: 14
- Saturated Fat: 6
- Carbohydrates: 54
- Protein: 4
Keywords: Halloween cupcakes, ghost cupcakes, marshmallow frosting, chocolate cupcakes, easy Halloween treats, kid-friendly cupcakes


