This was supposed to be soup. I had this whole plan—roasted butternut squash soup with a swirl of cream and maybe some crusty bread on the side. A cozy, predictable fall meal. I bought the squash, the cream, the fresh thyme. I even had my grandmother’s soup pot ready on the stove. Then I grabbed the wrong squash at the market.
I’d been in a hurry, you know how it is. Tuesday afternoon, rain tapping on the windshield, and I just grabbed the first orange thing I saw. Turned out it was honeynut squash—smaller, darker, cuter than butternut. I didn’t even know what to do with it. My soup plan was toast. Or so I thought.
I stood there in my kitchen, holding this tiny squash like it had personally betrayed me. The pot was empty. The cream was sitting on the counter, confused. And I had a dozen people coming over for dinner in three hours. Honestly, I almost panicked. But I’ve learned the hard way that panicking in the kitchen never ends well—trust me, I once set a kitchen towel on fire trying to flambé something I shouldn’t have.
So I took a breath. I sliced the squash in half, scooped out the seeds, and figured I’d just roast it with some butter and maple syrup. Worst case, I’d serve it as a side dish and apologize for the lack of soup. But what came out of that oven was nothing like the plan—and better. The edges caramelized into something almost candy-like, the maple brown butter pooled in the centers, and the smell? Let me tell you, it drew everyone into the kitchen before I even pulled the tray out.
That accidental side dish stole the whole dinner. People asked for the recipe before they even asked for seconds. And I’ve been making it ever since—on purpose, this time.
Why You’ll Love This Recipe
Look, I’ve tested this recipe probably a dozen times now. Not because it’s complicated—it’s almost embarrassingly simple—but because I wanted to make sure every single time was as good as that first happy accident. And honestly? It keeps delivering.
- Quick & Easy: Comes together in under 40 minutes, most of which is hands-off oven time. Perfect for when you’re juggling a dozen other dishes before guests arrive.
- Simple Ingredients: You likely have the maple syrup and butter in your kitchen right now. No fancy grocery runs needed—just good, honest ingredients.
- Perfect for Hosting: This dish looks way more impressive than the effort it requires. Slice them in half, roast them pretty, and watch your guests think you spent hours.
- Crowd-Pleaser: I’ve served this to kids who swear they hate squash, to picky in-laws, and to a friend who claimed to be “over” roasted vegetables. Every single one of them asked for the recipe.
- Unbelievably Delicious: The combo of sweet maple, nutty brown butter, and caramelized squash edges is next-level comfort food. It’s the kind of dish that makes people close their eyes after the first bite.
What makes this version different from the dozens of roasted squash recipes out there? It’s the technique. Getting that butter to just the right shade of golden brown—not burnt, not pale—makes all the difference. And using honeynut squash instead of butternut means you get thinner skins (edible!) and a naturally sweeter, denser flesh that caramelizes like a dream.
This isn’t just another roasted vegetable side dish. It’s the one that disappears first at every gathering. It’s comfort food reimagined—simpler, faster, but with the same soul-soothing satisfaction that makes everyone feel like they’re getting something special.
What Ingredients You Will Need
This recipe uses simple, wholesome ingredients to deliver bold flavor and satisfying texture without the fuss. Most of these are pantry staples or easy to find at any grocery store.
- Honeynut squash (4-6, halved lengthwise, seeds scooped out) – These little guys are the star of the show. They’re smaller and sweeter than butternut squash, with edible skin once roasted. Look for ones that feel heavy for their size with firm, unblemished skin. I’ve found them at Trader Joe’s and most farmers’ markets in fall.
- Unsalted butter (4 tablespoons, cut into pieces) – I always use unsalted so I can control the salt level. The browning process is where the magic happens—watch it closely so it doesn’t burn.
- Pure maple syrup (3 tablespoons) – Please use the real stuff, not pancake syrup. Grade A dark amber works beautifully here. The maple flavor concentrates as it roasts and mingles with the brown butter.
- Fresh thyme (4-5 sprigs, plus more for garnish) – Adds an earthy, slightly floral note that cuts through the sweetness. If you don’t have fresh, use ½ teaspoon dried thyme—but fresh really is better here.
- Flaky sea salt (½ teaspoon, plus more for finishing) – I love Maldon or Jacobsen for that final sprinkle. The crunchy salt flakes against the soft, caramelized squash is textural heaven.
- Black pepper (¼ teaspoon, freshly ground) – Just a touch to balance the sweetness. Don’t skip it—it makes the maple flavor pop.
- Optional: Crushed red pepper flakes (¼ teaspoon) – For a tiny kick of heat that plays beautifully with the maple. I add this when I’m serving a crowd I know likes a little spice.
- Optional: Toasted pecans or walnuts (¼ cup, roughly chopped) – Adds crunch and a nutty depth that complements the brown butter. Toast them in a dry pan for 2-3 minutes until fragrant.
For the best texture, I recommend using Kirkland Signature or Maple Grove Farms pure maple syrup—they have a consistent flavor that works well in baking and roasting. If you can’t find honeynut squash, you can substitute small butternut squash or delicata squash, but adjust roasting times accordingly since they vary in density.
Equipment Needed
You don’t need a fancy kitchen to pull this off. Here’s what you’ll need:
- Baking sheet or sheet pan (half-sheet size, rimmed) – A rimmed pan catches the maple butter as it bubbles, preventing a sticky mess in your oven. I use my Nordic Ware half-sheet pan almost daily.
- Parchment paper or aluminum foil – Lining the pan makes cleanup infinitely easier. The caramelized maple butter can be stubborn.
- Sharp chef’s knife – Honeynut squash are small but dense. A sharp knife makes halving them safe and easy. Dull knives are a recipe for disaster—trust me, I’ve slipped before.
- Large spoon or melon baller – For scooping out the seeds. A melon baller works surprisingly well for this.
- Small saucepan – For browning the butter. Use a light-colored pan if you have one—it’s easier to see the butter change color.
- Measuring spoons – Accuracy matters, especially with the maple syrup.
- Pastry brush (optional but helpful) – For brushing the maple brown butter evenly over the squash halves.
If you don’t have a pastry brush, just use a spoon to drizzle the butter mixture over the squash. It works fine, I promise. And if you’re using foil instead of parchment, give it a quick spray of cooking oil so the squash doesn’t stick.
Preparation Method
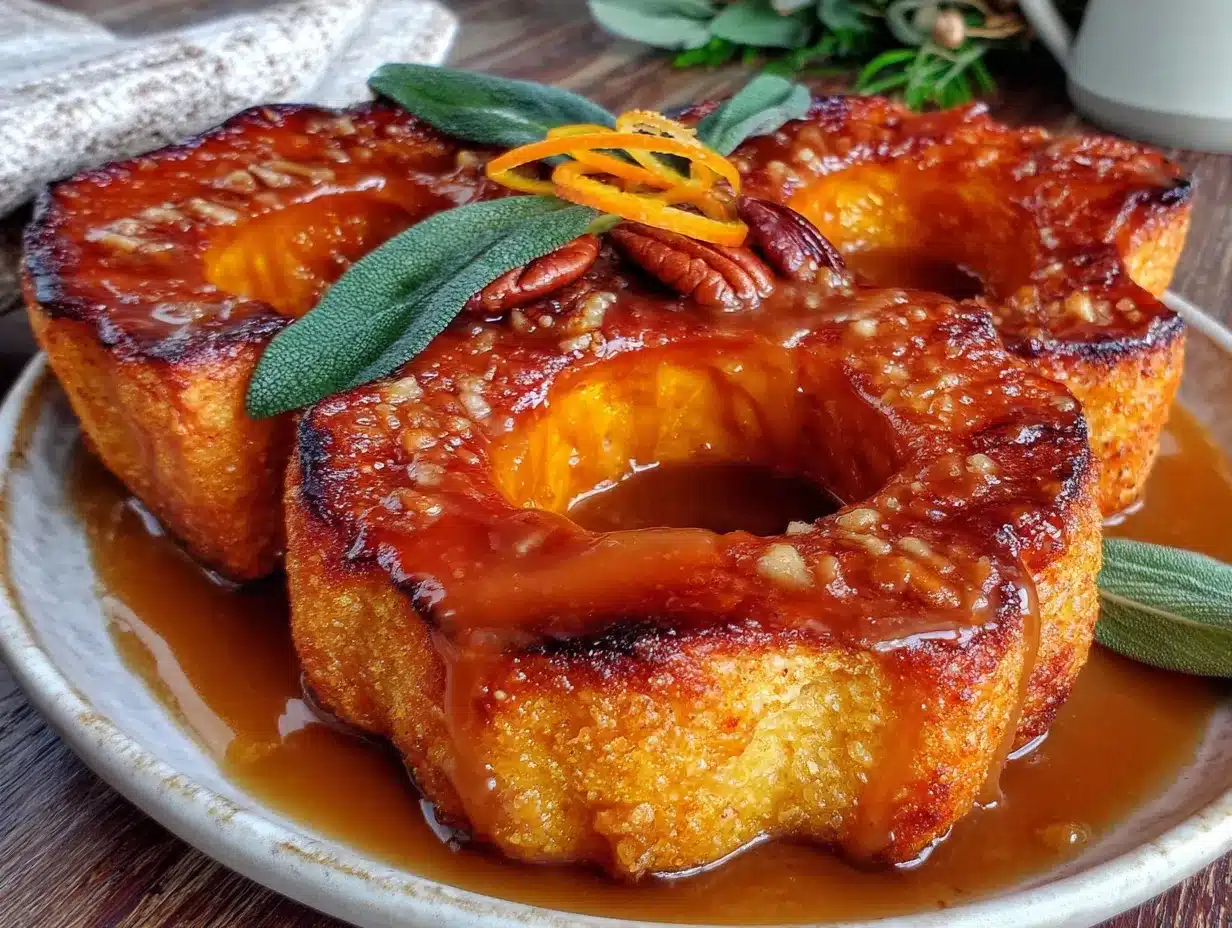
Alright, let’s get cooking. This is straightforward, but I’ll walk you through every step so you feel confident.
- Preheat your oven to 400°F (200°C). Line a rimmed baking sheet with parchment paper or foil. Position the rack in the middle of the oven.
- Prepare the squash. Carefully cut each honeynut squash in half lengthwise from stem to tip. Use a sharp chef’s knife and go slow—these little guys are dense. Scoop out the seeds and stringy bits with a spoon or melon baller. Don’t worry about being perfect; just get the bulk of it out. Place the squash halves cut-side up on the prepared baking sheet.
- Make the maple brown butter. In a small saucepan over medium heat, melt the butter. Swirl the pan occasionally. After about 3-4 minutes, the butter will start to foam and turn golden. Watch closely—it goes from golden to burnt fast. When you see brown specks forming at the bottom and it smells nutty and toasty, remove it from the heat immediately. Stir in the maple syrup, fresh thyme sprigs, ½ teaspoon flaky salt, and black pepper. Give it a quick whisk.
- Brush the squash. Using a pastry brush or spoon, generously brush the maple brown butter mixture over the cut sides of the squash. Don’t be shy—let it pool slightly in the cavities. Reserve about 2 tablespoons of the mixture for brushing later.
- Roast the squash. Place the baking sheet in the oven and roast for 25-30 minutes. Halfway through (around the 12-15 minute mark), brush the squash again with the reserved maple butter mixture. The squash is done when it’s tender all the way through—a fork should slide in easily—and the edges are caramelized and golden brown.
- Finish and serve. Remove from the oven. Sprinkle with additional flaky sea salt and fresh thyme leaves. If using, add crushed red pepper flakes and toasted pecans. Serve warm or at room temperature.
Pro tip from my own mistakes: Don’t overcrowd the pan. Give each squash half a little breathing room so the heat circulates properly. If they’re too close together, they’ll steam instead of caramelize, and you’ll lose that gorgeous golden edge.
Sensory cue: When it’s done, the squash should look slightly shriveled at the edges, almost like it’s hugging itself. The maple butter will have reduced into a syrupy glaze in the cavities. The smell? Like a fall candle, but edible.
Cooking Tips & Techniques
I’ve made this recipe enough times to know where things can go sideways. Let me save you the trouble.
Watch the butter like a hawk. I cannot stress this enough. The first time I made brown butter, I got distracted by a text message and ended up with burnt butter that smelled like a campfire. Not in a good way. The whole process takes maybe 3-4 minutes, so stand right there and watch it. When the foaming subsides and you see brown specks, pull it off the heat. That’s the sweet spot.
Don’t skip the flipping. I know I said to brush the squash halfway through, but here’s the thing—if you want truly even caramelization, flip the squash halves over for the last 5 minutes of roasting. The cut side will get direct contact with the hot pan, creating an even deeper caramelized crust. I learned this trick after noticing that the cut sides on the edges of the pan were always darker than the ones in the middle.
Room temperature matters. If your squash has been sitting in the fridge, let it come to room temperature for about 20 minutes before roasting. Cold squash will take longer to cook and won’t caramelize as evenly. I’ve made this mistake on a busy Thanksgiving morning—the centers were still firm while the edges were burning.
Multitasking strategy: While the squash roasts, prep the rest of your meal. This dish is hands-off for most of the cooking time, so it’s perfect for making alongside a roast chicken or a grain salad. Just set a timer for the halfway brush—trust me, you’ll forget otherwise.
Consistency tip: If your squash halves are different sizes (which happens), cut the larger ones slightly thinner so they cook at the same rate as the smaller ones. Or just accept that some will be a little softer—honestly, no one will complain.
Variations & Adaptations
This recipe is flexible, and I love playing around with it depending on the season or who’s coming over.
Savory herb version: Swap the maple syrup for honey and add 2 cloves of minced garlic to the brown butter along with fresh rosemary instead of thyme. The garlic gets slightly roasted and sweet, and the rosemary adds a piney depth that’s incredible with roasted meats.
Spicy maple version: Add ½ teaspoon of smoked paprika and ¼ teaspoon of cayenne pepper to the maple brown butter. The smokiness plays beautifully with the sweet squash, and the heat lingers just enough to keep things interesting. I made this for a football party and it was the first dish to disappear.
Vegan adaptation: Use coconut oil or vegan butter instead of regular butter. I’ve tried this with Miyoko’s European Style Cultured Vegan Butter and it browned surprisingly well. The maple syrup stays the same. It’s not exactly the same, but it’s still delicious—my vegan friend asked for seconds.
Different squash options: If you can’t find honeynut, delicata squash works beautifully (and you definitely don’t need to peel it). Small acorn squash also works, though the flavor is slightly less sweet. Just adjust roasting time—delicata might be done in 20 minutes, while acorn could take 35.
Nut-free option: Skip the pecans or walnuts entirely, or substitute pumpkin seeds (pepitas) for crunch. Toast them lightly in the same pan you used for the brown butter—they pick up the residual flavor beautifully.
Serving & Storage Suggestions
This dish is incredibly versatile when it comes to serving. I’ve brought it to potlucks, served it alongside roast chicken for Sunday dinner, and even eaten it cold from the fridge the next morning (don’t judge).
Serving temperature: Serve warm or at room temperature. The squash holds its texture well even as it cools, making it perfect for buffets or dinner parties where dishes sit out for a while. If serving at a gathering, I like to arrange the squash halves on a large wooden board, drizzle any remaining pan juices over them, and sprinkle with fresh thyme and flaky salt. It looks stunning.
What to serve alongside: This pairs beautifully with roasted chicken, grilled pork chops, or a simple seared steak. For a vegetarian main, serve with a hearty grain salad (farro or quinoa works great) and a dollop of Greek yogurt or labneh. The tanginess cuts through the sweetness.
Storage instructions: Store leftover squash in an airtight container in the refrigerator for up to 4 days. The flavors actually meld and deepen overnight—I’ve been known to eat leftovers cold straight from the container.
Reheating methods: Reheat in a 350°F oven for 5-7 minutes, or in the microwave for 30-60 seconds. The oven method preserves the caramelized edges better. If the squash seems dry, drizzle a tiny bit of maple syrup or water over it before reheating.
Freezer tip: You can freeze roasted squash halves for up to 3 months. Let them cool completely, then wrap individually in plastic wrap and place in a freezer bag. Thaw overnight in the fridge and reheat in the oven. The texture won’t be quite as perfect as fresh, but it’s still darn good.
Nutritional Information & Benefits
Let’s be real—this dish has butter and maple syrup, so it’s not exactly health food. But it’s made with whole ingredients, and honeynut squash is genuinely good for you.
Estimated per serving (1 squash half): Calories: 185, Fat: 9g, Carbohydrates: 26g, Fiber: 3g, Sugar: 14g, Protein: 2g, Sodium: 180mg.
Health benefits of key ingredients: Honeynut squash is packed with vitamin A (great for eye health), vitamin C, and potassium. The fiber content helps with digestion and keeps you feeling full. Maple syrup contains antioxidants and minerals like zinc and manganese—though let’s be honest, we’re eating it because it tastes amazing. Butter provides fat-soluble vitamins A, D, E, and K, and the browning process actually makes it easier to digest for some people.
Dietary considerations: This recipe is naturally gluten-free and can be made vegan with the substitutions mentioned above. It contains dairy in the butter form, so use vegan butter for a dairy-free version. The nuts are optional, so it’s easy to make nut-free.
Potential allergens: Dairy (butter), tree nuts (if using pecans or walnuts). Always check labels if serving someone with allergies.
Look, I’m not a nutritionist—I’m just a home cook who loves good food. But I feel good serving this to my family because it’s real food, made from scratch, with ingredients I can pronounce. That counts for something.
Conclusion
This crowd-pleasing honeynut squash with maple brown butter started as a mistake, but it’s become one of my most requested recipes. It’s the kind of dish that makes you look like a hero without actually working that hard—and honestly, isn’t that the dream when you’re hosting?
I love that this recipe is flexible enough to fit any occasion, from a casual weeknight dinner to a holiday feast. And I love that it always, always gets compliments. There’s something deeply satisfying about watching someone take their first bite and seeing their eyes light up.
Try it for your next gathering. Customize it with the variations I shared—or come up with your own twist. That’s the beauty of cooking, you know? You take a happy accident and make it yours.
I’d love to hear how it turns out for you. Drop a comment below and tell me what variation you tried, or share a photo of your squash on Pinterest. And if you’ve got your own kitchen disaster that turned into a triumph, I’m all ears.
Happy cooking, friends. Go make something delicious.
Frequently Asked Questions
Can I use butternut squash instead of honeynut?
Yes, but you’ll need to peel it first since butternut skin is too tough to eat. Cut it into similar-sized pieces and adjust roasting time to 35-40 minutes. The flavor won’t be as sweet, so you might want to add an extra tablespoon of maple syrup.
Do I have to brown the butter, or can I just melt it?
You can just melt it, but you’ll miss out on the nutty, toasty flavor that makes this dish special. Browning the butter takes only 3-4 extra minutes and transforms the whole recipe. Trust me—it’s worth it.
Can I make this ahead of time for a party?
Absolutely. Roast the squash up to a day ahead, let it cool, and store it in the fridge. Reheat in a 350°F oven for 5-7 minutes before serving. Add fresh thyme and salt right before serving for the best presentation.
How do I know when the squash is fully cooked?
A fork should slide into the flesh with little resistance. The edges should be caramelized and golden brown, and the squash should look slightly shriveled. If it’s still firm in the center, give it another 5 minutes.
Can I freeze the maple brown butter sauce separately?
Yes! Make a double batch of the maple brown butter and freeze it in an ice cube tray. Pop out a cube whenever you need it for roasted vegetables, drizzling over pancakes, or adding to oatmeal. It keeps for up to 3 months.
Pin This Recipe!
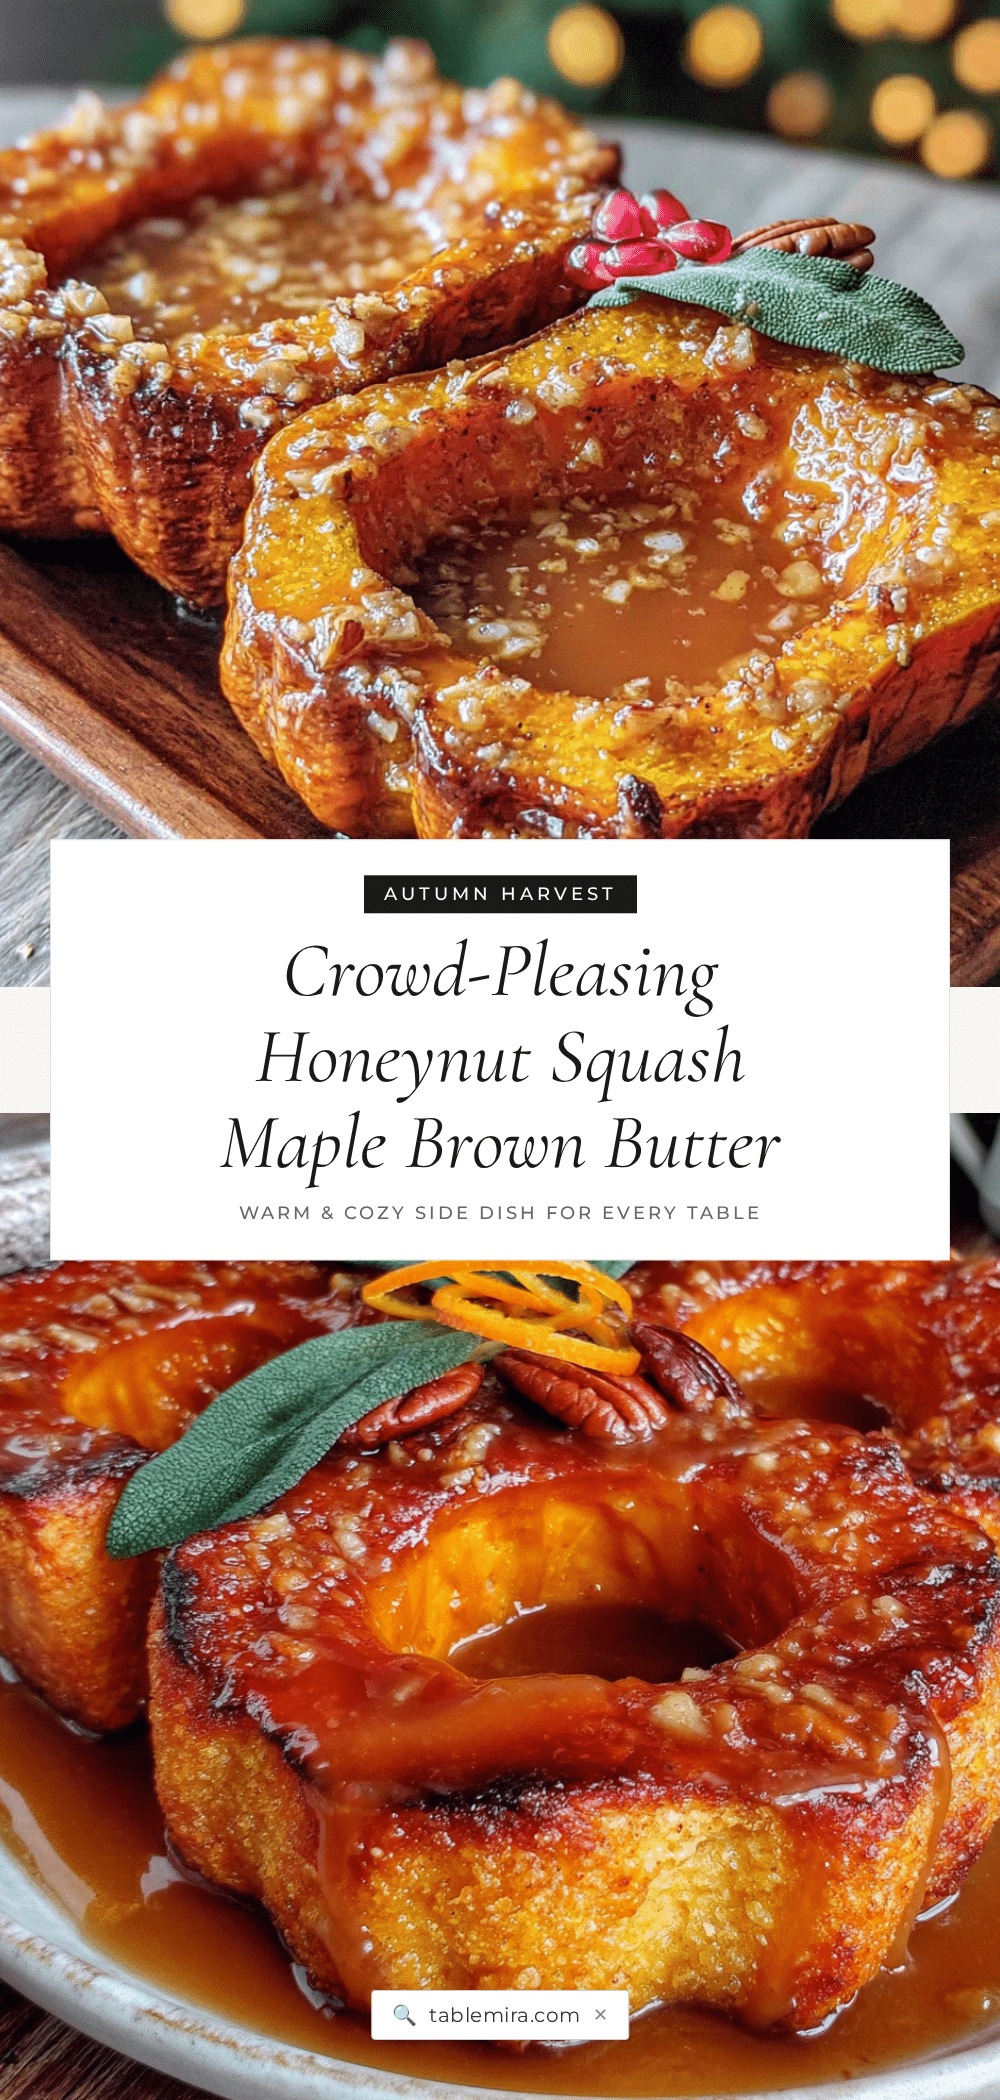
Crowd-Pleasing Honeynut Squash with Easy Maple Brown Butter
This accidental side dish turned into a crowd favorite—roasted honeynut squash halves are brushed with a luscious maple brown butter and caramelized to perfection. It’s quick, easy, and looks way more impressive than the effort it requires.
- Prep Time: 10 minutes
- Cook Time: 30 minutes
- Total Time: 40 minutes
- Yield: 4-6 servings 1x
- Category: Side Dish
- Cuisine: American
Ingredients
- 4–6 honeynut squash, halved lengthwise, seeds scooped out
- 4 tablespoons unsalted butter, cut into pieces
- 3 tablespoons pure maple syrup
- 4–5 sprigs fresh thyme, plus more for garnish
- ½ teaspoon flaky sea salt, plus more for finishing
- ¼ teaspoon freshly ground black pepper
- ¼ teaspoon crushed red pepper flakes (optional)
- ¼ cup toasted pecans or walnuts, roughly chopped (optional)
Instructions
- Preheat your oven to 400°F (200°C). Line a rimmed baking sheet with parchment paper or foil. Position the rack in the middle of the oven.
- Prepare the squash. Carefully cut each honeynut squash in half lengthwise from stem to tip. Use a sharp chef’s knife and go slow. Scoop out the seeds and stringy bits with a spoon or melon baller. Place the squash halves cut-side up on the prepared baking sheet.
- Make the maple brown butter. In a small saucepan over medium heat, melt the butter. Swirl the pan occasionally. After about 3-4 minutes, the butter will start to foam and turn golden. Watch closely—when you see brown specks forming at the bottom and it smells nutty and toasty, remove it from the heat immediately. Stir in the maple syrup, fresh thyme sprigs, ½ teaspoon flaky salt, and black pepper. Give it a quick whisk.
- Brush the squash. Using a pastry brush or spoon, generously brush the maple brown butter mixture over the cut sides of the squash. Let it pool slightly in the cavities. Reserve about 2 tablespoons of the mixture for brushing later.
- Roast the squash. Place the baking sheet in the oven and roast for 25-30 minutes. Halfway through (around the 12-15 minute mark), brush the squash again with the reserved maple butter mixture. The squash is done when it’s tender all the way through—a fork should slide in easily—and the edges are caramelized and golden brown.
- Finish and serve. Remove from the oven. Sprinkle with additional flaky sea salt and fresh thyme leaves. If using, add crushed red pepper flakes and toasted pecans. Serve warm or at room temperature.
Notes
Watch the butter closely when browning—it goes from golden to burnt fast. For even caramelization, flip the squash halves over for the last 5 minutes of roasting. Let cold squash come to room temperature for about 20 minutes before roasting for even cooking. Don’t overcrowd the pan to ensure proper caramelization.
Nutrition
- Serving Size: 1 squash half
- Calories: 185
- Sugar: 14
- Sodium: 180
- Fat: 9
- Saturated Fat: 5
- Carbohydrates: 26
- Fiber: 3
- Protein: 2
Keywords: honeynut squash, maple brown butter, roasted squash, fall side dish, easy recipe, crowd-pleaser, gluten-free


