For a while, I just accepted that mac and cheese with a kick wasn’t going to taste like something homemade but still have that perfect crispy finish. You know the type — creamy and comforting, yes, but usually a little soggy on top, lacking that golden crackle that makes you want to lick your fingers. That’s the gap I lived with for a long time. Hatch green chilies felt like a natural fit, adding a smoky warmth that could bring mac and cheese out of its comfort zone. But roasting those chilies and weaving them into a casserole that holds its texture? That was another story.
One chilly evening, I was fiddling with the idea, roasting Hatch green chilies until their skins bubbled and blackened just so, coaxing out that earthy aroma that fills the kitchen like a soft hum of home. The house smelled like a southwest market, and I remember thinking, this might be it — the recipe that finally marries creamy with crisp and spicy with smooth. This green chili mac and cheese casserole didn’t show up like a big revelation; it settled in quietly, inviting me back for seconds without fuss or fanfare.
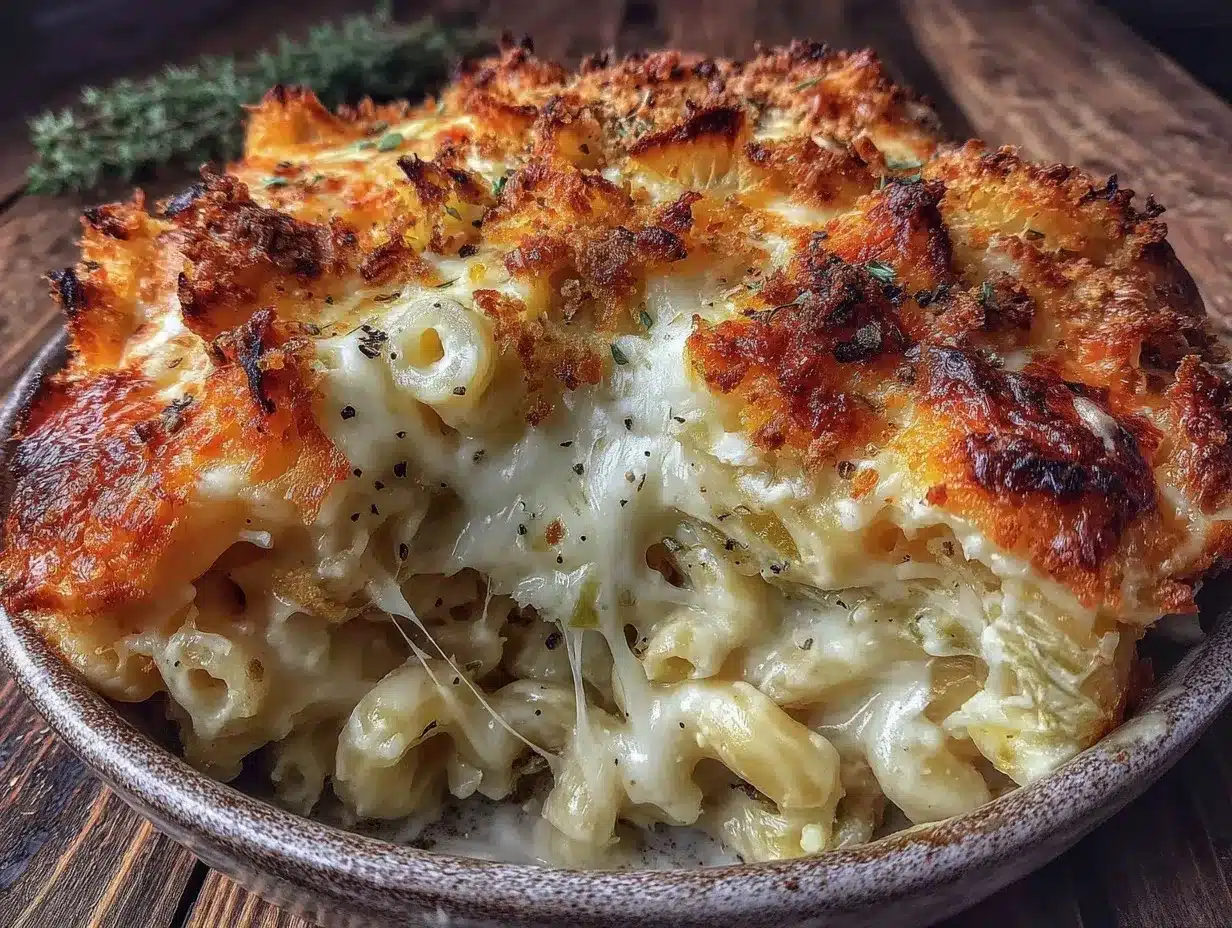
It’s not just about the chilies or the cheese — it’s that crust, that crunch on top, the kind that’s impossible to get right without a little patience. I’ve made this dish enough times now to know when the cheese is bubbling just right and the edges are teasingly toasted. The kind of meal that feels like a slow smile, one that sticks with you after the plate’s empty. Honestly, it’s a recipe that’s stuck because it’s simple and satisfying in a way that feels honest.
This casserole is the kind of thing you’ll keep coming back to, not because it’s flashy, but because it’s exactly what you want when you’re craving comfort with a bit of a twist. And that’s the quiet promise it holds — a dish that’s easy enough for weeknights but special enough to share, without pretense or too many steps.
Why You’ll Love This Crispy Roasted Hatch Green Chili Mac and Cheese Casserole Recipe
Having tested this recipe on my family and a few friends (who tend to be a tough crowd when it comes to spicy food), I can say this Hatch green chili mac and cheese casserole really hits the mark. It’s a dish that balances bold flavor with familiar comfort, making it a go-to for so many occasions.
- Quick & Easy: You can have it ready in about 45 minutes, which is perfect when dinner sneaks up on you.
- Simple Ingredients: No need for specialty stores—most come straight from the pantry or local markets.
- Perfect for Cozy Nights: Whether it’s a chilly evening or a casual weekend meal, this casserole fits right in.
- Crowd-Pleaser: From kids to adults, the crispy top and smoky chilies get rave reviews every time.
- Unbelievably Delicious: The creamy, cheesy sauce with little bursts of roasted chili heat creates a texture and flavor combo that’s just next level.
This recipe isn’t just another mac and cheese. The secret lies in roasting the Hatch green chilies until they’re sweet and smoky, then folding them gently into a rich cheese sauce. The topping? A crunchy layer that forms under the broiler, thanks to a little panko and sharp cheddar. It’s this contrast that sets it apart from the usual creamy casseroles you might know. Plus, the balance of spices is subtle enough to make it approachable but still exciting.
Honestly, it’s the kind of comfort food that makes you pause and savor, the kind that turns a simple dinner into a little celebration. I often think of it as the perfect companion to an easy garlic parmesan orzo or a fresh jalapeño lime cowboy caviar when I want to mix up the plate and keep things lively.
Ingredients You Will Need for Crispy Roasted Hatch Green Chili Mac and Cheese Casserole
This recipe uses simple, wholesome ingredients to deliver bold flavor and satisfying texture without the fuss. Most of these are pantry staples or easy to find at your local grocery store or farmer’s market if you’re lucky enough to find fresh Hatch chilies in season.
- 8 oz elbow macaroni (225 g) – the classic pasta shape that holds sauce perfectly
- 4-5 Hatch green chilies (roasted, peeled, and chopped) – the star ingredient, smoky and mildly spicy
- 3 tablespoons unsalted butter – for the roux and richness
- 3 tablespoons all-purpose flour – to thicken the cheese sauce
- 3 cups whole milk (720 ml) – warm, to avoid lumps
- 1 cup sharp cheddar cheese (100 g), shredded – for that tangy sharpness
- 1 cup Monterey Jack cheese (100 g), shredded – melts beautifully for creaminess
- 1 cup pepper jack cheese (100 g), shredded – adds subtle heat
- 1 teaspoon smoked paprika – complements the roasted chilies
- 1/2 teaspoon garlic powder – a gentle aromatic boost
- Salt and black pepper to taste
- 1 cup panko breadcrumbs (about 50 g) – for the crispy topping
- 2 tablespoons olive oil or melted butter – to toast the breadcrumbs
- Optional: 1/4 cup diced green onions (25 g) – for garnish and fresh bite
If fresh Hatch chilies aren’t available, you can use canned green chilies, but roasting fresh makes a noticeable difference in flavor. I often grab Hatch chilies during the late summer season when they’re at their best. For a gluten-free version, swap the all-purpose flour for a gluten-free blend and use gluten-free panko breadcrumbs.
Equipment Needed
- Large pot for boiling pasta
- Colander to drain the macaroni
- Baking sheet or cast iron skillet for roasting Hatch chilies (or broiler-safe pan)
- Medium saucepan for making the cheese sauce
- Whisk to smooth the roux and sauce
- 9×13-inch casserole dish or equivalent baking dish
- Measuring cups and spoons for precision
- Mixing bowls
- Oven or broiler for finishing the casserole
If you don’t have a broiler, a hot oven at 425°F (220°C) will get you the same crispy topping by baking a few extra minutes. I’ve also used a cast iron skillet to roast the chilies directly on the stovetop burner, which works well if you don’t want to fire up the oven twice. For toasting panko breadcrumbs, a small skillet on medium heat with a bit of olive oil does the trick without burning.
Preparation Method for Crispy Roasted Hatch Green Chili Mac and Cheese Casserole
- Roast the Hatch green chilies: Place the chilies on a baking sheet under the broiler or on a hot skillet. Turn occasionally until the skins blister and blacken, about 8-10 minutes total. Transfer to a bowl and cover with plastic wrap to steam for 10 minutes. Peel off skins, remove seeds, and chop finely. (This step builds the smoky flavor foundation.)
- Cook the pasta: Bring a large pot of salted water to a boil. Add 8 oz (225 g) elbow macaroni and cook 1-2 minutes less than package instructions for al dente texture. Drain and set aside.
- Make the cheese sauce: In a medium saucepan, melt 3 tablespoons unsalted butter over medium heat. Whisk in 3 tablespoons all-purpose flour and cook for 1-2 minutes until golden and bubbling but not browned.
- Add milk gradually: Slowly whisk in 3 cups (720 ml) warm whole milk, stirring constantly to avoid lumps. Bring to a gentle simmer and cook until thickened, about 5-7 minutes. It should coat the back of a spoon.
- Season and add cheese: Remove from heat, stir in 1 teaspoon smoked paprika, 1/2 teaspoon garlic powder, salt, and pepper to taste. Add 1 cup sharp cheddar, 1 cup Monterey Jack, and 1 cup pepper jack cheese, stirring until melted and smooth.
- Combine pasta and chilies: Fold the cooked macaroni and chopped roasted Hatch chilies into the cheese sauce, mixing gently to coat evenly.
- Prepare the topping: In a small bowl, toss 1 cup panko breadcrumbs with 2 tablespoons olive oil or melted butter.
- Assemble the casserole: Pour the mac and cheese mixture into a greased 9×13-inch baking dish. Sprinkle the panko mixture evenly over the top.
- Bake and broil: Bake at 350°F (175°C) for 20 minutes to warm through and set. Then switch to broil for 3-5 minutes, watching closely, until the topping is golden and crispy.
- Garnish and serve: Let it rest for 5 minutes before serving. Sprinkle diced green onions on top if using.
Keep an eye on the broiler step — that crispy top can go from perfect to burnt in a blink. If your broiler runs hot, pull it out early and let residual heat finish the job. The smell of roasted chilies mingling with bubbling cheese is a good sign you’re on track.
Cooking Tips & Techniques
Getting the right crispy top is all about timing and temperature. I’ve learned the hard way that broiling too soon can dry out the cheese sauce underneath, so give it that 20-minute bake first to let everything meld. Stirring the cheese sauce off the heat is key — too hot and the cheese can get grainy or separate.
Roasting Hatch chilies isn’t a step to skip. The blistered skins add a smoky depth that canned chilies just can’t match. If you find peeling tricky, steaming them briefly after roasting softens the skins and makes peeling easier (just don’t skip the char!).
When boiling pasta, undercook slightly so it doesn’t turn mushy in the casserole. Also, using a mix of cheeses (sharp cheddar, Monterey Jack, pepper jack) balances creaminess, melt, and a gentle spicy kick. For the panko topping, tossing it with olive oil or butter before baking ensures it crisps evenly without burning.
For a smoother sauce, warm your milk before adding it to the roux. Cold milk can cause lumps. And if you want to save time, roast the chilies ahead and store them in the fridge for up to 3 days or freeze for up to 3 months.
Variations & Adaptations
- Spicy Boost: Add a diced jalapeño or a pinch of cayenne pepper for more heat, or swap pepper jack cheese for a hotter variety.
- Vegetarian Protein: Stir in cooked black beans or cubed tofu to bulk it up without meat.
- Gluten-Free: Use gluten-free flour and breadcrumbs to keep the casserole crispy and safe for gluten-sensitive eaters.
- Dairy-Free: Substitute the milk and cheeses with dairy-free alternatives like cashew cream and vegan cheddar shreds.
- Smokier Flavor: Add a teaspoon of chipotle powder or smoked sea salt to deepen the smoky notes.
One personal twist I like is mixing in some sweet corn kernels just before baking — the sweetness contrasts nicely with the heat of the chilies. And if you want a bit of herbaceous brightness, fresh cilantro stirred in at the end adds a nice fresh pop.
Serving & Storage Suggestions
This green chili mac and cheese casserole shines best served warm and fresh, with the top still crackling. Let it sit for 5 minutes after baking to firm up slightly, making it easier to scoop. It pairs perfectly with a simple salad or a fresh side like the cucumber mint lime spritz for a refreshing contrast.
Store leftovers in an airtight container in the refrigerator for up to 3 days. When reheating, cover loosely with foil and warm in a 350°F (175°C) oven for about 15 minutes, or microwave individual servings until heated through. The topping won’t be quite as crispy after reheating, but a quick blast under the broiler can bring back some crunch.
Flavors tend to meld and deepen after a day, so sometimes I make this ahead intentionally. Just be sure to add the breadcrumb topping fresh before baking if you’re prepping early.
Nutritional Information & Benefits
This casserole delivers a hearty serving of protein and calcium from the cheese, plus the vitamin C and antioxidants found in roasted Hatch green chilies. While it is a comfort food, using whole milk and moderate amounts of cheese keeps it creamy without being overly heavy.
Per serving (about 1 cup), you can expect roughly 400-450 calories, 20 grams of fat, 25 grams of carbohydrates, and 15 grams of protein. It’s gluten-containing unless you swap flours and breadcrumbs.
For those watching carbs, you might reduce pasta or swap in cauliflower florets for a lower-carb version. The chilies add a metabolism-friendly capsaicin boost, which some say helps digestion.
Conclusion
This crispy roasted Hatch green chili mac and cheese casserole is a quiet winner — a dish that brings together smoky, spicy, creamy, and crunchy in a way that feels both familiar and fresh. It’s not complicated but rewards the little efforts, like roasting chilies and watching the cheese bubble just right.
Feel free to make it your own by adjusting the heat or mixing in your favorite add-ins. It’s the kind of recipe that grows on you, becoming a staple for those nights when you want comfort without fuss.
Honestly, I love how it brings a bit of Southwestern soul to a classic comfort food. If you try it, I’d love to hear how you put your own spin on it or what sides you paired it with. Cooking is more fun when we share those little discoveries, isn’t it?
Frequently Asked Questions
- Can I use canned green chilies instead of fresh Hatch chilies?
Yes, canned chilies work in a pinch, but roasting fresh Hatch chilies adds a deeper, smoky flavor that really makes the dish special. - How do I make sure the topping stays crispy?
Toss panko breadcrumbs with olive oil or melted butter before baking and broil at the end for a few minutes until golden and crunchy. - Can I prepare this casserole ahead of time?
Absolutely! Assemble it, cover tightly, and refrigerate up to 24 hours before baking. Add the breadcrumb topping fresh before baking. - Is this recipe suitable for gluten-free diets?
Yes, by swapping all-purpose flour and panko breadcrumbs with gluten-free alternatives, you can make it gluten-free without sacrificing texture. - What cheeses work best in this casserole?
A blend of sharp cheddar, Monterey Jack, and pepper jack cheeses gives a nice balance of sharpness, creaminess, and mild heat.
Pin This Recipe!
Crispy Roasted Hatch Green Chili Mac and Cheese Casserole

A comforting mac and cheese casserole with smoky roasted Hatch green chilies and a crispy golden topping, perfect for easy weeknight dinners with a spicy twist.
- Prep Time: 15 minutes
- Cook Time: 30 minutes
- Total Time: 45 minutes
- Yield: 6 servings 1x
- Category: Main Course
- Cuisine: Southwestern American
Ingredients
- 8 oz elbow macaroni (225 g)
- 4–5 Hatch green chilies (roasted, peeled, and chopped)
- 3 tablespoons unsalted butter
- 3 tablespoons all-purpose flour
- 3 cups whole milk (720 ml), warm
- 1 cup sharp cheddar cheese (100 g), shredded
- 1 cup Monterey Jack cheese (100 g), shredded
- 1 cup pepper jack cheese (100 g), shredded
- 1 teaspoon smoked paprika
- 1/2 teaspoon garlic powder
- Salt and black pepper to taste
- 1 cup panko breadcrumbs (about 50 g)
- 2 tablespoons olive oil or melted butter
- Optional: 1/4 cup diced green onions (25 g)
Instructions
- Roast the Hatch green chilies: Place the chilies on a baking sheet under the broiler or on a hot skillet. Turn occasionally until the skins blister and blacken, about 8-10 minutes total. Transfer to a bowl and cover with plastic wrap to steam for 10 minutes. Peel off skins, remove seeds, and chop finely.
- Cook the pasta: Bring a large pot of salted water to a boil. Add elbow macaroni and cook 1-2 minutes less than package instructions for al dente texture. Drain and set aside.
- Make the cheese sauce: In a medium saucepan, melt unsalted butter over medium heat. Whisk in all-purpose flour and cook for 1-2 minutes until golden and bubbling but not browned.
- Add milk gradually: Slowly whisk in warm whole milk, stirring constantly to avoid lumps. Bring to a gentle simmer and cook until thickened, about 5-7 minutes. It should coat the back of a spoon.
- Season and add cheese: Remove from heat, stir in smoked paprika, garlic powder, salt, and pepper to taste. Add sharp cheddar, Monterey Jack, and pepper jack cheeses, stirring until melted and smooth.
- Combine pasta and chilies: Fold the cooked macaroni and chopped roasted Hatch chilies into the cheese sauce, mixing gently to coat evenly.
- Prepare the topping: In a small bowl, toss panko breadcrumbs with olive oil or melted butter.
- Assemble the casserole: Pour the mac and cheese mixture into a greased 9×13-inch baking dish. Sprinkle the panko mixture evenly over the top.
- Bake and broil: Bake at 350°F (175°C) for 20 minutes to warm through and set. Then switch to broil for 3-5 minutes, watching closely, until the topping is golden and crispy.
- Garnish and serve: Let it rest for 5 minutes before serving. Sprinkle diced green onions on top if using.
Notes
Keep an eye on the broiler step to avoid burning the topping. Roasting Hatch chilies adds a smoky depth not matched by canned chilies. For gluten-free, swap flour and panko with gluten-free alternatives. Warm milk before adding to roux to avoid lumps. The casserole can be prepared ahead and refrigerated for up to 24 hours before baking; add breadcrumb topping fresh. Leftovers keep well refrigerated for 3 days and can be reheated in the oven or microwave.
Nutrition
- Serving Size: About 1 cup per serv
- Calories: 425
- Sugar: 6
- Sodium: 450
- Fat: 20
- Saturated Fat: 12
- Carbohydrates: 25
- Fiber: 2
- Protein: 15
Keywords: mac and cheese, Hatch green chilies, casserole, crispy topping, comfort food, spicy mac and cheese, roasted chilies, easy dinner


