The crackle of that first bite. That’s what I was after when I started experimenting with this recipe in my tiny apartment kitchen. Not just a nice crust, but the kind of shattering, audible crunch that makes you stop mid-conversation and look down at what you’re holding. And underneath that crisp shell, the crumb had to be something else entirely—tender, airy, with those irregular, open holes that catch pools of golden olive oil. This crispy no-knead sourdough focaccia with rosemary is the result of what felt like a hundred test bakes, each one teaching me something new about hydration, timing, and patience.
I remember the first time I pulled a proper focaccia out of the oven. It was lopsided, slightly pale on one side, and I’d been so nervous about sticking that I’d used way too much oil in the pan. But that first bite? Pure magic. The contrast between the brittle, salty crust and the pillowy interior was unlike any bread I’d made before. After years of wrestling with complicated sourdough techniques and elaborate shaping methods, this no-knead approach felt like a secret I’d stumbled upon. No stand mixer required. No complicated folding schedules. Just time, a little patience, and a willingness to get your hands messy with olive oil.
What kept me coming back to this recipe wasn’t just the incredible texture—though that certainly helped. It was how forgiving the whole process turned out to be. Some days my starter was sluggish. Other days I forgot about the dough for an extra hour during the bulk fermentation. And still, every single time, the focaccia turned out beautifully. There’s something deeply satisfying about a recipe that works with you, not against you. This one became my go-to for dinner parties, lazy Sunday afternoons, and those moments when I just needed to make something with my hands. It’s the kind of bread that makes you feel like a professional baker, even when you’re just someone who loves good food.
Why You’ll Love This Recipe
Let me tell you why this crispy no-knead sourdough focaccia with rosemary has earned a permanent spot in my weekly baking rotation. It’s not just about the incredible flavor—though that’s definitely a big part of it. This recipe solves so many of the common frustrations that come with homemade bread.
- No kneading required : Seriously. You mix the ingredients together, let time do the work, and end up with a dough that develops incredible gluten structure all on its own. No sore arms, no floury countertops, no wrestling with sticky dough.
- Simple, pantry-friendly ingredients : Flour, water, sourdough starter, salt, olive oil, and rosemary. That’s it. You probably already have most of these in your kitchen right now.
- Perfect for beginners and experts alike : If you’ve never worked with sourdough before, this is the perfect place to start. The high hydration makes it forgiving, and the lack of shaping means less stress. Experienced bakers will appreciate the technique and the consistently beautiful results.
- Incredible texture contrast : That crackly, golden-brown crust gives way to a soft, airy interior with those signature irregular holes. Every bite has both crunch and tenderness.
- Endlessly customizable : Rosemary and sea salt are a classic combination, but you can top this focaccia with almost anything—caramelized onions, cherry tomatoes, olives, or even a sprinkle of flaky sea salt and fresh herbs.
- Makes your house smell amazing : Honestly, the aroma of baking focaccia with rosemary and olive oil is worth the effort alone. It’s like a warm hug for your kitchen.
What really sets this recipe apart is the technique. The high hydration (about 85%) combined with a long, slow fermentation creates a dough that’s almost liquid when you first mix it. But after a series of gentle folds and a patient overnight rest, it transforms into something silky and strong. The dimpling technique—pressing your fingertips deep into the proofed dough—creates those signature pockets that pool with olive oil and crisp up into the most incredible texture. It’s not just another focaccia recipe; it’s the focaccia recipe that changed how I think about bread.
What Ingredients You Will Need
This recipe relies on a short list of quality ingredients, each playing a specific role in creating that perfect texture and flavor. Here’s everything you’ll need, along with a few notes about what to look for and why it matters.
For the Dough
- Bread flour (500g / about 4 cups) : I strongly recommend using bread flour here rather than all-purpose. The higher protein content (around 12-13%) creates more gluten, which gives the focaccia its characteristic chewy texture and helps it hold onto those beautiful air pockets. King Arthur Bread Flour is my go-to, but any good-quality bread flour will work. If you only have all-purpose, you can still make this—just expect a slightly softer, less chewy crumb.
- Water (425g / about 1 3/4 cups, lukewarm) : The water temperature matters here. You want it lukewarm—around 80°F (27°C)—to encourage fermentation without shocking the yeast. Too hot and you’ll kill the beneficial bacteria in your starter; too cold and fermentation will slow to a crawl. Tap water is fine, but if yours is heavily chlorinated, let it sit out for an hour before using.
- Active sourdough starter (100g / about 1/2 cup) : This is the heart of the recipe. Your starter should be bubbly, active, and have doubled in size within 4-6 hours of its last feeding. I feed mine a 1:1:1 ratio of starter, flour, and water the night before I plan to make this focaccia. If your starter is sluggish, give it a few days of regular feedings to strengthen it. A healthy starter makes all the difference.
- Fine sea salt (12g / about 2 teaspoons) : Salt does more than add flavor—it strengthens the gluten structure and controls fermentation. I use fine sea salt because it dissolves evenly into the dough. If you’re using kosher salt, you’ll need about 50% more by volume since the crystals are larger.
- Extra-virgin olive oil (60g / about 1/4 cup, plus more for the pan and topping) : This is not the time for your cheap cooking oil. Use a good-quality extra-virgin olive oil—the flavor really comes through in the finished bread. I like California Olive Ranch or a bottle from a local producer if I can find one. The oil goes into the dough for richness and tenderness, and you’ll use more for coating the pan and drizzling on top.
For the Topping
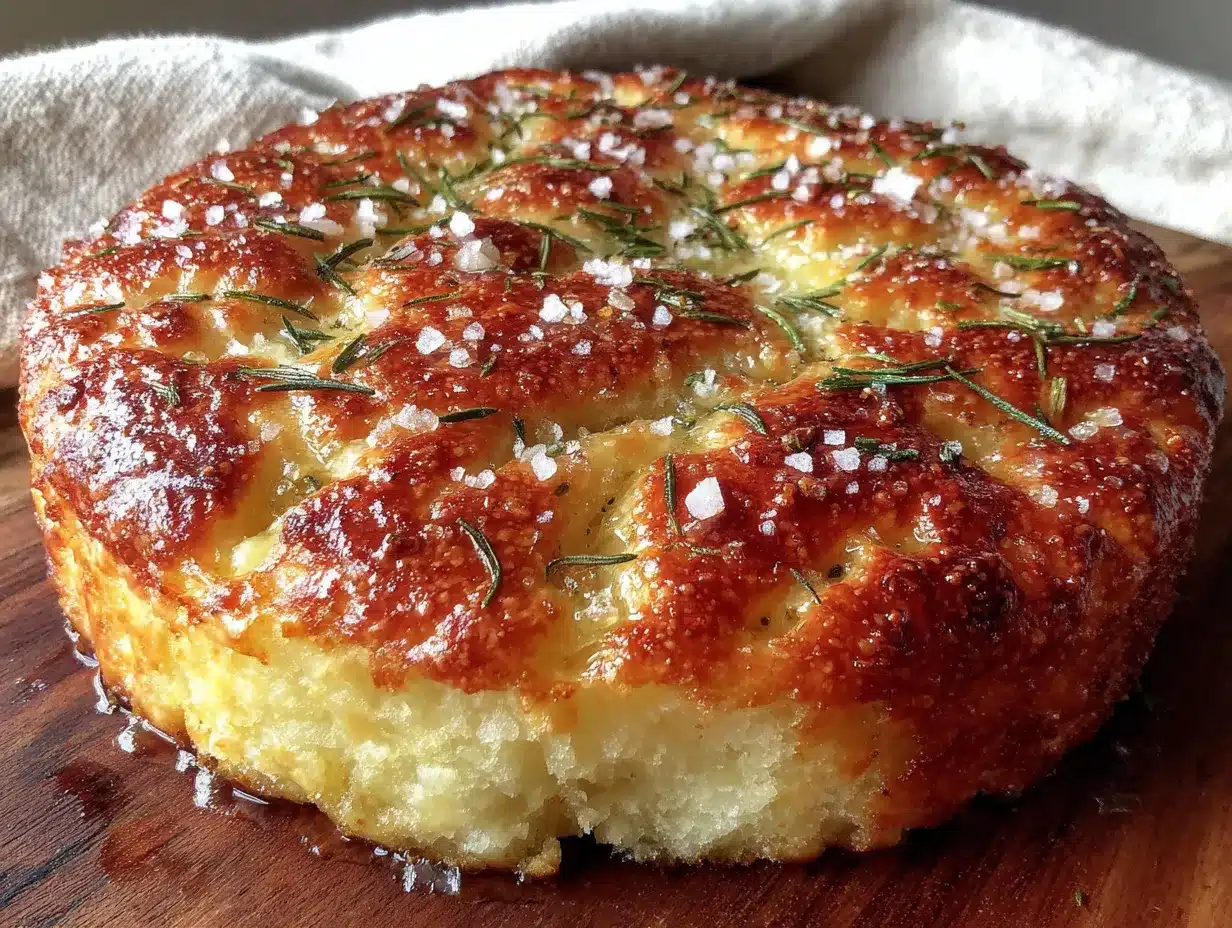
- Fresh rosemary (2-3 sprigs, leaves removed and roughly chopped) : Fresh rosemary is non-negotiable here. Dried rosemary just doesn’t have the same aromatic punch, and it can be a bit woody. Look for rosemary with bright green, pliable leaves. Strip the leaves from the stems and give them a rough chop—you want little pieces scattered across the surface, not a heavy blanket.
- Flaky sea salt (for finishing, about 1-2 teaspoons) : Maldon sea salt is my favorite for finishing bread. Those delicate, pyramid-shaped crystals provide a perfect burst of saltiness that contrasts beautifully with the rich olive oil. Don’t skip this—it’s what makes the focaccia truly memorable.
- Extra-virgin olive oil (for drizzling, about 2-3 tablespoons) : You’ll drizzle more oil over the dough before baking, and another drizzle when it comes out of the oven. This is what creates that impossibly crispy, golden crust.
One quick note about substitutions: if you don’t have a sourdough starter, you can find plenty of recipes for yeast-based focaccia. But honestly, the sourdough version is worth the extra planning. The tangy flavor and the incredible texture from the long fermentation just can’t be replicated with commercial yeast. Plus, maintaining a starter gives you endless possibilities for other recipes—like this cozy caramelized onion and gruyère sourdough focaccia loaf that’s perfect for a more indulgent twist.
Equipment Needed
You don’t need a lot of fancy equipment to make this focaccia, which is part of its charm. Here’s what you’ll need:
- Large mixing bowl : A good-sized bowl (at least 4 quarts) gives you room to mix the dough without flour flying everywhere. Glass or ceramic works well—I use a simple Pyrex mixing bowl.
- Digital kitchen scale : I cannot stress this enough. Weighing your ingredients is far more accurate than measuring by volume, especially with bread baking. A $15 scale from Amazon will change your baking life.
- Bench scraper or dough scraper : This inexpensive tool makes handling the sticky, high-hydration dough so much easier. Use it to scrape the dough from the bowl during the folding process.
- 9×13-inch baking pan : A metal or glass baking pan works perfectly. I prefer a metal pan because it conducts heat better and helps create a crisper bottom crust. Make sure it’s at least 2 inches deep to accommodate the dough as it rises.
- Plastic wrap or a large reusable bowl cover : You’ll need something to cover the dough during the long fermentation. Plastic wrap works, but I’ve switched to a silicone bowl cover that I can wash and reuse.
- Parchment paper (optional but helpful) : Lining your pan with parchment makes cleanup a breeze and ensures the focaccia releases easily. I use it every time.
- Oven-safe thermometer : While not strictly necessary, an instant-read thermometer helps you know when the bread is fully baked. The internal temperature should reach about 200°F (93°C).
- Cooling rack : A wire rack allows air to circulate around the focaccia as it cools, preventing the bottom from getting soggy.
If you don’t have a bench scraper, a stiff metal spatula works in a pinch. And if you’re using a glass pan, just be aware that the bottom crust might not get quite as crispy as it would in a metal pan. You can always pop the focaccia out of the pan and bake it directly on the oven rack for the last 5 minutes if you want extra crunch.
Preparation Method
This process is all about patience and gentle handling. The dough is very wet and sticky, but trust the process—it will come together beautifully. Here’s how to do it:
- Mix the dough (Day 1, morning or afternoon) : In a large mixing bowl, combine 500g bread flour and 12g fine sea salt. Whisk them together to distribute the salt evenly. In a separate container, mix 425g lukewarm water with 100g active sourdough starter until the starter is mostly dissolved. Pour the wet ingredients into the dry ingredients and stir with a wooden spoon or your hand until no dry flour remains. The dough will look shaggy and rough—that’s exactly right. Add 60g olive oil and mix again until incorporated. Cover the bowl with plastic wrap or a damp towel and let it rest for 30 minutes. This autolyse period allows the flour to absorb the water and starts developing gluten before you even begin folding.
- Perform the folds (first 2 hours) : After the rest, it’s time for the folding. Wet your hands slightly to prevent sticking. Grab a corner of the dough, stretch it up, and fold it over the center. Rotate the bowl 90 degrees and repeat. Do this 4 times total (one for each “corner”). Cover and rest for 30 minutes. Repeat this folding process 3 more times at 30-minute intervals. After the fourth fold, the dough should feel noticeably smoother, stronger, and more elastic. It will still be sticky, but it should hold its shape better.
- Bulk fermentation (overnight, 10-14 hours) : After the final fold, cover the bowl tightly with plastic wrap and place it in the refrigerator. Let it ferment slowly overnight. This long, cold fermentation develops complex sourdough flavor and strengthens the gluten structure. The dough will puff up significantly—don’t be alarmed if it looks like it’s about to crawl out of the bowl. If your kitchen is particularly cold, you might need the full 14 hours. A warmer kitchen might only need 10.
- Prepare the pan and second rise (Day 2, morning) : The next morning, take the dough out of the refrigerator. Generously coat your 9×13-inch baking pan with olive oil—don’t be shy here. Use about 2-3 tablespoons, making sure to coat the bottom and sides completely. Gently scrape the cold dough into the pan. It will be very sticky and might look like a blob. Don’t try to shape it too much at this point. Cover the pan with plastic wrap or a damp towel and let it come to room temperature and rise for 3-4 hours. The dough should puff up and nearly double in height. You’ll know it’s ready when it looks pillowy and jiggly when you gently shake the pan.
- Preheat the oven and dimple the dough : About 30 minutes before you’re ready to bake, preheat your oven to 425°F (220°C). Place a rack in the middle position. Once the dough has finished its second rise, it’s time for the fun part. Generously drizzle more olive oil over the surface—another 2-3 tablespoons. Then, using your fingertips, press deep dimples all over the dough. Go all the way down to the bottom of the pan. This is what creates those signature pockets that fill with oil and become incredibly crispy. Don’t be gentle—really press in there. Sprinkle the chopped fresh rosemary and flaky sea salt evenly over the top.
- Bake the focaccia : Place the pan in the preheated oven and bake for 25-30 minutes. The focaccia should be deeply golden brown on top and sound hollow when you tap it. If the top is browning too quickly but the bottom isn’t done, tent it loosely with foil for the last 10 minutes. I like to rotate the pan halfway through for even browning. The internal temperature should reach about 200°F (93°C) when fully baked.
- Cool and serve : Remove the pan from the oven and let it cool in the pan for 5 minutes. Then transfer the focaccia to a wire rack. Drizzle with a final tablespoon of olive oil while it’s still warm—it soaks into the crust and adds incredible flavor. Let it cool for at least 15-20 minutes before slicing. I know it’s tempting to dig in immediately, but letting it rest allows the steam to redistribute and the crust to stay crispy. Slice it with a serrated knife or just tear it apart with your hands—that’s my preferred method.
Cooking Tips & Techniques
After countless batches of this focaccia, I’ve collected a few hard-won lessons that make the process smoother and the results more consistent. Here are my best tips:
Don’t skip the folds. I know it seems fussy, especially when you’re busy, but those four folds in the first two hours are crucial. They build the gluten network that traps the gas bubbles and creates the open, airy crumb. If you skip them, you’ll end up with a dense, flat focaccia. Set a timer on your phone and make it part of your afternoon routine.
Use enough oil. This is the most common mistake I see. Focaccia needs olive oil—not just for flavor, but for texture. The oil in the pan prevents sticking, the oil in the dough adds tenderness, and the oil on top creates that incredible crispy crust. Don’t skimp. If you’re worried about it being greasy, don’t be. The bread absorbs what it needs, and the excess creates that golden, crackly exterior.
Watch your fermentation times. The cold fermentation in the fridge is more forgiving than room temperature, but it’s still possible to over-ferment. If the dough starts to smell strongly of alcohol or vinegar, or if it looks deflated and lifeless, you’ve gone too far. Aim for 10-14 hours in the fridge. If your kitchen is warm, lean toward the shorter end. If it’s cold, go longer.
Dimple with confidence. I used to be too gentle with the dimpling, afraid I’d deflate the dough. But those deep pockets are what make focaccia special. Press firmly and confidently, all the way to the bottom of the pan. The dough is resilient—it will spring back enough to create beautiful, irregular craters that fill with oil and crisp up perfectly.
Let it cool properly. This was a hard lesson for me. I wanted to eat the focaccia immediately, straight from the oven. But cutting into it too soon releases steam and makes the interior gummy. Give it at least 15-20 minutes on a wire rack. The crust stays crispy, and the crumb sets properly. If you’re serving it later, you can reheat slices in a 350°F oven for 5 minutes to restore that fresh-baked texture.
One mistake I made early on: I used a glass baking dish and wondered why the bottom crust was pale and soft. Glass doesn’t conduct heat as well as metal, so the bottom doesn’t get as crispy. If you only have glass, try baking the focaccia on a lower oven rack or preheating the pan in the oven before adding the dough. Or just accept a softer bottom—it’s still delicious.
Variations & Adaptations
This focaccia is wonderfully adaptable. Once you’ve mastered the basic recipe, you can experiment with endless toppings and add-ins. Here are some of my favorites:
Classic Rosemary and Sea Salt : The version I’ve shared here is a classic for a reason. But try swapping the rosemary for fresh thyme or oregano for a different herbal note. Or add a pinch of red pepper flakes for a subtle kick. The combination of flaky salt, fragrant herbs, and rich olive oil is timeless.
Sun-Dried Tomato and Olive : Press halved cherry tomatoes and pitted Kalamata olives into the dimpled dough before baking. The tomatoes burst and caramelize, while the olives add a briny punch. This version is perfect for summer when tomatoes are at their peak. For a similar approach, check out this crispy rosemary sea salt sourdough focaccia with sun-dried tomatoes—it’s a fantastic variation.
Caramelized Onion and Gruyère : Slowly caramelize 2-3 large onions in butter and olive oil until they’re deep golden and sweet. Spread them over the dough before dimpling, then sprinkle with shredded Gruyère cheese. The cheese melts into the crevices and creates a gooey, savory topping that’s absolutely irresistible. This pairs beautifully with a bowl of soup or a simple green salad.
Garlic and Parmesan : Mince 4-5 cloves of garlic and mix them with 2 tablespoons of olive oil. Drizzle this over the dimpled dough, then sprinkle with grated Parmesan cheese. The garlic becomes sweet and mellow during baking, and the Parmesan creates a crispy, umami-rich crust. This is my go-to for game day or casual parties.
Gluten-Free Adaptation : While I haven’t personally tested a gluten-free version of this recipe, I’ve heard from readers who’ve had success using a high-quality gluten-free bread flour blend. Look for one that includes xanthan gum, and be prepared for a slightly denser crumb. The hydration might need adjustment, so start with a little less water and add more as needed.
Dairy-Free : This recipe is naturally dairy-free as written, since it uses only olive oil. Just be sure to check your toppings—some cheeses and flavored oils might contain dairy. The focaccia itself is completely plant-based and delicious.
Serving & Storage Suggestions
This focaccia is incredibly versatile when it comes to serving. Here’s how to enjoy it at its best:
Serving temperature: Focaccia is best served warm, within a few hours of baking. The crust is at its crispiest, and the interior is soft and airy. If you’re serving it at room temperature, it’s still delicious—just know that the crust will soften slightly. For a quick refresh, pop slices in a 350°F oven for 3-5 minutes.
How to serve: Tear it into rustic pieces and serve alongside soups, stews, or salads. It’s perfect for dipping in olive oil and balsamic vinegar, or slathering with butter. Use it for sandwiches—it makes an incredible base for panini or grilled sandwiches. Or simply enjoy it on its own as a snack. I love serving it with a bowl of this creamy hatch green chili mac and cheese bake for a cozy, satisfying meal.
What to pair it with: Focaccia pairs beautifully with Italian-inspired dishes. Serve it alongside a hearty minestrone, a fresh Caprese salad, or a simple pasta dish. It’s also wonderful with antipasto platters, grilled vegetables, and roasted meats. For a lighter option, try it with this fresh no-cook Mediterranean grain bowl with homemade tzatziki dressing.
Storage: Store leftover focaccia in an airtight container or wrapped in foil at room temperature for up to 2 days. Do not refrigerate—the cold temperature will dry it out and make the crust tough. If you need to store it longer, freeze it.
Freezing: Focaccia freezes beautifully. Let it cool completely, then wrap it tightly in plastic wrap and then in foil. Freeze for up to 3 months. To thaw, let it come to room temperature wrapped, then unwrap and reheat in a 350°F oven for 5-10 minutes. The crust will crisp right back up.
How flavors develop: Interestingly, the sourdough flavor actually deepens after the focaccia has rested for a day. The tangy notes become more pronounced, and the texture becomes slightly more chewy. If you have leftovers, try toasting slices the next day—the crispness returns, and the flavor is even better.
Nutritional Information & Benefits
While I wouldn’t call focaccia a health food, it does have some redeeming qualities—especially when made with sourdough. Here’s a rough breakdown per serving (assuming 12 servings per recipe):
| Nutrient | Amount per serving |
|---|---|
| Calories | 280-320 |
| Total Fat | 12-15g |
| Saturated Fat | 2-3g |
| Carbohydrates | 35-40g |
| Fiber | 2-3g |
| Protein | 6-8g |
| Sodium | 350-450mg |
Health benefits of sourdough: Sourdough fermentation breaks down phytic acid, a compound in grains that can interfere with mineral absorption. This means your body can more easily access the iron, zinc, and magnesium in the flour. The fermentation also creates beneficial probiotics and prebiotics that support gut health. Plus, sourdough has a lower glycemic index than bread made with commercial yeast, meaning it won’t spike your blood sugar as dramatically.
Olive oil benefits: The extra-virgin olive oil in this recipe is rich in monounsaturated fats and antioxidants, particularly polyphenols, which have anti-inflammatory properties. It’s a heart-healthy fat that adds both flavor and nutritional value.
Dietary considerations: This recipe is dairy-free, egg-free, and vegan as written. It contains gluten from the wheat flour, so it’s not suitable for those with celiac disease or gluten sensitivity. The sodium content is moderate, but you can reduce the flaky salt topping if you’re watching your salt intake.
My perspective: I believe in balance. This focaccia is a treat—something to enjoy with family and friends, not something to eat every day. But when you do indulge, it’s made with real, whole ingredients and a traditional fermentation process that’s been used for centuries. That counts for something.
Conclusion
This crispy no-knead sourdough focaccia with rosemary has become more than just a recipe in my kitchen—it’s a ritual. The slow fermentation, the gentle folds, the satisfying dimpling, the anticipation as it bakes. There’s something almost meditative about the process, and the reward is a loaf of bread that’s genuinely special. The crackling crust, the tender, airy crumb, the fragrant rosemary and salty finish—it’s everything I want in a bread.
I hope you’ll give this recipe a try, even if you’re new to sourdough. The no-knead method makes it accessible, and the results are impressive enough to serve at any dinner party. Feel free to customize it with your favorite toppings—that’s half the fun. And if you make it, I’d love to hear how it turned out. Drop a comment below and let me know what variations you tried, or tag me in your photos on social media.
Happy baking, friends. May your crust be crispy, your crumb be airy, and your kitchen smell like the coziest bakery in town.
Frequently Asked Questions
Can I use all-purpose flour instead of bread flour?
Yes, you can, but the texture will be slightly different. Bread flour has more protein, which creates more gluten and gives the focaccia a chewier, more structured crumb. All-purpose flour will produce a softer, more tender focaccia. It will still be delicious, just not quite as chewy. If you’re using all-purpose, you might want to reduce the water slightly—start with 400g instead of 425g.
My dough seems very wet and sticky. Is that normal?
Absolutely. This is a high-hydration dough (about 85%), which means it’s much wetter than typical bread dough. That’s what creates the open, airy crumb and the crispy crust. Don’t be tempted to add more flour—trust the process. The folds and the long fermentation will develop enough gluten to hold everything together. Wet your hands before handling the dough to prevent sticking.
Can I use dried rosemary instead of fresh?
I really don’t recommend it. Dried rosemary has a more concentrated, almost piney flavor, and the leaves can be tough and woody. Fresh rosemary has a brighter, more aromatic quality that complements the olive oil and sourdough perfectly. If fresh rosemary isn’t available, try fresh thyme or oregano instead—they work beautifully as substitutes.
How do I know when my sourdough starter is ready to use?
Your starter is ready when it’s doubled in size, bubbly, and has a pleasant, slightly tangy aroma. It should pass the “float test”—a small spoonful dropped into a glass of water should float on the surface. If it sinks, your starter isn’t active enough yet. Feed it a 1:1:1 ratio of starter, flour, and water, and check again in 4-6 hours. A healthy, active starter is the key to a successful focaccia.
Can I make this recipe without a sourdough starter?
This recipe is specifically designed for sourdough, but you can adapt it using commercial yeast. Replace the 100g of sourdough starter with 5g (about 1 1/2 teaspoons) of active dry yeast dissolved in the water. Skip the overnight refrigeration and let the dough rise at room temperature for 2-3 hours after the folds. The flavor won’t be as complex, but the texture will still be excellent. For a true sourdough experience, though, nothing beats the real thing.
Pin This Recipe!
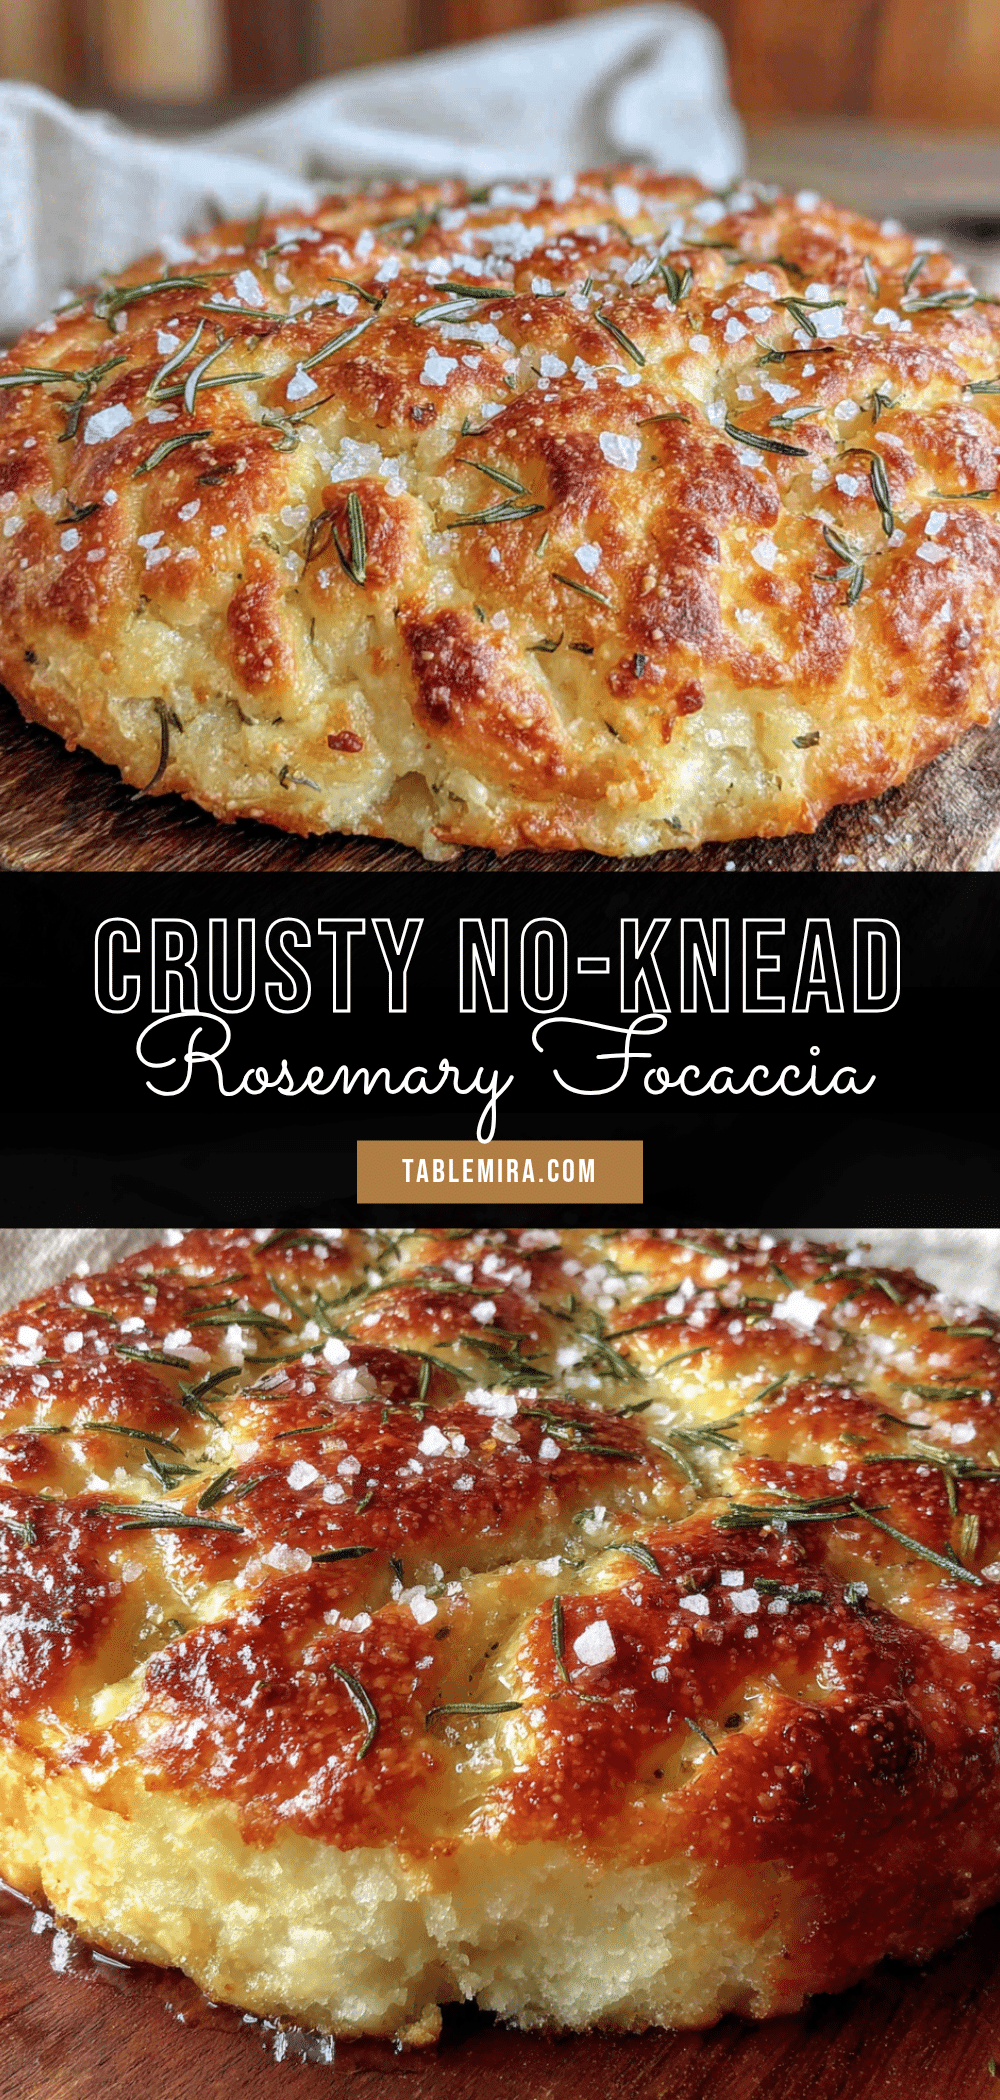
Crispy No-Knead Sourdough Focaccia with Rosemary
This crispy no-knead sourdough focaccia with rosemary features a shatteringly crisp crust and a tender, airy crumb with irregular holes that catch pools of golden olive oil. It’s an easy, forgiving recipe that requires no kneading and delivers consistently beautiful results.
- Prep Time: 30 minutes
- Cook Time: 30 minutes
- Total Time: 14 hours 30 minutes (includes overnight fermentation)
- Yield: 12 servings 1x
- Category: Bread
- Cuisine: Italian
Ingredients
- 500g bread flour (about 4 cups)
- 425g lukewarm water (about 1 3/4 cups)
- 100g active sourdough starter (about 1/2 cup)
- 12g fine sea salt (about 2 teaspoons)
- 60g extra-virgin olive oil (about 1/4 cup), plus more for pan and topping
- 2–3 sprigs fresh rosemary, leaves removed and roughly chopped
- 1–2 teaspoons flaky sea salt (for finishing)
- 2–3 tablespoons extra-virgin olive oil (for drizzling)
Instructions
- Mix the dough (Day 1, morning or afternoon): In a large mixing bowl, combine 500g bread flour and 12g fine sea salt. Whisk together. In a separate container, mix 425g lukewarm water with 100g active sourdough starter until mostly dissolved. Pour wet into dry and stir until no dry flour remains. Add 60g olive oil and mix again. Cover and let rest for 30 minutes.
- Perform the folds (first 2 hours): After the rest, wet your hands slightly. Grab a corner of the dough, stretch it up, and fold it over the center. Rotate the bowl 90 degrees and repeat. Do this 4 times total. Cover and rest for 30 minutes. Repeat this folding process 3 more times at 30-minute intervals.
- Bulk fermentation (overnight, 10-14 hours): After the final fold, cover the bowl tightly with plastic wrap and refrigerate overnight (10-14 hours).
- Prepare the pan and second rise (Day 2, morning): Generously coat a 9×13-inch baking pan with olive oil (2-3 tablespoons). Gently scrape the cold dough into the pan. Cover and let rise at room temperature for 3-4 hours until nearly doubled and jiggly.
- Preheat the oven and dimple the dough: Preheat oven to 425°F (220°C). Drizzle 2-3 tablespoons olive oil over the dough. Using your fingertips, press deep dimples all over the dough, going all the way to the bottom of the pan. Sprinkle chopped rosemary and flaky sea salt evenly over the top.
- Bake the focaccia: Bake for 25-30 minutes until deeply golden brown and hollow-sounding when tapped. Internal temperature should reach about 200°F (93°C). Rotate pan halfway through for even browning.
- Cool and serve: Let cool in pan for 5 minutes, then transfer to a wire rack. Drizzle with a final tablespoon of olive oil while still warm. Cool for at least 15-20 minutes before slicing.
Notes
Don’t skip the folds—they build gluten for an airy crumb. Use enough olive oil for a crispy crust. Dimple with confidence to create signature pockets. Let cool properly to maintain crispness. For a gluten-free version, use a high-quality gluten-free bread flour blend with xanthan gum.
Nutrition
- Serving Size: 1 slice (1/12 of rec
- Calories: 300
- Sodium: 400
- Fat: 13.5
- Saturated Fat: 2.5
- Carbohydrates: 37.5
- Fiber: 2.5
- Protein: 7
Keywords: sourdough focaccia, no-knead bread, crispy focaccia, rosemary focaccia, homemade bread, easy bread recipe