My neighbor, Beth, asked why I couldn’t just crush the cookies in the bag with a rolling pin instead of dirtying a food processor. I started to explain why that wouldn’t work — then stopped. Honestly, I had no good reason. I just always did it the “proper” way. So I grabbed a bag of Biscoff cookies, sealed it tight, and let my rolling pin do its thing. It was loud, a little messy, and somehow incredibly satisfying. And you know what? That crust came out perfect. Crunchy, buttery, and exactly what these creamy Biscoff cheesecake bars needed. I felt a little sheepish admitting she was right, but that’s the thing about cooking — sometimes the best lessons come from being wrong. I mean, the whole point is making something delicious, not making it complicated. Let me tell you, these bars have become my go-to for potlucks, lazy Sundays, and anytime I need a dessert that looks fancy but takes almost no real effort.
The first time I made them, I forgot to set the cream cheese out to soften. It was a Tuesday afternoon, and I was already in my pajamas. I stared at the cold block of cream cheese and almost gave up. But I microwaved it in short bursts, crossed my fingers, and kept going. The filling still came out silky smooth. That’s the beauty of this recipe — it forgives your mistakes. Maybe you’ve been there, staring at a brick of cold dairy and wondering if your dessert dreams are doomed. They’re not. These no-bake Biscoff cheesecake bars are resilient, just like us. And that first creamy, spiced bite? It makes all the little kitchen mishaps worth it. I keep making them because they remind me that the best recipes aren’t the most polished ones — they’re the ones that work even when you don’t.
Why You’ll Love This Recipe
These creamy Biscoff cheesecake bars are the kind of dessert that makes you close your eyes after the first bite. I’ve tested this recipe more times than I can count, tweaking the ratio of cream cheese to Biscoff spread until it hit that perfect sweet spot — rich but not heavy, creamy but not dense. Here’s why this recipe stands out from the rest:
- Quick & Easy: Comes together in under 30 minutes of active prep time. No baking, no fuss, just a few simple steps and you’re done.
- Simple Ingredients: You only need 7 basic ingredients. No fancy grocery trips needed; you likely already have most of them in your kitchen.
- Perfect for Any Occasion: Great for summer picnics, holiday dessert tables, birthday parties, or just a quiet night in with a sweet craving.
- Crowd-Pleaser: Always gets rave reviews from kids, adults, and even people who claim they don’t like cheesecake.
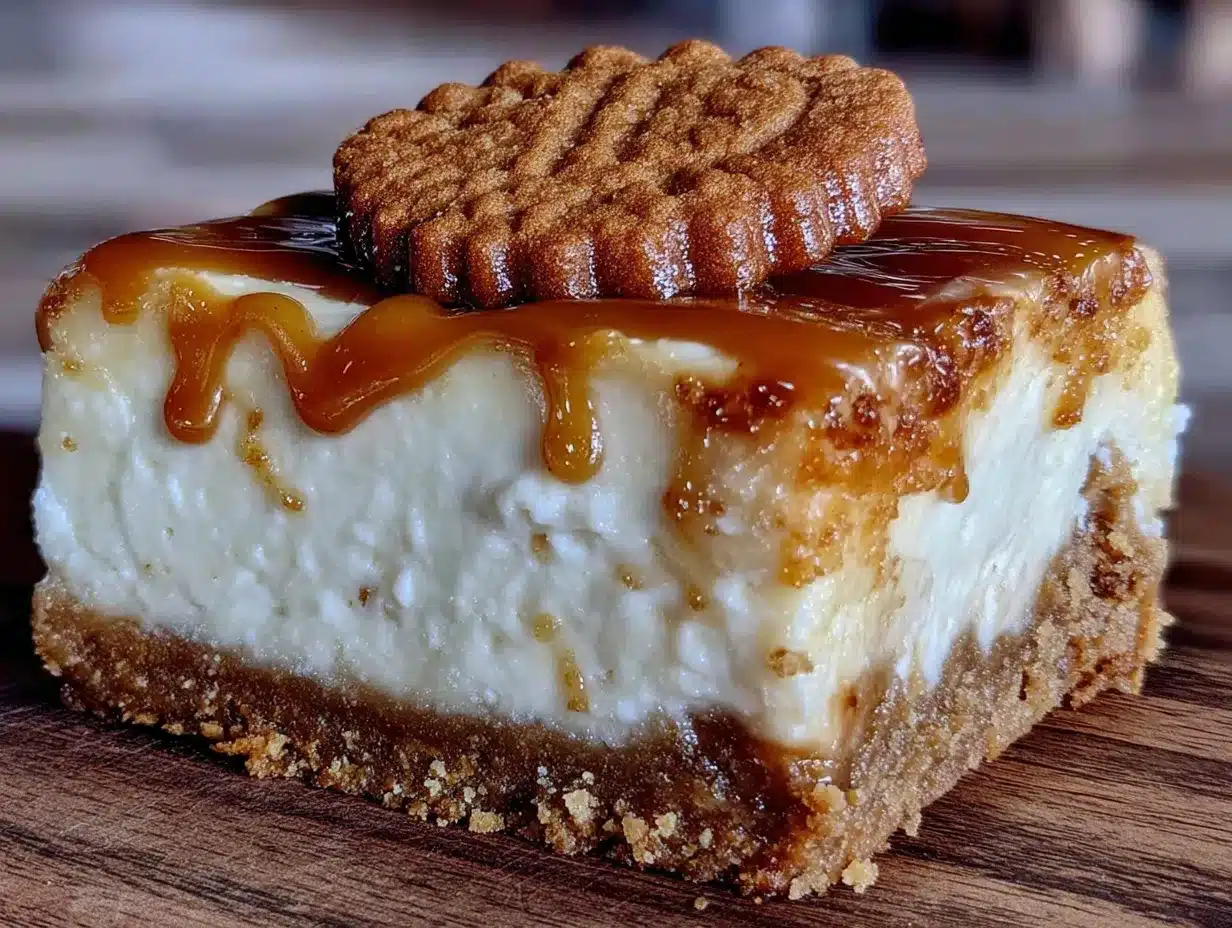
- Unbelievably Delicious: The combination of crunchy Biscoff crust, creamy cheesecake filling, and silky Biscoff topping is pure comfort food magic.
What makes this recipe different? It’s the texture. Most no-bake cheesecake bars can be either too dense or too fluffy. I found the sweet spot by using full-fat cream cheese and a specific ratio of heavy cream that gives you that velvety, sliceable consistency. And that swirl of melted Biscoff spread on top? It’s not just for looks — it adds a deep, caramelized spice flavor that ties everything together. This isn’t just another cheesecake bar recipe. It’s your new favorite dessert.
What Ingredients You Will Need
This recipe uses simple, wholesome ingredients to deliver bold flavor and satisfying texture without the fuss. Most of these are pantry staples or easy to find at any grocery store.
For the Crust
- Biscoff cookies, 250g (about 2 cups crushed) — These are the star of the crust. I recommend the classic Lotus Biscoff cookies for that authentic spiced flavor. You can crush them in a food processor or, as my neighbor proved, in a sealed bag with a rolling pin.
- Unsalted butter, 85g (6 tablespoons), melted — Adds richness and helps the crust hold together. Use salted butter if that’s all you have, just reduce any added salt.
- Granulated sugar, 2 tablespoons (25g) — A tiny bit of extra sweetness to balance the slightly bitter notes of the cookies.
For the Cheesecake Filling
- Full-fat cream cheese, 450g (16 oz), softened to room temperature — This is non-negotiable for that creamy texture. Low-fat cream cheese contains more water and can make the filling grainy. I always use Philadelphia brand for consistent results.
- Powdered sugar, 100g (¾ cup) — Dissolves easily into the cream cheese without any grittiness. No need to sift, but it helps if you’re feeling fancy.
- Biscoff spread, 120g (½ cup) — The smooth version, not crunchy. This adds that signature caramelized spice flavor to the filling. I’ve tried other cookie butters, but nothing beats the real thing.
- Heavy cream, 240ml (1 cup), cold — Whipped to stiff peaks, this gives the cheesecake its light, airy texture. Make sure it’s very cold for the best volume.
- Vanilla extract, 1 teaspoon — Enhances all the other flavors. Pure vanilla is best, but imitation works in a pinch.
For the Topping
- Biscoff spread, 60g (¼ cup), melted — Drizzled on top for that beautiful marbled effect and extra flavor punch.
- Optional: Crushed Biscoff cookies or a pinch of flaky sea salt for garnish.
Substitution Guidance: For a gluten-free version, use gluten-free speculoos cookies. For a dairy-free option, use vegan cream cheese and coconut cream instead of heavy cream — just note the texture will be slightly different. If you can’t find Biscoff spread, you can use any cookie butter, but the flavor profile will change.
Equipment Needed
You don’t need a professional kitchen to make these bars. Here’s what you’ll actually use:
- 9×9 inch square baking pan — The perfect size for bars that are thick but not too tall. An 8×8 pan works too, but your bars will be slightly thicker.
- Parchment paper — Essential for easy removal. I always leave an overhang on two sides to create “handles.”
- Mixing bowls — One large for the crust, one medium for the cream cheese mixture, and one large for the whipped cream.
- Electric hand mixer or stand mixer — A hand mixer is fine for the cream cheese, but a stand mixer makes whipping the cream a breeze. I’ve used both, and honestly, the hand mixer is easier for cleanup.
- Food processor or rolling pin — For crushing the cookies. I used to be team food processor, but now I’m team rolling pin. It’s oddly therapeutic.
- Spatula — For smoothing the filling. A small offset spatula works wonders for getting those perfect edges.
- Measuring cups and spoons — Accuracy matters in no-bake recipes. I learned that the hard way.
Budget-Friendly Tip: If you don’t have a food processor, the rolling pin and ziplock bag method works perfectly. If you don’t have a mixer, you can whisk the cream by hand — it takes about 5 minutes of vigorous arm work, but it’s a great workout!
Preparation Method
Follow these steps carefully, and you’ll have perfect creamy Biscoff cheesecake bars every time.
- Prepare the pan. Line your 9×9 inch baking pan with parchment paper, leaving an overhang on two opposite sides. This will be your lifeline for lifting the bars out later. Lightly grease the parchment if you’re feeling extra cautious.
- Make the crust. Crush the Biscoff cookies into fine crumbs. You need about 2 cups of crumbs. If using a food processor, pulse until you have a sand-like texture. If using a rolling pin, place the cookies in a sealed ziplock bag and go to town — it takes about 2 minutes of honest effort. Transfer the crumbs to a medium bowl. Pour in the melted butter and sugar, then stir with a fork until every crumb is moistened. The mixture should hold together when you squeeze a handful.
- Press the crust. Dump the crumb mixture into your prepared pan. Press it down firmly and evenly. I use the bottom of a flat measuring cup for this — it gives you a perfectly even surface. Don’t skip this step; a loose crust will crumble when you cut the bars. Pop the pan in the fridge while you make the filling.
- Soften the cream cheese. This is crucial. Your cream cheese should be at room temperature — soft enough that you can easily press a finger into it. If you forgot to take it out ahead of time (I’ve been there), cut it into cubes and microwave in 10-second bursts until just softened. Do not melt it.
- Make the cream cheese base. In a large bowl, beat the softened cream cheese with an electric mixer on medium speed until smooth and fluffy, about 2 minutes. Scrape down the sides of the bowl. Add the powdered sugar and beat until combined. Then add the Biscoff spread and vanilla extract, and beat until the mixture is smooth and uniform. It should look like a pale, creamy tan color.
- Whip the cream. In a separate large bowl, pour the cold heavy cream. Using clean beaters, whip on medium-high speed until stiff peaks form. This takes about 3-4 minutes with a hand mixer. You’ll know it’s ready when you lift the beaters and the cream holds its shape without drooping. Be careful not to overwhip, or you’ll end up with butter.
- Fold it together. Add about one-third of the whipped cream to the cream cheese mixture. Fold gently with a spatula — cut through the center, scrape along the bottom, and fold over. This lightens the mixture. Add the remaining whipped cream and fold until just combined. You want a uniform color with no white streaks, but don’t overmix or you’ll deflate the cream.
- Assemble the bars. Remove the crust from the fridge. Spoon the cheesecake filling onto the crust and spread it evenly. I use an offset spatula for this, but the back of a spoon works too. Smooth the top as best you can.
- Add the topping. Melt the remaining Biscoff spread in a small microwave-safe bowl in 15-second bursts, stirring between each, until smooth and pourable. Drizzle it over the top of the cheesecake in a zigzag pattern. Use a toothpick or the tip of a knife to swirl it gently — just a few passes for that marbled look. Don’t over-swirl, or you’ll lose the contrast.
- Chill. Cover the pan with plastic wrap and refrigerate for at least 6 hours, but overnight is best. The bars need this time to set properly. If you try to cut them too early, you’ll get a delicious mess instead of clean slices. Trust me on this — I learned the hard way when I tried to rush it for a dinner party.
- Slice and serve. When fully set, lift the bars out using the parchment overhang. Place on a cutting board and use a sharp knife to slice into 16 squares. For clean cuts, wipe the knife between each slice. Serve cold, straight from the fridge.
Cooking Tips & Techniques
After making these creamy Biscoff cheesecake bars more times than I can count, I’ve picked up a few tricks that make a real difference.
Temperature is everything. Cold cream cheese will give you lumpy filling. Room temperature cream cheese blends smoothly in under a minute. Set it out at least an hour before you start. Same goes for the heavy cream — it needs to be ice cold to whip properly. I keep my bowl and beaters in the fridge for 10 minutes before whipping. It sounds fussy, but it shaves off a minute of whipping time and gives you better volume.
Don’t rush the chilling. This is the most common mistake I see. Six hours is the minimum, but overnight is where the magic happens. The flavors meld, the texture firms up, and the crust sets perfectly. I once made these at 10 PM for a noon event the next day, and they were perfect. I’ve also made them at 8 AM for a 2 PM party, and they were still a little soft. Plan ahead.
Watch your swirl. When I first made these, I went crazy with the toothpick and ended up with a muddy brown top instead of beautiful marbled swirls. The trick is to make just 4-5 passes through the melted Biscoff spread. Less is more. You want distinct ribbons of cookie butter against the pale cheesecake.
Clean cuts every time. Run your knife under hot water, dry it quickly, then slice. The warm blade glides through the cheesecake without dragging. Wipe the blade clean between each cut. This gives you those Instagram-worthy squares with sharp edges.
My biggest failure: The first time I made these, I used low-fat cream cheese because I was trying to be “healthy.” The filling never set properly. It was more like a pudding than a cheesecake bar. Tasted fine, but I couldn’t slice it. Full-fat cream cheese isn’t just about flavor — it’s about structure. Don’t swap it out.
Variations & Adaptations
One of the best things about this recipe is how adaptable it is. Here are some variations I’ve tried and loved:
- Chocolate Biscoff Bars: Add 60g (¼ cup) of melted dark chocolate to the cheesecake filling before folding in the whipped cream. The chocolate and Biscoff flavors are a match made in dessert heaven. I did this for a friend’s birthday, and she still asks for the recipe.
- Vegan Version: Use vegan cream cheese (I like Violife or Kite Hill), coconut cream instead of heavy cream, and vegan butter. The texture is slightly less firm, but the flavor is still incredible. Chill for at least 8 hours for best results.
- Mini Cheesecake Bites: Press the crust into a mini muffin tin lined with paper liners, fill with cheesecake mixture, and chill. These are perfect for parties and portion control. Reduce chilling time to 4 hours since they’re smaller.
- Nutty Crunch: Add 60g (½ cup) of toasted chopped pecans or walnuts to the crust mixture. The extra crunch is wonderful against the creamy filling. I tried this on a whim one Thanksgiving, and it was a hit.
- Seasonal Twist: In fall, add ½ teaspoon of pumpkin pie spice to the cheesecake filling. In summer, top with fresh berries before serving. The tartness of raspberries is a beautiful contrast to the sweet Biscoff.
Serving & Storage Suggestions
These creamy Biscoff cheesecake bars are best served cold, straight from the refrigerator. The texture is firm but creamy, and the flavors are most pronounced when chilled. I like to let them sit at room temperature for about 5 minutes before serving — just enough to take the chill off without losing the structure.
Presentation ideas: Place the bars on a white platter for contrast. Dust with a light sprinkle of crushed Biscoff cookies or a tiny pinch of flaky sea salt just before serving. The salt enhances the caramel notes in the Biscoff spread. For a dinner party, serve each bar on a small plate with a dollop of whipped cream and a single fresh raspberry.
Perfect pairings: These bars are lovely with a cup of coffee or espresso — the bitterness balances the sweetness. A glass of cold milk is a classic choice, especially if kids are involved. For an adult twist, try a dessert wine like a late-harvest Riesling or a dark rum.
Storage instructions: Store leftover bars in an airtight container in the refrigerator for up to 5 days. Layer them between sheets of parchment paper so they don’t stick together. The flavor actually improves after a day or two as the Biscoff flavor permeates the cheesecake.
Freezing tips: These bars freeze beautifully. Place the fully set bars on a baking sheet and freeze until solid, about 2 hours. Then wrap each bar individually in plastic wrap and store in a freezer-safe bag for up to 3 months. Thaw in the refrigerator overnight before serving. I always keep a stash in my freezer for unexpected guests or late-night cravings.
Reheating note: Do not microwave these bars. They’re meant to be served cold. If you want a warm dessert, try the filling as a dip with warm Biscoff cookies — but that’s a different recipe entirely.
Nutritional Information & Benefits
While these creamy Biscoff cheesecake bars are definitely a treat, they do offer some surprising benefits. Here’s a rough estimate per bar (based on 16 servings):
| Nutrient | Amount per Bar |
|---|---|
| Calories | 285 |
| Total Fat | 19g |
| Saturated Fat | 10g |
| Carbohydrates | 25g |
| Sugar | 16g |
| Protein | 4g |
| Calcium | 6% DV |
Health highlights: The cream cheese provides a decent amount of calcium and protein. Biscoff cookies are made with wheat flour, offering some fiber and B vitamins. The heavy cream contains vitamin A and healthy fats that help your body absorb fat-soluble vitamins. Of course, this is still a dessert — it’s meant to be enjoyed in moderation as part of a balanced diet. I personally love that I can make these for a gathering and feel good about offering something homemade with real ingredients, no artificial flavors or preservatives.
Dietary considerations: This recipe contains dairy, wheat, and gluten. For a gluten-free version, use gluten-free speculoos cookies. For a dairy-free version, use vegan alternatives as mentioned in the variations section. The recipe is naturally egg-free and nut-free (unless you add the nutty variation).
Conclusion
These creamy Biscoff cheesecake bars are proof that the best desserts don’t need to be complicated. With just 7 ingredients and 30 minutes of active prep, you can create something that looks like it came from a fancy bakery. The crunchy spiced crust, the silky smooth filling, and that beautiful swirl of cookie butter on top — it’s a combination that never gets old.
I love this recipe because it’s forgiving. It works when you forget to soften the cream cheese. It works when you crush the cookies with a rolling pin instead of a food processor. It works when you’re in your pajamas on a Tuesday afternoon, just wanting something sweet. And every time I make it, I remember that Beth was right — sometimes the simple way is the best way.
Now I want to hear from you. Have you tried these bars? Did you add your own twist? Drop a comment below and let me know how they turned out. And if you loved them as much as I do, share this recipe with a friend who needs a little sweetness in their life. Happy no-baking!
Frequently Asked Questions
Can I use a different size pan?
Yes, you can. An 8×8 inch pan will give you slightly thicker bars — just increase the chilling time by an hour or two. A 9×13 inch pan will give you thinner bars, so reduce the chilling time slightly. The baking time stays the same since there’s no actual baking involved.
Can I make these bars ahead of time?
Absolutely. These bars are actually better when made a day ahead. They need at least 6 hours to set, but 24 hours is ideal. You can make them up to 3 days in advance and store them in the refrigerator. Just keep them covered tightly.
Why is my cheesecake filling not setting?
This usually happens for one of three reasons: the cream cheese wasn’t fully softened, the heavy cream wasn’t whipped to stiff peaks, or you didn’t chill it long enough. Make sure your cream cheese is at room temperature and your heavy cream is very cold before whipping. And don’t rush the chilling time — 6 hours minimum, overnight is best.
Can I freeze these bars?
Yes, they freeze wonderfully. Freeze the fully set bars on a baking sheet until solid, then wrap each bar individually in plastic wrap and store in a freezer bag for up to 3 months. Thaw in the refrigerator overnight before serving. They’ll taste just as fresh as the day you made them.
What can I use instead of Biscoff spread?
If you can’t find Biscoff spread, you can use any cookie butter, like Speculoos or even Nutella for a chocolate version. The flavor will change, but the texture will be similar. For the crust, any crunchy cookie like graham crackers or ginger snaps works well — just adjust the sugar slightly depending on how sweet your cookie is.
Pin This Recipe!
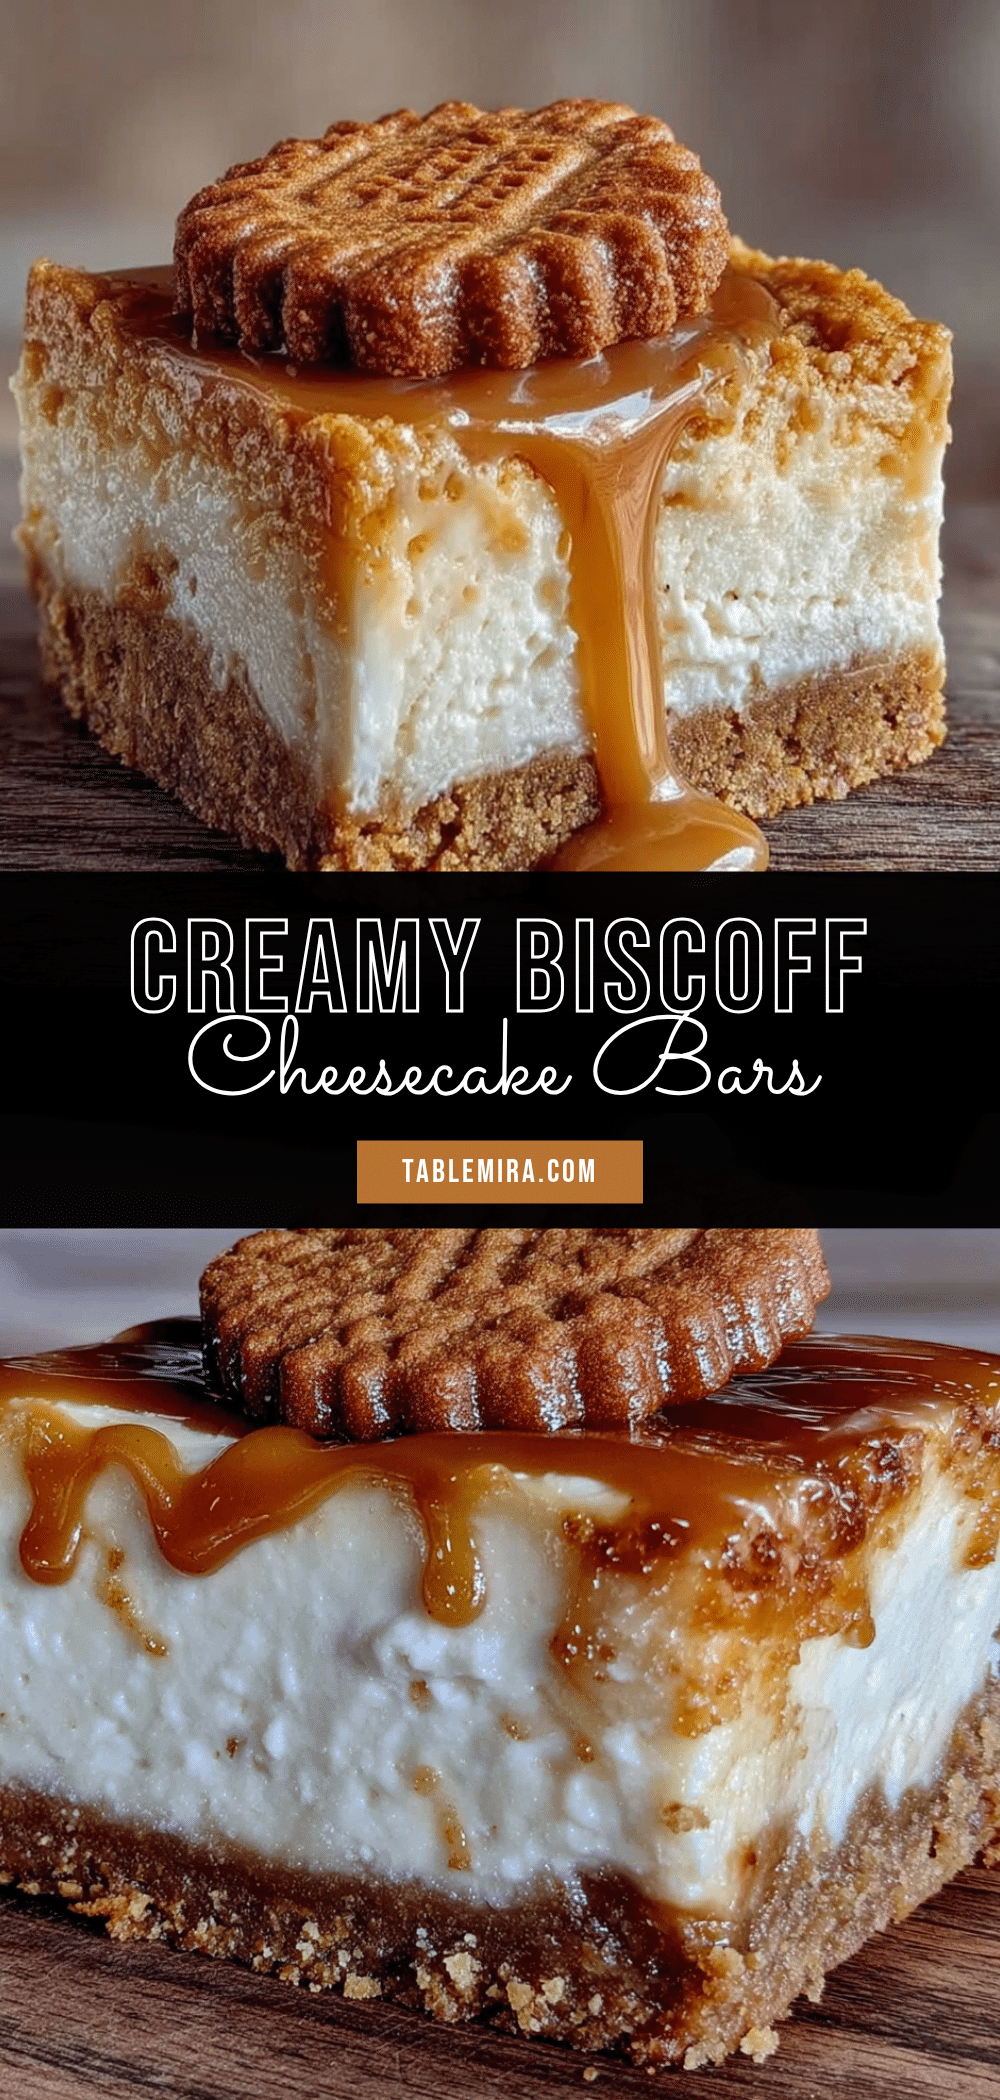
Creamy Biscoff Cheesecake Bars: Easy No-Bake Dessert Recipe
These no-bake Biscoff cheesecake bars feature a crunchy cookie crust, silky smooth cheesecake filling, and a beautiful swirl of melted Biscoff spread on top. With just 7 ingredients and 30 minutes of active prep, they’re perfect for any occasion.
- Prep Time: 30 minutes
- Cook Time: 0 minutes
- Total Time: 6 hours 30 minutes (includes chilling)
- Yield: 16 servings 1x
- Category: Dessert
- Cuisine: American
Ingredients
- 250g (about 2 cups crushed) Biscoff cookies
- 85g (6 tablespoons) unsalted butter, melted
- 2 tablespoons (25g) granulated sugar
- 450g (16 oz) full-fat cream cheese, softened to room temperature
- 100g (¾ cup) powdered sugar
- 120g (½ cup) Biscoff spread (smooth)
- 240ml (1 cup) heavy cream, cold
- 1 teaspoon vanilla extract
- 60g (¼ cup) Biscoff spread, melted (for topping)
- Optional: crushed Biscoff cookies or flaky sea salt for garnish
Instructions
- Line a 9×9 inch baking pan with parchment paper, leaving an overhang on two opposite sides. Lightly grease the parchment if desired.
- Crush the Biscoff cookies into fine crumbs (about 2 cups). Transfer to a medium bowl, add melted butter and sugar, and stir until every crumb is moistened. The mixture should hold together when squeezed.
- Press the crumb mixture firmly and evenly into the prepared pan using the bottom of a flat measuring cup. Refrigerate while making the filling.
- Soften the cream cheese to room temperature. If needed, cut into cubes and microwave in 10-second bursts until just softened (do not melt).
- In a large bowl, beat the softened cream cheese with an electric mixer on medium speed until smooth and fluffy, about 2 minutes. Scrape down the sides. Add powdered sugar and beat until combined. Add 120g Biscoff spread and vanilla extract, and beat until smooth and uniform.
- In a separate large bowl, whip the cold heavy cream on medium-high speed until stiff peaks form, about 3-4 minutes. Be careful not to overwhip.
- Add one-third of the whipped cream to the cream cheese mixture and fold gently with a spatula. Add the remaining whipped cream and fold until just combined (no white streaks).
- Remove the crust from the fridge. Spoon the cheesecake filling onto the crust and spread evenly. Smooth the top.
- Melt the remaining 60g Biscoff spread in a small microwave-safe bowl in 15-second bursts, stirring between each, until smooth and pourable. Drizzle over the top in a zigzag pattern. Use a toothpick or knife to swirl gently (4-5 passes).
- Cover the pan with plastic wrap and refrigerate for at least 6 hours, preferably overnight.
- When fully set, lift the bars out using the parchment overhang. Place on a cutting board and slice into 16 squares using a sharp knife (wipe blade between cuts for clean edges). Serve cold.
Notes
For clean cuts, run your knife under hot water, dry it, then slice. Wipe the blade clean between each cut. The bars are best served cold. They can be stored in an airtight container in the refrigerator for up to 5 days, or frozen for up to 3 months.
Nutrition
- Serving Size: 1 bar
- Calories: 285
- Sugar: 16
- Fat: 19
- Saturated Fat: 10
- Carbohydrates: 25
- Protein: 4
Keywords: Biscoff cheesecake bars, no-bake cheesecake, Biscoff dessert, easy cheesecake bars, cookie butter cheesecake


