I was standing in line at the post office—of all places—when the woman ahead of me started talking about cake. Not just any cake, mind you. She was describing a cream cake with such reverence that people around us stopped checking their phones to listen. She was the postmaster, a no-nonsense woman named Carol who I’d only ever seen sorting mail and reminding people about proper package taping. But there she was, telling a complete stranger about the perfect cream cake with vanilla bean frosting that her grandmother made for every family celebration. And honestly? I wasn’t expecting cooking advice from the postmaster, but there I was, clutching a package I’d forgotten to insure, listening to her describe exactly how to make this cake.
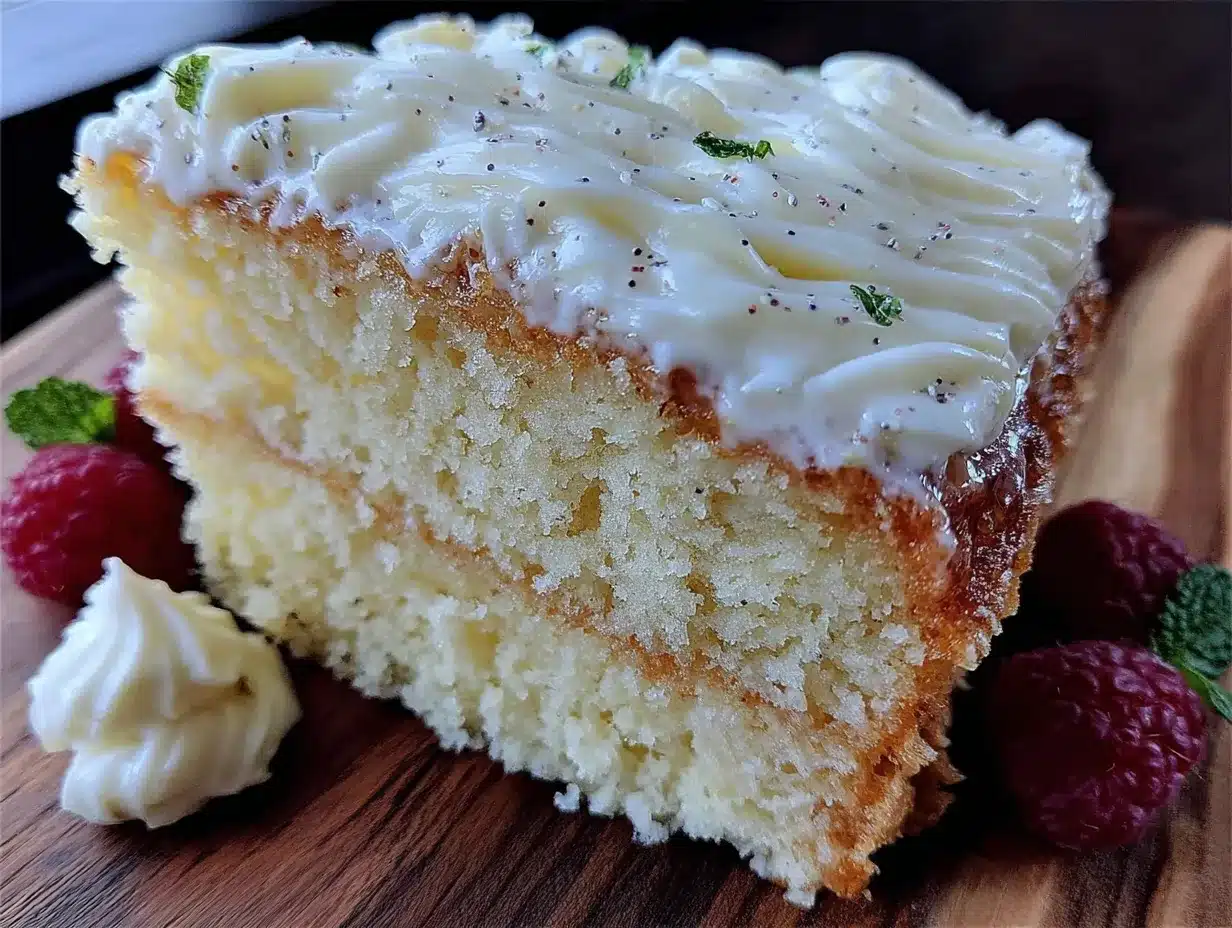
She told me the secret was in how you handle the cream—not whipping it too stiff, not folding it too rough. I scribbled notes on the back of a shipping label while she talked. I must have looked ridiculous, but I didn’t care. This was clearly a recipe worth chasing. I went home that afternoon and tried her method, and let me tell you, the first slice I pulled out of that pan was something else. The crumb was tender, almost velvety, and that frosting had these tiny black vanilla bean specks that made it look like something from a fancy bakery window.
Now, I’ve made a lot of cakes in my time. Some turned out great, some turned out… edible. But this one? This one stuck with me. Maybe you’ve been there—you taste something and you just know it’s going to be part of your regular rotation. That’s what this cream cake with vanilla bean frosting became for me. It’s the cake I bring to dinner parties, the one friends request for their birthdays, the one that makes people close their eyes when they take a bite. And the best part? It came from a post office conversation with a woman who just really loved her grandmother’s recipe.
Why You’ll Love This Recipe
Let me be straight with you—I’ve tested this cream cake recipe at least a dozen times to get it just right. I wanted to make sure it was foolproof enough for a weeknight but impressive enough for a dinner party. Here’s why this version stands out from every other cake recipe you’ve tried:
- Perfect for Hosting: This cake feeds a crowd beautifully. It slices clean, stacks well, and looks stunning on a cake stand. Your guests will think you spent hours on it.
- Simple Pantry Ingredients: No chasing down exotic ingredients. You probably have most of this stuff in your kitchen right now. Heavy cream, butter, sugar, flour, eggs—the usual suspects.
- That Vanilla Bean Frosting: This isn’t your average buttercream. The vanilla bean specks add this gorgeous visual and flavor depth that extract just can’t match. It feels special without being fussy.
- Make-Ahead Friendly: You can bake the cake layers a day ahead and frost them the day of your gathering. Perfect for when you’re hosting and need to spread out the work.
- Crowd-Pleasing Texture: The cream in the batter gives this cake an incredibly tender crumb. It’s moist without being heavy, light without being dry. The kind of texture that makes people ask for the recipe.
- Stress-Free Assembly: This cream cake with vanilla bean frosting comes together in layers that are forgiving to work with. No crumbling edges, no sliding fillings. Just a beautiful cake that makes you look like a pro.
This recipe isn’t just good—it’s the kind that makes you close your eyes after the first bite. It’s comfort dessert reimagined, with the same soul-soothing satisfaction but a texture that feels next-level. Perfect for impressing guests without stress, or turning a simple dinner into something memorable.
What Ingredients You Will Need
This cream cake recipe uses simple, wholesome ingredients to deliver that signature tender crumb and rich vanilla flavor. Most of these are pantry staples, which makes this cake perfect for those moments when you need a showstopper dessert without a special trip to the store.
For the Cake
- 2 ½ cups all-purpose flour (spooned and leveled—don’t scoop straight from the bag)
- 2 teaspoons baking powder (make sure it’s fresh for proper lift)
- ½ teaspoon baking soda
- ½ teaspoon salt (fine sea salt works best)
- ¾ cup unsalted butter, softened to room temperature (I prefer Kerrygold for its richness)
- 1 ½ cups granulated sugar
- 3 large eggs, room temperature (leave them out for 30 minutes before starting)
- 2 teaspoons vanilla extract (use pure, not imitation)
- 1 cup heavy cream, at room temperature (this is the secret to the tender crumb)
- ½ cup whole milk, room temperature
For the Vanilla Bean Frosting
- 1 cup unsalted butter, softened (let it sit out for at least an hour)
- 4 cups powdered sugar, sifted (sifting prevents lumps)
- 2 tablespoons heavy cream (add more if needed for consistency)
- 1 vanilla bean, split and seeds scraped (or 2 teaspoons vanilla bean paste)
- Pinch of salt (to balance sweetness)
For Assembly (Optional but Recommended)
- Additional vanilla bean seeds for sprinkling on top
- Fresh berries or edible flowers for garnish (makes it look bakery-worthy)
A few notes on ingredients: When I say room temperature, I mean it. Cold ingredients don’t emulsify properly, and you’ll end up with a denser cake. I learned this the hard way when I rushed through a batch for a friend’s birthday party. The cake was good, but not great. Take the extra 20 minutes to let everything warm up. Also, if you can’t find a whole vanilla bean, vanilla bean paste is your next best option. It has those beautiful specks and a concentrated flavor that extract just can’t replicate. For a dairy-free version, you can substitute the heavy cream with full-fat coconut cream and use a plant-based butter, but honestly, this cake really shines with the real stuff.
Equipment Needed
You don’t need a professional bakery setup to make this cream cake with vanilla bean frosting. Here’s what you’ll actually use:
- Two 9-inch round cake pans (I love my Fat Daddio’s anodized aluminum pans—they conduct heat evenly and never rust)
- Parchment paper (cut circles for the pan bottoms—trust me, this saves your cake from sticking)
- Stand mixer or hand mixer (a stand mixer makes creaming butter and sugar easier, but a hand mixer works fine too)
- Large mixing bowls (at least two)
- Whisk (for dry ingredients)
- Rubber spatula (for folding and scraping every last bit of batter)
- Cooling rack (wire rack lets air circulate so your cakes cool evenly)
- Offset spatula (for spreading frosting—this tool is worth the $8 investment)
- Cake stand or serving plate (something that rotates is nice but not necessary)
- Sharp knife or cake leveler (for trimming domed tops)
If you don’t have an offset spatula, a butter knife works in a pinch. And if you’re using glass or dark-colored cake pans, reduce your oven temperature by 25°F to prevent over-browning. I learned that one after a few too many dark-bottomed cakes.
Preparation Method
Making this cream cake is actually pretty straightforward. Let me walk you through it step by step.
- Preheat your oven to 350°F (175°C). Position the rack in the center of the oven. Grease two 9-inch round cake pans, line the bottoms with parchment paper circles, then grease the parchment too. Dust lightly with flour and tap out the excess.
- Whisk the dry ingredients together. In a medium bowl, combine 2 ½ cups all-purpose flour, 2 teaspoons baking powder, ½ teaspoon baking soda, and ½ teaspoon salt. Whisk until evenly distributed. Set aside.
- Cream the butter and sugar. In the bowl of your stand mixer fitted with the paddle attachment (or using a hand mixer), beat ¾ cup softened unsalted butter with 1 ½ cups granulated sugar on medium speed for 3-4 minutes. You want it light and fluffy—almost pale in color. Scrape down the sides and bottom of the bowl halfway through.
- Add the eggs one at a time. Crack in 3 room-temperature eggs, one at a time, beating well after each addition. The mixture should look smooth and glossy. Add 2 teaspoons vanilla extract and beat until combined.
- Combine the wet ingredients. In a liquid measuring cup or small bowl, whisk together 1 cup heavy cream and ½ cup whole milk. Both should be at room temperature—if they’re cold, they’ll seize the butter mixture.
- Alternate adding dry and wet ingredients. With the mixer on low speed, add about one-third of the flour mixture. Mix until just combined. Add half of the cream mixture. Mix. Repeat with another third of flour, then the remaining cream, then the final third of flour. Stop mixing as soon as the flour disappears—overmixing makes tough cake.
- Divide the batter evenly. Use a kitchen scale for accuracy if you have one (about 400-450 grams per pan). If not, use a measuring cup and eyeball it. Give each pan a gentle tap on the counter to release air bubbles.
- Bake for 25-30 minutes. The cakes are done when a toothpick inserted in the center comes out clean or with a few moist crumbs. The tops should be golden and spring back when lightly touched. Let them cool in the pans for 10 minutes, then run a knife around the edges and turn them out onto a wire rack to cool completely.
- Make the vanilla bean frosting. While the cakes cool, beat 1 cup softened unsalted butter in a clean mixer bowl on medium speed for 2 minutes until smooth and creamy. Add the seeds from 1 vanilla bean (or 2 teaspoons vanilla bean paste) and a pinch of salt. Beat until combined. Gradually add 4 cups sifted powdered sugar, about 1 cup at a time, beating on low speed. Add 2 tablespoons heavy cream and beat on medium-high for 3-4 minutes until light and fluffy. If the frosting is too thick, add another tablespoon of cream. Too thin? Add a bit more powdered sugar.
- Assemble the cake. Place one cooled cake layer on your serving plate. Spread about ¾ cup of frosting evenly on top. Place the second layer on top, flat side up. Apply a thin crumb coat (a thin layer of frosting all over the cake) and refrigerate for 20 minutes. Then apply the final layer of frosting, using your offset spatula to create swirls or smooth sides. Sprinkle extra vanilla bean seeds on top if you’re feeling fancy.
A quick note: If your cake layers domed during baking, use a serrated knife to level them before assembling. I usually wait until they’re completely cool, then slice off the rounded top. Save those scraps for snacking or making cake truffles!
Cooking Tips & Techniques
After making this cream cake with vanilla bean frosting more times than I can count, I’ve picked up a few tricks that make a real difference.
Room temperature matters more than you think. I know I said this already, but it’s worth repeating. Cold butter won’t cream properly, cold eggs will curdle your batter, and cold cream won’t incorporate smoothly. Set everything out on the counter at least 30 minutes before you start. Your cake will thank you with a tender, even crumb.
Don’t overmix once the flour goes in. This is probably the most common mistake I see. Once you add flour, gluten development kicks into high gear. Mix just until you can’t see any more white streaks. A few small lumps are totally fine—they’ll bake out. Overmixing gives you a tough, dense cake instead of that light, velvety texture we’re after.
Use a kitchen scale for the flour. I resisted this for years, but honestly, it’s a game-changer. Scooping flour from the bag can give you 20-30% more flour than the recipe intends. If you don’t have a scale, spoon the flour into your measuring cup and level it off with a knife. Don’t pack it down.
Let the frosting beat long enough. That 3-4 minute beating time isn’t just for show. It incorporates air and makes the frosting light and fluffy. Shortchange it, and you’ll end up with a dense, greasy frosting that doesn’t spread nicely. I once rushed through this step because guests were arriving in 20 minutes, and the frosting was a mess. Learn from my mistake!
Chill between coats. That crumb coat layer isn’t optional if you want a clean finish. A 20-minute chill in the fridge sets the frosting and traps any loose crumbs. The final coat goes on smooth and beautiful. This is especially important when you’re serving this cake at a gathering—presentation matters.
Bake the layers on the same rack position. If you try to bake both layers on different racks, they’ll cook at different rates. Bake them side by side on the center rack. If your oven has hot spots, rotate the pans halfway through baking.
Variations & Adaptations
One of the best things about this cream cake is how versatile it is. Here are some variations I’ve tried and loved:
Lemon Cream Cake: Add the zest of 2 lemons to the sugar and rub it in with your fingers before creaming with the butter. Replace 2 tablespoons of the milk with fresh lemon juice. For the frosting, add 1 tablespoon lemon zest and a splash of lemon extract. The bright citrus cuts through the richness beautifully—perfect for spring gatherings.
Chocolate Cream Cake: Replace ½ cup of the flour with ½ cup unsweetened cocoa powder. Add 2 tablespoons of strong brewed coffee to the cream mixture (coffee enhances chocolate flavor without making it taste like coffee). For the frosting, melt 4 ounces of dark chocolate and let it cool slightly, then beat it into the vanilla bean frosting. This version is dangerously good.
Berry Swirl Cream Cake: Before baking, drop spoonfuls of raspberry or strawberry jam onto the batter in the pans and swirl gently with a knife. The jam creates these gorgeous ribbons of fruit throughout the cake. Top with fresh berries and a dusting of powdered sugar instead of the full frosting for a lighter dessert.
Gluten-Free Option: Substitute the all-purpose flour with a 1:1 gluten-free baking flour blend (I like King Arthur’s Measure for Measure). Add 1 teaspoon xanthan gum if your blend doesn’t include it. The texture will be slightly more delicate, but still delicious. Let the batter rest for 15 minutes before baking to allow the flours to hydrate.
Dairy-Free Adaptation: Use plant-based butter sticks (not the spreadable kind in a tub) and full-fat oat milk mixed with 1 tablespoon melted coconut oil to replace the cream. The texture won’t be exactly the same, but it’s surprisingly good. I made this version for a friend with dairy allergies and she asked for the recipe.
My personal favorite variation? The lemon version with a handful of fresh blueberries folded into the batter. It’s bright, summery, and always gets rave reviews at potlucks.
Serving & Storage Suggestions
This cream cake with vanilla bean frosting is best served at room temperature. If you’ve refrigerated it, let it sit out for about 30 minutes before slicing. The texture softens and the flavors really open up.
For a Dinner Party: Slice the cake and serve each piece with a dollop of lightly sweetened whipped cream and a handful of fresh raspberries. The tartness of the berries balances the sweet vanilla frosting perfectly. A cup of strong black coffee or a glass of cold milk on the side never hurts.
Storage: This cake keeps beautifully in the refrigerator for up to 5 days. Store it in a cake carrier or under a large inverted bowl to prevent it from drying out. If you don’t have a cake carrier, wrap the cake in plastic wrap once the frosting has set—just be gentle so you don’t mess up the swirls.
Freezing: You can freeze unfrosted cake layers for up to 3 months. Wrap each layer tightly in plastic wrap, then foil. When you’re ready to use them, thaw overnight in the refrigerator, unwrap, and bring to room temperature before frosting. The frosting itself can also be frozen in an airtight container for up to 2 months. Thaw in the fridge overnight, then re-whip for a minute before using.
Leftover Cake: If you somehow have leftovers after a party (unlikely, but possible), try making cake truffles. Crumble the leftover cake, mix with a spoonful of frosting, roll into balls, and dip in melted chocolate. Instant dessert upgrade.
One thing I love about this cake is that the flavors actually improve after a day in the fridge. The vanilla bean infuses the frosting more deeply, and the cake becomes even more moist. So don’t stress about making it a day ahead—it might actually be better that way.
Nutritional Information & Benefits
Let’s be real—this is a celebration cake, not a health food. But that doesn’t mean it’s all empty calories. Here’s a rough breakdown per slice (based on 12 servings):
| Nutrient | Amount Per Slice |
|---|---|
| Calories | 480-520 |
| Total Fat | 28g |
| Saturated Fat | 17g |
| Carbohydrates | 58g |
| Sugar | 42g |
| Protein | 5g |
| Calcium | 6% DV |
| Vitamin A | 15% DV |
The heavy cream in this recipe provides a good dose of Vitamin A and calcium, and the eggs contribute high-quality protein and choline. The vanilla bean contains small amounts of antioxidants like vanillin. Is it a superfood? No. But if you’re going to enjoy dessert, this cream cake with vanilla bean frosting is made with real, recognizable ingredients—no preservatives, no artificial flavors, just honest baking.
For those watching their sugar intake, you can reduce the sugar in the cake to 1 cup without dramatically affecting the texture. The frosting needs the full amount for structure, but you can use a sugar-free powdered sugar alternative if needed. This cake contains gluten, dairy, and eggs, so it’s not suitable for those with related allergies without the substitutions I mentioned earlier.
I believe in balance. This cake is for celebrations, gatherings, and those moments when you deserve something truly special. Enjoy a slice, savor every bite, and don’t feel guilty about it.
Conclusion
This cream cake with vanilla bean frosting has become my go-to dessert for every occasion that calls for something special. It’s the cake I bring to holiday dinners, the one friends request for their birthdays, the one that makes people ask, “Where did you get this?” with genuine surprise when I say I made it myself.
What I love most about this recipe is how it brings people together. There’s something about slicing into a beautiful homemade cake that makes a gathering feel more meaningful. It’s not just dessert—it’s a gesture, a little piece of care and effort that says “you’re worth it.” And honestly, that’s what cooking for the people we love is all about.
I’d love to hear how this cake turns out for you. Did you try one of the variations? Add your own twist? Serve it at a special occasion? Drop a comment below and let me know—I read every single one. And if you share a photo on social media, tag me so I can see your beautiful creation. Happy baking, friends!
Frequently Asked Questions
Can I use vanilla extract instead of a vanilla bean?
Absolutely. Use 2 teaspoons of pure vanilla extract in the frosting instead of the vanilla bean seeds. You won’t get those beautiful black specks, but the flavor will still be delicious. Vanilla bean paste is another great option if you want the specks without the hassle of scraping a bean.
Why did my cake turn out dense?
This usually happens for one of three reasons: overmixing the batter after adding flour, using cold ingredients, or too much flour. Make sure you’re measuring your flour correctly (spoon and level, don’t scoop) and stop mixing as soon as the flour disappears. Room temperature ingredients are non-negotiable for a light texture.
Can I make this cake in advance?
Yes! You can bake the cake layers up to 24 hours ahead. Wrap them tightly in plastic wrap once they’re completely cool and store at room temperature. The frosting can also be made a day ahead and refrigerated—just let it come to room temperature and re-whip for a minute before using. Assembled cake keeps well in the fridge for up to 2 days.
How do I get clean slices?
Use a long, sharp knife and run it under hot water before each cut. Wipe the blade clean between slices. For the prettiest presentation, chill the cake for 30 minutes before slicing—the frosting firms up and cuts more cleanly.
Can I bake this as a sheet cake instead?
Definitely. Pour the batter into a greased 9×13-inch pan and bake at 350°F for 30-35 minutes. You’ll need about half the frosting recipe for a single layer. This is a great option when you’re feeding a crowd and don’t want to fuss with layering.
Pin This Recipe!
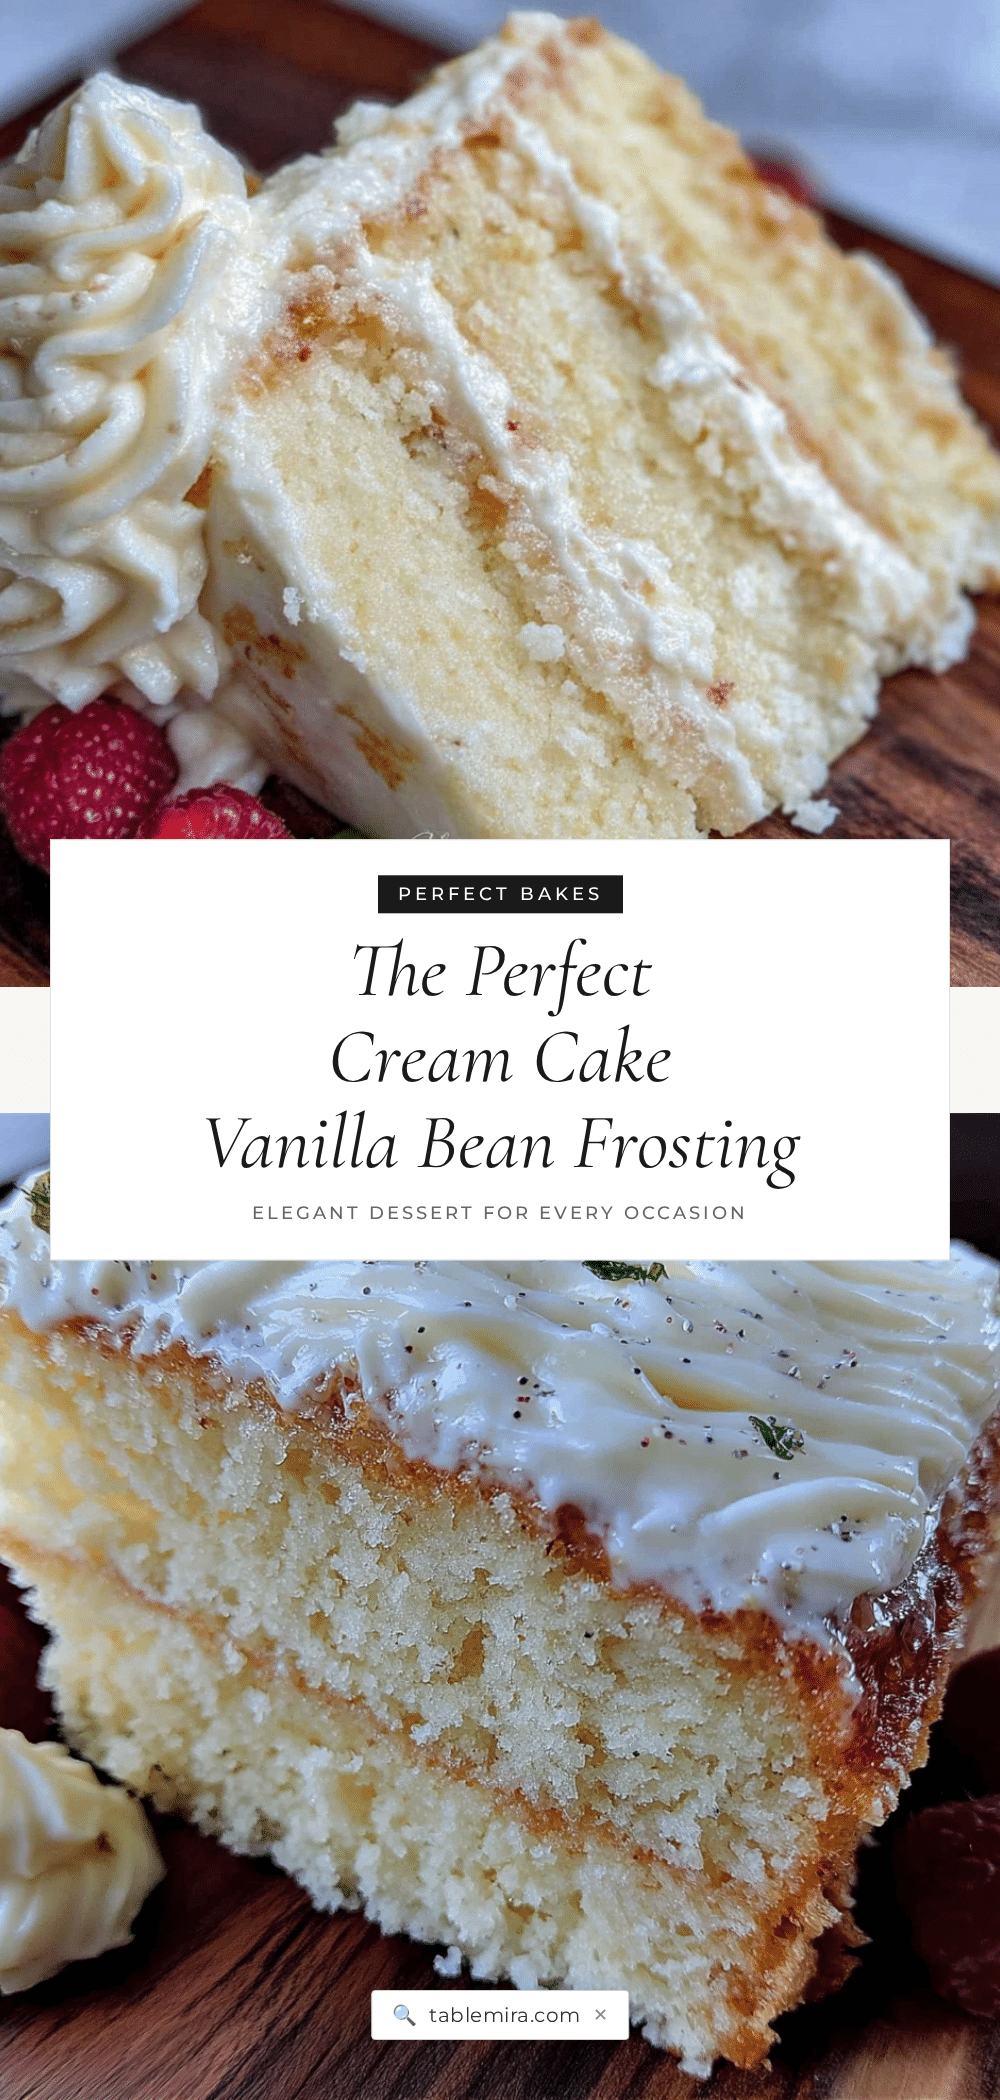
Cream Cake with Vanilla Bean Frosting: Easy Homemade Dessert
This cream cake with vanilla bean frosting is a tender, velvety dessert perfect for any celebration. Made with simple pantry ingredients, it features a moist crumb and a rich vanilla bean buttercream that looks bakery-worthy.
- Prep Time: 30 minutes
- Cook Time: 30 minutes
- Total Time: 1 hour 30 minutes (includes cooling and chilling)
- Yield: 12 servings 1x
- Category: Dessert
- Cuisine: American
Ingredients
- 2 ½ cups all-purpose flour (spooned and leveled)
- 2 teaspoons baking powder
- ½ teaspoon baking soda
- ½ teaspoon fine sea salt
- ¾ cup unsalted butter, softened to room temperature
- 1 ½ cups granulated sugar
- 3 large eggs, room temperature
- 2 teaspoons pure vanilla extract
- 1 cup heavy cream, room temperature
- ½ cup whole milk, room temperature
- 1 cup unsalted butter, softened (for frosting)
- 4 cups powdered sugar, sifted
- 2 tablespoons heavy cream (for frosting, plus more if needed)
- 1 vanilla bean, split and seeds scraped (or 2 teaspoons vanilla bean paste)
- Pinch of salt (for frosting)
- Additional vanilla bean seeds for sprinkling (optional)
- Fresh berries or edible flowers for garnish (optional)
Instructions
- Preheat oven to 350°F (175°C). Grease two 9-inch round cake pans, line bottoms with parchment paper, grease parchment, and dust with flour.
- In a medium bowl, whisk together flour, baking powder, baking soda, and salt.
- In a stand mixer with paddle attachment, beat butter and sugar on medium speed for 3-4 minutes until light and fluffy. Scrape down sides.
- Add eggs one at a time, beating well after each. Mix in vanilla extract.
- In a small bowl, whisk together heavy cream and milk.
- With mixer on low, add one-third of flour mixture, mixing until just combined. Add half of cream mixture. Repeat with another third of flour, remaining cream, and final third of flour. Do not overmix.
- Divide batter evenly between pans (about 400-450g each). Tap pans on counter to release air bubbles.
- Bake for 25-30 minutes until a toothpick inserted in center comes out clean. Cool in pans for 10 minutes, then turn out onto wire rack to cool completely.
- For frosting: Beat 1 cup softened butter on medium speed for 2 minutes until smooth. Add vanilla bean seeds and salt. Gradually add sifted powdered sugar, beating on low. Add 2 tablespoons heavy cream and beat on medium-high for 3-4 minutes until light and fluffy. Adjust consistency with more cream or sugar if needed.
- Assemble cake: Place one cooled layer on serving plate. Spread about ¾ cup frosting on top. Add second layer. Apply thin crumb coat and refrigerate for 20 minutes. Apply final layer of frosting, creating swirls or smooth sides. Garnish with vanilla bean seeds or berries if desired.
Notes
Room temperature ingredients are crucial for a tender crumb. Do not overmix once flour is added. For clean slices, chill cake for 30 minutes before cutting. Cake can be made a day ahead; flavors improve after refrigeration.
Nutrition
- Serving Size: 1 slice
- Calories: 500
- Sugar: 42
- Sodium: 250
- Fat: 28
- Saturated Fat: 17
- Carbohydrates: 58
- Protein: 5
Keywords: cream cake, vanilla bean frosting, homemade cake, easy dessert, birthday cake, layer cake, vanilla cake


