I wasn’t expecting cooking advice from my plumber, but there I was, standing in my kitchen while he fixed a leaky pipe under the sink, listening to him describe exactly how to make cauliflower mash. His name is Dave, and he’d been fixing pipes in my neighborhood for twenty years. Between tightening a wrench and wiping his hands on a rag, he told me about the Thanksgiving his wife was sick and he had to make the whole dinner himself. “I messed up everything except the cauliflower,” he said, grinning. “Turns out, it’s hard to ruin it. And it’s better than potatoes if you do it right.”
Honestly, I’d been looking for a lighter side dish for our family Thanksgiving for years. My aunt always brings the same heavy, butter-laden mashed potatoes, and while I love them, let’s face it—by the third helping, I’m ready for a nap, not dessert. Dave’s story stuck with me. The next week, I tried his method, and I mean, I was shocked. It was creamy, rich, and had this subtle sweetness that potatoes just don’t have. I added fresh chives from my garden because, well, they make everything look fancy, and suddenly this “mistake” of a side dish became my go-to.
You know that feeling when you find a recipe that solves a problem you didn’t even know you had? That’s this cauliflower mash for me. It’s cozy enough for a Thanksgiving table but easy enough for a random Tuesday night when you want something warm and comforting. Dave probably doesn’t know he inspired a family tradition, but every year, when I make this mash, I think of him and that leaky pipe. And honestly, it’s the best thing that came out of that plumbing bill.
Why You’ll Love This Recipe
This cozy Thanksgiving cauliflower mash isn’t just another vegetable side dish. It’s the kind of recipe that makes people at the dinner table ask, “Wait, is this really cauliflower?” I’ve tested this version through three Thanksgivings, two Christmas dinners, and countless weeknight meals, and it never disappoints. Here’s why you’ll keep coming back to it:
- Quick & Easy: Comes together in under 30 minutes, which is a lifesaver when your oven is already packed with turkey and pies. No complicated steps, just boil, blend, and serve.
- Simple Ingredients: You probably already have cauliflower, butter, and garlic in your kitchen. The fresh chives are optional but highly recommended—they add a pop of color and a mild oniony flavor that makes this dish feel special.
- Perfect for Thanksgiving: This side dish fits right in with all the classic holiday flavors. It’s creamy like mashed potatoes but lighter, so you have room for extra gravy and stuffing. Plus, it’s naturally gluten-free and low-carb, which makes it a hit with guests who have dietary restrictions.
- Crowd-Pleaser: I’ve served this to kids, picky eaters, and even my uncle who swears he hates vegetables. Every single person went back for seconds. It’s that good.
- Unbelievably Delicious: The texture is what gets people. It’s silky and smooth, not watery or grainy like some cauliflower mash recipes. The secret is draining the cauliflower really well and using a food processor instead of a potato masher. Trust me on this one.
What makes this recipe different from the rest is the technique. Instead of just boiling and mashing, I sauté the cauliflower with garlic first, then blend it with butter and a splash of cream. This extra step deepens the flavor and removes that “cabbage-y” smell that cauliflower can sometimes have. It’s not just a healthier alternative to mashed potatoes—it’s a genuinely delicious side dish that stands on its own.
This recipe is the kind that makes you close your eyes after the first bite. It’s comfort food reimagined—lighter, faster, but with the same soul-soothing satisfaction. Perfect for impressing your in-laws without stress, or turning a simple weeknight dinner into something memorable.
What Ingredients You Will Need
This recipe uses simple, wholesome ingredients to deliver bold flavor and satisfying texture without the fuss. Most of these are pantry staples or easy to find at any grocery store, especially during the fall season when cauliflower is at its peak.
- 1 large head of cauliflower (about 2 pounds or 900 grams), cut into small florets. Look for a head that’s firm and white with no brown spots. Fresh cauliflower works best here—frozen tends to release too much water and makes the mash watery.
- 3 cloves garlic, peeled and smashed. I prefer using fresh garlic rather than pre-minced from a jar. The flavor is sharper and more aromatic. If you’re sensitive to garlic, you can use just 2 cloves.
- 3 tablespoons unsalted butter (42 grams), plus more for serving. I recommend using a good-quality butter like Kerrygold or Plugrà for the richest flavor. You can also use vegan butter if you’re dairy-free.
- ¼ cup heavy cream (60 ml), or use half-and-half for a lighter version. For a dairy-free option, full-fat coconut milk works beautifully—just make sure it’s the canned kind, not the carton.
- ½ teaspoon salt, plus more to taste. I use fine sea salt for even seasoning. Kosher salt works too, but you might need a bit more.
- ¼ teaspoon black pepper, freshly ground. Pre-ground pepper is okay, but freshly ground adds a nicer kick.
- 2 tablespoons fresh chives, finely chopped. These are for garnish and flavor. If you can’t find fresh chives, you can substitute with the green parts of a scallion or a tablespoon of dried chives. But honestly, fresh makes a big difference in both taste and presentation.
- Optional: ¼ cup grated Parmesan cheese (25 grams) for extra richness. I add this sometimes when I want a more indulgent version. It’s not traditional, but it’s delicious.
For the best texture, I recommend using a food processor or high-speed blender. A potato masher will work in a pinch, but the mash won’t be as smooth. Also, make sure your cauliflower is thoroughly dried after boiling—excess moisture is the enemy of creamy mash.
Equipment Needed
You don’t need a fancy kitchen to make this cauliflower mash, but having the right tools makes the process smoother. Here’s what you’ll need:
- Large pot for boiling the cauliflower. A 5-quart pot works well. Make sure it’s big enough to hold all the florets without overcrowding.
- Colander for draining the cooked cauliflower. A fine-mesh colander is best to catch small pieces.
- Food processor or high-speed blender for achieving that silky-smooth texture. I’ve used both, and I prefer a food processor because it’s easier to scrape down the sides. If you’re using a blender, work in batches and don’t overfill it.
- Chef’s knife and cutting board for chopping the cauliflower and chives. A sharp knife makes cutting through the tough core much easier.
- Wooden spoon or spatula for stirring. Silicone spatulas are great for scraping every last bit of mash out of the food processor.
- Measuring cups and spoons for accuracy. I know some cooks eyeball it, but for this recipe, precise measurements ensure consistent results.
If you don’t have a food processor, you can use a potato masher or a hand mixer, but expect a chunkier texture. I’ve tried the hand mixer method, and it works okay, but you have to be careful not to overwork it or it can become gluey. A ricer is also a good option if you have one, but it takes more elbow grease.
For cleanup, I recommend rinsing your food processor immediately after use. Cauliflower mash can stick to the blades if it dries, and nobody wants to scrub that off later.
Preparation Method
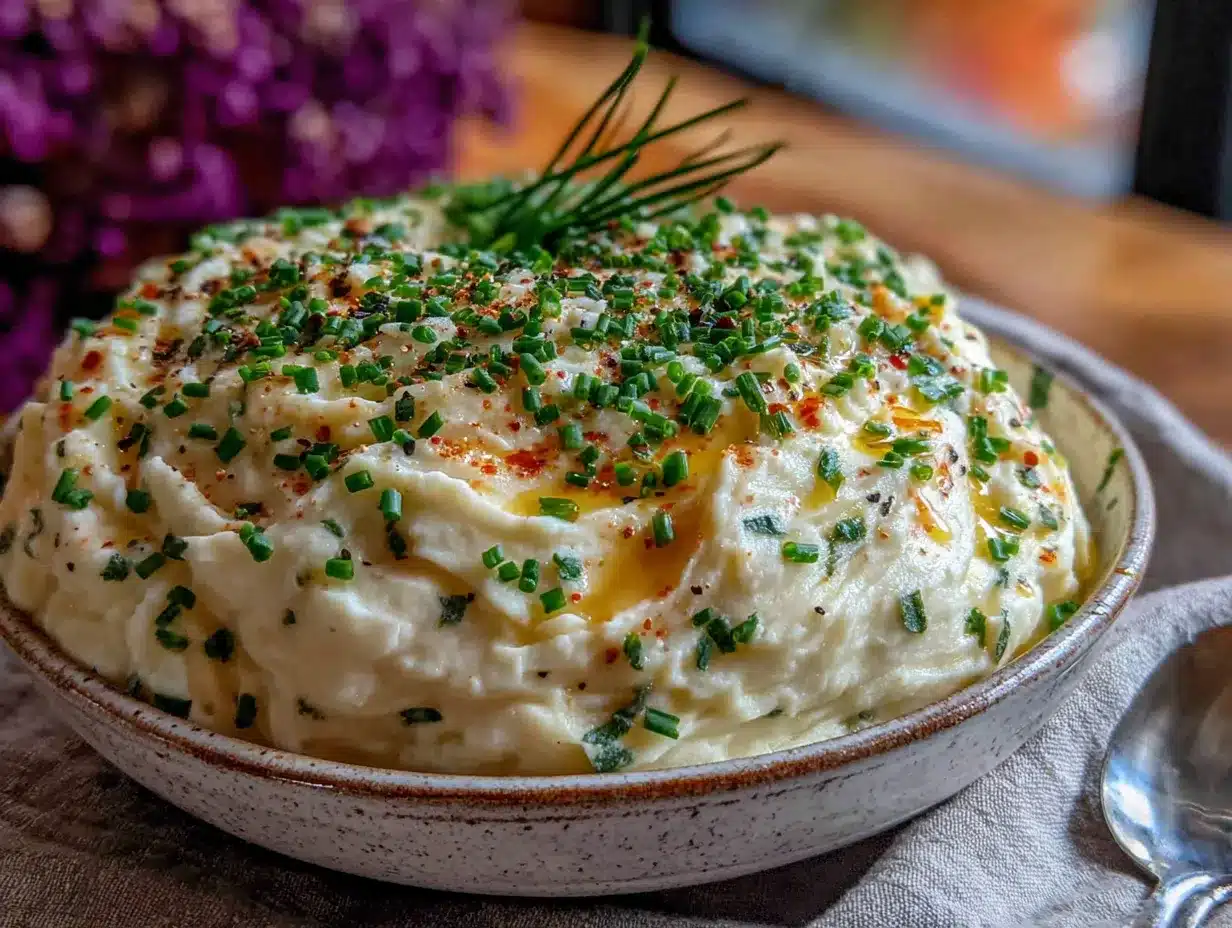
This recipe takes about 25 minutes from start to finish, and most of that time is hands-off boiling. Here’s how to make the best cauliflower mash of your life:
- Prepare the cauliflower: Remove the green leaves and tough core from the cauliflower head. Cut it into small, uniform florets—about 1 to 2 inches each. Uniform pieces cook evenly, so take your time here. Rinse the florets under cold water and let them drain in a colander.
- Boil the cauliflower: Fill a large pot with water and add a generous pinch of salt. Bring it to a rolling boil over high heat. Add the cauliflower florets and the smashed garlic cloves. Boil for 8 to 10 minutes, until the cauliflower is fork-tender. You want it soft enough that a knife slides through easily, but not mushy. Overcooking can make it waterlogged.
- Drain thoroughly: Pour the cauliflower and garlic into a colander and let it drain for at least 2 minutes. Shake the colander a few times to release excess water. This step is crucial—too much moisture will make your mash thin and watery. I sometimes pat the florets dry with a clean kitchen towel if I’m in a hurry.
- Sauté for flavor (optional but recommended): In the same pot you used for boiling, melt 1 tablespoon of butter over medium heat. Add the drained cauliflower and garlic and sauté for 2 to 3 minutes, stirring occasionally. This helps evaporate any remaining moisture and adds a nutty, caramelized flavor. You’ll notice the cauliflower starts to smell sweet instead of “cabbage-y.”
- Blend until smooth: Transfer the cauliflower and garlic to a food processor. Add the remaining 2 tablespoons of butter, heavy cream, salt, and pepper. Secure the lid and pulse a few times to break up the cauliflower, then process continuously for 30 to 45 seconds. Scrape down the sides with a spatula, then process again until the mash is completely smooth and creamy. If it seems too thick, add an extra tablespoon of cream or a splash of the cooking water.
- Taste and adjust: Give the mash a taste. Does it need more salt? More pepper? A little extra butter? Adjust to your preference. Remember, the flavors will mellow slightly as it cools, so season a bit more than you think you need.
- Fold in the chives: Transfer the mash to a serving bowl. Gently fold in half of the chopped fresh chives, reserving the rest for garnish. This distributes the chive flavor throughout the mash while keeping some for a pretty topping.
- Serve immediately: Spoon the mash into a warm serving dish. Top with a pat of butter (because why not?), a sprinkle of remaining chives, and an extra crack of black pepper. Serve while hot.
If you’re making this ahead of time for Thanksgiving, you can complete the recipe through step 5, then transfer the mash to a slow cooker on the “warm” setting. Stir in the chives just before serving. I’ve done this many times, and it works perfectly.
Cooking Tips & Techniques
After making this cauliflower mash more times than I can count, I’ve learned a few tricks that make a big difference. Here are my best tips:
Don’t skip the drying step. I know it sounds fussy, but taking those extra minutes to drain and even pat the cauliflower dry is the single most important step for a creamy, not-watery mash. I learned this the hard way when my first attempt turned into cauliflower soup. Trust me, your future self will thank you.
Use room-temperature dairy. Cold butter and cream straight from the fridge can cause the mash to seize up and become grainy. Let them sit on the counter for 15 minutes before blending. If you forget, you can microwave the cream for 10 seconds and soften the butter in your hands.
Season in layers. Add salt to the boiling water, season again when you sauté, and adjust at the end. This builds flavor from the inside out instead of just having salty surface notes. It’s a simple trick that makes your cooking taste more professional.
Watch your blending time. Over-processing cauliflower can release too much starch and turn the mash gummy. Stop as soon as it’s smooth. If you’re using a high-speed blender, pulse instead of running it continuously. I once got distracted and ended up with cauliflower glue—not my finest moment.
For a make-ahead option: Prepare the mash up to two days in advance and store it in an airtight container in the fridge. To reheat, transfer it to a saucepan and warm over medium-low heat, stirring frequently. Add a splash of cream or milk to loosen it up. You can also reheat it in a microwave-safe bowl, stirring every 30 seconds.
If it’s too thin: Don’t panic. Return the mash to the pot and cook over medium heat, stirring constantly, for 2 to 3 minutes. The excess moisture will evaporate, and it will thicken right up. This happens more often when you use frozen cauliflower, which is why I always recommend fresh.
Variations & Adaptations
One of the best things about this cauliflower mash is how versatile it is. Here are some ways to change it up depending on your mood, diet, or what you have in the fridge:
- Dairy-Free Version: Replace the butter with vegan butter or olive oil, and use full-fat canned coconut milk instead of heavy cream. The coconut flavor is subtle and actually complements the cauliflower nicely. I’ve made this for dairy-free friends, and they always ask for the recipe.
- Roasted Cauliflower Version: Instead of boiling, roast the cauliflower florets at 400°F (200°C) for 25 minutes until golden and tender. This adds a deeper, nuttier flavor that’s amazing for a more decadent Thanksgiving side. Just be aware that roasted cauliflower has less moisture, so you’ll need to add a bit more cream to achieve the right consistency.
- Cheesy Cauliflower Mash: Stir in ½ cup of shredded sharp cheddar or Gruyère cheese after blending. The cheese melts into the mash and makes it extra indulgent. This version is a huge hit with kids and cheese lovers. I sometimes add a pinch of smoked paprika for a subtle smoky kick.
- Herb Variations: Fresh chives are classic, but you can use any soft herb you like. Try fresh parsley, dill, or tarragon for a different flavor profile. In the summer, I love using basil and a squeeze of lemon juice for a brighter, fresher mash that pairs well with grilled chicken or fish.
- Garlic Lover’s Version: Roast a whole head of garlic in the oven until soft and sweet, then squeeze the cloves into the food processor along with the cauliflower. Roasted garlic adds a mellow, almost buttery flavor that’s less pungent than raw or boiled garlic. It takes a bit more time, but it’s absolutely worth it for special occasions.
- Low-Carb/Keto Adaptation: This recipe is already low in carbs, but you can make it even keto-friendly by increasing the butter and cream. Add an extra tablespoon of butter and use full-fat cream cheese instead of heavy cream for an even richer texture. It’s so decadent, you won’t miss the potatoes at all.
Serving & Storage Suggestions
This cauliflower mash is best served hot, straight from the pot. But there are plenty of ways to make it work for your schedule and presentation style.
Serving Temperature and Presentation: Transfer the mash to a warm serving bowl and top with a pat of butter, a sprinkle of fresh chives, and a crack of black pepper. For a Thanksgiving table, I like to serve it in a rustic ceramic bowl alongside the turkey, gravy, and cranberry sauce. The pale yellow color of the mash looks beautiful next to the deep brown of gravy and the bright red of cranberries.
Complementary Dishes: This mash pairs beautifully with roasted meats like turkey, chicken, or pork. It also works well with vegetarian mains like mushroom wellington or stuffed acorn squash. For a complete meal, serve it with a side of roasted Brussels sprouts or a simple green salad with vinaigrette.
Storage Instructions: Store leftover mash in an airtight container in the refrigerator for up to 5 days. The flavors actually meld and become even better after a day or two. I often make a double batch just to have leftovers for quick lunches.
Freezing: You can freeze cauliflower mash for up to 3 months. Let it cool completely, then transfer it to a freezer-safe bag or container. To thaw, place it in the refrigerator overnight. Reheat gently on the stovetop or in the microwave, adding a splash of cream to restore the creamy texture. Note that the texture may be slightly less smooth after freezing, but it’s still delicious.
Reheating Methods: The stovetop is my preferred method for reheating. Place the mash in a saucepan over medium-low heat, stirring frequently. Add a tablespoon of milk or cream if it seems dry. You can also reheat individual portions in the microwave for 1 to 2 minutes, stirring halfway through. Avoid high heat, which can cause the mash to separate or become grainy.
Flavor Development: Like many comfort foods, this cauliflower mash tastes even better the next day. The garlic and chive flavors mellow and blend together beautifully. If you’re making it for a holiday meal, preparing it a day ahead is actually a great strategy—it frees up your stove and serving dishes on the big day.
Nutritional Information & Benefits
This cauliflower mash isn’t just delicious—it’s also packed with nutrients that make it a smart choice for your Thanksgiving table or any meal.
Estimated Nutritional Values (per serving, based on 6 servings):
| Nutrient | Amount |
|---|---|
| Calories | 145 |
| Total Fat | 12g |
| Saturated Fat | 7g |
| Carbohydrates | 8g |
| Fiber | 3g |
| Sugar | 3g |
| Protein | 3g |
| Sodium | 220mg |
Health Benefits of Key Ingredients: Cauliflower is a cruciferous vegetable rich in vitamin C, vitamin K, and fiber. It’s also a good source of antioxidants and compounds that support digestive health. Garlic adds immune-boosting properties, while chives provide a dose of vitamins A and C. Compared to traditional mashed potatoes, this version has about half the calories and carbs, making it a great option for anyone watching their intake.
Dietary Considerations: This recipe is naturally gluten-free, low-carb, and vegetarian. With the substitutions mentioned in the variations section, it can easily be made dairy-free, vegan, or keto-friendly. It’s also suitable for those following a Whole30 diet if you omit the dairy and use ghee instead of butter.
Potential Allergens: This recipe contains dairy (butter and cream). If you have a dairy allergy, use the dairy-free substitutions suggested earlier. It does not contain nuts, eggs, soy, or gluten in its basic form, but always check your ingredient labels if you have severe allergies.
From my perspective, this cauliflower mash is a perfect example of how healthy eating doesn’t have to feel like a sacrifice. It’s satisfying, flavorful, and nourishing—everything comfort food should be.
Conclusion
This cozy Thanksgiving cauliflower mash with fresh chives has become a staple in my kitchen, and I have a feeling it will become one in yours too. It’s proof that sometimes the best recipes come from the most unexpected places—like a plumber fixing a leaky pipe who just happened to share his secret side dish. I love how versatile this recipe is, how it fits right in with all the heavy holiday classics while still feeling light and fresh.
I encourage you to make this recipe your own. Add more garlic, swap in different herbs, or try the roasted version for a deeper flavor. The beauty of cooking is that you can adapt and experiment until it feels perfect for you and your family. And if you’re serving it for Thanksgiving, don’t be surprised if someone asks for the recipe before the turkey even hits the table.
I’d love to hear how your cauliflower mash turns out! Leave a comment below and let me know what variations you tried, or share a photo of your creation on social media and tag me. Your feedback and creativity are what make this community so special. Now go make some mash—your Thanksgiving table is waiting.
Frequently Asked Questions
Can I use frozen cauliflower for this recipe?
You can, but I don’t recommend it for the best texture. Frozen cauliflower contains more water, which can make the mash watery. If you’re in a pinch, thaw the frozen cauliflower completely and press it dry with paper towels before cooking. You may also need to cook it for a few minutes less since frozen florets are usually pre-blanched.
How do I make this recipe vegan?
Replace the butter with vegan butter or olive oil, and use full-fat canned coconut milk instead of heavy cream. The coconut flavor is subtle and works well with the cauliflower. For an extra creamy texture, you can also add a tablespoon of nutritional yeast for a cheesy flavor without the dairy.
Can I make this cauliflower mash ahead of time?
Absolutely! Prepare the mash up to two days in advance and store it in an airtight container in the refrigerator. Reheat it gently on the stovetop or in the microwave, adding a splash of cream or milk to restore the creamy texture. This is actually a great time-saver for holiday meals.
Why is my cauliflower mash watery?
This usually happens when the cauliflower isn’t drained thoroughly after boiling. Make sure to let it drain in a colander for at least 2 minutes, and pat it dry with a clean kitchen towel if needed. Also, avoid overcooking the cauliflower—it should be fork-tender but not falling apart. If your mash is already watery, return it to the pot and cook over medium heat, stirring constantly, for 2 to 3 minutes to evaporate the excess moisture.
Can I freeze leftover cauliflower mash?
Yes, you can freeze it for up to 3 months. Let the mash cool completely, then transfer it to a freezer-safe bag or container. To thaw, place it in the refrigerator overnight. Reheat gently on the stovetop, adding a splash of cream to restore the texture. Note that the texture may be slightly less smooth after freezing, but it’s still delicious and a great way to reduce food waste.
Pin This Recipe!
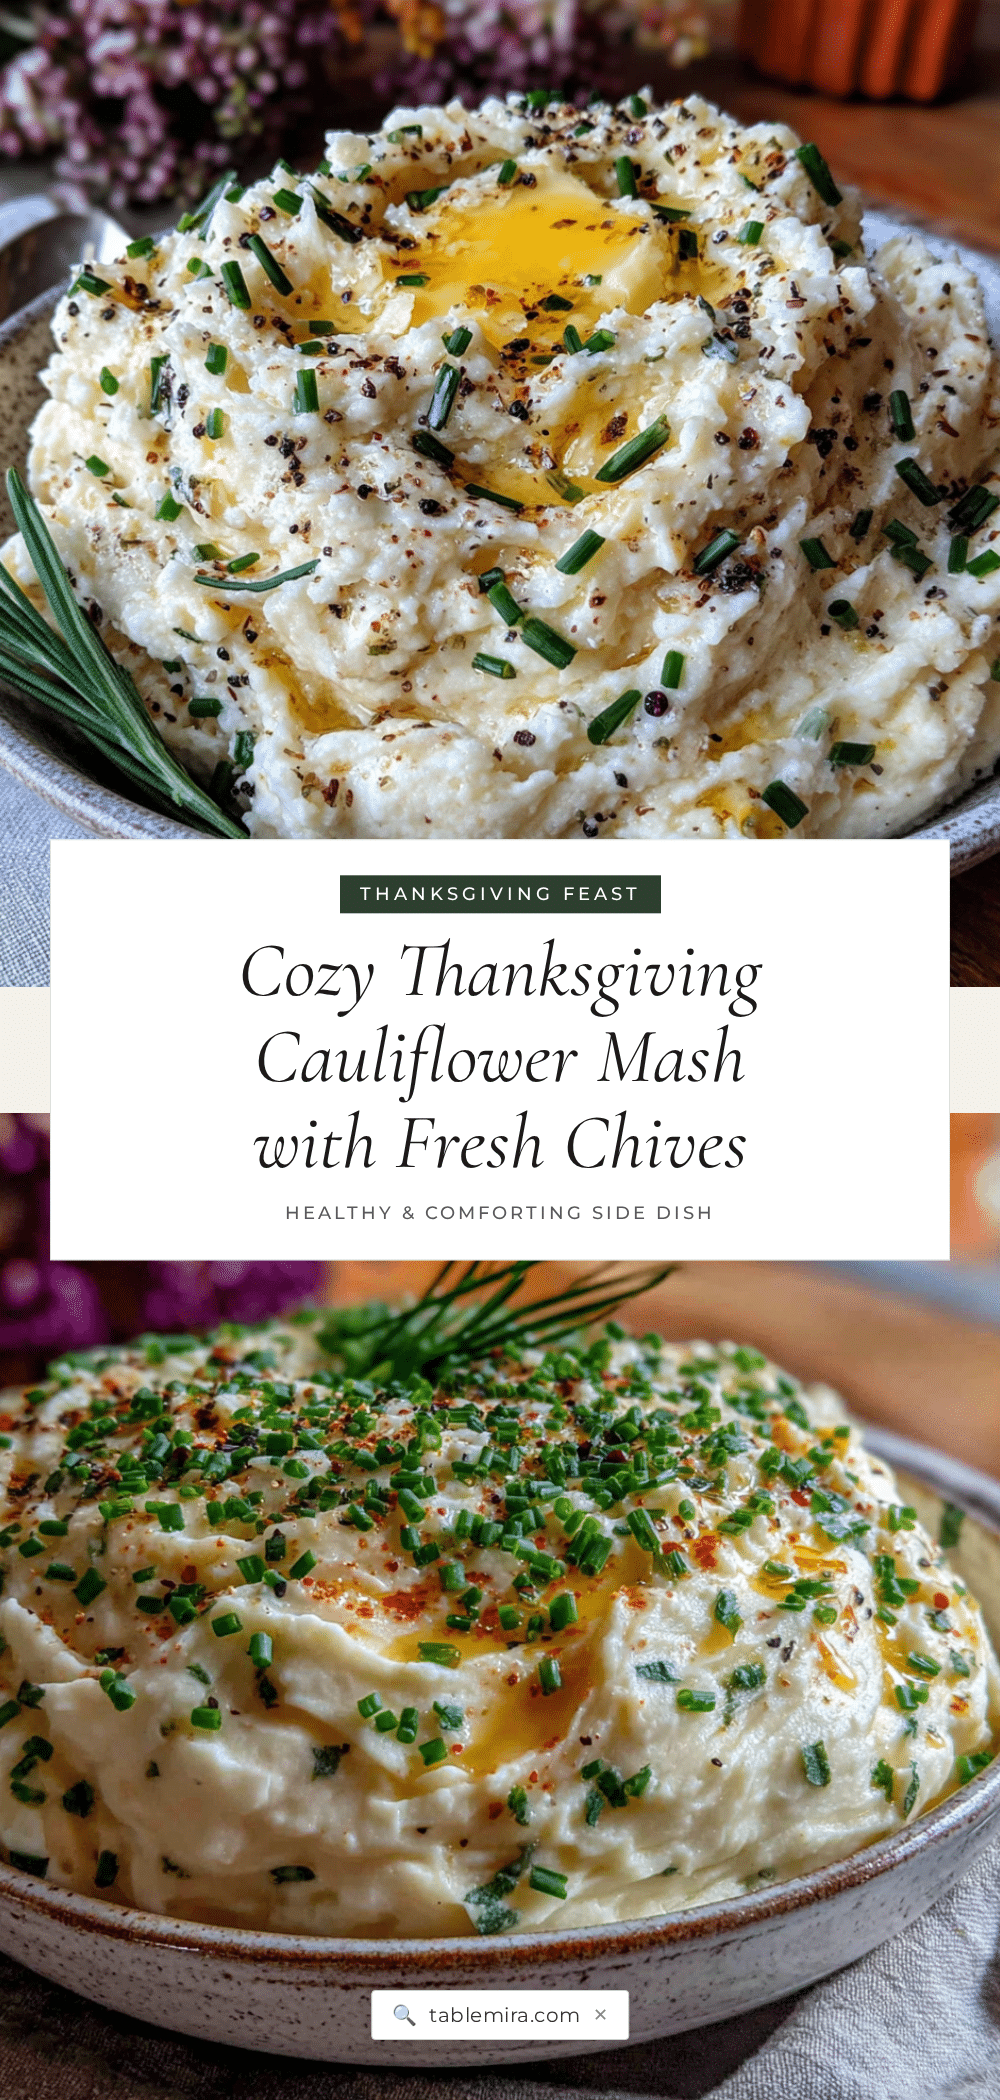
Cozy Thanksgiving Cauliflower Mash with Easy Fresh Chives
This creamy, rich cauliflower mash is a lighter alternative to traditional mashed potatoes, perfect for Thanksgiving or any cozy meal. It’s quick, easy, and packed with flavor from fresh chives and garlic.
- Prep Time: 10 minutes
- Cook Time: 15 minutes
- Total Time: 25 minutes
- Yield: 6 servings 1x
- Category: Side Dish
- Cuisine: American
Ingredients
- 1 large head of cauliflower (about 2 pounds or 900 grams), cut into small florets
- 3 cloves garlic, peeled and smashed
- 3 tablespoons unsalted butter (42 grams), plus more for serving
- ¼ cup heavy cream (60 ml)
- ½ teaspoon salt, plus more to taste
- ¼ teaspoon black pepper, freshly ground
- 2 tablespoons fresh chives, finely chopped
- Optional: ¼ cup grated Parmesan cheese (25 grams)
Instructions
- Prepare the cauliflower: Remove the green leaves and tough core from the cauliflower head. Cut it into small, uniform florets—about 1 to 2 inches each. Rinse the florets under cold water and let them drain in a colander.
- Boil the cauliflower: Fill a large pot with water and add a generous pinch of salt. Bring it to a rolling boil over high heat. Add the cauliflower florets and the smashed garlic cloves. Boil for 8 to 10 minutes, until the cauliflower is fork-tender.
- Drain thoroughly: Pour the cauliflower and garlic into a colander and let it drain for at least 2 minutes. Shake the colander a few times to release excess water. Pat the florets dry with a clean kitchen towel if needed.
- Sauté for flavor (optional but recommended): In the same pot, melt 1 tablespoon of butter over medium heat. Add the drained cauliflower and garlic and sauté for 2 to 3 minutes, stirring occasionally.
- Blend until smooth: Transfer the cauliflower and garlic to a food processor. Add the remaining 2 tablespoons of butter, heavy cream, salt, and pepper. Pulse a few times, then process continuously for 30 to 45 seconds. Scrape down the sides and process again until smooth.
- Taste and adjust: Adjust seasoning with more salt, pepper, or butter as needed.
- Fold in the chives: Transfer the mash to a serving bowl. Gently fold in half of the chopped fresh chives, reserving the rest for garnish.
- Serve immediately: Spoon the mash into a warm serving dish. Top with a pat of butter, a sprinkle of remaining chives, and an extra crack of black pepper. Serve while hot.
Notes
For the best texture, drain the cauliflower thoroughly after boiling. Use room-temperature dairy to prevent graininess. Season in layers for deeper flavor. If making ahead, complete through step 5 and reheat gently with a splash of cream.
Nutrition
- Serving Size: 1 serving (about 1/6
- Calories: 145
- Sugar: 3
- Sodium: 220
- Fat: 12
- Saturated Fat: 7
- Carbohydrates: 8
- Fiber: 3
- Protein: 3
Keywords: cauliflower mash, Thanksgiving side dish, low-carb, gluten-free, vegetarian, creamy cauliflower, healthy mashed potatoes alternative


