My kitchen counter had been covered in pumpkin recipes for weeks. I had tested a few, tweaked others, and honestly, I was getting a little tired of the same heavy, overly spiced results. I wanted something that felt like a crisp October morning, not a sugar bomb. I wanted a scone that was tender, not dry. Something that let the pumpkin taste like pumpkin, not just a vehicle for cinnamon. For a while, I just accepted that maybe the perfect pumpkin scone didn’t exist outside of a certain famous coffee shop’s pastry case. Then, on a random Tuesday, I pulled out my baking sheet, grabbed the last can of pumpkin puree from my pantry, and decided to stop looking.
I started with the basics—flour, butter, a little sugar. But instead of reaching for the usual pumpkin pie spice blend, I focused on the maple. Real maple syrup, not the flavored stuff. It has this way of wrapping around the pumpkin without shouting over it. I added a splash of heavy cream because scones deserve richness, and I used cold butter because I am stubborn about flaky layers. The dough came together in a shaggy, sticky pile, and I knew I was onto something when it smelled like a fall candle you actually want to eat.
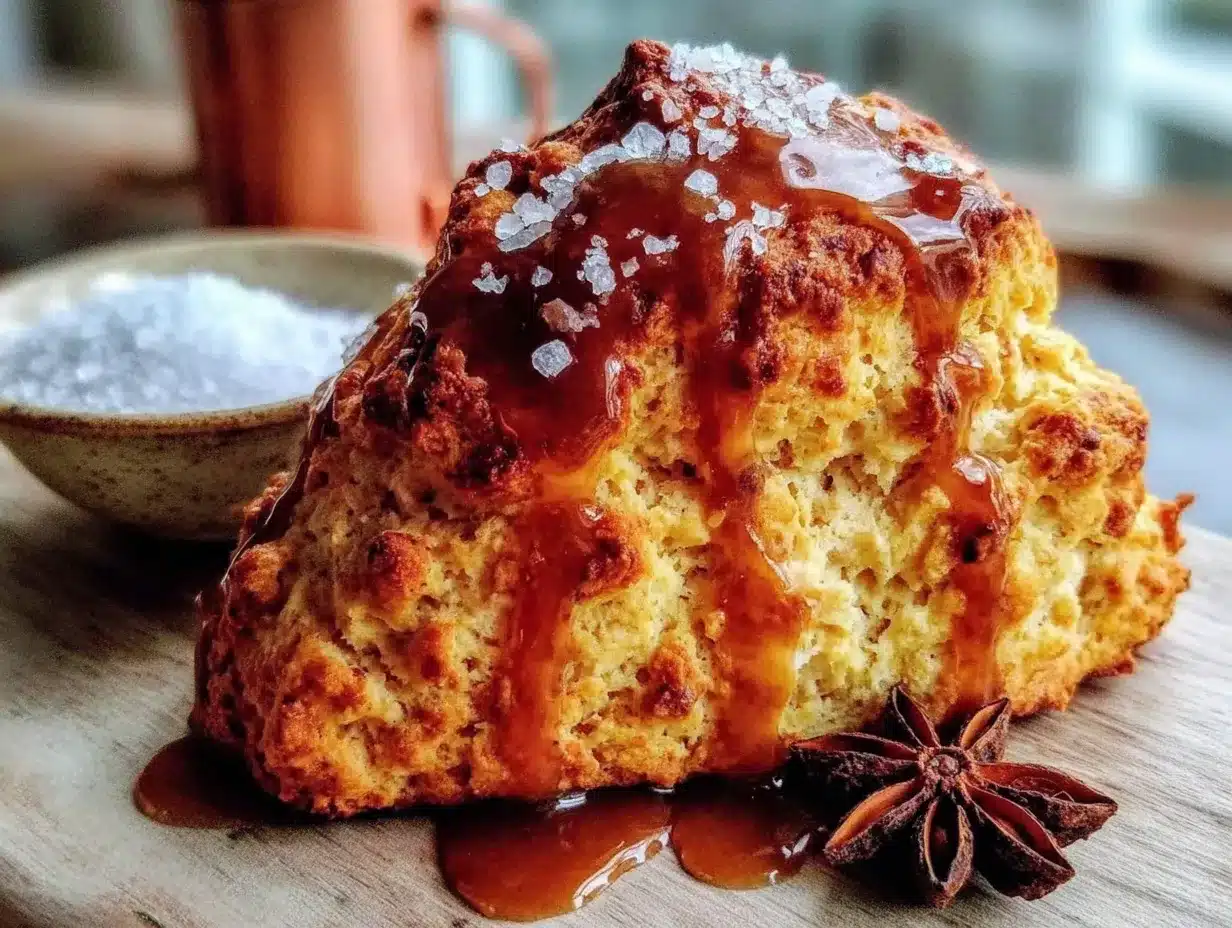
The glaze was the real turning point. Brown butter is one of those things that sounds fancy but is really just butter that got a little too toasty on purpose. It smells nutty and warm, like the best part of a caramel. I whisked it into powdered sugar with a pinch of salt and a drizzle of maple syrup, and it turned into this glossy, golden ribbon that sank into every crack of the warm scones. I stood there, eating one straight off the wire rack, and I realized I had finally found what I had been looking for. This was the scone that would make me stop searching.
Why You’ll Love This Recipe
I have tested this recipe six times to get the texture just right. The first batch was too dry. The second was too flat. By the fourth attempt, I had figured out the secret: not overworking the dough and keeping everything cold. This is the version I would serve to my mom, and she is a tough critic.
- Quick & Easy: From start to finish, these scones come together in about 35 minutes. No chilling the dough overnight, no complicated folds.
- Simple Ingredients: You probably have most of these in your kitchen right now. Pumpkin puree, flour, butter, maple syrup, and a few spices.
- Perfect for Fall Mornings: These scones pair beautifully with a hot cup of coffee or chai tea. They make weekend brunch feel special without the stress.
- Crowd-Pleaser: I brought a batch to a family gathering, and they disappeared before the main course. Kids and adults went back for seconds.
- Unbelievably Delicious: The brown butter glaze is honestly the star. It adds a depth of flavor that plain icing just cannot match.
What makes this recipe different from the rest is the technique. I use a combination of cold butter and heavy cream to create a tender, almost fluffy interior, while the outside stays golden and slightly crisp. The brown butter glaze is not just a topping; it is the finishing touch that ties the maple and pumpkin together. This is not just another pumpkin scone recipe—it is the one I actually look forward to making again.
This recipe is the kind that makes you close your eyes after the first bite. It is comfort food reimagined—faster than a pie, simpler than a pastry, but with the same soul-soothing satisfaction. Perfect for impressing guests without stress, or turning a quiet Sunday into something memorable.
What Ingredients You Will Need
This recipe uses simple, wholesome ingredients to deliver bold flavor and satisfying texture without the fuss. Most of these are pantry staples, especially during the fall season.
- All-purpose flour – 2 cups (240g). Provides the structure. I recommend Gold Medal or King Arthur for consistent results.
- Granulated sugar – 1/3 cup (65g). Adds just enough sweetness without overpowering the pumpkin.
- Baking powder – 1 tablespoon. This is crucial for lift. Make sure it is fresh.
- Pumpkin pie spice – 1 teaspoon. You can use store-bought or make your own with cinnamon, nutmeg, ginger, and cloves.
- Salt – 1/2 teaspoon. Balances the sweetness and enhances the maple flavor.
- Unsalted butter – 6 tablespoons (85g), very cold and cut into small cubes. Cold butter is the secret to flaky layers.
- Pumpkin puree – 1/2 cup (120g). Not pumpkin pie filling. Pure pumpkin puree only. Libby’s is my go-to brand.
- Heavy cream – 1/3 cup (80ml), plus extra for brushing the tops. Adds richness and tenderness.
- Maple syrup – 3 tablespoons (60ml). Use real maple syrup, not pancake syrup. Grade A dark amber works beautifully.
- Vanilla extract – 1 teaspoon. Pure vanilla, not imitation.
For the Brown Butter Glaze:
- Unsalted butter – 4 tablespoons (56g). You will brown this on the stove.
- Powdered sugar – 1 cup (120g), sifted to avoid lumps.
- Maple syrup – 1 tablespoon (15ml). Adds that extra maple kick.
- Heavy cream or milk – 2 to 3 tablespoons (30-45ml), to thin the glaze to your preferred consistency.
- Pinch of salt – A small pinch of flaky sea salt balances the sweetness.
Substitution Guidance: For a dairy-free version, use cold vegan butter and full-fat coconut cream. For a gluten-free option, swap the all-purpose flour with a 1:1 gluten-free baking blend. The texture will be slightly more delicate, but still delicious.
Equipment Needed
You do not need a lot of fancy equipment for these scones. Here is what I use every time.
- Baking sheet – A standard half-sheet pan works perfectly. Line it with parchment paper for easy cleanup.
- Large mixing bowl – For combining the dry ingredients.
- Pastry cutter or two forks – To cut the cold butter into the flour. You can also use your fingertips, but work quickly so the butter stays cold.
- Small saucepan – For browning the butter. A light-colored pan helps you see the color change.
- Whisk – For the glaze and for mixing the wet ingredients.
- Bench scraper or sharp knife – To cut the dough into triangles.
- Wire cooling rack – Essential for letting the glaze set without making the scones soggy.
I have made these scones with a cheap baking sheet and a wooden spoon, and they still turned out great. Do not overthink the tools. If you do not have a pastry cutter, two forks work just fine. Just keep everything cold.
Preparation Method
Preheat your oven to 400°F (200°C). Line your baking sheet with parchment paper. This is non-negotiable for easy cleanup.
- Mix the dry ingredients. In a large bowl, whisk together the flour, sugar, baking powder, pumpkin pie spice, and salt. Make sure there are no lumps of baking powder hiding in the flour.
- Cut in the butter. Add the cold, cubed butter to the flour mixture. Use a pastry cutter or two forks to cut the butter into the flour until it resembles coarse meal with some pea-sized butter pieces remaining. Do not overdo it. Those little bits of butter create steam pockets and make the scones flaky.
- Combine the wet ingredients. In a separate small bowl, whisk together the pumpkin puree, heavy cream, maple syrup, and vanilla extract until smooth. It will look a little thick, and that is okay.
- Bring it together. Pour the wet mixture into the dry mixture. Stir with a fork or spatula just until the dough comes together. It will look shaggy and a little sticky. Do not overmix, or the scones will be tough. If there are a few dry bits at the bottom of the bowl, use your hands to gently press them in.
- Shape the dough. Turn the dough out onto a lightly floured surface. Gently pat it into a circle about 3/4-inch thick. Use a bench scraper or sharp knife to cut the circle into 8 equal wedges, like a pizza. Do not twist the knife; press straight down for clean edges.
- Bake the scones. Place the wedges on the prepared baking sheet, spacing them about 2 inches apart. Brush the tops with a little extra heavy cream for a golden finish. Bake for 15 to 18 minutes, or until the edges are lightly golden and the tops are firm to the touch. The scones will feel slightly soft in the center, but they will set as they cool.
- Make the brown butter glaze. While the scones are baking, place the 4 tablespoons of butter in a small saucepan over medium heat. Stir constantly as the butter melts, foams, and then begins to turn golden. You will see brown specks forming at the bottom of the pan. This happens quickly, so watch carefully. Once the butter smells nutty and is a deep amber color, remove it from the heat immediately. Pour it into a heatproof bowl to stop the cooking process.
- Finish the glaze. Add the sifted powdered sugar, maple syrup, and a pinch of salt to the browned butter. Whisk until smooth. Add the heavy cream or milk one tablespoon at a time until the glaze is thick but pourable. It should coat the back of a spoon.
- Glaze the scones. Let the baked scones cool on the baking sheet for 5 minutes, then transfer them to a wire rack. While they are still warm (but not hot), drizzle the brown butter glaze generously over the tops. Let the glaze set for about 10 minutes before serving. The glaze will form a thin, crackly crust that is absolutely addictive.
Cooking Tips & Techniques
I have made the mistake of overmixing scone dough more times than I care to admit. The result is always a dense, hockey-puck-like texture. The trick is to stop mixing as soon as the dough comes together. It is okay if it looks a little rough. Trust the process.
Another lesson I learned the hard way: do not skip the cold butter. If your butter warms up before the scones hit the oven, they will spread into flat, greasy discs. If your kitchen is warm, pop the shaped scones into the freezer for 10 minutes before baking. That little chill makes a huge difference in the height and flakiness.
When browning the butter, use a light-colored saucepan so you can actually see the color change. The butter will go from yellow to golden to amber very quickly. As soon as you see brown specks and smell that nutty aroma, pull it off the heat. Burnt brown butter tastes bitter, and there is no saving it.
For the glaze, if it becomes too thick as it sits, just add a few drops of warm water or cream and whisk again. If it is too thin, add a little more powdered sugar. You want it to flow slowly off the spoon, not run off the scones entirely.
Variations & Adaptations
I love how flexible this recipe is. Here are a few ways I have adapted it over the years.
- Add mix-ins. Fold in 1/2 cup of toasted pecans, chopped walnuts, or dried cranberries before shaping the dough. The nuts add crunch, and the cranberries bring a tart pop that balances the sweetness.
- Make it dairy-free. Substitute the unsalted butter with a high-quality vegan butter (like Miyoko’s) and use full-fat coconut cream instead of heavy cream. The scones will be slightly less flaky but still tender and delicious.
- Spice it up. Add 1/4 teaspoon of ground ginger or a pinch of cayenne pepper to the dry ingredients for a subtle warmth. It pairs beautifully with the maple glaze.
- Change the glaze. If you are short on time, skip the brown butter and make a simple maple glaze with just powdered sugar, maple syrup, and a splash of milk. It will still taste great, just less complex.
- Mini scones. Cut the dough into smaller wedges (about 16 instead of 8) and reduce the baking time to 10-12 minutes. Perfect for brunch buffets or tea parties.
I once made a batch with white whole wheat flour instead of all-purpose, and they turned out surprisingly good—a little denser, but with a nice nutty flavor. If you try that, add an extra tablespoon of cream to keep the dough from getting too dry.
Serving & Storage Suggestions
These scones are best served warm, within an hour of baking. The glaze is slightly soft and the interior is tender. I like to serve them with a side of fresh fruit and a hot cup of pumpkin chai latte overnight oats for the ultimate fall breakfast spread.
For storage, place leftover scones in an airtight container at room temperature for up to 2 days. The glaze will soften slightly, but they will still taste fantastic. If you need to keep them longer, freeze the unglazed scones. Wrap each one tightly in plastic wrap, then place them in a freezer bag. They will keep for up to 3 months. When you are ready to eat, thaw at room temperature, then reheat in a 300°F oven for 5 minutes. Add the glaze after reheating.
I do not recommend refrigerating these scones. The fridge tends to dry out baked goods. Room temperature or freezer is the way to go. The flavors actually deepen a little overnight, so day-old scones are still a treat.
Nutritional Information & Benefits
Here is the approximate nutritional breakdown for one scone (with glaze).
| Nutrient | Amount per Scone |
|---|---|
| Calories | 320 |
| Total Fat | 16g |
| Saturated Fat | 10g |
| Carbohydrates | 42g |
| Sugar | 22g |
| Fiber | 2g |
| Protein | 4g |
| Vitamin A | 45% DV |
Pumpkin is packed with vitamin A, which supports eye health and immune function. The maple syrup provides a more natural source of sweetness compared to refined sugar, though it is still sugar, so enjoy in moderation. These scones are not health food, but they are a wholesome treat made from real ingredients. I love knowing exactly what went into them, and they fit perfectly into a balanced fall menu alongside something like creamy roasted butternut squash soup for a cozy dinner.
Frequently Asked Questions
Can I use pumpkin pie filling instead of pumpkin puree?
No, do not swap them. Pumpkin pie filling is pre-sweetened and spiced, which will throw off the balance of the recipe. Stick with 100% pure pumpkin puree for the best texture and flavor.
Why did my scones turn out dry?
Dry scones usually come from overmixing the dough or using too much flour. Measure your flour by spooning it into the measuring cup and leveling it off. Also, make sure your pumpkin puree is not watery. If it looks thin, pat it dry with a paper towel before using.
Can I make the dough ahead of time?
Absolutely. Shape the scones, place them on a parchment-lined baking sheet, and freeze them until solid. Then transfer them to a freezer bag. Bake directly from frozen, adding 2-3 minutes to the baking time. No need to thaw.
How do I know when the brown butter is done?
Watch for the butter to foam up, then subside. You will see small brown specks forming at the bottom of the pan. The butter will smell nutty and toasty. As soon as it reaches a deep amber color, remove it from the heat. It happens fast, so do not walk away.
Can I skip the glaze?
You can, but the glaze really makes these scones special. If you want a lighter option, dust the warm scones with a little powdered sugar and a drizzle of maple syrup. It is not the same, but it is still good.
Conclusion
These maple pumpkin scones with brown butter glaze are the kind of recipe that makes you want to slow down and enjoy the season. They are simple enough for a weekday morning but special enough for a holiday brunch. The combination of tender pumpkin, real maple syrup, and nutty brown butter is honestly unforgettable.
I encourage you to make them your own. Add your favorite nuts, swap the glaze, or double the batch because they will disappear fast. I have made these scones for friends, family, and even just for myself on a quiet Saturday, and they never disappoint. They are the recipe I reach for when I want to feel like I have everything I need, right in my own kitchen.
If you try this recipe, I would love to hear how it turned out. Leave a comment below or tag me in your photos. And if you are in the mood for more cozy fall baking, do not miss my apple cinnamon sourdough French toast casserole or these soft brown butter pumpkin chocolate chip cookies. Happy baking, friends!
Pin This Recipe!
Cozy Maple Pumpkin Scones with Easy Brown Butter Glaze
Tender, flaky pumpkin scones sweetened with real maple syrup and topped with a nutty brown butter glaze. Perfect for fall mornings, this easy recipe comes together in about 35 minutes and uses simple ingredients.
- Prep Time: 15 minutes
- Cook Time: 18 minutes
- Total Time: 35 minutes
- Yield: 8 servings 1x
- Category: Breakfast
- Cuisine: American
Ingredients
- 2 cups (240g) all-purpose flour
- 1/3 cup (65g) granulated sugar
- 1 tablespoon baking powder
- 1 teaspoon pumpkin pie spice
- 1/2 teaspoon salt
- 6 tablespoons (85g) unsalted butter, very cold and cut into small cubes
- 1/2 cup (120g) pumpkin puree (not pumpkin pie filling)
- 1/3 cup (80ml) heavy cream, plus extra for brushing
- 3 tablespoons (60ml) real maple syrup
- 1 teaspoon vanilla extract
- For the Brown Butter Glaze:
- 4 tablespoons (56g) unsalted butter
- 1 cup (120g) powdered sugar, sifted
- 1 tablespoon (15ml) real maple syrup
- 2–3 tablespoons (30-45ml) heavy cream or milk
- Pinch of flaky sea salt
Instructions
- Preheat oven to 400°F (200°C). Line a baking sheet with parchment paper.
- In a large bowl, whisk together flour, sugar, baking powder, pumpkin pie spice, and salt.
- Add cold, cubed butter to the flour mixture. Use a pastry cutter or two forks to cut the butter into the flour until it resembles coarse meal with some pea-sized butter pieces remaining.
- In a separate small bowl, whisk together pumpkin puree, heavy cream, maple syrup, and vanilla extract until smooth.
- Pour the wet mixture into the dry mixture. Stir with a fork or spatula just until the dough comes together. It will look shaggy and slightly sticky. Do not overmix.
- Turn the dough out onto a lightly floured surface. Gently pat it into a circle about 3/4-inch thick. Cut the circle into 8 equal wedges using a bench scraper or sharp knife.
- Place the wedges on the prepared baking sheet, spacing them about 2 inches apart. Brush the tops with a little extra heavy cream.
- Bake for 15 to 18 minutes, or until the edges are lightly golden and the tops are firm to the touch. Let cool on the baking sheet for 5 minutes, then transfer to a wire rack.
- While the scones are baking, make the brown butter glaze: Place 4 tablespoons butter in a small saucepan over medium heat. Stir constantly until the butter melts, foams, and turns golden with brown specks. Remove from heat immediately and pour into a heatproof bowl.
- Add sifted powdered sugar, maple syrup, and a pinch of salt to the browned butter. Whisk until smooth. Add heavy cream or milk one tablespoon at a time until the glaze is thick but pourable.
- While the scones are still warm, drizzle the brown butter glaze generously over the tops. Let the glaze set for about 10 minutes before serving.
Notes
Do not overmix the dough; stop as soon as it comes together. Keep butter cold for flaky layers. If your kitchen is warm, freeze shaped scones for 10 minutes before baking. For the brown butter, use a light-colored pan to monitor color change; remove from heat as soon as it turns amber. The glaze can be thinned with a few drops of warm water or cream if it thickens.
Nutrition
- Serving Size: 1 scone
- Calories: 320
- Sugar: 22
- Fat: 16
- Saturated Fat: 10
- Carbohydrates: 42
- Fiber: 2
- Protein: 4
Keywords: pumpkin scones, maple scones, brown butter glaze, fall baking, breakfast scones, easy scone recipe


