This was supposed to be a simple roast chicken. I had planned it for a quiet Sunday dinner, just me and my neighbor, a woman named Carol who always brought over her famous lemon bars. I was in my tiny apartment kitchen, feeling pretty confident. I had the chicken, the herbs, the lemon. But then I opened the fridge and grabbed what I thought was the butter dish. It was not butter. It was a solid block of frozen herb compound butter I had made weeks ago for a pasta dish I never got around to cooking. My plan was ruined. The chicken was already thawed, the oven was preheating, and Carol was due in an hour. I was that close to just ordering pizza.
Honestly, I almost threw the frozen butter block in the trash. But I was stubborn, and the thought of admitting defeat over a simple chicken dinner bugged me. So I did something that felt completely wrong. I shoved that frozen, rock-hard herb butter under the skin of the chicken. It was awkward, my fingers were freezing, and bits of parsley and garlic kept falling onto the counter. It was a mess. I put the bird in the oven, fully expecting a disaster. What came out of the oven an hour later was nothing like the plan—and so much better. The skin was impossibly crispy, the meat was the juiciest I had ever made, and the flavor of the herbs had infused every single bite. I never did make that pasta dish.
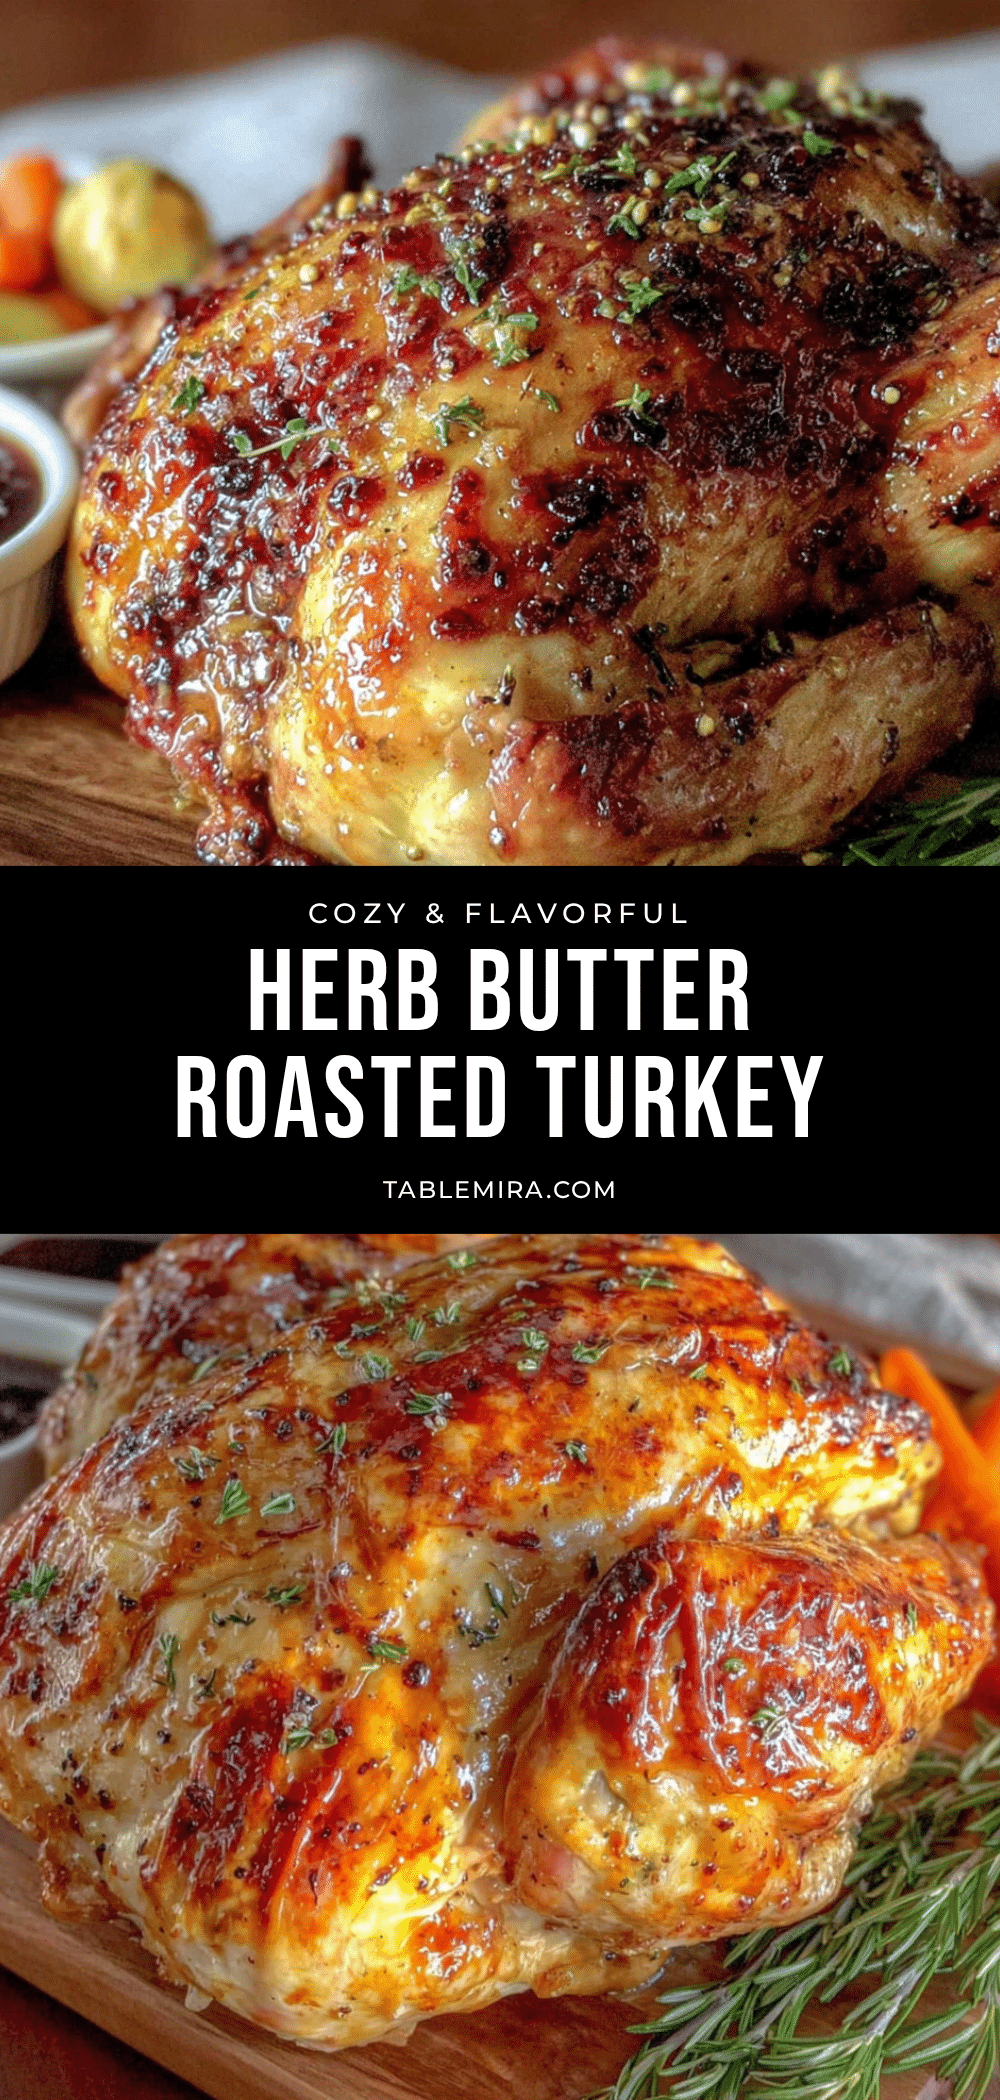
And that, my friends, is how my obsession with roasted birds started. That happy accident taught me the one trick that separates a dry, boring turkey from a showstopper. Maybe you’ve been there, staring at a raw turkey, feeling the pressure of a holiday meal. I get it. That’s exactly why I had to share this recipe for Cozy Herb Butter Roasted Turkey for Beginners. It takes the stress out of the equation and delivers a bird that looks and tastes like you spent days on it. This recipe stayed with me because it proved that sometimes, the best things in the kitchen come from a little bit of chaos.
Why You’ll Love This Recipe
Let’s be real for a second. Roasting a whole turkey can be intimidating. I’ve been there, pacing around the kitchen, checking the oven every ten minutes, and sweating over whether it will be dry. This recipe is designed to take all that anxiety away. It’s built for beginners, but it’s so good that even seasoned cooks will ask for your secret.
- Foolproof & Beginner-Friendly: This method is forgiving. The herb butter acts as a safety net, keeping the breast meat moist even if you leave it in a few minutes too long. No brining, no basting, no fuss.
- Simple, Everyday Ingredients: You don’t need a specialty grocery store. Butter, garlic, fresh herbs, salt, and pepper. That’s it. You probably have most of this in your kitchen right now.
- Perfect for a Cozy Holiday or Sunday Dinner: Whether it’s Thanksgiving, Christmas, or just a cold Sunday in November, this turkey feels like a special occasion. It fills your home with that incredible, warm, savory aroma that says “everything is going to be okay.”
- A Total Crowd-Pleaser: The herb butter creates a rich, savory flavor that everyone loves. The skin gets perfectly golden and crispy, while the meat underneath stays unbelievably tender and juicy. Kids and adults will be fighting over the leftovers.
- Unbelievably Delicious: This isn’t just another turkey recipe. The technique of using a compound butter under the skin creates a layer of flavor and moisture that you just can’t get from rubbing spices on the outside. It’s next-level comfort food.
This recipe is the kind that makes you close your eyes after the first bite. It’s comfort food at its finest—simple, warm, and soul-soothing. It’s perfect for impressing your family without the stress, or for turning a regular evening into a memorable feast.
What Ingredients You Will Need
This recipe uses a handful of simple, high-quality ingredients to create a turkey that is bursting with flavor and incredibly moist. The magic is in the herb compound butter, which is easier to make than you think.
- For the Turkey:
- 1 (12-14 lb) whole turkey, thawed: Make sure your turkey is completely thawed. A frozen turkey will not cook evenly. I recommend buying a fresh turkey if possible, but a frozen one works perfectly as long as you plan ahead. (Allow 24 hours of thawing in the fridge for every 4-5 pounds).
- 1 tablespoon kosher salt: Don’t skimp on the salt. It’s essential for seasoning the meat from the inside out. I use Diamond Crystal kosher salt, but any brand works. If using table salt, use half the amount.
- 1 teaspoon black pepper, freshly ground: Freshly ground pepper has a much bolder flavor than pre-ground. It makes a difference.
- For the Herb Butter:
- 1 cup (2 sticks) unsalted butter, softened: The butter must be at room temperature so it mixes easily with the herbs. Let it sit out for an hour before you start. I prefer unsalted butter so I can control the salt level.
- 4 cloves garlic, minced: Fresh garlic is a must. The jarred stuff just won’t give you the same punch of flavor. Mince it as fine as you can so it distributes evenly.
- 2 tablespoons fresh rosemary, finely chopped: Rosemary has a piney, aromatic flavor that is a classic pairing with poultry. Strip the leaves from the woody stem before chopping.
- 2 tablespoons fresh thyme leaves: Thyme is earthy and slightly floral. It adds a lovely complexity to the butter. Just run your fingers down the stem to remove the leaves.
- 2 tablespoons fresh sage, finely chopped: Sage has a warm, slightly peppery flavor that is quintessentially Thanksgiving. It’s a non-negotiable for me.
- 1 tablespoon fresh parsley, finely chopped: Parsley adds a fresh, bright note that balances out the richer herbs. It’s the unsung hero of this butter.
- 1 teaspoon lemon zest: This is my secret ingredient. The lemon zest cuts through the richness of the butter and adds a subtle brightness that makes the flavor pop. Do not skip this.
- For the Aromatics (inside the cavity):
- 1 onion, quartered: The onion steams from the inside, keeping the bird moist and adding a savory depth of flavor.
- 1 lemon, quartered: Similar to the zest, the lemon in the cavity adds a gentle citrus note that perfumes the whole bird.
- 4 sprigs fresh rosemary: For extra aromatic steam.
- 4 sprigs fresh thyme: More herbaceous goodness from the inside out.
- 4 cloves garlic, smashed: Smashing the cloves releases their oils, creating a mellow, sweet garlic flavor as they roast.
Equipment Needed
You don’t need a professional kitchen to make this turkey. A few basic tools will do the trick. Here is exactly what you will need.
- Roasting Pan with a V-Rack: This is the most important piece of equipment. The V-rack lifts the turkey off the bottom of the pan, allowing hot air to circulate all around it. This ensures the bottom of the bird doesn’t get soggy. If you don’t have a V-rack, you can place the turkey on a bed of thick-cut carrots and onions, but the rack is much better.
- Instant-Read Meat Thermometer: Do not guess. I cannot stress this enough. A meat thermometer is the only way to guarantee a perfectly cooked turkey. I use a Thermapen, but any instant-read thermometer will work. It is a game-changer.
- Chef’s Knife and Cutting Board: For chopping all those fresh herbs and prepping the aromatics. A sharp knife makes the job so much easier.
- Small Bowl: For mixing your herb butter.
- Kitchen Twine: Optional, but helpful for tying the legs together. This helps the turkey cook more evenly and gives it a nice, compact shape.
- Paper Towels: You need to pat the turkey completely dry before you start. This is critical for getting crispy skin. Wet skin equals soggy skin.
- Aluminum Foil: For tenting the turkey if the skin starts to brown too quickly.
Preparation Method
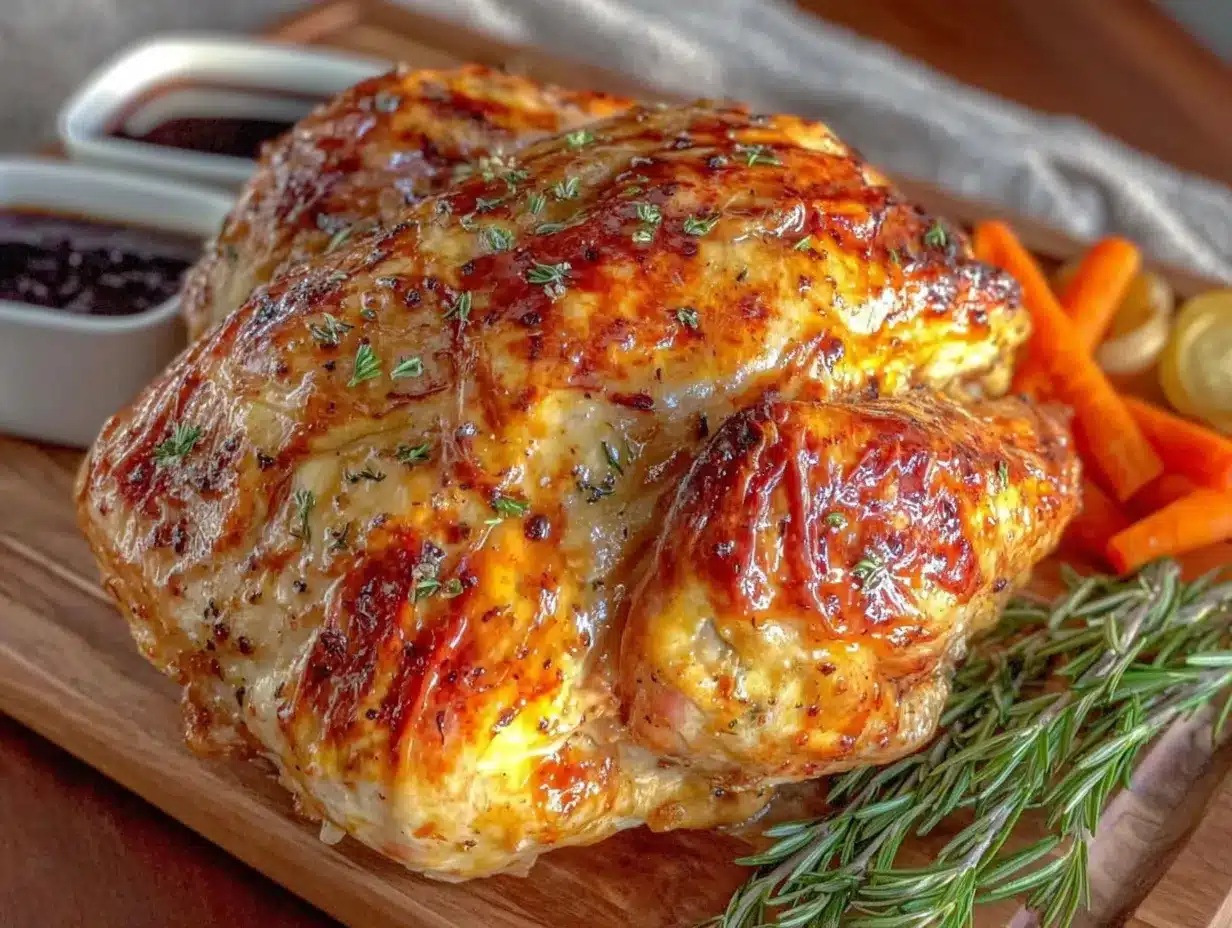
Alright, let’s get to it. Follow these steps, and you will have a gorgeous, golden-brown turkey that will be the star of your table. Take your time, and don’t rush.
- Prep the Turkey (20 minutes before you start): Take your turkey out of the fridge and remove it from all packaging. Remove the giblets and the neck from the cavity. I usually save these for making gravy later, but you can discard them if you prefer. Pat the turkey completely dry inside and out with paper towels. This step is non-negotiable for crispy skin. Let it sit on the counter for about 30 minutes to take the chill off. A cold turkey going into a hot oven can cause the breast to dry out before the thigh is cooked through.
- Make the Herb Butter (5 minutes): In your small bowl, combine the 1 cup of softened butter, minced garlic, chopped rosemary, thyme, sage, parsley, and lemon zest. Mix it all together with a fork until everything is evenly distributed. The mixture should be spreadable but not melted. If your butter is too hard, let it sit for another 10 minutes.
- Season the Cavity (2 minutes): Season the inside of the turkey cavity with a generous pinch of salt and pepper. Then, stuff it with the quartered onion, quartered lemon, rosemary sprigs, thyme sprigs, and smashed garlic cloves. Don’t pack it too tightly; you want air to circulate.
- Apply the Herb Butter (10 minutes): This is the most important step. Using your hands, gently loosen the skin of the turkey breast. Start at the neck cavity and work your fingers between the skin and the meat, being careful not to tear the skin. You want to create a pocket. Take about two-thirds of your herb butter and push it under the skin, spreading it evenly over the breast meat. Massage it from the outside to make sure it’s distributed in an even layer. Then, take the remaining butter and rub it all over the outside of the turkey—the legs, the thighs, the back, everywhere. Season the entire outside of the bird generously with the 1 tablespoon of kosher salt and 1 teaspoon of black pepper.
- Truss the Turkey (Optional, 2 minutes): If you want a nice, compact shape, tie the legs together with kitchen twine. You can also tuck the wing tips under the bird to prevent them from burning. This is not strictly necessary, but it does help with even cooking.
- Roast the Turkey (2.5 – 3 hours): Preheat your oven to 425°F (220°C). Place the turkey on the V-rack in your roasting pan, breast side up. Roast it at this high temperature for 30 minutes. This initial blast of heat will help the skin start to brown and crisp up. After 30 minutes, reduce the oven temperature to 350°F (175°C). Do not open the oven door during this temperature change. Continue roasting until the thickest part of the thigh registers 165°F (74°C) on your instant-read thermometer. Start checking the temperature about 45 minutes after you lower the heat. The total time will vary based on your oven and the size of your turkey. If the skin is browning too quickly, tent the turkey loosely with a piece of aluminum foil.
- Rest the Turkey (30 minutes): This is the second most important step. Once the turkey hits 165°F, remove it from the oven and transfer it to a cutting board. Do not skip the resting period. Tent it loosely with foil and let it rest for at least 30 minutes. This allows the juices to redistribute throughout the meat. If you cut into it immediately, all those beautiful juices will run out onto the cutting board, leaving you with a dry turkey. Patience is key.
- Carve and Serve: After the rest, carve your turkey and serve it warm. You will be rewarded with incredibly juicy meat and perfectly crispy, flavorful skin. The aroma in your kitchen will be absolutely heavenly.
Cooking Tips & Techniques
I have made plenty of mistakes in the kitchen, and I want to help you avoid them. Here are some of the most important tips I have learned from my own failures.
- The Biggest Mistake: Not Letting it Rest. I once carved a turkey right out of the oven because I was hungry and impatient. The juice flooded the cutting board, and the meat was dry and tough. Learn from my mistake. The 30-minute rest is not optional. It is a crucial part of the cooking process.
- Don’t Trust the Pop-Up Timer: Those little plastic pop-up timers that come with some turkeys are notoriously unreliable. They often pop when the turkey is already overcooked. Always, always use your own instant-read thermometer. It is the only way to be sure.
- The “Dry Brine” Alternative: If you have the time, you can take this recipe a step further. The day before you plan to cook, pat the turkey dry and season it generously with salt. Place it on a baking sheet, uncovered, in the fridge for 24 hours. This dry brines the bird, drawing the salt deep into the meat and drying out the skin for an even crispier result. If you do this, reduce the salt in the recipe by half.
- Multitasking is Your Friend: While the turkey is roasting, you have plenty of time to make your side dishes. The high heat for the first 30 minutes gives you a window to prep your mashed potatoes or green bean casserole. Once you lower the heat, you can start cooking them. The turkey will be resting while you finish everything up.
- Use the Drippings for Gravy: After you remove the turkey from the pan, don’t throw away those drippings! Pour them through a strainer into a fat separator or a glass measuring cup. The drippings are pure flavor. Use them as the base for your gravy. It is the best part.
Variations & Adaptations
This recipe is a fantastic base, but feel free to make it your own. Here are a few of my favorite variations that I have tried over the years.
- Citrus Herb Butter: For a brighter, more summery flavor, add the zest of one orange along with the lemon zest. You can also add a tablespoon of fresh orange juice to the butter. It pairs beautifully with the rosemary and thyme.
- Spicy Chipotle Butter: If you like a little heat, add 1-2 finely minced chipotle peppers in adobo sauce to the herb butter. The smoky, spicy flavor is incredible with the turkey. This is perfect for a Thanksgiving with a Southwestern twist.
- Garlic & Herb Paste (Dairy-Free): To make this recipe dairy-free, simply replace the butter with 1/2 cup of good quality olive oil. Mix the oil with the garlic, herbs, and lemon zest to create a paste. Rub it under the skin and all over the outside of the turkey just as you would with the butter. It won’t be quite as rich, but it will still be incredibly flavorful and moist.
- Smoked Turkey: For a completely different flavor profile, cook this turkey on a smoker instead of an oven. Set your smoker to 225°F (110°C) using fruit wood like apple or cherry. Smoke the turkey until the internal temperature reaches 165°F. It will take much longer (5-7 hours), but the smoky flavor is out of this world.
Serving & Storage Suggestions
Knowing how to serve and store your turkey is just as important as cooking it. Here is how to make the most of your beautiful bird.
- Serving: Serve the turkey warm, ideally within 30 minutes of carving. Arrange the carved pieces on a large platter. The presentation is part of the experience. A few sprigs of fresh rosemary or thyme around the platter make it look beautiful.
- What to Serve With It: This turkey is the star, but it loves supporting actors. Classic mashed potatoes, creamy gravy, green bean casserole, roasted Brussels sprouts, and a tangy cranberry sauce are all perfect pairings. For a cozy dinner, a simple side of roasted root vegetables is all you need.
- Storing Leftovers: Remove all the meat from the bones within two hours of cooking. Store the carved turkey in an airtight container in the refrigerator. It will stay fresh for 3-4 days. The bones and carcass can be used to make a fantastic turkey stock for soup.
- Reheating: The best way to reheat leftover turkey without drying it out is in the oven. Place the slices in a baking dish, add a splash of chicken broth or turkey drippings, cover with foil, and warm in a 300°F (150°C) oven for about 15-20 minutes. You can also reheat it in a skillet with a little butter over medium-low heat.
- Freezing: Cooked turkey freezes very well. Store the carved meat in a freezer-safe bag or container. It will keep for up to 3 months. Thaw it overnight in the refrigerator before reheating.
Nutritional Information & Benefits
This recipe is not just delicious; it also has some nutritional benefits. Here is a look at what you are getting in each serving.
- Estimated Nutritional Values (per 4 oz serving of breast meat):
- Calories: 250
- Fat: 14g
- Protein: 30g
- Carbohydrates: 1g
- Health Benefits: Turkey is a fantastic source of lean protein, which is essential for muscle building and repair. It is also rich in B vitamins, particularly B6 and B12, which support energy metabolism and brain function. The herbs in this recipe, like rosemary and thyme, are packed with antioxidants.
- Dietary Considerations: This recipe is naturally gluten-free and low-carb, making it suitable for a variety of dietary needs. For a dairy-free version, simply use the olive oil paste variation mentioned above.
- Personal Note: I love that this recipe allows me to enjoy a rich, comforting meal without feeling overly heavy. The lean protein from the turkey keeps me satisfied, and the fresh herbs add a nutritional boost without any extra effort.
Conclusion
So there you have it. A Cozy Herb Butter Roasted Turkey for Beginners that is not only achievable but absolutely delicious. It all started with a frozen block of butter and a ruined plan, and it turned into one of my most treasured recipes. I hope this recipe takes the fear out of roasting a turkey for you.
I encourage you to make this recipe your own. Don’t be afraid to play with the herbs, add a little spice, or try a different cooking method. The best recipes are the ones that feel like you. I honestly believe that everyone deserves to experience the joy of pulling a perfectly roasted turkey out of the oven. It is a feeling of pure accomplishment.
If you try this recipe, I would love to hear about it! Leave a comment below and let me know how it turned out. Did you make any changes? What did you serve with it? Your stories are what make this community so special. Happy cooking, friends. You’ve got this.
Frequently Asked Questions
Can I use dried herbs instead of fresh for the butter?
You can, but I really recommend fresh herbs for this recipe. Dried herbs are more concentrated and can sometimes taste a bit dusty or bitter when used in a raw butter. If you must use dried, use about one-third of the amount called for. For example, use 2 teaspoons of dried rosemary instead of 2 tablespoons of fresh.
How do I know when my turkey is fully thawed?
The safest way to thaw a turkey is in the refrigerator. Plan for 24 hours of thawing for every 4-5 pounds of turkey. A 12-pound turkey will take about 3 days. The turkey is fully thawed when there are no ice crystals in the cavity and the legs and wings move freely. Never thaw a turkey on the counter at room temperature.
My turkey skin is getting too dark. What should I do?
This is a common issue. If the skin is browning faster than the meat is cooking, simply tent the turkey loosely with a piece of aluminum foil. The foil will reflect the heat and prevent the skin from burning while the inside continues to cook. Check on it every 20 minutes or so.
Can I stuff the turkey with stuffing?
I do not recommend stuffing the turkey cavity with traditional bread stuffing. The stuffing needs to reach 165°F to be safe to eat, and by the time the center of the stuffing hits that temperature, the turkey breast will almost certainly be overcooked and dry. It is much safer and easier to bake your stuffing in a separate dish.
What if I don’t have a roasting pan with a V-rack?
No problem! You can still make this recipe. Place the turkey on a bed of thick-cut vegetables like carrots, celery, and onions in a large, sturdy baking dish or sheet pan. The vegetables act as a natural rack, lifting the turkey slightly and adding flavor to the drippings. Just make sure your pan has sides to catch all the juices.
Pin This Recipe!