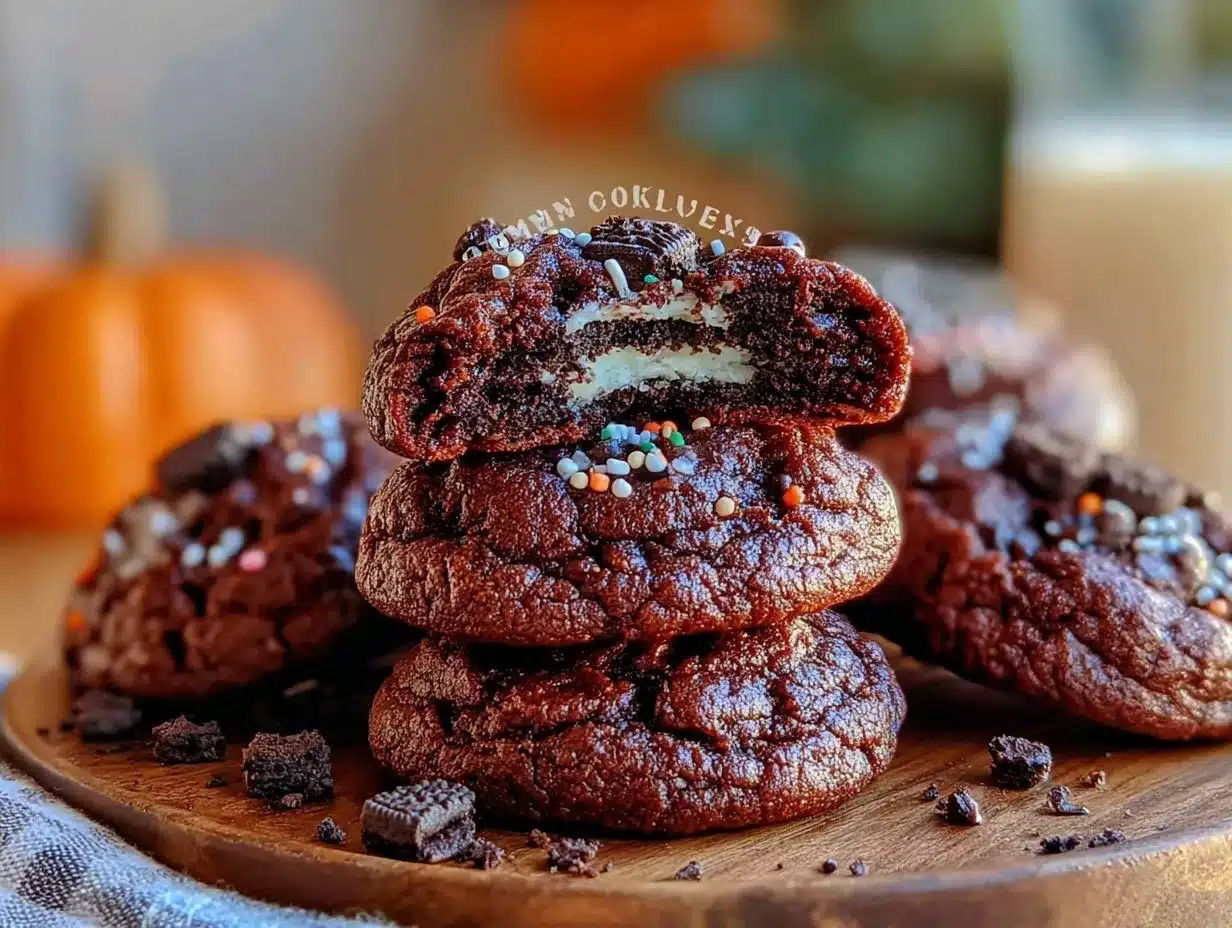
My partner took one bite of these Black Velvet Halloween Oreo Stuffed Cookies and then just stared at me, wide-eyed, before asking if I could make them again tomorrow. Honestly, that moment caught me off guard because I was just experimenting late one night, trying to come up with a fun Halloween treat that wasn’t the usual pumpkin spice or candy corn overload. The way the black velvet cookie hugged the Oreo filling — still crisp but melting slightly warm — was something else. The contrast of the deep, dark cookie with the classic Oreo surprise inside made the whole kitchen smell like a chocolate lover’s dream, and that crunch followed by soft chew was the kind of texture combo you don’t forget.
Watching that reaction, I realized this recipe wasn’t just about the spooky vibe or the festive look — it was about a genuinely irresistible cookie experience that felt like a treat and a tiny celebration in every bite. Plus, it’s got that perfect balance of sweetness without being cloying, so you can enjoy a few without that heavy, sugar crash feeling. This recipe stuck with me because it’s easy enough to whip up last minute, and somehow it manages to look like you put in way more effort than you actually did.
There’s something quietly satisfying about seeing someone enjoy a cookie this much. Black Velvet Halloween Oreo Stuffed Cookies aren’t just a seasonal snack; they’re a reminder that simple ingredients and a little creativity can bring moments of joy that linger. And that’s why I keep coming back to this recipe year after year.
Why You’ll Love This Recipe
This Black Velvet Halloween Oreo Stuffed Cookies recipe is one of those treats that just works — every time. I’ve tested it through a handful of Halloween parties and cozy evenings, and it’s always the cookie that disappears first. Here’s why I think you’ll be reaching for this recipe:
- Quick & Easy: You can have these cookies ready in under 30 minutes, making them perfect for last-minute spooky celebrations or a sweet fix after dinner.
- Simple Ingredients: No hunting for weird spices or exotic items. Just pantry staples plus a pack of Oreos, which you probably already have lying around.
- Perfect for Halloween Gatherings: Their black velvet color and hidden Oreo center make them a showstopper for Halloween parties, school events, or even a fun family baking day.
- Crowd-Pleaser: Kids, adults, friends, neighbors — everyone loves the fun surprise inside and the soft yet chewy texture outside.
- Unbelievably Delicious: The cookie dough has a slight cocoa kick that plays well with the familiar Oreo cream, making each bite a little more magical.
What sets this recipe apart is the way the cookie dough bakes around the Oreo, keeping that iconic crunch inside while the outside stays tender and moist. It’s not your average stuffed cookie — the black velvet dough’s richness and subtle cocoa flavor make it feel more gourmet, without being complicated. Plus, I’ve found that chilling the dough just a bit before baking helps keep that perfect shape so the Oreos don’t melt out everywhere. If you’ve tried recipes that end up with flat cookies or messy fillings, this one will pleasantly surprise you. It’s a mix of tried-and-true baking basics with a Halloween twist that feels both nostalgic and fresh.
What Ingredients You Will Need
This recipe uses simple, wholesome ingredients that come together to create bold flavor and that perfect chewy texture without fuss. Most of these are pantry staples, and the star of the show — the Oreos — are easy to grab from any grocery store.
- For the Cookie Dough:
- All-purpose flour (2 ¼ cups / 280 g) – I prefer King Arthur for consistent texture
- Cocoa powder, unsweetened (⅓ cup / 35 g) – use a good quality Dutch-processed for deeper color
- Baking soda (½ teaspoon)
- Salt (½ teaspoon)
- Unsalted butter, softened (¾ cup / 170 g) – room temperature, not melted
- Granulated sugar (¾ cup / 150 g)
- Brown sugar, packed (⅓ cup / 65 g) – adds moisture and chewiness
- Large eggs (2) – room temperature to help with mixing
- Vanilla extract (1 teaspoon) – pure vanilla makes a difference
- For the Filling:
- Regular Oreo cookies (1 package, about 36 cookies) – you can use the classic or Halloween-themed Oreos
Pro tip: If you want to switch things up, you can grab the limited-edition Halloween Oreos with orange cream filling for an extra festive touch. Also, using brown sugar is key here for that chewy texture I mentioned. If you’re in a pinch, substitute coconut sugar, but the flavor will be a bit different.
Equipment Needed
- Mixing bowls – at least two, one for wet ingredients and one for dry
- Electric mixer or stand mixer – helps cream the butter and sugars thoroughly
- Measuring cups and spoons – accuracy is key for baking
- Spatula – for folding ingredients and scraping sides
- Baking sheets – lined with parchment paper or silicone mats
- Wire cooling rack – for letting cookies cool evenly
- Optional: cookie scoop – I use a medium-sized one for even portions
If you don’t have a stand mixer, no worries — a sturdy hand mixer or even a whisk with some elbow grease will do just fine. When it comes to baking sheets, I’ve found that dark metal pans brown cookies more quickly, so watch the baking time closely if you’re using those. For a budget-friendly option, you can line any baking sheet with parchment paper to prevent sticking and make cleanup easier. Also, cooling the cookies on a wire rack helps keep the bottoms crisp instead of soggy, which is a game-changer for stuffed cookies like these.
Preparation Method
- Preheat your oven to 350°F (175°C). Line two baking sheets with parchment paper or silicone baking mats to prevent sticking and allow even baking.
- Mix the dry ingredients: In a medium bowl, sift together 2 ¼ cups (280 g) all-purpose flour, ⅓ cup (35 g) unsweetened cocoa powder, ½ teaspoon baking soda, and ½ teaspoon salt. Set aside.
- Cream the butter and sugars: In a large bowl, use an electric mixer to beat ¾ cup (170 g) softened unsalted butter with ¾ cup (150 g) granulated sugar and ⅓ cup (65 g) packed brown sugar until light and fluffy, about 3-4 minutes. This step is crucial for that tender crumb.
- Add eggs and vanilla: Beat in 2 room temperature eggs, one at a time, ensuring each is fully incorporated before adding the next. Stir in 1 teaspoon pure vanilla extract.
- Combine wet and dry: Gradually add the dry ingredients to the wet mixture, mixing on low speed or folding with a spatula until just combined. Avoid overmixing — you want a soft, thick dough.
- Chill the dough: Cover the dough with plastic wrap and refrigerate for at least 20 minutes. This helps the cookies hold their shape when baking and prevents the Oreos from melting too much inside.
- Assemble the cookies: Using a cookie scoop or spoon, take about 2 tablespoons (30 g) of dough and flatten it slightly in your palm. Place one Oreo cookie in the center, then gently mold another 2 tablespoons (30 g) of dough over the Oreo, sealing it completely. The dough should fully encase the Oreo with no gaps.
- Bake: Place the stuffed cookies on the prepared baking sheets, spacing them about 2 inches (5 cm) apart. Bake for 10-12 minutes, or until the edges are set but the centers still look slightly soft. The top will have a matte, velvety appearance.
- Cool: Let the cookies cool on the baking sheet for 5 minutes before transferring to a wire rack to cool completely. This step is important to avoid breaking the cookies and to let the filling set.
Note: If you find your cookies are spreading too thin, chill the assembled cookies for 10 minutes before baking. Also, keep an eye on them near the end of baking – you want them just done, not overbaked, to keep that soft texture.
Cooking Tips & Techniques
Stuffed cookies can be tricky, but these tips have saved me from many a cookie catastrophe:
- Chill the dough: This is non-negotiable. It keeps the cookie dough from spreading too much and helps the Oreo stay intact inside. I learned the hard way that skipping this step leads to flat, sad cookies.
- Don’t overload the dough: Use just enough dough to completely cover the Oreo. Too thin and the filling bursts out; too thick and the cookie takes forever to bake through.
- Watch your baking time: The edges should be set and the center just slightly soft. Overbaking dries out the cookie and ruins the gooey surprise inside.
- Use quality cocoa powder: Dutch-processed cocoa gives these cookies their signature dark, velvet color and a smoother chocolate flavor.
- Let cookies cool properly: Removing cookies too soon from the baking sheet can cause them to break. A few minutes’ rest helps them firm up gently.
Also, I like to multitask by prepping the dough while preheating the oven and lining the pans. This keeps everything flowing smoothly, especially when you’re juggling a busy kitchen or baking with little helpers. If you’re curious about other ways to add a seasonal twist, pairing these with a warm drink like a spiced hot chocolate or even a pumpkin latte can send your Halloween vibes over the moon.
Variations & Adaptations
One of the best things about this recipe is how adaptable it is. Here are some ways I’ve tweaked it depending on mood, season, or dietary needs:
- Dietary swap: Replace all-purpose flour with a gluten-free blend for a celiac-friendly version. Just watch texture, as gluten-free doughs tend to be more delicate.
- Flavor twist: Add a teaspoon of espresso powder to the dough for a mocha note that pairs beautifully with the Oreo filling.
- Seasonal spin: Swap regular Oreos for mint-flavored or pumpkin spice Oreos during fall for a subtle flavor surprise.
- Alternative fillings: Try stuffing the cookies with peanut butter cups or caramel-filled chocolates for a gooey, decadent surprise.
- Cooking methods: If you want to save oven space, these cookies can be baked on a pizza stone for even heat distribution, which I did for a recent Halloween party. They came out perfectly crisp on the edges.
Personally, I once tried adding a sprinkle of flaky sea salt on top before baking. It gave a salty-sweet balance that was unexpectedly addictive. If you’re curious about other decadent chocolate treats, you might enjoy the double chocolate fudge zucchini bread — it’s another recipe where I played with rich, chocolatey flavors and textures.
Serving & Storage Suggestions
These cookies are best enjoyed fresh from the oven when the Oreo inside is still slightly warm and melty. Serve them on a festive Halloween platter with maybe a glass of cold milk or a hot cup of coffee. They’re a big hit at parties and also make great gifts wrapped in cellophane.
For storing, let cookies cool completely, then place them in an airtight container at room temperature for up to 3 days. If you want to keep them longer, pop them in the freezer for up to 2 months. To reheat, microwave a cookie for about 15 seconds to bring back that soft, gooey center — just don’t overdo it or they’ll get tough.
Over time, the cookies soften a bit, which some folks prefer, but the initial texture contrast is what I personally love most. If you’re planning a Halloween spread, pairing these cookies with a light fruit dessert like the sugar cookie fruit pizza can balance the richness nicely.
Nutritional Information & Benefits
Each Black Velvet Halloween Oreo Stuffed Cookie contains roughly 180-200 calories, depending on the size, with a mix of fats, sugars, and carbs that make it a satisfying treat. The cocoa powder adds antioxidants, and using unsalted butter lets you control the salt content better.
This recipe isn’t designed as a health food, but it’s a reasonable indulgence you can enjoy in moderation. For those with dietary restrictions, swapping ingredients like gluten-free flour or dairy-free butter can make it more inclusive.
From a wellness perspective, I appreciate that this cookie hits the spot without going overboard on sweetness or artificial flavors, making it a better choice than many store-bought Halloween treats.
Conclusion
Black Velvet Halloween Oreo Stuffed Cookies combine the thrill of a surprise Oreo center with the deep, rich flavor of a cocoa cookie, making them a must-try for this spooky season. Their ease and versatility mean you can experiment with flavors or just stick to the classic for a guaranteed crowd-pleaser. Personally, I love how these cookies bring a bit of magic to ordinary baking — and watching someone’s face light up with that first bite never gets old.
If you give this recipe a try, tweak it to match your taste, and don’t forget to share your favorite variations or moments with these cookies. Baking is, after all, about sharing joy one bite at a time.
FAQs
Can I use double stuff Oreos for extra cream inside?
Yes! Double stuff Oreos work great and make the filling even creamier, but you might need a bit more dough to fully cover them.
What if my cookies spread too much during baking?
Make sure your dough and assembled cookies are chilled well before baking. Also, avoid using melted butter — softened is best.
Can I prepare these cookies in advance and freeze them before baking?
Absolutely! Assemble the stuffed cookies, freeze them on a tray until firm, then transfer to a freezer bag. Bake directly from frozen — just add a couple extra minutes to the baking time.
Are these cookies suitable for dairy-free diets?
With some substitutions like dairy-free butter and dairy-free Oreos (check labels), you can make a dairy-free version, but the texture might vary slightly.
How should I store leftover cookies to keep them fresh?
Store in an airtight container at room temperature for up to 3 days. For longer storage, freeze and reheat gently in the microwave.
Pin This Recipe!
Black Velvet Halloween Oreo Stuffed Cookies

These Black Velvet Halloween Oreo Stuffed Cookies feature a rich cocoa cookie dough that encases a classic Oreo, creating a perfect balance of soft, chewy texture and a crunchy, melty center. Ideal for Halloween parties or any festive occasion, they are quick, easy, and irresistibly delicious.
- Prep Time: 15 minutes
- Cook Time: 12 minutes
- Total Time: 27 minutes
- Yield: 36 cookies 1x
- Category: Dessert
- Cuisine: American
Ingredients
- 2 1/4 cups (280 g) all-purpose flour
- 1/3 cup (35 g) unsweetened cocoa powder (Dutch-processed recommended)
- 1/2 teaspoon baking soda
- 1/2 teaspoon salt
- 3/4 cup (170 g) unsalted butter, softened (room temperature)
- 3/4 cup (150 g) granulated sugar
- 1/3 cup (65 g) packed brown sugar
- 2 large eggs, room temperature
- 1 teaspoon pure vanilla extract
- 1 package (about 36 cookies) regular Oreo cookies (classic or Halloween-themed)
Instructions
- Preheat your oven to 350°F (175°C). Line two baking sheets with parchment paper or silicone baking mats.
- In a medium bowl, sift together the flour, cocoa powder, baking soda, and salt. Set aside.
- In a large bowl, use an electric mixer to beat the softened butter with granulated sugar and brown sugar until light and fluffy, about 3-4 minutes.
- Beat in the eggs one at a time, ensuring each is fully incorporated before adding the next. Stir in the vanilla extract.
- Gradually add the dry ingredients to the wet mixture, mixing on low speed or folding with a spatula until just combined. Avoid overmixing.
- Cover the dough with plastic wrap and refrigerate for at least 20 minutes.
- Using a cookie scoop or spoon, take about 2 tablespoons (30 g) of dough and flatten it slightly in your palm. Place one Oreo cookie in the center, then mold another 2 tablespoons (30 g) of dough over the Oreo, sealing it completely.
- Place the stuffed cookies on the prepared baking sheets, spacing them about 2 inches (5 cm) apart.
- Bake for 10-12 minutes, or until the edges are set but the centers still look slightly soft. The top will have a matte, velvety appearance.
- Let the cookies cool on the baking sheet for 5 minutes before transferring to a wire rack to cool completely.
Notes
Chill the dough before baking to prevent spreading and keep the Oreo intact. If cookies spread too much, chill assembled cookies for 10 minutes before baking. Watch baking time closely to keep centers soft. Use Dutch-processed cocoa powder for best color and flavor. Let cookies cool on the baking sheet before transferring to avoid breakage. For variations, try gluten-free flour, add espresso powder, or use different Oreo flavors.
Nutrition
- Serving Size: 1 cookie
- Calories: 190
- Sugar: 18
- Sodium: 120
- Fat: 9
- Saturated Fat: 5
- Carbohydrates: 27
- Fiber: 1
- Protein: 2
Keywords: Halloween cookies, Oreo stuffed cookies, black velvet cookies, chocolate cookies, stuffed cookies, easy Halloween treats, Oreo recipes


