November drizzle against the kitchen window, and the only thing I want is a pan of these pumpkin pie bars with that dark, spicy gingersnap crust cooling on the counter. Not the full-blown pie production, not the fussy crimping of pastry dough that never looks as good as my grandmother’s. Just a simple 9×13 pan where the filling can set up overnight while I sleep, and the crust crunches exactly the way it should. I started making these about four years ago, right after I realized that traditional pumpkin pie, as much as I love it, has this annoying habit of cracking across the top when you look at it wrong. And honestly, who needs that kind of pressure on Thanksgiving morning?
There’s something about the way the gingersnap crust comes together. You crush the cookies, mix them with melted butter, press them into the pan, and suddenly the whole kitchen smells like December. I remember the first time I made these, I used store-bought gingersnaps because that’s what I had, and I thought, well, this is fine. But then I tried it with a slightly higher-end brand, the kind with real molasses and chunks of candied ginger, and the difference was honestly shocking. The crust went from good to that kind of good where you sneak pieces off the edge before anyone sees you.
The filling is where these bars really shine. It’s richer than a standard pumpkin pie filling because you’re not worrying about the structural integrity of a crust that has to hold itself up on a plate. With bars, the filling can be a little softer, a little creamier, and it sets up beautifully in the fridge overnight. I’ve brought these to Friendsgiving dinners, to office potlucks, and to my own Thanksgiving table, and every single time, someone asks for the recipe. Not the pie recipe. The bar recipe. There’s a reason for that.
Why You’ll Love This Recipe
Let’s be real for a second. Thanksgiving cooking is stressful enough without adding a finicky pie crust to the list. These pumpkin pie bars solve that problem completely. They’re the kind of dessert that makes you look like you spent hours in the kitchen when really, you just pressed some cookie crumbs into a pan and let the fridge do the work. I’ve tested this recipe about seven times over the last few seasons, tweaking the spice ratio, adjusting the bake time, and figuring out exactly how long the bars need to chill for that perfect clean slice. So trust me when I say this version is the one.
- Make-Ahead Magic: These bars actually taste better after a night in the fridge. The flavors meld together, the crust firms up, and the filling gets this silky texture that you just can’t rush. Make them two days ahead if you want. They hold up beautifully.
- No Pie Crust Stress: No rolling, no chilling, no worrying about shrinkage or soggy bottoms. The gingersnap crust is forgiving, foolproof, and absolutely delicious. You just crush, mix, and press.
- Crowd-Sized Portions: A 9×13 pan serves way more people than a standard pie. Perfect for holiday gatherings, potlucks, or meal prep if you’re the kind of person who wants pumpkin dessert for breakfast (no judgment here).
- That Gingersnap Crust: The spicy, molasses-y crunch of the crust against the smooth, creamy pumpkin filling is a textural dream. It’s not your average graham cracker situation. It’s better.
- Foolproof Filling: No water bath needed. No worrying about cracks. The filling bakes up smooth and sets perfectly in the fridge. It’s basically impossible to mess up.
I’ve made a lot of pumpkin desserts over the years, from gingerbread cheesecake bars to classic pies, but these pumpkin pie bars have become my go-to for fall gatherings. They’re the recipe I turn to when I want something impressive without the stress. The kind of dessert that people hover around, cutting themselves another square when they think no one is watching.
What Ingredients You Will Need
This recipe uses simple, pantry-friendly ingredients to create a dessert that tastes anything but basic. The magic is in the combination of warm spices, creamy pumpkin, and that bold gingersnap crust. Here’s what you’ll need:
For the Gingersnap Crust
- 2 cups (about 8 ounces) crushed gingersnap cookies – I recommend using a brand like Anna’s or Mi-Del for the best flavor. You want cookies with real molasses and a good spice kick. Avoid the soft, cakey kind. You need crunchy cookies here.
- 6 tablespoons unsalted butter, melted – This binds the crust together and adds richness. Use salted butter if that’s what you have, just reduce the added salt in the filling slightly.
- 2 tablespoons granulated sugar – Just a little sweetness to balance the spicy cookies.
- Pinch of salt – Don’t skip this. Salt makes the crust taste more buttery and enhances the ginger flavor.
For the Pumpkin Filling
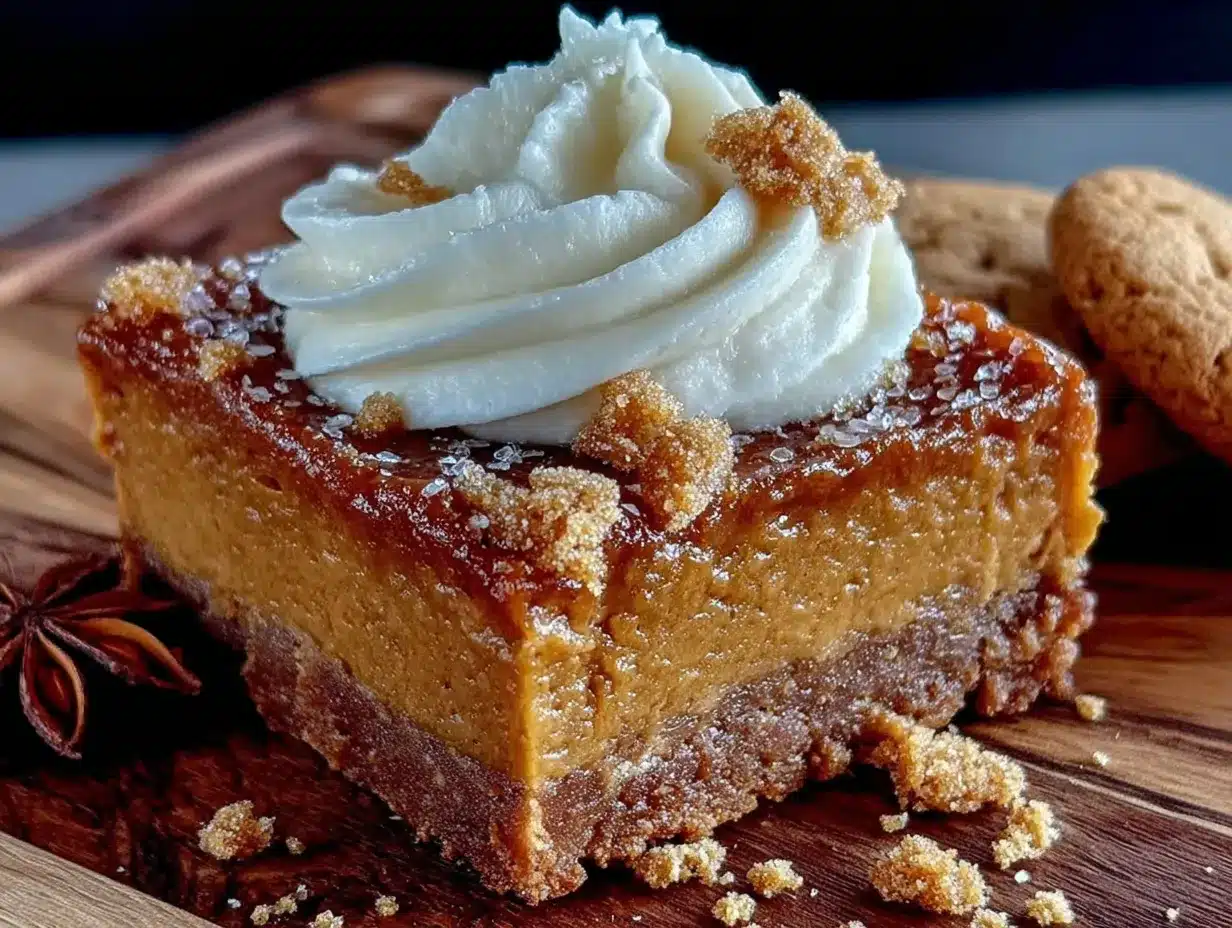
- 1 can (15 ounces) pure pumpkin puree – Not pumpkin pie filling. Make sure you grab the plain stuff. I prefer Libby’s for consistent texture and flavor.
- 1 can (14 ounces) sweetened condensed milk – This is what gives the filling that rich, creamy sweetness without needing a ton of sugar. It also helps the bars set up firmly.
- 2 large eggs, at room temperature – Room temperature eggs incorporate more smoothly into the filling, giving you a silkier texture. Take them out of the fridge about 30 minutes before you start.
- 1 teaspoon vanilla extract – Pure vanilla extract makes a difference here. The artificial stuff has a weird aftertaste that you don’t want in your pumpkin bars.
- 1 ½ teaspoons ground cinnamon – The backbone of pumpkin pie spice. Get a fresh jar if yours has been sitting in the cabinet for more than a year.
- ½ teaspoon ground ginger – This doubles down on the gingersnap crust flavor and adds warmth.
- ½ teaspoon ground nutmeg – Freshly grated if you have it. The flavor is brighter and more aromatic.
- ¼ teaspoon ground cloves – A little goes a long way. Cloves add that deep, almost smoky spice note.
- ¼ teaspoon salt – Balances the sweetness and enhances all the warm spices.
For the Topping (Optional but Recommended)
- 1 cup heavy whipping cream – For homemade whipped cream. Cold cream whips up better, so keep it in the fridge until you’re ready.
- 2 tablespoons powdered sugar – Adds sweetness without grittiness.
- ½ teaspoon vanilla extract – For flavor.
- Crushed gingersnap cookies for garnish – Because more crunch is always a good idea.
Equipment Needed
You don’t need a fancy kitchen to make these bars, but having the right tools makes the process smoother. Here’s what I use:
- 9×13-inch baking pan – Glass or metal both work. If you use a dark non-stick pan, keep an eye on the crust during pre-baking. Dark pans absorb more heat and can over-brown the edges.
- Food processor or rolling pin – A food processor makes quick work of crushing the gingersnaps into fine crumbs. If you don’t have one, put the cookies in a zip-top bag and go at them with a rolling pin. It’s a little more work, but honestly, it’s kind of therapeutic.
- Mixing bowls – One medium bowl for the crust, one large bowl for the filling.
- Whisk – For smoothing out the filling. A hand mixer works too, but whisking by hand gives you more control and fewer air bubbles.
- Rubber spatula – For scraping every last bit of filling into the pan. Waste not, want not.
- Parchment paper – Line the pan with parchment, leaving some overhang on the long sides. This creates handles that make lifting the bars out of the pan so much easier. Trust me on this one.
- Cooling rack – For cooling the bars before you chill them. You want air to circulate around the pan so the bars cool evenly.
If you’re looking for a budget-friendly option, skip the food processor and use the zip-top bag method. I did that for years before I finally bought a food processor, and the crust turned out great every time. The key is getting the crumbs fairly fine, with no big chunks left behind.
Preparation Method
Let me walk you through this step by step. I’ve made these bars enough times to know exactly where things can go wrong, so I’ll point out the tricky bits as we go.
- Preheat your oven to 350°F (175°C). While the oven heats up, line your 9×13-inch baking pan with parchment paper. Leave about 2 inches of overhang on the two long sides. This will act as handles later when you lift the bars out. Lightly spray the parchment with non-stick cooking spray, just to be safe.
- Make the crust. Put the gingersnap cookies in your food processor and pulse until you have fine crumbs. You should have about 2 cups of crumbs. If you’re using the zip-top bag method, crush the cookies until no pieces bigger than a pea remain. Pour the crumbs into a medium bowl, add the melted butter, sugar, and salt, and stir with a fork until everything is evenly moistened. It should look like wet sand that clumps together when you squeeze it.
- Press the crust into the pan. Dump the crumb mixture into the prepared pan. Use the bottom of a measuring cup or a flat-bottomed glass to press the crumbs down firmly and evenly. Don’t skimp on this step. A tightly packed crust holds together better when you slice the bars later. Press the crumbs about ¼ inch up the sides of the pan to create a slight edge. This helps contain the filling.
- Pre-bake the crust. Bake the crust for 10 minutes at 350°F. You want it to be set and just starting to turn golden at the edges. Remove it from the oven and let it cool on a wire rack for about 10 minutes while you make the filling. Don’t skip the pre-bake. A pre-baked crust stays crisp instead of getting soggy from the pumpkin filling.
- Make the filling. In a large bowl, whisk the eggs until they’re light and frothy, about 30 seconds. Add the pumpkin puree, sweetened condensed milk, vanilla extract, cinnamon, ginger, nutmeg, cloves, and salt. Whisk until everything is completely smooth and well combined. The mixture should be thick but pourable, with a beautiful orange color. Scrape down the sides of the bowl with a rubber spatula to make sure no spices are hiding at the bottom.
- Pour the filling over the crust. Slowly pour the pumpkin mixture over the pre-baked crust. Use your spatula to spread it evenly to the edges. Tap the pan gently on the counter a few times to release any air bubbles that might be trapped in the filling.
- Bake the bars. Place the pan in the oven and bake at 350°F for 35 to 40 minutes. The filling should be set around the edges but still slightly jiggly in the center. That slight jiggle is what gives you that creamy, silky texture after chilling. If the center is completely firm when you take it out, the bars will be overbaked and might crack as they cool. I’ve made that mistake before, and while they still tasted good, the texture wasn’t as smooth.
- Cool completely. Place the pan on a wire rack and let the bars cool to room temperature. This usually takes about 1 to 2 hours. Don’t rush this step. If you put warm bars in the fridge, condensation will form on the surface and make the top watery.
- Chill overnight. Once the bars are at room temperature, cover the pan with plastic wrap or aluminum foil and refrigerate for at least 6 hours, but preferably overnight. The overnight chill is non-negotiable in my opinion. It allows the filling to set up firmly enough to slice cleanly, and the flavors meld together in a way that just doesn’t happen with a shorter chill time.
- Slice and serve. Use the parchment paper handles to lift the bars out of the pan. Place them on a cutting board and use a sharp knife to slice them into squares. I usually go for 12 large bars or 24 smaller ones, depending on the occasion. Wipe the knife clean between cuts for the neatest slices. Serve with a dollop of whipped cream and a sprinkle of crushed gingersnaps on top.
Cooking Tips & Techniques
I’ve learned a few things the hard way so you don’t have to. Here are my best tips for perfect pumpkin pie bars every time:
Don’t overmix the filling. Whisk just until everything is combined. Overmixing incorporates too much air into the filling, which can cause bubbles and cracks during baking. A few gentle strokes with the whisk are all you need.
Watch the bake time carefully. Every oven runs a little differently. Start checking your bars at the 30-minute mark. The edges should be set and slightly puffed, and the center should wobble just a little when you gently shake the pan. If you insert a knife near the center, it should come out mostly clean with a little bit of moist filling clinging to it.
Use room temperature ingredients. Cold eggs can seize up the filling and create a lumpy texture. Take your eggs out of the fridge about 30 minutes before you start. If you forget, put them in a bowl of warm water for 5 minutes to bring them up to temperature quickly.
Press the crust firmly. I cannot stress this enough. A loosely packed crust will crumble when you try to cut the bars. Use the bottom of a measuring cup and really lean into it. The crust should feel solid and compact, not fluffy or loose.
Let the bars chill fully. I know it’s tempting to dig in after a few hours, but the texture really does improve with a full overnight chill. The filling firms up, the flavors deepen, and the crust absorbs just enough moisture from the filling to soften slightly without losing its crunch. It’s the perfect balance.
I once made these bars for a Friendsgiving dinner and skipped the overnight chill because I was running late. I served them after only 4 hours in the fridge, and while everyone was polite about it, the slices were messy and the texture was more like pumpkin pudding than pie bars. Learn from my mistake. Give them the full night.
Variations & Adaptations
One of the best things about this recipe is how adaptable it is. Here are some variations I’ve tried and loved:
Gluten-Free Version: Use gluten-free gingersnap cookies for the crust. There are several good brands available now, and the texture works just as well. The filling is naturally gluten-free, so you’re only swapping out the crust. I’ve tested this with Schär brand gluten-free gingersnaps, and the result was fantastic.
Dairy-Free Adaptation: Substitute the butter in the crust with coconut oil or a plant-based butter alternative. For the filling, use a can of full-fat coconut milk instead of sweetened condensed milk, and add ¼ cup of maple syrup or brown sugar to compensate for the lost sweetness. The texture will be slightly less creamy, but still delicious.
Spiced-Up Version: Add ¼ teaspoon of cardamom and a pinch of white pepper to the filling for a more complex spice profile. Cardamom pairs beautifully with pumpkin and adds a floral note that makes these bars feel extra special. I made this version for a holiday cookie exchange last year, and people went crazy for it.
Pecan Praline Topping: After the bars have chilled, top them with a layer of pecan praline. Melt ¼ cup of brown sugar with 2 tablespoons of butter, stir in ½ cup of chopped pecans, and spread the mixture over the bars. Let it set for about 30 minutes before slicing. This turns the bars into something closer to a bourbon pecan pie bar hybrid, and honestly, it’s incredible.
Pumpkin Cheesecake Swirl: Before baking, drop spoonfuls of a simple cheesecake mixture (8 ounces cream cheese, ¼ cup sugar, 1 egg, ½ teaspoon vanilla) over the pumpkin filling. Use a knife to swirl them together gently. This creates a marbled effect that looks beautiful and adds a tangy cream cheese layer to the bars. I’ve done this for Thanksgiving a few times, and it always gets compliments.
Serving & Storage Suggestions
These bars are best served cold, straight from the fridge. The chilled filling has a firm, creamy texture that slices beautifully and holds its shape on the plate. If you prefer a softer texture, let the bars sit at room temperature for about 15 minutes before serving. I like them both ways, honestly, depending on my mood.
For presentation, I like to arrange the bars on a large platter with a generous dollop of whipped cream on each square. A sprinkle of crushed gingersnaps or a light dusting of cinnamon adds a nice finishing touch. If you’re feeling fancy, drizzle a little caramel sauce over the top. The combination of pumpkin, ginger, and caramel is absolutely divine.
These bars pair beautifully with a cup of hot coffee or spiced apple cider. For a holiday dessert spread, serve them alongside brown butter apple cider cake or a simple vanilla ice cream. The contrast between the cold, creamy bars and the warm, spiced cake is a match made in fall dessert heaven.
Storage: Keep the bars covered in the refrigerator for up to 5 days. The flavor actually improves after the first day as the spices meld together. I’ve kept them for a full week before, and they were still delicious, though the crust started to soften a bit after day 4.
Freezing: These bars freeze exceptionally well. Slice them into individual portions, wrap each piece tightly in plastic wrap, and place them in a freezer-safe container. They’ll keep for up to 3 months. To thaw, transfer a bar to the refrigerator overnight, or let it sit at room temperature for about 30 minutes. I often make a double batch and freeze half for later. It’s like having a secret stash of fall comfort waiting for you whenever you need it.
Reheating: I don’t recommend reheating these bars. They’re designed to be served cold, and the texture changes when you warm them up. If you absolutely must have a warm pumpkin dessert, try warming a slice in the microwave for about 10 seconds, but be warned that the crust will soften significantly.
Nutritional Information & Benefits
Here’s the honest truth: these are dessert bars, not health food. But they do have some redeeming qualities worth mentioning. Pumpkin is packed with vitamin A, fiber, and antioxidants. It’s one of those ingredients that feels indulgent but actually brings some nutritional value to the table. The eggs add protein, and the gingersnaps, well, they add happiness.
Here’s an approximate nutritional breakdown per bar (based on 12 servings):
| Nutrient | Amount per Bar |
|---|---|
| Calories | 320 |
| Total Fat | 14g |
| Saturated Fat | 8g |
| Cholesterol | 65mg |
| Sodium | 280mg |
| Total Carbohydrates | 44g |
| Dietary Fiber | 2g |
| Sugars | 32g |
| Protein | 5g |
Dietary Considerations: This recipe contains gluten, dairy, and eggs. For gluten-free and dairy-free options, check the variations section above. The bars are nut-free as written, but the pecan praline variation adds tree nuts.
I personally love that these bars feel like a treat but aren’t overly heavy. One bar is satisfying without leaving you in a sugar coma. That said, I’ve definitely eaten two in one sitting before, and I don’t regret it.
Conclusion
These make-ahead pumpkin pie bars with gingersnap crust have become a staple in my fall baking rotation for a reason. They’re forgiving, they’re delicious, and they take all the stress out of holiday dessert prep. The combination of that spicy, crunchy crust with the silky, spiced pumpkin filling is the kind of thing that makes people close their eyes when they take a bite. I’ve watched it happen more times than I can count.
What I love most about this recipe is how adaptable it is. You can dress it up with whipped cream and caramel for a fancy dinner party, or keep it simple for a weekday treat. You can make it gluten-free, dairy-free, or loaded with extra spices. It’s the kind of recipe that meets you where you are and still turns out beautiful every time.
I’d love to hear how these turn out for you. Did you add your own twist? Did you serve them at a holiday gathering? Drop a comment below and let me know. And if you’re looking for more fall dessert inspiration, check out the cranberry orange sourdough loaf or the gingerbread cheesecake bars on the blog. Both are perfect companions to these pumpkin pie bars for a full holiday dessert spread.
Happy baking, friends. And remember, the bars taste even better when you make them the night before and let the fridge do the work. That’s not just a tip. That’s a promise.
Frequently Asked Questions
Can I use fresh pumpkin instead of canned?
You can, but I don’t recommend it for this recipe. Canned pumpkin has a consistent texture and moisture content that’s hard to replicate with fresh pumpkin. Fresh pumpkin puree tends to be more watery, which can make the filling too soft. If you really want to use fresh, roast and puree the pumpkin, then drain it in a cheesecloth-lined sieve for at least an hour to remove excess moisture.
Why did my crust fall apart when I cut the bars?
This usually happens for one of two reasons: either the crust wasn’t pressed firmly enough into the pan, or the bars weren’t chilled long enough. Make sure you really compact the crumb mixture with the bottom of a measuring cup. And give the bars a full overnight chill before slicing. A sharp knife also helps. Use a long, thin-bladed knife and wipe it clean between cuts.
Can I use a different cookie for the crust?
Absolutely. Graham crackers, shortbread cookies, or vanilla wafers all work well. Just keep in mind that the flavor profile will change. Gingersnaps add that warm, spicy kick that complements the pumpkin perfectly, but a graham cracker crust will give you a more classic pumpkin pie experience. If you use a sweeter cookie like shortbread, reduce the sugar in the crust to 1 tablespoon.
How far in advance can I make these bars?
You can make them up to 3 days ahead of time. Store them covered in the refrigerator. The flavor actually improves after the first day as the spices have time to meld together. If you’re making them for a holiday meal, I recommend making them 2 days ahead. That gives you plenty of time to focus on the main dishes without rushing the dessert.
Can I double this recipe?
Yes, but you’ll need two 9×13 pans. Don’t try to fit a double batch into one pan because the bars will be too thick and won’t bake evenly. If you’re feeding a crowd, make two separate batches. They’ll bake in the same amount of time if you put both pans in the oven at once, just rotate the pans halfway through baking to ensure even cooking.
Pin This Recipe!
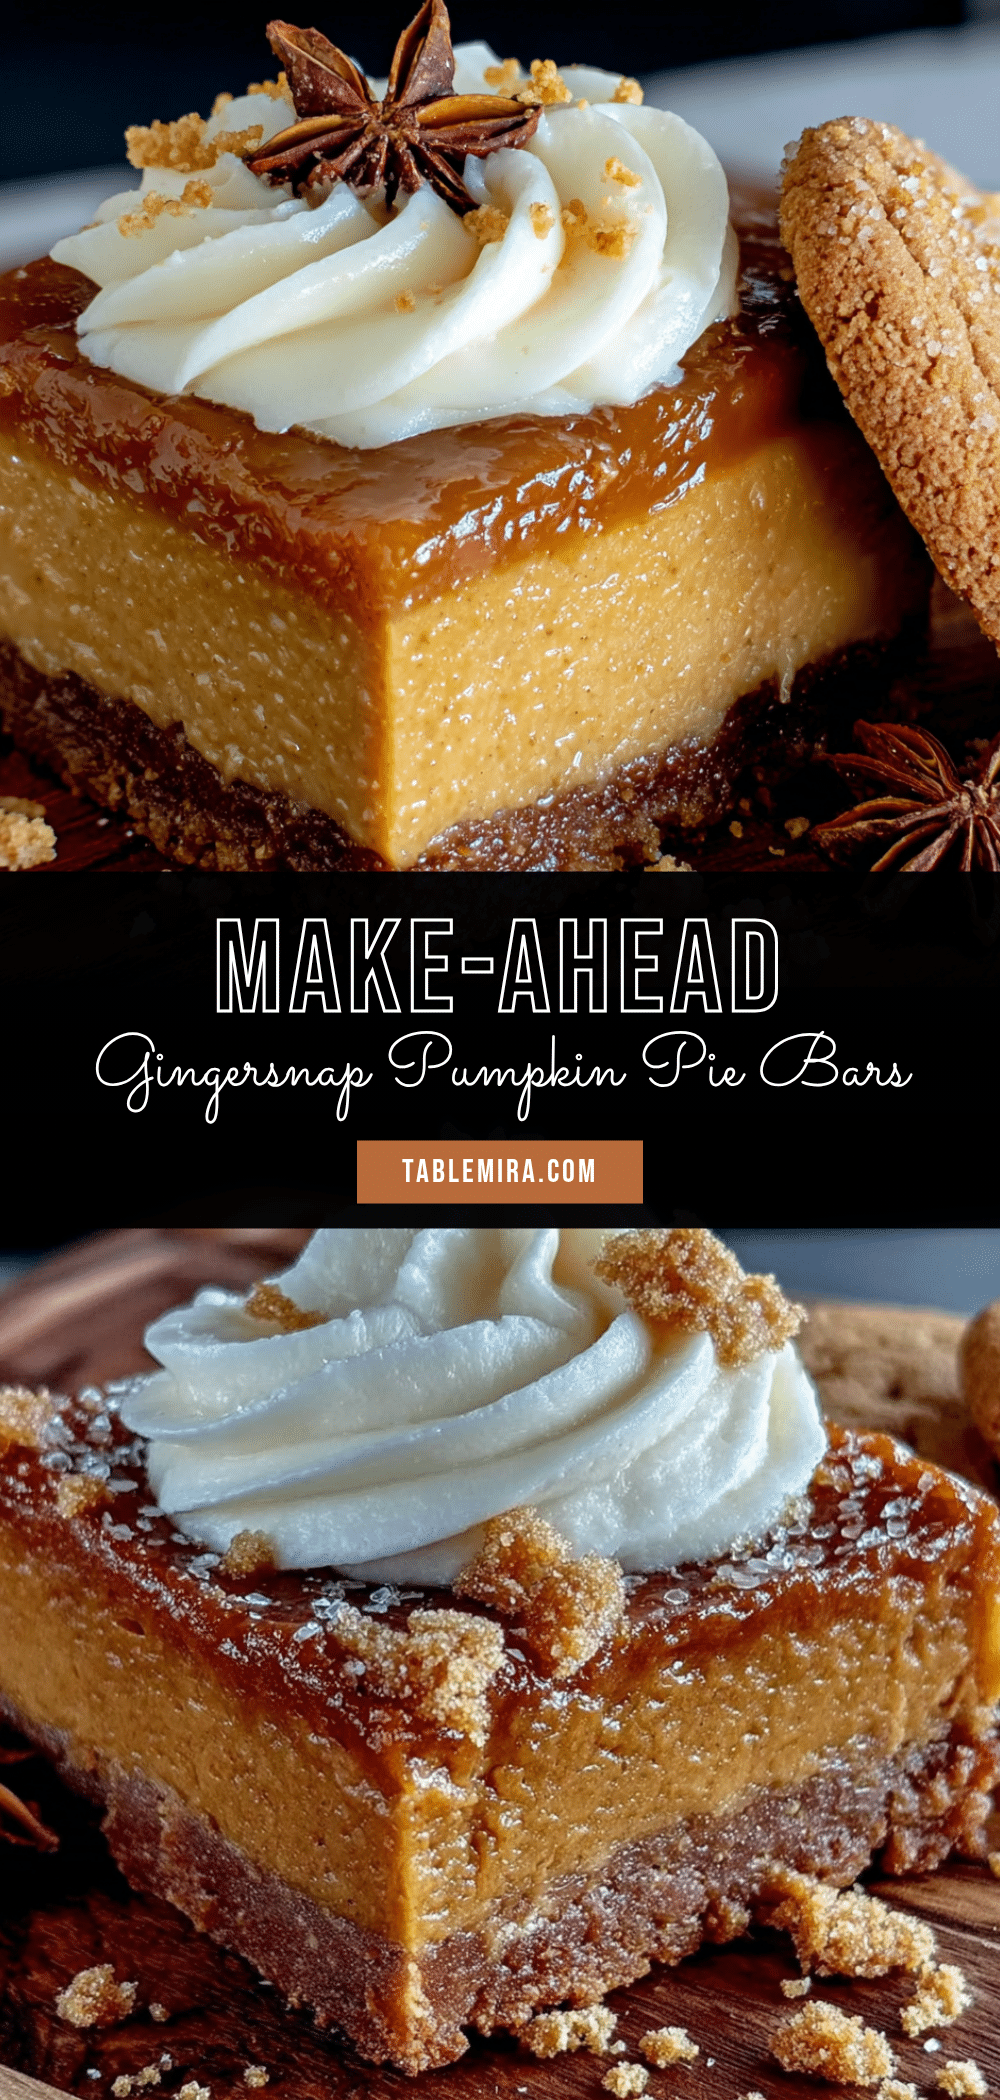
Best Make-Ahead Pumpkin Pie Bars with Gingersnap Crust
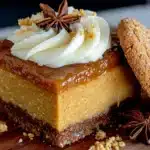
These make-ahead pumpkin pie bars feature a spicy gingersnap crust and a creamy, foolproof pumpkin filling. Perfect for holiday gatherings, they can be made a day or two in advance and slice beautifully without cracking.
- Prep Time: 20 minutes
- Cook Time: 40 minutes
- Total Time: 8 hours 20 minutes (includes chilling)
- Yield: 12 servings 1x
- Category: Dessert
- Cuisine: American
Ingredients
- 2 cups (about 8 ounces) crushed gingersnap cookies
- 6 tablespoons unsalted butter, melted
- 2 tablespoons granulated sugar
- Pinch of salt
- 1 can (15 ounces) pure pumpkin puree
- 1 can (14 ounces) sweetened condensed milk
- 2 large eggs, at room temperature
- 1 teaspoon vanilla extract
- 1 ½ teaspoons ground cinnamon
- ½ teaspoon ground ginger
- ½ teaspoon ground nutmeg
- ¼ teaspoon ground cloves
- ¼ teaspoon salt
- 1 cup heavy whipping cream (for topping, optional)
- 2 tablespoons powdered sugar (for topping, optional)
- ½ teaspoon vanilla extract (for topping, optional)
- Crushed gingersnap cookies for garnish (optional)
Instructions
- Preheat your oven to 350°F (175°C). Line a 9×13-inch baking pan with parchment paper, leaving about 2 inches of overhang on the long sides. Lightly spray the parchment with non-stick cooking spray.
- Make the crust: Pulse gingersnap cookies in a food processor until fine crumbs form. You should have about 2 cups of crumbs. In a medium bowl, combine the crumbs with melted butter, sugar, and a pinch of salt. Stir with a fork until evenly moistened (like wet sand).
- Press the crust into the prepared pan firmly and evenly using the bottom of a measuring cup. Press the crumbs about ¼ inch up the sides of the pan to create a slight edge.
- Pre-bake the crust for 10 minutes at 350°F. Remove from oven and let cool on a wire rack for about 10 minutes.
- Make the filling: In a large bowl, whisk the eggs until light and frothy, about 30 seconds. Add pumpkin puree, sweetened condensed milk, vanilla extract, cinnamon, ginger, nutmeg, cloves, and salt. Whisk until completely smooth and well combined.
- Pour the filling over the pre-baked crust. Spread evenly to the edges. Tap the pan gently on the counter a few times to release air bubbles.
- Bake at 350°F for 35 to 40 minutes, until the edges are set and the center is slightly jiggly. Do not overbake.
- Cool completely on a wire rack (about 1 to 2 hours). Do not rush this step.
- Cover the pan with plastic wrap or foil and refrigerate for at least 6 hours, preferably overnight.
- Use the parchment paper handles to lift the bars out of the pan. Slice into squares with a sharp knife, wiping the knife clean between cuts. Serve cold with whipped cream and crushed gingersnaps if desired.
Notes
For best results, chill overnight. The bars taste even better after a day in the fridge. Use room temperature eggs for a smoother filling. Press the crust firmly to prevent crumbling. Do not overmix the filling to avoid cracks.
Nutrition
- Serving Size: 1 bar
- Calories: 320
- Sugar: 32
- Sodium: 280
- Fat: 14
- Saturated Fat: 8
- Carbohydrates: 44
- Fiber: 2
- Protein: 5
Keywords: pumpkin pie bars, gingersnap crust, make-ahead dessert, Thanksgiving dessert, fall dessert, pumpkin bars