My sister showed up at my door at 4 PM on Thanksgiving Eve holding a raw bag of frozen green beans and a look of panic. She’d volunteered to bring the green bean casserole to our family dinner, but she’d also double-booked herself for a work presentation the next morning. The only thing in her fridge was some heavy cream, a block of cheddar, and a half-empty jar of crispy fried onions from a party dip she made two weeks ago. I looked at the clock, looked at her face, and realized we needed a serious game plan. That night, standing in my kitchen with a colander of thawing beans and a very stressed sister, I started testing what would become my go-to method for this iconic side dish.
You see, the classic version is wonderful—don’t get me wrong. But it’s also a last-minute scramble that leaves you sweating over the stove while everyone else is sipping wine. My sister needed something she could make ahead, something that wouldn’t turn into a watery mess after sitting in the fridge overnight. So we started experimenting. We swapped the canned soup for a from-scratch mushroom sauce (honestly, it takes ten extra minutes and tastes like a different planet). We added a touch of nutmeg because that’s the secret nobody tells you about. And we figured out the exact timing for the crispy onions so they stay crunchy even after reheating.
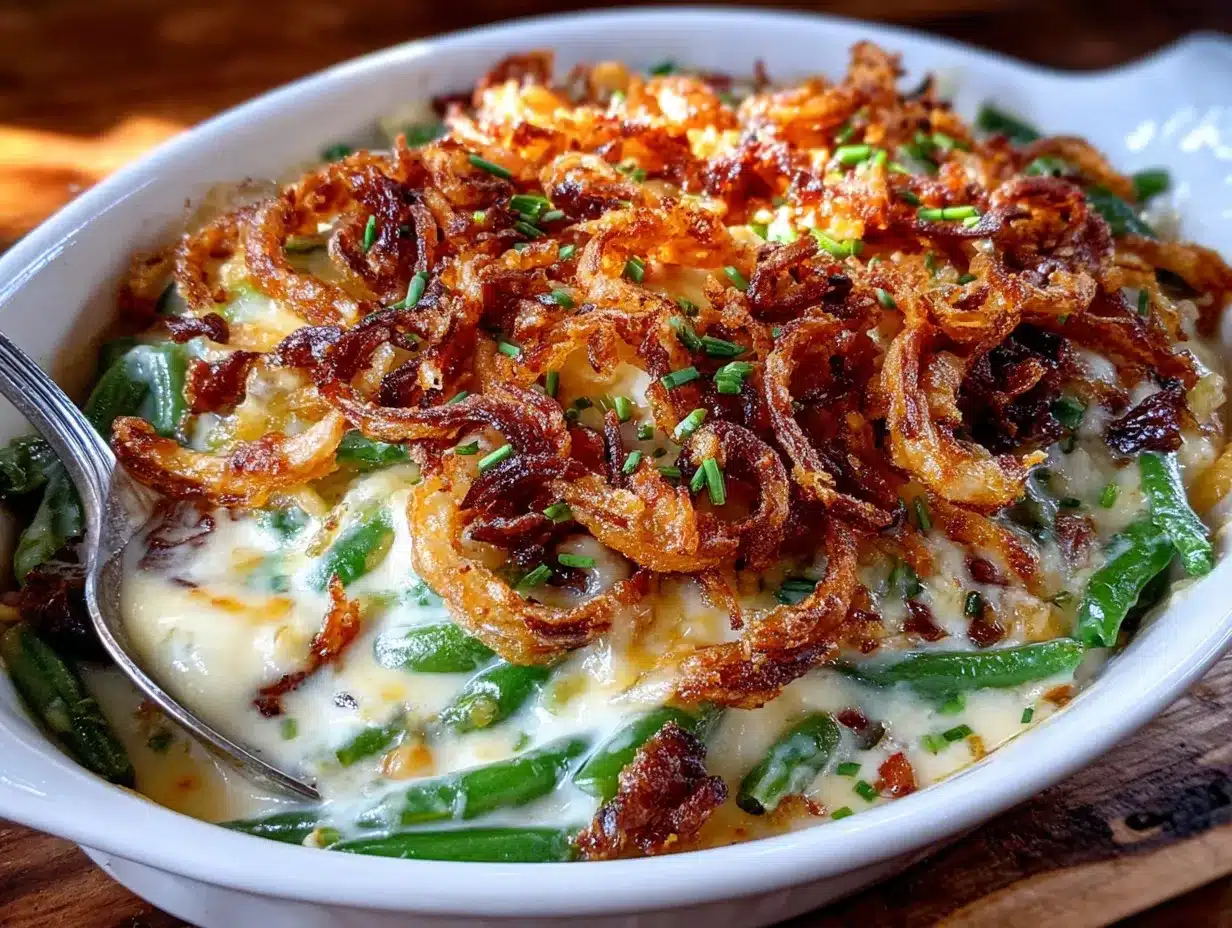
The result? A make-ahead green bean casserole that actually tastes better the next day. The flavors meld together overnight, the cream sauce gets all cozy with the beans, and that topping stays shatteringly crisp. My sister brought it to dinner the next day, and my aunt (who is notoriously picky about her green bean casserole) asked for the recipe before she finished her first helping. That’s when I knew we’d cracked the code.
This is the kind of recipe that saves holidays. It gives you back precious oven space, reduces your stress, and still delivers that nostalgic, creamy, onion-crunchy goodness everyone craves. And honestly? It’s just a really, really good green bean casserole.
Why You’ll Love This Recipe
I’ve tested this recipe more times than I can count—through three Thanksgivings, two Christmas dinners, and a handful of random Sunday suppers where I just needed a comfort food fix. Here’s why it’s become my absolute favorite way to make green bean casserole:
- Truly Make-Ahead Friendly : Assemble it up to two days in advance, then just pop it in the oven when you’re ready. The sauce actually thickens beautifully overnight, so you get an even creamier result.
- No Canned Soup Required : The homemade mushroom sauce is rich, velvety, and packed with umami from fresh mushrooms and a splash of soy sauce. It’s still quick—about 15 minutes of active time—but tastes like you spent hours.
- Perfect for Holidays : This frees up your oven and your brain on the big day. You can focus on the turkey, the ham, or whatever else is on your menu without worrying about a last-minute casserole crisis.
- Crispy Onions That Stay Crispy : The trick is layering them both inside the casserole and on top, then adding a final fresh batch right before baking. No soggy topping here.
- Crowd-Pleaser Status : I’ve served this to green-bean-haters, to kids who only eat beige food, and to my uncle who claims he “doesn’t do casseroles.” Every single one of them went back for seconds.
What makes this different from every other green bean casserole recipe out there? It’s the balance. The creamy sauce isn’t too heavy, the beans stay bright green and tender-crisp, and the onions provide that salty, crunchy contrast that makes the whole thing addictive. Plus, it’s been tested by a professional recipe developer (that’s me) and approved by a notoriously critical family. It’s not just another version—it’s the version you’ll come back to year after year.
This is the kind of dish that makes you close your eyes after the first bite. It’s comfort food reimagined—healthier than the canned version, but with the same soul-soothing satisfaction. Perfect for impressing guests without stress, or turning a simple weeknight dinner into something memorable.
What Ingredients You Will Need
This recipe uses simple, wholesome ingredients to deliver bold flavor and satisfying texture without the fuss. Most of these are pantry staples, which makes this dish even more convenient when you’re planning ahead for a big meal.
For the Green Beans:
- 2 pounds fresh green beans, trimmed and cut into 2-inch pieces (or 2 pounds frozen green beans, thawed and patted dry)
- 1 tablespoon kosher salt (for blanching water)
Fresh beans give you that perfect snap, but frozen work beautifully in a pinch. Just make sure to thaw them completely and pat them dry—excess moisture is the enemy of a good casserole. If using fresh, look for beans that are bright green and firm, with no brown spots.
For the Creamy Mushroom Sauce:
- 4 tablespoons unsalted butter
- 1 pound cremini mushrooms, sliced (baby bellas work great here)
- 1 medium yellow onion, finely diced
- 4 cloves garlic, minced
- 1/4 cup all-purpose flour
- 2 cups whole milk, warmed
- 1 cup heavy cream
- 1 teaspoon kosher salt
- 1/2 teaspoon black pepper
- 1/4 teaspoon freshly grated nutmeg (trust me on this one)
- 2 teaspoons soy sauce (this adds incredible depth)
- 1/2 cup grated Parmesan cheese (optional, but recommended)
I use cremini mushrooms because they have more flavor than white button mushrooms, but you can use any variety you like. The soy sauce is my secret weapon—it boosts the umami without making the sauce taste Asian. And that nutmeg? It’s the little touch that makes people say “what’s in this? It’s amazing.”
For the Crispy Fried Onion Topping:
- 2 large yellow onions, thinly sliced into rings
- 1 cup buttermilk
- 1 cup all-purpose flour
- 1 teaspoon kosher salt
- 1/2 teaspoon black pepper
- 1/2 teaspoon paprika
- Vegetable or canola oil, for frying
- Or 2 cups store-bought crispy fried onions (I recommend French’s for consistency)
I’ll be honest—sometimes I use store-bought fried onions because they’re convenient and reliably crunchy. But if you have an extra 20 minutes, homemade are absolutely worth it. They’re more flavorful, less greasy, and you can control the salt level. If you’re using store-bought, look for the extra-crispy variety.
For Assembly:
- 1 cup shredded sharp cheddar cheese (optional, but adds a lovely golden crust)
- Fresh parsley, chopped, for garnish
The cheese is totally optional, but I love how it creates a slightly crispy, golden layer on top. If you’re dairy-free or want to keep it traditional, just skip it—the casserole is still incredible without it.
Equipment Needed
You don’t need anything fancy for this recipe, which is part of its beauty. Here’s what you’ll need:
- Large pot for blanching the green beans (a 6-quart pot works well)
- Large skillet or sauté pan for the mushroom sauce (I use a 12-inch stainless steel pan)
- 9×13-inch baking dish (or any 3-quart casserole dish)
- Colander for draining the beans
- Mixing bowls (one large, one medium)
- Whisk for the sauce (a flat whisk is ideal for avoiding lumps)
- Sharp knife and cutting board
- Measuring cups and spoons
- Aluminum foil for covering during storage and baking
If you don’t have a 9×13 dish, you can use two smaller dishes—just adjust the baking time slightly. And if you’re making the homemade fried onions, you’ll also need a deep pot or Dutch oven for frying and a slotted spoon or tongs for removing them from the oil. A candy thermometer is helpful but not essential—you can test the oil temperature by dropping in a small piece of onion; it should sizzle immediately.
I’ve made this in a cast-iron skillet before, and it works beautifully—just reduce the baking time by about 5 minutes since cast iron holds heat so well. My grandmother’s old Pyrex dish is my go-to, though. There’s something about glass baking dishes that just feels right for casseroles.
Preparation Method
This recipe comes together in three main stages: the beans, the sauce, and the topping. Here’s how to do it, step by step.
Step 1: Prepare the Green Beans
Bring a large pot of water to a rolling boil and add 1 tablespoon of kosher salt. While you wait, fill a large bowl with ice water and set it nearby. Add the green beans to the boiling water and cook for exactly 3 minutes (if using fresh) or 2 minutes (if using thawed frozen). You want them bright green and still crisp—they’ll continue cooking in the oven later. Immediately transfer the beans to the ice water bath using a slotted spoon or colander. Let them sit for 3-4 minutes until completely cool. Drain well and pat dry with a clean kitchen towel. Set aside.
Pro tip: Don’t skip the ice bath! It stops the cooking process instantly and locks in that beautiful green color. If you skip this step, your beans will turn olive-drab in the oven.
Step 2: Make the Creamy Mushroom Sauce
In a large skillet over medium-high heat, melt 2 tablespoons of butter. Add the sliced mushrooms and cook, stirring occasionally, for 6-8 minutes until they release their liquid and start to brown. You want deep golden edges—that’s where the flavor lives. Remove the mushrooms from the pan and set them aside.
Reduce the heat to medium and add the remaining 2 tablespoons of butter. Add the diced onion and cook for 4-5 minutes until softened and translucent. Add the minced garlic and cook for 30 seconds until fragrant. Sprinkle the flour over the onions and garlic, stirring constantly, and cook for 1-2 minutes until the flour turns a light golden color. This is your roux—it’s the foundation of the sauce.
Slowly pour in the warm milk while whisking continuously to prevent lumps. Add the heavy cream and continue whisking until the sauce thickens, about 3-4 minutes. It should coat the back of a spoon. Stir in the salt, pepper, nutmeg, soy sauce, and cooked mushrooms. If using Parmesan, add it now and stir until melted. Taste and adjust seasoning—you might want a pinch more salt or pepper.
Step 3: Make the Crispy Fried Onions (Optional, But Worth It)
If you’re using store-bought onions, skip this step. If you’re making them from scratch, here’s what to do. Soak the sliced onions in buttermilk for 10 minutes. In a shallow bowl, combine the flour, salt, pepper, and paprika. Heat about 2 inches of oil in a deep pot to 350°F. Working in batches, dredge the soaked onion rings in the seasoned flour, shaking off excess, and carefully lower them into the hot oil. Fry for 2-3 minutes until golden brown and crispy. Transfer to a paper towel-lined plate and season immediately with a pinch of salt.
Warning: The onions will continue to darken after you remove them from the oil, so pull them out when they’re just slightly lighter than you want. And please, for the love of all things crispy, don’t crowd the pot—it lowers the oil temperature and gives you soggy onions.
Step 4: Assemble the Casserole
Preheat your oven to 375°F. In a large mixing bowl, combine the blanched green beans with about half of the mushroom sauce and half of the crispy fried onions (or about 1 cup of store-bought). Stir gently until everything is evenly coated. Transfer the mixture to your greased 9×13 baking dish and spread it into an even layer. Pour the remaining sauce over the top, spreading it evenly. If using cheddar cheese, sprinkle it over the sauce now.
Cover the dish tightly with aluminum foil and refrigerate for up to 2 days. When you’re ready to bake, remove the casserole from the fridge and let it sit on the counter for 20 minutes while the oven preheats. This helps it cook more evenly.
Step 5: Bake and Finish
Bake the casserole covered for 25 minutes. Remove the foil and bake for another 10 minutes until bubbly and golden. Sprinkle the remaining crispy fried onions over the top and bake for an additional 5 minutes, uncovered, until the topping is deeply golden and crunchy. Let the casserole rest for 5-10 minutes before serving—this allows the sauce to set slightly so you get clean portions.
Sensory cues: The sauce should be bubbling around the edges, the top should be golden brown, and the onions should smell toasty and irresistible. If you’re using cheese, it should be melted and slightly browned in spots.
Cooking Tips & Techniques
After a dozen or so test runs, I’ve learned a few things the hard way. Here are my best tips for green bean casserole success:
Don’t Overcook the Beans. I can’t stress this enough. Three minutes in boiling water is plenty. If you’re using frozen beans that are already blanched, just thaw and pat dry—no need to cook them further. Overcooked beans turn mushy and sad in the oven.
Warm Your Milk. Cold milk added to a hot roux can cause lumps that are nearly impossible to smooth out. Microwave your milk for about 45 seconds before adding it to the pan. This one step makes your sauce silky every time.
Layer the Onions Twice. This is the secret to maximum crunch. Mixing some onions into the filling ensures every bite has that onion flavor, while the fresh batch on top stays crispy. I learned this after my first attempt where all the onions went on top and got soft during baking. Never again.
Let It Rest. I know it’s tempting to dig in right away, but letting the casserole rest for 5-10 minutes after baking allows the sauce to thicken. If you serve it immediately, it will be runny. Patience pays off here.
Make Extra Sauce. The sauce is honestly the best part, and having a little extra never hurts. If you’re feeding a crowd, consider making 1.5 times the sauce recipe. You can always store leftovers separately.
One of my biggest failures? I once forgot to pat the beans dry after blanching. The extra water turned my sauce into soup. It was still edible, but it wasn’t the creamy, luxurious casserole I was going for. Learn from my mistakes—dry those beans!
Variations & Adaptations
This recipe is incredibly flexible. Here are some ways to make it your own:
Dietary Adaptations:
- Gluten-Free: Use a gluten-free all-purpose flour blend for the roux and the fried onions. For the onions, you can use gluten-free panko or crushed gluten-free crackers as a coating. The sauce thickens beautifully with a good gluten-free flour blend.
- Dairy-Free: Substitute the butter with vegan butter or olive oil, use unsweetened oat milk or cashew milk for the sauce, and skip the heavy cream (use full-fat coconut cream instead). Omit the Parmesan and cheddar, or use dairy-free alternatives. The sauce won’t be as rich, but it’s still delicious.
- Lower-Carb: Replace the flour roux with a small amount of xanthan gum or use a low-carb thickener like glucomannan powder. Skip the fried onions or use crushed pork rinds for crunch.
Flavor Twists:
- Bacon Lover’s Version: Cook 6 slices of bacon until crispy, crumble them, and stir half into the sauce. Sprinkle the remaining bacon over the top along with the fried onions. Bacon and green beans are a match made in heaven.
- Roasted Garlic Version: Roast a head of garlic in the oven at 400°F for 40 minutes until soft and caramelized. Squeeze the cloves into the sauce before adding the milk. It adds a sweet, nutty depth that’s incredible.
- Cheesy Upgrade: Stir 1 cup of shredded Gruyère or smoked Gouda into the sauce along with the Parmesan. These cheeses melt beautifully and add a sophisticated flavor profile.
Seasonal Variations:
- Spring: Add 1 cup of fresh peas or asparagus tips along with the green beans. The bright green pop is gorgeous.
- Fall: Stir in 1/2 cup of roasted butternut squash cubes and a pinch of dried sage. It’s like autumn in a dish.
- Summer: Use fresh corn kernels and a handful of cherry tomatoes, halved. The sweetness of the corn balances the savory sauce perfectly.
I’ve personally tried the bacon version (obviously) and the roasted garlic version, and both are keepers. The roasted garlic version is my go-to for dinner parties because it feels a little more elevated without being fussy.
Serving & Storage Suggestions
This casserole is best served warm, straight from the oven. Let it rest for 5-10 minutes after baking so the sauce sets up nicely. I like to garnish it with a sprinkle of fresh parsley for color and a final crack of black pepper.
What to Serve With It:
- Thanksgiving turkey or Christmas ham (obviously!)
- Roasted chicken or honey garlic slow cooker chicken thighs for a cozy weeknight dinner
- Mashed potatoes or creamy crockpot lasagna soup for a comfort food feast
- Crusty bread or dinner rolls to soak up any extra sauce
- A crisp green salad with a tangy vinaigrette to cut through the richness
Storage Instructions:
- Refrigerator: Store leftovers in an airtight container for up to 4 days. The flavors actually deepen overnight, so leftovers are a treat.
- Freezer: You can freeze the assembled but unbaked casserole for up to 3 months. Wrap it tightly in foil and then a layer of plastic wrap. Thaw in the refrigerator overnight before baking. Add 10-15 minutes to the baking time since you’re starting from cold.
- Reheating: Reheat individual portions in the microwave for 1-2 minutes, or reheat the entire casserole in a 350°F oven for 15-20 minutes. If the top starts to brown too much, tent it with foil. The onions won’t be as crispy after reheating, so I like to add a fresh sprinkle of fried onions just before serving leftovers.
One thing I’ve noticed: this casserole tastes even better on day two. The sauce thickens up beautifully, and the flavors meld together in a way that’s hard to describe. It’s like the dish settles into itself. So don’t be sad if you have leftovers—embrace them!
Nutritional Information & Benefits
Here’s the estimated nutritional breakdown per serving (based on 8 servings, using whole milk, heavy cream, and homemade fried onions):
- Calories: 320
- Total Fat: 22g
- Saturated Fat: 12g
- Cholesterol: 55mg
- Sodium: 680mg
- Total Carbohydrates: 24g
- Dietary Fiber: 4g
- Sugars: 8g
- Protein: 9g
Health Benefits: Green beans are a great source of vitamin K, vitamin C, and fiber. They’re also low in calories, so even with the creamy sauce, this dish fits into a balanced meal. Mushrooms provide B vitamins and selenium, which supports immune function. And while this isn’t exactly health food, using fresh ingredients and making the sauce from scratch means you’re avoiding the preservatives and excessive sodium found in canned versions.
Dietary Considerations: This recipe contains dairy and gluten. For gluten-free and dairy-free options, see the variations section above. It’s also vegetarian as written, making it a great side dish for mixed-diet gatherings.
I’m not a nutritionist, but I do believe in balance. This casserole is a celebration dish—it’s meant to be enjoyed without guilt. Pair it with lighter sides and plenty of vegetables, and you’ve got a meal that feels indulgent but isn’t over the top.
Conclusion
This make-ahead green bean casserole has become my secret weapon for holidays and busy weeknights alike. It delivers everything you love about the classic—creamy sauce, tender beans, crunchy onions—without the last-minute stress. Plus, it actually gets better as it sits, which is the hallmark of a great make-ahead dish.
I hope you’ll try this recipe and make it your own. Maybe you’ll add bacon, or swap in Gruyère, or double the onions like I always do. The beauty of this dish is that it’s forgiving, flexible, and always delicious. Whether you’re serving it at Thanksgiving dinner or a random Tuesday supper, it’s guaranteed to bring smiles to the table.
If you make this, I’d love to hear about it! Drop a comment below and tell me how it turned out—or share your own twist on the classic. And if you’re looking for more cozy, make-ahead recipes, check out my creamy slow cooker white chicken chili or this savory brown sugar bourbon glazed baby back ribs for your next gathering.
Happy cooking, friends. And remember: the best dishes are the ones made with love—and a little bit of planning ahead.
Frequently Asked Questions
Can I use frozen green beans instead of fresh?
Absolutely! Frozen green beans work perfectly in this recipe. Just thaw them completely and pat them dry with a paper towel before using. Skip the blanching step since frozen beans are already pre-cooked. Reduce the baking time by about 5 minutes to prevent them from getting too soft.
How far in advance can I assemble this casserole?
You can assemble the casserole up to 2 days in advance. Simply prepare everything as directed, cover tightly with foil, and refrigerate. When you’re ready to bake, let it sit at room temperature for 20 minutes while the oven preheats, then bake as directed. You may need to add 5-10 minutes to the baking time since you’re starting from cold.
Can I make this without the homemade sauce?
If you’re short on time, you can substitute the homemade mushroom sauce with two cans of condensed cream of mushroom soup. The texture will be slightly different—a bit thinner and less rich—but it’s still a solid option for busy holidays. If going this route, reduce the salt since canned soup is already salty.
Why are my fried onions getting soggy?
Soggy fried onions are usually caused by one of two things: overcrowding the pan when frying (which lowers the oil temperature and makes them absorb more oil) or adding them too early during baking. To keep them crispy, add the final layer of onions during the last 5 minutes of baking only. And if you’re using store-bought onions, make sure they’re fresh—check the expiration date!
Can I double this recipe for a crowd?
Yes! This recipe doubles beautifully. Use a larger baking dish (or two 9×13 dishes) and increase the baking time by about 10 minutes. Just make sure the casserole reaches an internal temperature of 165°F before serving. If you’re making it for a potluck or large gathering, this is a perfect choice because it travels well and stays warm for a while.
Pin This Recipe!

Best Make-Ahead Green Bean Casserole with Crispy Onions

A make-ahead green bean casserole with a from-scratch mushroom sauce and crispy fried onions that stays crunchy even after reheating. Perfect for holidays and stress-free entertaining.
- Prep Time: 30 minutes
- Cook Time: 45 minutes
- Total Time: 1 hour 15 minutes
- Yield: 8 servings 1x
- Category: Side Dish
- Cuisine: American
Ingredients
- 2 pounds fresh green beans, trimmed and cut into 2-inch pieces (or 2 pounds frozen green beans, thawed and patted dry)
- 1 tablespoon kosher salt (for blanching water)
- 4 tablespoons unsalted butter
- 1 pound cremini mushrooms, sliced
- 1 medium yellow onion, finely diced
- 4 cloves garlic, minced
- 1/4 cup all-purpose flour
- 2 cups whole milk, warmed
- 1 cup heavy cream
- 1 teaspoon kosher salt
- 1/2 teaspoon black pepper
- 1/4 teaspoon freshly grated nutmeg
- 2 teaspoons soy sauce
- 1/2 cup grated Parmesan cheese (optional)
- 2 large yellow onions, thinly sliced into rings (for homemade fried onions)
- 1 cup buttermilk (for homemade fried onions)
- 1 cup all-purpose flour (for homemade fried onions)
- 1 teaspoon kosher salt (for homemade fried onions)
- 1/2 teaspoon black pepper (for homemade fried onions)
- 1/2 teaspoon paprika (for homemade fried onions)
- Vegetable or canola oil, for frying (for homemade fried onions)
- Or 2 cups store-bought crispy fried onions
- 1 cup shredded sharp cheddar cheese (optional)
- Fresh parsley, chopped, for garnish
Instructions
- Bring a large pot of water to a rolling boil and add 1 tablespoon of kosher salt. Fill a large bowl with ice water. Add the green beans to the boiling water and cook for exactly 3 minutes (fresh) or 2 minutes (thawed frozen). Immediately transfer to the ice water bath. Let sit for 3-4 minutes until completely cool. Drain well and pat dry with a clean kitchen towel. Set aside.
- In a large skillet over medium-high heat, melt 2 tablespoons of butter. Add the sliced mushrooms and cook, stirring occasionally, for 6-8 minutes until they release their liquid and start to brown. Remove mushrooms from the pan and set aside.
- Reduce heat to medium and add the remaining 2 tablespoons of butter. Add the diced onion and cook for 4-5 minutes until softened. Add the minced garlic and cook for 30 seconds until fragrant. Sprinkle the flour over the onions and garlic, stirring constantly, and cook for 1-2 minutes until the flour turns light golden.
- Slowly pour in the warm milk while whisking continuously to prevent lumps. Add the heavy cream and continue whisking until the sauce thickens, about 3-4 minutes. Stir in the salt, pepper, nutmeg, soy sauce, and cooked mushrooms. If using Parmesan, add it now and stir until melted. Taste and adjust seasoning.
- If making homemade fried onions: Soak sliced onions in buttermilk for 10 minutes. In a shallow bowl, combine flour, salt, pepper, and paprika. Heat about 2 inches of oil in a deep pot to 350°F. Working in batches, dredge soaked onion rings in seasoned flour, shaking off excess, and fry for 2-3 minutes until golden brown. Transfer to a paper towel-lined plate and season with salt.
- Preheat oven to 375°F. In a large mixing bowl, combine the blanched green beans with about half of the mushroom sauce and half of the crispy fried onions (or about 1 cup of store-bought). Stir gently. Transfer to a greased 9×13 baking dish and spread into an even layer. Pour the remaining sauce over the top. If using cheddar cheese, sprinkle it over the sauce now.
- Cover the dish tightly with aluminum foil and refrigerate for up to 2 days. When ready to bake, remove from fridge and let sit at room temperature for 20 minutes while oven preheats.
- Bake covered for 25 minutes. Remove foil and bake for another 10 minutes until bubbly and golden. Sprinkle remaining crispy fried onions over the top and bake for an additional 5 minutes, uncovered, until topping is deeply golden and crunchy. Let rest for 5-10 minutes before serving.
Notes
For best results, don’t overcook the beans—3 minutes in boiling water is plenty. Warm the milk before adding to the roux to prevent lumps. Layer the onions twice: some inside the casserole and a fresh batch on top for maximum crunch. Let the casserole rest for 5-10 minutes after baking to allow the sauce to set. The casserole tastes even better on day two.
Nutrition
- Serving Size: 1 serving (about 1 c
- Calories: 320
- Sugar: 8
- Sodium: 680
- Fat: 22
- Saturated Fat: 12
- Carbohydrates: 24
- Fiber: 4
- Protein: 9
Keywords: green bean casserole, make-ahead, Thanksgiving, holiday side dish, crispy onions, mushroom sauce


