My husband had refused to eat a three-flavor cake for years. Fifteen years, if we’re being honest. “Too much going on,” he’d say whenever I’d mention a marble or rainbow layer situation. “Pick a flavor and commit.” Then, last August, I made this Neapolitan layer cake for a neighbor’s birthday—just because I had leftover strawberry puree and a new piping tip I wanted to try. I left the finished cake on the counter to set the frosting and walked away for maybe ten minutes. When I came back, there he was, standing over the cake plate with a butter knife in one hand and a chunk of the chocolate layer in the other. Caught red-handed. Or, I guess, chocolate-handed. He didn’t even try to look sorry. “That’s not fair,” he mumbled with his mouth full. “That’s three cakes in one.”
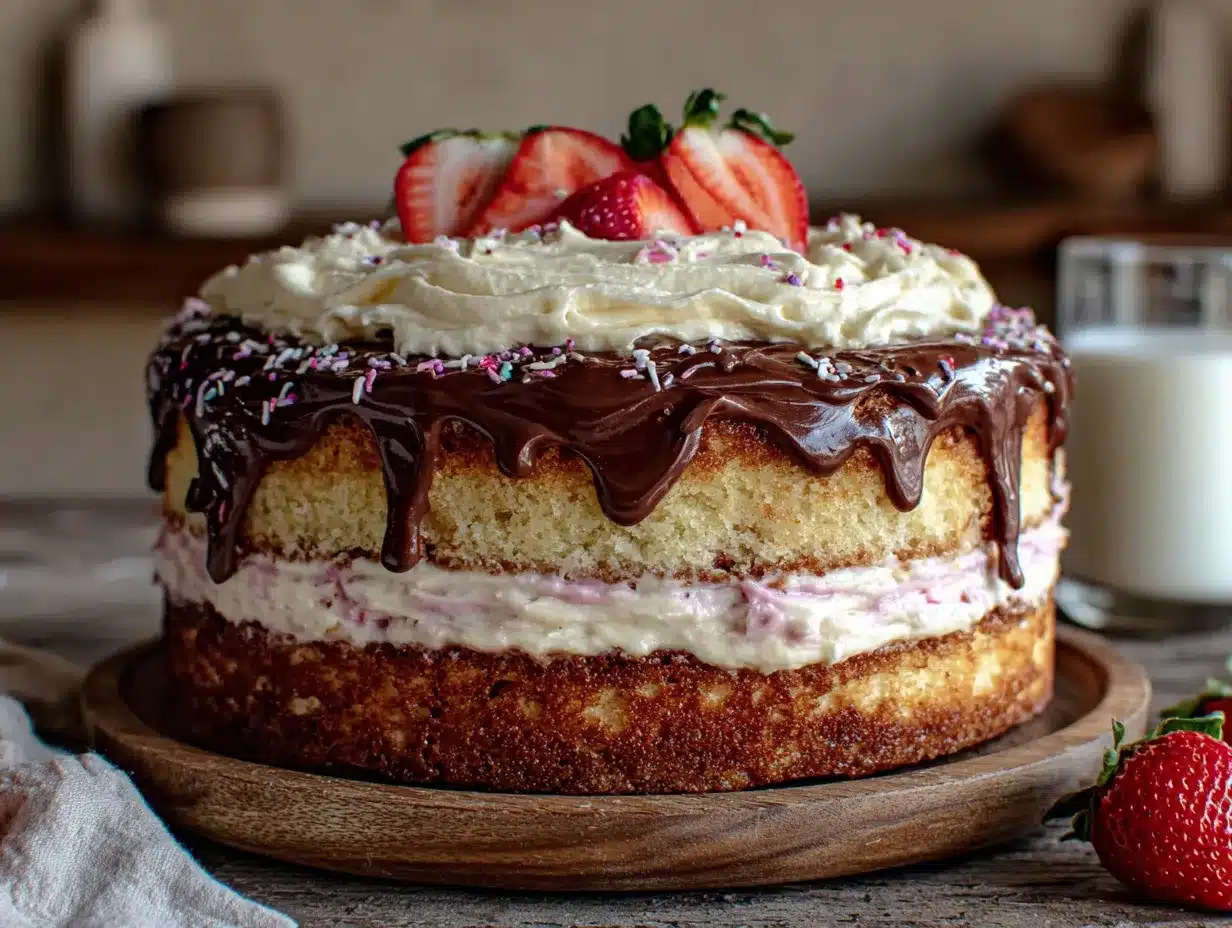
And honestly? He wasn’t wrong. That’s exactly what this Neapolitan layer cake is—three distinct, beloved cake flavors stacked into one showstopping dessert. You get a tender vanilla cake layer, a rich chocolate cake layer, and a fruity strawberry cake layer, all held together with a silky vanilla buttercream. It’s the kind of cake that makes people stop mid-conversation at a party. “Wait, which flavor am I eating?” they’ll ask, taking another bite to figure it out. I mean, I’ve seen guests eat three separate slices just to compare the layers side by side. No judgment here.
Maybe you’ve been there—standing in the baking aisle, trying to decide between vanilla, chocolate, or strawberry for a birthday cake, and feeling like you’re betraying someone no matter what you pick. This cake solves that problem completely. You don’t choose. You get all three. It’s the diplomatic solution to dessert disagreements, the peace treaty written in buttercream. And let me tell you, the first time I pulled this out of the pan and saw those three distinct stripes, I actually clapped my hands together like a cartoon character. That moment never gets old. This is the recipe that made my husband eat his words—and his cake—and it might just do the same for whoever you’re baking for.
Why You’ll Love This Recipe
Let me walk you through exactly why this Neapolitan layer cake is going to become your new go-to celebration cake. I’ve tested this recipe more times than I care to admit—somewhere around seven or eight batches—because I wanted each layer to hold its own without one flavor overpowering the others. The results speak for themselves.
- Three Flavors, One Cake: You get vanilla, chocolate, and strawberry in every single slice. No more fighting over which cake to make for birthdays, holidays, or Tuesday nights when you just need something beautiful.
- Simple Ingredients: Nothing fancy here. All-purpose flour, granulated sugar, eggs, butter, milk—the usual suspects. The strawberry layer gets its flavor from real strawberry puree, not boxed gelatin or artificial syrups.
- Perfect for Celebrations: This cake was made for birthdays, anniversaries, graduations, or any occasion where you want to hear people say “wow” when you set it on the table. It feeds a crowd, too—easily 12 to 14 servings.
- Crowd-Pleaser Across Ages: Kids love the strawberry layer. Adults argue over whether the chocolate or vanilla is better. Everyone wins. I’ve served this at three different family gatherings now, and it’s the first dessert to disappear every single time.
- Unbelievably Moist: Each layer uses a slightly different technique to stay tender, but the result is consistent—a crumb that’s soft, fluffy, and melts on your tongue. The strawberry layer in particular stays incredibly moist thanks to the fruit puree.
What makes this recipe different from every other Neapolitan cake out there? It’s the balance. I spent two weeks tweaking the chocolate-to-vanilla-to-strawberry ratio so that no single flavor dominates. Each bite gives you a distinct taste, but when you eat all three together, something magical happens. The chocolate deepens the vanilla, the strawberry brightens the chocolate, and the vanilla ties everything together. It’s not just a gimmick cake—it’s a genuinely well-developed recipe that happens to look like a work of art.
This is the kind of cake that makes you close your eyes after the first bite. I’m not exaggerating. The first time I nailed all three layers, I sat down with a slice and a cup of coffee at 10 p.m., took one forkful, and just sat there for a solid thirty seconds. It’s comfort food reimagined—familiar flavors you already love, stacked into something that feels brand new. And the best part? You don’t need to be a professional baker to pull this off. If you can measure flour and follow instructions, you can make this cake.
What Ingredients You Will Need
This Neapolitan layer cake uses three separate batters, but the ingredient lists overlap beautifully. You’ll use the same base ingredients for all three layers, with a few additions to create each distinct flavor. Here’s everything you need, broken down by layer.
For the Vanilla Layer
- 1 ½ cups (190g) all-purpose flour
- 1 ½ teaspoons baking powder
- ¼ teaspoon salt
- ½ cup (113g) unsalted butter, softened to room temperature
- 1 cup (200g) granulated sugar
- 2 large eggs, room temperature
- 2 teaspoons vanilla extract (use pure vanilla extract, not imitation—I prefer Nielsen-Massey for its rich flavor)
- ½ cup (120ml) whole milk, room temperature
For the Chocolate Layer
- 1 ½ cups (190g) all-purpose flour
- ⅓ cup (28g) unsweetened cocoa powder (I recommend Ghirardelli or Hershey’s Special Dark for a deeper chocolate flavor)
- 1 ½ teaspoons baking powder
- ¼ teaspoon salt
- ½ cup (113g) unsalted butter, softened
- 1 cup (200g) granulated sugar
- 2 large eggs, room temperature
- 1 teaspoon vanilla extract
- ½ cup (120ml) whole milk, room temperature
- 2 tablespoons hot water or hot coffee (coffee enhances the chocolate flavor without making it taste like coffee)
For the Strawberry Layer
- 1 ½ cups (190g) all-purpose flour
- 1 ½ teaspoons baking powder
- ¼ teaspoon salt
- ½ cup (113g) unsalted butter, softened
- 1 cup (200g) granulated sugar
- 2 large eggs, room temperature
- 1 teaspoon vanilla extract
- ¼ cup (60ml) whole milk, room temperature
- ⅓ cup (80ml) strawberry puree (from about 6-8 fresh or frozen strawberries, blended and strained)
- 2-3 drops pink or red food coloring (optional, for a more vibrant color)
For the Vanilla Buttercream Frosting
- 1 ½ cups (340g) unsalted butter, softened to room temperature
- 4 cups (480g) powdered sugar, sifted
- 2 teaspoons vanilla extract
- 2-3 tablespoons heavy cream or whole milk
- ¼ teaspoon salt
For Decoration
- ½ cup (60g) fresh strawberries, sliced thin
- ¼ cup (30g) chocolate shavings or curls
- Optional: sprinkles in pink, brown, and white
A quick note on the strawberry puree: don’t skip straining it. Fresh strawberry seeds can get stuck in your teeth, and they also create tiny air pockets in the cake that affect the texture. Just press the blended strawberries through a fine-mesh sieve with the back of a spoon. It takes two extra minutes and makes a huge difference. If you’re using frozen strawberries, thaw them completely first and drain off any excess liquid before blending.
For the cocoa powder, I’ve tested this with both natural and Dutch-processed cocoa. Natural cocoa gives a slightly more intense chocolate flavor that stands up better to the sweet vanilla and fruity strawberry layers. If all you have is Dutch-processed, it will still work—just expect a milder, more mellow chocolate taste.
Equipment Needed
Before we get started, let me walk you through the tools you’ll need. Nothing too crazy here—most of these are standard kitchen equipment.
- Three 8-inch round cake pans: This is non-negotiable. You need three separate pans so you can bake all the layers at once. If you only have two pans, you’ll need to wash and reuse one, which adds cooling time. I use Wilton Performance Pans—they’re affordable, distribute heat evenly, and have never let me down.
- Stand mixer or hand mixer: A stand mixer makes creaming the butter and sugar easier, but a hand mixer works just fine. You’ll be making three separate batters, so be prepared to wash the bowl between each one, or use a separate bowl for each.
- Mixing bowls: At least three medium bowls for dry ingredients and three large bowls for wet ingredients. I use glass Pyrex bowls because they don’t retain odors.
- Whisk and rubber spatula: For mixing dry ingredients and folding batters.
- Fine-mesh sieve: For straining the strawberry puree. A small mesh strainer works perfectly.
- Parchment paper: Cut circles to line the bottom of each cake pan. This guarantees your cakes release cleanly every time.
- Cooling rack: A wire rack is essential for cooling cakes evenly. Stacking hot cakes traps steam and makes them soggy.
- Offset spatula: For frosting. A straight spatula works too, but an offset one gives you more control.
- Cake stand or turntable: Not required, but a turntable makes frosting much easier and more professional-looking.
- Serrated knife: For leveling the cake layers if they dome during baking.
If you don’t have three 8-inch pans, you can use 9-inch pans instead—just reduce the baking time by 3-5 minutes and expect thinner layers. The cake will still taste great, it just won’t be as tall and dramatic.
Preparation Method
Okay, let’s bake this beauty. I’ll walk you through each step carefully, including all the little tricks I’ve picked up from my many test batches. Set aside about 2 hours total—30 minutes of active prep, 25-30 minutes of baking, and about an hour for cooling and assembly.
Step 1: Prep Your Pans and Oven
Preheat your oven to 350°F (175°C). Grease three 8-inch round cake pans with butter or non-stick spray, then line the bottoms with parchment paper circles. Dust the sides lightly with flour and tap out the excess. This double-coating method ensures your cakes release cleanly every single time. Trust me on this—I learned the hard way after losing half a cake layer to a stuck pan.
Step 2: Make the Vanilla Layer Batter
In a medium bowl, whisk together 1 ½ cups flour, 1 ½ teaspoons baking powder, and ¼ teaspoon salt. Set aside. In a large bowl, beat ½ cup softened butter and 1 cup sugar together on medium speed until light and fluffy, about 3 minutes. Scrape the bowl down once during mixing. Add 2 eggs one at a time, beating well after each addition. Mix in 2 teaspoons vanilla extract. Reduce speed to low and add the flour mixture in three additions, alternating with ½ cup milk, starting and ending with the flour. Mix just until combined—overmixing makes the cake tough. Pour the batter into one prepared pan and spread it even with a spatula.
Step 3: Make the Chocolate Layer Batter
In a medium bowl, whisk together 1 ½ cups flour, ⅓ cup cocoa powder, 1 ½ teaspoons baking powder, and ¼ teaspoon salt. In a large bowl, cream ½ cup butter and 1 cup sugar until light and fluffy, about 3 minutes. Add 2 eggs one at a time, then mix in 1 teaspoon vanilla. Add the flour mixture in three additions, alternating with ½ cup milk. Finally, stir in 2 tablespoons hot water or hot coffee—this thins the batter slightly and deepens the chocolate flavor. Pour into the second prepared pan and spread evenly.
Step 4: Make the Strawberry Layer Batter
In a medium bowl, whisk together 1 ½ cups flour, 1 ½ teaspoons baking powder, and ¼ teaspoon salt. In a large bowl, cream ½ cup butter and 1 cup sugar until fluffy, about 3 minutes. Add 2 eggs one at a time, then mix in 1 teaspoon vanilla. Add the flour mixture in three additions, alternating with ¼ cup milk. Fold in ⅓ cup strawberry puree and 2-3 drops food coloring if using. The batter will be slightly thicker than the other two—that’s normal. Pour into the third prepared pan and spread evenly.
Step 5: Bake All Three Layers
Place all three pans in the oven, spacing them evenly. Bake for 22-27 minutes, rotating the pans halfway through. The cakes are done when a toothpick inserted in the center comes out clean or with just a few moist crumbs. The chocolate layer may take a minute or two longer than the vanilla and strawberry layers—check it separately. Let the cakes cool in their pans for 10 minutes, then run a knife around the edges and turn them out onto a wire rack. Remove the parchment paper and let them cool completely, about 1 hour. Do not frost warm cakes—the buttercream will melt and slide right off.
Step 6: Make the Buttercream Frosting
In a large bowl, beat 1 ½ cups softened butter on medium speed until smooth and creamy, about 2 minutes. Gradually add 4 cups sifted powdered sugar, one cup at a time, beating on low speed after each addition. Add 2 teaspoons vanilla extract, ¼ teaspoon salt, and 2 tablespoons heavy cream. Beat on medium-high speed for 3-4 minutes until light, fluffy, and spreadable. If the frosting is too thick, add another tablespoon of cream. If it’s too thin, add more powdered sugar a tablespoon at a time.
Step 7: Assemble the Cake
If any of your cake layers have domed tops, use a serrated knife to level them. Place the vanilla layer on your cake stand or serving plate. Spread about ¾ cup of buttercream evenly on top. Place the chocolate layer on top of the vanilla, pressing gently to adhere. Spread another ¾ cup of buttercream on the chocolate layer. Top with the strawberry layer, flat side up. Apply a thin crumb coat—a thin layer of frosting over the entire cake to seal in crumbs—and refrigerate for 20 minutes. Then apply the final, thicker layer of frosting, smoothing it with an offset spatula. Decorate with fresh strawberry slices and chocolate shavings on top.
Cooking Tips & Techniques
After making this cake more times than I’d like to count, I’ve collected a few hard-won lessons that will save you time and frustration. Let me share them so you don’t make the same mistakes I did.
Room temperature ingredients matter more than you think. Cold butter doesn’t cream properly with sugar, and cold milk can seize up your batter. Take your butter, eggs, and milk out of the fridge about 45 minutes before you start baking. If you forgot to plan ahead, cut the butter into small cubes and let it sit for 15 minutes, and place the eggs in a bowl of warm water for 5 minutes. It’s not quite as good as natural room temperature, but it works in a pinch.
Weigh your flour if you can. I know not everyone has a kitchen scale, but scooping flour directly from the bag can give you 20-30% more flour than the recipe calls for, which makes your cake dry and dense. If you’re measuring by volume, spoon the flour into your measuring cup and level it off with a knife. Don’t scoop—that’s the number one mistake home bakers make.
Don’t overmix the batters. Once you add the flour, mix just until you don’t see any more white streaks. Overmixing develops gluten, and too much gluten makes cake layers tough and rubbery. The strawberry batter is especially prone to this because the puree adds extra moisture that makes it tempting to keep mixing. Stop a few turns early and finish folding by hand with a rubber spatula.
Bake the layers on the same rack position. If your oven has hot spots—and most do—rotate the pans halfway through baking. I forgot to do this once and ended up with one layer that was perfectly baked, one that was slightly underdone, and one that was practically a hockey puck. The rotating trick distributes the heat evenly across all three pans.
Let the cake chill before slicing. I know it’s tempting to cut into it right away, but a fully assembled Neapolitan cake needs at least 30 minutes in the fridge to set the frosting and let the layers settle. If you slice it too soon, the layers can slide apart and the frosting will squish out the sides. Patience pays off here—I promise.
Variations & Adaptations
One of the best things about this Neapolitan layer cake is how adaptable it is. Here are a few ways I’ve customized it over the years for different occasions and dietary needs.
Gluten-Free Version: Substitute the all-purpose flour with a 1:1 gluten-free baking flour blend that contains xanthan gum. I’ve had good results with Bob’s Red Mill Gluten-Free 1-to-1 Baking Flour. The texture will be slightly more tender and a bit crumblier, but the flavor is spot-on. Add an extra tablespoon of milk to each batter to compensate for the drier gluten-free flour.
Dairy-Free Adaptation: Replace the butter in both the cake and frosting with a high-quality vegan butter stick—not margarine, but specifically vegan butter. Miyoko’s and Country Crock Plant Butter work well. Use oat milk or almond milk instead of whole milk in the batters, and use a dairy-free heavy cream alternative in the frosting. The strawberry layer is naturally dairy-free if you make these swaps.
Strawberry-Only Cake: If you want to skip the three-flavor thing and just make a straight strawberry cake, double the strawberry puree to ⅔ cup and omit the food coloring. Bake two strawberry layers instead of three different ones. It’s a fantastic standalone cake that’s perfect for spring and summer birthdays.
Chocolate-Forward Version: For serious chocolate lovers, add ¼ cup of mini chocolate chips to the chocolate layer batter and use a chocolate buttercream instead of vanilla. Just add ¼ cup cocoa powder to the buttercream recipe and increase the cream by 1 tablespoon. The contrast between the sweet vanilla and strawberry layers with the deeply chocolate frosting is incredible.
Cupcake Adaptation: This recipe makes about 24 cupcakes—8 of each flavor. Divide the batters into lined muffin tins and bake at 350°F for 16-18 minutes. Frost each cupcake with vanilla buttercream and top with a small strawberry slice or chocolate shaving. They’re adorable for parties and much easier to serve than a full layer cake.
Serving & Storage Suggestions
This Neapolitan layer cake is at its absolute best when served at room temperature. Cold cake from the fridge will taste fine, but the buttercream will be firm and the cake layers will be slightly less tender. Let the cake sit out for about 20-30 minutes before slicing and serving. The flavors really bloom at room temperature—the strawberry becomes more pronounced, the chocolate deepens, and the vanilla ties everything together beautifully.
For presentation, I like to garnish the top with a ring of fresh strawberry slices around the edge and a pile of chocolate shavings in the center. It gives a visual hint of what’s inside each slice. If you’re feeling extra fancy, you can pipe a border of buttercream rosettes around the bottom edge of the cake. A few fresh mint leaves add a nice pop of green color too.
This cake pairs wonderfully with a cold glass of milk, a hot cup of coffee, or even a scoop of vanilla ice cream on the side. For adult gatherings, a glass of cold milk punch or a light Prosecco complements the fruity and chocolate notes without overwhelming them.
Storage Instructions: Store leftover cake in an airtight container in the refrigerator for up to 5 days. The cake actually tastes even better on day two—the flavors meld together and the strawberry layer becomes even more moist. Just make sure the container is sealed well, or the cake will absorb any fridge odors. If you live in a humid environment, the strawberry layer can sometimes develop condensation on the surface, so pat it dry gently with a paper towel before serving leftovers.
Freezing Instructions: You can freeze this cake whole or in individual slices. Wrap the cake tightly in plastic wrap, then a layer of aluminum foil, and freeze for up to 3 months. To thaw, transfer the wrapped cake to the refrigerator overnight. Do not unwrap it until it’s fully thawed, or condensation will form on the frosting and make it sticky. Individual slices thaw in about 30 minutes at room temperature—perfect for a quick dessert emergency.
Reheating Tip: If you prefer your cake slightly warm, microwave individual slices for 10-15 seconds. The buttercream will soften and the cake will taste freshly baked. Just don’t overdo it, or the frosting will melt completely.
Nutritional Information & Benefits
I’m not going to pretend this Neapolitan layer cake is health food—it’s a celebration cake, and it’s meant to be enjoyed as a treat. But I do think it’s worth knowing what’s in your food, especially when you’re feeding a family. Here’s the estimated nutritional breakdown for one slice (based on 14 servings):
| Nutrient | Amount Per Slice |
|---|---|
| Calories | 485 |
| Total Fat | 26g |
| Saturated Fat | 16g |
| Cholesterol | 95mg |
| Sodium | 280mg |
| Total Carbohydrates | 60g |
| Dietary Fiber | 1g |
| Sugars | 42g |
| Protein | 5g |
On the plus side, this cake does use real butter, fresh eggs, and real strawberries—no artificial flavors or preservatives here. The strawberry layer provides a small amount of vitamin C and antioxidants from the fruit puree. And because you’re making it from scratch, you control exactly what goes into it. You can reduce the sugar by ¼ cup in each layer if you prefer a less sweet cake, or use a sugar substitute like monk fruit sweetener for a lower-sugar version.
If you’re watching your intake, a thin slice goes a long way. The three flavors are so distinct and satisfying that a smaller portion feels just as indulgent as a large one. I usually cut this cake into 14 thin slices rather than 12 thick ones, and nobody has ever complained about the portion size.
Conclusion
This Neapolitan layer cake is more than just a pretty dessert—it’s a solution to the age-old problem of choosing between chocolate, vanilla, and strawberry. With one recipe, you get all three, baked into a stunning layer cake that looks like it came from a fancy bakery but costs a fraction of the price. The flavors are balanced, the texture is tender, and the presentation is guaranteed to impress.
I love this cake because it never fails to spark joy. Every time I serve it, someone takes a photo. Every time I slice into it, someone gasps at the three distinct layers. And every time someone takes that first bite, they close their eyes and smile. That’s the kind of reaction you just don’t get from a box mix.
I’d love to hear how your Neapolitan layer cake turns out. Did you try a variation? Did your family fight over which layer was best? Drop a comment below and let me know—I read every single one, and I’m always looking for new ideas to test in my kitchen. And if you loved this recipe, share it with a friend who loves baking but needs a showstopper. Trust me, they’ll thank you.
Happy baking, friends. Go make something beautiful.
Frequently Asked Questions
Can I use cake flour instead of all-purpose flour?
Yes, you absolutely can. Cake flour has a lower protein content than all-purpose flour, which results in a more tender, delicate crumb. If you’re using cake flour, use 1 ½ cups plus 2 tablespoons per layer instead of the 1 ½ cups called for, because cake flour is lighter and you need slightly more by volume. The texture will be softer and more velvety—perfect for this kind of celebration cake.
Do I have to use food coloring in the strawberry layer?
No, the food coloring is completely optional. The strawberry puree gives the cake a pale pinkish hue naturally, but it’s subtle—more of a light blush than a vibrant pink. If you want that classic Neapolitan pink stripe, add 2-3 drops of pink or red gel food coloring. If you prefer a more natural look, skip it entirely. The taste is the same either way.
Can I make this cake in advance for a party?
Definitely. This cake is actually better when made a day ahead. Bake the layers, let them cool completely, wrap each one tightly in plastic wrap, and store them at room temperature overnight. Assemble and frost the cake the next day. The layers will be even more moist and flavorful after resting. You can also freeze the unfrosted layers for up to 3 months—just thaw them in the refrigerator overnight before assembling.
Why did my strawberry layer turn out dense and heavy?
This usually happens for one of two reasons. First, the strawberry puree might have been too watery. If you used frozen strawberries that weren’t fully thawed and drained, the extra liquid can make the batter heavy. Second, you might have overmixed the batter. The strawberry puree makes the batter feel thicker than the other two, which tempts you to keep mixing. Stop as soon as the flour disappears. If your cake still turns out dense, try reducing the puree to ¼ cup next time and increasing the milk to ⅓ cup.
How do I get clean slices without the layers smearing?
Use a long, sharp serrated knife and chill the cake for at least 30 minutes before slicing. Run the knife under hot water, dry it off, then make your cut. The heat helps the knife glide through the frosting without dragging it. Wipe the knife clean between each slice. For the neatest presentation, slice the cake when it’s cold, then let the slices come to room temperature before serving.
Pin This Recipe!
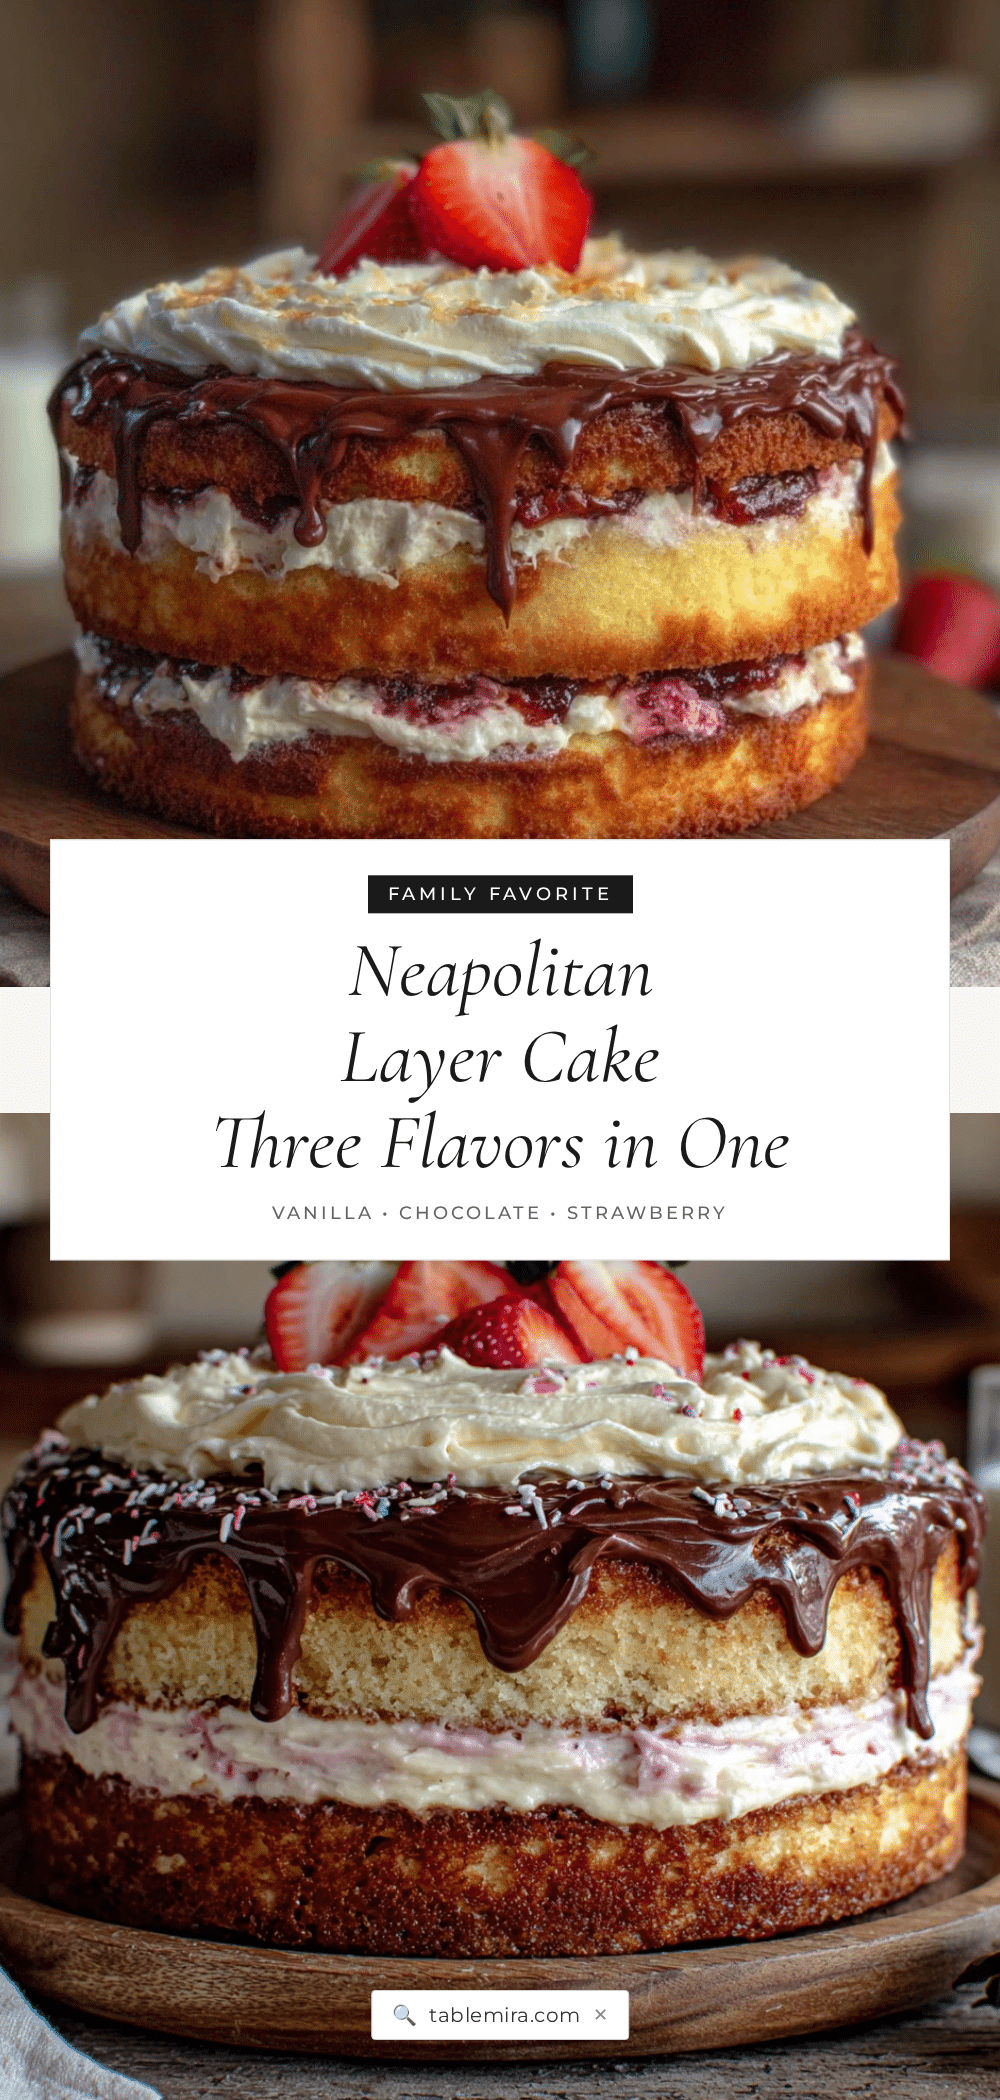
Best Homemade Neapolitan Layer Cake: Easy 3-Flavor Recipe
A stunning three-layer cake featuring vanilla, chocolate, and strawberry cake layers held together with silky vanilla buttercream. This showstopping dessert solves the dilemma of choosing just one flavor, offering all three in every slice.
- Prep Time: 30 minutes
- Cook Time: 25 minutes
- Total Time: 2 hours
- Yield: 14 servings 1x
- Category: Dessert
- Cuisine: American
Ingredients
- 1 ½ cups (190g) all-purpose flour
- 1 ½ teaspoons baking powder
- ¼ teaspoon salt
- ½ cup (113g) unsalted butter, softened to room temperature
- 1 cup (200g) granulated sugar
- 2 large eggs, room temperature
- 2 teaspoons vanilla extract
- ½ cup (120ml) whole milk, room temperature
- 1 ½ cups (190g) all-purpose flour
- ⅓ cup (28g) unsweetened cocoa powder
- 1 ½ teaspoons baking powder
- ¼ teaspoon salt
- ½ cup (113g) unsalted butter, softened
- 1 cup (200g) granulated sugar
- 2 large eggs, room temperature
- 1 teaspoon vanilla extract
- ½ cup (120ml) whole milk, room temperature
- 2 tablespoons hot water or hot coffee
- 1 ½ cups (190g) all-purpose flour
- 1 ½ teaspoons baking powder
- ¼ teaspoon salt
- ½ cup (113g) unsalted butter, softened
- 1 cup (200g) granulated sugar
- 2 large eggs, room temperature
- 1 teaspoon vanilla extract
- ¼ cup (60ml) whole milk, room temperature
- ⅓ cup (80ml) strawberry puree (from about 6–8 fresh or frozen strawberries, blended and strained)
- 2–3 drops pink or red food coloring (optional)
- 1 ½ cups (340g) unsalted butter, softened to room temperature
- 4 cups (480g) powdered sugar, sifted
- 2 teaspoons vanilla extract
- 2–3 tablespoons heavy cream or whole milk
- ¼ teaspoon salt
- ½ cup (60g) fresh strawberries, sliced thin
- ¼ cup (30g) chocolate shavings or curls
- Optional: sprinkles in pink, brown, and white
Instructions
- Preheat your oven to 350°F (175°C). Grease three 8-inch round cake pans with butter or non-stick spray, then line the bottoms with parchment paper circles. Dust the sides lightly with flour and tap out the excess.
- Make the vanilla layer batter: In a medium bowl, whisk together 1 ½ cups flour, 1 ½ teaspoons baking powder, and ¼ teaspoon salt. Set aside. In a large bowl, beat ½ cup softened butter and 1 cup sugar together on medium speed until light and fluffy, about 3 minutes. Scrape the bowl down once during mixing. Add 2 eggs one at a time, beating well after each addition. Mix in 2 teaspoons vanilla extract. Reduce speed to low and add the flour mixture in three additions, alternating with ½ cup milk, s…
- Make the chocolate layer batter: In a medium bowl, whisk together 1 ½ cups flour, ⅓ cup cocoa powder, 1 ½ teaspoons baking powder, and ¼ teaspoon salt. In a large bowl, cream ½ cup butter and 1 cup sugar until light and fluffy, about 3 minutes. Add 2 eggs one at a time, then mix in 1 teaspoon vanilla. Add the flour mixture in three additions, alternating with ½ cup milk. Finally, stir in 2 tablespoons hot water or hot coffee. Pour into the second prepared pan and spread evenly.
- Make the strawberry layer batter: In a medium bowl, whisk together 1 ½ cups flour, 1 ½ teaspoons baking powder, and ¼ teaspoon salt. In a large bowl, cream ½ cup butter and 1 cup sugar until fluffy, about 3 minutes. Add 2 eggs one at a time, then mix in 1 teaspoon vanilla. Add the flour mixture in three additions, alternating with ¼ cup milk. Fold in ⅓ cup strawberry puree and 2-3 drops food coloring if using. Pour into the third prepared pan and spread evenly.
- Bake all three layers: Place all three pans in the oven, spacing them evenly. Bake for 22-27 minutes, rotating the pans halfway through. The cakes are done when a toothpick inserted in the center comes out clean or with just a few moist crumbs. Let the cakes cool in their pans for 10 minutes, then run a knife around the edges and turn them out onto a wire rack. Remove the parchment paper and let them cool completely, about 1 hour.
- Make the buttercream frosting: In a large bowl, beat 1 ½ cups softened butter on medium speed until smooth and creamy, about 2 minutes. Gradually add 4 cups sifted powdered sugar, one cup at a time, beating on low speed after each addition. Add 2 teaspoons vanilla extract, ¼ teaspoon salt, and 2 tablespoons heavy cream. Beat on medium-high speed for 3-4 minutes until light, fluffy, and spreadable. If the frosting is too thick, add another tablespoon of cream. If it’s too thin, add more powdered …
- Assemble the cake: If any of your cake layers have domed tops, use a serrated knife to level them. Place the vanilla layer on your cake stand or serving plate. Spread about ¾ cup of buttercream evenly on top. Place the chocolate layer on top of the vanilla, pressing gently to adhere. Spread another ¾ cup of buttercream on the chocolate layer. Top with the strawberry layer, flat side up. Apply a thin crumb coat—a thin layer of frosting over the entire cake to seal in crumbs—and refrigerate for 20…
Notes
Room temperature ingredients are crucial for proper creaming and batter consistency. Weigh flour for accuracy if possible. Do not overmix batters to avoid tough cake. Bake layers on the same rack position and rotate pans halfway through. Chill cake for at least 30 minutes before slicing for clean cuts. The cake tastes even better on day two as flavors meld.
Nutrition
- Serving Size: 1 slice
- Calories: 485
- Sugar: 42
- Sodium: 280
- Fat: 26
- Saturated Fat: 16
- Carbohydrates: 60
- Fiber: 1
- Protein: 5
Keywords: Neapolitan cake, layer cake, vanilla cake, chocolate cake, strawberry cake, birthday cake, celebration cake, three-flavor cake


