My husband took one bite of this cake, looked me dead in the eye, and said, “Don’t ever lose this recipe.” That was three weeks ago. He has asked for it four times since. Not because I’m some kind of dessert genius, but because this cake does something that most chocolate-peanut butter desserts don’t—it stays ridiculously moist for days, the filling seeps into every single bite, and it tastes like you spent hours on it when you really didn’t.
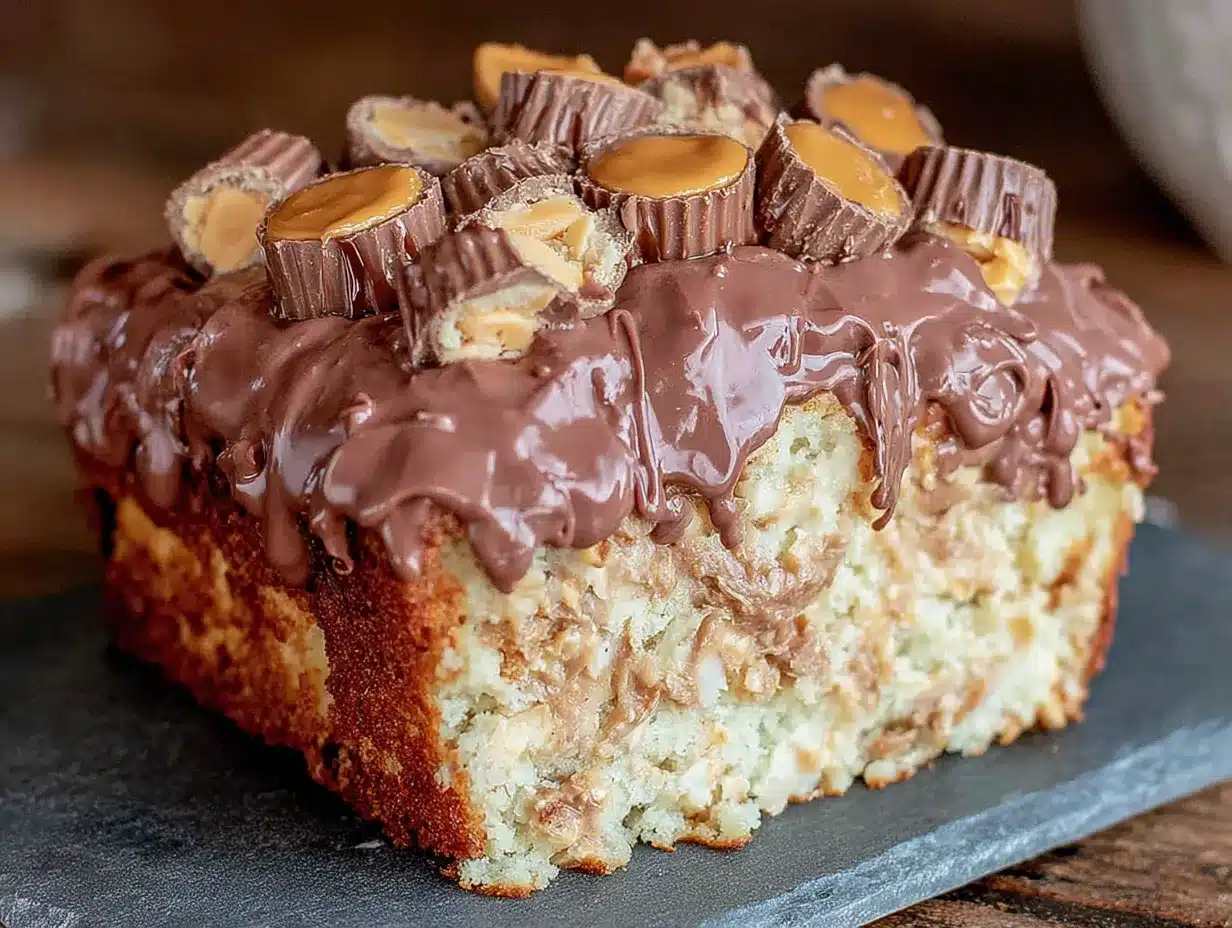
This isn’t just another poke cake. The combination of fudgy chocolate cake, sweetened condensed milk infused with peanut butter, and a layer of melted Reese’s cups creates something that honestly feels a little unfair. You get the richness of a bakery-style dessert with the effort level of a boxed mix. And let’s be real—sometimes that’s exactly what we need.
I brought this to a potluck last month, and three people asked for the recipe before I even set the serving dish down. One of them texted me the next morning saying her kids finished the leftovers for breakfast. No judgment here. If you’re going to have cake for breakfast, this is the one to do it with.
What I love most about this cake is how forgiving it is. You don’t need a stand mixer, you don’t need fancy piping skills, and you definitely don’t need to stress about it looking perfect. The poke holes do half the work for you, and the topping hides any mistakes. It’s the kind of dessert that makes you look like you’ve got it together, even when you’re just trying to get dinner on the table.
Why You’ll Love This Recipe
- Quick & Easy: Comes together in about 40 minutes of active time, then the fridge does the rest. Perfect for busy weeknights or last-minute dessert emergencies.
- Simple Ingredients: You probably already have most of this in your pantry. No weird extracts or specialty flours here.
- Perfect for Parties: This cake travels well, feeds a crowd, and always gets the “ooh” reaction when you cut into it.
- Crowd-Pleaser: Kids love it, adults love it, even my dad who “doesn’t do sweets” had two slices.
- Unbelievably Delicious: The texture is what gets you. The condensed milk and peanut butter soak into the cake and make it almost pudding-like in some spots, while the chocolate frosting and Reese’s cups on top add that classic crunch.
What makes this different from every other chocolate poke cake out there? It’s the double hit of peanut butter. Most recipes just drizzle some peanut butter into the filling and call it a day. This one uses creamy peanut butter in both the filling and the frosting, plus actual Reese’s cups folded into the top layer. Every bite has that salty-sweet thing going on, and honestly, that’s where the magic lives.
What Ingredients You Will Need
This recipe uses simple, everyday ingredients that come together to create something that tastes way more complicated than it is. Most of these are pantry staples, which is exactly what you want when a dessert craving hits at 8 p.m.
For the Cake Base
- 1 box chocolate cake mix (I prefer Duncan Hines Devil’s Food or Betty Crocker Super Moist—both give a fudgy crumb that holds up well to the filling)
- Eggs, oil, and water (as called for on the cake mix box—usually 3 eggs, 1/3 cup oil, and 1 cup water)
For the Peanut Butter Filling
- 1 can (14 oz) sweetened condensed milk (this is non-negotiable—don’t use evaporated milk, they’re not the same)
- 1/2 cup creamy peanut butter (I use Jif or Skippy for consistency; natural peanut butter that separates can make the filling grainy)
- 1 teaspoon vanilla extract (adds warmth and rounds out the peanut butter flavor)
For the Chocolate Ganache Topping
- 1 cup semi-sweet chocolate chips (Guittard or Ghirardelli melt the smoothest)
- 1/2 cup heavy cream (you can substitute half-and-half in a pinch, but the ganache won’t set as firmly)
- 2 tablespoons unsalted butter (adds shine and helps the ganache stay soft on top)
For the Reese’s Layer
- 12-15 mini Reese’s peanut butter cups (chopped roughly—some chunks for texture, some smaller pieces for even distribution)
- 1/4 cup creamy peanut butter (for drizzling on top before chilling)
Optional Garnishes
- Flaky sea salt (trust me on this one—it cuts through the sweetness and makes the peanut butter pop)
- Whipped cream (for serving, if you want to get fancy)
Equipment Needed
You don’t need a bakery setup for this one. Here’s what you’ll actually use:
- 9×13-inch baking pan (glass or metal both work—just adjust baking time slightly if using dark metal)
- Mixing bowls (one large for the cake batter, one medium for the filling, one small for the ganache)
- Whisk or electric hand mixer (hand mixer makes the cake batter quicker, but a whisk works fine)
- Wooden spoon or spatula (for poking holes—the round handle of a wooden spoon works perfectly)
- Saucepan (for heating the cream for ganache)
- Measuring cups and spoons
- Rubber spatula (for scraping every last bit of that condensed milk mixture—don’t waste it)
If you don’t have a 9×13, you can use two 8-inch round pans, but you’ll need to adjust the filling amounts and the cake won’t be as tall. I’ve also made this in a disposable aluminum pan for potlucks, and it works great—just watch the baking time since aluminum heats up faster.
Preparation Method
Step 1: Bake the Cake
Preheat your oven to 350°F (175°C). Grease your 9×13 pan well—I use a butter wrapper or cooking spray with flour. Prepare the chocolate cake mix according to the package directions. Pour the batter into the prepared pan and spread it evenly. Bake for 28-33 minutes, or until a toothpick inserted in the center comes out with a few moist crumbs (not wet batter). Let the cake cool in the pan for 15-20 minutes—you want it warm but not hot when you poke the holes.
Step 2: Make the Peanut Butter Filling
While the cake cools, make the filling. In a medium bowl, whisk together the sweetened condensed milk, 1/2 cup creamy peanut butter, and vanilla extract. It should be smooth and pourable—if it’s too thick, microwave it for 10-15 seconds and stir again. Don’t skip this step; the warmth helps it soak into the cake better.
Step 3: Poke the Holes
Using the round handle of a wooden spoon, poke holes all over the warm cake. Space them about 1 inch apart. Go all the way to the bottom of the pan—don’t be shy. You want the filling to reach every layer. I usually poke about 30-35 holes. If some cake crumbs come up, just brush them off.
Step 4: Pour the Filling
Slowly pour the peanut butter filling over the entire cake, making sure it gets into every hole. Use a spatula to spread it evenly across the surface. Some filling will pool on top—that’s fine. Let the cake sit for 10 minutes so the filling can fully absorb.
Step 5: Make the Ganache
In a small saucepan, heat the heavy cream over medium heat until it just begins to simmer (small bubbles around the edges, not a full boil). Remove from heat and pour over the chocolate chips in a small bowl. Let it sit for 2 minutes, then stir until smooth. Add the butter and stir until melted and glossy. Let the ganache cool for 5 minutes before pouring—it should be thick but pourable.
Step 6: Assemble the Topping
Pour the ganache over the cake and spread it evenly. While the ganache is still wet, sprinkle the chopped Reese’s cups over the top. Warm the remaining 1/4 cup peanut butter in the microwave for about 20 seconds, then drizzle it over the Reese’s cups in a zigzag pattern. If you’re using flaky sea salt, sprinkle it now.
Step 7: Chill and Set
Cover the cake with plastic wrap or foil and refrigerate for at least 4 hours, preferably overnight. This step is crucial—the cake needs time to absorb all that filling and for the ganache to set properly. I know it’s hard to wait, but trust me, it’s worth it.
Cooking Tips & Techniques
Let me save you from my own mistakes. The first time I made this, I poked the holes while the cake was still too hot, and the whole thing kind of crumbled apart. Wait until the cake is just warm to the touch—about 15-20 minutes out of the oven. The holes should be clean and the cake should hold its shape.
Another thing I learned the hard way: don’t overfill the holes. If you dump all the filling in one spot, it’ll just pool on top and not soak in evenly. Pour slowly and let the filling find its way. You can always add more after a minute or two.
For the ganache, here’s a trick I picked up from a pastry chef friend: if your chocolate seizes (gets grainy and stiff), you overheated the cream. Always take it off the heat before it boils. And if your ganache is too thick, add warm cream a tablespoon at a time and stir until it loosens up.
Timing-wise, I like to bake the cake in the evening, let it chill overnight, and serve it the next day. The flavors actually get better after 24 hours. The peanut butter mellows out and the chocolate deepens. Plus, it’s one less thing to worry about when you’re hosting.
If you’re in a rush, you can speed up the chilling process by putting the cake in the freezer for about 1.5 hours instead of the fridge for 4. Just keep an eye on it—you want the ganache set, not rock hard.
Variations & Adaptations
Gluten-Free Version
Use a gluten-free chocolate cake mix (King Arthur Flour makes a good one) and double-check your Reese’s cups—most are gluten-free, but always read the label. The filling and ganache are naturally gluten-free, so this swap is easier than you’d think.
Extra Peanut Butter Punch
If you’re a peanut butter fanatic like me, add 1/4 cup of peanut butter powder (like PB2) to the cake mix before baking. It intensifies the peanut flavor without making the cake dry. You can also swirl extra peanut butter into the ganache before pouring it over the top.
Dark Chocolate Lover’s Twist
Swap the semi-sweet chocolate chips for dark chocolate (60-70% cacao) in the ganache. The bitterness balances the sweetened condensed milk beautifully. I’ve also used dark chocolate Reese’s cups for the topping, and it takes this cake to a whole new level.
No-Bake Adaptation
This one’s a little unconventional, but if you don’t want to turn on the oven, you can use a store-bought chocolate loaf cake or even chocolate pound cake as the base. Just slice it, arrange it in a dish, poke holes, and proceed with the filling and topping. It won’t be as fluffy, but it’ll still taste amazing.
Serving & Storage Suggestions
This cake is best served cold or at room temperature. I prefer it straight from the fridge—the filling firms up and the texture gets almost fudge-like. If you like a softer cake, let it sit out for 15-20 minutes before serving.
For presentation, I like to cut the cake into squares and serve each piece with a dollop of whipped cream and a drizzle of chocolate syrup. It looks fancy with almost no effort. Pair it with a glass of cold milk or a hot coffee—the contrast is perfect.
If you’re in the mood for something cozy, this cake goes surprisingly well with a creamy pumpkin cold foam latte. The chocolate and peanut butter play nicely with the pumpkin spice, and the cold foam adds a nice creamy texture alongside the cake.
Storage-wise, keep the cake covered in the refrigerator for up to 5 days. It actually gets better on days 2 and 3 as the flavors meld. You can freeze individual slices for up to 3 months—just wrap them tightly in plastic wrap and then foil. Thaw in the fridge overnight before serving.
For reheating, I don’t recommend microwaving the whole slice. Instead, microwave individual portions for about 15 seconds if you want a warm, melty experience. Or just eat it cold—I won’t judge.
Nutritional Information & Benefits
Let’s be honest—this is a treat, not a health food. But here’s what you’re working with per slice (based on 12 servings): approximately 480 calories, 28g fat, 55g carbohydrates, 8g protein, and 35g sugar. The peanut butter does add some protein and healthy fats, and the dark chocolate in the ganache provides antioxidants. But mostly, this is about joy, not macros.
If you’re looking for a slightly lighter option, you can use a sugar-free cake mix and sugar-free chocolate chips. The sweetened condensed milk is harder to replace, but there are dairy-free and lower-sugar versions available now. Just know the texture will be slightly different.
For those with peanut allergies, you can substitute sunflower seed butter (like SunButter) in the filling and drizzle. Just be aware that the color will be different—more greenish-brown—but the taste is still great. And obviously, skip the Reese’s cups on top.
This recipe is vegetarian and can be made dairy-free with a few swaps: use a dairy-free cake mix, coconut cream instead of heavy cream for the ganache, and dairy-free chocolate chips. The filling works with canned coconut milk (full fat) instead of sweetened condensed milk, but it won’t be as thick.
Conclusion
This Reese’s Peanut Butter Cup Poke Cake is one of those recipes that earns a permanent spot in your rotation. It’s the kind of dessert that people request for birthdays, potlucks, and random Tuesday nights when you just need something chocolatey and good. The best part? It looks like you spent hours on it, but the secret is that the cake mix and the poke method do most of the work for you.
I love this recipe because it reminds me that you don’t have to be a professional baker to make something that feels special. It’s forgiving, it’s flexible, and it always delivers. Whether you’re making it for a crowd or just because you deserve a treat, this cake never disappoints.
If you try this recipe, I’d love to hear how it turned out. Leave a comment below and tell me about your variations, your serving ideas, or just how many slices you ate in one sitting. No judgment here—I’ve been there. And if you’re looking for another easy dessert that feeds a crowd, check out these chewy peanut butter chocolate chip granola bars—they’re perfect for when you want something sweet but slightly more portable.
Frequently Asked Questions
Can I make this cake ahead of time?
Absolutely. In fact, I recommend it. Make the cake a day ahead, let it chill overnight, and it’ll taste even better. The flavors meld and the texture gets perfectly fudgy. Just keep it covered in the fridge until you’re ready to serve.
Can I use a homemade chocolate cake instead of a box mix?
Yes, you can. Use your favorite homemade chocolate cake recipe, but make sure it’s sturdy enough to hold up to the filling. Lighter, airier cakes might get soggy. A dense, fudgy chocolate cake works best. Just adjust the baking time as needed.
Why did my ganache turn out grainy?
This usually happens when the cream is too hot or when water gets into the chocolate. Always heat the cream just until it simmers—don’t let it boil. And make sure your bowl and utensils are completely dry. If your ganache does seize, you can try whisking in a tablespoon of warm cream at a time until it smooths out.
Can I use crunchy peanut butter instead of creamy?
You can, but I don’t recommend it for the filling. The crunchy bits can make the texture uneven, and they might not soak into the cake holes as well. Save the crunchy peanut butter for the topping if you want some extra texture, but stick with creamy for the filling.
How do I get clean slices without the cake falling apart?
Use a sharp knife and wipe it clean between each cut. For the cleanest slices, refrigerate the cake for at least 4 hours (overnight is better) before cutting. You can also run the knife under hot water and dry it off before slicing—the heat helps cut through the ganache without dragging it.
Pin This Recipe!
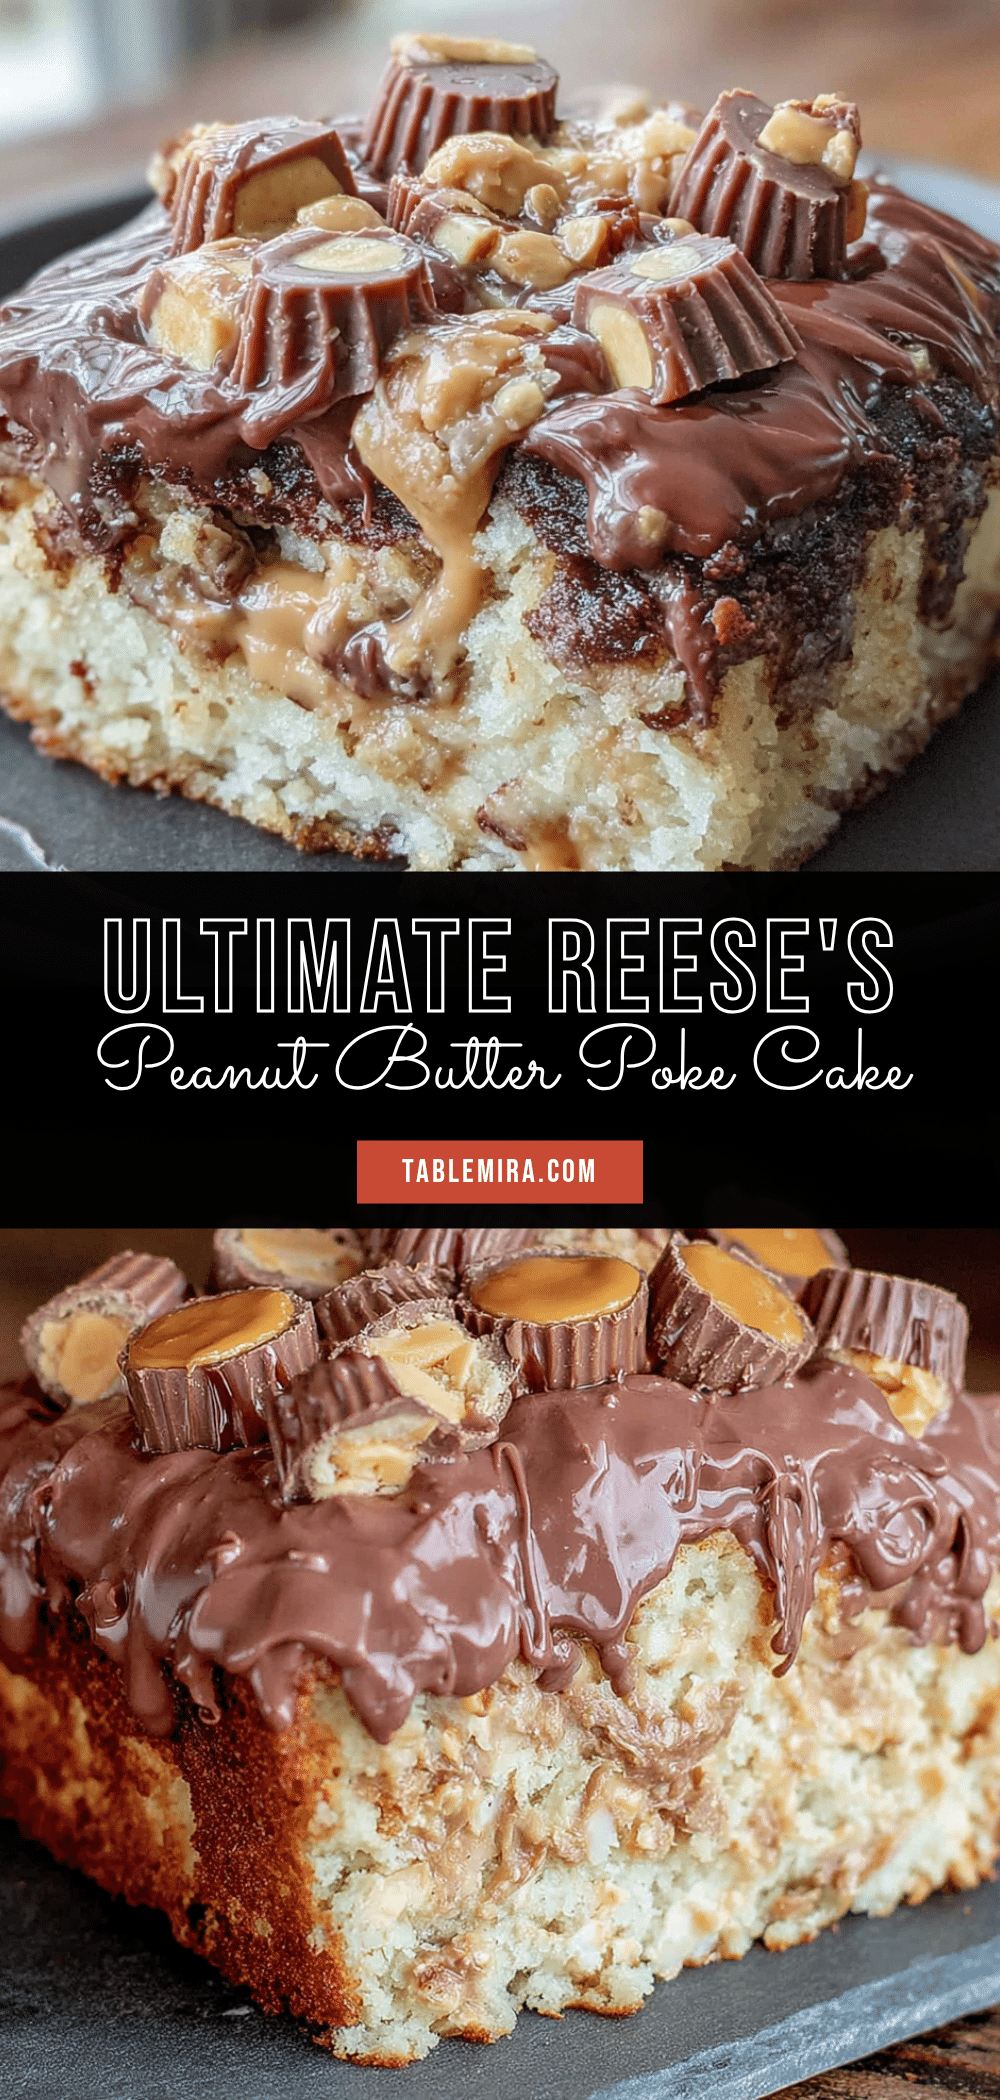
Best Easy Reese’s Peanut Butter Cup Poke Cake Recipe

A ridiculously moist chocolate poke cake filled with peanut butter and sweetened condensed milk, topped with chocolate ganache, chopped Reese’s cups, and a peanut butter drizzle. This easy dessert tastes like a bakery treat but comes together with a boxed cake mix.
- Prep Time: 40 minutes
- Cook Time: 30 minutes
- Total Time: 4 hours 40 minutes (includes chilling)
- Yield: 12 servings 1x
- Category: Dessert
- Cuisine: American
Ingredients
- 1 box chocolate cake mix (Duncan Hines Devil’s Food or Betty Crocker Super Moist)
- Eggs, oil, and water (as called for on the cake mix box: usually 3 eggs, 1/3 cup oil, 1 cup water)
- 1 can (14 oz) sweetened condensed milk
- 1/2 cup creamy peanut butter (Jif or Skippy recommended)
- 1 teaspoon vanilla extract
- 1 cup semi-sweet chocolate chips (Guittard or Ghirardelli)
- 1/2 cup heavy cream
- 2 tablespoons unsalted butter
- 12–15 mini Reese’s peanut butter cups, chopped
- 1/4 cup creamy peanut butter (for drizzling)
- Flaky sea salt (optional)
- Whipped cream (optional, for serving)
Instructions
- Preheat oven to 350°F (175°C). Grease a 9×13-inch baking pan.
- Prepare the chocolate cake mix according to package directions. Pour batter into prepared pan and spread evenly. Bake for 28-33 minutes, until a toothpick inserted in the center comes out with a few moist crumbs. Let cool in the pan for 15-20 minutes (warm, not hot).
- While the cake cools, make the filling: In a medium bowl, whisk together sweetened condensed milk, 1/2 cup creamy peanut butter, and vanilla extract until smooth and pourable. If too thick, microwave for 10-15 seconds.
- Using the round handle of a wooden spoon, poke holes all over the warm cake, spacing them about 1 inch apart and going all the way to the bottom of the pan. Brush off any crumbs.
- Slowly pour the peanut butter filling over the cake, making sure it gets into every hole. Use a spatula to spread evenly. Let sit for 10 minutes to absorb.
- Make the ganache: In a small saucepan, heat heavy cream over medium heat until it just begins to simmer. Remove from heat and pour over chocolate chips in a small bowl. Let sit for 2 minutes, then stir until smooth. Add butter and stir until melted and glossy. Let cool for 5 minutes.
- Pour ganache over the cake and spread evenly. While still wet, sprinkle chopped Reese’s cups on top. Warm the remaining 1/4 cup peanut butter in the microwave for about 20 seconds, then drizzle over the Reese’s cups in a zigzag pattern. Sprinkle with flaky sea salt if desired.
- Cover the cake with plastic wrap or foil and refrigerate for at least 4 hours, preferably overnight, to set.
- Serve cold or at room temperature. Optionally, top with whipped cream.
Notes
For best results, chill overnight. The cake gets better after 24 hours. To speed up chilling, freeze for about 1.5 hours instead of refrigerating for 4 hours. For gluten-free, use a gluten-free cake mix and check Reese’s cups label. For dairy-free, use dairy-free cake mix, coconut cream instead of heavy cream, and dairy-free chocolate chips.
Nutrition
- Serving Size: 1 slice (1/12 of cak
- Calories: 480
- Sugar: 35
- Sodium: 380
- Fat: 28
- Saturated Fat: 12
- Carbohydrates: 55
- Fiber: 2
- Protein: 8
Keywords: Reese's peanut butter cup poke cake, chocolate peanut butter cake, easy poke cake, chocolate cake with peanut butter, Reese's cake