There used to be a little bakery in our neighborhood called The Enchanted Oven that made the most incredible Halloween-themed fruit platters for school parties. When they closed their doors two summers ago—just packed up and vanished—I honestly felt a little panicked. My youngest, Leo, had just started kindergarten, and their “Monster Eyeball” tray was the only thing that got him excited about classroom celebrations. After seven tries—some of them honestly hilarious failures, like the time the “eyeballs” slid right off the plate—I finally cracked the code. This recipe is that exact bakery magic, recreated in my own kitchen.
Let me tell you, the first time I brought this to Leo’s Halloween party, the room went quiet for a second. Then the kids erupted. They weren’t just eating fruit; they were giggling, pointing, and pretending to be scared. One little guy named Sam actually whispered, “Is it watching me?” before popping a grape eyeball into his mouth. That moment—the pure, unadulterated joy of a child who thinks they’re being brave by eating a monster’s eye—is why this recipe stuck with me. Maybe you’ve been there, scrambling for a healthy Halloween treat that doesn’t feel like a punishment. This is it. This is the one that makes fruit the star of the spooky show.
Why You’ll Love This Recipe
I’ve tested this tray at three different school parties, two family gatherings, and one very skeptical book club meeting. It passed every single test with flying colors. Here’s why this particular monster eyeball fruit tray works so well:
- Quick & Easy : You can assemble this entire tray in under 20 minutes. No baking, no blending, no waiting. Perfect for those last-minute Halloween classroom sign-ups.
- Simple Ingredients : Everything comes from your regular grocery store. No fancy produce markets or specialty shops needed. You probably already have most of this in your fridge.
- Perfect for Halloween Parties : Whether it’s a school celebration, a neighborhood block party, or just a spooky movie night at home, this tray steals the show without stealing your time.
- Crowd-Pleaser : I’ve watched picky eaters, fruit-haters, and vegetable-avoiders all reach for these “eyeballs” without a second thought. The visual fun overrides any food resistance.
- Unbelievably Delicious : The combination of sweet melon balls, tart green grapes, and creamy cheese eyeballs creates a flavor and texture experience that’s genuinely satisfying—not just a gimmick.
What makes this recipe different from all the other Halloween fruit trays out there? It’s the little details. The way I use a tiny dab of cream cheese to make the “pupils” stay put. The specific melon baller size that creates the perfect eyeball shape. The trick to keeping everything from sliding around on the tray. I learned these through trial and error—mostly error—so you don’t have to.
This isn’t just a fruit tray. It’s the kind that makes parents breathe a sigh of relief because their kids are actually eating something healthy at a party full of candy. It’s the tray that gets photographed and shared. It’s the one that makes you feel like a Halloween hero without spending hours in the kitchen.
What Ingredients You Will Need
This recipe uses simple, wholesome ingredients to deliver maximum spooky fun without any fuss. Most of these are pantry staples or easy seasonal finds. Let’s break down what you’ll need and why each ingredient matters.
- For the Eyeball Base:
- 1 large honeydew melon (firm, not too ripe—you want clean ball shapes)
- 1 large cantaloupe (same rule—firm is your friend here)
- 1 large seedless watermelon (the red “bloodshot” effect is perfect for eyeballs)
- 2 cups green seedless grapes (these become the smaller, creepier eyeballs)
- 2 cups red seedless grapes (adds color variety and sweetness)
- For the “Eyeball” Details:
- 4 ounces cream cheese, softened (I recommend Philadelphia for best texture—it holds its shape better than store brands)
- 2 tablespoons plain Greek yogurt (thins the cream cheese just enough for piping, without making it runny)
- 1 teaspoon vanilla extract (adds a subtle sweetness that kids love)
- 1 tablespoon powdered sugar (just enough to make the “white” of the eye pop)
- For the “Bloodshot” Veins:
- 1/4 cup strawberry jam or preserves (seedless works best for a smooth “blood” effect)
- 1 tablespoon water (to thin the jam to a drizzle-able consistency)
- For the “Pupils”:
- 1/2 cup dark chocolate chips (the mini ones work best—they look like actual pupils)
- 1/2 cup white chocolate chips (for contrast on darker fruit bases)
- 1 teaspoon coconut oil (helps the chocolate melt smoothly for attaching pupils)
- For the Spooky Platter:
- 1 large black or dark purple platter or serving board (the contrast makes the eyeballs pop)
- Fresh mint leaves (optional, for a “monster hair” effect around the edges)
- Pretzel sticks (for “monster fingers” or “spider legs” arranged around the tray)
For the melon selection, look for ones that feel heavy for their size and have a slight give at the stem end. Avoid anything with soft spots—you want clean, firm balls. I usually buy my melons two days before I plan to assemble the tray and let them sit on the counter to reach peak ripeness.
If you’re dairy-free, swap the cream cheese for a vegan cream cheese alternative. Just note that it might be slightly softer, so chill it for 15 minutes before piping. For a nut-free version, skip the pretzel sticks or use gluten-free pretzels. The rest of the recipe is naturally nut-free and gluten-free.
Equipment Needed
You don’t need a professional kitchen to pull this off. Here’s what I use and what you can substitute:
- Melon baller (the 1-inch size is ideal for eyeball proportions—I’ve tried smaller and they just look like weird peas)
- Piping bag with small round tip (or a zip-top bag with a tiny corner snipped off—works just as well)
- Cutting board (a large one, because things get messy with melon juice)
- Sharp knife (for halving melons and cutting grapes)
- Small microwave-safe bowl (for melting chocolate)
- Large serving platter (dark colored is best for visual impact)
- Paper towels (trust me, you’ll need these for drying melon balls)
- Toothpicks (for placing pupils precisely without getting chocolate all over your fingers)
If you don’t have a melon baller, you can use a small cookie scoop or even cut the melon into cubes and shape them into rough balls with your hands. It’s not as pretty, but it still works. I actually did this my first time because I forgot my melon baller at my sister’s house. The eyeballs were a little lumpy, but the kids didn’t care one bit.
Preparation Method
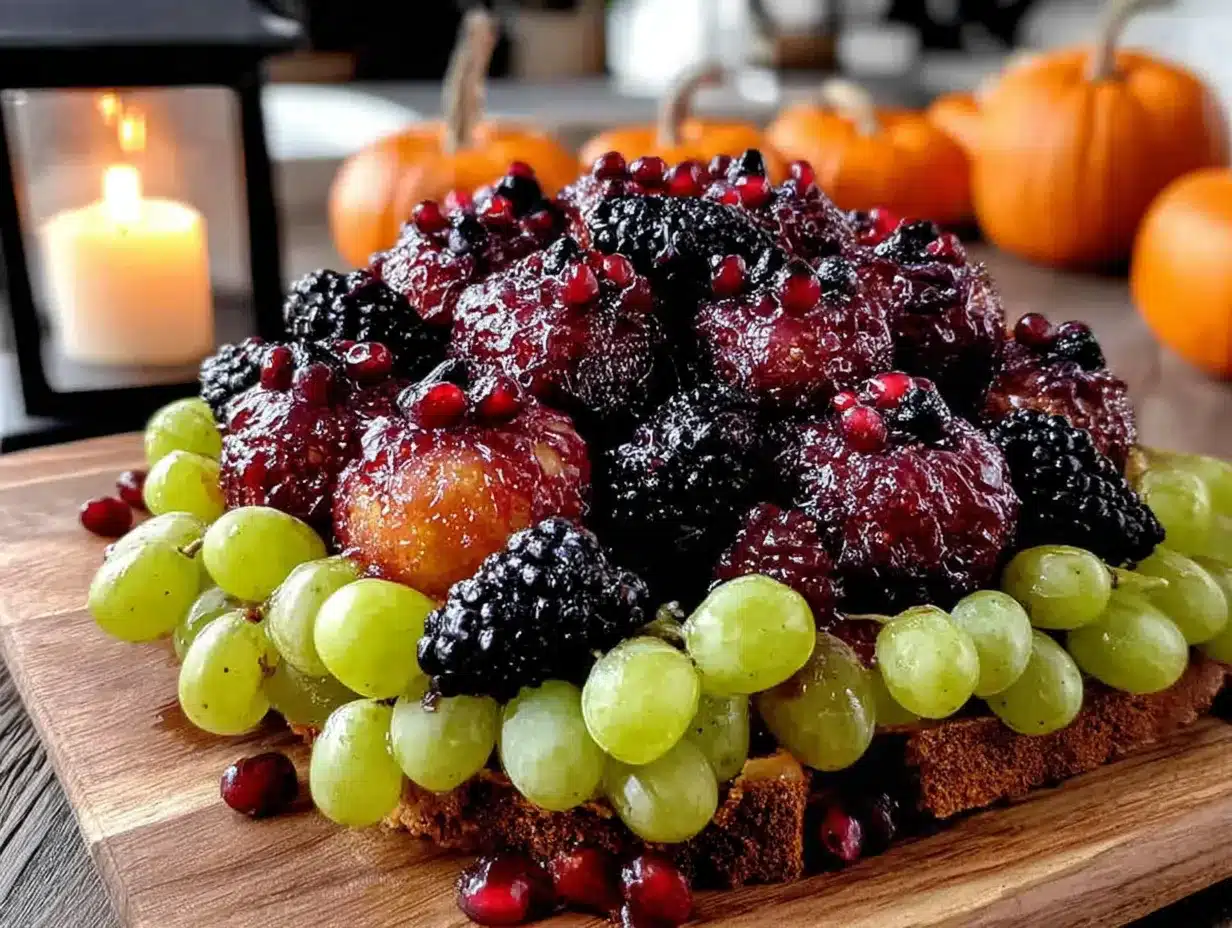
Alright, let’s get spooky. Here’s exactly how I put this tray together, step by step. I’ve included all the little tricks I learned the hard way.
- Prepare the Melon Balls (about 10 minutes)
Cut the honeydew, cantaloupe, and watermelon in half. Scoop out the seeds from the cantaloupe and honeydew. Using your melon baller, scoop out as many balls as you can from each melon. You want a mix of colors—green, orange, and red. Aim for about 20-25 balls total. Pat them dry with paper towels. This is crucial—wet melon balls make the cream cheese slide right off. I learned this the hard way after my first batch of eyeballs looked like they were crying.
- Prepare the Grapes (about 3 minutes)
Rinse the green and red grapes and pat them completely dry. Leave about half of them whole—these become the smaller eyeballs. Cut the remaining grapes in half lengthwise. These flat halves will serve as bases for the “eyeball” cream cheese circles. The flat side helps everything stay put on the tray.
- Make the Eyeball Cream (about 5 minutes)
In a small bowl, beat the softened cream cheese with the Greek yogurt, vanilla extract, and powdered sugar until smooth. You want it thick enough to hold its shape but soft enough to pipe. If it’s too stiff, add another teaspoon of yogurt. If it’s too runny, pop it in the fridge for 10 minutes. Transfer to your piping bag or zip-top bag.
- Prepare the “Blood” Drizzle (about 2 minutes)
In another small bowl, stir the strawberry jam with the water until smooth. You want a consistency that drizzles easily but isn’t watery. Set aside.
- Melt the Chocolate Pupils (about 3 minutes)
Place the dark chocolate chips and coconut oil in a microwave-safe bowl. Microwave in 20-second intervals, stirring between each, until smooth. Do the same with the white chocolate chips in a separate bowl. Let them cool for 2 minutes—you don’t want hot chocolate melting your cream cheese.
- Assemble the Eyeballs (about 10 minutes)
Take each melon ball or whole grape and pipe a small circle of cream cheese mixture on top. This is the “white” of the eye. For the larger melon balls, make the circle about the size of a quarter. For grapes, make it about the size of a dime. Using a toothpick, dab a tiny amount of melted dark chocolate in the center of each cream cheese circle for the pupil. For the red melon balls, use white chocolate pupils instead—the contrast is more visible. Let the chocolate set for about 5 minutes.
- Add the Bloodshot Veins (about 3 minutes)
Using a small spoon or a clean toothpick, drizzle the strawberry jam mixture in thin lines radiating outward from the cream cheese circles. Don’t overdo it—you want it to look like creepy veins, not a massacre. A little goes a long way here.
- Arrange the Platter (about 5 minutes)
Place your dark platter on the counter. Start by arranging the larger melon ball eyeballs in a loose cluster in the center. Then scatter the grape eyeballs around them. Tuck the cut grape halves flat-side down between the eyeballs for stability. If you’re using pretzel sticks, arrange them like spider legs reaching out from under the eyeballs. Tuck fresh mint leaves around the edges for a “monster hair” effect.
- Final Touch (about 2 minutes)
Take a step back and look at your tray. Rearrange any eyeballs that look lonely or crowded. Add a few extra drizzles of “blood” if needed. Place a few whole grapes in the gaps for color balance.
Cooking Tips & Techniques
I’ve made this tray probably twenty times now, and I’ve messed it up in almost every way possible. Here’s what I’ve learned:
The Melon Baller Trick – Run your melon baller under cold water between scoops. The melon releases more easily and you get cleaner, rounder balls. I wasted an entire honeydew my first time because I didn’t do this and ended up with melon mush.
Timing is Everything – Assemble the tray no more than 2 hours before serving. The melon balls release water over time, and the cream cheese pupils will start to slide. If you need to prep ahead, scoop the melon balls and store them in an airtight container in the fridge, then assemble right before serving.
The Chocolate Pupil Problem – I once used hot chocolate straight from the microwave and watched in horror as it melted right through the cream cheese. Let your melted chocolate cool for at least 2 minutes before applying. Better yet, use a toothpick to dab it on in tiny amounts.
Multitasking Strategy – While the chocolate is cooling, pipe the cream cheese circles onto all the melon balls and grapes. By the time you’re done, the chocolate will be perfect for pupil placement. This saves about 5 minutes of standing around.
The Sticky Fingers Solution – Keep a damp paper towel nearby. Your fingers will get sticky from the jam drizzle, and nothing ruins the vibe faster than accidentally smearing “blood” where you don’t want it.
Variations & Adaptations
One of the best things about this recipe is how flexible it is. Here are some ways I’ve adapted it for different situations:
- Dairy-Free Monster Eyeballs: Use vegan cream cheese and dairy-free chocolate chips. I’ve tried this with Kite Hill brand cream cheese and it worked beautifully—just chill it for an extra 10 minutes before piping.
- Low-Sugar Version: Skip the powdered sugar in the cream cheese mixture and use sugar-free strawberry jam. The fruit itself is sweet enough, honestly. I made this for a diabetic friend’s Halloween party and nobody noticed the difference.
- Berry Eyeballs: Swap the grapes for large blueberries or blackberries. They make tiny, intensely creepy eyeballs that look like they belong to baby monsters. Just note that they’re harder to pipe cream cheese onto because of the bumps.
- Savory Monster Platter: Replace the sweet cream cheese with a savory herbed cream cheese (mix in garlic powder, onion powder, and dried dill). Use cherry tomatoes instead of grapes. This is surprisingly good for adult Halloween parties.
- Frozen Fruit Eyeballs: Use frozen melon balls and grapes for a slushy, icy effect. The cream cheese won’t stick as well, but the cold factor is fun for outdoor Halloween events. Just assemble right before serving and expect some sliding.
My personal favorite variation? I once made a “zombie” version by using only green grapes and honeydew melon balls, then drizzling with a thin matcha glaze instead of strawberry jam. The green-on-green effect was genuinely unsettling in a fun way. My kids called it “alien eyeballs” and devoured the whole tray.
Serving & Storage Suggestions
This tray is best served chilled, right out of the fridge. The cold temperature keeps the cream cheese firm and the fruit crisp. I usually pull it out about 10 minutes before serving to take the edge off the chill—cold fruit has less flavor, and you want those sweet melon notes to shine.
For presentation, I like to place the tray on a bed of crushed ice if I’m serving outdoors. It keeps everything cold and adds a creepy, fog-like effect as the ice melts. Just make sure the platter has a lip to catch the water.
As for drinks, this tray pairs beautifully with sparkling apple cider or a simple fruit punch. For an adult gathering, a crisp white wine or a light rosé complements the sweetness without overpowering it.
Storage is where this recipe gets tricky. Honestly, this is not a make-ahead-and-store dish. The melon balls release water, the cream cheese gets weepy, and the chocolate pupils start to slide. If you have leftovers (unlikely, but possible), store them in an airtight container in the fridge for up to 24 hours. The fruit will be soft and the eyeballs will look a little sad, but they’ll still taste fine. I’ve repurposed leftover eyeballs into fruit salad the next day—just stir everything together and nobody knows they were once spooky.
For reheating? Don’t. This is a cold dish through and through. If you need to refresh the tray, make a fresh batch of cream cheese mixture and re-pipe the pupils. It takes 5 minutes and saves the whole thing.
Nutritional Information & Benefits
Here’s the estimated nutritional breakdown per serving (about 1 cup of fruit with cream cheese and chocolate):
- Calories: 180-220
- Carbohydrates: 35g
- Fiber: 3g
- Sugar: 28g (natural from fruit)
- Protein: 4g
- Fat: 6g
- Vitamin C: 45% of daily value
- Vitamin A: 30% of daily value
The health benefits here are real. Melons are packed with hydration and antioxidants—honeydew is rich in vitamin C, cantaloupe is loaded with beta-carotene, and watermelon contains lycopene. Grapes add resveratrol and other heart-healthy compounds. Even the cream cheese provides a small amount of calcium and protein.
This recipe is naturally gluten-free and nut-free (if you skip the pretzel sticks). It’s also vegetarian. For those watching their sugar intake, the majority of sugar comes from the fruit itself, which is a far better choice than processed Halloween candy.
From a wellness perspective, I love that this tray lets kids indulge in the fun of Halloween without the sugar crash. The protein from the cream cheese and the fiber from the fruit provide steady energy. My son Leo actually sleeps better on Halloween nights when he’s eaten this tray instead of a pile of candy bars.
Conclusion
Look, I know Halloween can be stressful. Between costume emergencies, classroom party sign-ups, and the endless debate over what’s “too scary” for different ages, it’s easy to default to store-bought treats. But this monster eyeball fruit tray is worth the 20 minutes it takes to assemble. It’s the recipe that makes parents feel like they’ve won Halloween—kids are happy, fruit is being eaten, and nobody’s bouncing off the walls from a sugar high.
I’ve made this tray for my own kids, for their classmates, for neighborhood parties, and even for a grown-up Halloween dinner where the adults loved it just as much as the children. There’s something universally delightful about eating something that looks like a monster’s eye. It’s silly, it’s fun, and it’s genuinely delicious.
Don’t be afraid to customize this based on what your family loves. Swap in different fruits, try different jam flavors, or go wild with the monster theme. The first time you hear a child shriek with laughter as they pop a “monster eyeball” into their mouth, you’ll understand why this recipe has become a permanent part of our Halloween tradition.
I’d love to hear how your monster eyeball tray turns out! Drop a comment below with your favorite variation, or tag me in your Halloween party photos. And if you have any questions—trust me, I’ve probably made every mistake you can imagine—just ask. Happy Halloween, and happy snacking!
Frequently Asked Questions
How far in advance can I make this monster eyeball fruit tray?
I recommend assembling the tray no more than 2 hours before serving. The melon balls release water over time, which makes the cream cheese pupils slide off. You can prep the melon balls and grapes up to 24 hours ahead and store them in an airtight container in the fridge, then assemble right before your party.
Can I use other fruits besides melons and grapes?
Absolutely! Large strawberries, pineapple chunks, and even apple slices work well. Just keep in mind that apples brown quickly, so dip them in lemon water first. Kiwi slices make excellent “alien” eyeballs with their green color and seed pattern.
My cream cheese mixture is too runny. What did I do wrong?
This usually happens if the cream cheese wasn’t fully softened before mixing, or if you added too much yogurt. Pop the mixture in the fridge for 15-20 minutes to firm up. If it’s still runny, mix in a tablespoon of powdered sugar to thicken it.
How do I keep the eyeballs from rolling around on the tray?
Cut some of your grapes in half lengthwise and place them flat-side down as “anchors” between the round eyeballs. You can also use a slightly textured platter or board—the fruit grips better on a rough surface than on a smooth one.
Can I make this recipe nut-free for school parties?
Yes! The recipe itself is naturally nut-free. Just skip the pretzel sticks (which are often processed on shared equipment with nuts) or use certified nut-free pretzels. Everything else—melon, grapes, cream cheese, chocolate—is nut-free and safe for most school environments.
Pin This Recipe!
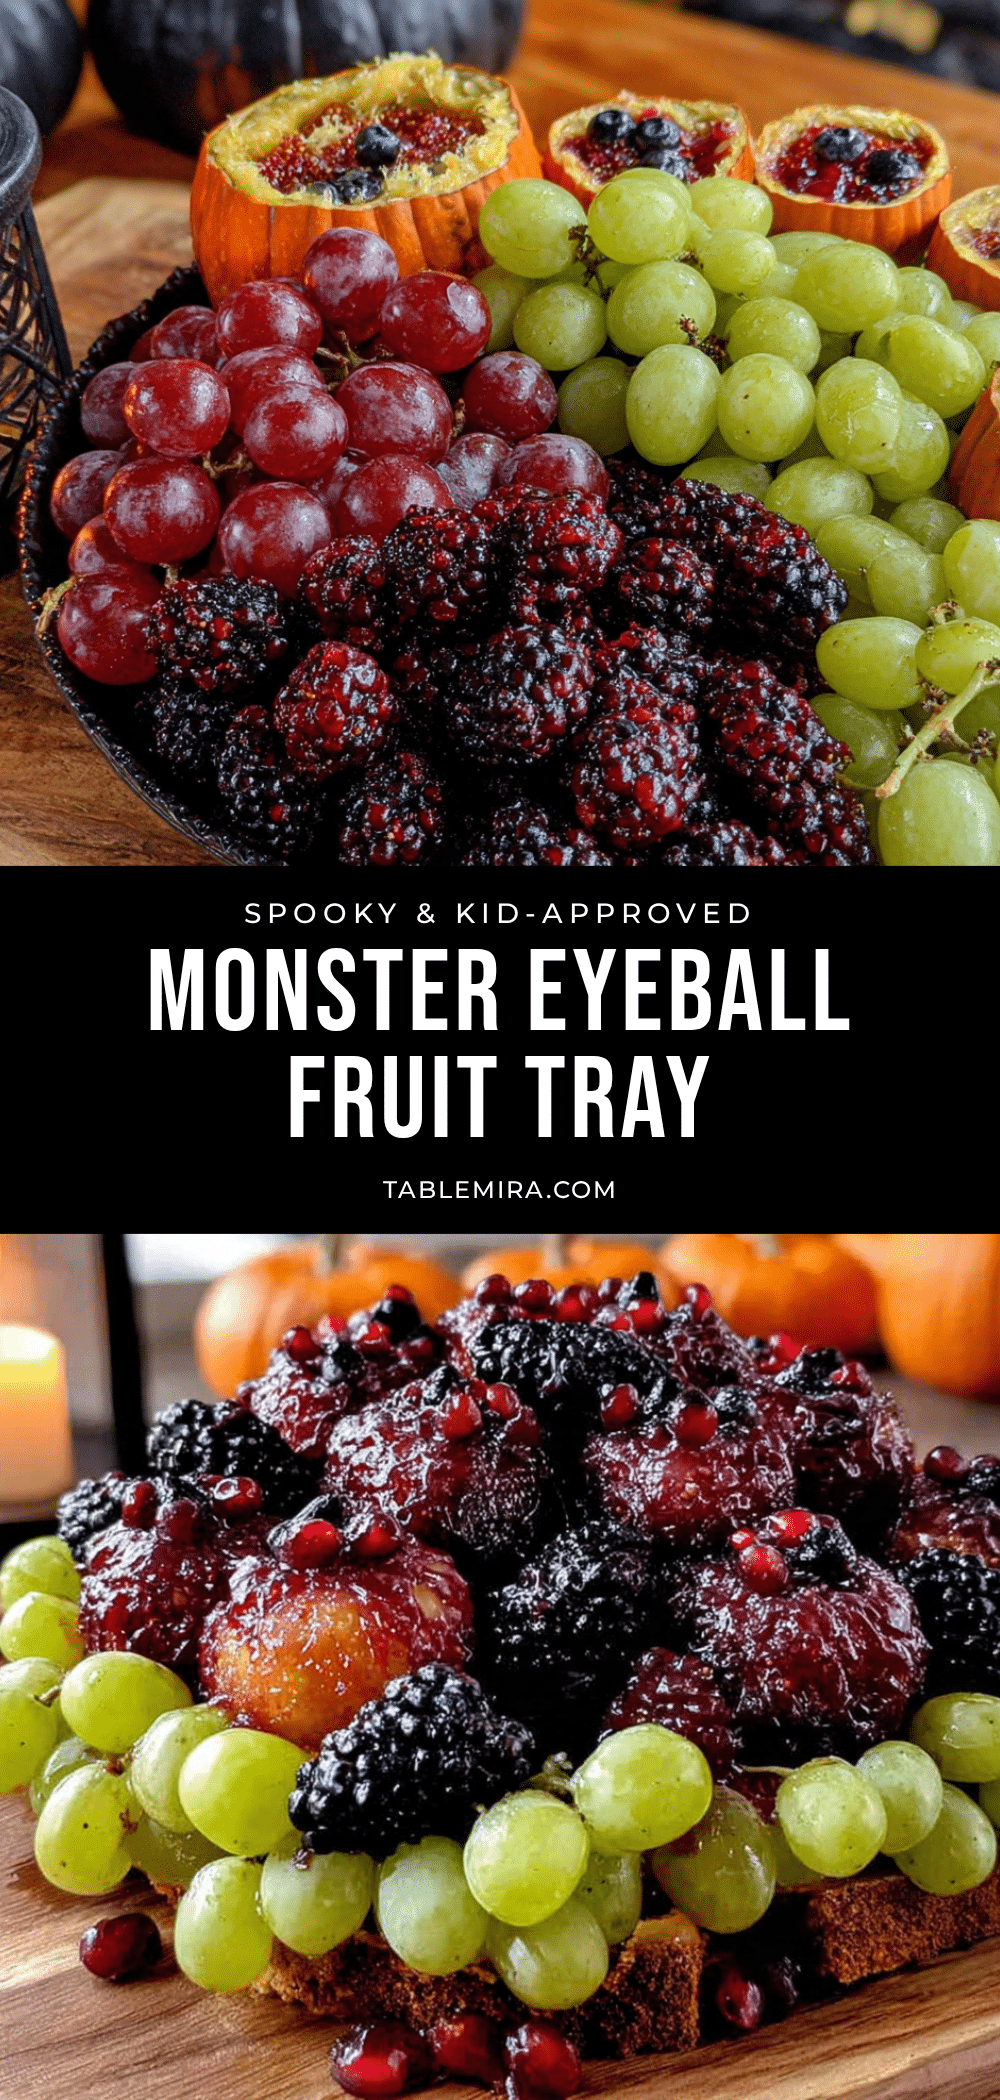
Best Easy Monster Eyeball Fruit Tray for Halloween
A fun and healthy Halloween fruit tray featuring melon balls and grapes transformed into spooky monster eyeballs with cream cheese, chocolate pupils, and strawberry jam ‘bloodshot’ veins. Perfect for school parties and family gatherings.
- Prep Time: 20 minutes
- Cook Time: 0 minutes
- Total Time: 20 minutes
- Yield: 8 servings 1x
- Category: Appetizer
- Cuisine: American
Ingredients
- 1 large honeydew melon (firm)
- 1 large cantaloupe (firm)
- 1 large seedless watermelon
- 2 cups green seedless grapes
- 2 cups red seedless grapes
- 4 ounces cream cheese, softened
- 2 tablespoons plain Greek yogurt
- 1 teaspoon vanilla extract
- 1 tablespoon powdered sugar
- 1/4 cup strawberry jam or preserves (seedless)
- 1 tablespoon water
- 1/2 cup dark chocolate chips (mini preferred)
- 1/2 cup white chocolate chips
- 1 teaspoon coconut oil
- Fresh mint leaves (optional, for garnish)
- Pretzel sticks (optional, for decoration)
Instructions
- Prepare the Melon Balls: Cut honeydew, cantaloupe, and watermelon in half. Scoop out seeds from cantaloupe and honeydew. Using a melon baller, scoop out 20-25 balls total from all melons. Pat dry with paper towels.
- Prepare the Grapes: Rinse green and red grapes and pat dry. Leave half whole; cut remaining grapes in half lengthwise.
- Make the Eyeball Cream: In a small bowl, beat softened cream cheese with Greek yogurt, vanilla extract, and powdered sugar until smooth. Transfer to a piping bag or zip-top bag with a small corner snipped off.
- Prepare the ‘Blood’ Drizzle: In another small bowl, stir strawberry jam with water until smooth and drizzle-able.
- Melt the Chocolate Pupils: Place dark chocolate chips and coconut oil in a microwave-safe bowl. Microwave in 20-second intervals, stirring between each, until smooth. Repeat with white chocolate chips in a separate bowl. Let cool for 2 minutes.
- Assemble the Eyeballs: Pipe a small circle of cream cheese mixture on top of each melon ball or whole grape. Using a toothpick, dab a tiny amount of melted dark chocolate in the center for the pupil. For red melon balls, use white chocolate pupils. Let set for 5 minutes.
- Add the Bloodshot Veins: Using a small spoon or toothpick, drizzle strawberry jam mixture in thin lines radiating outward from the cream cheese circles.
- Arrange the Platter: Place dark platter on counter. Arrange larger melon ball eyeballs in a loose cluster in the center. Scatter grape eyeballs around them. Tuck cut grape halves flat-side down between eyeballs for stability. Add pretzel sticks and mint leaves if desired.
- Final Touch: Rearrange any eyeballs as needed. Add extra drizzles of ‘blood’ if desired. Place a few whole grapes in gaps for color balance.
Notes
Assemble no more than 2 hours before serving. Pat melon balls dry to prevent cream cheese from sliding. Let melted chocolate cool for 2 minutes before applying. For dairy-free, use vegan cream cheese and dairy-free chocolate chips. For low-sugar, skip powdered sugar and use sugar-free jam.
Nutrition
- Serving Size: 1 cup
- Calories: 200
- Sugar: 28
- Sodium: 80
- Fat: 6
- Saturated Fat: 3
- Carbohydrates: 35
- Fiber: 3
- Protein: 4
Keywords: Halloween, fruit tray, monster eyeballs, healthy Halloween treat, school party, kid-friendly


