This was supposed to be a savory, spicy, throw-them-in-a-bowl-and-forget-about-them kind of snack. I had the pumpkin seeds all cleaned and patted dry, and I was reaching for the cayenne pepper and smoked paprika like I always do. But my hand—honestly, I still don’t know how—grabbed the cinnamon instead. I was already in a rush, the kitchen was a disaster zone from the morning’s pumpkin carving session, and my toddler was using the flour canister as a drum. So I just went with it. I dumped cinnamon, sugar, and a pinch of salt over those little green seeds, tossed them in butter, and roasted them with absolutely zero expectations. What came out was nothing like the plan—and better.
Let me tell you, the smell alone made me stop mid-sweep. It filled the whole house with this warm, cozy scent that felt like fall had literally moved into my kitchen and unpacked its bags. I pulled the baking sheet out, let them cool for maybe two minutes (I’m impatient, okay?), and popped a handful into my mouth. The crunch. The sweet, buttery coating. The way the cinnamon hit first, then the sugar, then that tiny hint of salt. I actually laughed out loud. I mean, I had completely ruined my usual recipe, and somehow ended up with something I wanted to eat by the fistful.
Maybe you’ve been there—staring at a pile of pumpkin seeds after Halloween or a cozy weekend carving session, wondering if you should bother. You know the feeling: they’re a little slimy to clean, a little tedious to dry, and honestly, the savory versions can get boring after the third handful. This cinnamon sugar version changed all that for me. It turned pumpkin seeds from an afterthought into the thing I actually look forward to making. Now I save seeds all season long, just so I can make another batch.
Why You’ll Love This Recipe
I’ve tested this recipe more times than I care to admit—burned a batch, undercooked a batch, made one so sweet it could double as candy. Through all those trials, I landed on the perfect balance. Here’s why this one works:
- Quick & Easy: From bowl to snack in under 30 minutes. It’s perfect for those post-carving afternoons when you’re tired but still want something homemade.
- Simple Ingredients: You probably have everything in your pantry right now. No specialty stores, no weird extracts, just butter, sugar, cinnamon, and salt.
- Perfect for Fall Gatherings: Great for Thanksgiving snack tables, cozy movie nights, or packing into little bags for neighbors and teachers.
- Crowd-Pleaser: I’ve watched kids pick these over candy. Adults too. There’s something about that sweet-salty crunch that hooks everyone.
- Unbelievably Delicious: The texture is crispy on the outside, tender on the inside, and the cinnamon sugar coating sticks to every single seed.
What makes this recipe different from the rest? It’s the butter-to-sugar ratio, honestly. I spent three batches getting it just right—too much butter and the seeds get soggy, too little and the sugar doesn’t stick. This version gives you that crackly, caramelized coating without any greasiness. Plus, I use a lower temperature than most recipes call for, which means the seeds toast evenly without burning the sugar. It’s not just another pumpkin seed recipe—it’s the one that made me stop looking for alternatives.
This recipe is the kind that makes you close your eyes after the first bite. It’s comfort food reimagined—healthier than a cookie, faster than a pie, but with the same soul-soothing satisfaction. Perfect for impressing guests without stress, or turning a simple snack into something memorable.
What Ingredients You Will Need
This recipe uses simple, wholesome ingredients to deliver bold flavor and satisfying crunch without the fuss. Most of these are pantry staples, especially if you’ve just carved a pumpkin.
- Fresh pumpkin seeds – 1 cup (about 120g), cleaned and patted dry. You can use seeds from any pumpkin variety. I prefer sugar pumpkins because the seeds are smaller and more tender, but jack-o’-lantern seeds work great too.
- Unsalted butter – 2 tablespoons (28g), melted. I use unsalted so I can control the salt level. Kerrygold is my go-to for the richest flavor, but any brand works.
- Granulated sugar – 2 tablespoons (25g). This gives the seeds that classic sweet coating. You can use coconut sugar for a deeper flavor, but the texture will be slightly grainier.
- Ground cinnamon – 1 teaspoon. I recommend Saigon cinnamon if you can find it—it’s warmer and more aromatic than standard cassia cinnamon. It makes a real difference here.
- Salt – ¼ teaspoon fine sea salt, plus a pinch for sprinkling after roasting. The salt balances the sweetness and keeps these from tasting like dessert-only.
Optional add-ins: A tiny pinch of nutmeg or cardamom adds warmth. If you want a little heat, a dash of cayenne pepper (just a tiny pinch) creates a sweet-spicy combo that’s addictive.
Substitution guidance: Use coconut oil or avocado oil instead of butter for a dairy-free version. The flavor will be slightly different—less rich, but still delicious. For a lower-sugar option, try monk fruit sweetener or allulose, though the caramelization won’t be quite the same. If you’re using pre-packaged pumpkin seeds from the store, skip the cleaning step and go straight to mixing.
Equipment Needed
You don’t need much for this recipe, which is part of its charm. Here’s what you’ll want on hand:
- Baking sheet – A rimmed baking sheet works best to keep the seeds from rolling off. I use a half-sheet pan (18×13 inches) for even roasting.
- Parchment paper or silicone baking mat – This prevents sticking and makes cleanup a breeze. I’ve forgotten the parchment before, and let me tell you, scraping caramelized sugar off a baking sheet is not fun.
- Mixing bowl – Any medium bowl works. I use a glass bowl because it doesn’t hold onto smells.
- Spatula or wooden spoon – For tossing the seeds with the butter mixture.
- Colander – For rinsing the seeds if you’re starting fresh from a pumpkin.
- Paper towels or clean kitchen towel – For drying the seeds thoroughly. This step matters more than you think.
Budget-friendly tip: No parchment paper? Lightly grease your baking sheet with butter or oil. It works, just watch the seeds a little more closely to prevent sticking.
Preparation Method
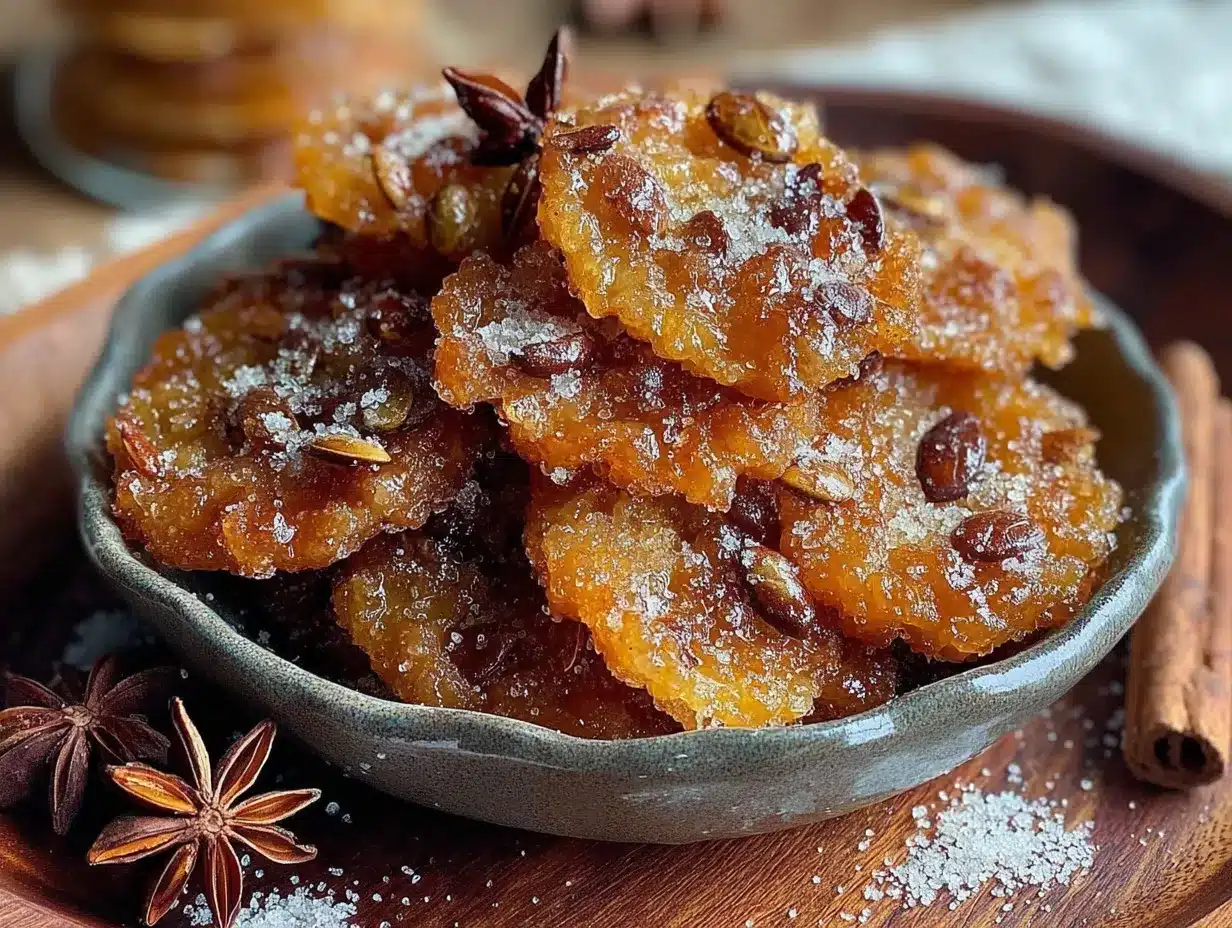
Follow these steps carefully, and you’ll have the best batch of cinnamon sugar pumpkin seeds you’ve ever tasted. I’ve learned through trial and error—including one batch that ended up in the trash—so trust me on the details.
- Preheat your oven to 300°F (150°C). This lower temperature is key. I tried 350°F once, and the sugar burned before the seeds were fully toasted. 300°F gives you that golden, even roast without the bitter char.
- Clean the pumpkin seeds. If you’re using fresh seeds, separate them from the pumpkin guts. Place them in a colander and rinse under cold water, rubbing them gently to remove any stringy bits. Don’t stress about getting every last fiber—a few tiny pieces won’t hurt.
- Dry the seeds thoroughly. Spread them on a clean kitchen towel or paper towels and pat them dry. Let them sit for 5-10 minutes to air dry a bit more. Wet seeds won’t crisp up properly, and the butter mixture won’t stick. I learned this the hard way—my first batch came out chewy and sad.
- Melt the butter. In a small microwave-safe bowl, melt the butter in 15-second intervals until fully liquid. Alternatively, melt it in a small saucepan over low heat. Let it cool for a minute—you don’t want it hot enough to cook the seeds on contact.
- Mix the coating. In a medium mixing bowl, combine the granulated sugar, ground cinnamon, and ¼ teaspoon of salt. Stir with a fork to break up any clumps. The cinnamon tends to clump, so be thorough here.
- Toss the seeds. Add the cleaned, dried pumpkin seeds to the bowl with the sugar mixture. Pour the melted butter over the top. Use a spatula or wooden spoon to toss everything together until every seed is coated. The mixture will look a little sandy—that’s perfect.
- Spread on baking sheet. Line your baking sheet with parchment paper or a silicone mat. Spread the coated seeds in a single, even layer. Try not to overlap them too much, or some will steam instead of roast. Leave a little space between seeds if you can.
- Roast for 20-25 minutes. Place the baking sheet on the middle rack. Roast for 10 minutes, then pull the sheet out and stir the seeds with a spatula. This ensures even toasting. Return to the oven and roast for another 10-15 minutes. The seeds should be golden brown and fragrant. They’ll still feel slightly soft when you take them out—they’ll crisp up as they cool.
- Cool completely. Let the seeds cool on the baking sheet for at least 15-20 minutes. Don’t skip this step. They continue to crisp as they cool, and if you eat them too early, they’ll seem underdone. Trust the process.
- Add a finishing pinch of salt. Once cooled, sprinkle a tiny pinch of flaky sea salt over the top. This little step brightens all the flavors and makes the sweetness pop.
Cooking Tips & Techniques
I’ve made this recipe more times than I can count, and I’ve definitely made my share of mistakes. Here’s what I’ve learned so you don’t have to repeat them.
Dry your seeds like your life depends on it. I cannot stress this enough. Wet seeds steam instead of roast, and you’ll end up with chewy, sad little things. I once rushed through drying because my kids were fighting over a TV remote, and that batch went straight to the compost. Take the extra five minutes.
Watch the oven like a hawk in the last 5 minutes. Sugar burns fast. I walked away to answer a phone call once, and by the time I came back, my kitchen smelled like a caramel factory fire. Set a timer, and check the seeds at the 20-minute mark. If they’re golden, pull them out. If they need more time, check every 2 minutes after that.
Use room temperature butter. If your butter is too hot, it’ll melt the sugar into a paste instead of coating the seeds evenly. Let it cool for a minute after melting. I usually melt mine first, then clean the pumpkin seeds while it cools—perfect timing.
Don’t overcrowd the baking sheet. I know it’s tempting to dump all the seeds on one pan and call it a day, but overlapping seeds means uneven cooking. Use two baking sheets if you’re making a double batch. Your future self will thank you.
Let them cool completely before storing. I made the mistake of putting warm seeds in a container once, and they turned soft and sticky within hours. Spread them out, walk away, and come back when they’re room temperature.
Variations & Adaptations
This recipe is flexible, and I’ve played around with it more than I’d like to admit. Here are some of my favorite twists:
Spiced Chai Version: Add ½ teaspoon of ground cardamom, ¼ teaspoon of ground ginger, and a pinch of ground cloves along with the cinnamon. The result tastes like a warm cup of chai in seed form. I made this for a fall brunch, and people asked for the recipe before they even finished their coffee.
Maple Brown Sugar Version: Substitute the granulated sugar with 2 tablespoons of packed brown sugar and add 1 tablespoon of maple syrup. Reduce the butter to 1½ tablespoons since the syrup adds moisture. This version is a little stickier but deeply caramelized. My kids beg for this one.
Dairy-Free Version: Swap the butter with melted coconut oil or avocado oil. Coconut oil adds a subtle tropical note that pairs surprisingly well with cinnamon. Use refined coconut oil if you don’t want the coconut flavor.
Extra Crunchy Version: After tossing the seeds with the butter mixture, let them sit for 10 minutes before roasting. This allows the coating to adhere better. Then roast at 300°F for 25-28 minutes, stirring twice. The extra time gives you a deeper crunch.
Savory-Sweet Hybrid: Add ¼ teaspoon of smoked paprika and a pinch of cayenne pepper to the cinnamon sugar mixture. The heat sneaks up on you, and the smokiness adds incredible depth. This is my personal favorite for snacking with beer or cocktails.
Serving & Storage Suggestions
These seeds are best served at room temperature, straight from the baking sheet or a serving bowl. I love piling them into a wooden bowl for a cozy fall snack table—they look beautiful next to apples, nuts, and a warm drink.
What to serve with them: They’re perfect alongside a hot mug of apple cider or a pumpkin spice latte. For a party, set them out with cheese boards, charcuterie, or even alongside a bowl of chili. The sweet crunch contrasts beautifully with savory dishes.
Storage: Store cooled seeds in an airtight container at room temperature for up to 2 weeks. I use a glass jar with a tight-fitting lid. Do not refrigerate—the moisture will soften them. If they lose their crunch after a few days, spread them on a baking sheet and re-crisp in a 300°F oven for 5 minutes.
Freezer instructions: These freeze beautifully. Place completely cooled seeds in a freezer-safe bag or container, squeeze out the air, and freeze for up to 3 months. Thaw at room temperature for about 15 minutes before serving. They’ll taste almost as fresh as the day you made them.
Flavor development: Honestly, these seeds taste best on the first day, right after they’ve cooled. The coating is at its crispiest, and the cinnamon flavor is most vibrant. After a day or two, the sugar absorbs a bit of moisture from the air, but they’re still delicious.
Nutritional Information & Benefits
Here’s the estimated nutrition for a ¼-cup serving (about 30g) of these cinnamon sugar pumpkin seeds:
| Nutrient | Amount |
|---|---|
| Calories | 180 |
| Total Fat | 14g |
| Saturated Fat | 4g |
| Carbohydrates | 10g |
| Sugar | 6g |
| Protein | 7g |
| Fiber | 2g |
| Sodium | 150mg |
Health benefits: Pumpkin seeds are packed with magnesium, zinc, and healthy fats. Magnesium supports sleep and muscle function, while zinc is great for immune health—perfect for the cold and flu season. The cinnamon adds antioxidants and may help with blood sugar regulation. This snack is far more nutritious than a handful of candy or processed crackers.
Dietary considerations: This recipe is naturally gluten-free and can be made dairy-free with a simple swap. It’s also vegetarian and egg-free. The main allergen is dairy (butter), but the coconut oil substitution works well.
I personally love that I can satisfy my sweet tooth with something that actually has nutritional value. It’s not health food, but it’s a whole lot better than reaching for a cookie.
Conclusion
This cinnamon sugar roasted pumpkin seeds recipe started as a complete accident—a distracted moment, the wrong spice, and zero expectations. But sometimes the best things in the kitchen happen when you stop trying so hard. These seeds are proof of that.
They’re sweet, crunchy, buttery, and just salty enough to keep you coming back for more. Whether you’re making them after a pumpkin carving session, packing them for a fall road trip, or setting them out for Thanksgiving guests, they never disappoint. And honestly, they’re so simple that you’ll wonder why you ever bothered with the savory versions.
I’d love to hear how these turn out for you. Did you try any of the variations? Did your kids eat them before they even cooled? Drop a comment below and let me know—I read every single one. And if you share a photo on Pinterest or Instagram, tag me so I can see your beautiful batch. Happy roasting, friends!
Frequently Asked Questions
Can I use store-bought pumpkin seeds instead of fresh?
Absolutely. Store-bought raw, shelled pumpkin seeds (also called pepitas) work perfectly. Just skip the cleaning and drying steps, and toss them directly with the butter mixture. Roast for 18-22 minutes since they’re already dry.
Why did my pumpkin seeds turn out chewy instead of crispy?
This usually happens for one of two reasons: the seeds weren’t dried thoroughly before roasting, or they were stored before they fully cooled. Make sure you pat them completely dry, and let them cool on the baking sheet for at least 20 minutes before transferring to a container.
Can I double this recipe?
Yes! Just use two baking sheets so the seeds stay in a single layer. Don’t try to cram them all onto one pan, or they’ll steam instead of roast. Rotate the pans halfway through baking for even cooking.
How do I clean pumpkin seeds easily?
Place the seeds and pumpkin guts in a large bowl of water. Swish them around with your hands, and the seeds will float to the top while the pulp sinks. Scoop the seeds out with a slotted spoon, rinse in a colander, and pat dry. It’s much faster than picking through the guts by hand.
Can I make these in an air fryer?
Yes! Preheat your air fryer to 300°F (150°C). Toss the seeds with the butter mixture as directed, then spread them in the air fryer basket in a single layer. Cook for 10-12 minutes, shaking the basket halfway through. Keep an eye on them—air fryers run hot, and the sugar can burn quickly.
Pin This Recipe!
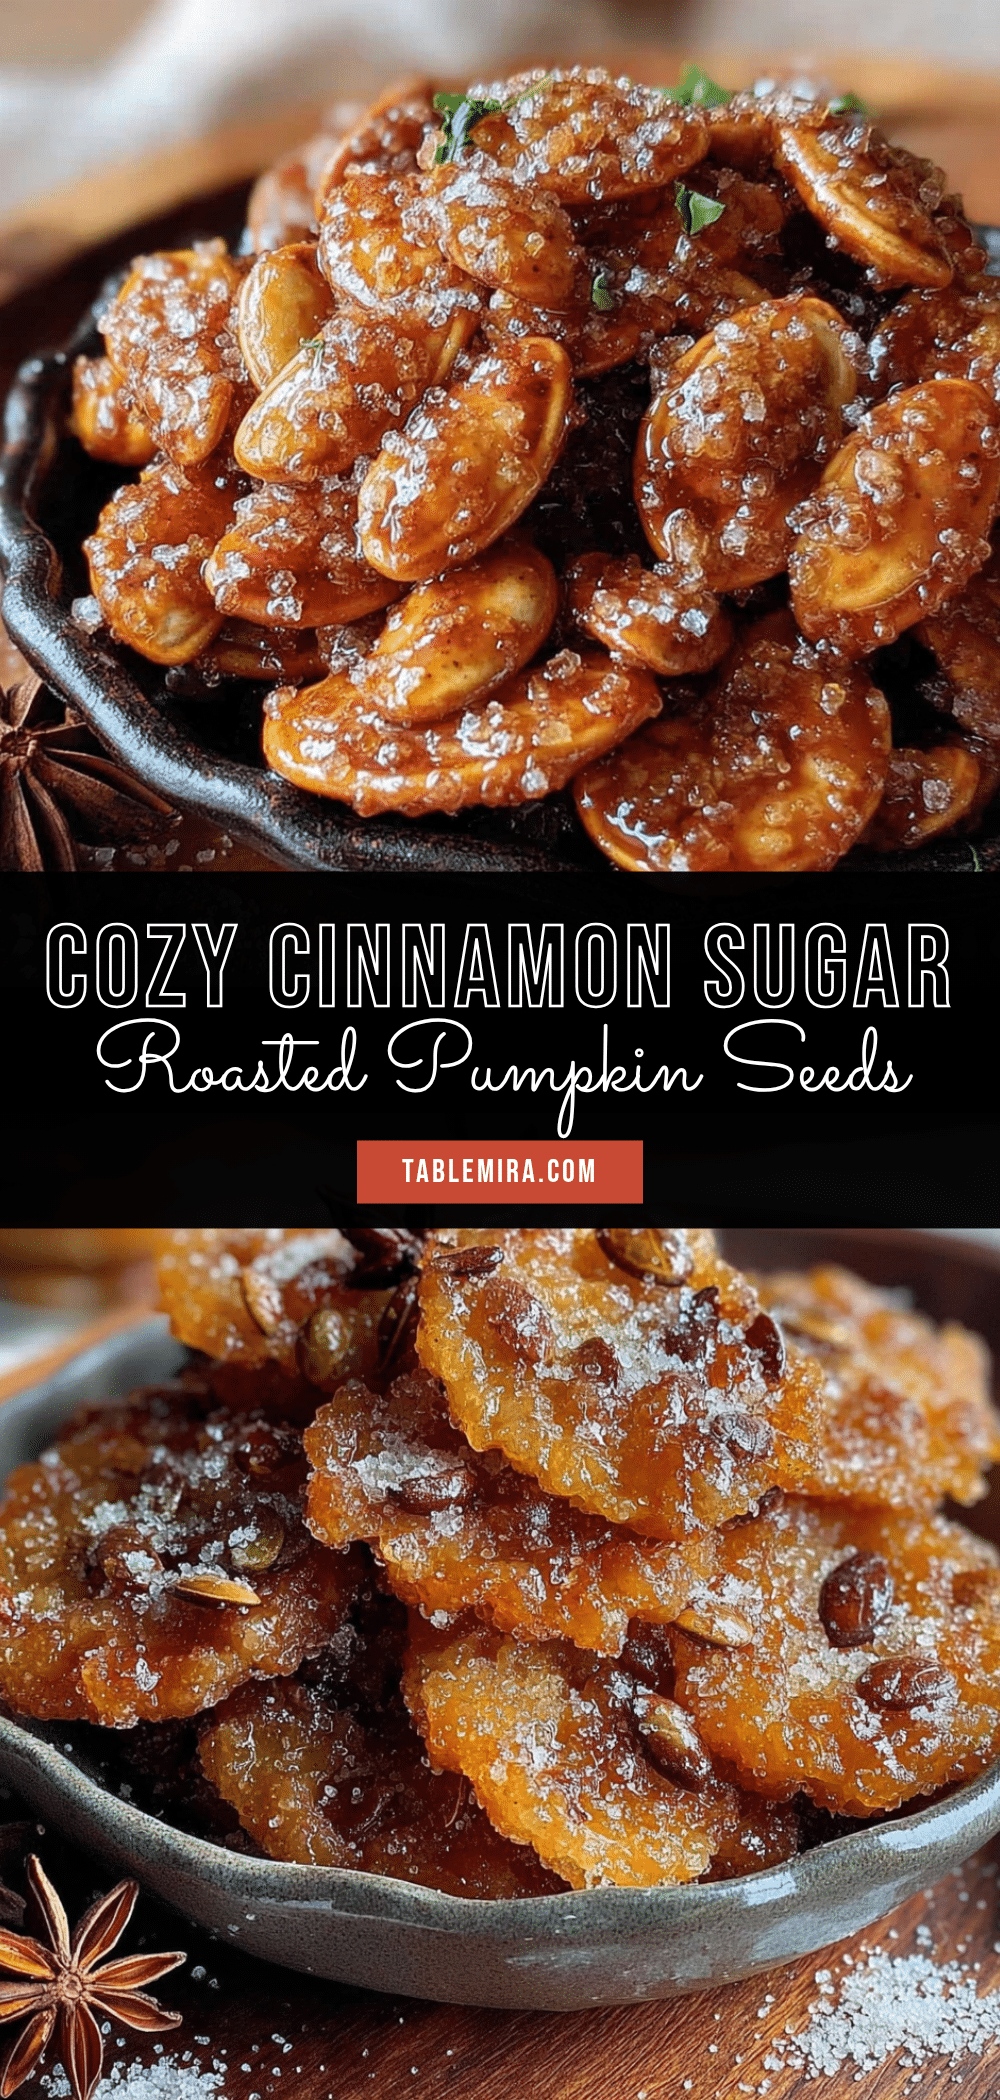
Best Easy Cinnamon Sugar Roasted Pumpkin Seeds Recipe

A sweet and crunchy fall snack made with fresh pumpkin seeds, butter, cinnamon, and sugar. This easy recipe turns leftover pumpkin seeds into an irresistible treat that’s perfect for cozy gatherings and holiday snacking.
- Prep Time: 15 minutes
- Cook Time: 25 minutes
- Total Time: 40 minutes
- Yield: 4 servings 1x
- Category: Snack
- Cuisine: American
Ingredients
- 1 cup fresh pumpkin seeds (about 120g), cleaned and patted dry
- 2 tablespoons unsalted butter (28g), melted
- 2 tablespoons granulated sugar (25g)
- 1 teaspoon ground cinnamon
- ¼ teaspoon fine sea salt, plus a pinch for sprinkling after roasting
Instructions
- Preheat your oven to 300°F (150°C).
- Clean the pumpkin seeds: separate from pumpkin guts, rinse in a colander under cold water, and rub gently to remove stringy bits.
- Dry the seeds thoroughly: spread on a clean kitchen towel or paper towels and pat dry. Let sit for 5-10 minutes to air dry.
- Melt the butter in a small microwave-safe bowl in 15-second intervals until fully liquid. Let cool for a minute.
- In a medium mixing bowl, combine granulated sugar, ground cinnamon, and ¼ teaspoon salt. Stir with a fork to break up clumps.
- Add the cleaned, dried pumpkin seeds to the bowl with the sugar mixture. Pour melted butter over the top. Toss with a spatula or wooden spoon until every seed is coated.
- Line a rimmed baking sheet with parchment paper or a silicone baking mat. Spread the coated seeds in a single, even layer, leaving a little space between seeds if possible.
- Roast for 10 minutes, then stir the seeds with a spatula. Return to the oven and roast for another 10-15 minutes, until golden brown and fragrant. Seeds will still feel slightly soft—they’ll crisp as they cool.
- Cool completely on the baking sheet for at least 15-20 minutes.
- Once cooled, sprinkle a tiny pinch of flaky sea salt over the top.
Notes
Dry seeds thoroughly to avoid chewiness. Watch the oven closely in the last 5 minutes to prevent burning. Let seeds cool completely before storing to maintain crispness. For dairy-free, substitute butter with coconut oil or avocado oil.
Nutrition
- Serving Size: ¼ cup (about 30g)
- Calories: 180
- Sugar: 6
- Sodium: 150
- Fat: 14
- Saturated Fat: 4
- Carbohydrates: 10
- Fiber: 2
- Protein: 7
Keywords: cinnamon sugar pumpkin seeds, roasted pumpkin seeds, fall snack, easy pumpkin seed recipe, sweet pumpkin seeds


