I want a black velvet cupcake right now. Not red velvet—black. The kind that looks like midnight on a plate, with that deep, dark cocoa flavor that hits you in the back of the throat. I have everything except one thing: the right frosting. Cream cheese is non-negotiable, but I keep staring at the oranges sitting in the bowl on my counter. And honestly? That feels like the missing piece.
This is how the best recipe ideas happen around here. Not in some grand moment of inspiration, but in the quiet space between craving something and realizing you can make it better than you imagined. I’ve made red velvet cupcakes more times than I can count—they’re a staple at every family gathering and holiday table. But black velvet? That’s different. That’s the version you make when you want something that feels a little mysterious, a little dramatic, and completely unforgettable.
The first time I made these, I was testing a recipe for a friend’s Halloween party. I wanted something that looked stunning but tasted like actual dessert—not just a gimmick. The black cocoa powder gave the cupcakes that dark, dramatic color, but the flavor was almost too intense on its own. It needed something bright to cut through all that richness. That’s when I grabbed an orange without thinking, zested it into the cream cheese frosting, and watched everything click into place.
The orange doesn’t scream at you. It whispers. It sits underneath the tangy cream cheese and the deep chocolate, making each bite feel balanced and complete. These cupcakes became the thing people asked for year after year, not just for Halloween but for birthdays, dinner parties, and random Tuesday nights when someone needed a little bit of magic.
So here’s the thing about this recipe—it’s not complicated. It’s just smart. The kind of smart that comes from standing in your kitchen, trusting your instincts, and knowing that sometimes the best combinations happen when you stop overthinking and start tasting.
Why You’ll Love This Recipe
Let me tell you why these cupcakes keep showing up on my counter year after year. I’ve tested this recipe more times than I care to admit, and every single batch has taught me something new about balance, texture, and the magic of unexpected flavor pairings.
- Deep, Rich Flavor Without the Food Coloring – Black cocoa powder does all the heavy lifting here. No artificial dyes, no staining your fingers purple. Just pure, intense chocolate flavor that tastes like a grown-up version of your favorite childhood treat.
- The Frosting Is Next Level – Orange and cream cheese belong together. I didn’t invent this combination, but I’ve perfected it. The zest adds brightness without making it taste like breakfast, and the cream cheese keeps everything tangy and smooth.
- Simple Ingredients You Can Find Anywhere – Nothing fancy here. You probably have most of these things in your pantry right now. The black cocoa is the only specialty item, and you can order it online or find it at well-stocked grocery stores.
- Perfect for Any Occasion – Yes, these are stunning for Halloween. But honestly? I make them for birthdays, Valentine’s Day, dinner parties, and random Sundays when I want to feel fancy. The black color is dramatic enough for holidays, but the flavor is timeless enough for any day of the year.
- Always Gets Rave Reviews – I’ve brought these to potlucks, bake sales, and family dinners. People take one bite and their eyes go wide. The combination surprises everyone in the best way possible.
What makes this recipe different from every other black velvet cupcake out there is the balance. I spent weeks testing ratios—too much black cocoa and the cupcakes taste almost bitter. Too little and they’re just gray. The sweet spot I landed on gives you that dark, dramatic color with a flavor that’s rich but not overwhelming. And that orange cream cheese frosting? It’s the kind of thing that makes people ask for the recipe before they finish their first cupcake.
These are the cupcakes you make when you want to impress someone without stress. They come together in under an hour, they look like you spent hours decorating, and they taste like something from a fancy bakery. But the best part? They’re yours. You made them. And they’re perfect.
What Ingredients You Will Need
This recipe uses simple, wholesome ingredients to create something that feels special without the fuss. I’ve tested every substitution and variation so you don’t have to guess.
For the Black Velvet Cupcakes:
- All-purpose flour – 1 ½ cups (180g). Standard all-purpose gives the best structure. Don’t substitute with bread flour or cake flour unless you’re experienced with adjustments.
- Black cocoa powder – ½ cup (50g). This is the star of the show. I recommend King Arthur Flour Black Cocoa for the deepest color and smoothest flavor. Regular Dutch-process cocoa won’t give you the same dramatic black color.
- Granulated sugar – 1 cup (200g). Keeps the cupcakes tender and sweet without being cloying.
- Brown sugar – ¼ cup (50g), packed. Adds moisture and a hint of molasses that complements the dark cocoa.
- Baking soda – 1 teaspoon. Black cocoa is naturally more acidic, so baking soda helps it rise properly.
- Salt – ½ teaspoon. Don’t skip this. Salt makes chocolate taste like chocolate.
- Buttermilk – 1 cup (240ml), room temperature. The acidity tenderizes the crumb and reacts with the baking soda for lift. If you don’t have buttermilk, add 1 tablespoon of lemon juice to regular milk and let it sit for 5 minutes.
- Vegetable oil – ½ cup (120ml). Oil keeps these cupcakes moist for days. Butter adds flavor but dries out faster, so I stick with oil here.
- Large eggs – 2, room temperature. Room temperature eggs incorporate better and give a smoother batter.
- Vanilla extract – 2 teaspoons. Pure vanilla, not imitation. It makes a difference.
- White vinegar – 1 teaspoon. Sounds weird, I know. But vinegar reacts with the cocoa to deepen the color and enhance the rise. Trust me on this one.
- Hot coffee – ½ cup (120ml), freshly brewed. Coffee doesn’t make these taste like coffee. It intensifies the chocolate flavor and makes the crumb incredibly tender.
For the Orange Cream Cheese Frosting:
- Cream cheese – 8 ounces (226g), full-fat and softened. Low-fat cream cheese makes the frosting runny. Don’t do it.
- Unsalted butter – ½ cup (113g), softened. Butter adds stability and richness.
- Powdered sugar – 3 to 4 cups (360g to 480g), sifted. Start with 3 cups and add more if you need a stiffer frosting.
- Orange zest – 2 tablespoons from 1 large orange. This is non-negotiable. Fresh zest gives that bright, citrusy aroma that bottled juice just can’t replicate.
- Fresh orange juice – 2 tablespoons. Adds flavor and thins the frosting to the perfect consistency.
- Vanilla extract – 1 teaspoon.
- Pinch of salt – Just a tiny pinch to balance the sweetness.
Ingredient Selection Tips: Look for black cocoa powder that’s labeled as “black” or “extra dark.” Regular Dutch-process cocoa will give you a dark brown cupcake, not black. For the oranges, choose ones that feel heavy for their size—they have more juice and more flavorful zest.
Substitution Guidance: Need this dairy-free? Use a high-quality dairy-free cream cheese (I like Miyoko’s) and substitute the buttermilk with 1 cup of unsweetened almond milk mixed with 1 tablespoon of lemon juice. For a gluten-free version, swap the all-purpose flour with a 1:1 gluten-free baking blend. The texture will be slightly different but still delicious.
Equipment Needed
You don’t need a professional bakery setup for these cupcakes, but a few key tools make the process smoother and the results more consistent.
- Standard 12-cup muffin tin – Non-stick or regular, either works. If you’re using a non-stick pan, you might not need liners, but I still recommend them for easy cleanup.
- Paper cupcake liners – I like white or silver liners for the best contrast against the black cupcakes. Dark liners hide the color.
- Electric hand mixer or stand mixer – You can make the frosting by hand, but your arm will thank you for using a mixer. For the cupcakes, a hand mixer works perfectly.
- Large mixing bowls – At least two. One for dry ingredients, one for wet ingredients.
- Whisk – For combining dry ingredients evenly.
- Rubber spatula – For scraping down the bowl and folding in the coffee.
- Cooling rack – Crucial for letting cupcakes cool completely before frosting. If you frost warm cupcakes, you’ll have a melty mess.
- Piping bag and large star tip – Optional but recommended for that bakery-style look. A 1M or 2D tip works beautifully. If you don’t have a piping bag, a zip-top bag with the corner snipped off works in a pinch.
- Microplane or fine grater – For zesting the orange. A box grater works too, but a microplane gives you that fine, fluffy zest that blends seamlessly into the frosting.
I’ve made these cupcakes with nothing but a whisk and a wooden spoon before, and they still turned out great. But investing in a good cooling rack and a piping bag really does make a difference in the final presentation. Budget-friendly options work just fine—I bought my first piping bag at a dollar store and used it for years.
Preparation Method
Let’s walk through this step by step. I’ve included time estimates and sensory cues so you know exactly what to look for at each stage.
Step 1: Preheat and Prepare (5 minutes)
Preheat your oven to 350°F (175°C). Line your muffin tin with 12 paper liners. This recipe makes exactly 12 standard-sized cupcakes—no more, no less. If you’re using a dark non-stick pan, reduce the oven temperature by 25°F to prevent over-browning.
Step 2: Combine Dry Ingredients (5 minutes)
In a large bowl, whisk together 1 ½ cups all-purpose flour, ½ cup black cocoa powder, 1 cup granulated sugar, ¼ cup packed brown sugar, 1 teaspoon baking soda, and ½ teaspoon salt. Whisk for about 30 seconds to make sure everything is evenly distributed. The mixture will look like dark gray sand with no visible lumps. If you see clumps of black cocoa, break them up with your fingers.
Step 3: Combine Wet Ingredients (5 minutes)
In a separate bowl, whisk together 1 cup room-temperature buttermilk, ½ cup vegetable oil, 2 room-temperature eggs, 2 teaspoons vanilla extract, and 1 teaspoon white vinegar. Whisk until the eggs are fully incorporated and the mixture looks smooth and slightly thick. It should smell tangy from the buttermilk and vinegar—that’s a good sign.
Step 4: Make the Batter (3 minutes)
Pour the wet ingredients into the dry ingredients. Stir with a rubber spatula until just combined—about 15 to 20 strokes. You’ll see some streaks of flour remaining, and that’s okay. Now pour in ½ cup of hot coffee and fold it in gently. The batter will look thin and very dark, almost like a chocolate milkshake. Don’t overmix. A few small lumps are fine. Overmixing develops gluten and makes the cupcakes tough.
Step 5: Fill the Liners (5 minutes)
Divide the batter evenly among the 12 liners. Each liner should be about ⅔ to ¾ full. I use a large cookie scoop for even portions, but a measuring cup works too. The batter is thin, so it will spread and settle on its own. Tap the pan gently on the counter to release any air bubbles.
Step 6: Bake (18 to 22 minutes)
Bake at 350°F (175°C) for 18 to 22 minutes. At 18 minutes, insert a toothpick into the center of a cupcake. If it comes out with a few moist crumbs, they’re done. If it comes out wet, give them 2 more minutes and check again. The tops should spring back when lightly touched. Don’t overbake—these cupcakes are meant to be moist and tender.
Step 7: Cool Completely (30 minutes)
Let the cupcakes cool in the pan for 5 minutes. Then transfer them to a cooling rack and let them cool completely—about 30 minutes. This step is non-negotiable. If you frost them while they’re still warm, the frosting will melt into a sad puddle. I learned this the hard way.
Step 8: Make the Frosting (10 minutes)
While the cupcakes cool, make the frosting. In a large bowl, beat 8 ounces of softened cream cheese and ½ cup of softened butter together until smooth and fluffy—about 2 minutes on medium speed. Scrape down the bowl. Add 2 tablespoons of orange zest, 2 tablespoons of orange juice, 1 teaspoon of vanilla extract, and a pinch of salt. Beat until combined. Gradually add 3 cups of sifted powdered sugar, beating on low speed until incorporated. Increase to medium speed and beat for 2 minutes until light and fluffy. If the frosting seems too soft, add the remaining cup of powdered sugar. If it seems too stiff, add a teaspoon more orange juice.
Step 9: Frost and Decorate (15 minutes)
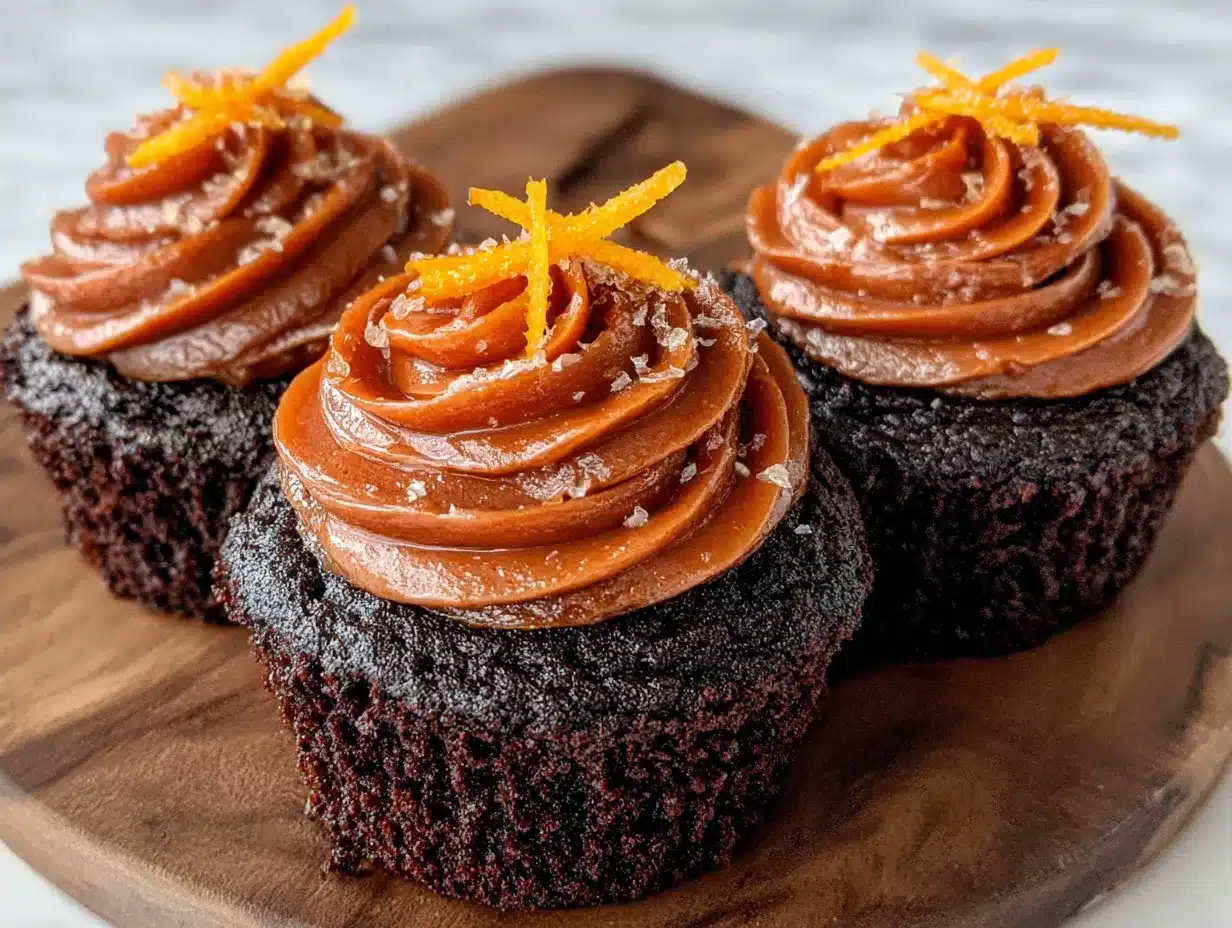
Once the cupcakes are completely cool, pipe or spread the frosting. I use a large star tip for that classic bakery swirl, but a simple knife spread works beautifully too. If you want to get fancy, add a little extra orange zest on top or a tiny slice of candied orange. The contrast of bright orange against the dark black cupcake is stunning.
Cooking Tips & Techniques
I’ve made these cupcakes more times than I can count, and I’ve made every mistake in the book so you don’t have to. Here’s what I’ve learned.
The Coffee Trick – Hot coffee is non-negotiable in this recipe. It doesn’t make the cupcakes taste like coffee—it deepens the chocolate flavor and makes the crumb incredibly tender. I’ve tested this with water and with milk, and coffee wins every time. Use freshly brewed coffee for the best results.
Room Temperature Ingredients Matter – I know it’s tempting to use cold eggs and cold buttermilk straight from the fridge. Don’t. Cold ingredients don’t emulsify properly, which leads to dense, heavy cupcakes. Set your eggs and buttermilk on the counter 30 minutes before you start baking. Set a timer if you have to.
Don’t Overmix the Batter – This is the most common mistake I see. Once you add the wet ingredients to the dry, mix just until the flour disappears. Then add the coffee and fold gently. Overmixing develops gluten, and gluten makes tough cupcakes. A few lumps are fine—they’ll bake out.
The Toothpick Test Is Your Friend – Ovens run at different temperatures, so baking times are guidelines, not rules. Start checking at 18 minutes. Insert a toothpick into the center of a cupcake. If it comes out with a few moist crumbs, they’re perfect. If it comes out clean, they’re slightly overbaked but still good. If it comes out wet, give them more time.
Frosting Consistency – The orange cream cheese frosting should be soft but not runny. If it’s too soft, refrigerate it for 10 minutes before piping. If it’s too stiff, add a splash of orange juice. The perfect consistency holds its shape when piped but still feels light and creamy on the tongue.
My Biggest Failure – The first time I made these, I forgot the vinegar. The cupcakes baked up gray instead of black, and they were flat and dense. I almost threw the whole batch away. But I tasted one, and the flavor was still good—just not as dramatic. Now I keep a little sticky note on my fridge that says “VINEGAR.” It’s saved me more than once.
Variations & Adaptations
One of the best things about this recipe is how adaptable it is. Here are some variations I’ve tested and loved.
Dairy-Free Version – Substitute the buttermilk with 1 cup of unsweetened almond milk mixed with 1 tablespoon of lemon juice. Use a high-quality dairy-free cream cheese like Miyoko’s or Violife for the frosting. Use vegan butter or coconut oil in place of regular butter. The texture will be slightly different but still delicious.
Gluten-Free Version – Swap the all-purpose flour with a 1:1 gluten-free baking blend that contains xanthan gum. I’ve had great results with King Arthur Flour Measure for Measure. The cupcakes will be slightly more delicate, so handle them gently when transferring to the cooling rack.
Spiced Orange Variation – Add 1 teaspoon of cinnamon and ½ teaspoon of nutmeg to the dry ingredients. The warm spices complement both the black cocoa and the orange frosting beautifully. This version is especially good in the fall.
Halloween Cupcakes – Skip the orange zest and use a classic cream cheese frosting. Top with crushed Oreos for a “dirt” effect and add gummy worms or candy eyeballs. The black cupcakes look like little pots of soil, and kids absolutely love them.
Lemon Cream Cheese Version – Replace the orange zest and juice with lemon zest and juice. The bright, tart lemon cuts through the rich black cocoa in a completely different way. This is my go-to version for spring and summer gatherings.
My Personal Favorite Variation – I once made these with a teaspoon of espresso powder added to the dry ingredients and topped them with a salted caramel drizzle over the orange cream cheese frosting. The combination of dark chocolate, orange, coffee, and salt was absolutely ridiculous. I ate three in one sitting and have no regrets.
Serving & Storage Suggestions
These cupcakes are best served at room temperature. The crumb is tender, the frosting is creamy, and the flavors are most balanced when everything has come to the same temperature. If you’ve refrigerated them, let them sit on the counter for 20 to 30 minutes before serving.
Presentation Ideas: Arrange the cupcakes on a black or white cake stand for maximum visual impact. The contrast between the dark cupcakes and a light stand is stunning. If you’re serving them for a special occasion, add a few fresh orange slices or edible flowers around the base of the stand.
Complementary Pairings: These cupcakes are rich and decadent, so they pair beautifully with something light and refreshing. A cup of black coffee or an espresso is perfect. For a dessert spread, serve them alongside this apple cider donut bundt cake for a fall-themed dessert table that will impress everyone.
Storage Instructions: Store unfrosted cupcakes in an airtight container at room temperature for up to 3 days. Frosted cupcakes should be stored in the refrigerator in an airtight container for up to 5 days. The frosting will firm up in the fridge, so let them sit at room temperature for 15 minutes before serving.
Freezing Instructions: You can freeze unfrosted cupcakes for up to 3 months. Wrap each cupcake individually in plastic wrap, then place them in a freezer-safe bag. Thaw at room temperature for about an hour before frosting. I do not recommend freezing frosted cupcakes—the cream cheese frosting can become grainy when thawed.
Reheating Tips: If you want that just-baked warmth, microwave an unfrosted cupcake for 10 to 15 seconds. Add the frosting after reheating. The frosting will melt if you microwave it, so always frost after warming.
How Flavors Develop: Honestly, these cupcakes taste even better the day after they’re made. The black cocoa flavor deepens overnight, and the orange zest in the frosting becomes more pronounced. If you have the time, make the cupcakes a day ahead and frost them the morning you plan to serve them.
Nutritional Information & Benefits
I’m not a nutritionist, but I’ve calculated the approximate values based on the ingredients I use. One cupcake with frosting contains roughly:
- Calories: 380-420
- Fat: 18-22g
- Carbohydrates: 50-55g
- Protein: 5-7g
- Sugar: 38-42g
Health Benefits of Key Ingredients: Black cocoa powder is rich in antioxidants called flavonoids, which can help reduce inflammation and support heart health. Oranges provide a good dose of vitamin C, which supports immune function. Cream cheese contains calcium and protein, though it’s also high in saturated fat—everything in moderation.
Dietary Considerations: This recipe contains gluten, dairy, and eggs. For gluten-free and dairy-free versions, see the variations section above. These cupcakes are not low-carb or keto-friendly due to the sugar content.
Potential Allergens: Wheat (gluten), dairy, eggs. If you’re serving these at a gathering, I recommend labeling them so guests with allergies can make informed choices.
My Personal Wellness Perspective: Look, these are cupcakes. They’re a treat, not a health food. But I believe in the power of enjoying something decadent and delicious without guilt. Life is short. Eat the cupcake. Share one with a friend. Savor every bite.
Conclusion
These black velvet cupcakes with orange cream cheese frosting are the kind of recipe that becomes a signature. They’re dramatic enough for holidays and special occasions, but simple enough for a random Tuesday when you need a little bit of magic in your day.
The combination of deep, dark cocoa and bright, citrusy cream cheese is unexpected in the best possible way. Every time I make these, someone takes a bite and their eyes go wide. That surprised, delighted look never gets old.
I love this recipe because it reminds me that the best things in the kitchen often come from trusting your instincts. I didn’t plan to put orange in cream cheese frosting. I just had an orange on my counter and a feeling that it would work. And it did. That’s the kind of cooking I believe in—experimental, intuitive, and always delicious.
If you make these cupcakes, I want to hear about it. Leave a comment below and tell me how they turned out. Did you try a variation? Did your family love them? Did you eat three in one sitting like I did? No judgment here.
Go ahead and give these a try. Your kitchen is about to smell incredible, and your taste buds are in for something special.
Happy baking, friends.
Frequently Asked Questions
Can I use regular cocoa powder instead of black cocoa?
You can, but the cupcakes won’t be black. Regular cocoa powder gives a dark brown color, not black. The flavor will also be less intense and slightly more bitter. If you can’t find black cocoa, use Dutch-process cocoa and add an extra tablespoon for a deeper color.
Why did my cupcakes turn out gray instead of black?
This usually happens when the black cocoa isn’t fresh, or when the batter is overmixed. Fresh black cocoa has a very dark, almost purple-black color. If yours is old, it may have oxidized and lost some of its potency. Also, make sure you didn’t skip the vinegar—it helps deepen the color.
Can I make these cupcakes ahead of time?
Absolutely. You can bake the cupcakes up to 3 days ahead and store them unfrosted in an airtight container at room temperature. You can also freeze them for up to 3 months. Frost them the day you plan to serve them for the best texture and appearance.
How do I get that perfect swirl on top of the cupcakes?
Use a piping bag fitted with a large star tip (like a 1M or 2D). Hold the bag straight up and apply steady pressure as you pipe in a spiral from the outside edge toward the center. Lift straight up when you reach the middle. If the frosting is too soft, refrigerate it for 10 minutes before piping.
Can I use bottled orange juice instead of fresh?
I really don’t recommend it. Bottled orange juice lacks the bright, fresh flavor that makes this frosting special. The zest is even more important than the juice—it’s where most of the orange flavor comes from. If you’re in a pinch, use fresh orange juice from a carton, but don’t skip the fresh zest.
Pin This Recipe!
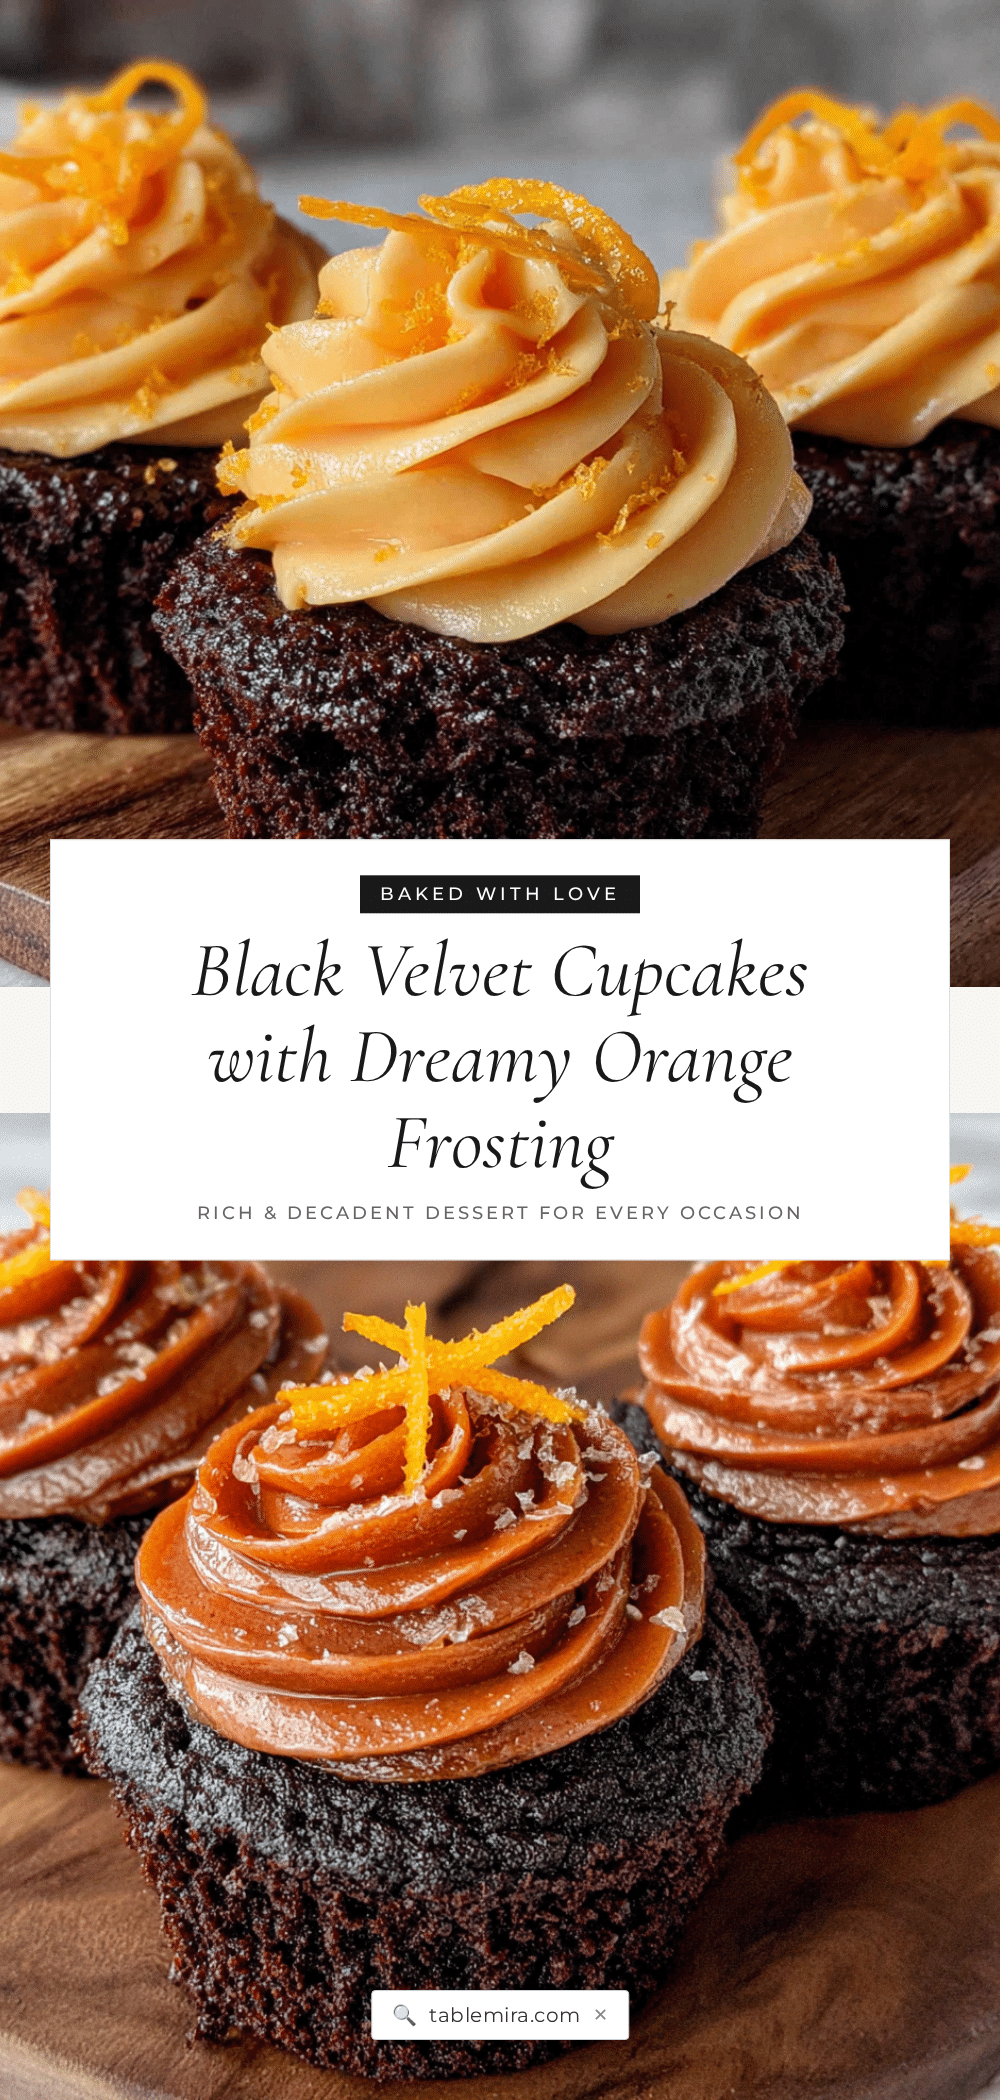
Best Black Velvet Cupcakes with Orange Cream Cheese Frosting
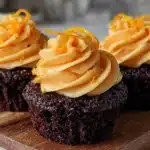
Deep, dark black velvet cupcakes with a rich cocoa flavor, topped with a bright and tangy orange cream cheese frosting. This recipe is perfect for any occasion, from Halloween to birthdays, and always gets rave reviews.
- Prep Time: 15 minutes
- Cook Time: 20 minutes
- Total Time: 1 hour 5 minutes
- Yield: 12 cupcakes 1x
- Category: Dessert
- Cuisine: American
Ingredients
- 1 ½ cups (180g) all-purpose flour
- ½ cup (50g) black cocoa powder
- 1 cup (200g) granulated sugar
- ¼ cup (50g) packed brown sugar
- 1 teaspoon baking soda
- ½ teaspoon salt
- 1 cup (240ml) buttermilk, room temperature
- ½ cup (120ml) vegetable oil
- 2 large eggs, room temperature
- 2 teaspoons vanilla extract
- 1 teaspoon white vinegar
- ½ cup (120ml) hot coffee, freshly brewed
- 8 ounces (226g) cream cheese, softened
- ½ cup (113g) unsalted butter, softened
- 3 to 4 cups (360g to 480g) powdered sugar, sifted
- 2 tablespoons orange zest (from 1 large orange)
- 2 tablespoons fresh orange juice
- 1 teaspoon vanilla extract
- Pinch of salt
Instructions
- Preheat oven to 350°F (175°C). Line a 12-cup muffin tin with paper liners.
- In a large bowl, whisk together flour, black cocoa powder, granulated sugar, brown sugar, baking soda, and salt until evenly combined.
- In a separate bowl, whisk together buttermilk, vegetable oil, eggs, vanilla extract, and white vinegar until smooth.
- Pour wet ingredients into dry ingredients and stir with a rubber spatula until just combined (about 15-20 strokes). Fold in hot coffee gently. Batter will be thin and dark.
- Divide batter evenly among the 12 liners, filling each about ⅔ to ¾ full. Tap pan gently to release air bubbles.
- Bake for 18 to 22 minutes, until a toothpick inserted into the center comes out with a few moist crumbs. Cool in pan for 5 minutes, then transfer to a cooling rack to cool completely (about 30 minutes).
- While cupcakes cool, make frosting: Beat cream cheese and butter together until smooth and fluffy (about 2 minutes). Add orange zest, orange juice, vanilla extract, and salt; beat until combined. Gradually add 3 cups powdered sugar, beating on low until incorporated, then increase to medium and beat for 2 minutes. Add more powdered sugar if needed for stiffness.
- Once cupcakes are completely cool, pipe or spread frosting onto each cupcake. Garnish with extra orange zest if desired.
Notes
Hot coffee deepens the chocolate flavor without making the cupcakes taste like coffee. Room temperature ingredients are crucial for proper emulsification. Do not overmix the batter. The vinegar helps deepen the color. Frosted cupcakes can be refrigerated for up to 5 days; let sit at room temperature for 15 minutes before serving.
Nutrition
- Serving Size: 1 cupcake
- Calories: 400
- Sugar: 40
- Sodium: 280
- Fat: 20
- Saturated Fat: 8
- Carbohydrates: 52
- Fiber: 2
- Protein: 6
Keywords: black velvet cupcakes, orange cream cheese frosting, black cocoa, Halloween cupcakes, chocolate cupcakes