There used to be a tiny bakery tucked between a laundromat and a vintage shop on the south side of town that made the most unforgettable black velvet cupcakes. When they closed their doors three years ago—a “For Lease” sign taped in the window one Tuesday morning—I honestly felt a little lost. That bakery had been my go-to for birthdays, bad days, and everything in between. Their black velvet cake was impossibly dark, incredibly moist, and they always topped it with this bright, zesty orange frosting that nobody else seemed to make. After a dozen attempts—some so dry they crumbled into dust, others that tasted more like charcoal than chocolate—I finally got it. This is the recreation of that exact experience, and let me tell you, it was worth every single failed batch.
The funny thing is, I didn’t even know what I was chasing at first. I just knew the regular chocolate cupcakes weren’t cutting it anymore. You know that feeling when you’re craving something specific but can’t quite put your finger on it? That was me, standing in my kitchen at 9 PM on a Wednesday, staring at a box of cocoa powder like it owed me answers. It took me three tries before I realized the secret wasn’t just in the cocoa—it was in the vinegar and baking soda reaction that gives black velvet its signature tender crumb. And the frosting? That took even longer to nail. I mean, I went through a whole bag of oranges before I figured out the perfect balance of zest and juice.
What I love most about this recipe is how fast it comes together. These aren’t the kind of cupcakes that require you to clear your whole afternoon. From start to finish, you’re looking at about 45 minutes, tops. That’s faster than driving to the bakery that closed down, honestly. The batter comes together in one bowl with a whisk—no stand mixer required—and the frosting is a simple buttercream that takes five minutes to whip up. For a weeknight when you’re tired and hungry but still want something that feels special, these cupcakes deliver every single time. Let me show you how to make them.
Why You’ll Love This Recipe
These Quick Black Velvet Cupcakes with Orange Frosting aren’t just another dessert recipe—they’re the kind of thing that makes people close their eyes after the first bite. I’ve tested this recipe more times than I care to admit, and every single batch has been better than the last. Here’s why I think you’ll fall for them too:
- Quick & Easy: These come together in under 45 minutes from start to finish. No complicated techniques, no fancy equipment—just a whisk and a muffin tin. Perfect for those evenings when you need dessert fast.
- Simple Ingredients: You probably already have most of these in your pantry. Flour, sugar, cocoa, oil, vinegar—the usual suspects. The only thing you might need to pick up is an orange for the frosting.
- Perfect for Weeknights: These cupcakes are designed for busy people cooking on limited time. The batter takes about 10 minutes to mix, and they bake while you clean up dinner. Minimal effort, maximum reward.
- Crowd-Pleaser: I’ve brought these to potlucks, office parties, and family dinners, and they always disappear first. The black velvet color is striking, and the orange frosting surprises everyone in the best way.
- Unbelievably Delicious: The texture is incredibly moist and tender—thanks to the vinegar and baking soda reaction—and the orange frosting cuts through the rich cocoa perfectly. It’s comfort food with a bright, unexpected twist.
What makes this recipe different from the rest is the technique. Most black velvet recipes use a ton of black food coloring, which can leave a bitter aftertaste. I use a combination of dark cocoa powder and a small amount of natural black cocoa powder to get that deep color without the chemical taste. It’s a trick I learned after my third failed attempt, and it makes all the difference. Plus, the orange frosting isn’t just a garnish—it’s an integral part of the experience. The citrus brightens the chocolate in a way that vanilla frosting just can’t match.
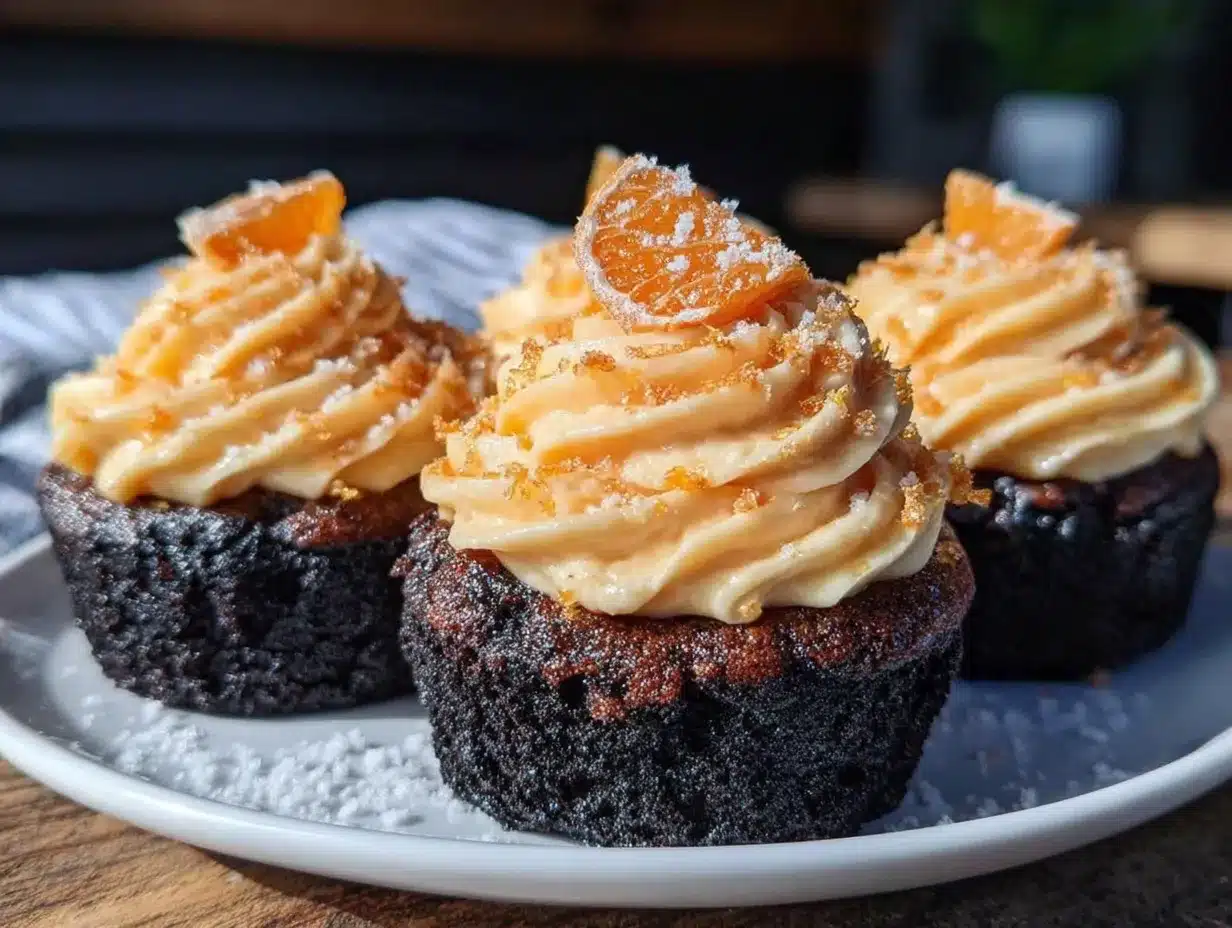
Honestly, this recipe is the kind that makes you feel like a hero in the kitchen. It’s simple enough for a Tuesday night but impressive enough for a birthday party. And when you pull those dark, domed cupcakes out of the oven and top them with that glossy orange buttercream, you’ll understand why I spent three years chasing this exact combination. It’s worth every single try.
What Ingredients You Will Need
This recipe uses simple, everyday ingredients to create something truly special. I’ve tested each one carefully, and I’ll share my notes on what works best so you can get perfect results every time.
For the Cupcakes
- All-purpose flour, 1 ½ cups (190g) — I use Gold Medal or King Arthur for consistent results. Spoon and level your flour; don’t scoop directly from the bag or you’ll pack it too tight.
- Granulated sugar, 1 cup (200g) — Regular white sugar works perfectly here. No need for anything fancy.
- Unsweetened cocoa powder, ½ cup (45g) — I recommend Hershey’s Special Dark or a mix of regular cocoa and black cocoa for that deep color. If you use only natural cocoa, the color will be more brown than black.
- Black cocoa powder, 2 tablespoons (15g) — This is optional but highly recommended for the signature black velvet color. You can find it online or at specialty baking stores. If you skip it, add an extra 2 tablespoons of regular cocoa.
- Baking soda, 1 teaspoon — This reacts with the vinegar to create the tender crumb. Make sure it’s fresh—test it by dropping a pinch in vinegar; it should fizz immediately.
- Salt, ½ teaspoon — Balances the sweetness and enhances the chocolate flavor. I use fine sea salt.
- Vegetable oil, ½ cup (120ml) — Any neutral oil works: canola, grapeseed, or even melted coconut oil. Oil keeps these cupcakes incredibly moist, unlike butter which can make them dense.
- White vinegar, 1 tablespoon — This is the magic ingredient. It reacts with the baking soda to create bubbles that make the cupcakes light and tender. Don’t worry—you won’t taste it at all.
- Vanilla extract, 1 teaspoon — Pure vanilla extract adds depth. Imitation vanilla works in a pinch, but the real stuff is better.
- Water, 1 cup (240ml) — Hot water helps bloom the cocoa powder, bringing out its full flavor. I use water straight from the tap after running it hot for a few seconds.
For the Orange Frosting
- Unsalted butter, ½ cup (113g), softened — Let it sit at room temperature for about 30 minutes. It should be soft enough to press with your finger but not melted.
- Powdered sugar, 2 cups (240g) — Sift it if it’s lumpy. No one wants gritty frosting.
- Fresh orange zest, 1 tablespoon — From about one medium orange. Only zest the orange part; the white pith is bitter. I recommend using a microplane for the finest zest.
- Fresh orange juice, 2 tablespoons — Squeezed from the same orange you zested. Fresh juice makes a huge difference compared to bottled.
- Vanilla extract, ½ teaspoon — Just a touch to round out the flavors.
- Salt, a tiny pinch — This balances the sweetness.
Ingredient Tips and Substitutions
For a dairy-free version, use a plant-based butter stick in the frosting—I’ve had good results with Miyoko’s. The cupcakes themselves are already dairy-free since they use oil and water. If you don’t have black cocoa powder, you can use all regular cocoa, but the color will be closer to dark brown than black. You can also add a drop or two of black gel food coloring if you want that dramatic look, but I honestly prefer the natural dark color. For the orange juice, make sure it’s fresh—bottled orange juice has a cooked flavor that doesn’t work as well in the frosting.
Equipment Needed
You don’t need a lot of fancy equipment for these cupcakes, which is part of why I love them. Here’s what you’ll need:
- Muffin tin — A standard 12-cup muffin tin. I use a non-stick one, but any will work. If you only have a 6-cup tin, just bake in batches.
- Paper cupcake liners — I prefer white or black liners for the dramatic contrast. You can also grease the pan directly if you don’t have liners.
- Mixing bowls — One large bowl for the dry ingredients and another for the wet. I use glass or stainless steel.
- Whisk — A good wire whisk is all you need. No electric mixer required for the batter.
- Measuring cups and spoons — For accuracy. I keep a set of dry measuring cups for flour and sugar, and a liquid measuring cup for the water and oil.
- Microplane or fine grater — For zesting the orange. A box grater works too, but a microplane gives finer zest that blends better into the frosting.
- Electric mixer — For the frosting. A hand mixer works great, or you can use a stand mixer with the paddle attachment. You can make the frosting by hand with a whisk, but it takes some elbow grease.
- Cooling rack — Letting the cupcakes cool completely before frosting is crucial. A wire rack allows air to circulate so they cool evenly.
- Offset spatula or piping bag — For frosting the cupcakes. I use a piping bag with a star tip for a bakery look, but a simple spatula works perfectly too.
If you don’t have a microplane, you can use the small holes on a box grater. If you don’t have an electric mixer, you can make the frosting by hand—just soften the butter really well and whisk vigorously. I’ve done it both ways, and honestly, the hand-whisked frosting has a slightly different texture that some people prefer.
Preparation Method
- Preheat your oven to 350°F (175°C). Position the rack in the center of the oven. Line your muffin tin with 12 paper liners. I like to do this before I start mixing so I’m not scrambling later.
- Mix the dry ingredients. In a large bowl, whisk together the all-purpose flour, granulated sugar, cocoa powder, black cocoa powder (if using), baking soda, and salt. Whisk for about 30 seconds to make sure everything is evenly distributed. You want to break up any lumps in the cocoa powder.
- Add the wet ingredients. Make a well in the center of the dry ingredients. Pour in the vegetable oil, white vinegar, and vanilla extract. Don’t stir yet—just let them sit in the well.
- Pour in the hot water. Measure 1 cup of hot water—it should be hot but not boiling, about the temperature of a hot cup of coffee. Pour it over the wet ingredients in the well.
- Whisk until just combined. Start whisking from the center, gradually incorporating the dry ingredients into the wet. Whisk gently until the batter is smooth and no streaks of flour remain. Don’t overmix—about 20-30 seconds of whisking is plenty. The batter will be thin, almost like a milkshake. That’s normal.
- Fill the cupcake liners. Use a cookie scoop or a measuring cup to divide the batter evenly among the 12 liners. Fill each about ⅔ full. The batter is thin, so it will spread easily. If you have a little extra, distribute it evenly among the cups.
- Bake for 18-22 minutes. Place the pan in the preheated oven and bake until a toothpick inserted into the center of a cupcake comes out clean or with just a few moist crumbs. The tops should spring back when lightly touched. Start checking at 18 minutes—ovens vary, and you don’t want to overbake them.
- Cool completely. Remove the pan from the oven and let the cupcakes cool in the pan for 5 minutes. Then transfer them to a wire rack to cool completely. This is important—if you frost them while they’re still warm, the frosting will melt and slide right off. I usually wait at least 30 minutes.
- Make the orange frosting. While the cupcakes are cooling, make the frosting. In a medium bowl, beat the softened butter with an electric mixer on medium speed until smooth and creamy, about 1 minute. Add the powdered sugar, orange zest, orange juice, vanilla extract, and a tiny pinch of salt. Start mixing on low speed to avoid a sugar cloud, then increase to medium-high and beat for 2-3 minutes until light and fluffy. If the frosting seems too thick, add another teaspoon of orange juice. If it’s too thin, add a tablespoon more powdered sugar.
- Frost the cupcakes. Once the cupcakes are completely cool, frost them using a piping bag fitted with a star tip, or simply spread the frosting with an offset spatula. I like to pipe a generous swirl on each cupcake—it gives them that bakery look. Top with a little extra orange zest if you’re feeling fancy.
A few notes from my many trials: If your batter seems lumpy after adding the water, don’t panic. Just whisk a little more gently. The lumps are usually just pockets of cocoa that need a bit more encouragement. Also, if your cupcakes sink in the middle after baking, it might mean your oven wasn’t hot enough, or you opened the door too early. Try not to peek until the 18-minute mark. And if the frosting seems a little orange-heavy at first, trust me—it will mellow as it sits. The flavors actually get better after about 30 minutes.
Cooking Tips & Techniques
After making these cupcakes more times than I can count, I’ve picked up a few tricks that make the process smoother and the results more consistent. Let me share what I’ve learned the hard way so you don’t have to.
The vinegar-baking soda reaction is crucial. This is what makes black velvet cupcakes so tender. The vinegar and baking soda create carbon dioxide bubbles that lift the batter without needing eggs. Make sure your baking soda is fresh—if it’s been sitting in your pantry for more than six months, test it by dropping a pinch into a little vinegar. If it doesn’t fizz vigorously, get a new box. I learned this the hard way when my first batch came out flat and dense.
Hot water is non-negotiable. I know it seems like a small detail, but using hot water to bloom the cocoa powder makes a huge difference in flavor. The heat helps release the cocoa’s natural oils and deepens the chocolate taste. Cold water just doesn’t do the same thing. I run my tap until it’s hot—about 120°F—and use that. Don’t use boiling water, though, as it can start to cook the flour and create a gummy texture.
Don’t overmix the batter. This is probably the most common mistake I see. The batter is thin, so it’s tempting to keep whisking until it’s perfectly smooth. But overmixing develops the gluten in the flour, which makes the cupcakes tough. Whisk just until the dry ingredients are incorporated—a few small lumps are fine. They’ll disappear during baking.
Room temperature ingredients matter for the frosting. The butter needs to be properly softened for the frosting to come together smoothly. If it’s too cold, you’ll end up with lumps. If it’s melted, the frosting will be runny. Let the butter sit out for about 30 minutes before you start. If you’re in a hurry, you can microwave it for 10-second intervals, but be careful—it’s easy to overdo it. I speak from experience.
Timing is everything. Here’s my strategy for a quick weeknight bake: Preheat the oven first, then mix the batter while it heats up. While the cupcakes bake, wash the dishes and make the frosting. By the time the cupcakes are cool enough to frost, you’re ready to go. Total active time is about 15 minutes, and you’ll have fresh cupcakes in under an hour.
One mistake I made early on: I tried to double the batch and bake it all at once in a larger pan. Don’t do that. The batter doesn’t scale well for a sheet cake because the vinegar-baking soda reaction is calibrated for the cupcake size. If you need more, make two separate batches. Trust me on this one.
Variations & Adaptations
One of the best things about this recipe is how adaptable it is. I’ve played around with different variations over the years, and here are some of my favorites:
Gluten-Free Version: Substitute the all-purpose flour with a good gluten-free baking blend that contains xanthan gum. I’ve had great results with Bob’s Red Mill 1-to-1 Baking Flour. The texture is slightly more delicate, but the flavor is spot on. Just be careful not to overmix—gluten-free batters can get gummy if you work them too much.
Different Citrus Frostings: The orange frosting is my signature, but you can easily swap it out. Lemon frosting works beautifully with the dark chocolate—use lemon zest and juice instead of orange. Lime is also fantastic, especially if you add a little tequila to the frosting for a grown-up twist. I made a batch with grapefruit frosting once, and while it was good, the bitterness of the grapefruit didn’t play as nicely with the cocoa. Stick with the sweeter citrus fruits.
Spice It Up: Add a teaspoon of cinnamon and a pinch of cayenne pepper to the dry ingredients for a Mexican hot chocolate twist. The warmth of the spices complements the deep cocoa flavor, and the orange frosting cuts through the heat perfectly. This is my go-to variation for fall gatherings.
Mini Cupcakes: For parties or bite-sized treats, use a mini muffin tin and bake for 10-12 minutes instead of 18-22. You’ll get about 36 mini cupcakes. The frosting recipe stays the same, and they’re perfect for snacking without the commitment of a full-sized cupcake.
Dairy-Free Option: The cupcakes are already dairy-free since they use oil and water. For the frosting, use a plant-based butter stick—I’ve found that Miyoko’s works best for texture and flavor. Make sure it’s softened properly, and you might need to add a little more powdered sugar to get the right consistency since vegan butters tend to be softer.
Extra Dark Version: If you’re a dark chocolate lover like me, increase the black cocoa powder to ¼ cup and reduce the regular cocoa to ¼ cup. The cupcakes will be almost black in color and have a more intense, slightly bitter chocolate flavor that pairs beautifully with the sweet orange frosting. Just be aware that black cocoa powder can make the batter a bit thicker, so you might need to add an extra tablespoon of water.
Serving & Storage Suggestions
These cupcakes are best served at room temperature, which lets the frosting soften slightly and the cake stay tender. If you’ve refrigerated them, let them sit out for about 20 minutes before serving. The orange flavor in the frosting really shines when it’s not ice-cold.
For presentation, I like to arrange them on a white cake stand or a simple wooden board. The contrast between the dark cupcakes and the bright orange frosting is stunning. If you’re feeling extra, garnish each cupcake with a thin slice of candied orange peel or a little extra zest. For a more casual look, a simple swirl of frosting and a dusting of cocoa powder works beautifully.
These cupcakes pair wonderfully with a cup of hot coffee or a glass of cold milk. If you’re serving them for dessert after a meal, they go nicely with a light, fruity red wine like a Beaujolais or a chilled Moscato. For a non-alcoholic option, a sparkling water with a slice of orange complements the citrus notes in the frosting.
Storage is simple: Keep the cupcakes in an airtight container at room temperature for up to 3 days. If your kitchen is warm, you can refrigerate them, but let them come to room temperature before serving. The frosting will firm up in the fridge, which actually makes them easier to stack if you’re transporting them.
For freezing, I recommend freezing the unfrosted cupcakes. Wrap each one tightly in plastic wrap, then place them in a freezer bag. They’ll keep for up to 3 months. When you’re ready to serve, thaw them at room temperature (about 1-2 hours) and then make the frosting fresh. The frosting doesn’t freeze well—it can become grainy when thawed. I learned that one the hard way.
One thing I’ve noticed: these cupcakes actually taste even better the next day. The flavors meld together overnight, and the texture stays incredibly moist. So if you can resist eating them all on day one, you’re in for a treat on day two.
Nutritional Information & Benefits
I’m not a nutritionist, but I’ve done my best to estimate the nutritional values for these cupcakes. Keep in mind that these numbers will vary based on exact ingredients and portion sizes. One cupcake with frosting contains approximately:
- Calories: 320
- Fat: 14g
- Carbohydrates: 47g
- Protein: 3g
- Fiber: 2g
- Sugar: 33g
While these aren’t health food by any stretch, there are a few redeeming qualities. The cocoa powder is rich in antioxidants called flavonoids, which can help reduce inflammation and support heart health. The oranges in the frosting provide a small amount of vitamin C, and using oil instead of butter in the cake keeps the saturated fat content lower than traditional butter-based cakes.
For those with dietary restrictions, these cupcakes are naturally egg-free and dairy-free (if you use a plant-based butter in the frosting). They can easily be made gluten-free with a proper flour blend. However, they do contain wheat and are not suitable for those with celiac disease unless you use certified gluten-free flour.
Honestly, I believe in balance. These cupcakes are a treat, meant to be enjoyed in moderation. I make them for birthdays, holidays, and those “I just need something good” days. The joy they bring is worth every calorie. And if you’re looking for a slightly lighter option, you can make the mini version—two minis are about the same as one regular cupcake, and they feel more indulgent somehow.
Conclusion
These Quick Black Velvet Cupcakes with Orange Frosting are the kind of recipe that becomes a staple in your rotation. They’re fast enough for a weeknight craving, impressive enough for company, and forgiving enough for beginner bakers. The combination of deep, dark chocolate and bright, citrusy orange is unexpected in the best possible way—it’s the kind of flavor pairing that makes people pause and say, “Wait, what’s in this?”
I’ve spent years perfecting this recipe, chasing the memory of that little bakery that closed its doors too soon. And while I still miss that place, I’ve come to love my version even more. There’s something satisfying about recreating a favorite food in your own kitchen, making it your own, and sharing it with the people you love. That’s what cooking is all about, isn’t it?
I’d love to hear how these turn out for you. Did you try any of the variations? Did you come up with your own twist? Drop a comment below and let me know—I read every single one, and I love seeing what you create. And if you make these for someone special, tag me in your photos. There’s nothing that makes my day like seeing your beautiful cupcakes on my feed.
Now go preheat that oven. You’ve got some cupcakes to bake.
Frequently Asked Questions
Can I make these cupcakes ahead of time?
Absolutely! You can bake the cupcakes up to 2 days in advance and store them unfrosted in an airtight container at room temperature. Make the frosting fresh on the day you plan to serve them for the best texture and flavor. If you need to make them further ahead, freeze the unfrosted cupcakes for up to 3 months.
Why are my cupcakes not black?
The most common reason is not using enough dark or black cocoa powder. Regular natural cocoa powder produces a brown color, not black. For the signature black velvet color, use a mix of regular cocoa and black cocoa powder. You can also add a small amount of black gel food coloring, but the cocoa method gives better flavor without any chemical aftertaste.
Can I use bottled orange juice instead of fresh?
I really don’t recommend it. Fresh orange juice has a bright, clean flavor that’s essential for the frosting. Bottled orange juice often has a cooked, slightly bitter taste and lacks the natural sweetness of fresh oranges. Plus, you need the zest from the orange anyway, so you might as well use the juice too.
My cupcakes sank in the middle. What went wrong?
This usually happens for one of three reasons: your oven wasn’t hot enough, you opened the oven door too early, or your baking soda is old. Make sure your oven is fully preheated to 350°F before you put the cupcakes in. Don’t open the door to check on them until at least the 18-minute mark. And always test your baking soda for freshness before using it.
Can I turn these into a cake instead of cupcakes?
You can, but the baking time will change significantly. Pour the batter into a greased 8-inch round cake pan and bake at 350°F for 25-30 minutes, or until a toothpick comes out clean. The texture will be slightly different since the vinegar-baking soda reaction works best in smaller portions. For a layer cake, double the recipe and bake in two pans. The frosting recipe will need to be doubled as well.
Pin This Recipe!
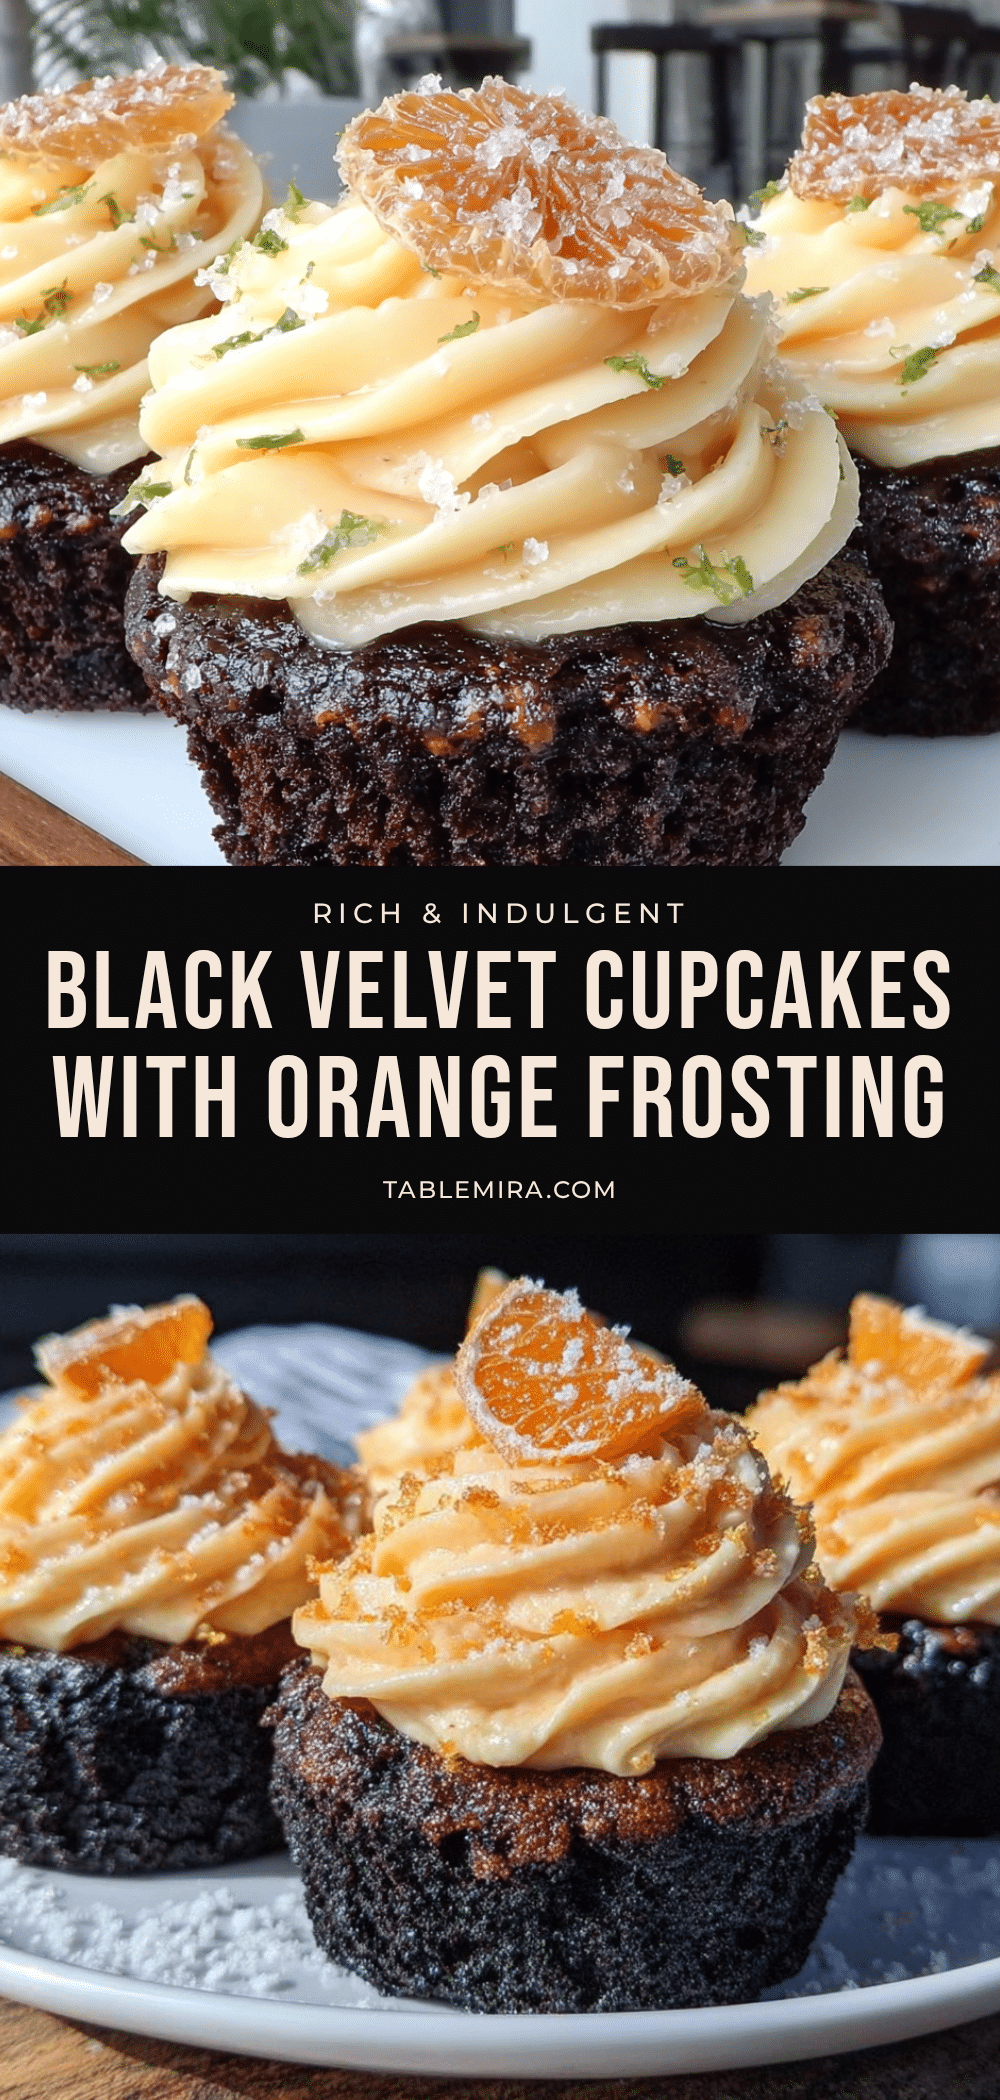
Best Quick Black Velvet Cupcakes with Orange Frosting
These Quick Black Velvet Cupcakes with Orange Frosting are incredibly moist, tender, and feature a striking dark color paired with a bright, zesty orange buttercream. They come together in under 45 minutes with simple ingredients and no stand mixer required.
- Prep Time: 15 minutes
- Cook Time: 20 minutes
- Total Time: 45 minutes
- Yield: 12 cupcakes 1x
- Category: Dessert
- Cuisine: American
Ingredients
- 1 ½ cups (190g) all-purpose flour
- 1 cup (200g) granulated sugar
- ½ cup (45g) unsweetened cocoa powder (preferably Hershey’s Special Dark)
- 2 tablespoons (15g) black cocoa powder (optional, for deeper color)
- 1 teaspoon baking soda
- ½ teaspoon fine sea salt
- ½ cup (120ml) vegetable oil (or canola, grapeseed, melted coconut oil)
- 1 tablespoon white vinegar
- 1 teaspoon pure vanilla extract
- 1 cup (240ml) hot water (about 120°F)
- ½ cup (113g) unsalted butter, softened
- 2 cups (240g) powdered sugar, sifted if lumpy
- 1 tablespoon fresh orange zest (from about 1 medium orange)
- 2 tablespoons fresh orange juice
- ½ teaspoon pure vanilla extract
- Tiny pinch of salt
Instructions
- Preheat your oven to 350°F (175°C). Position the rack in the center. Line a 12-cup muffin tin with paper liners.
- In a large bowl, whisk together the all-purpose flour, granulated sugar, cocoa powder, black cocoa powder (if using), baking soda, and salt for about 30 seconds until evenly distributed.
- Make a well in the center of the dry ingredients. Pour in the vegetable oil, white vinegar, and vanilla extract. Do not stir yet.
- Pour the hot water over the wet ingredients in the well.
- Whisk gently from the center, gradually incorporating the dry ingredients into the wet, until the batter is smooth and no streaks of flour remain. Do not overmix—about 20-30 seconds. The batter will be thin.
- Divide the batter evenly among the 12 liners, filling each about ⅔ full.
- Bake for 18-22 minutes, until a toothpick inserted into the center comes out clean or with a few moist crumbs. The tops should spring back when lightly touched. Start checking at 18 minutes.
- Let the cupcakes cool in the pan for 5 minutes, then transfer to a wire rack to cool completely (at least 30 minutes).
- While the cupcakes cool, make the frosting: In a medium bowl, beat the softened butter with an electric mixer on medium speed until smooth and creamy, about 1 minute.
- Add the powdered sugar, orange zest, orange juice, vanilla extract, and a tiny pinch of salt. Mix on low speed to avoid a sugar cloud, then increase to medium-high and beat for 2-3 minutes until light and fluffy. If too thick, add another teaspoon of orange juice; if too thin, add a tablespoon more powdered sugar.
- Once the cupcakes are completely cool, frost them using a piping bag fitted with a star tip or spread with an offset spatula. Garnish with extra orange zest if desired.
Notes
The vinegar and baking soda reaction is crucial for the tender crumb—ensure baking soda is fresh. Hot water blooms the cocoa for deeper flavor. Do not overmix the batter. For the frosting, butter must be properly softened. Cupcakes taste even better the next day. Store unfrosted cupcakes in an airtight container at room temperature for up to 3 days, or freeze unfrosted for up to 3 months. Frosting does not freeze well.
Nutrition
- Serving Size: 1 cupcake
- Calories: 320
- Sugar: 33
- Sodium: 220
- Fat: 14
- Saturated Fat: 5
- Carbohydrates: 47
- Fiber: 2
- Protein: 3
Keywords: black velvet cupcakes, orange frosting, quick cupcakes, chocolate cupcakes, citrus frosting, easy dessert, weeknight baking


