It was 10:47 PM on a random Wednesday in October, and I had a very specific craving for something ridiculous. Not just any snack—I wanted something that looked like it crawled out of a cartoon graveyard but tasted like a buttery, salty, golden-brown miracle. I didn’t have any fancy pastry dough or gourmet sausages lying around, but I had a pack of crescent rolls in the back of the fridge and a bag of hot dogs that were, let’s be honest, probably a week past their prime. And then the idea arrived, fully formed, like a little monster tapping me on the shoulder: mummy hot dogs.
I remember standing there in my pajamas, the kitchen light buzzing, thinking, “This is either going to be the best thing I’ve ever made or a total mess.” I mean, the concept is simple—wrap a hot dog in dough strips, bake it, add little mustard eyes—but something about doing it at nearly midnight made it feel like a secret experiment. I ended up using way too much dough on the first one and had to peel it off and start over (my fingers were sticky, the counter was a disaster, and I honestly almost gave up). But that second attempt? Perfect. Creepy, cute, and weirdly satisfying.
Maybe you’ve been there—wanting to make something fun for Halloween but not wanting to spend hours on a project that looks better than it tastes. These mummy hot dogs are the answer. They’re the kind of snack that makes people laugh, then grab three more. I’ve made them for every Halloween party since, and honestly, they never get old. They’re easy, they’re spooky, and they taste like the best part of your childhood. Let me show you how to make them.
Why You’ll Love This Recipe
I’ve tested this recipe more times than I care to admit—burned a few mummies in the process, learned the hard way that not all crescent roll brands wrap the same way, and figured out the perfect baking time that gives you golden, flaky dough without overcooking the hot dog. So trust me when I say this version is the one.
- Quick & Easy: From fridge to table in under 25 minutes. Perfect for last-minute Halloween plans or a fun weeknight dinner surprise.
- Simple Ingredients: You only need three things—crescent rolls, hot dogs, and mustard. That’s it. No special trips to a fancy grocery store.
- Perfect for Halloween Parties: These little guys are the life of the party. Kids love them, adults sneak them, and they look adorable on any spooky snack table.
- Crowd-Pleaser: I’ve served these at gatherings where people were skeptical at first—then watched the plate empty in minutes. They’re universally loved.
- Unbelievably Delicious: The combination of buttery, flaky crescent roll dough wrapped around a juicy hot dog is pure comfort food magic. Add a little mustard “face,” and you’ve got a snack that’s as fun to eat as it is to make.
What makes this recipe different from the dozens of other versions out there? It’s the wrapping technique and the baking temperature. I found that rolling the dough strips a little thinner and baking at a slightly higher temperature gives you that perfect golden-brown color without the dough turning gummy in the middle. Plus, I use a specific trick for the mustard eyes so they don’t just blob into a mess. This isn’t just another recipe—it’s the one I’ve perfected through trial and error.
This recipe isn’t just good—it’s the kind that makes you close your eyes after the first bite. It’s comfort food reimagined: quick, fun, and with the same soul-soothing satisfaction as a classic baked treat. Perfect for impressing guests without stress, or turning a simple weeknight into something memorable.
What Ingredients You Will Need
This recipe uses simple, everyday ingredients to create something that feels special. You probably already have most of these in your kitchen, which makes it perfect for spontaneous Halloween fun.
- 1 can (8 oz) refrigerated crescent roll dough (I recommend Pillsbury for consistent texture—the sheets work best, but the perforated triangle version works too if you press the seams together)
- 8 hot dogs (beef, turkey, or plant-based—your choice. I prefer beef for that classic flavor, but turkey works great if you’re watching fat content)
- Mustard (yellow mustard works best for the “eyes” because it’s thick enough to stay put. Dijon is too runny and will spread into a sad puddle)
For the mustard eyes, you’ll also want a toothpick or a small piping tip to apply it precisely. Trust me, it makes a difference when you’re trying to create those cute little mummy faces.
If you want to get creative, you can add a few optional ingredients:
- Everything bagel seasoning for a savory twist on the dough
- Grated parmesan cheese sprinkled on top before baking for extra flavor
- Ketchup or sriracha for dipping (or to create little blood splatters on the serving plate—very Halloween)
When choosing your hot dogs, look for ones that are uniform in size. Thicker hot dogs work better because they hold their shape during baking and don’t get lost in the dough. I’ve tried using cocktail sausages, and while they’re cute, they tend to dry out faster. Stick with standard-sized hot dogs for the best results.
For the crescent rolls, I’ve tested both the original and the reduced-fat versions. The reduced-fat dough doesn’t brown as nicely and has a slightly tougher texture, so I recommend sticking with the original if you can. But honestly, even with the lighter version, these mummies turn out pretty great—so don’t stress if that’s what you have on hand.
Equipment Needed
You don’t need much for this recipe, which is part of its charm. Here’s what you’ll need:
- Baking sheet (a standard half-sheet pan works perfectly—line it with parchment paper for easy cleanup)
- Parchment paper (optional but highly recommended—the dough can stick to ungreased pans)
- Sharp knife or pizza cutter (for cutting the crescent roll dough into strips. A pizza cutter makes the cleanest cuts)
- Toothpick or small piping tip (for applying the mustard eyes with precision)
- Small bowl (for holding the mustard while you work)
- Cooling rack (optional but helps keep the mummies crispy if you’re making a big batch)
If you don’t have a pizza cutter, a sharp knife works fine—just make sure it’s clean and dry. I’ve used a butter knife in a pinch, and while it wasn’t pretty, the mummies still turned out delicious. The key is to cut the dough into even strips so they bake uniformly. Uneven strips mean some parts of the mummy will be overdone while others are still doughy—and nobody wants a half-baked mummy.
For the baking sheet, I recommend a light-colored metal pan. Dark pans can cause the bottoms of the mummies to brown too quickly. If that’s all you have, just reduce the baking time by a minute or two and keep an eye on them.
Preparation Method
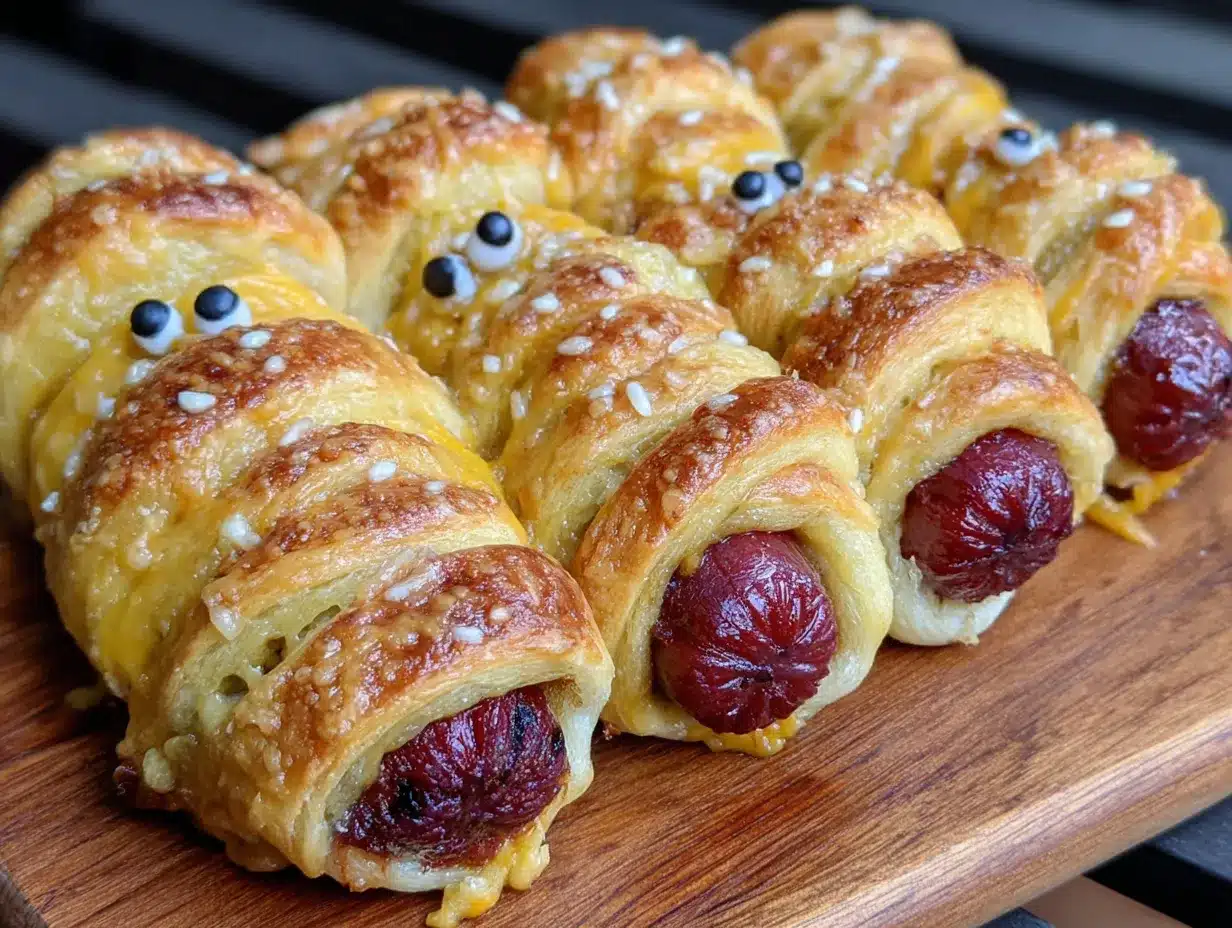
Let’s get into the fun part—making these little guys come to life (or un-life, I suppose). Follow these steps carefully, and you’ll have a batch of adorable, delicious mummies in no time.
- Preheat your oven to 375°F (190°C). Line a baking sheet with parchment paper. This is a small step that makes a big difference—the parchment prevents sticking and makes cleanup a breeze. If you’re using a dark pan, reduce the temperature to 370°F (188°C) to prevent over-browning.
- Unroll the crescent roll dough onto a clean, dry cutting board. If you’re using the perforated triangle version, press the seams together gently with your fingers to create a solid sheet. Don’t overwork the dough—you just want to seal the seams without compressing it too much.
- Cut the dough lengthwise into 8 even strips. Use a sharp knife or pizza cutter for clean cuts. You want strips that are about 1/2 inch wide. If they’re too thin, they’ll tear when you wrap them; too thick, and they’ll overwhelm the hot dog. I’ve found that 8 strips per can of dough is the sweet spot.
- Prepare your hot dogs. Pat them dry with a paper towel to remove any excess moisture. This helps the dough stick better and prevents steam from making the dough soggy. Leave them whole—no need to cut them unless you want mini mummies (in which case, cut each hot dog in half crosswise).
- Wrap each hot dog with a strip of dough. Start at one end and wrap the dough around the hot dog, slightly overlapping each layer. Leave a small gap at the top for the “face” where the eyes will go. Don’t wrap too tightly—the dough will expand as it bakes, and you want it to have room to puff up. Leave about 1/2 inch of the hot dog exposed at the top.
- Place the wrapped mummies on the prepared baking sheet, leaving about 2 inches between each one. They’ll expand a bit as they bake, so give them some breathing room. If they’re too close together, they’ll steam instead of bake, and you’ll lose that golden-brown crispiness.
- Bake for 12-15 minutes, or until the dough is golden brown and the hot dogs are heated through. The exact time depends on your oven and the thickness of your dough strips. Start checking at the 12-minute mark—you want the dough to be a deep golden brown, not pale. If the edges are browning too quickly but the center is still pale, tent the pan loosely with foil for the last 2 minutes.
- Remove from the oven and let cool for 2-3 minutes on the baking sheet. This allows the dough to set so it doesn’t fall apart when you move the mummies. Don’t skip this step—I’ve learned the hard way that impatient mummy-moving leads to dough disasters.
- Add the mustard eyes. Dip a toothpick into the mustard and dot two small eyes onto the exposed hot dog at the top of each mummy. Don’t make them too big—a little goes a long way. If you want a more expressive face, you can also add a tiny mustard mouth or use ketchup to create a “blood” effect. Get creative!
- Serve immediately while the mummies are still warm and the dough is at its flakiest. They’re best fresh out of the oven, but they’re still pretty good at room temperature for a few hours.
Here’s a personal tip: if you’re making these for a party, you can prep them ahead of time. Wrap the hot dogs in the dough strips, place them on the baking sheet, and refrigerate for up to 2 hours before baking. Just add 1-2 minutes to the baking time since the dough will be cold. This is a lifesaver when you’re juggling multiple dishes for a Halloween gathering.
Cooking Tips & Techniques
I’ve made these mummies more times than I can count, and I’ve picked up a few tricks along the way. Here are the things I wish someone had told me before my first attempt.
Don’t overwork the dough. Crescent roll dough is delicate, and handling it too much can make it tough. When you’re pressing the seams together or cutting strips, be gentle. The less you touch it, the flakier it’ll be. I learned this the hard way after making a batch of mummies that were more like hockey pucks than pastries.
Leave room for the eyes. It’s tempting to wrap the dough all the way to the top of the hot dog, but you need that little exposed area for the mustard eyes. If you cover the entire hot dog, you’ll have to poke through the dough to add the eyes, which can tear the pastry. Trust me on this one—leave about 1/2 inch bare at the top.
Watch the oven like a hawk. The difference between perfectly golden mummies and burnt ones is about 60 seconds. Every oven is different, so start checking at the 10-minute mark if you’re using a dark pan or if your oven runs hot. I once got distracted by a phone call and ended up with mummies that looked like they’d been through a fire—not the spooky vibe I was going for.
Use a light hand with the mustard. A tiny dot is all you need for each eye. Too much mustard will blob and run down the hot dog, creating a sad, mustardy mess. If you’re worried about precision, you can use a small piping tip or even a clean, empty ketchup bottle with a fine tip. Practice on a paper towel first if you’re nervous.
Make extra—seriously. These disappear fast. I’ve never made a batch that lasted more than 15 minutes at a party. If you’re serving a crowd, double the recipe. You can bake them in batches or use two baking sheets at the same time (just rotate them halfway through baking).
Variations & Adaptations
One of the best things about this recipe is how easy it is to customize. Here are some variations I’ve tried and loved.
Cheesy Mummies: Before wrapping the hot dog, slice it lengthwise and insert a thin strip of cheddar or mozzarella cheese. Wrap as usual and bake. The cheese melts into the hot dog and creates a gooey, delicious surprise. Just be careful—the cheese can leak out during baking, so place them on a parchment-lined sheet.
Spicy Mummies: Use spicy hot dogs or brush the dough with a little sriracha before baking. You can also add a pinch of cayenne pepper to the dough for an extra kick. These are great for adults who want a little heat with their Halloween fun.
Vegetarian Mummies: Swap the hot dogs for plant-based sausages or even cheese sticks (mozzarella or cheddar). The cooking time stays the same, but keep an eye on cheese sticks—they can melt faster than hot dogs. I’ve also used veggie dogs, and they work perfectly.
Breakfast Mummies: Use breakfast sausages instead of hot dogs and serve with maple syrup for dipping. The sweet-and-savory combo is surprisingly good. These are perfect for a Halloween morning breakfast before school or work.
Gluten-Free Mummies: Use gluten-free crescent roll dough (available at most major grocery stores) and gluten-free hot dogs. The texture might be slightly different, but they’re still delicious. I’ve tested this with a friend who has celiac disease, and she gave them two thumbs up.
Mini Mummies: Cut each hot dog into thirds and use smaller strips of dough. These are perfect for appetizers or kids’ lunchboxes. Reduce the baking time to 8-10 minutes since they’re smaller. I made these for a Halloween movie night, and they were gone before the first scary scene.
Serving & Storage Suggestions
These mummies are best served warm, right out of the oven. The dough is at its flakiest, and the hot dog is perfectly juicy. But they’re still pretty good at room temperature, which makes them perfect for parties.
For presentation, I like to arrange them on a dark plate or platter to make the golden-brown color pop. Add a few sprigs of fresh rosemary or thyme around the edges for a “graveyard” vibe. You can also drizzle a little ketchup or sriracha on the plate to look like blood—it’s a fun touch that always gets a laugh.
If you’re serving these at a party, keep them warm in a low oven (200°F/93°C) for up to 30 minutes. Just cover them loosely with foil to prevent the dough from drying out. I’ve also kept them in a slow cooker on the “warm” setting for an hour, and they stayed perfectly crispy.
For storage, place any leftovers in an airtight container in the refrigerator for up to 3 days. The dough will lose its crispiness, but they’ll still taste great. To reheat, pop them in a 350°F (175°C) oven for 5-7 minutes, or until heated through. Avoid the microwave—it makes the dough soggy and sad.
You can also freeze these mummies before baking. Wrap them in plastic wrap and place them in a freezer bag. When you’re ready to bake, add 3-5 minutes to the baking time since they’ll be frozen. This is a great make-ahead option for busy Halloween weeks.
I’ve noticed that the flavors actually develop a little overnight—the hot dog and dough meld together in a way that’s surprisingly good. So if you have leftovers, don’t toss them. They make a great lunch the next day, cold or reheated.
Nutritional Information & Benefits
Let’s be real—these mummy hot dogs aren’t health food. But they’re a fun treat for Halloween, and with a few smart swaps, you can make them a little more wholesome without sacrificing taste.
Per serving (2 mummies): approximately 280-320 calories, 18g fat, 24g carbohydrates, 10g protein, 2g sugar, 680mg sodium. These values will vary based on the type of hot dog and crescent roll dough you use.
If you’re looking to lighten things up, use turkey or chicken hot dogs (which have less fat and fewer calories) and reduced-fat crescent roll dough. You can also use whole-wheat crescent rolls for added fiber. Every little swap helps.
The hot dogs provide a decent amount of protein, which helps keep you full. And the crescent roll dough offers quick energy from carbohydrates—perfect for fueling a night of trick-or-treating or partying. The mustard adds minimal calories but a good dose of flavor and a tiny bit of turmeric, which has anti-inflammatory properties.
These mummies are not suitable for gluten-free diets unless you use gluten-free dough. They also contain dairy (in the crescent roll dough), so if you’re lactose intolerant, look for a dairy-free crescent roll option. Vegan hot dogs and dairy-free dough can make this recipe fully plant-based.
My personal take? Enjoy these for what they are—a fun, occasional treat. Pair them with a side of veggies or a fresh salad if you want to balance things out. Life’s about balance, right?
Conclusion
These Easy Spooky Mummy Hot Dogs are the perfect Halloween recipe—fun, fast, and ridiculously delicious. They’re the kind of snack that brings people together, makes everyone smile, and disappears before you can say “trick or treat.” Whether you’re hosting a party, looking for a fun activity with the kids, or just want to make a silly, satisfying snack for yourself, these mummies deliver.
I love this recipe because it reminds me that cooking doesn’t have to be complicated to be special. Sometimes the best dishes come from a late-night craving, a few pantry staples, and a willingness to try something ridiculous. These mummies are proof that a little creativity can turn ordinary ingredients into something memorable.
So go ahead—make a batch. Get messy with the dough. Laugh at your imperfect mummies. And then watch them disappear. When you do, I’d love to hear about it. Drop a comment below and tell me how yours turned out, or share a photo on social media with the hashtag #SpookyMummies. Did you add any creative twists? Did your kids help? I want to hear it all. Happy Halloween, and happy snacking!
Frequently Asked Questions
Can I make these ahead of time?
Absolutely! You can wrap the hot dogs in the dough strips and refrigerate them on the baking sheet for up to 2 hours before baking. Just add 1-2 minutes to the baking time. You can also freeze them unbaked for up to a month—bake straight from frozen, adding 3-5 minutes to the cooking time.
What if I don’t have crescent roll dough?
No problem! You can use puff pastry, pizza dough, or even refrigerated biscuit dough (flattened and cut into strips). Each will give you a slightly different texture—puff pastry is flakier, pizza dough is chewier—but they’ll all work beautifully. Just adjust the baking time as needed.
Can I use different types of hot dogs?
Yes! Beef, turkey, chicken, plant-based—they all work. Just make sure they’re standard-sized hot dogs. Cocktail sausages are too small and tend to dry out. If you want mini mummies, cut standard hot dogs into thirds instead.
My dough keeps tearing when I wrap the hot dogs. What’s wrong?
Your dough might be too cold, or you’re wrapping too tightly. Let the dough sit at room temperature for 5-10 minutes before cutting it into strips. And when wrapping, leave a little slack—the dough will puff up as it bakes, so it doesn’t need to be tight. If the dough still tears, just press it back together with your fingers—it’ll fuse during baking.
How do I make the mustard eyes look neat?
Use a toothpick or a small piping tip to apply the mustard. Dip the toothpick into the mustard, then dot it onto the hot dog. For more control, you can fill a small piping bag (or a zip-top bag with the corner snipped off) with mustard. Practice on a paper towel first if you’re worried about making a mess.
Pin This Recipe!
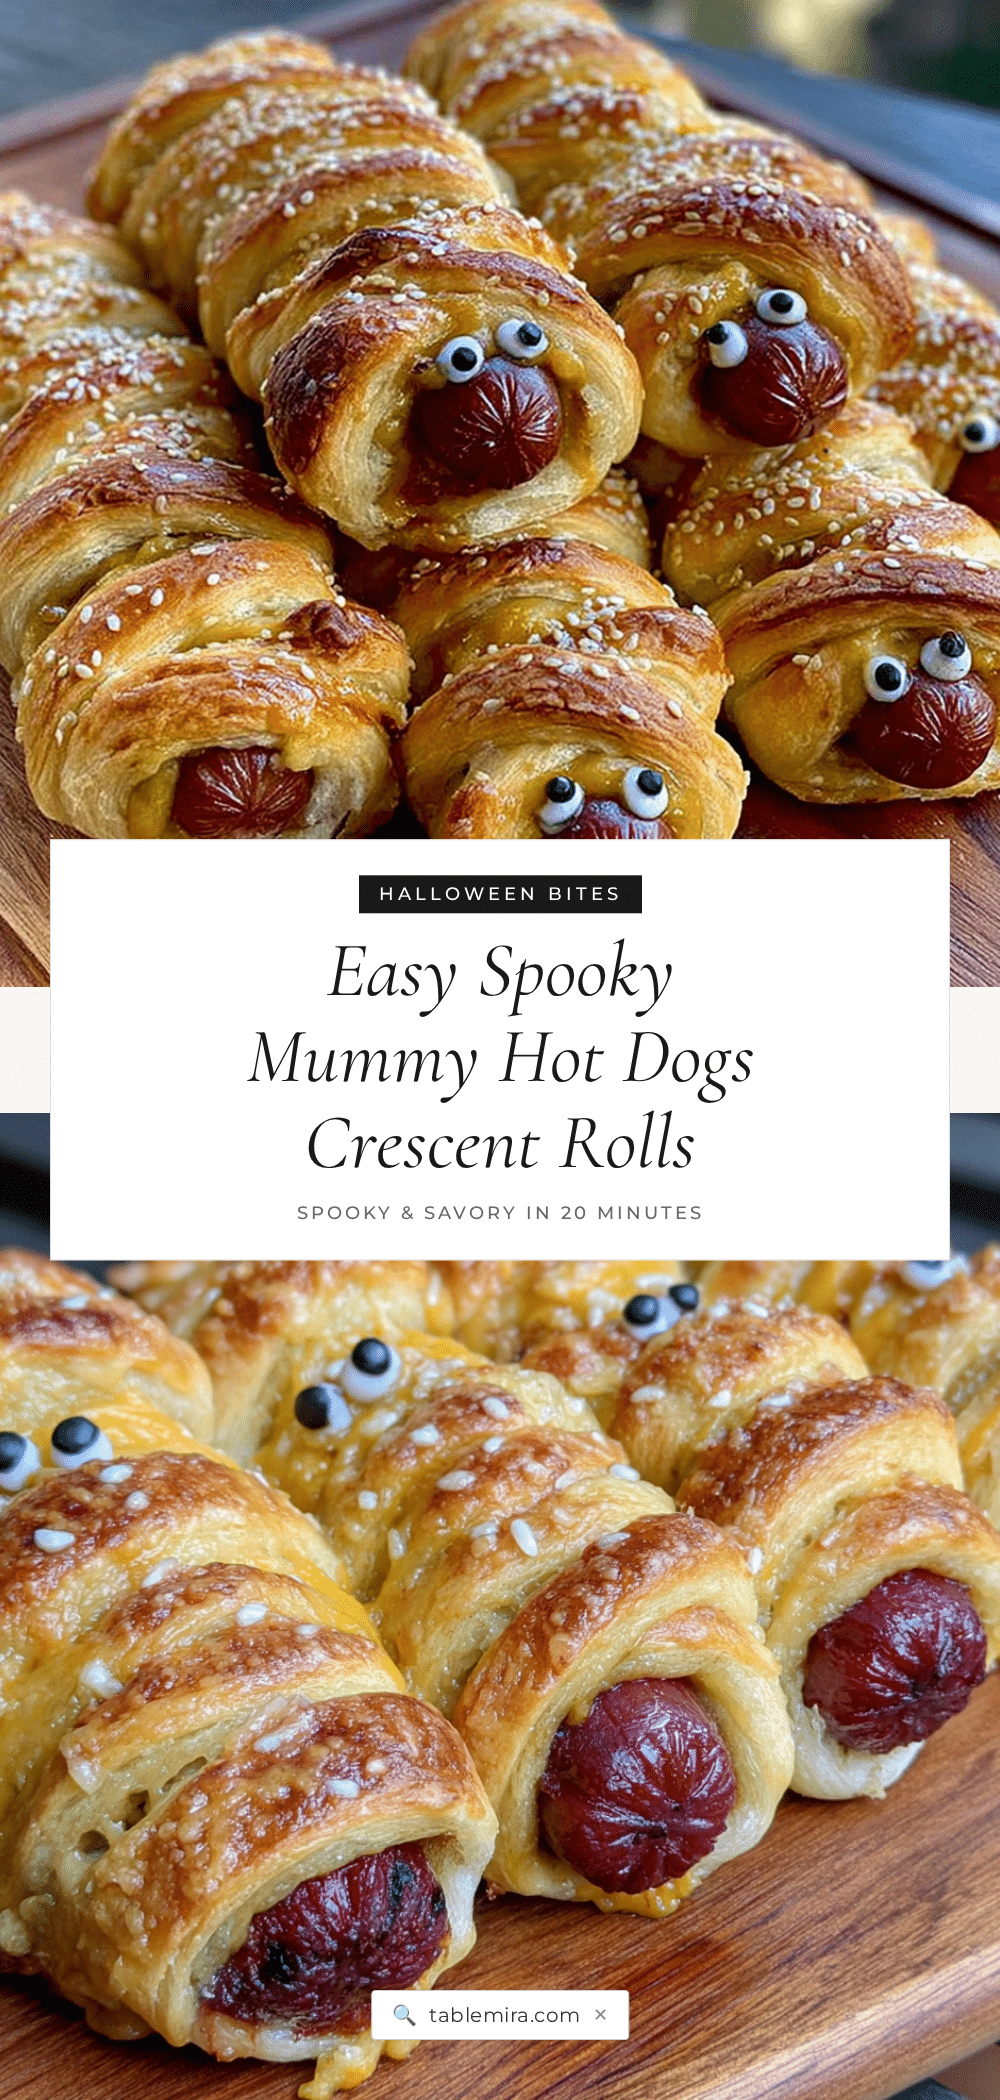
Easy Spooky Mummy Hot Dogs: Perfect Halloween Treat
These mummy hot dogs are a fun, quick, and delicious Halloween snack made with crescent roll dough wrapped around hot dogs, baked until golden, and finished with mustard eyes. Perfect for parties or a spooky weeknight treat.
- Prep Time: 10 minutes
- Cook Time: 15 minutes
- Total Time: 25 minutes
- Yield: 8 servings 1x
- Category: Appetizer
- Cuisine: American
Ingredients
- 1 can (8 oz) refrigerated crescent roll dough (Pillsbury recommended)
- 8 hot dogs (beef, turkey, or plant-based)
- Mustard (yellow mustard preferred for eyes)
- Optional: everything bagel seasoning, grated parmesan cheese, ketchup or sriracha for dipping
Instructions
- Preheat oven to 375°F (190°C). Line a baking sheet with parchment paper.
- Unroll crescent roll dough onto a clean cutting board. If using perforated triangles, press seams together to form a solid sheet.
- Cut dough lengthwise into 8 even strips, about 1/2 inch wide.
- Pat hot dogs dry with a paper towel.
- Wrap each hot dog with a strip of dough, starting at one end and slightly overlapping. Leave about 1/2 inch of hot dog exposed at the top for the face.
- Place wrapped mummies on prepared baking sheet, about 2 inches apart.
- Bake for 12-15 minutes, until dough is golden brown and hot dogs are heated through.
- Remove from oven and let cool for 2-3 minutes on the baking sheet.
- Dip a toothpick into mustard and dot two small eyes onto the exposed hot dog at the top of each mummy.
- Serve immediately while warm.
Notes
For best results, use standard-sized hot dogs and original crescent roll dough. Leave a gap at the top for the eyes. Watch the oven closely to avoid burning. Can be prepped ahead and refrigerated for up to 2 hours before baking.
Nutrition
- Serving Size: 2 mummies
- Calories: 300
- Sugar: 2
- Sodium: 680
- Fat: 18
- Saturated Fat: 6
- Carbohydrates: 24
- Protein: 10
Keywords: mummy hot dogs, Halloween snack, crescent roll hot dogs, spooky treats, easy Halloween recipe


