My daughter came home from a holiday market last December holding a single round chocolate ball wrapped in cellophane. She handed it over like it was treasure. “You drop it in hot milk and it explodes into hot cocoa,” she said, dead serious. I looked at that little sphere and honestly thought—there’s no way that works without a mess. But I was wrong. It worked beautifully. And for the rest of that winter, I couldn’t find another one anywhere. Every store was sold out, every online shop had them on backorder. So I did what any stubborn home cook would do—I figured out how to make them myself.
The thing about hot cocoa bombs is they look fancy but they’re actually pretty straightforward once you understand the rhythm. You melt chocolate, coat a mold, let it set, then fill it with cocoa mix and marshmallows before sealing it shut. The first batch I made looked like lopsided eggs. The second batch looked like something you’d actually gift. By the third batch, I had a system down that worked every single time. This Ultimate Hot Cocoa Bomb Bar with Marshmallows recipe is that system—tested, tweaked, and finally foolproof. It’s the kind of thing you can make ahead for holiday gifts, snow-day surprises, or just because you want a little magic in your mug.
I’ve tried all kinds of chocolate for these bombs and I’ll tell you right now—quality matters. Cheap chocolate doesn’t melt evenly and it cracks when you try to unmold it. Good chocolate behaves. And the marshmallow situation? That took some experimenting too. Mini marshmallows work best because they fit neatly inside without bulging the seams. This recipe gives you the freedom to build your own hot cocoa bomb bar at home with whatever fillings you like. It’s the kind of project that feels like an event. And honestly? Watching that chocolate shell crack open in hot milk never gets old.
Why You’ll Love This Recipe
This isn’t just another hot cocoa bomb recipe you’ll find floating around the internet. I’ve tested this one multiple times to make sure the chocolate shells come out shiny, sturdy, and perfectly round without any weird cracks or fingerprints. Here’s what makes it stand out:
- Beginner-Friendly : If you’ve never made chocolate molds before, this recipe walks you through every step. No fancy equipment needed.
- Simple Ingredients : You only need a few things—good chocolate, cocoa mix, and mini marshmallows. Everything else is optional fun.
- Perfect for Gifting : These bombs look like professional candy shop items. Wrap them in cellophane with a ribbon and people think you spent hours.
- Crowd-Pleaser : Kids go crazy for them. Adults act cool but secretly love watching the chocolate melt open. It’s universal joy.
- Completely Customizable : You can make them peppermint, salted caramel, or even spicy Mexican hot chocolate style. The base recipe stays the same.
What makes this version different from others I’ve tried is the marshmallow placement trick. Most recipes just toss marshmallows inside loose, but I’ve found that pressing one marshmallow gently into the bottom half of the chocolate shell before sealing helps everything stay put during storage. No rattling, no shifting, no broken shells. And the flavor? It’s rich without being overwhelming. The chocolate shell melts into the milk and creates this velvety texture that instant packets just can’t replicate.
This is the kind of recipe that makes you feel like you’ve got a secret skill. It’s perfect for holiday gatherings, snowed-in weekends, or even as a fun activity for a kids’ party. And if you’re someone who loves cozy dessert projects (like these Eggnog Snickerdoodle Cookies), this fits right into that same comforting vibe.
What Ingredients You Will Need
This recipe uses simple, high-quality ingredients to create hot cocoa bombs that taste as good as they look. The key is using chocolate that melts smoothly and sets firmly, plus fillings that complement rather than overwhelm. Here’s everything you need:
For the Chocolate Shell
- 12 ounces (340g) high-quality semi-sweet chocolate chips or bars – Chopped into small, even pieces. I prefer Ghirardelli or Guittard for reliable melting. Avoid chocolate chips with stabilizers—they don’t melt as smoothly.
- 1 teaspoon (5ml) coconut oil or cocoa butter – This helps thin the chocolate for easier coating and gives the shells a beautiful shine. Optional but highly recommended.
For the Filling
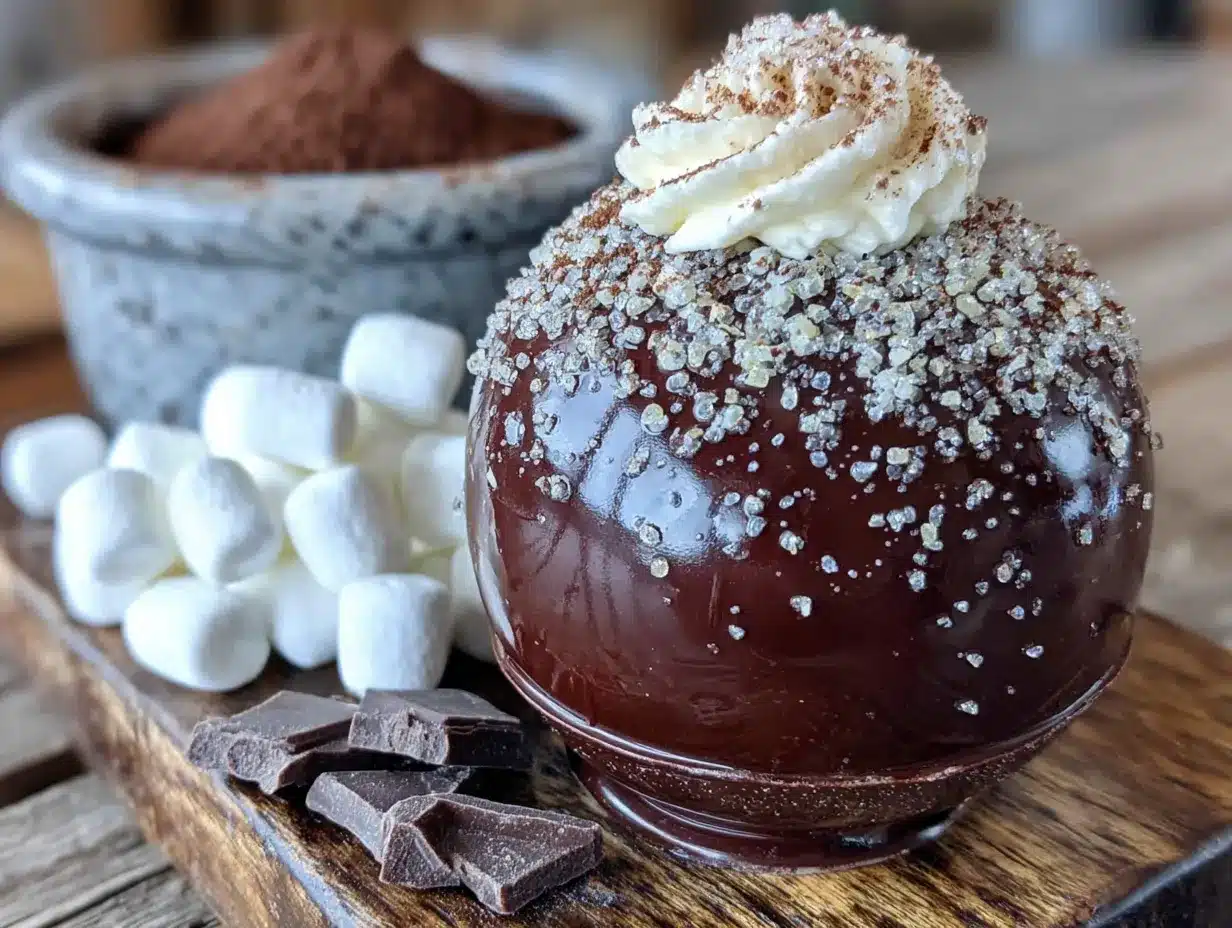
- 1/2 cup (60g) hot cocoa mix – Use your favorite brand or homemade mix. I like using a dark chocolate cocoa mix for deeper flavor.
- 1/2 cup (50g) mini marshmallows – Regular mini marshmallows fit perfectly. Don’t use jumbo ones—they’re too big and cause the shells to bulge.
- Optional add-ins per bomb : 1 tablespoon crushed candy canes, 1 teaspoon caramel sauce (thickened), 1 tablespoon white chocolate chips, or a pinch of cinnamon and cayenne for Mexican hot cocoa.
For Decoration (Optional)
- 2 ounces (57g) white chocolate or colored candy melts – For drizzling on top of finished bombs.
- Sprinkles, crushed peppermint, edible glitter, or sea salt flakes – For garnishing.
I recommend using semi-sweet chocolate rather than milk chocolate because it holds its shape better at room temperature. Milk chocolate tends to soften too much and can lose its round form during storage. If you prefer white chocolate bombs, use white chocolate that contains real cocoa butter—not compound coating—for the best texture and flavor.
The hot cocoa mix is where you can get creative. I’ve tested this with Swiss Miss, Starbucks, and homemade mixes. They all work, but the higher-quality mixes dissolve more completely and leave less sediment at the bottom of the mug. For a truly indulgent version, use a mix that already contains powdered milk or creamer.
Equipment Needed
You don’t need a candy thermometer or a tempering machine for this recipe. Here’s what you’ll actually use:
- 2-inch (5cm) round silicone chocolate bomb molds – These come in half-sphere shapes and are essential for getting that perfect round shape. Available on Amazon or at craft stores for under $10.
- Microwave-safe bowl or double boiler – For melting chocolate. I use a glass bowl over a pot of simmering water for more control, but the microwave works fine if you go slow.
- Small offset spatula or spoon – For spreading chocolate evenly inside the molds.
- Baking sheet lined with parchment paper – For holding the filled molds while they set.
- Piping bag or small zip-top bag – For drizzling decorative chocolate. A spoon works too.
- Pastry brush – Optional but helpful for smoothing chocolate inside the molds.
If you don’t have silicone molds, you can use a metal muffin tin—just line each cup with plastic wrap first so the chocolate releases. It’s not as neat, but it works in a pinch. I’ve also seen people use large plastic Easter egg halves as molds, though the seam can be tricky.
One tip: wash your silicone molds with warm soapy water and dry them thoroughly before using. Any residue or moisture will cause the chocolate to seize or stick. And don’t use paper towels—they leave lint. Use a clean, lint-free cloth instead.
Preparation Method
This process takes about 45 minutes of active time plus 30 minutes of chilling. The steps are simple but require patience between layers. Here’s how to do it:
- Melt the chocolate : Place the chopped semi-sweet chocolate and coconut oil in a microwave-safe bowl. Microwave in 30-second intervals, stirring between each, until fully melted and smooth. This usually takes about 90 seconds total. Don’t overheat—chocolate burns easily and becomes grainy. Alternatively, use a double boiler with simmering water and stir constantly until melted.
- Fill the molds : Spoon about 1 tablespoon (15ml) of melted chocolate into each half-sphere mold cavity. Use the back of a spoon or a pastry brush to spread the chocolate evenly up the sides, making sure to cover the entire surface with no thin spots. The chocolate layer should be about 1/8 inch (3mm) thick. Place the filled molds on the parchment-lined baking sheet.
- First chill : Transfer the baking sheet to the refrigerator and chill for 10 minutes, or until the chocolate is firm and no longer glossy. Don’t freeze—freezing can cause condensation that makes the chocolate bloom (develop white streaks).
- Unmold the shells : Gently press the bottom of each silicone mold cavity to release the chocolate half-spheres. Handle them by the edges—your fingers will leave marks on the surface. If a shell cracks, you can re-melt the chocolate and start again. Place the unmolded shells on a clean parchment-lined tray.
- Add the filling : For each bomb, take one chocolate half-sphere and fill it with 1 tablespoon (8g) of hot cocoa mix and 1 tablespoon (6g) of mini marshmallows. Press one marshmallow gently into the cocoa mix to keep everything in place. Add any optional fillings now—like crushed candy canes or caramel sauce.
- Seal the bomb : Warm a small plate in the microwave for 10 seconds, then place the rim of an empty chocolate half-sphere on the warm plate for 3-5 seconds to melt the edge slightly. Immediately press it onto the filled half-sphere, aligning the edges carefully. Hold for 10 seconds to seal. You should see a thin seam of melted chocolate where they join. If the seam is visible, you can smooth it with a warm fingertip.
- Second chill : Place the sealed bombs back in the refrigerator for 10 minutes to set the seam firmly.
- Decorate (optional) : Melt the white chocolate or candy melts in a small bowl. Dip a fork into the melted chocolate and drizzle it over the tops of the bombs in a zigzag pattern. Add sprinkles or crushed peppermint immediately before the drizzle sets. Return to the refrigerator for 5 minutes to harden.
One thing I learned the hard way: don’t overfill the bombs. If you pack too many marshmallows inside, the seam will bulge and crack during chilling. Stick to about 5-6 mini marshmallows per bomb. And if your hands are warm, wear food-safe gloves when handling the shells—body heat can soften the chocolate and leave fingerprints.
Cooking Tips & Techniques
Making hot cocoa bombs is more about patience than skill. Here are the things I wish someone had told me before my first attempt:
Temperature control is everything. Chocolate that’s too warm will run out of the mold and create thin spots. Chocolate that’s too cool won’t spread evenly. Aim for a consistency like thick syrup—smooth but not runny. If your chocolate starts to thicken while you’re working, reheat it in 10-second bursts.
Don’t skip the coconut oil. Even a small amount makes the chocolate more fluid and helps it release from the mold cleanly. Without it, you’ll struggle to get the shells out without cracking them. I’ve tried both ways—coconut oil wins every time.
Work in small batches. Only fill 4-6 mold cavities at a time. If you fill all 12 at once, the chocolate in the first ones will start setting before you can spread it evenly. Working in batches keeps everything consistent.
Check for thin spots. Hold a filled mold up to the light before chilling. If you see any translucent areas, add a drop more chocolate and spread it thin. Those weak spots are where the shell will break during unmolding.
Store them carefully. Finished bombs should be kept in an airtight container in a cool, dry place—not the refrigerator. Refrigeration can cause condensation that ruins the shine. They’ll keep for up to 2 weeks at room temperature, though the marshmallows will start to soften after about 10 days.
I once tried making these in a humid kitchen during a rainstorm. The chocolate refused to set properly and the shells came out sticky and dull. Lesson learned: low humidity is your friend. If you live in a humid climate, run the air conditioner or dehumidifier before starting.
Variations & Adaptations
Once you’ve mastered the basic technique, the possibilities are endless. Here are some of my favorite variations:
- Peppermint Cocoa Bombs : Add 1 tablespoon of crushed candy canes to the filling and drizzle the finished bombs with white chocolate and more crushed peppermint. Perfect for Christmas.
- Salted Caramel Bombs : Use a caramel-flavored hot cocoa mix and add 1 teaspoon of thick caramel sauce to each bomb before sealing. Sprinkle the finished bombs with flaky sea salt. This one is dangerously good.
- Spicy Mexican Hot Chocolate : Add 1/4 teaspoon of cinnamon and a pinch of cayenne pepper to the cocoa mix. Use dark chocolate for the shell. The heat builds slowly and pairs beautifully with the rich chocolate.
- White Chocolate Raspberry : Use white chocolate for the shell and add freeze-dried raspberry pieces to the filling. Drizzle with melted dark chocolate for contrast.
- Vegan Version : Use dairy-free dark chocolate and coconut oil. Fill with a vegan hot cocoa mix and mini vegan marshmallows (Dandies brand works great). The technique is identical.
For a fun twist, try making mini bombs using smaller 1.5-inch (4cm) molds. They’re perfect for kids or for serving as after-dinner treats. Just reduce the filling to 1 teaspoon of cocoa mix and 3 mini marshmallows per bomb.
If you’re feeling ambitious, you can even make a hot cocoa bomb bar for parties. Set out bowls of different cocoa mixes, marshmallows, sprinkles, and toppings, and let guests assemble their own bombs. It’s a hit with both kids and adults—kind of like setting up a charcuterie board but for dessert.
Serving & Storage Suggestions
To serve a hot cocoa bomb, heat 8-10 ounces (240-300ml) of milk (dairy or plant-based) until steaming hot but not boiling. Place one bomb in a large mug and pour the hot milk directly over it. Watch as the chocolate shell melts and the marshmallows float to the surface. Stir until the chocolate is fully incorporated. The result is a rich, creamy hot cocoa with melted chocolate throughout.
I recommend serving these in clear glass mugs so you can see the chocolate melting. It’s part of the experience. For extra indulgence, top with whipped cream and an extra drizzle of chocolate syrup.
For storage, keep finished bombs in an airtight container at cool room temperature (65-70°F / 18-21°C). Layer them between sheets of parchment paper so they don’t stick together. They’ll stay fresh for up to 2 weeks, though the marshmallows will gradually soften. Do not refrigerate—condensation will ruin the chocolate’s shine and texture.
If you’re making these as gifts, wrap each bomb individually in clear cellophane bags tied with a ribbon. Add a tag with instructions for serving. They make wonderful hostess gifts, teacher gifts, or stocking stuffers. I’ve also packaged them in decorative tins with layers of tissue paper for a more polished look.
These bombs also freeze surprisingly well. Place them in a single layer in a freezer-safe container with parchment between layers. Freeze for up to 3 months. To serve, let them sit at room temperature for 10 minutes before using—don’t microwave them frozen or the chocolate will seize.
Nutritional Information & Benefits
Each hot cocoa bomb (using semi-sweet chocolate and standard cocoa mix) contains approximately:
- Calories : 280-320
- Fat : 18-22g
- Carbohydrates : 30-35g
- Sugar : 24-28g
- Protein : 4-6g
- Fiber : 2-3g
These values vary based on the type of chocolate and cocoa mix you use. Dark chocolate versions will have slightly less sugar and more antioxidants. The mini marshmallows add minimal calories—about 4 calories each.
Dark chocolate contains flavonoids that support heart health and improve blood flow. Cocoa powder is rich in magnesium, iron, and zinc. While this is certainly a treat rather than a health food, using high-quality dark chocolate gives you some nutritional benefits along with the indulgence.
For a lower-sugar version, use sugar-free cocoa mix and dark chocolate with 85% cocoa content. The flavor will be more intense and less sweet, but still satisfying. You can also use unsweetened almond milk instead of dairy milk to reduce calories further.
Potential allergens: dairy (from chocolate and cocoa mix), soy (often in chocolate), and gluten (check your cocoa mix). Use certified gluten-free ingredients if needed.
Conclusion
Making hot cocoa bombs at home is one of those projects that feels like magic even when you know exactly how it works. The first time you watch that chocolate shell crack open and release marshmallows into steaming milk, you’ll understand why these little spheres became so popular. They’re not just hot cocoa—they’re an experience.
I love this recipe because it’s forgiving enough for beginners but customizable enough for experienced candy makers. You can keep it simple with just chocolate and marshmallows, or go all out with caramel drizzles, peppermint crunch, and edible glitter. There’s no wrong way to do it. And honestly, the imperfect ones taste just as good as the perfect ones.
If you try this recipe, I’d love to hear how it goes. Drop a comment below and let me know what fillings you used, or share a photo of your finished bombs. And if you’re looking for more cozy winter treats, check out the Brown Butter Apple Cider Cake or the Peppermint Bark Fudge—both are perfect for this time of year. Happy cocoa bombing!
Frequently Asked Questions
Why did my chocolate shells crack when I tried to remove them from the mold?
This usually happens when the chocolate layer is too thin or when the shells weren’t chilled long enough. Make sure your chocolate coating is at least 1/8 inch thick and chill for a full 10 minutes. If they’re still cracking, add a teaspoon of coconut oil to your melted chocolate—it makes the shells more flexible.
Can I use milk chocolate instead of semi-sweet?
You can, but milk chocolate is softer and more prone to melting at room temperature. The shells may lose their shape during storage. If you prefer milk chocolate, add an extra tablespoon of coconut oil to help stabilize it and keep the bombs in a cool place.
How far in advance can I make hot cocoa bombs?
They’ll stay fresh for up to 2 weeks in an airtight container at room temperature. After that, the marshmallows start to dry out and the chocolate may develop white streaks (bloom). For longer storage, freeze them for up to 3 months.
My sealed bombs keep coming apart. What am I doing wrong?
The most common issue is not melting the rim enough before sealing. Warm a plate in the microwave for 10 seconds, then press the rim of the empty shell onto it for 5-7 seconds. The edge should look slightly glossy before you press it onto the filled shell. Hold firmly for 10-15 seconds to set.
Can I make these without silicone molds?
Yes! Use a metal muffin tin lined with plastic wrap. Press the melted chocolate into each cup and chill. The plastic wrap helps you lift the shells out cleanly. The shape won’t be as perfectly round, but they’ll still work beautifully.
Pin This Recipe!
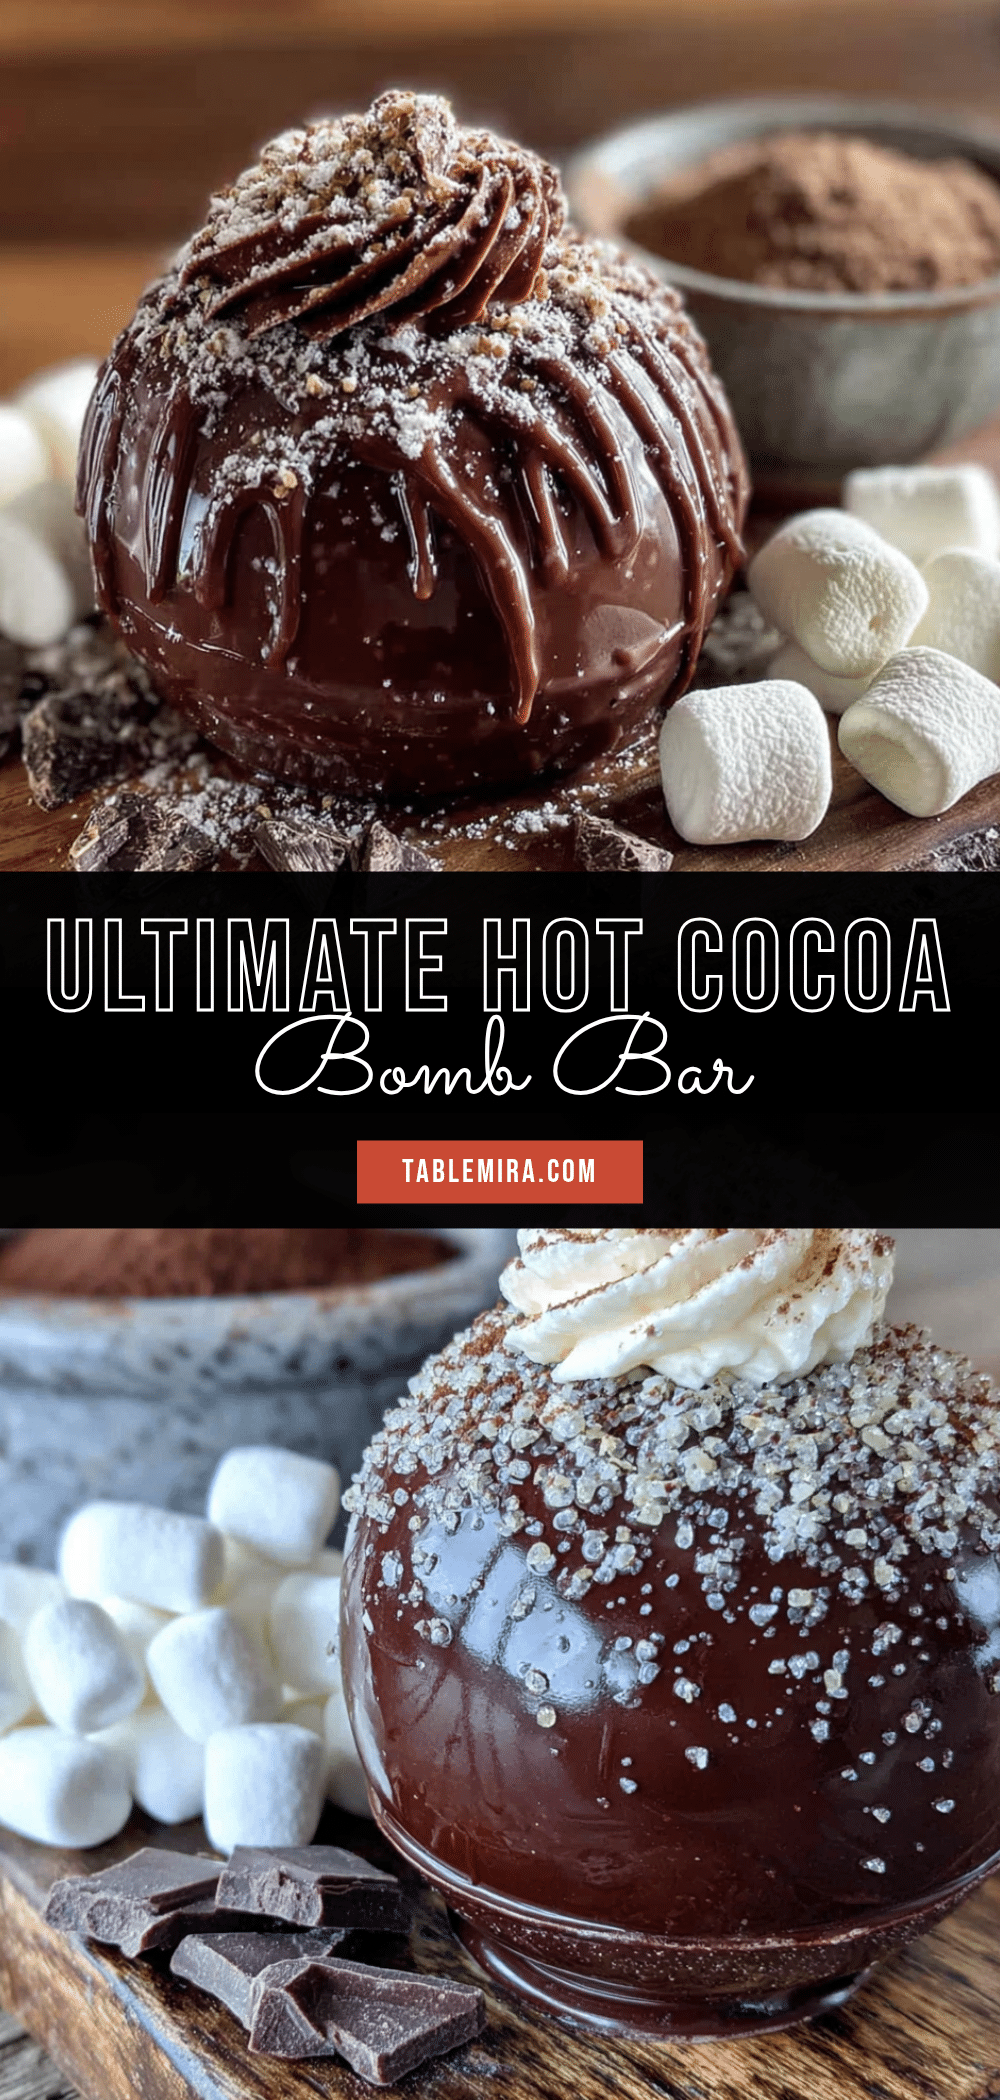
Ultimate Hot Cocoa Bomb Bar with Easy Marshmallow Topping
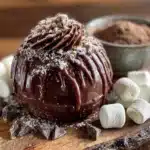
Learn how to make perfect hot cocoa bombs at home with this foolproof recipe. These chocolate spheres filled with cocoa mix and mini marshmallows melt into a rich, velvety hot cocoa when hot milk is poured over them.
- Prep Time: 45 minutes
- Cook Time: 0 minutes
- Total Time: 1 hour 15 minutes
- Yield: 6 servings 1x
- Category: Dessert
- Cuisine: American
Ingredients
- 12 ounces (340g) high-quality semi-sweet chocolate chips or bars, chopped
- 1 teaspoon (5ml) coconut oil or cocoa butter
- 1/2 cup (60g) hot cocoa mix
- 1/2 cup (50g) mini marshmallows
- Optional: 1 tablespoon crushed candy canes per bomb
- Optional: 1 teaspoon caramel sauce (thickened) per bomb
- Optional: 1 tablespoon white chocolate chips per bomb
- Optional: pinch of cinnamon and cayenne per bomb
- 2 ounces (57g) white chocolate or colored candy melts (for decoration)
- Sprinkles, crushed peppermint, edible glitter, or sea salt flakes (for garnish)
Instructions
- Melt the chocolate: Place the chopped semi-sweet chocolate and coconut oil in a microwave-safe bowl. Microwave in 30-second intervals, stirring between each, until fully melted and smooth (about 90 seconds total). Alternatively, use a double boiler.
- Fill the molds: Spoon about 1 tablespoon (15ml) of melted chocolate into each half-sphere mold cavity. Use the back of a spoon or a pastry brush to spread the chocolate evenly up the sides, making sure to cover the entire surface with no thin spots. The chocolate layer should be about 1/8 inch (3mm) thick. Place the filled molds on a parchment-lined baking sheet.
- First chill: Transfer the baking sheet to the refrigerator and chill for 10 minutes, or until the chocolate is firm and no longer glossy. Do not freeze.
- Unmold the shells: Gently press the bottom of each silicone mold cavity to release the chocolate half-spheres. Handle them by the edges. Place the unmolded shells on a clean parchment-lined tray.
- Add the filling: For each bomb, take one chocolate half-sphere and fill it with 1 tablespoon (8g) of hot cocoa mix and 1 tablespoon (6g) of mini marshmallows. Press one marshmallow gently into the cocoa mix to keep everything in place. Add any optional fillings now.
- Seal the bomb: Warm a small plate in the microwave for 10 seconds, then place the rim of an empty chocolate half-sphere on the warm plate for 3-5 seconds to melt the edge slightly. Immediately press it onto the filled half-sphere, aligning the edges carefully. Hold for 10 seconds to seal.
- Second chill: Place the sealed bombs back in the refrigerator for 10 minutes to set the seam firmly.
- Decorate (optional): Melt the white chocolate or candy melts in a small bowl. Dip a fork into the melted chocolate and drizzle it over the tops of the bombs in a zigzag pattern. Add sprinkles or crushed peppermint immediately before the drizzle sets. Return to the refrigerator for 5 minutes to harden.
Notes
Quality chocolate matters—cheap chocolate doesn’t melt evenly and cracks when unmolding. Don’t overfill the bombs; stick to about 5-6 mini marshmallows per bomb. Work in small batches (4-6 molds at a time) to keep chocolate from setting before spreading. Store finished bombs in an airtight container at cool room temperature (65-70°F) for up to 2 weeks. Do not refrigerate. For longer storage, freeze for up to 3 months.
Nutrition
- Serving Size: 1 bomb with 8-10 oz
- Calories: 300
- Sugar: 26
- Sodium: 150
- Fat: 20
- Saturated Fat: 12
- Carbohydrates: 33
- Fiber: 2.5
- Protein: 5
Keywords: hot cocoa bomb, hot chocolate bomb, chocolate bomb, marshmallow, holiday treat, winter dessert, gift idea, homemade hot cocoa