This was supposed to be a slow-simmered Sunday gravy. I had the whole afternoon planned out—a big pot, a low flame, the kind of cooking that fills the house with that “something good is happening” smell for hours. But it was a Tuesday, and on Tuesdays, my youngest has a 5:45 PM meltdown window that hits like clockwork. I grabbed the wrong pack of chicken from the freezer—thighs instead of the drumsticks I’d planned on—and the burner I reached for was on high instead of medium. I was already ten minutes behind, the timer was screaming, and I just stood there staring at the sizzling pan, thinking, “Well, this is going to be a disaster.”
Honestly? I almost scraped it all into a takeout container. But the butter was already melting, the garlic was hitting that golden moment, and the smell—you know that smell when garlic hits hot butter? It stopped me. I figured I’d just finish it fast, call it a loss, and order pizza anyway. What came out of that pan was nothing like the gravy I had planned. It was better. The chicken was tender, the skin was crispy, and there was this buttery, garlicky pan sauce that the kids literally sopped up with their bread. No slow simmer. No complicated steps. Just one pan, a few ingredients, and a happy accident that saved dinner.
Maybe you’ve been there—standing in your kitchen, the plan completely falling apart, and the clock is your enemy. That’s where this recipe comes from. It’s not fancy. It’s not fussy. It’s the kind of dinner that makes you look like a hero when you’re actually just trying to survive a Tuesday. And honestly, that’s the best kind of recipe to keep around.
Why You’ll Love This Recipe
I’ve tested this one-pan garlic butter chicken thighs recipe more times than I can count, and it’s become the official “please everyone” dinner in our house. It’s the kind of meal that makes you feel like you’ve got it all figured out, even when you don’t. Here’s why it works:
- Quick & Easy: From fridge to table in about 30 minutes. No marinating, no complicated techniques, and only one pan to wash at the end.
- Simple Ingredients: You probably have everything already—chicken thighs, butter, garlic, a few pantry spices. No fancy grocery store trips required.
- Perfect for Busy Weeknights: This is the meal you make when you’re tired, the kids are hungry, and you need something that just works.
- Crowd-Pleaser: Even picky eaters ask for seconds. The butter and garlic combo is practically magic for little taste buds.
- Unbelievably Delicious: The chicken stays juicy, the skin gets perfectly crispy, and the pan sauce is so good you’ll want to drink it.
What makes this recipe different from all the other chicken thigh recipes out there? It’s the technique. Instead of fussing with flipping and basting, you let the chicken do its thing in a hot pan, then finish it with a simple butter and garlic bath. The result is a restaurant-quality dinner without the stress. It’s comfort food that’s actually fast—healthier than takeout, cheaper than delivery, and way more satisfying.
What Ingredients You Will Need
This recipe uses simple, everyday ingredients that work together to create something genuinely special. No weird stuff, no hard-to-find items—just honest cooking with big flavor.
- Bone-in, skin-on chicken thighs (about 6 thighs, or 2 lbs total)—the bone keeps the meat juicy, and the skin gets that gorgeous crispy texture we’re after. I prefer organic or free-range when the budget allows, but any good quality thigh works.
- Unsalted butter (4 tablespoons)—this is the star of the show. Using unsalted lets you control the salt level. I’ve tried salted in a pinch, and it works, but the final dish can be a little unpredictable.
- Garlic cloves (6-8 cloves, minced)—fresh garlic is non-negotiable here. The pre-minced stuff in a jar just doesn’t deliver the same punch. Trust me on this one.
- Olive oil (1 tablespoon)—for getting that initial sear. Butter alone burns too quickly at high heat, so the oil helps create a stable base.
- Chicken broth (½ cup)—this deglazes the pan and creates the sauce. Low-sodium is best so you can season to taste.
- Lemon juice (1 tablespoon, fresh squeezed)—a tiny bit of acid brightens everything up and cuts through the richness.
- Dried thyme (1 teaspoon)—earthy and warm, it pairs beautifully with garlic and butter. Fresh thyme works too, just use about 1 tablespoon of leaves.
- Paprika (1 teaspoon)—adds a subtle smokiness and gives the chicken a beautiful golden color. Smoked paprika is amazing here if you have it.
- Salt and black pepper (to taste)—don’t be shy with the salt. It’s what makes the skin really sing.
- Fresh parsley (for garnish, optional)—a sprinkle of green makes it look pretty, but honestly, it’s optional. The kids won’t notice.
Ingredient Tips: I usually buy my chicken thighs from the local butcher counter when I can—they’re often fresher and not much more expensive than the pre-packaged ones. For the butter, I’m a fan of Kerrygold for its richness, but any good unsalted butter works. If you’re out of lemon juice, a splash of white wine vinegar does the trick in a pinch.
Equipment Needed
One of the best things about this recipe is how little equipment it requires. Here’s what you’ll need:
- Large oven-safe skillet (12-inch cast iron or stainless steel)—cast iron gives you that perfect sear, but stainless steel works great too. Avoid non-stick if you want really crispy skin.
- Tongs—for flipping the chicken without piercing the skin. A good pair of tongs is worth its weight in gold.
- Cutting board and sharp knife—for mincing the garlic. A microplane works in a pinch if your knife skills are rusty.
- Measuring spoons—for the spices and liquids. Eyeballing works, but measuring keeps things consistent.
- Paper towels—for patting the chicken dry. This is a small step that makes a big difference in getting crispy skin.
If you don’t have an oven-safe skillet, you can transfer the chicken to a baking dish after searing—just add the butter and garlic to the dish before popping it in the oven. I’ve done it this way when my cast iron was already dirty from breakfast, and it still turned out great. Budget-friendly tip: a good cast iron skillet from a thrift store is usually under $20 and will last forever.
Preparation Method
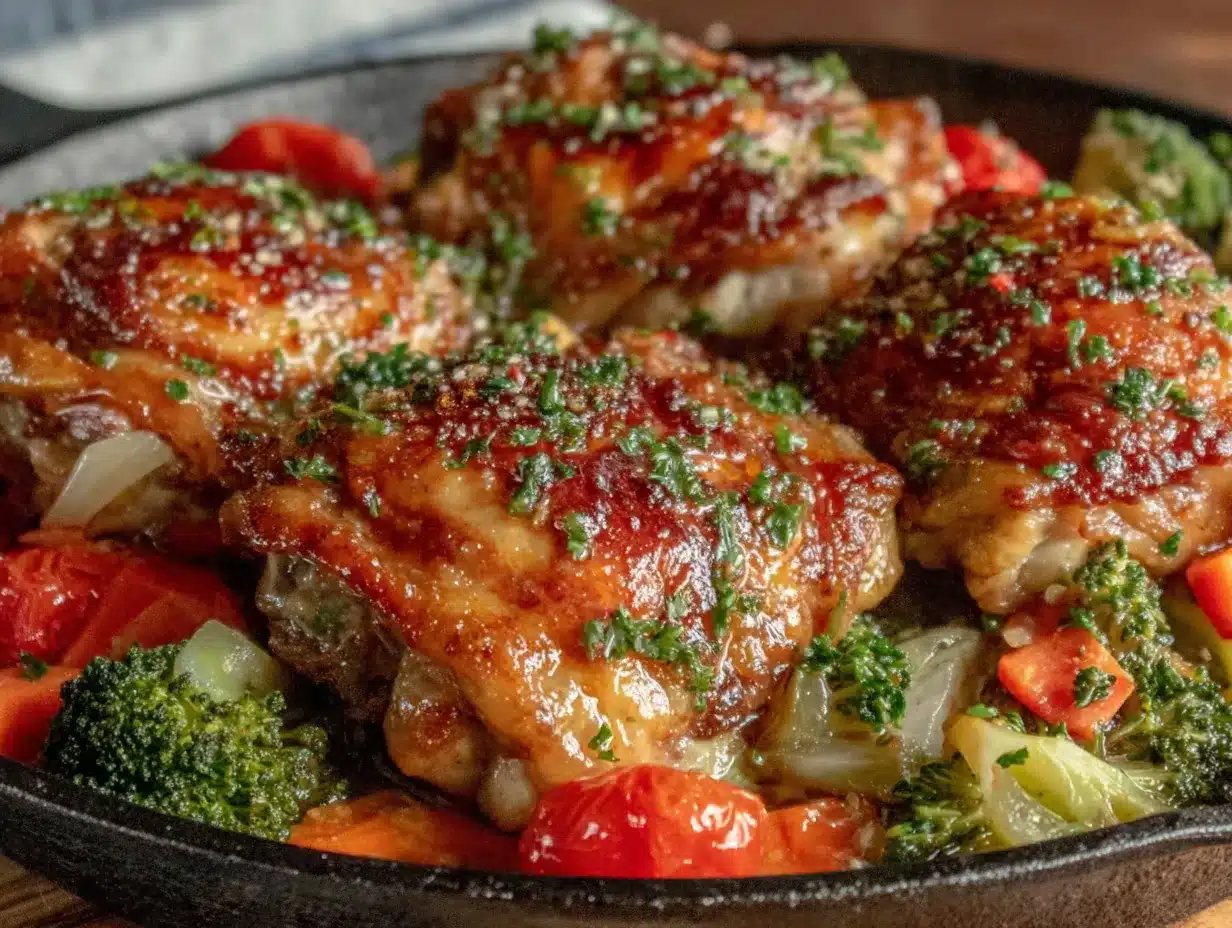
Let’s get cooking. This comes together fast, so have everything ready before you start. Trust me, you don’t want to be hunting for the paprika while the garlic is burning.
- Preheat your oven to 400°F (200°C). Give it a good 10-15 minutes to come to temperature. While that’s happening, pat the chicken thighs dry with paper towels. This is the secret to crispy skin—wet skin steams, dry skin sears.
- Season the chicken generously. Sprinkle both sides with salt, pepper, paprika, and dried thyme. Don’t be shy—the seasoning is what builds flavor. Let the chicken sit at room temperature for about 10 minutes while you get the pan ready.
- Heat your skillet over medium-high heat. Add the olive oil and let it get shimmering—about 2 minutes. You want the pan hot enough that the chicken sizzles the second it hits the surface.
- Sear the chicken, skin-side down. Place the thighs in the pan, skin side down, being careful not to crowd them. If your pan is too small, do this in two batches. Let them cook undisturbed for 5-6 minutes. The skin should be deep golden brown and crispy. Don’t move them around—just let them do their thing.
- Flip the chicken. Using your tongs, carefully flip each thigh over. Cook for another 3-4 minutes on the second side. The chicken should have a nice golden crust all over.
- Remove the chicken temporarily. Transfer the seared thighs to a plate. Don’t worry if they’re not cooked through yet—they’ll finish in the oven.
- Make the garlic butter sauce. Reduce the heat to medium-low. Add the butter to the pan and let it melt, scraping up any browned bits from the bottom with a wooden spoon. Those bits are pure flavor. Add the minced garlic and cook for about 30 seconds, just until fragrant. Don’t let it burn—burnt garlic is bitter and sad.
- Add the broth and lemon juice. Pour in the chicken broth and lemon juice, stirring to combine. Let it simmer for about 1 minute, until it thickens slightly.
- Return the chicken to the pan. Place the thighs back in the skillet, skin-side up. Spoon some of the garlic butter sauce over the top of each piece.
- Bake until done. Transfer the skillet to the preheated oven. Bake for 15-20 minutes, or until the internal temperature of the thickest thigh reaches 165°F (74°C). The sauce will be bubbly and the chicken will be incredibly tender.
- Rest and serve. Remove the skillet from the oven and let the chicken rest for 5 minutes. This lets the juices redistribute so every bite is moist. Garnish with fresh parsley if you’re feeling fancy, and serve with the pan sauce spooned over the top.
Cooking Tips & Techniques
I’ve made this recipe more times than I can count, and I’ve definitely learned a few things the hard way. Here are my best tips for getting it right every time:
Don’t skip drying the chicken. I know it seems like a small step, but it’s the difference between crispy, golden skin and sad, rubbery skin. Pat those thighs dry like your dinner depends on it—because it kind of does.
Let the pan get hot enough. I used to rush this step and end up with pale, unappealing chicken. The pan needs to be hot enough that the chicken sizzles immediately. If it doesn’t sizzle, wait another minute. Your patience will be rewarded.
Watch the garlic like a hawk. Garlic goes from fragrant to burnt in about 15 seconds. Once you add it to the butter, keep stirring and have your broth ready to pour in. I’ve burned garlic more times than I’d like to admit, and it always makes me sad.
Use a meat thermometer if you have one. It takes the guesswork out of cooking chicken. The USDA says 165°F is safe, and I find that’s perfect for thighs—they stay juicy and tender. Without a thermometer, look for clear juices running from the thickest part.
Let it rest. I know you’re hungry, but cutting into that chicken right away will release all those lovely juices onto the plate instead of keeping them in the meat. Five minutes. Set a timer if you have to.
Variations & Adaptations
This recipe is wonderfully flexible. Here are some ways to make it your own:
- Dairy-Free Version: Swap the butter for a good quality vegan butter or use olive oil instead. The garlic will still be amazing, and the chicken will still be tender.
- Add Vegetables: Toss in some baby potatoes or green beans around the chicken before baking. They’ll cook in the pan juices and become incredibly flavorful. I’ve done this on nights when I wanted a one-pan meal with everything included.
- Spice It Up: Add a pinch of red pepper flakes along with the garlic for a little heat. My husband loves this version, though the kids prefer the original.
- Herb Swap: Replace the thyme with rosemary or oregano for a different flavor profile. Fresh herbs work beautifully here—just use about three times as much as dried.
- Chicken Thigh Alternative: Boneless, skinless thighs work in a pinch, but you’ll need to reduce the cooking time by about 5 minutes. The skinless version won’t be as crispy, but it’ll still be delicious.
One of my favorite variations came from a night when I had a half-empty jar of sun-dried tomatoes in the fridge. I chopped up a few and added them to the pan with the broth. The sweetness and tang were incredible—definitely a happy accident worth repeating.
Serving & Storage Suggestions
This chicken is best served hot, straight from the pan, with that gorgeous garlic butter sauce spooned over the top. I love it with simple sides that soak up all that goodness:
- Mashed potatoes—the creamy texture is perfect for catching every drop of sauce.
- Rice or quinoa—fluffy and neutral, it lets the chicken shine.
- Crusty bread—for sopping up the pan sauce. This is non-negotiable in my house.
- Roasted vegetables—broccoli, asparagus, or green beans all work beautifully.
Storage: Leftover chicken keeps well in an airtight container in the refrigerator for up to 3 days. The flavors actually meld together overnight, making it even better the next day. Reheat gently in a skillet over medium-low heat with a splash of broth to keep it moist. You can also microwave it, but the skin won’t be as crispy.
Freezing: This recipe freezes beautifully. Let the chicken cool completely, then store it in a freezer-safe container with the sauce for up to 3 months. Thaw overnight in the refrigerator and reheat as directed.
Meal Prep Tip: I often make a double batch on Sunday and use the leftovers for lunch salads or quick dinners throughout the week. The chicken shreds beautifully and works great in wraps or over greens.
Nutritional Information & Benefits
While this isn’t a health food per se, chicken thighs offer some solid nutritional benefits. Here’s a rough breakdown per serving (one thigh with sauce):
- Calories: Approximately 350-400
- Protein: 25-30 grams
- Fat: 25-30 grams (including healthy fats from olive oil and butter)
- Carbohydrates: 2-3 grams
Chicken thighs are richer in iron and zinc than chicken breasts, making them a great choice for growing kids and active adults. The garlic in this recipe is also known for its immune-boosting properties—a nice bonus during cold and flu season. If you’re watching your sodium, use low-sodium broth and go easy on the added salt. The butter adds richness, but you can reduce it to 2 tablespoons if you’re looking to cut calories without sacrificing too much flavor.
Conclusion
This one-pan garlic butter chicken thighs recipe has saved dinner in our house more times than I can count. It’s the kind of meal that feels special but is actually ridiculously simple—perfect for those nights when you need a win in the kitchen. The chicken is juicy, the skin is crispy, and that garlic butter sauce is honestly good enough to drink.
I love this recipe because it reminds me that sometimes the best things come from happy accidents. That Tuesday night disaster turned into a family favorite that we make at least twice a month. It’s proof that you don’t need fancy ingredients or complicated techniques to make something genuinely delicious.
Give it a try, and don’t be afraid to make it your own. Swap the herbs, add some veggies, or double the garlic if you’re feeling bold. And when you make it—because I really hope you do—come back and let me know how it turned out. Did the kids ask for seconds? Did you discover a new variation? I’d love to hear about your happy accidents in the comments below.
Frequently Asked Questions
Can I use boneless, skinless chicken thighs?
Absolutely. Boneless, skinless thighs will work, but you’ll need to reduce the cooking time by about 5-7 minutes. They won’t get that crispy skin, but the garlic butter flavor will still be amazing.
Can I make this recipe on the stovetop only?
Yes! After searing the chicken and making the sauce, simply cover the pan and simmer on low heat for 15-20 minutes, or until the chicken reaches 165°F. The skin won’t be as crispy, but it’s a great option if you don’t want to turn on the oven.
How do I know when the chicken is fully cooked?
The most reliable way is to use a meat thermometer inserted into the thickest part of the thigh—it should read 165°F (74°C). Without a thermometer, look for clear juices running from the meat and no pinkness near the bone.
Can I prep this recipe ahead of time?
You can season the chicken up to 24 hours in advance and store it in the refrigerator. When you’re ready to cook, just let it sit at room temperature for 15 minutes before searing. The garlic can also be minced ahead of time.
What can I serve with this chicken to make it a complete meal?
Mashed potatoes, rice, or crusty bread are my go-to choices for soaking up the sauce. Add a simple green salad or roasted vegetables for a complete, balanced dinner that everyone will love.
Pin This Recipe!

Kid-Approved One-Pan Garlic Butter Chicken Thighs

Juicy, crispy-skinned chicken thighs in a rich garlic butter sauce, all made in one pan in about 30 minutes. This easy weeknight dinner is a family favorite that turns a hectic Tuesday into a delicious win.
- Prep Time: 10 minutes
- Cook Time: 25 minutes
- Total Time: 35 minutes
- Yield: 6 servings 1x
- Category: Main Course
- Cuisine: American
Ingredients
- 6 bone-in, skin-on chicken thighs (about 2 lbs total)
- 4 tablespoons unsalted butter
- 6–8 garlic cloves, minced
- 1 tablespoon olive oil
- ½ cup low-sodium chicken broth
- 1 tablespoon fresh lemon juice
- 1 teaspoon dried thyme
- 1 teaspoon paprika
- Salt and black pepper to taste
- Fresh parsley for garnish (optional)
Instructions
- Preheat oven to 400°F (200°C). Pat chicken thighs dry with paper towels.
- Season both sides of chicken generously with salt, pepper, paprika, and dried thyme. Let sit at room temperature for 10 minutes.
- Heat olive oil in a large oven-safe skillet over medium-high heat until shimmering (about 2 minutes).
- Place chicken skin-side down in the skillet without crowding. Cook undisturbed for 5-6 minutes until skin is deep golden brown and crispy.
- Flip chicken and cook for another 3-4 minutes on the second side until golden crust forms.
- Transfer seared chicken to a plate (it will not be fully cooked).
- Reduce heat to medium-low. Add butter to the pan, scraping up browned bits. Add minced garlic and cook for 30 seconds until fragrant.
- Pour in chicken broth and lemon juice, stirring to combine. Simmer for 1 minute until slightly thickened.
- Return chicken to the skillet skin-side up. Spoon garlic butter sauce over each piece.
- Transfer skillet to preheated oven and bake for 15-20 minutes until internal temperature reaches 165°F (74°C).
- Remove from oven and let rest for 5 minutes. Garnish with fresh parsley if desired. Serve with pan sauce spooned over the top.
Notes
Pat chicken dry for crispy skin. Don’t crowd the pan when searing. Watch garlic carefully to avoid burning. Let chicken rest 5 minutes before serving. For stovetop-only version, cover and simmer on low for 15-20 minutes after making sauce.
Nutrition
- Serving Size: 1 chicken thigh with
- Calories: 375
- Sugar: 1
- Sodium: 450
- Fat: 28
- Saturated Fat: 12
- Carbohydrates: 3
- Protein: 28
Keywords: one-pan chicken, garlic butter chicken, chicken thighs, easy weeknight dinner, family dinner, crispy chicken, 30-minute meal


